This guide will show you how to install a manifold insulator / spacer in your VE or VF Commodore fitted with an LFX engine (MY12+ Vehicles). This process is also very similar for late model Camaro vehicles fitted with the LFX engine.
Difficulty Rating
Moderate
Tools/Parts Required
Socket Set
Torx Key Set
Spanners (Ratchet Spanners are preferable!)
Blue RTV Gasket Maker
Warning
Work at your own risk. This work is inherently dangerous and must only be carried out by a qualified mechanic. AutoInstruct will not be held responsible for damage to your vehicle or personal injury / death as a result of the information we provide.
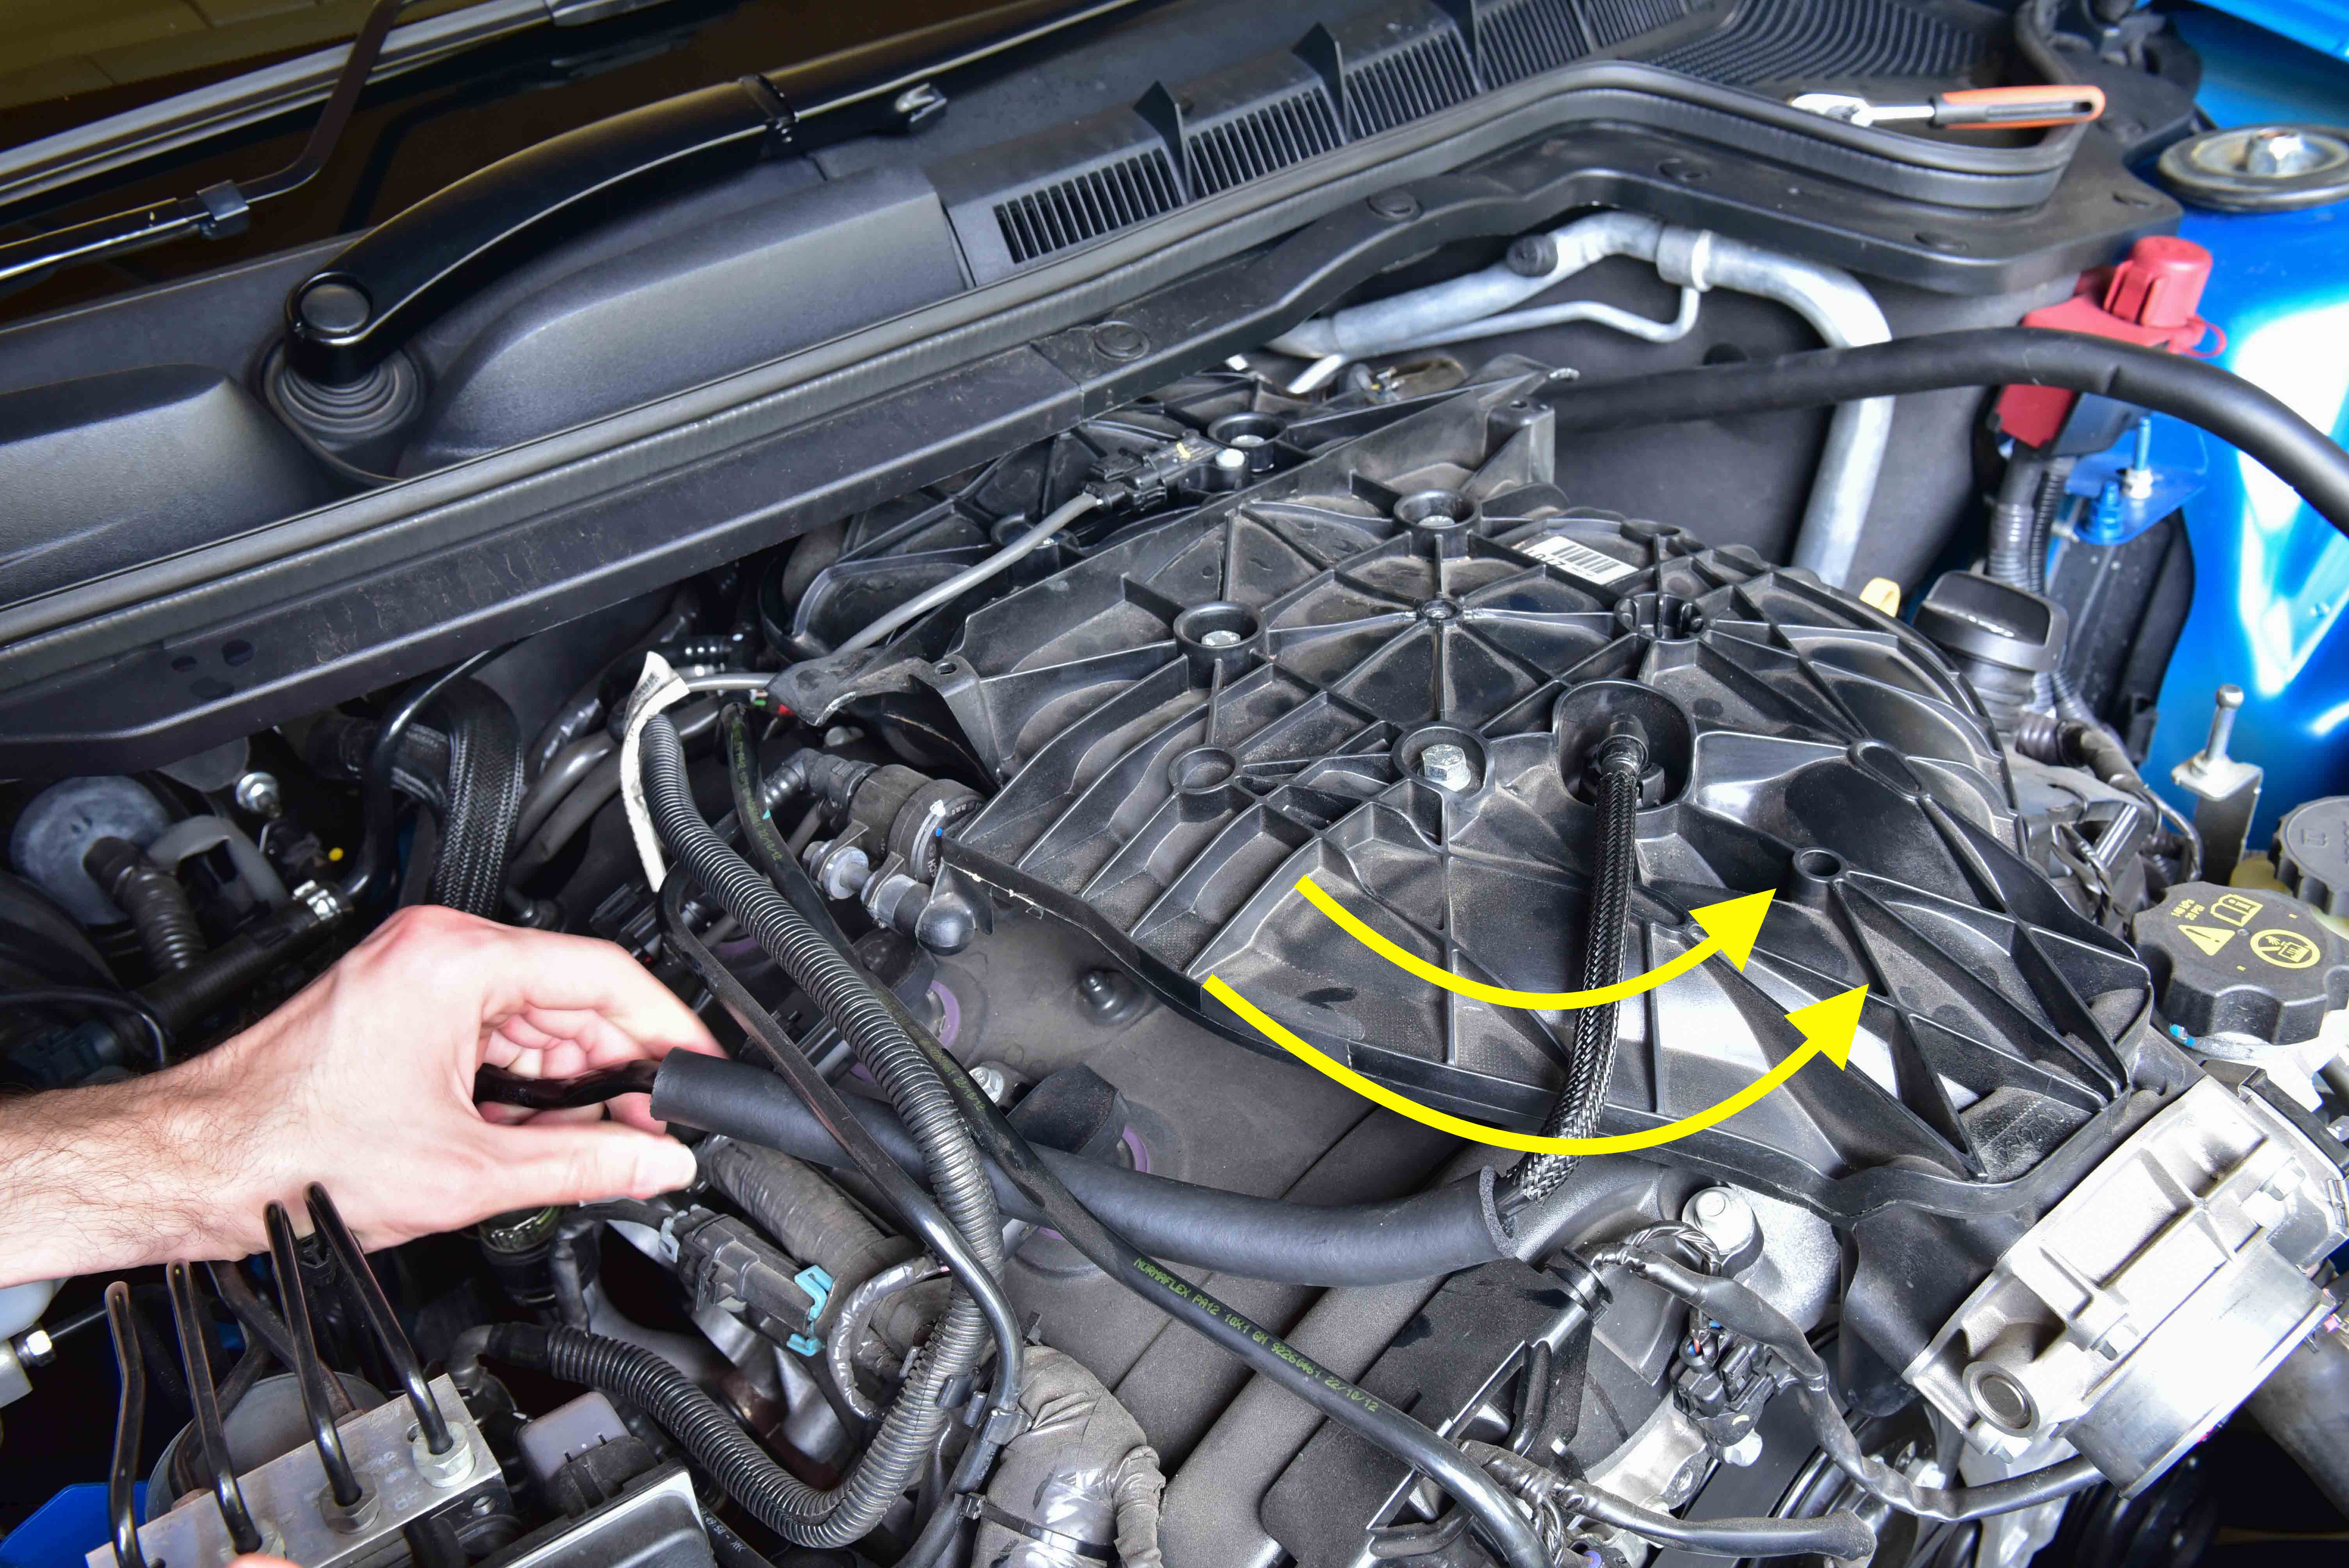
Step 1
Remove the engine cover by pulling upwards on the front, then sliding the cover off the engine.
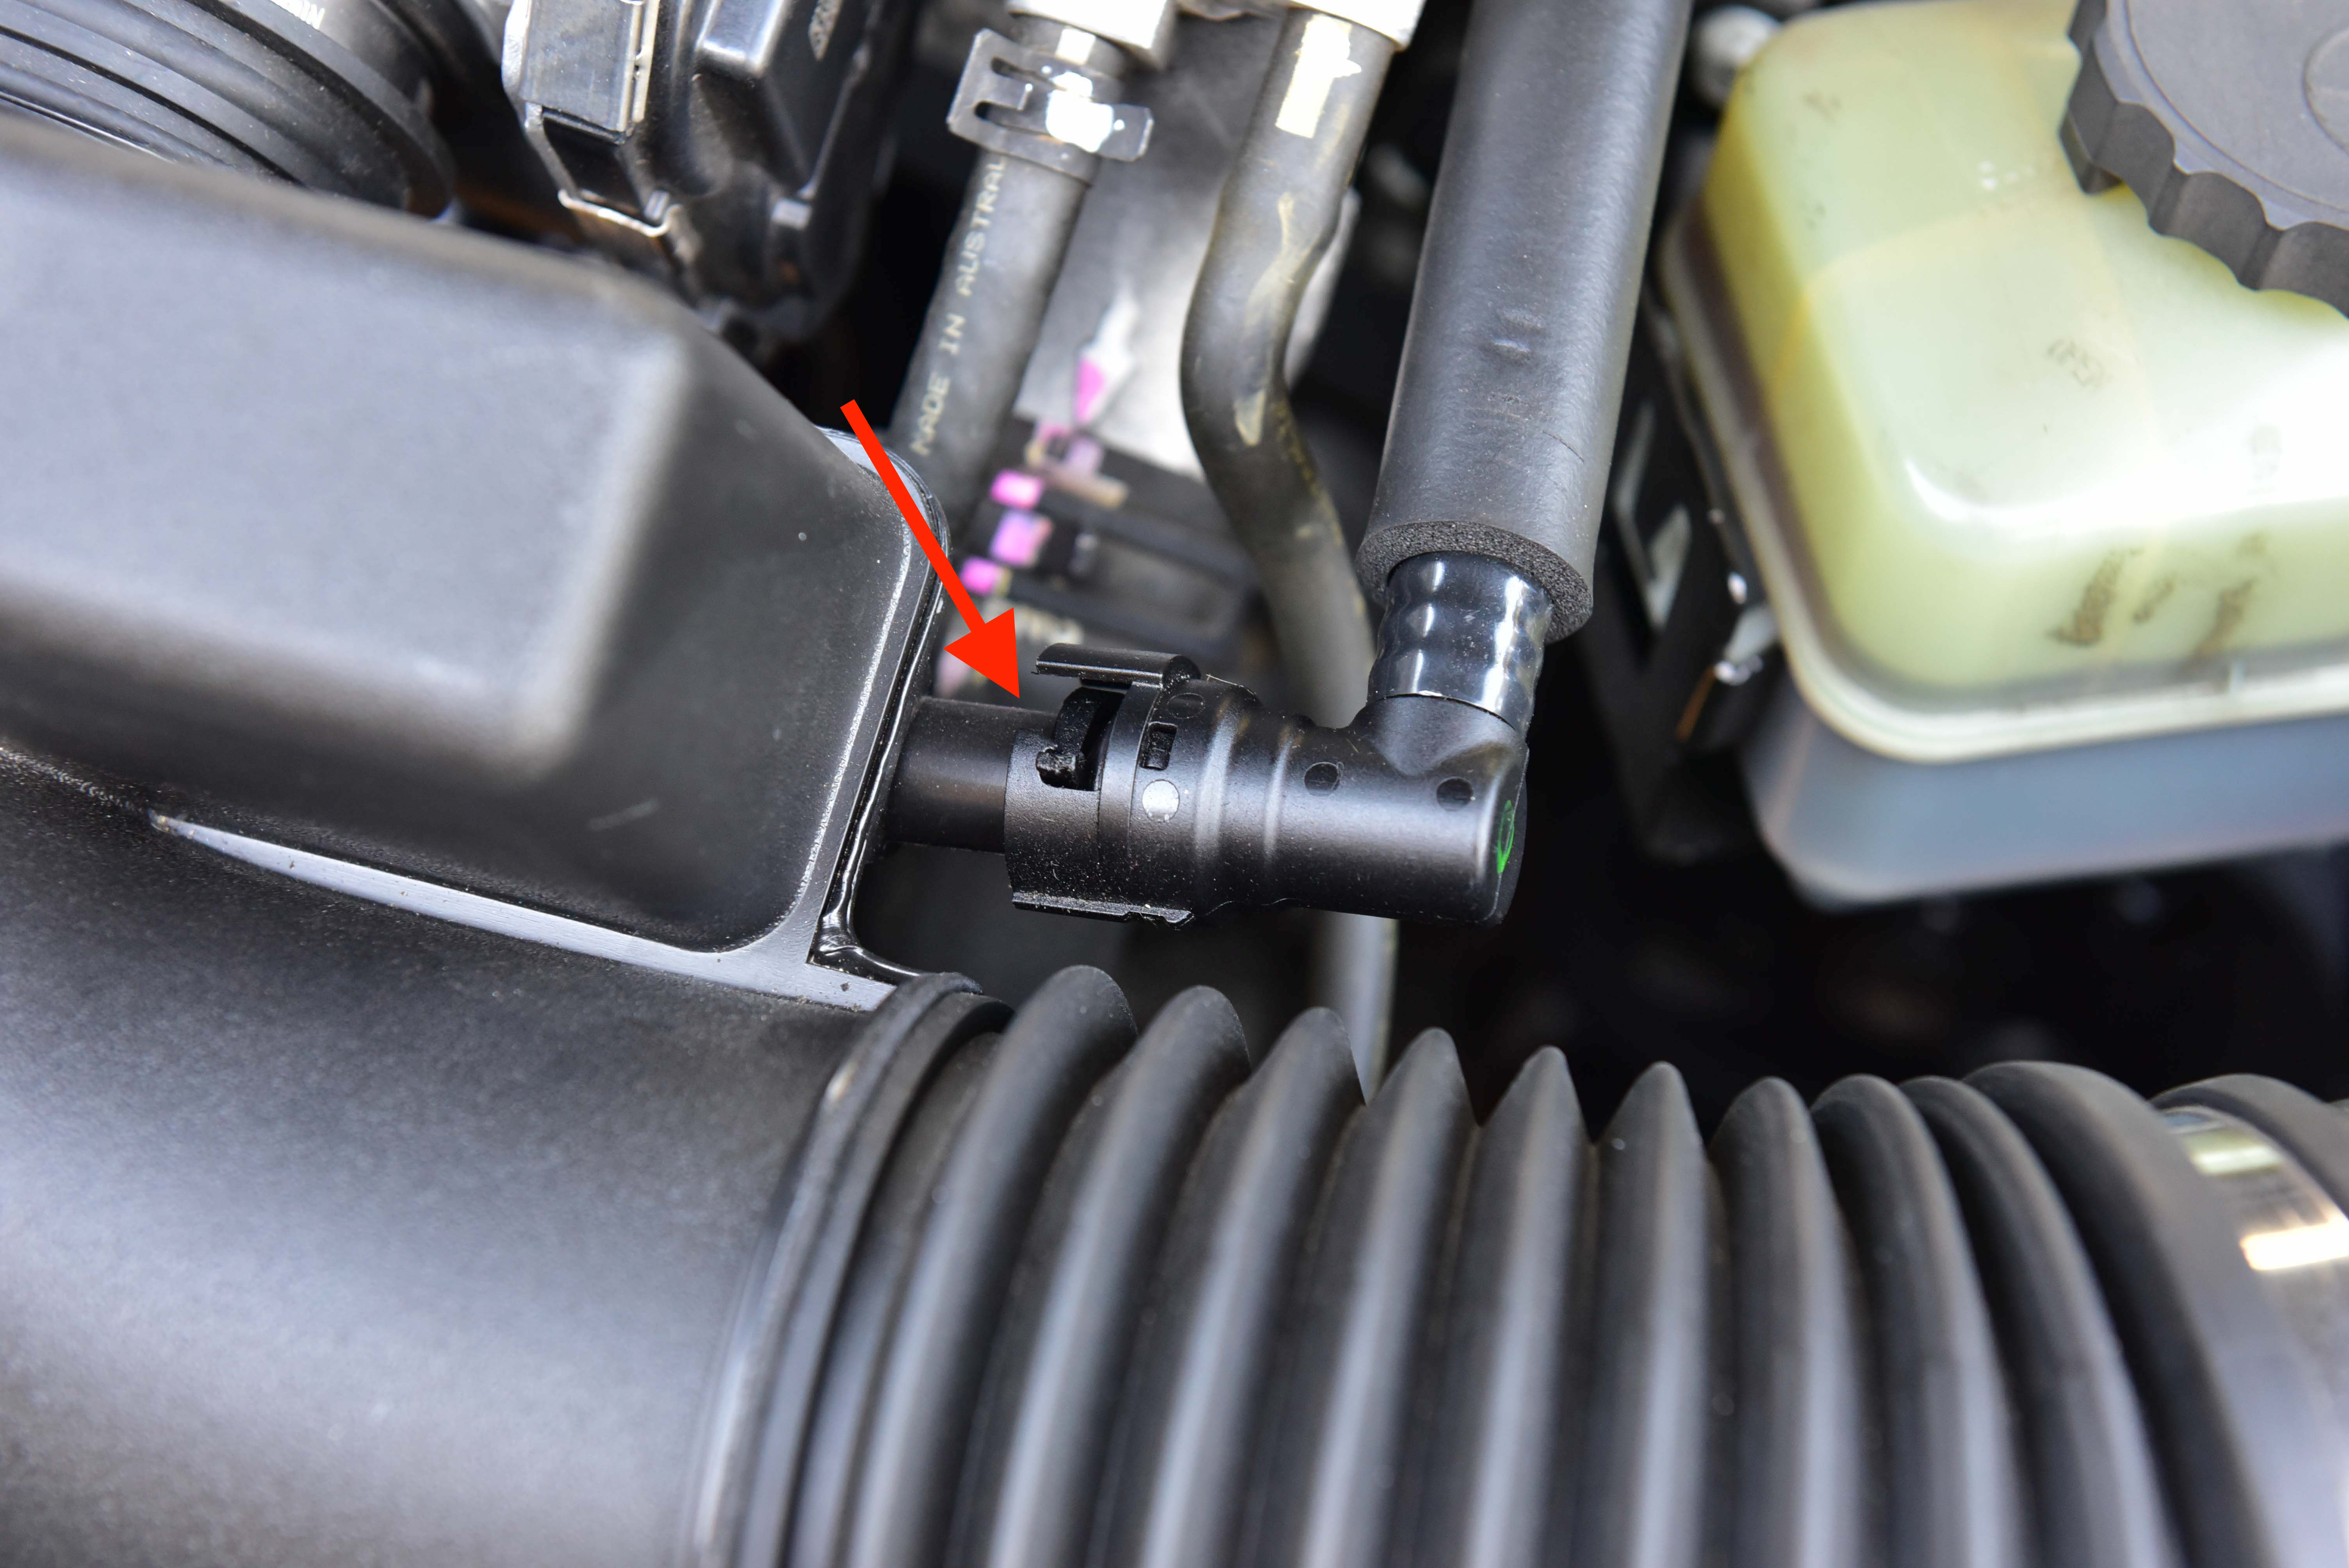
Disconnect the PCV pipe from the air intake resonator.
Step 2
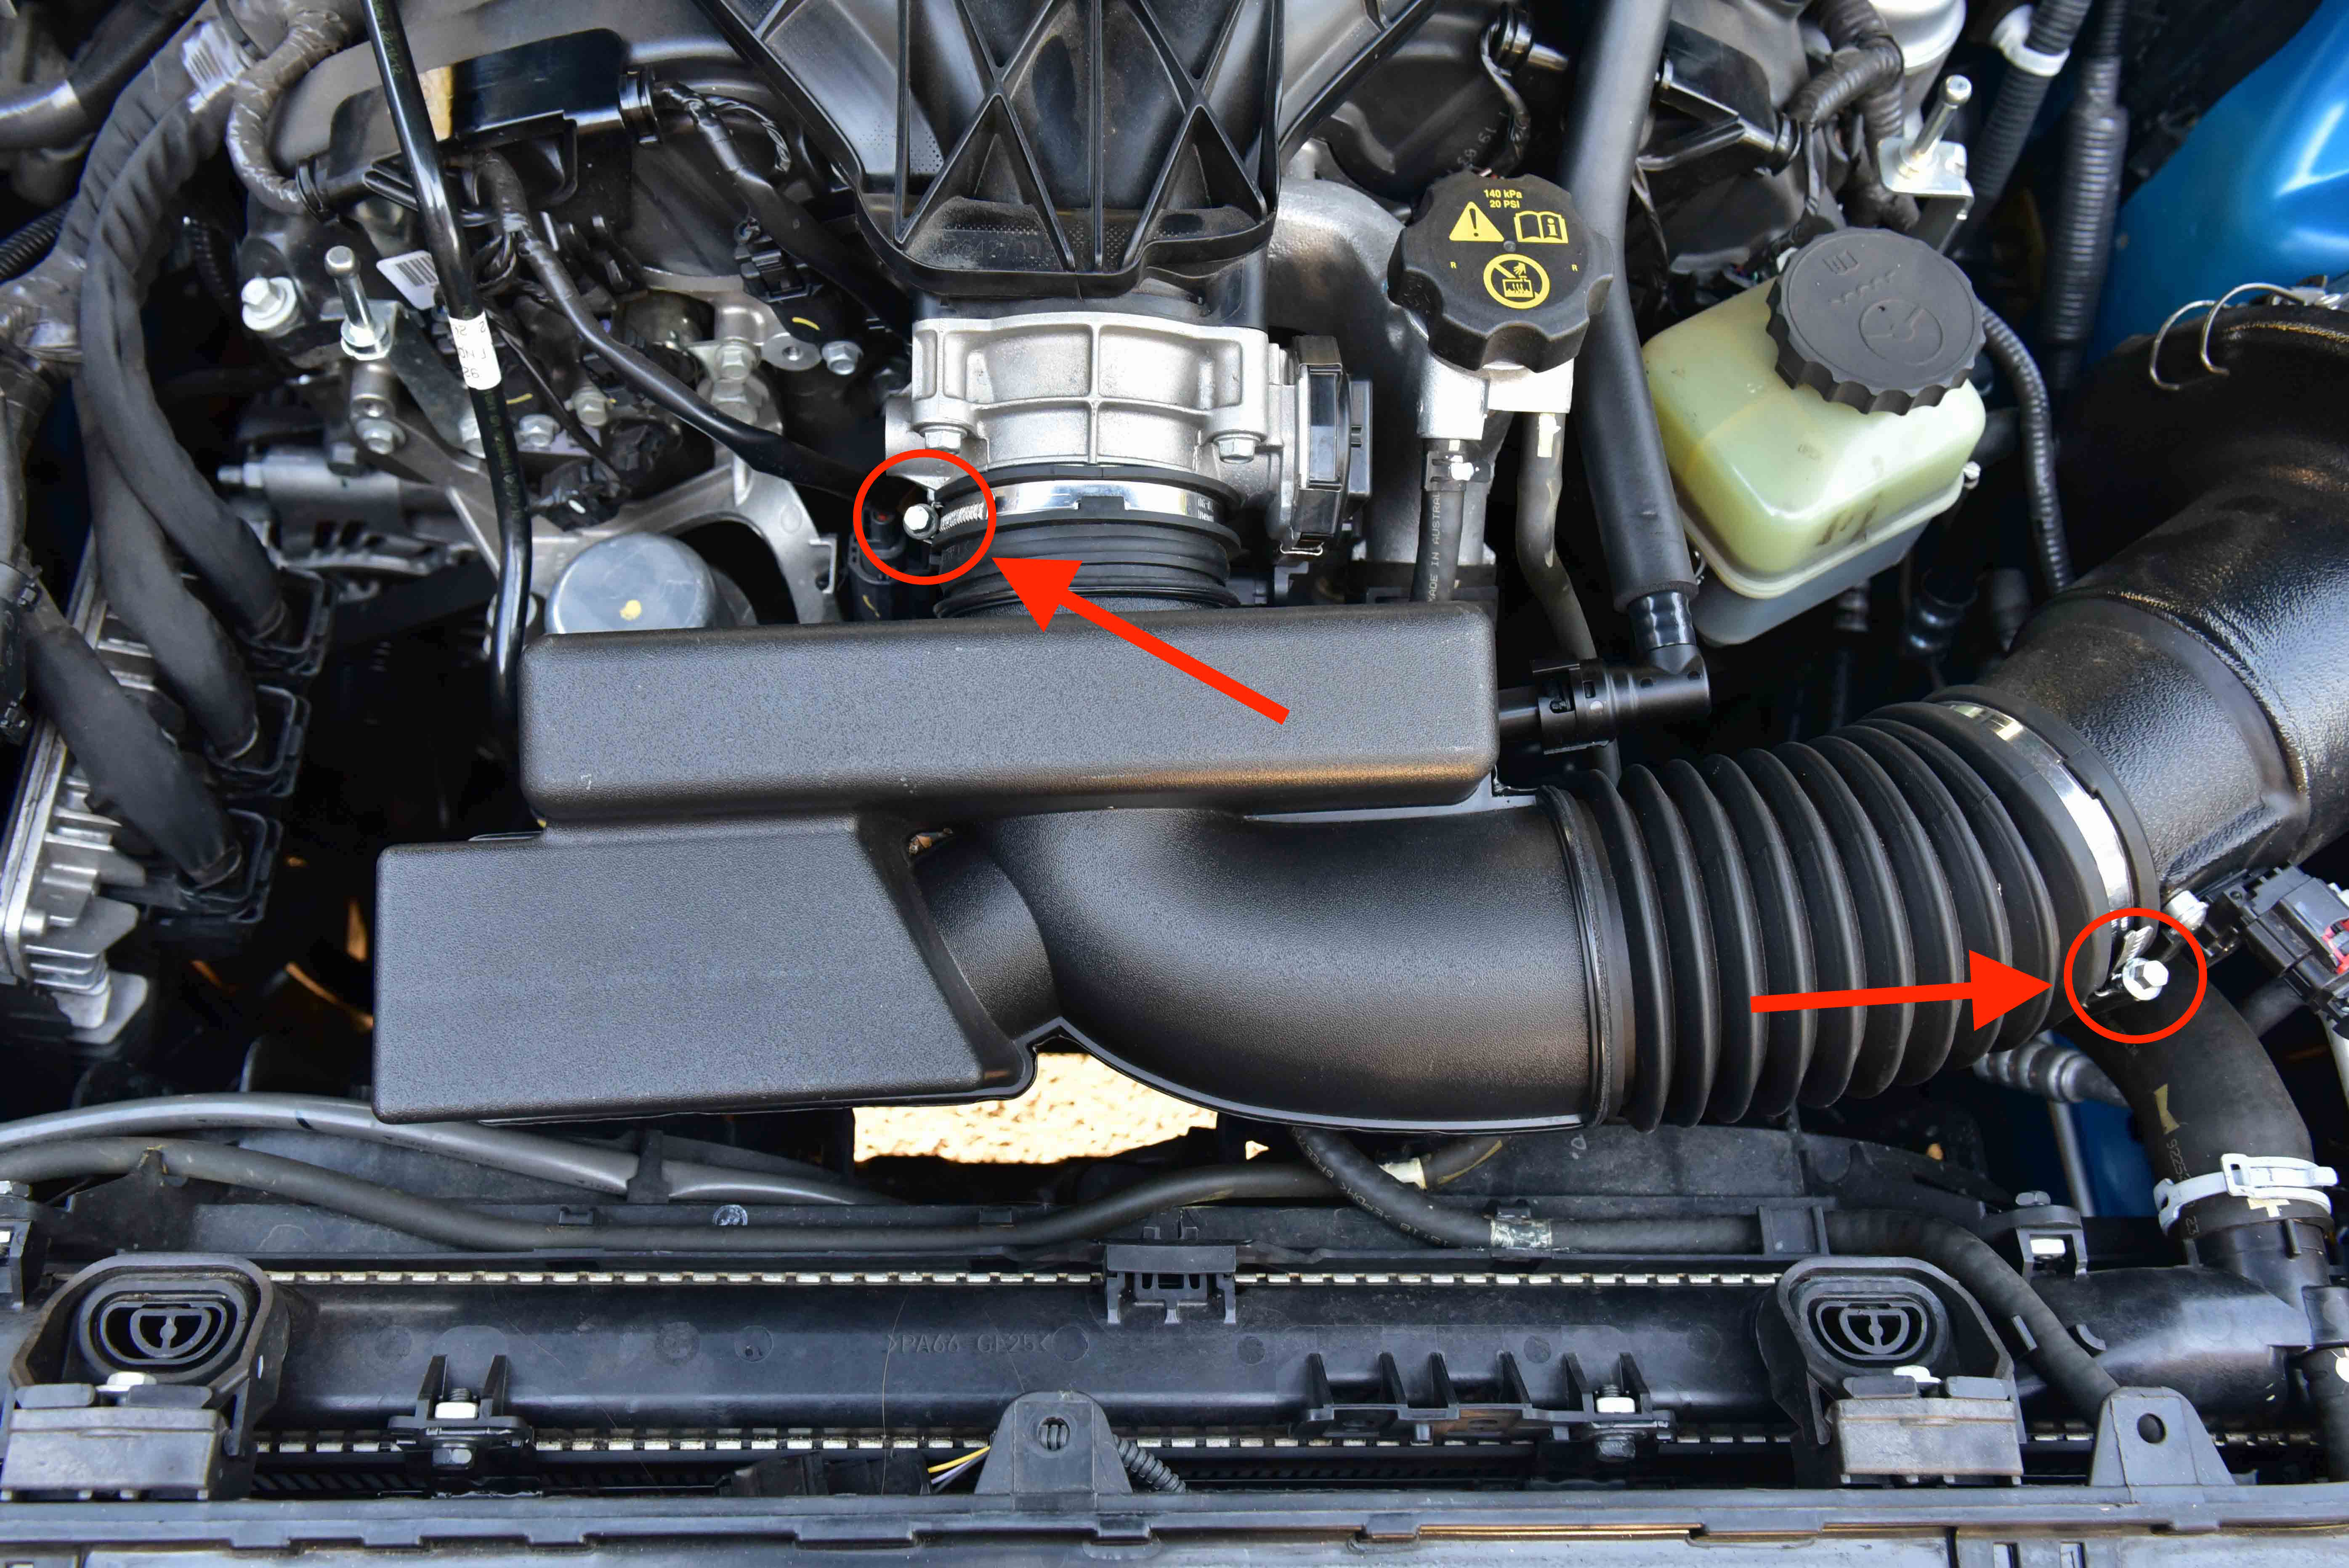
Remove the air intake pipe located between the throttle body and filter housing.
Step 3
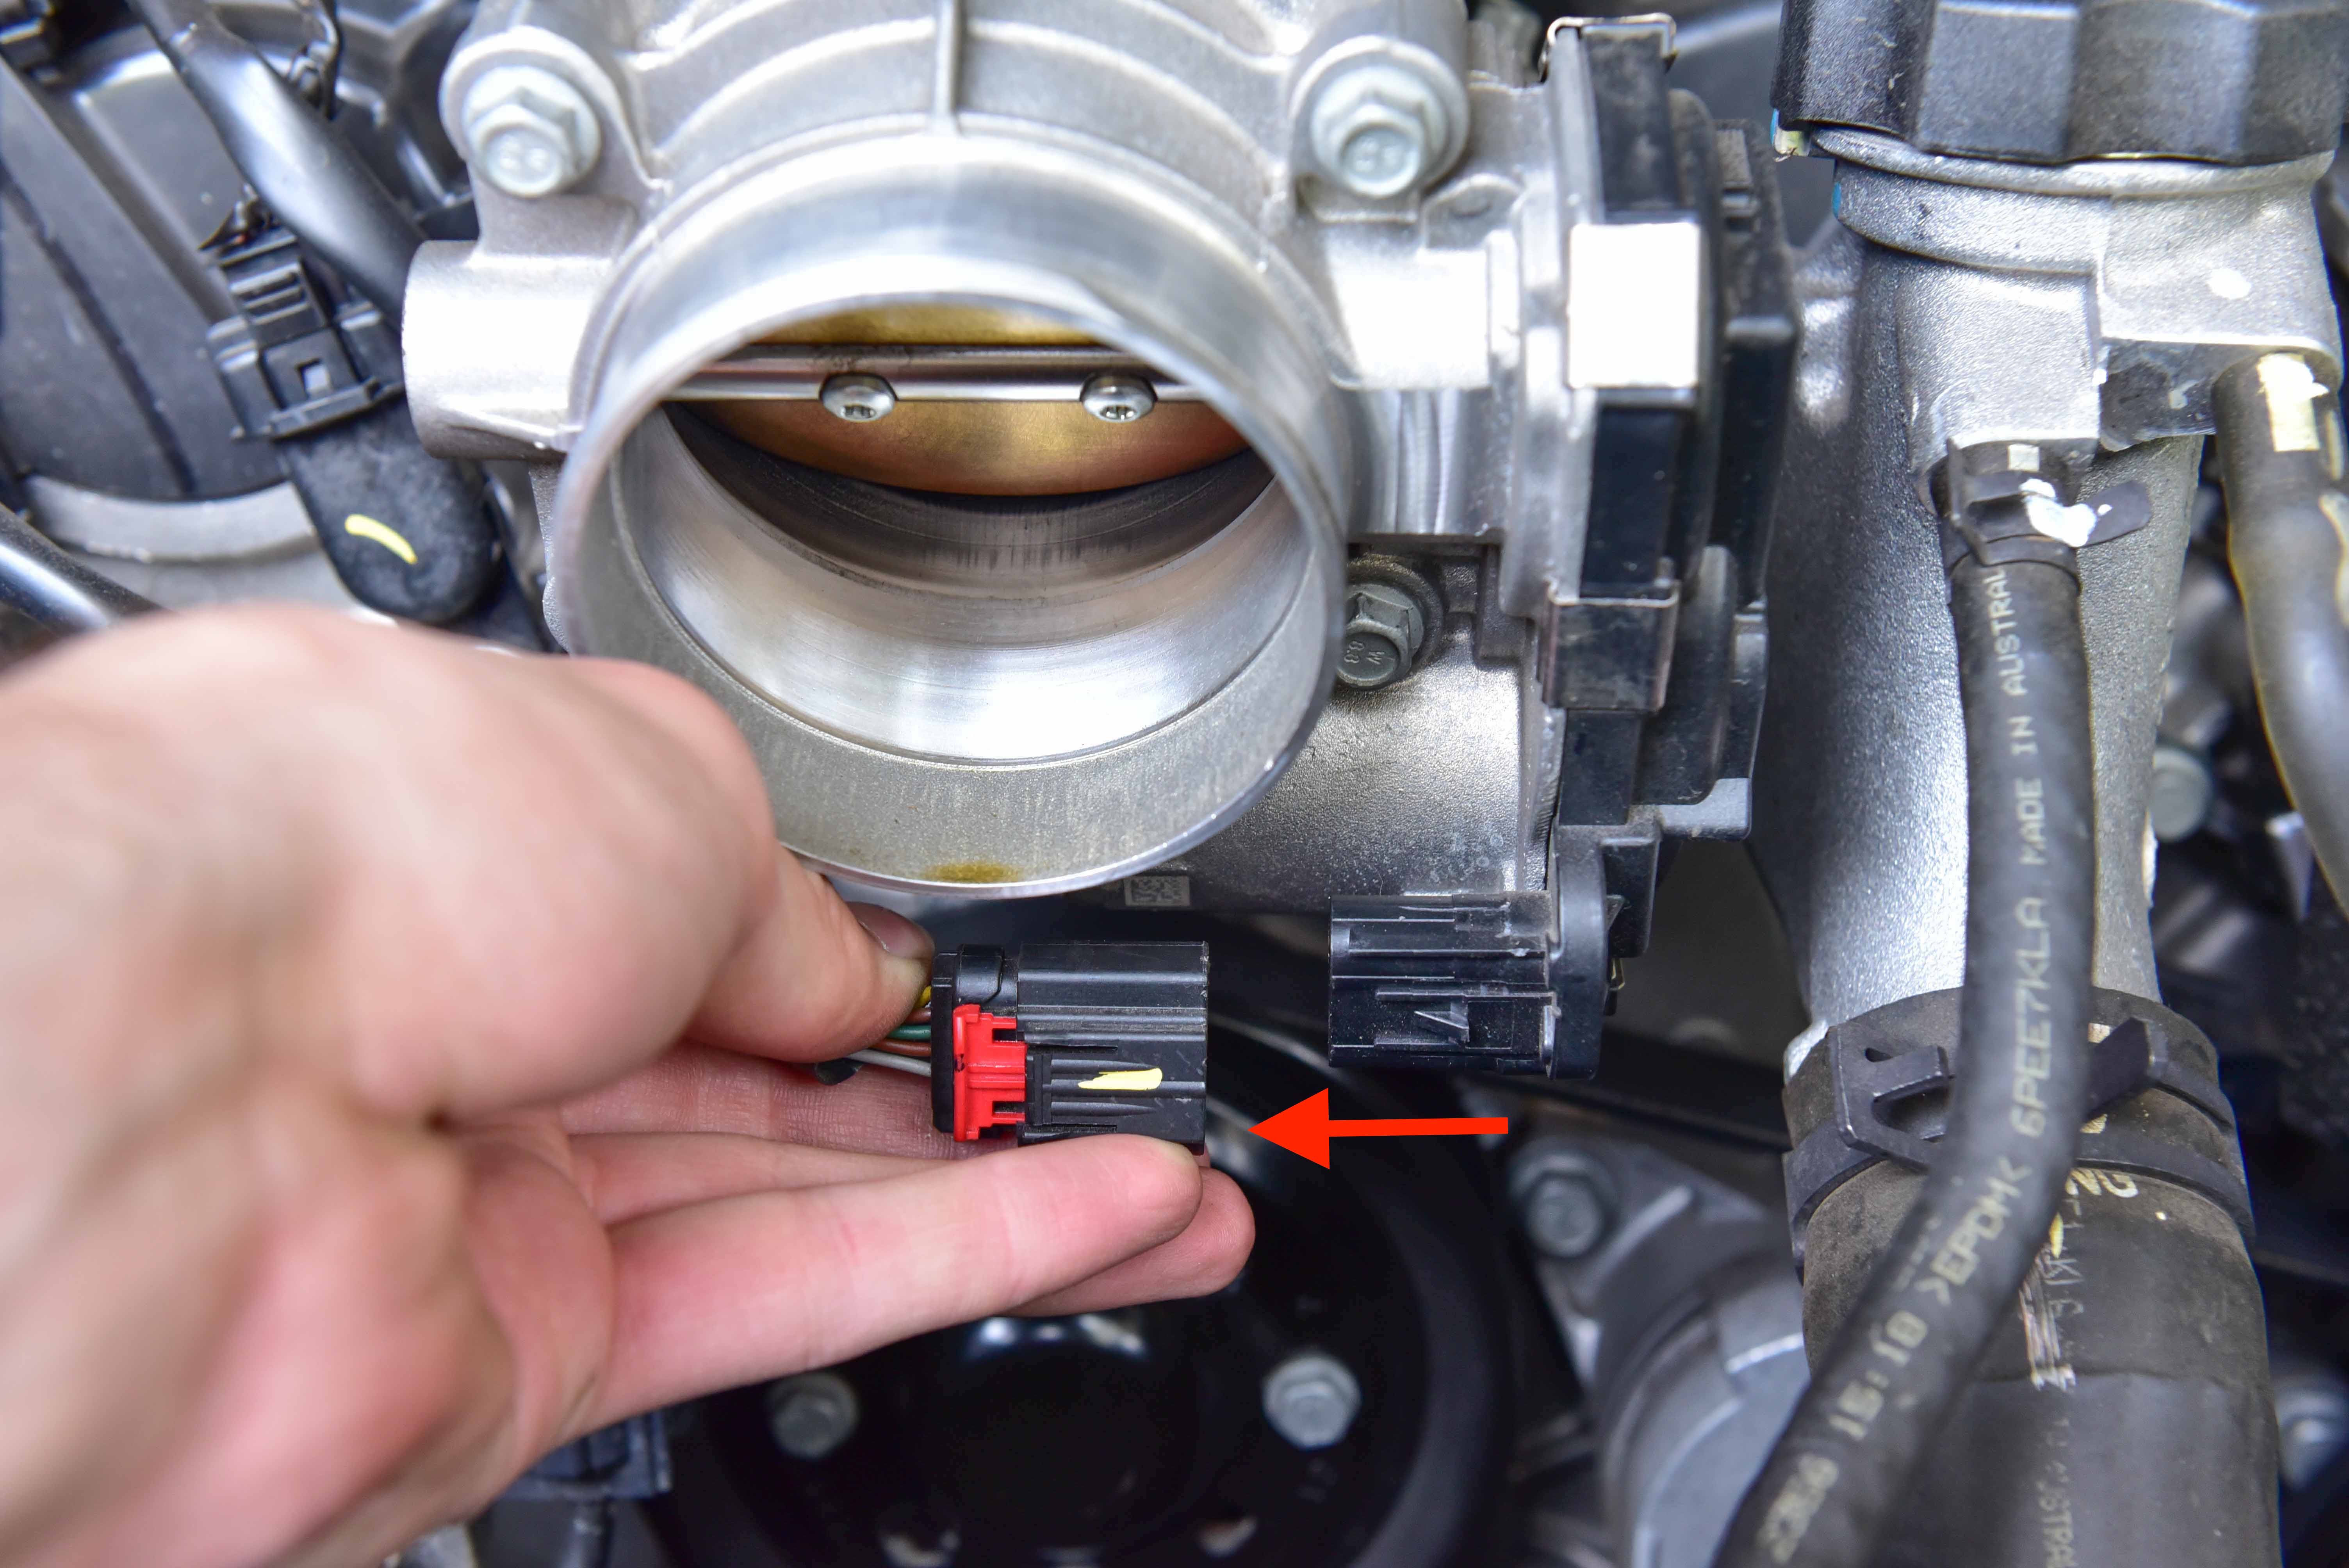
Disconnect the throttle body loom. Slide the red tab outwards then unplug the connector.
Step 4
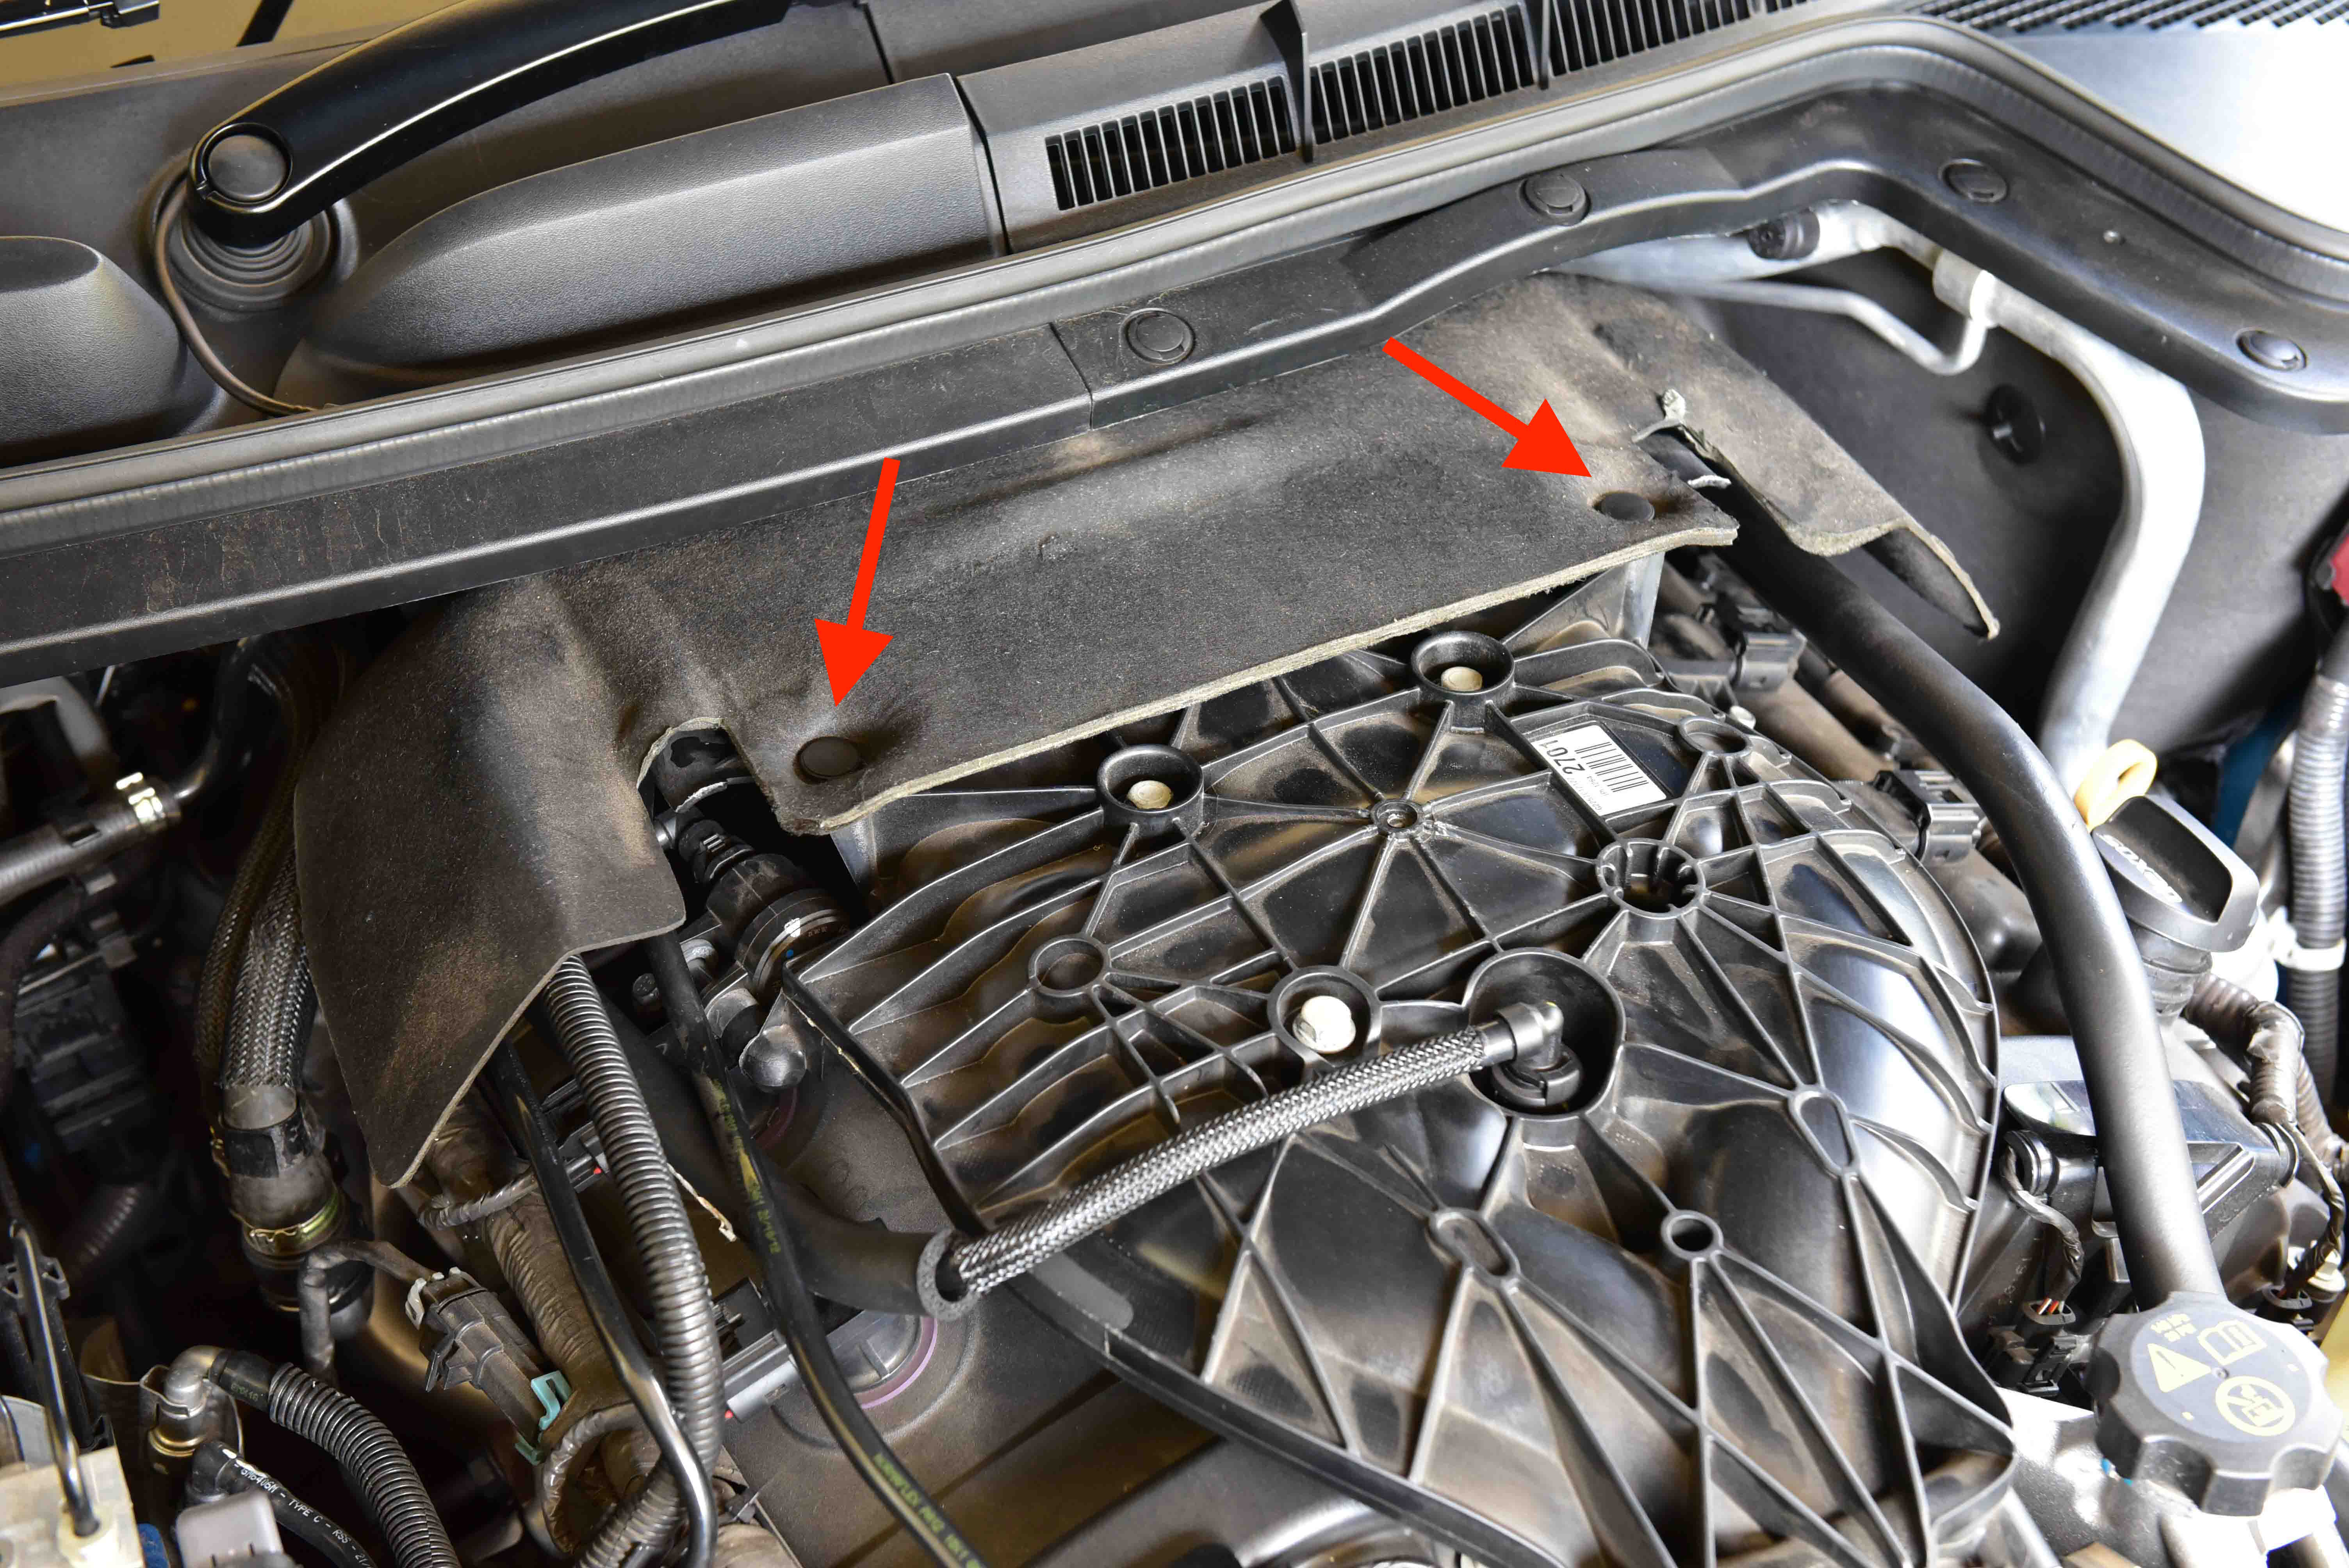
Remove the shield pictured by popping the two clips on the top of the engine. The shield can then be wiggled off the engine.
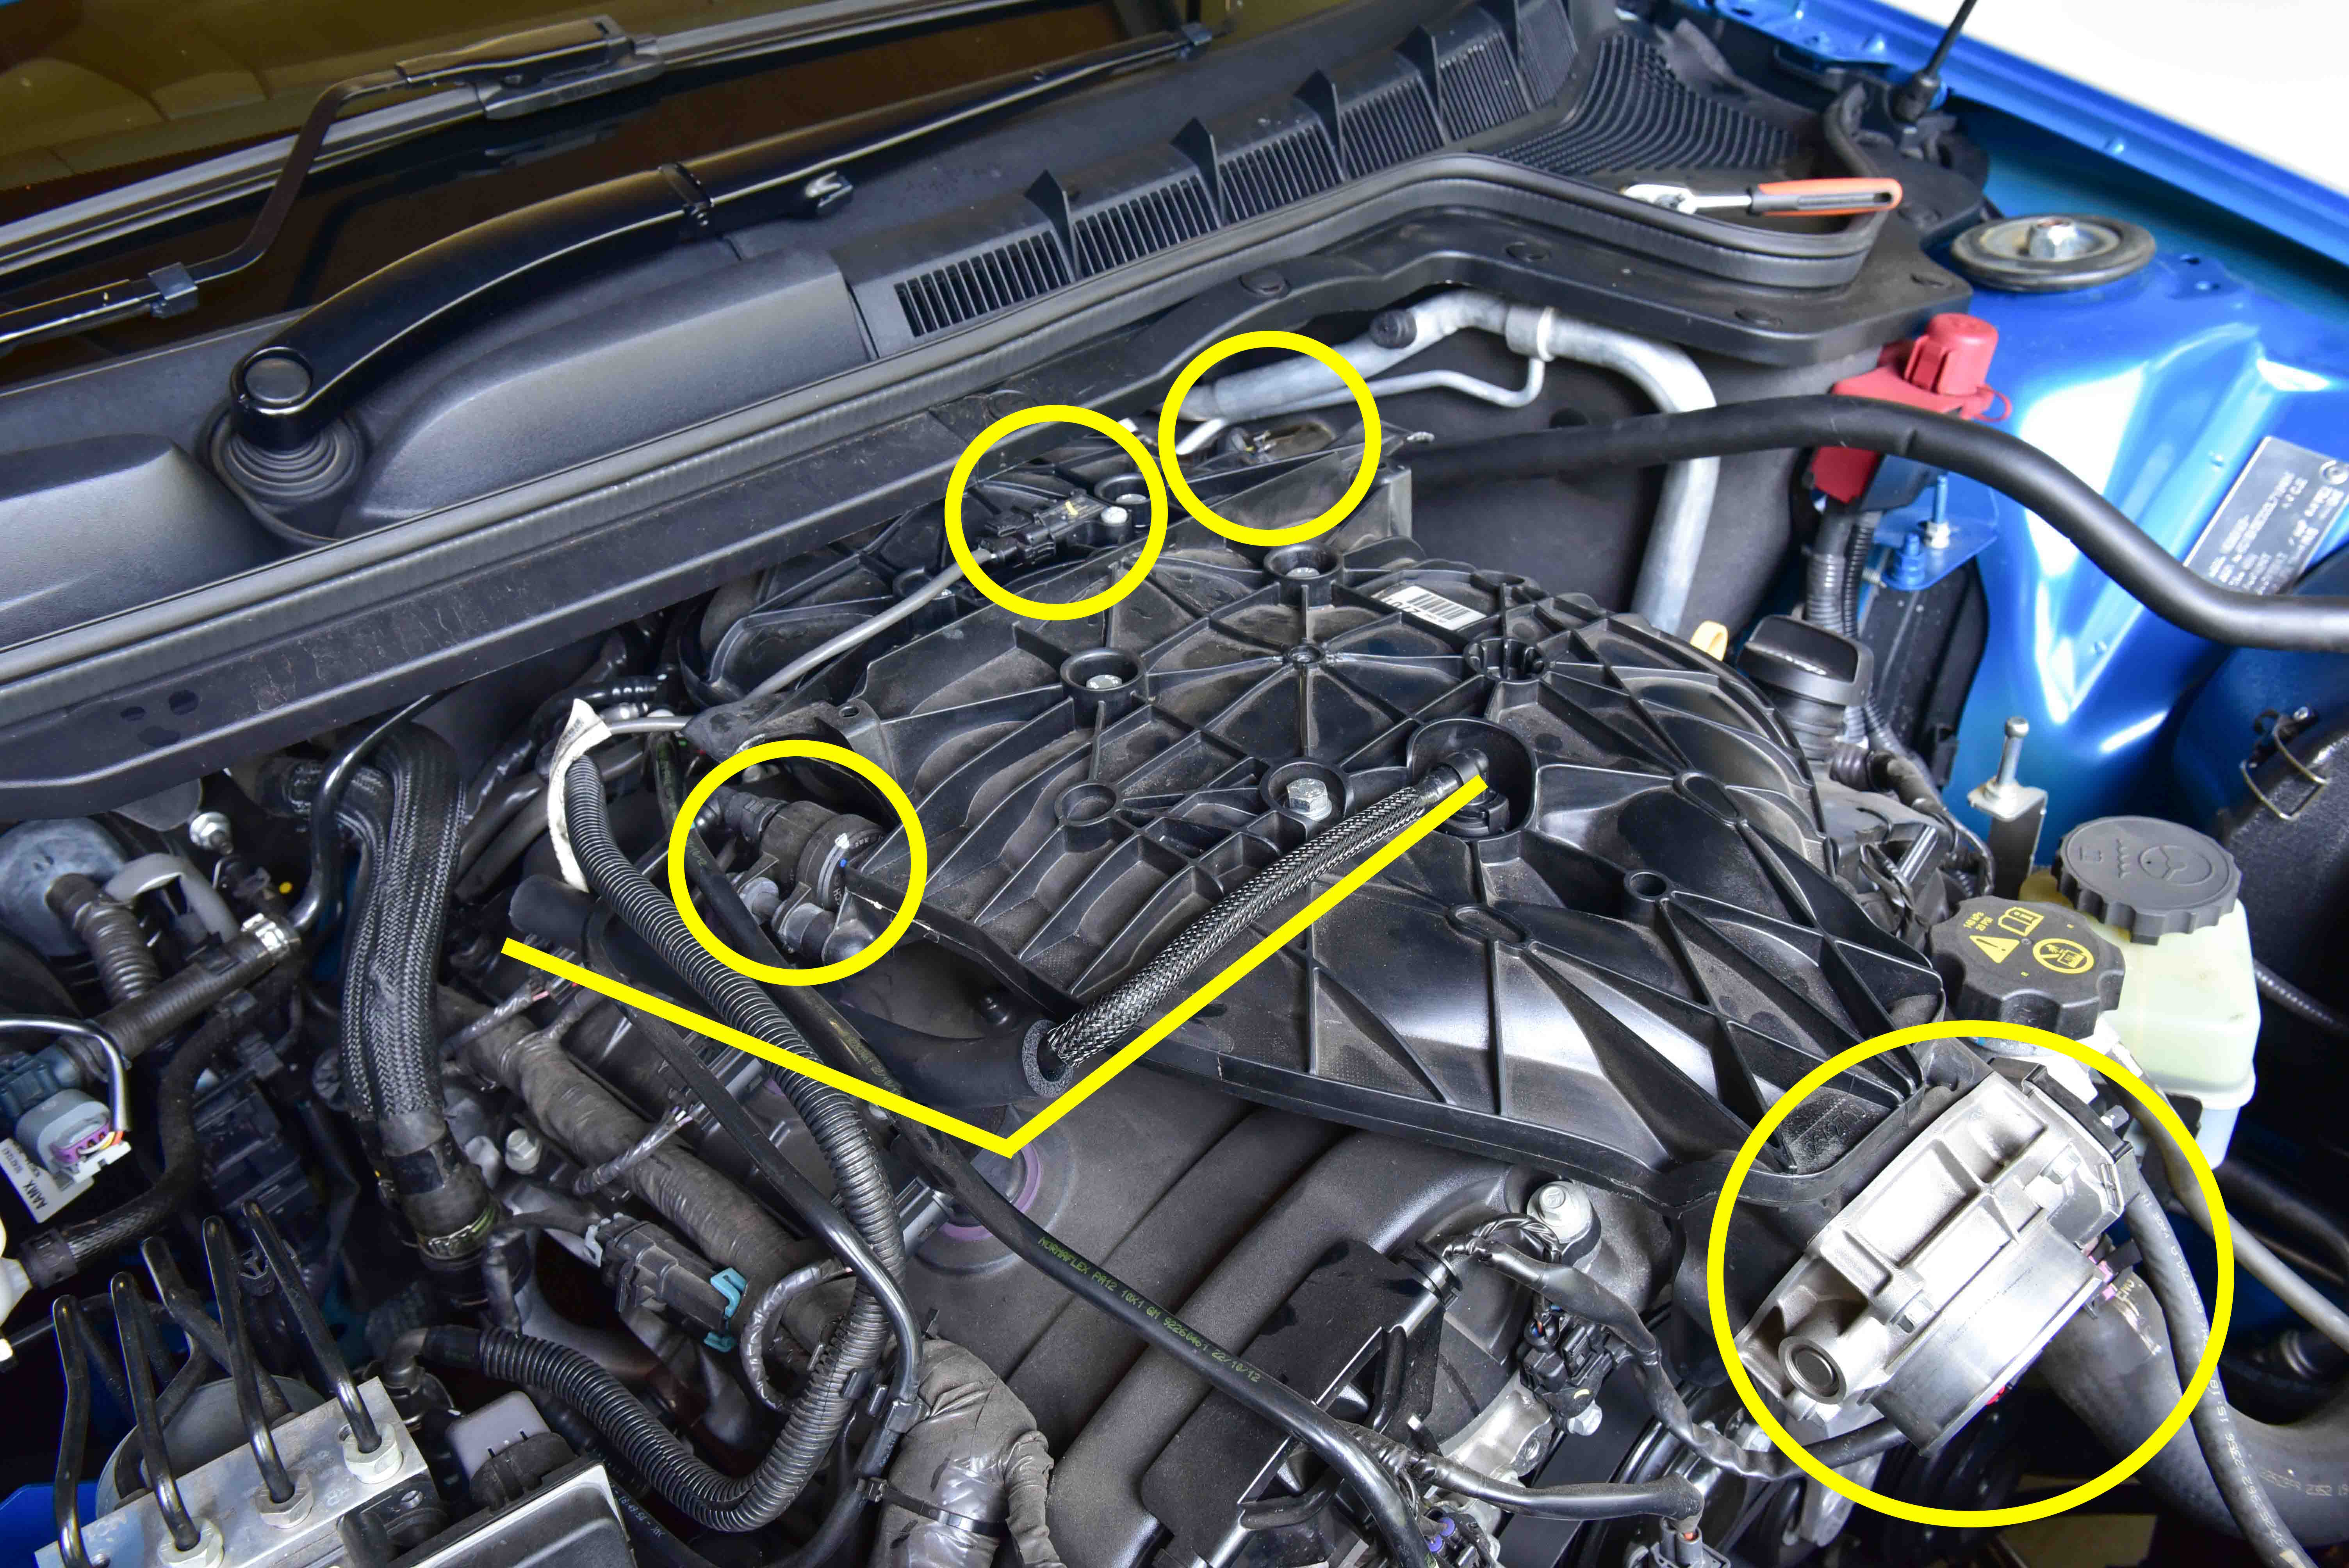
Step 5
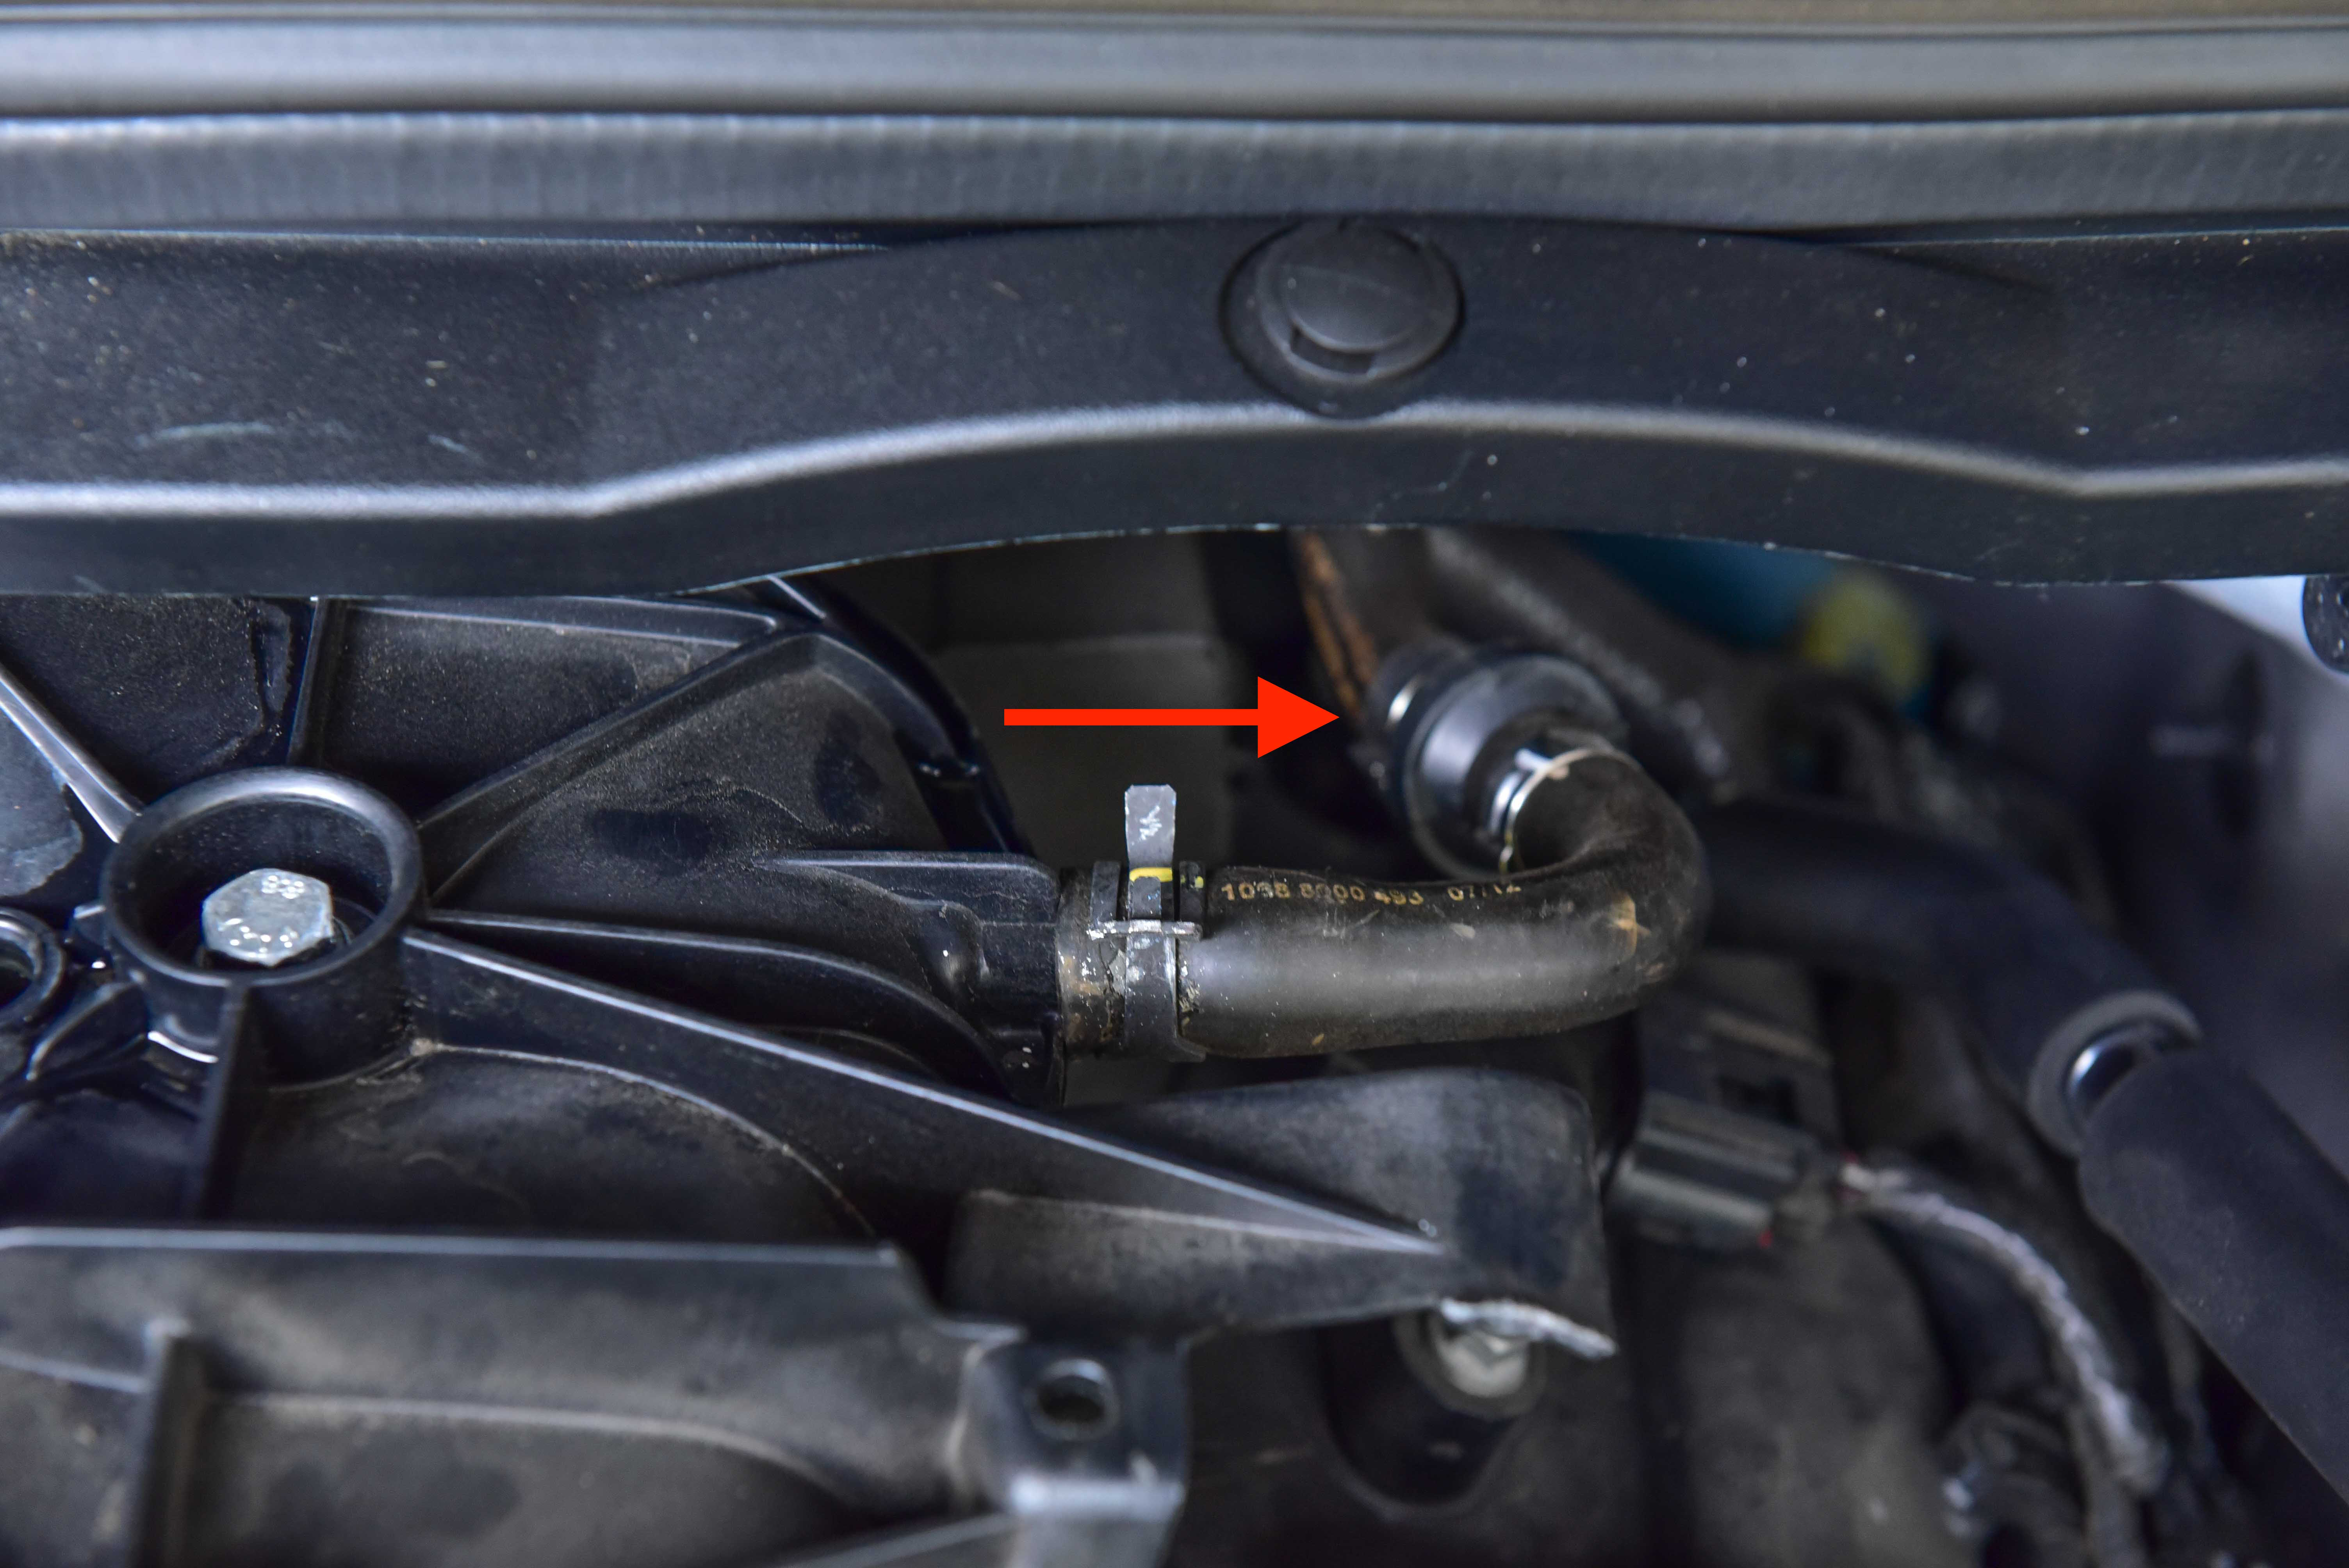
Remove the PCV (Positive Crankcase Ventilation) hose located on top of the intake manifold.
Follow this hose to the rear of the engine where you will find a clip-down fitting. To release this fitting, push the plastic tab across whilst pulling up on the hose.
Step 6
Rotate the hose 90 degrees in an anti-clockwise direction. You will need to bend it around the other hoses that may be in the way. This step is required to release the other end from the manifold.
Once rotated 90 degrees, pull the PCV hose upwards and remove from the vehicle.
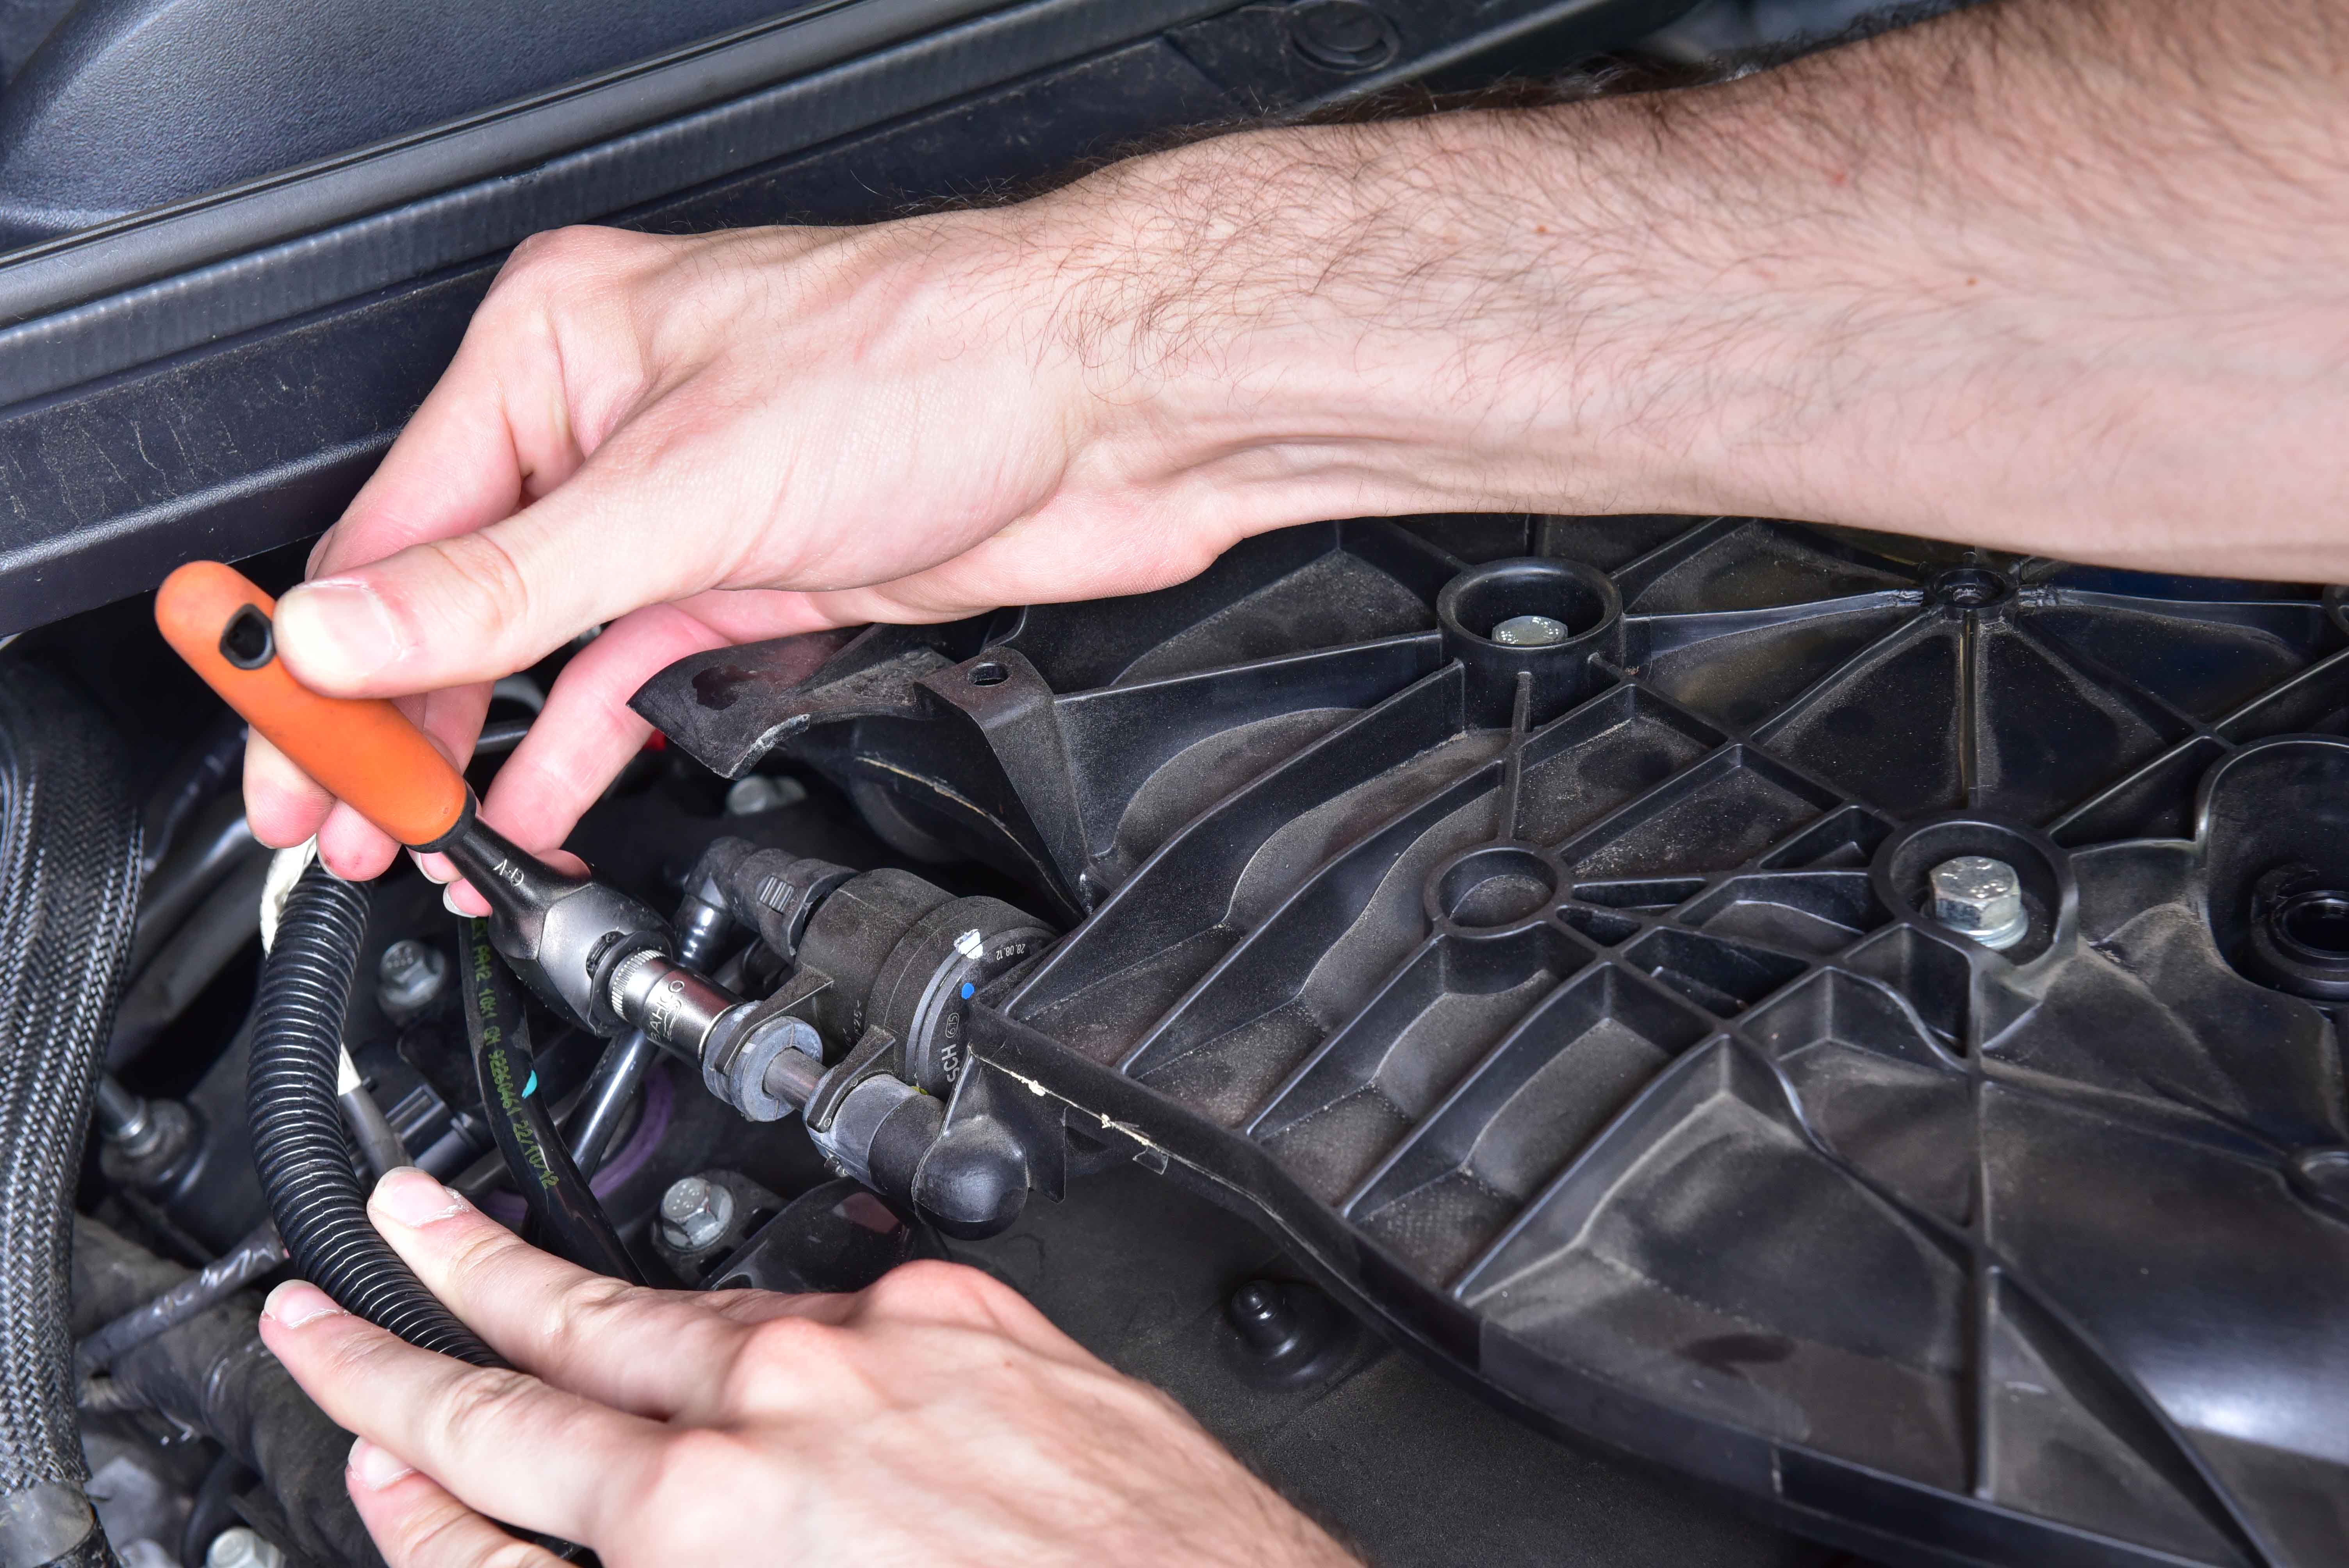
Step 7
Unbolt the purge solenoid from the intake manifold. There is a single bolt holding this in place as pictured.
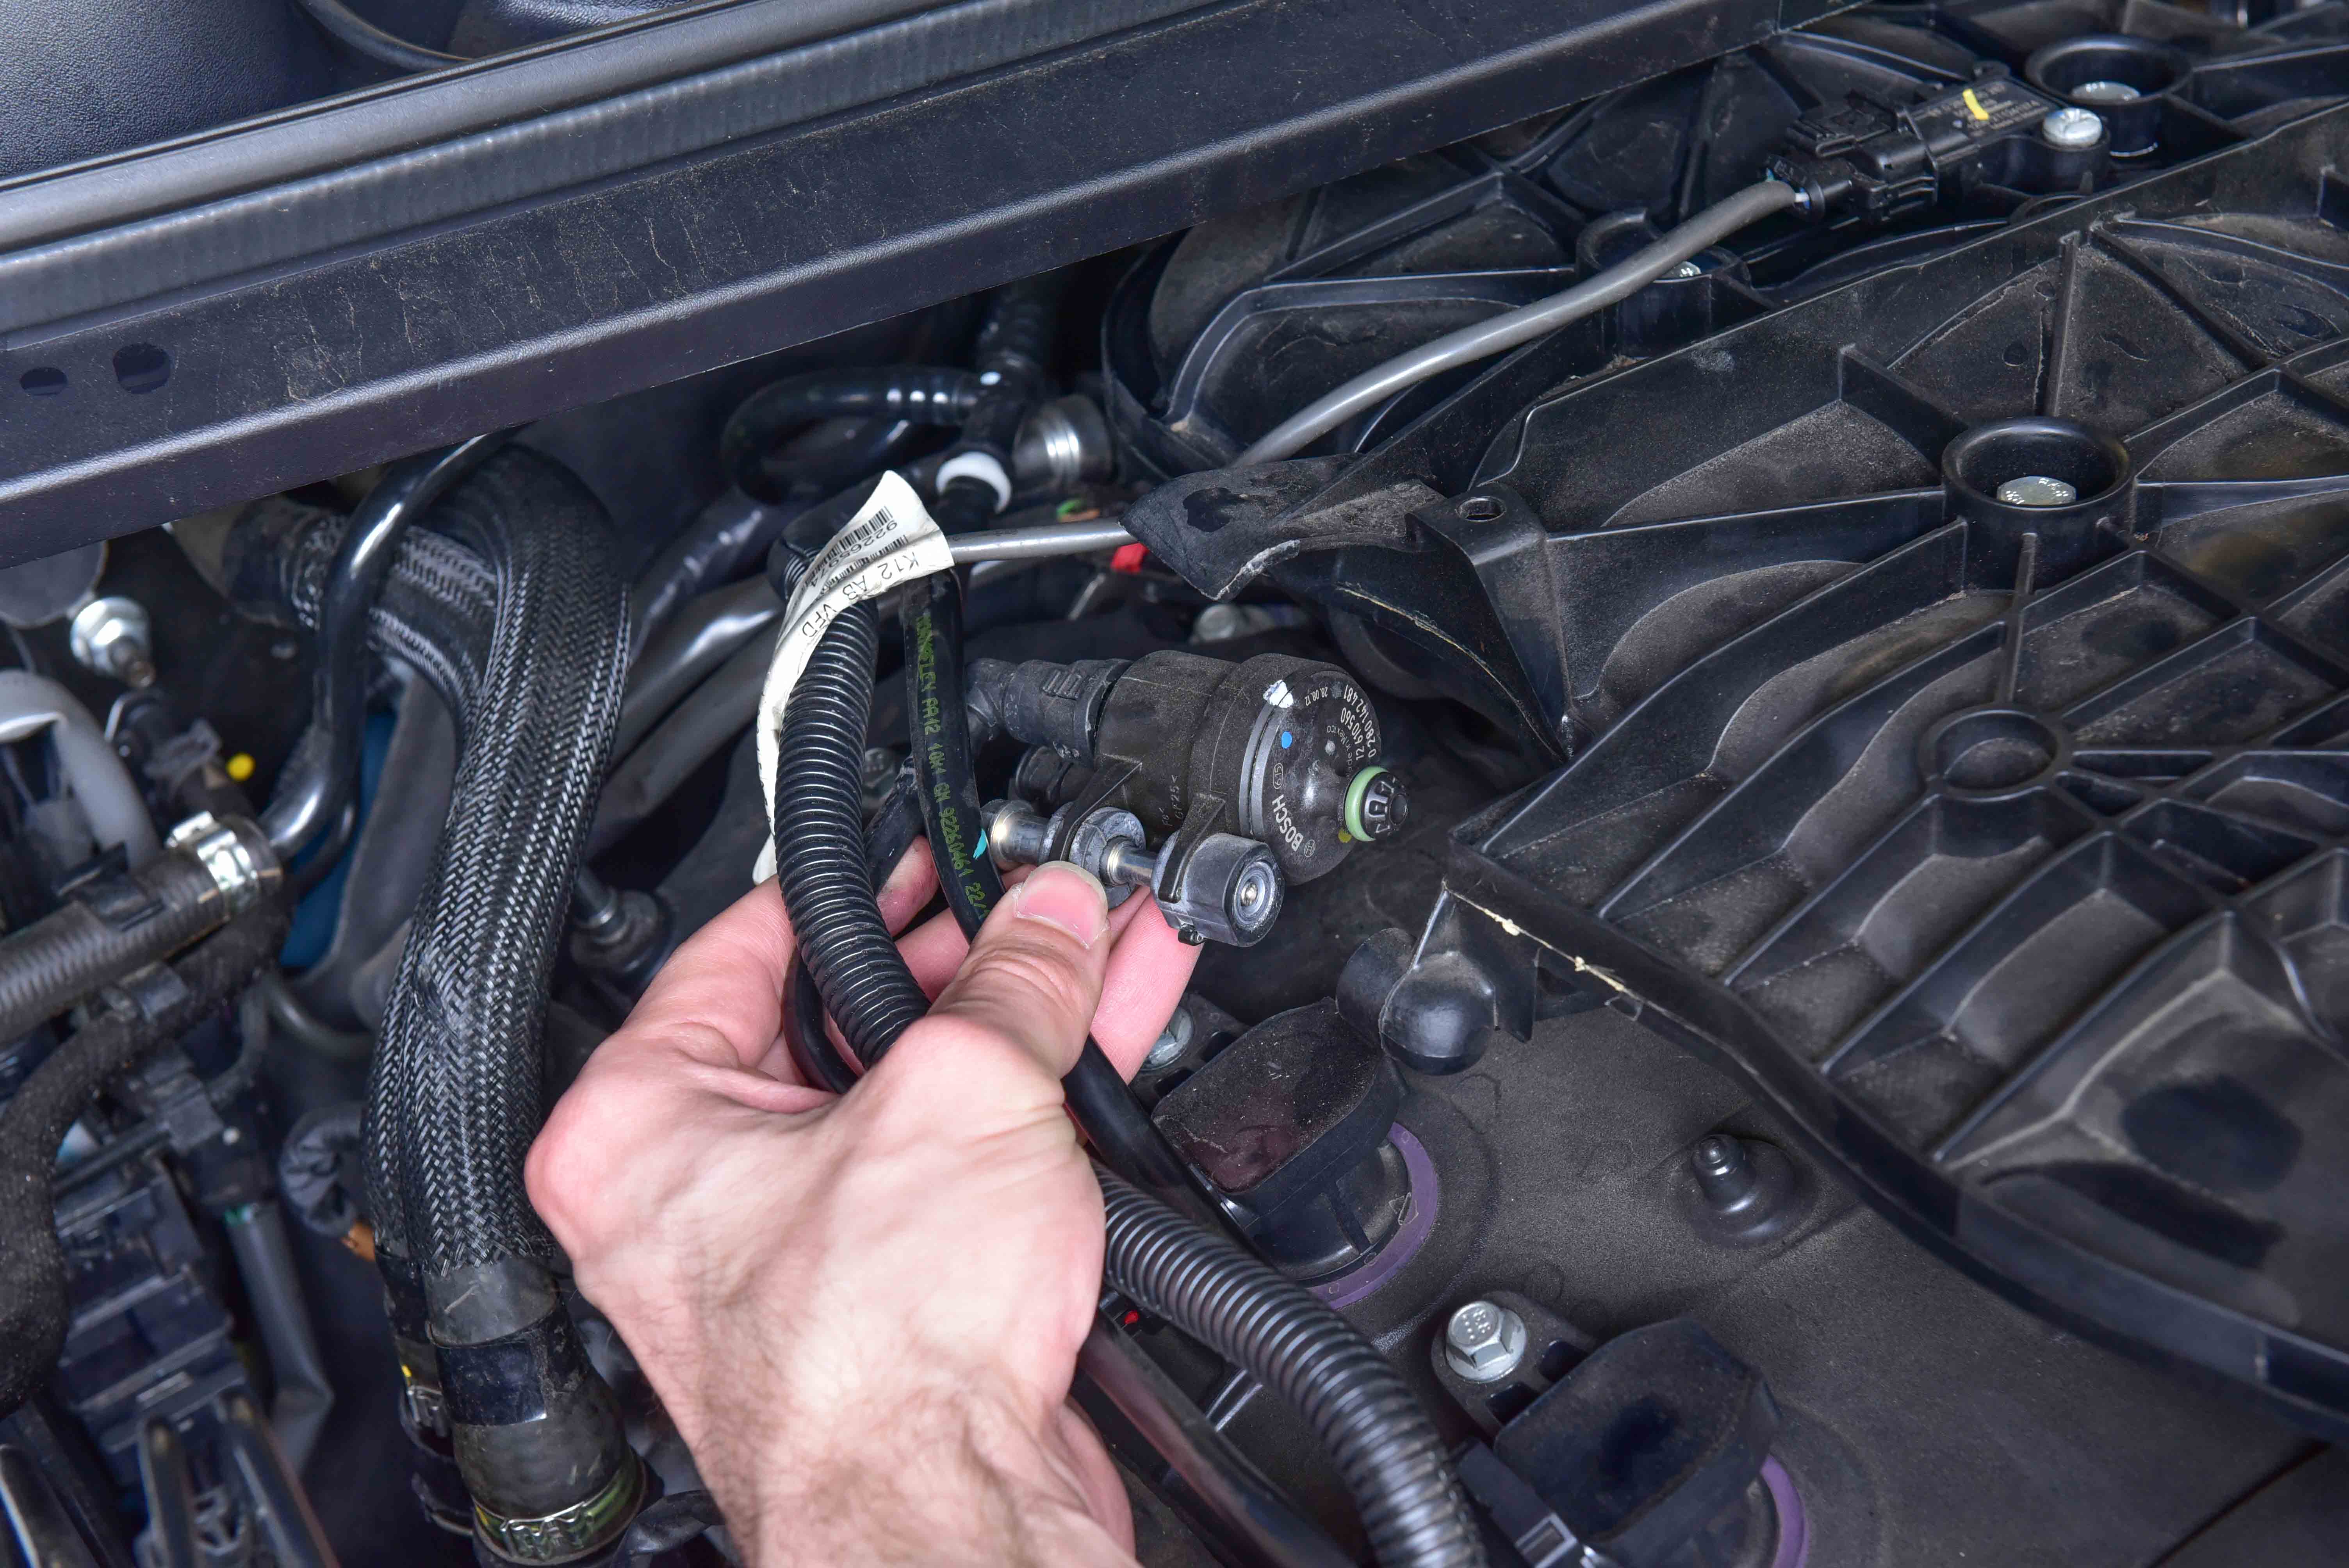
Step 8
Using a small amount of force, disconnect the purge solenoid from the intake manifold.
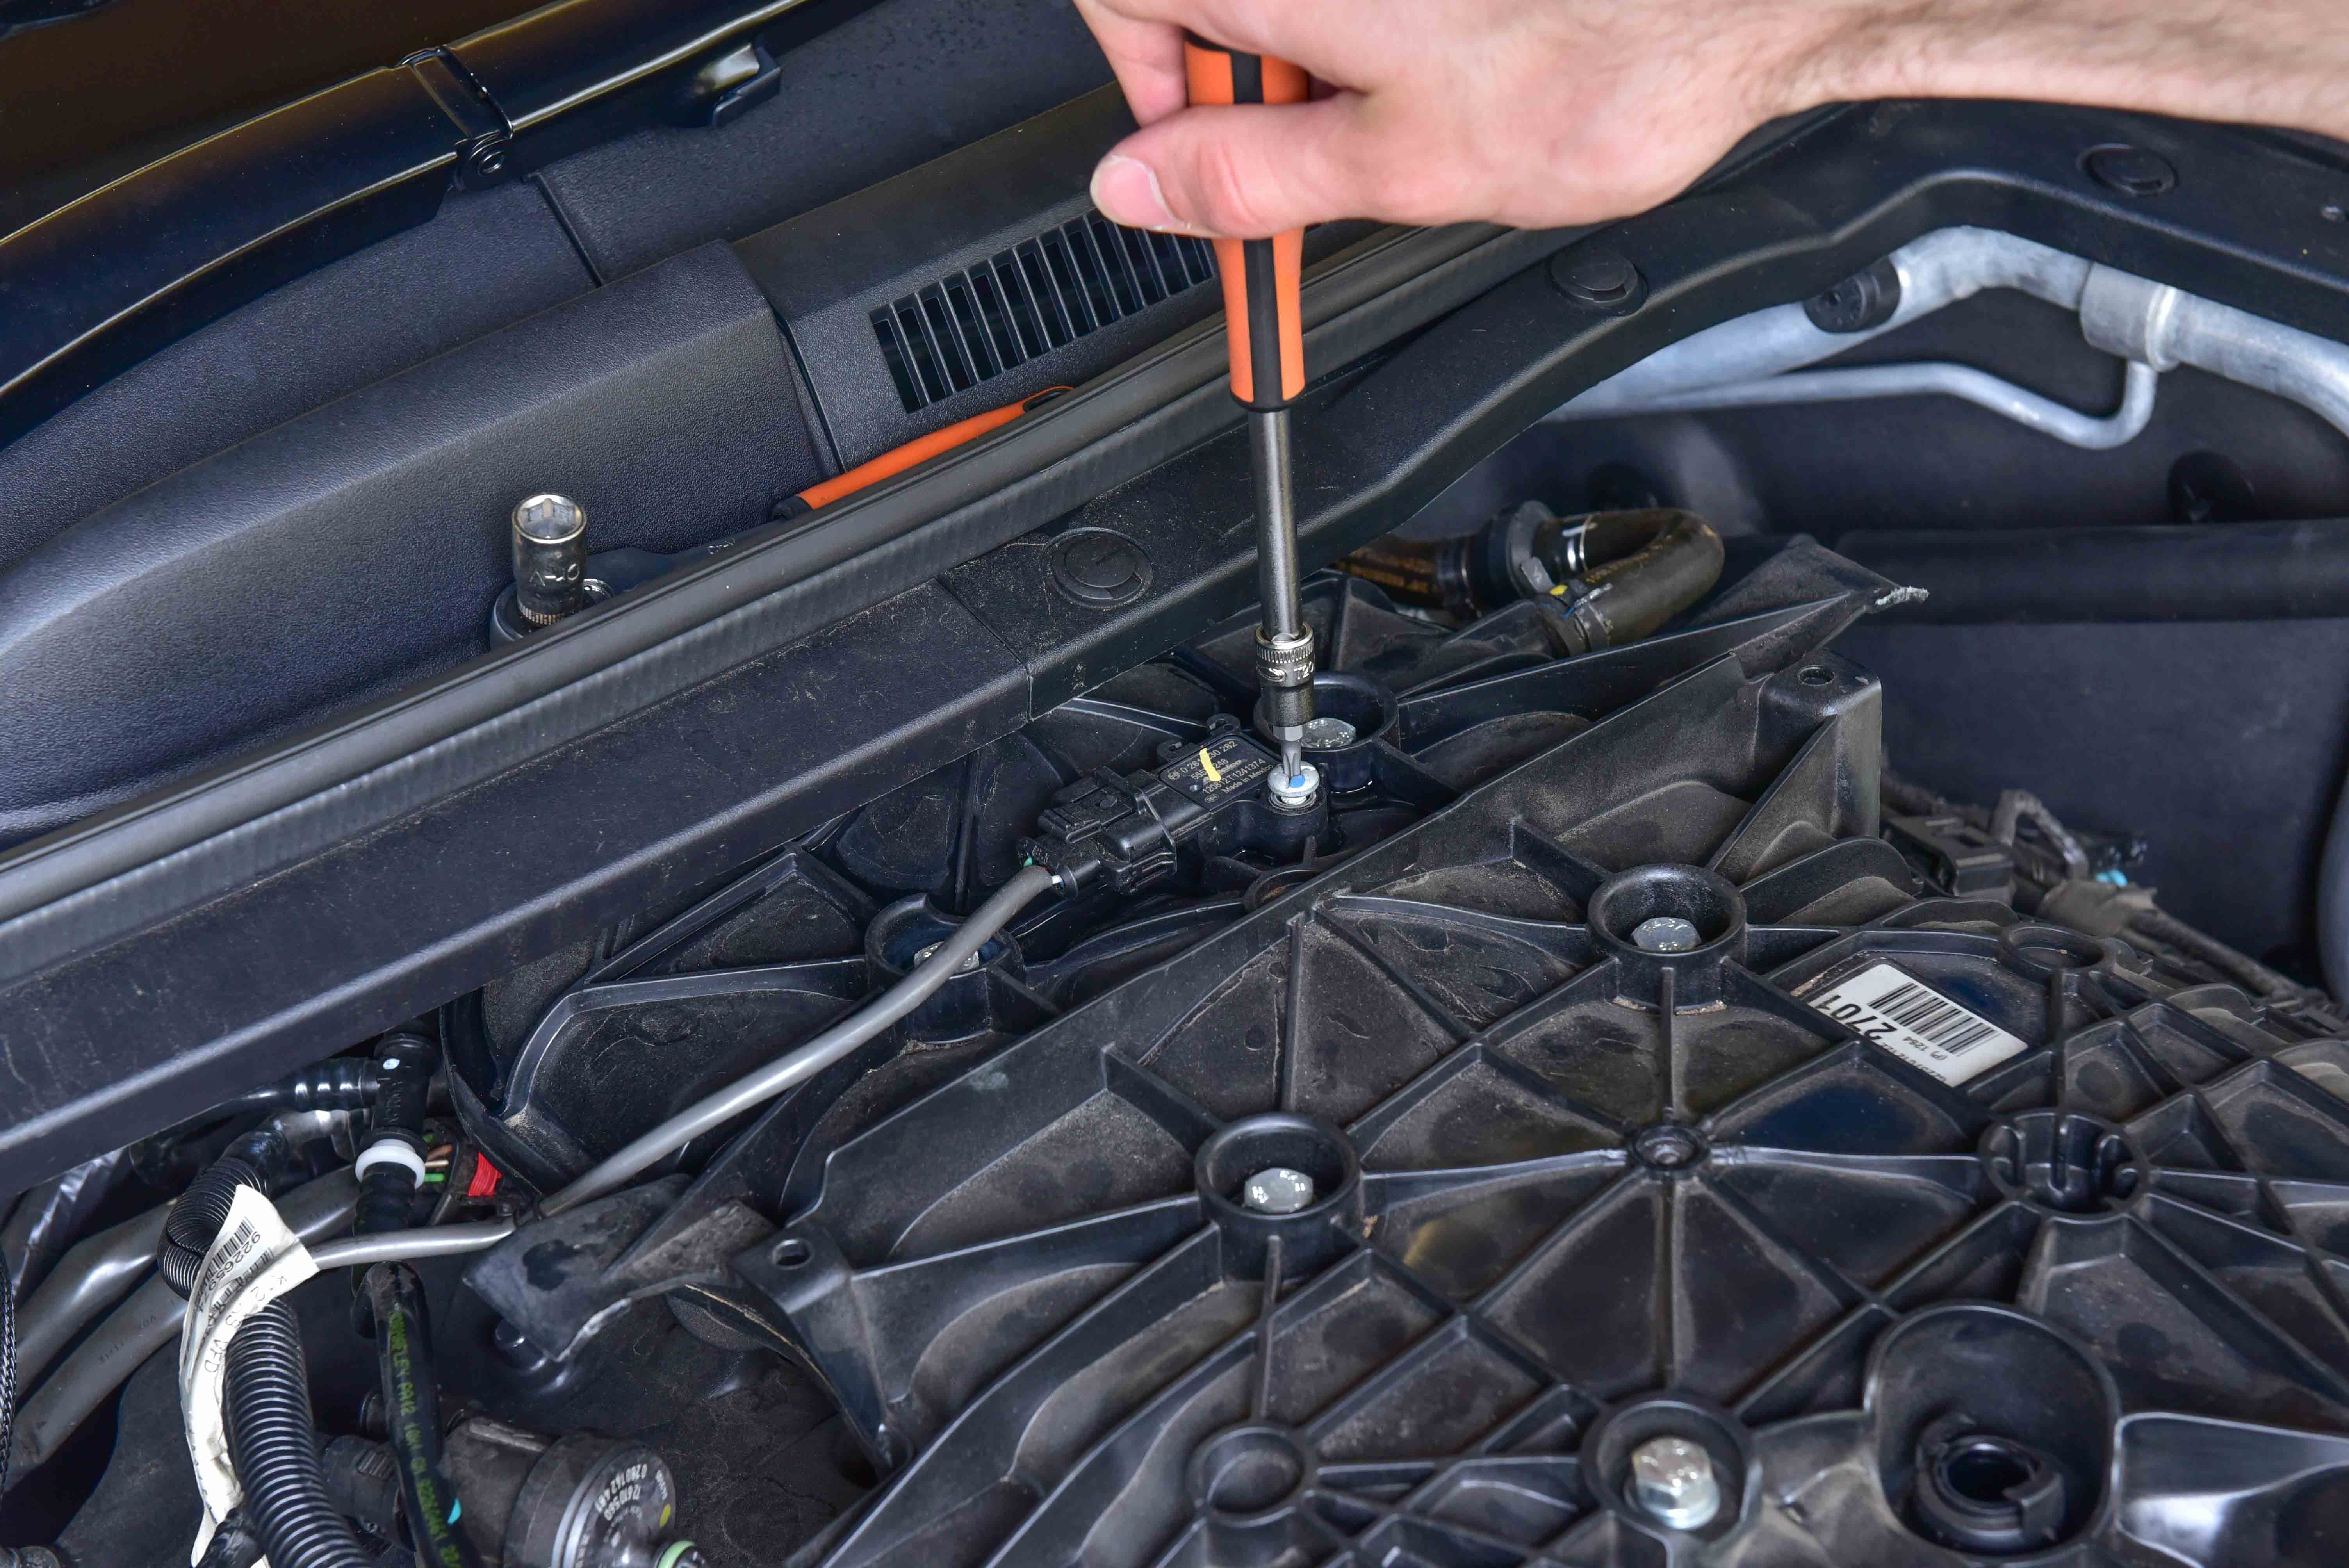
Step 9
Use a hex key to unscrew the MAP sensor.
Pull the map sensor upwards to disconnect it from the manifold. Also remove the clip holding the wire in place.
Step 10
Use pliers to squeeze this clip and release the hose from the manifold.
Step 11
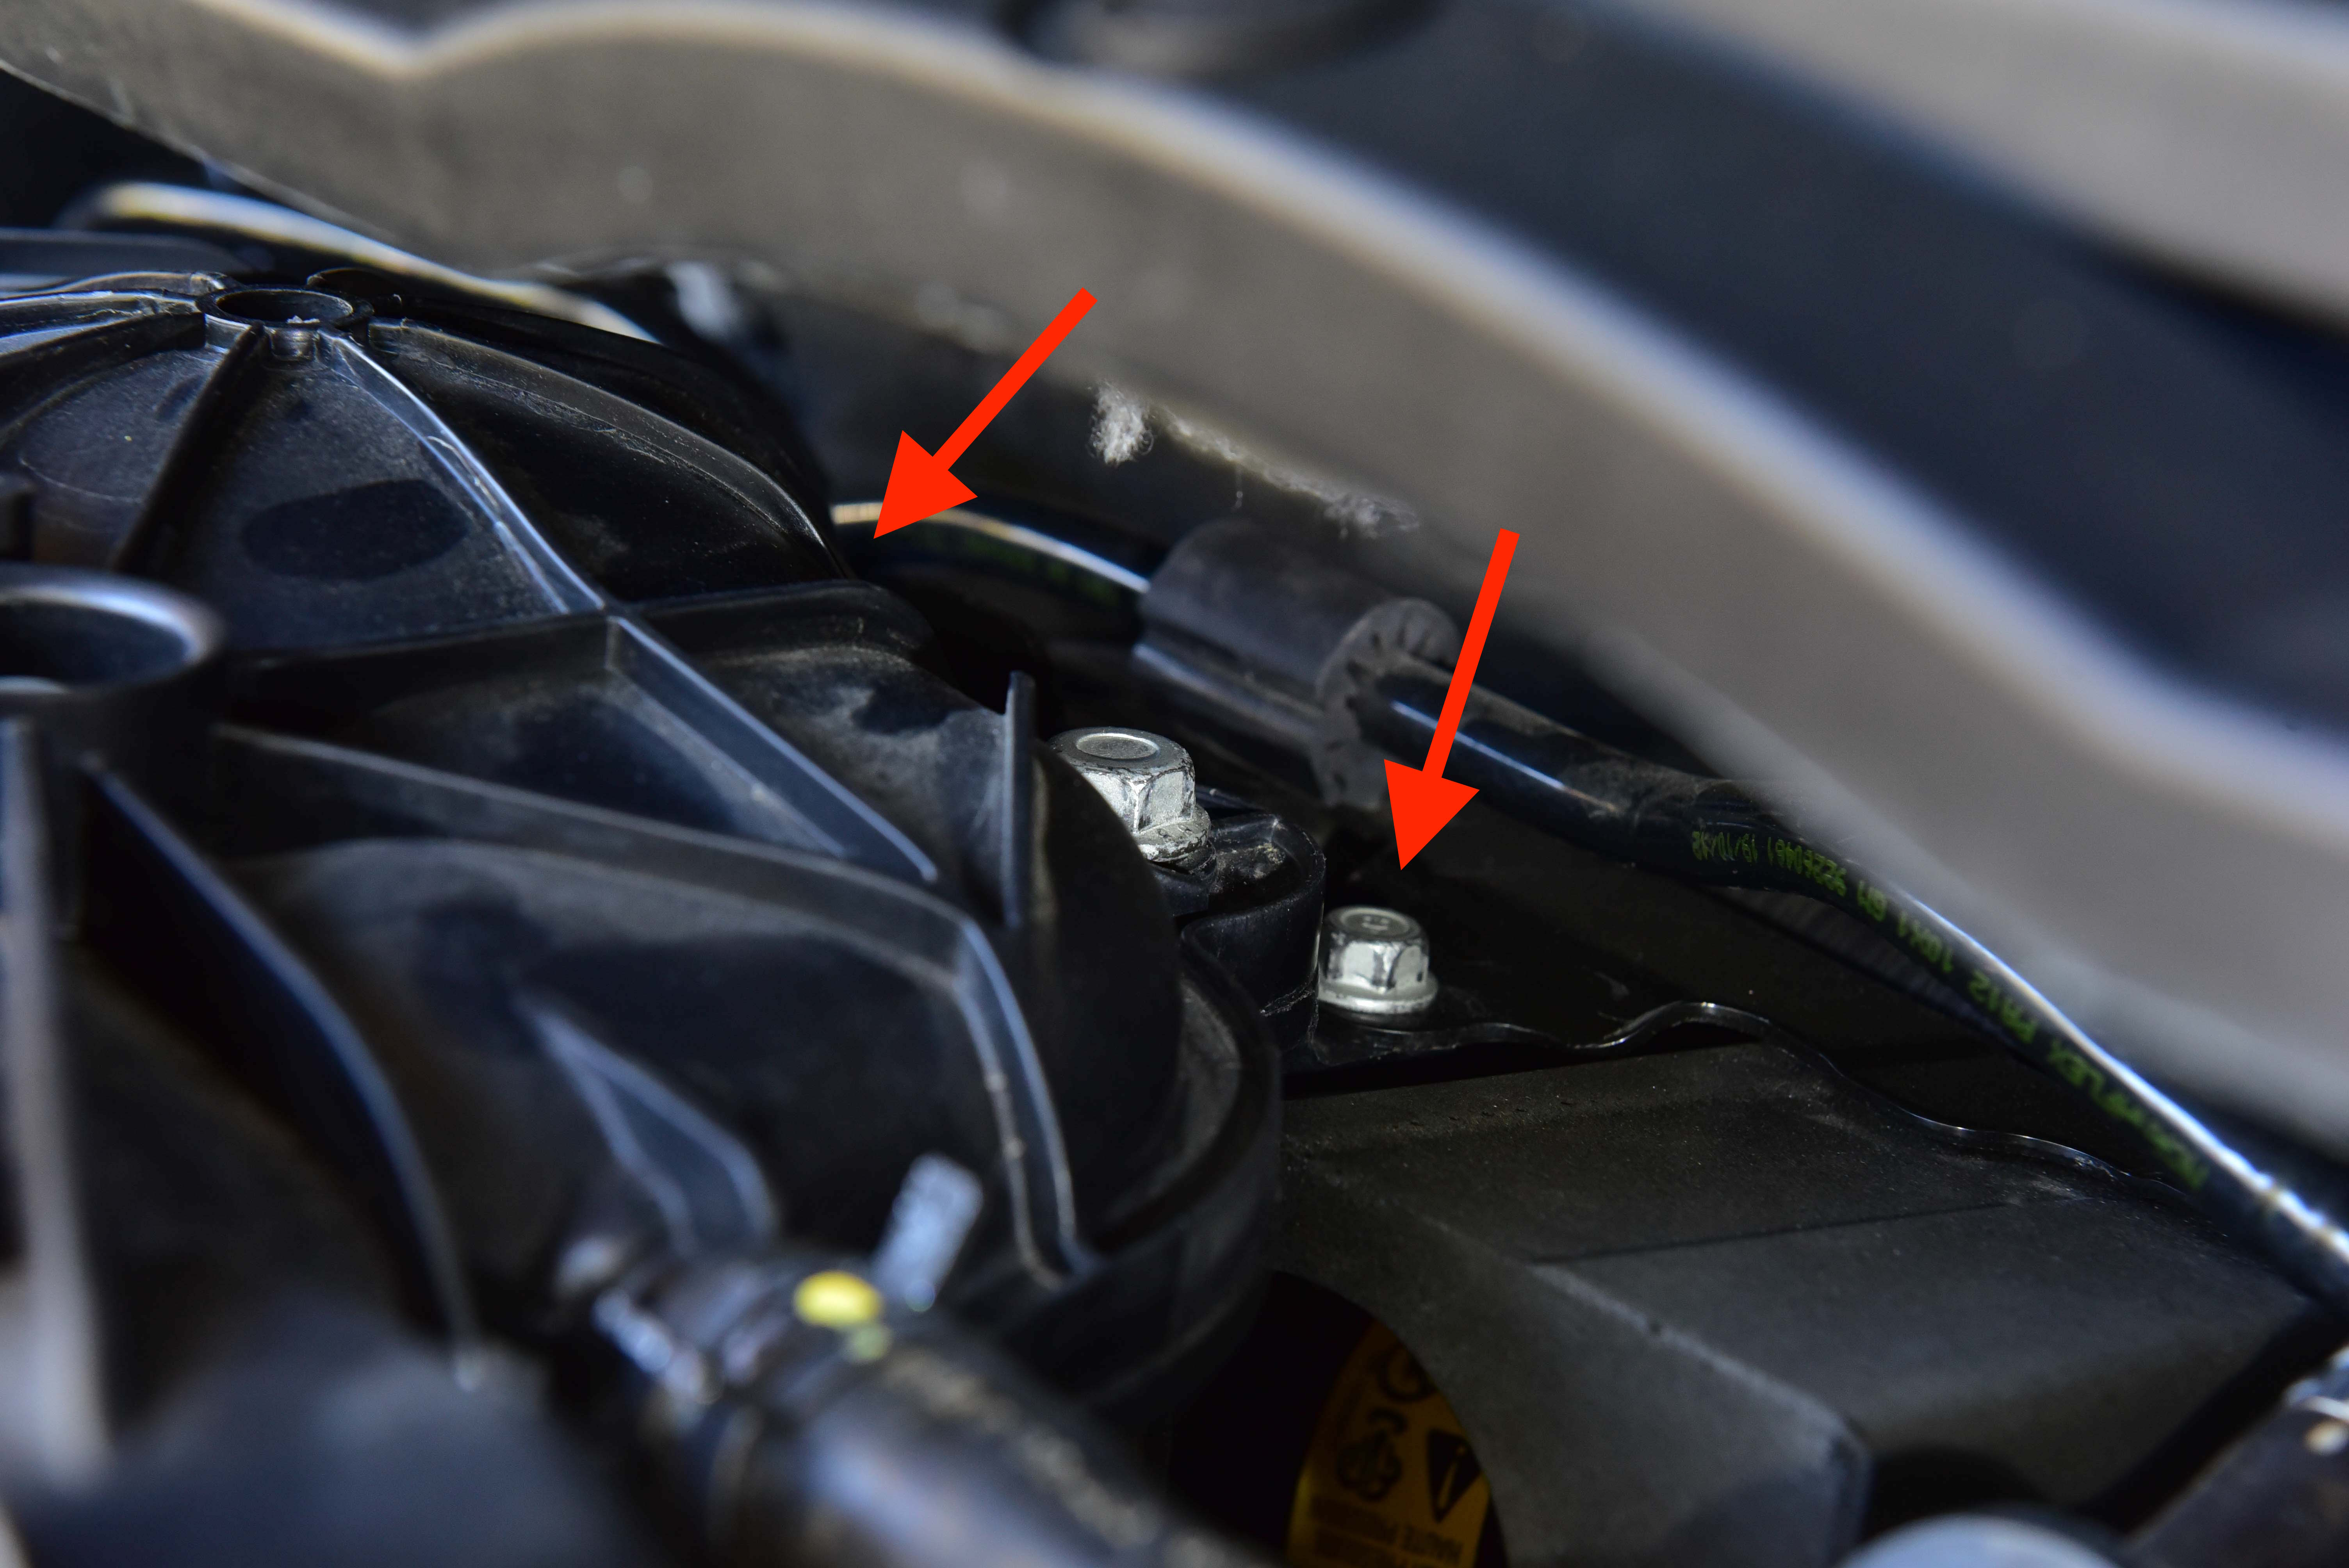
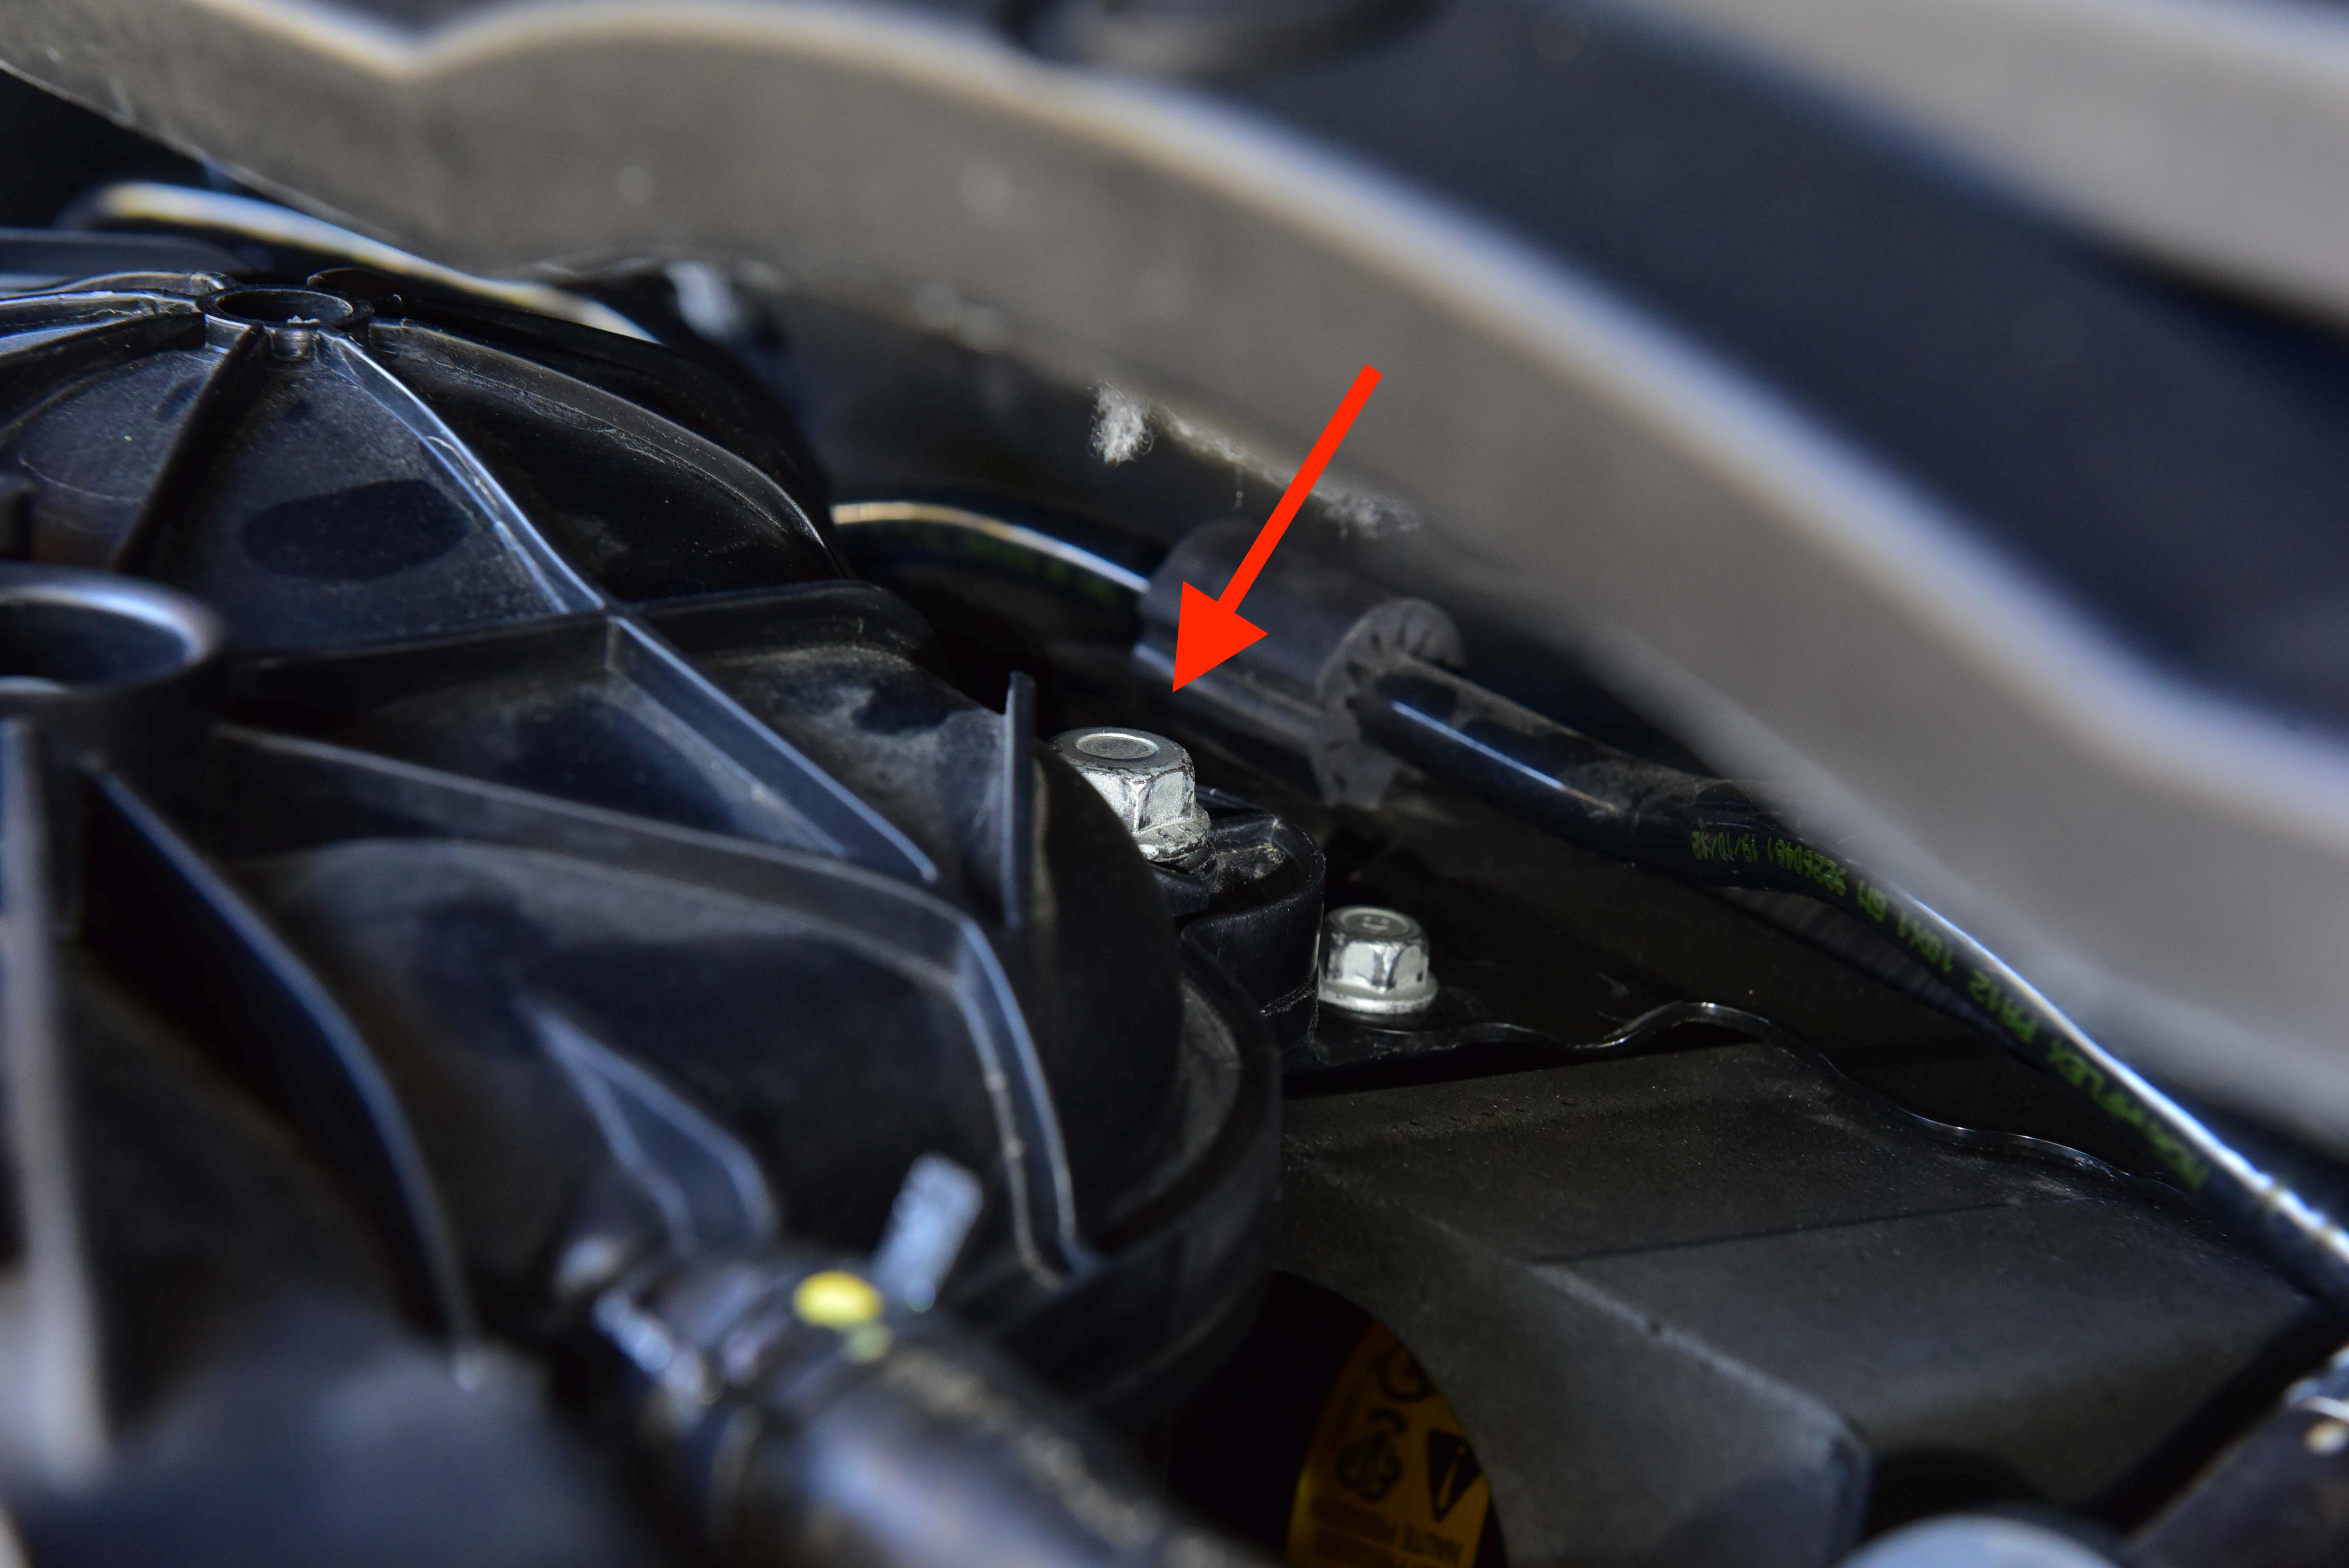
Remove the two bolts holding the fuel line shield in place. These are quite small, and there is one on each side of the engine.
Note: You will not be able to re-install these once the spacer is installed. The shield will actually sit comfortably in place without requiring the bolts.
Step 12
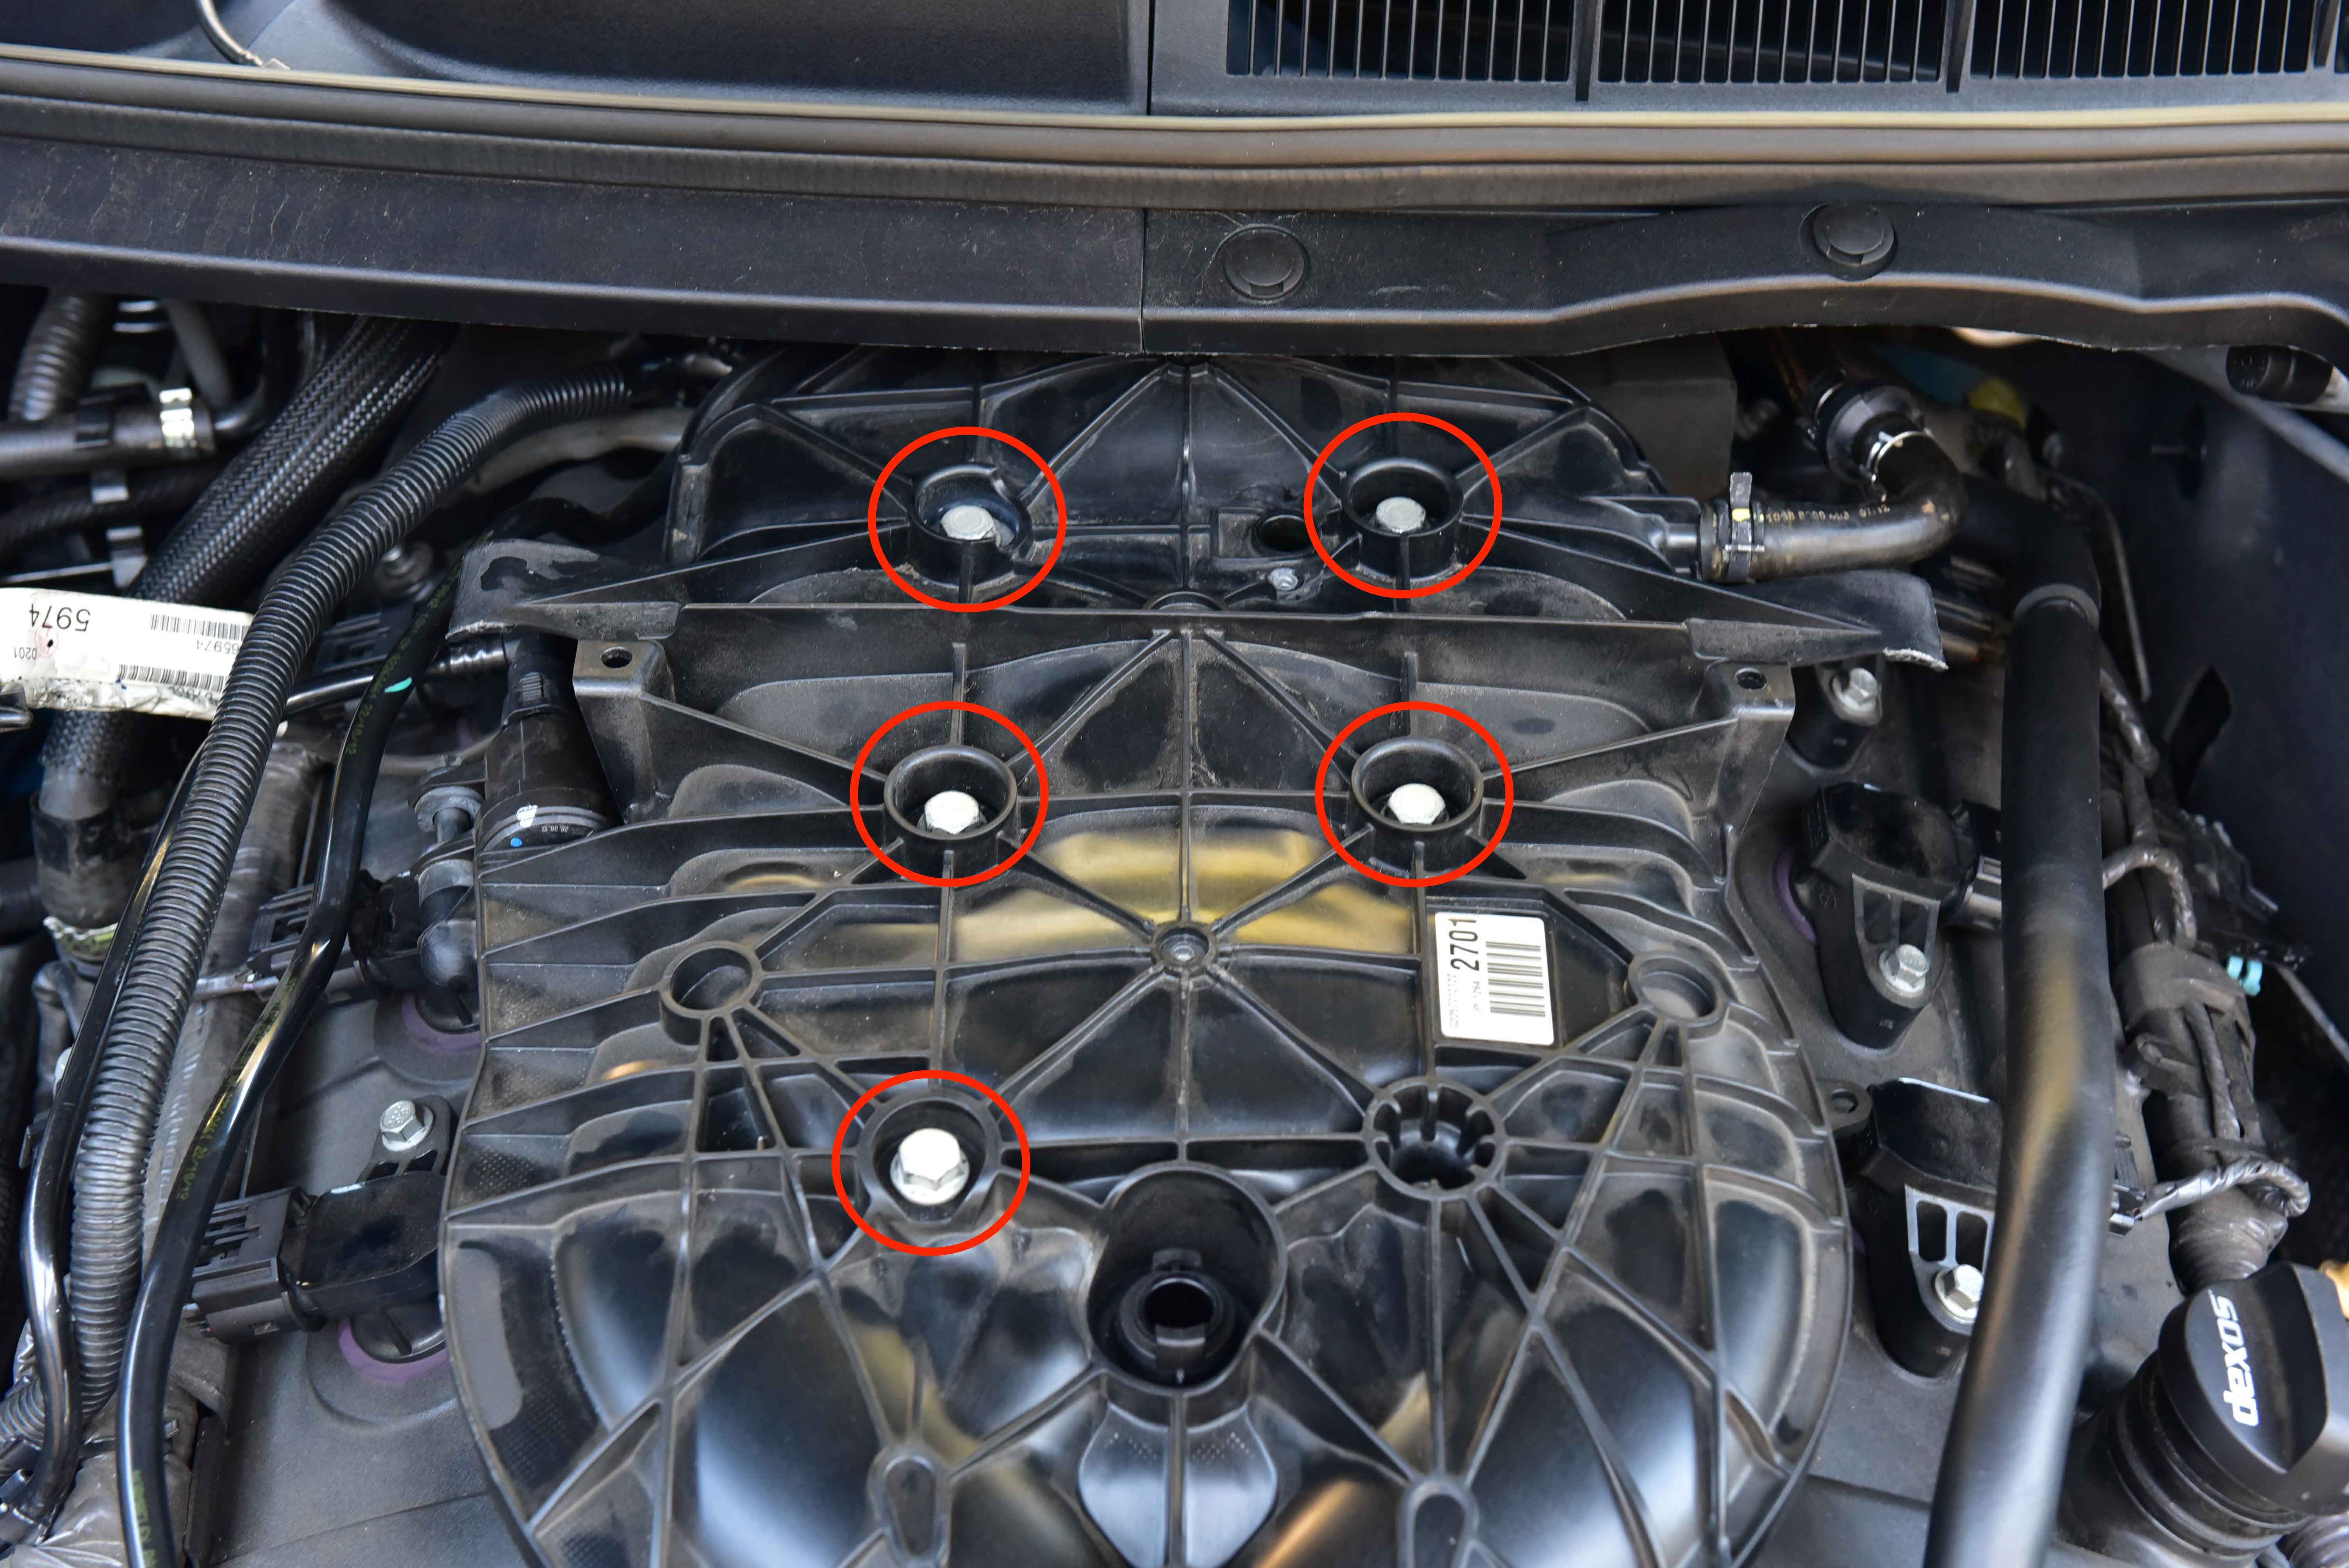
Unbolt the five bolts located on top of the intake manifold. Be gentle when removing these.
Step 13
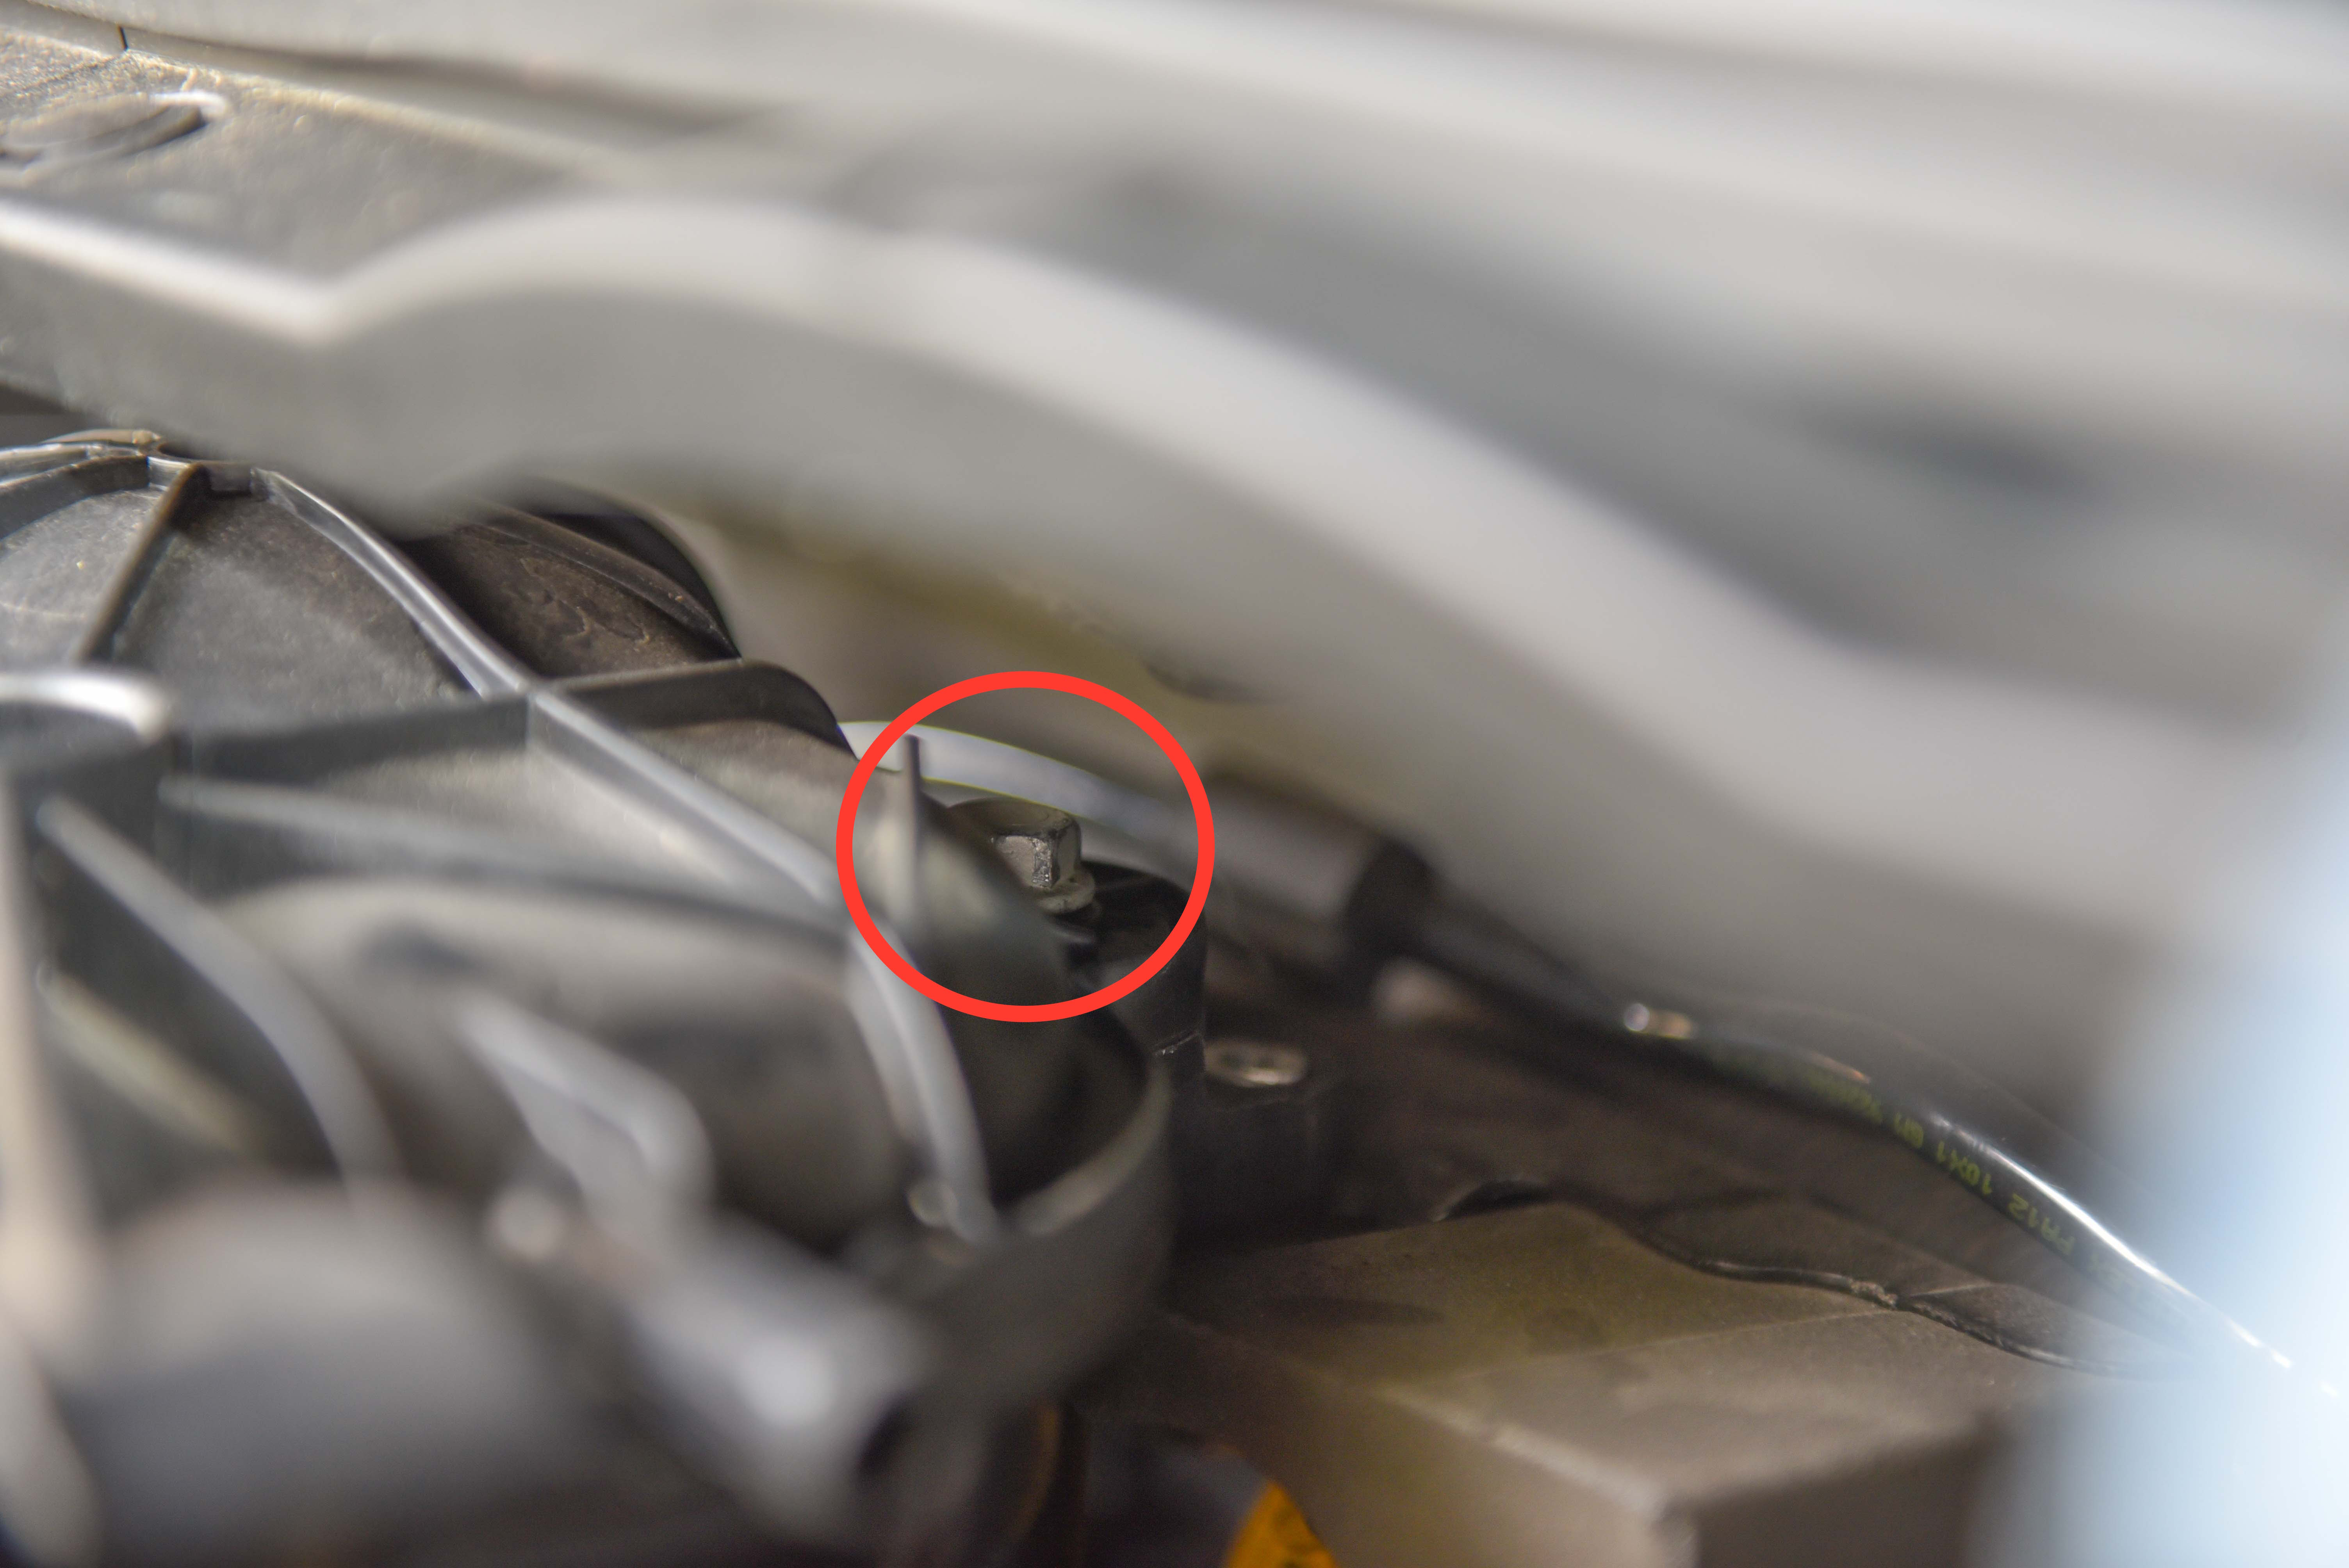
Next, unbolt the final bolt securing the manifold to the engine. You will need to unscrew this bolt entirely, however you will not be able to remove it from the manifold due to a lack of clearance. It needs to be guided out with the manifold upon its removal in the next step.
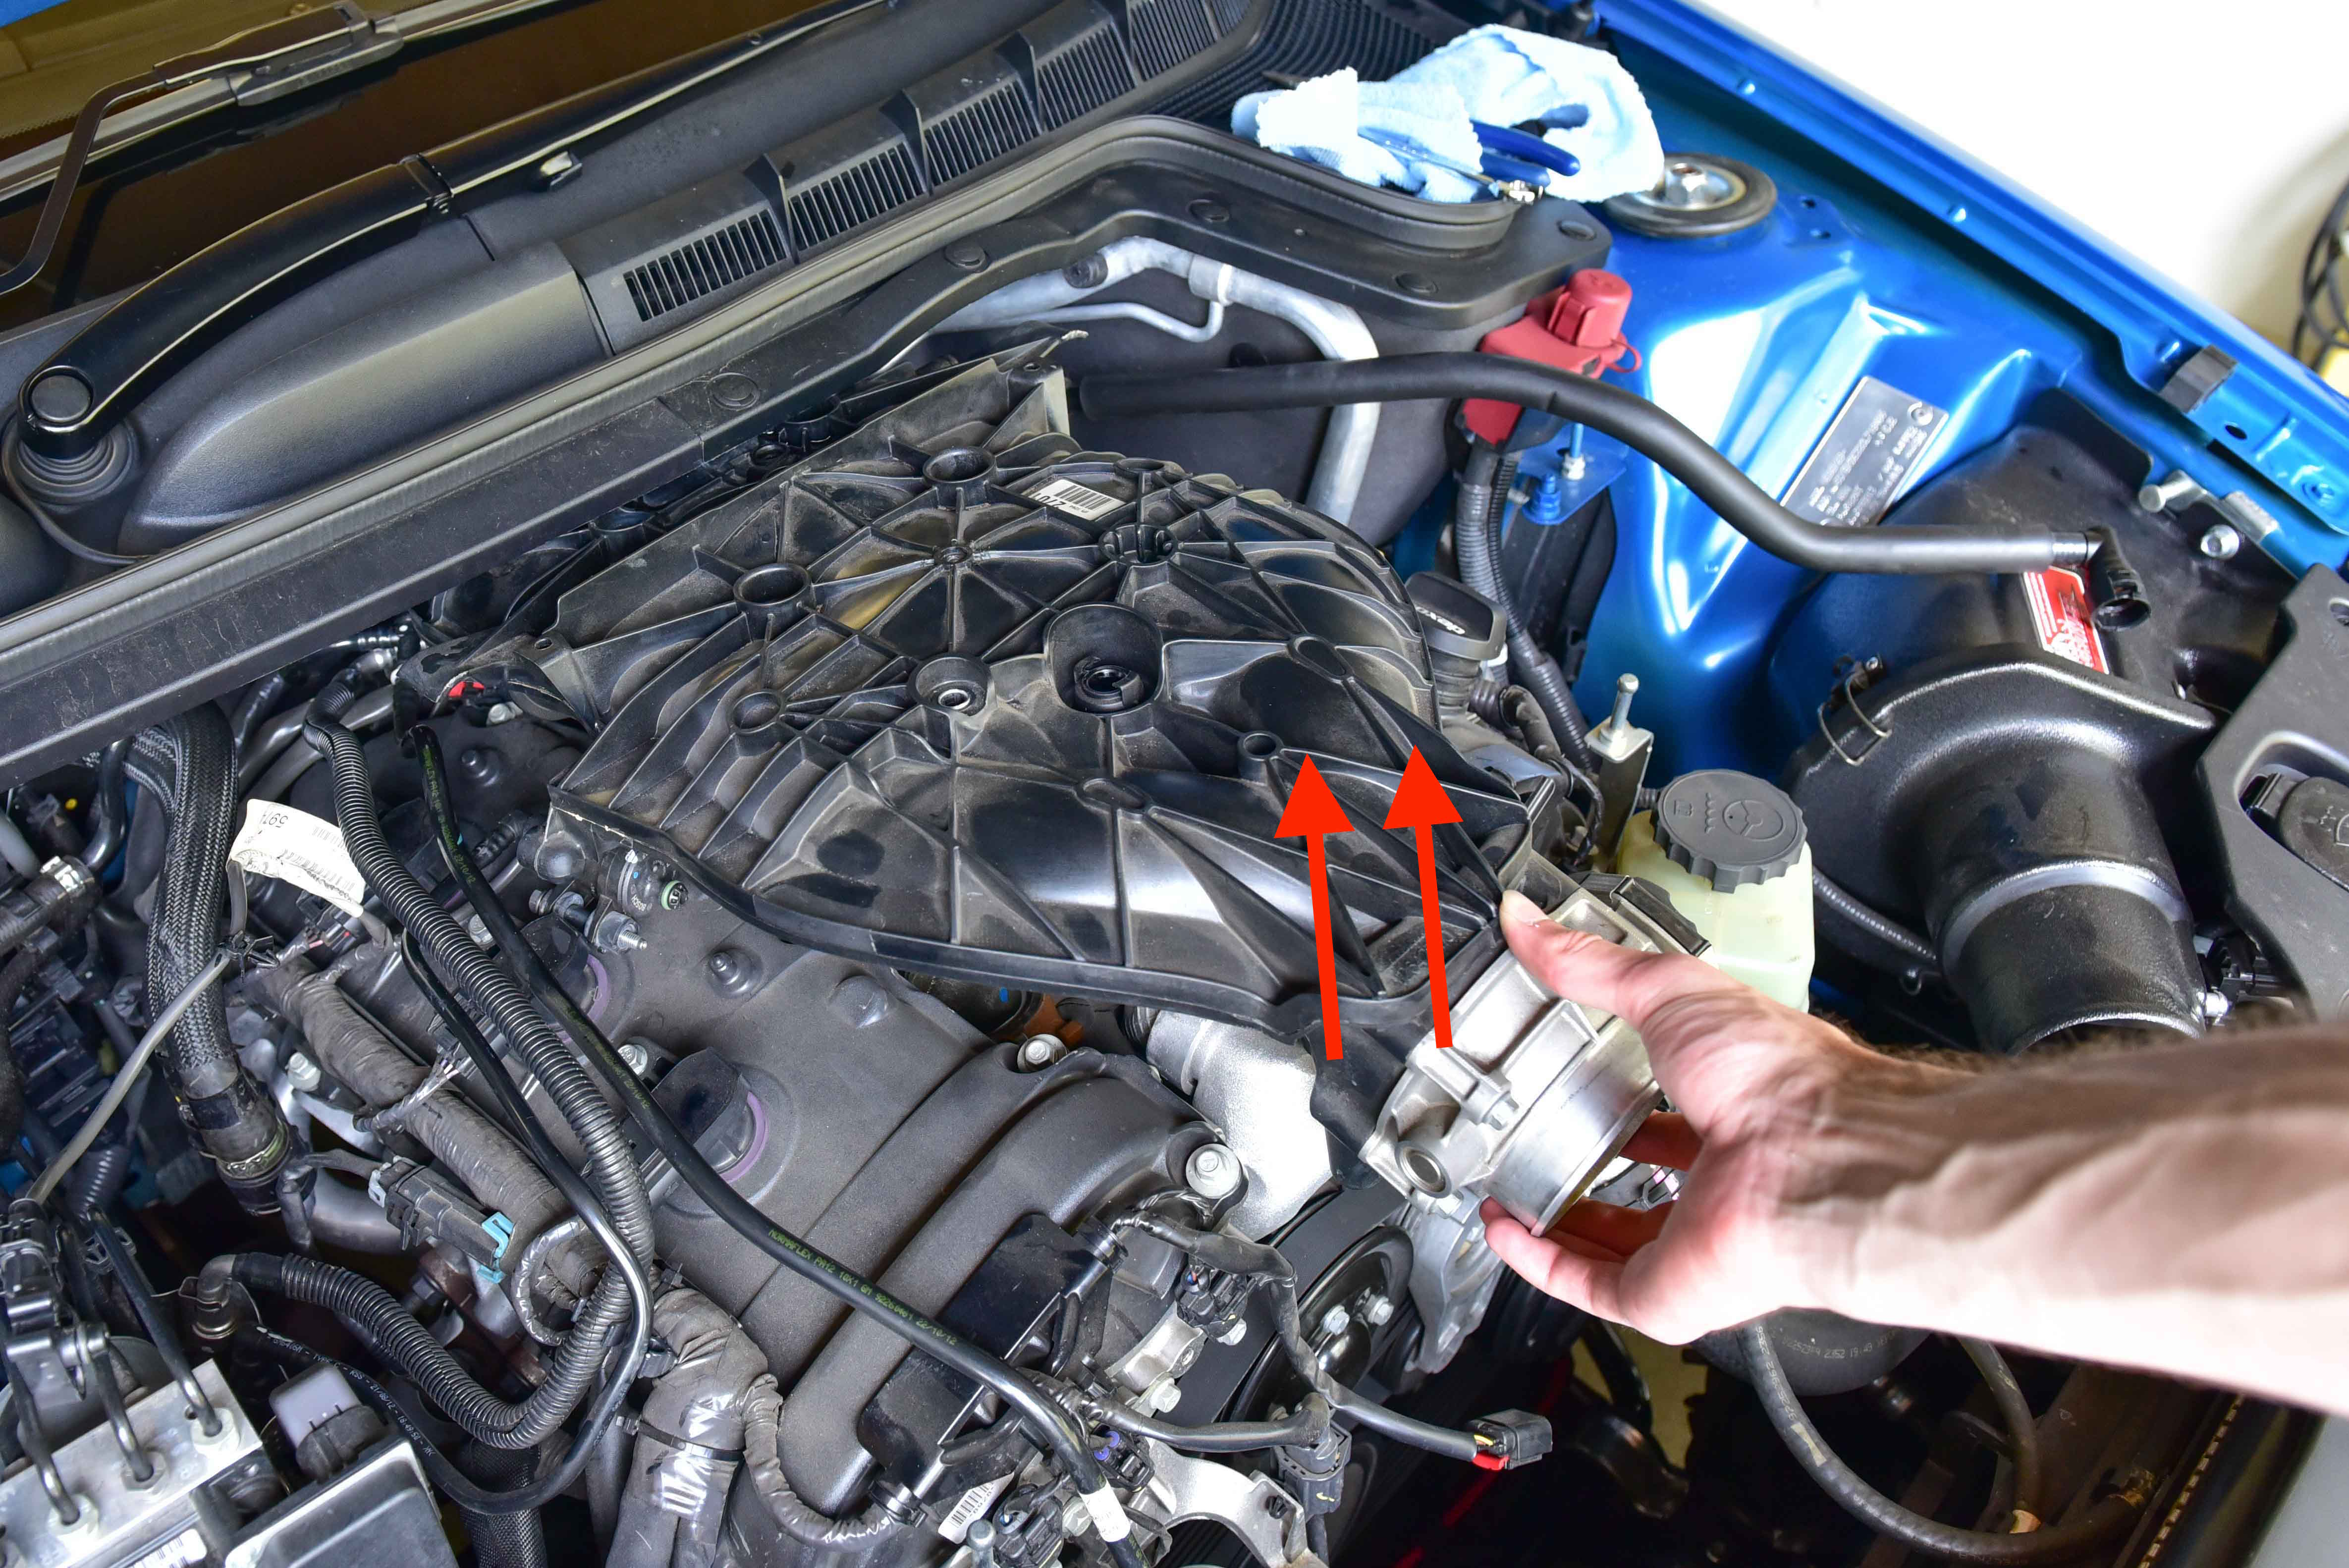
Step 14
The intake manifold can now be removed from the vehicle. Grasp the throttle body and gently lift upwards and away from the engine, guiding the remaining bolt out at the same time.
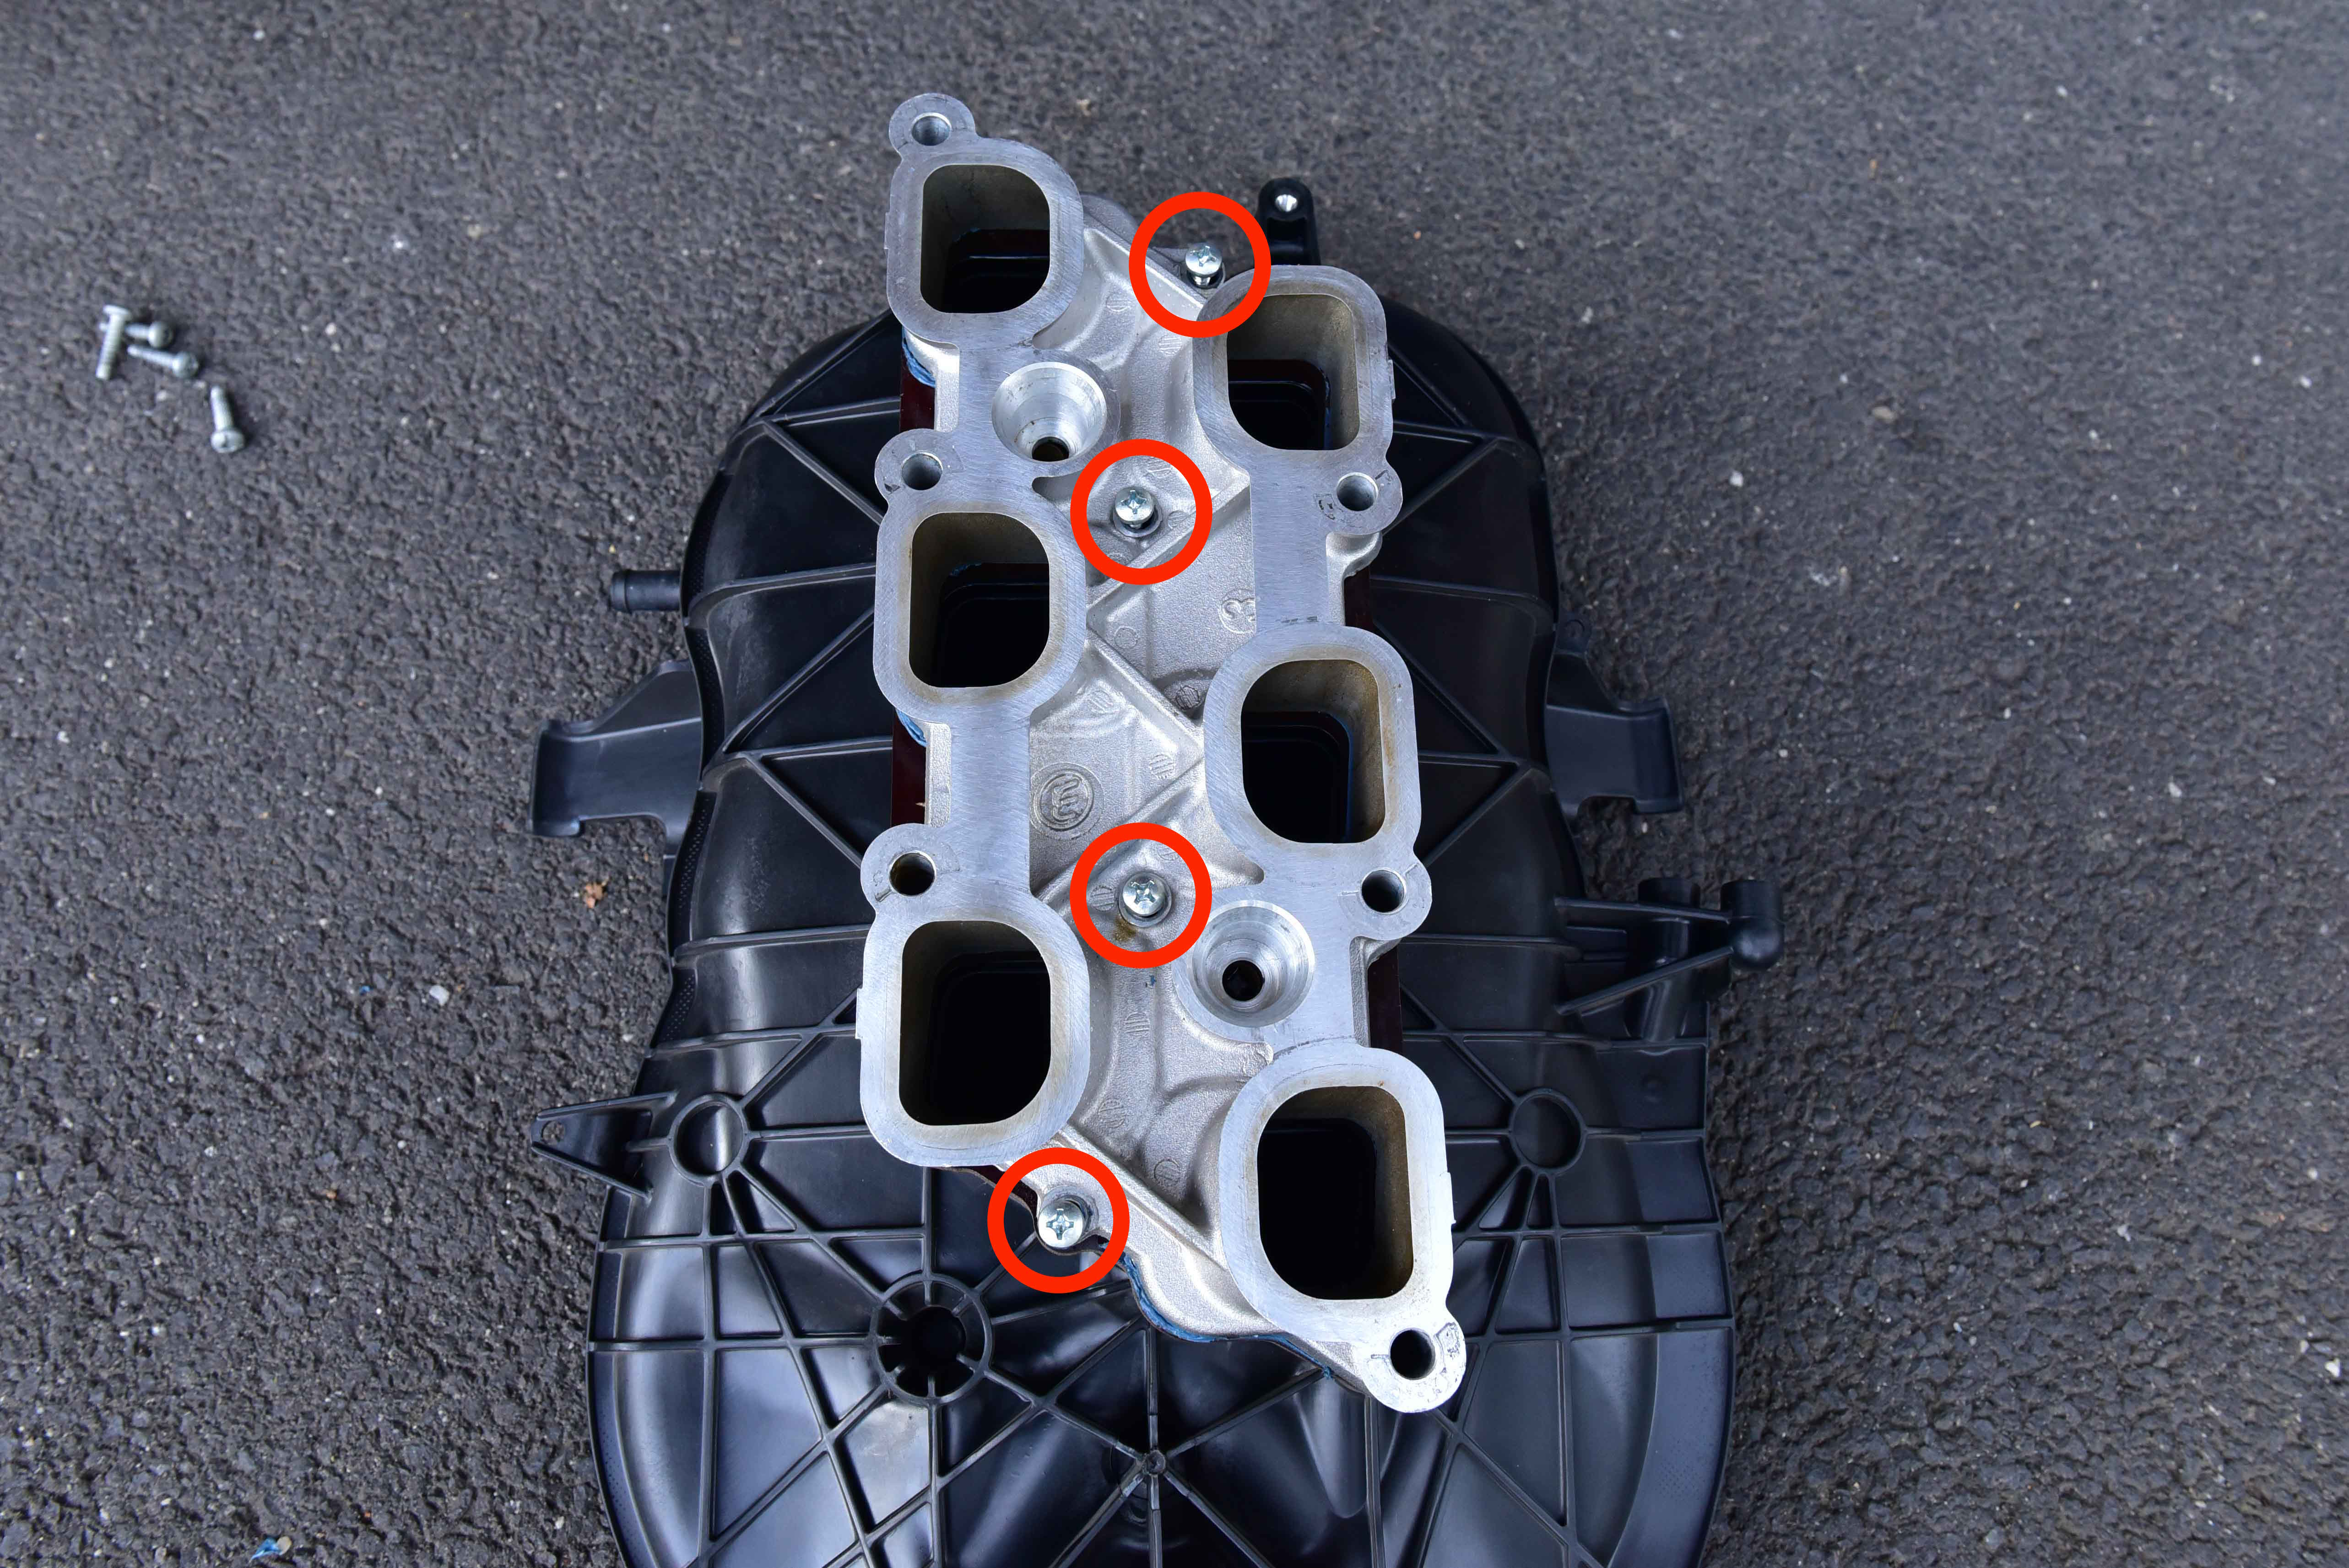
Step 15
With the intake manifold removed from the vehicle, flip it over to reveal four triangular shaped screws that hold the aluminium section in place. Unscrew these using a HEX key and remove the aluminium piece.
Step 16
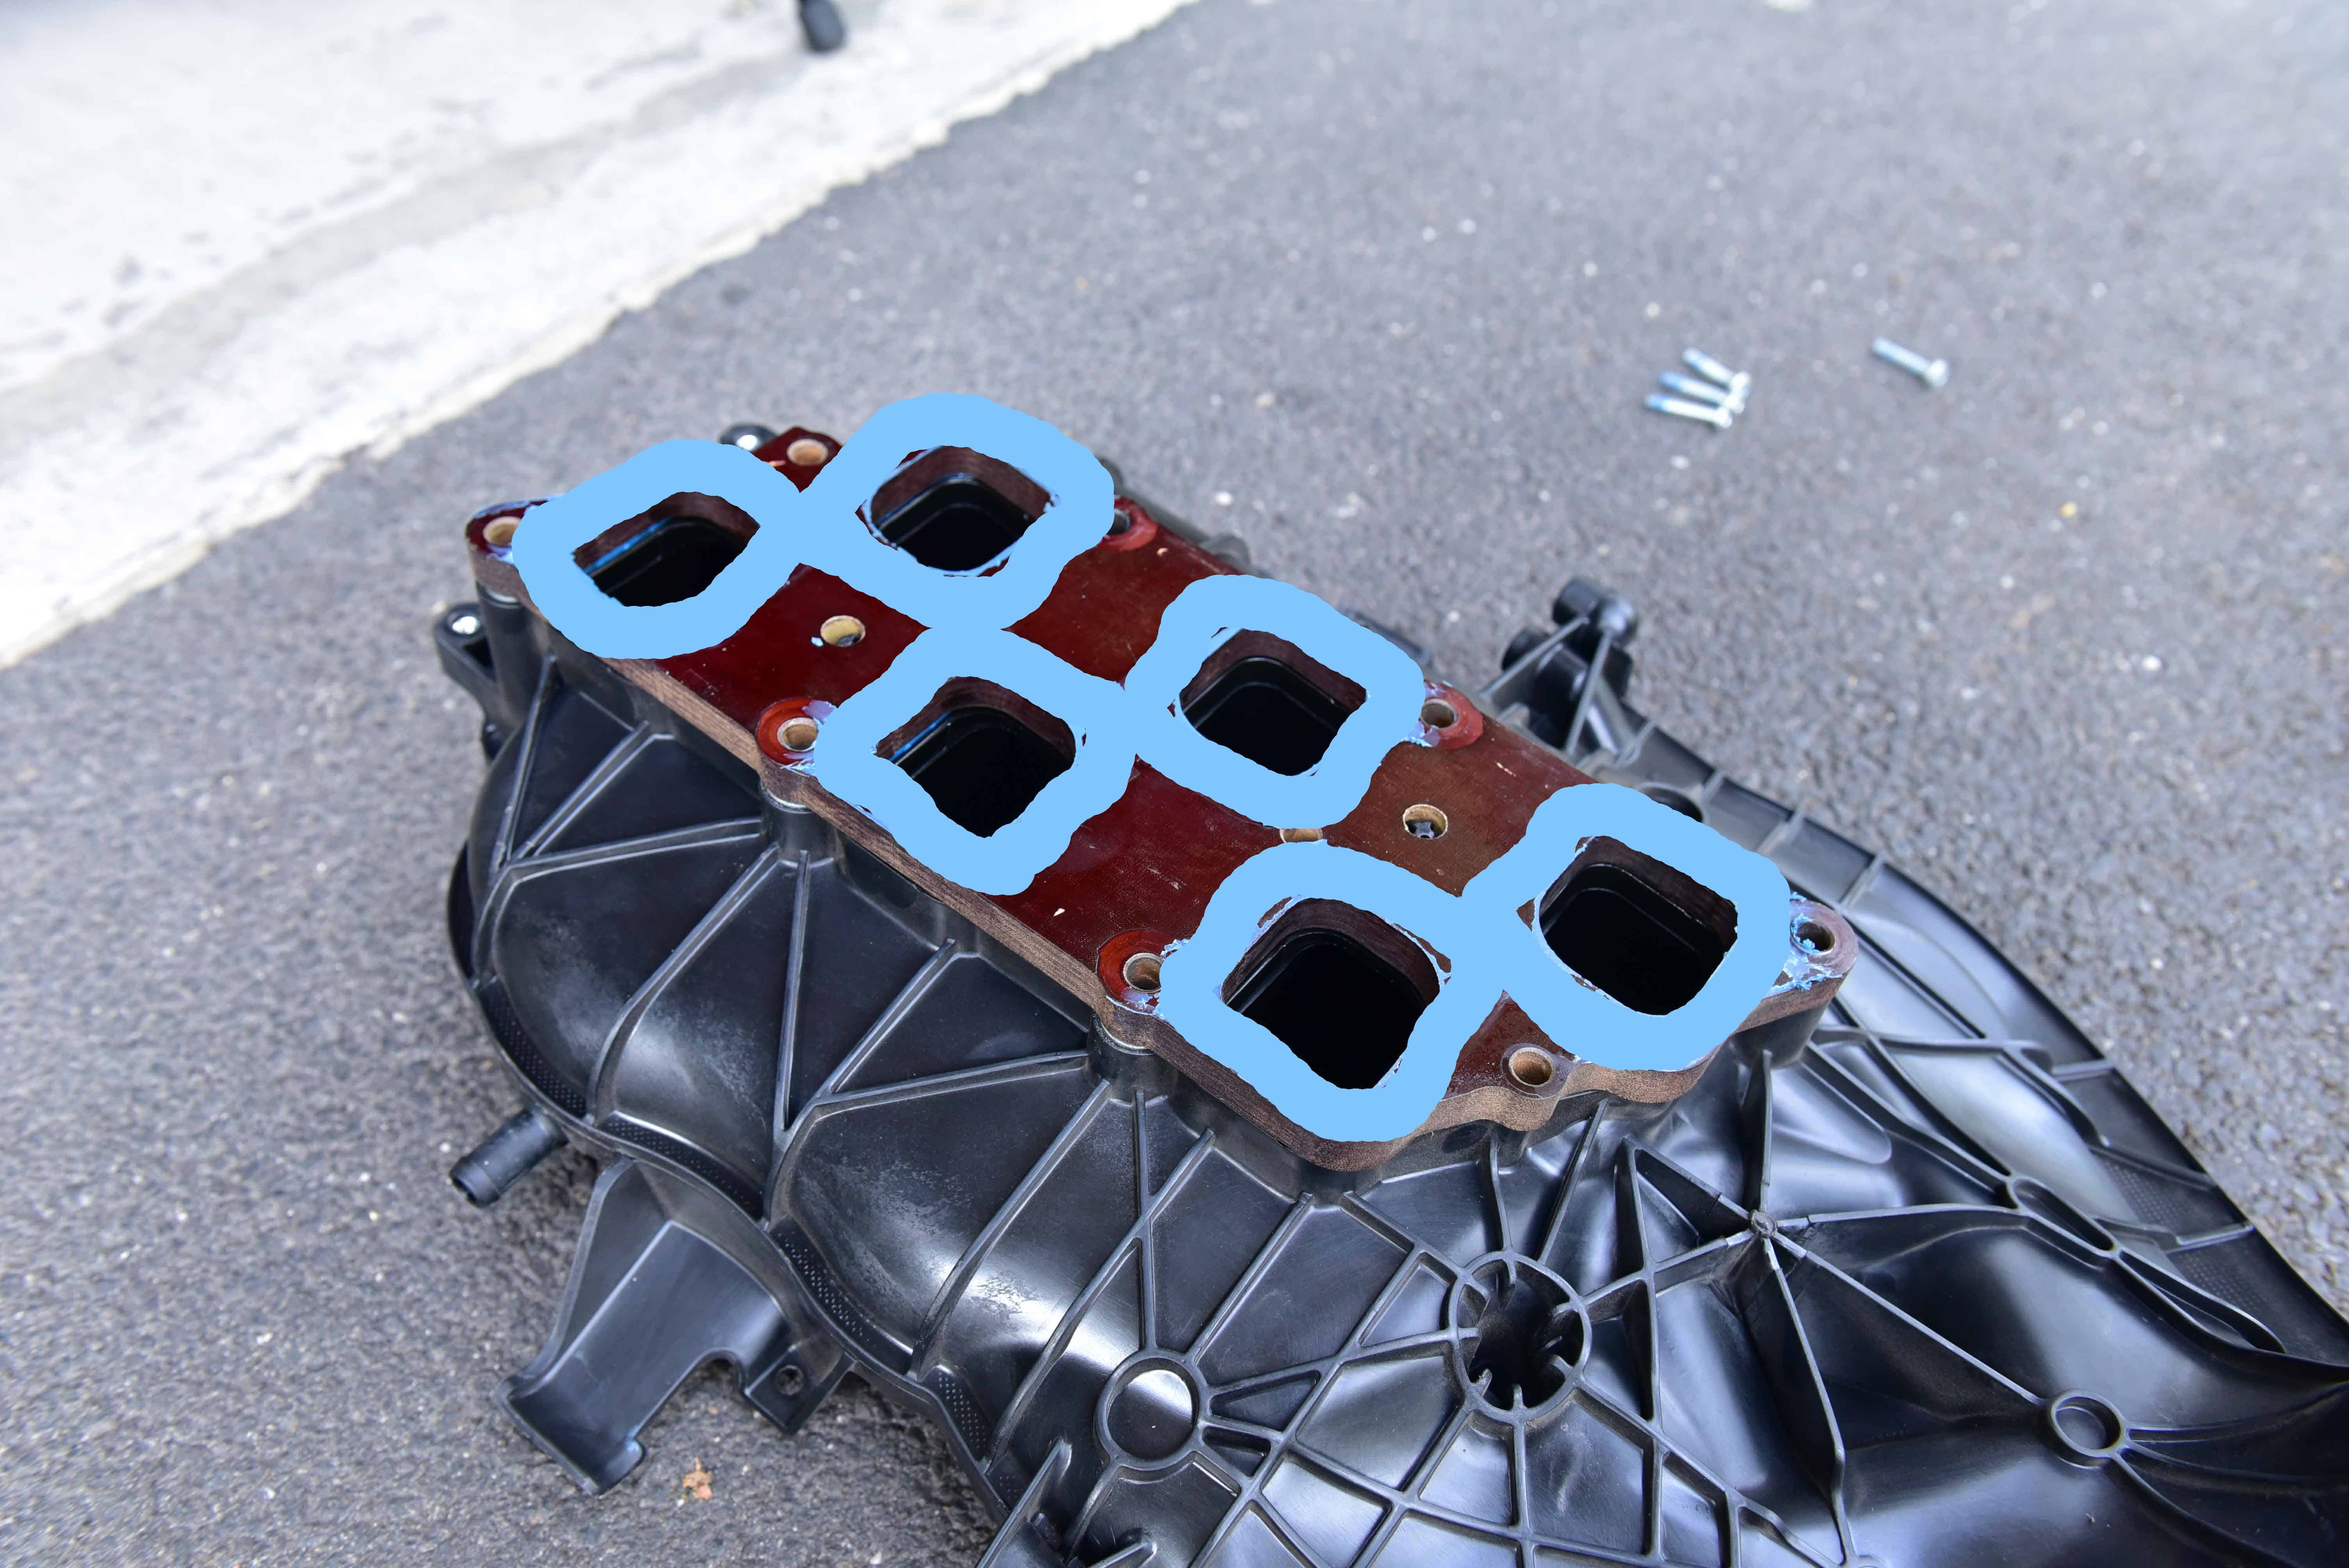
Orientate the spacer onto the manifold. To aid this process you can insert the long OEM bolts into the holes to help align the spacer onto the manifold. Once secure, place a thin bead of gasket sealer around each runner as per the blue illustration on the image.
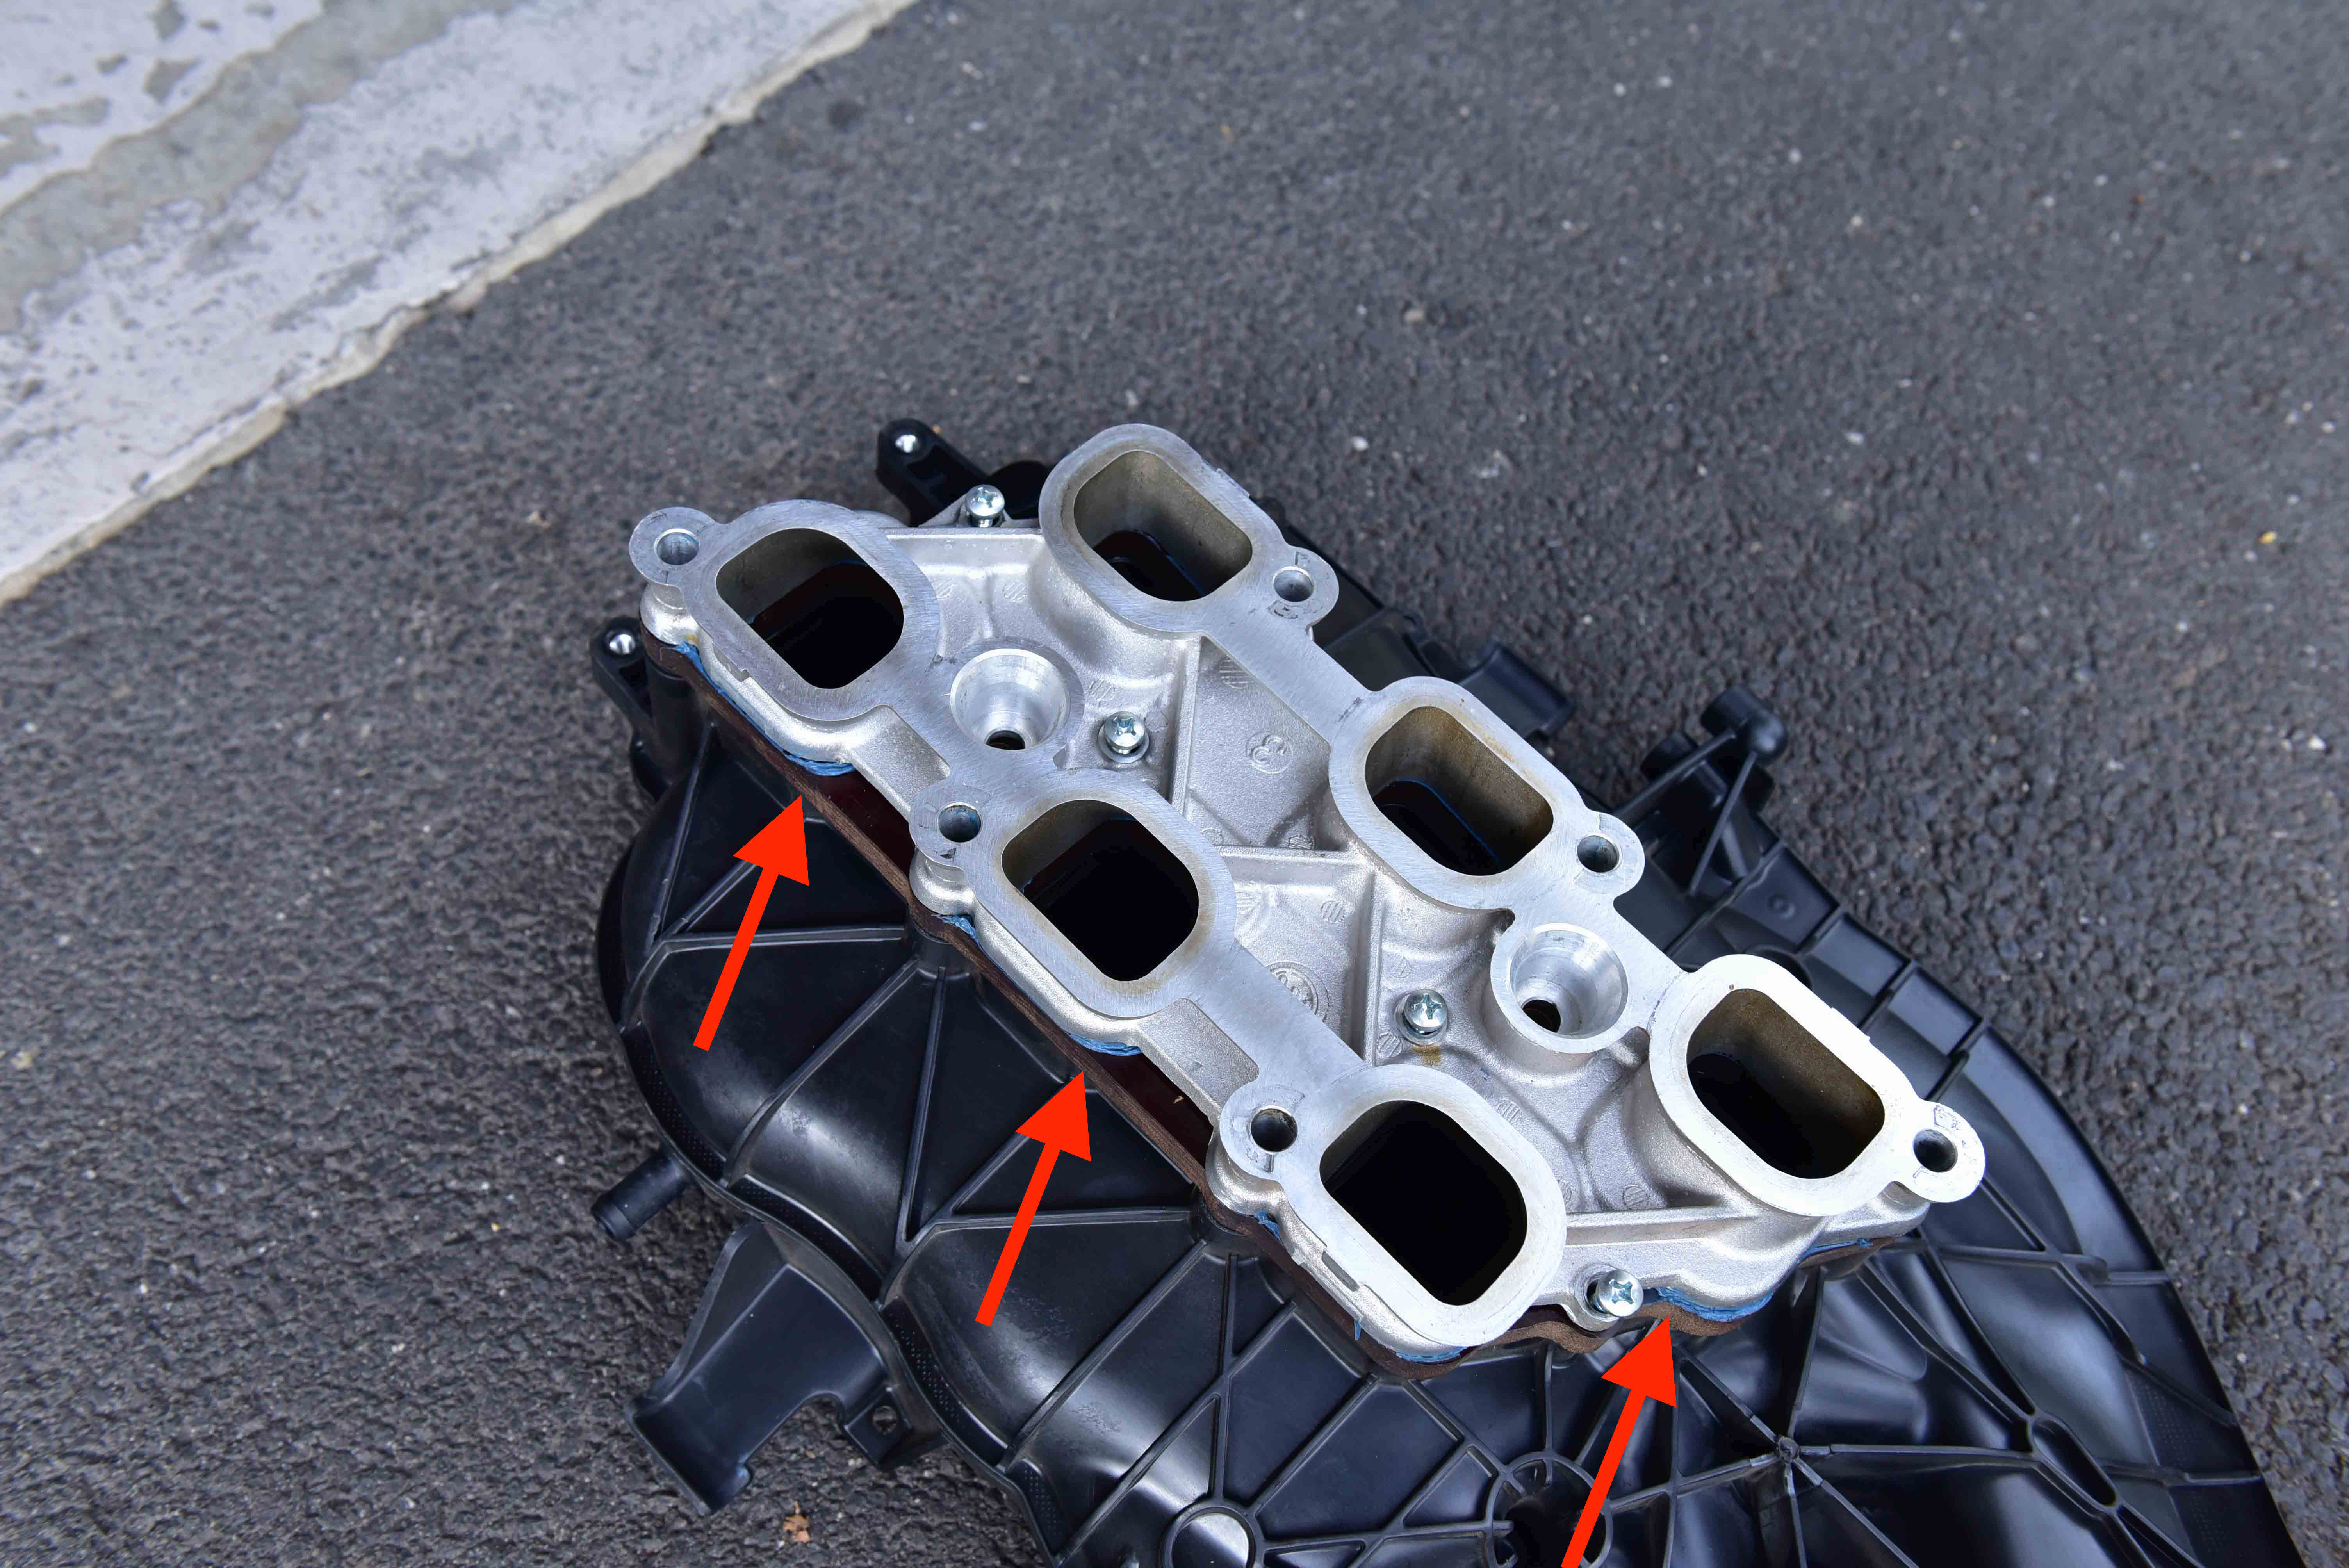
Step 17
Next, place the aluminium piece onto the spacer and screw into place using the supplied screws (Which are longer than the original ones). Wipe up any excess sealant around the outside and inside the intake runners as shown in the image.
Step 18
Once the sealant has dried, install the manifold back onto the vehicle.
Please note that the rear bolt on the manifold MUST be pre-inserted into the manifold as you guide it into position, reversing the initial removal process. Due to the length of this bolt, it can not be inserted after the manifold is in place. There is simply not enough room above the intake manifold.
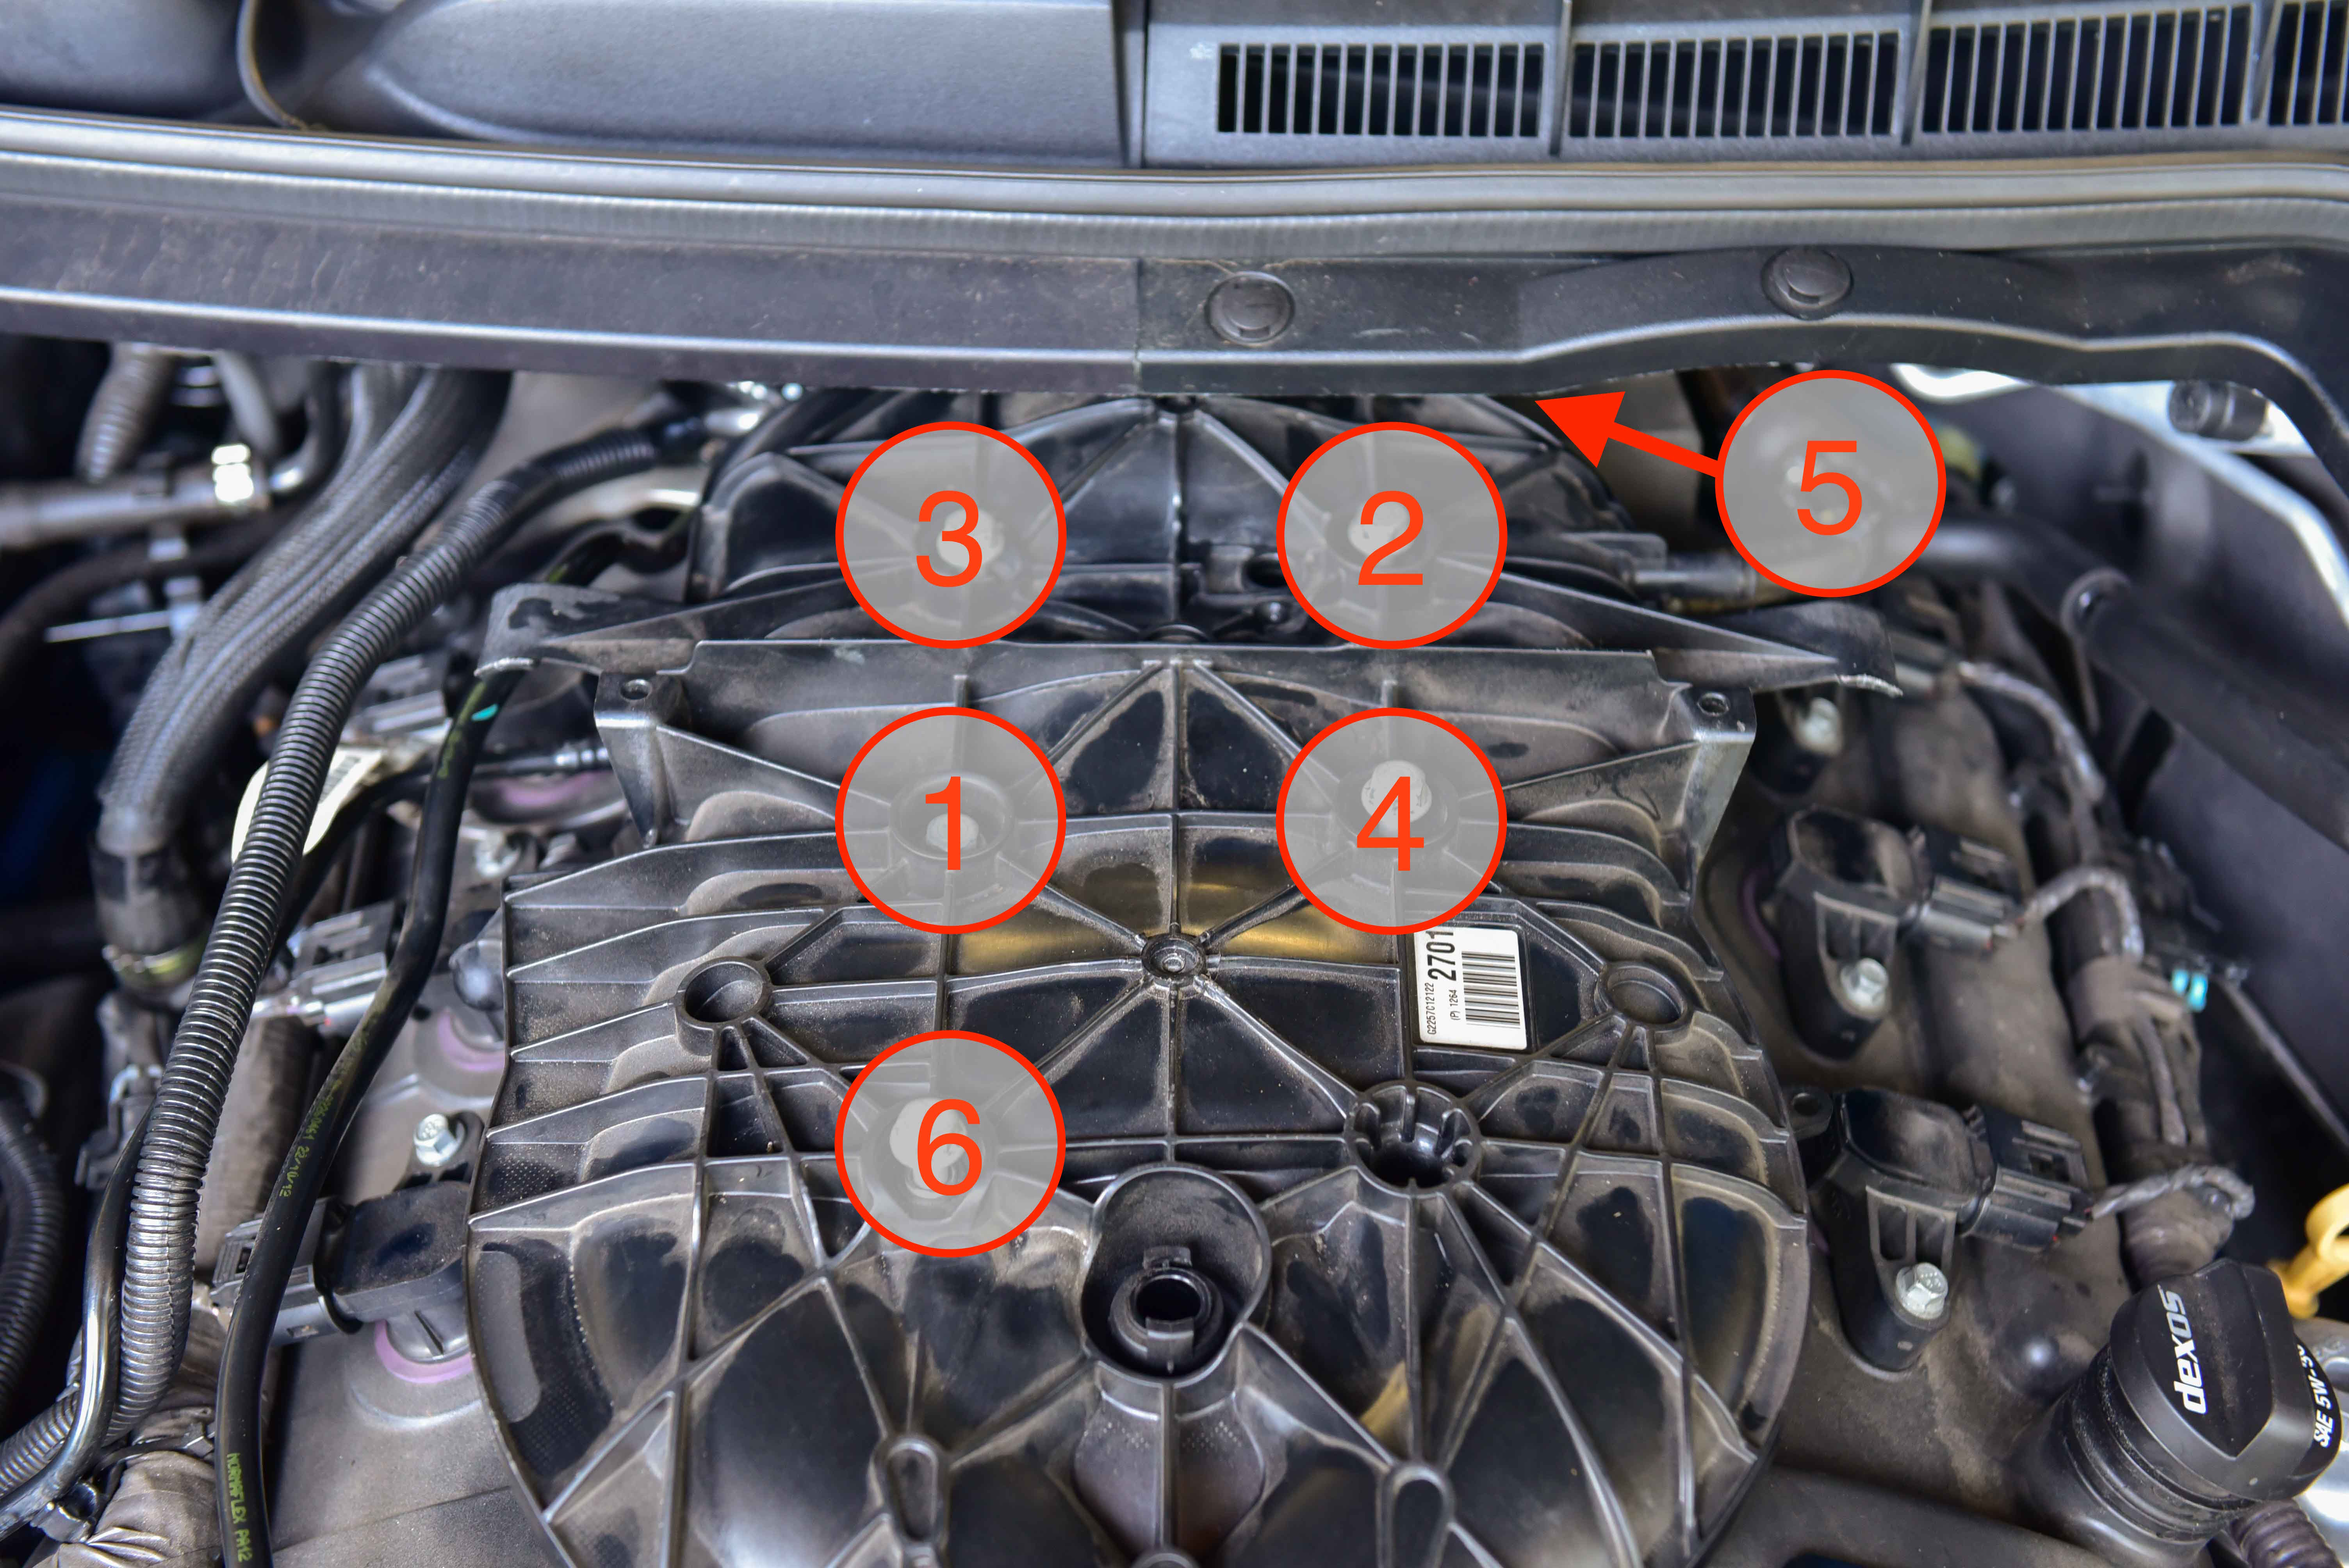
Step 19
Tighten the five remaining bolts to 25nm of torque in the order as shown in the image.
Step 20
Lastly re-install all components onto the intake manifold as per the removal steps.
Did you find this guide helpful? Consider sharing it to help other car enthusiasts
Hi just wondering if the 3.0ltr v6 Intake manifold is the same as the 3.6ltr v6 intake manifold
And can you swap them eg : The plastic one for a alloy one


This Post Has 3 Comments
Hi, just wondering what is the use of the spacer and can it be done on the 3.0 commodore? If so where do we get spacer from?
The spacer improve torque and reduces heat soak to the manifold. We originally got ours from Mace.
Hi just wondering if the 3.0ltr v6 Intake manifold is the same as the 3.6ltr v6 intake manifold
And can you swap them eg : The plastic one for a alloy one