
E46 Track Car: Prep for the first trackday
On the 4th of May our BMW E46 325ci will see a track for the first time under Autoinstruct ownership (Most likely for the first time in its life). Before the BMW can touch the bitumen though, the car needs to be serviced and prepared. In addition to doing all fluids and general servicing, here is the list we aimed to get through in just over a week:
- Replace shifter bushings
- Remove the clutch delay valve
- Delete aircon system
- Recondition the VANOS
- Refresh cooling system
- Replace the steering rack and tierods
- Replace the power steering hoses
So, all in for a few solid nights of work to get in before the trackday!

Day 1 – Removing the last dead-weight
Shifter bushings were first on the menu, the shifter had enough slop in it that you’de think the gears were made of jelly! A relatively straight-forward yet tedious job, in fact most jobs are somewhat tedious on these cars. I guess BMW’s aren’t known to be easy to wrench on.
Without taking the car for a drive the new bushing made a night-day difference, I wouldn’t say its quite the tightest box but there is now positive feedback on engagement – a huge improvement!
While beneath the car, it was prime-time to remove the Clutch Delay Valve (CDV). The CDV stops the clutch from being let out too quickly, assisting novices with smooth clutch engagement ie. completely unnecessary so we ripped it out.
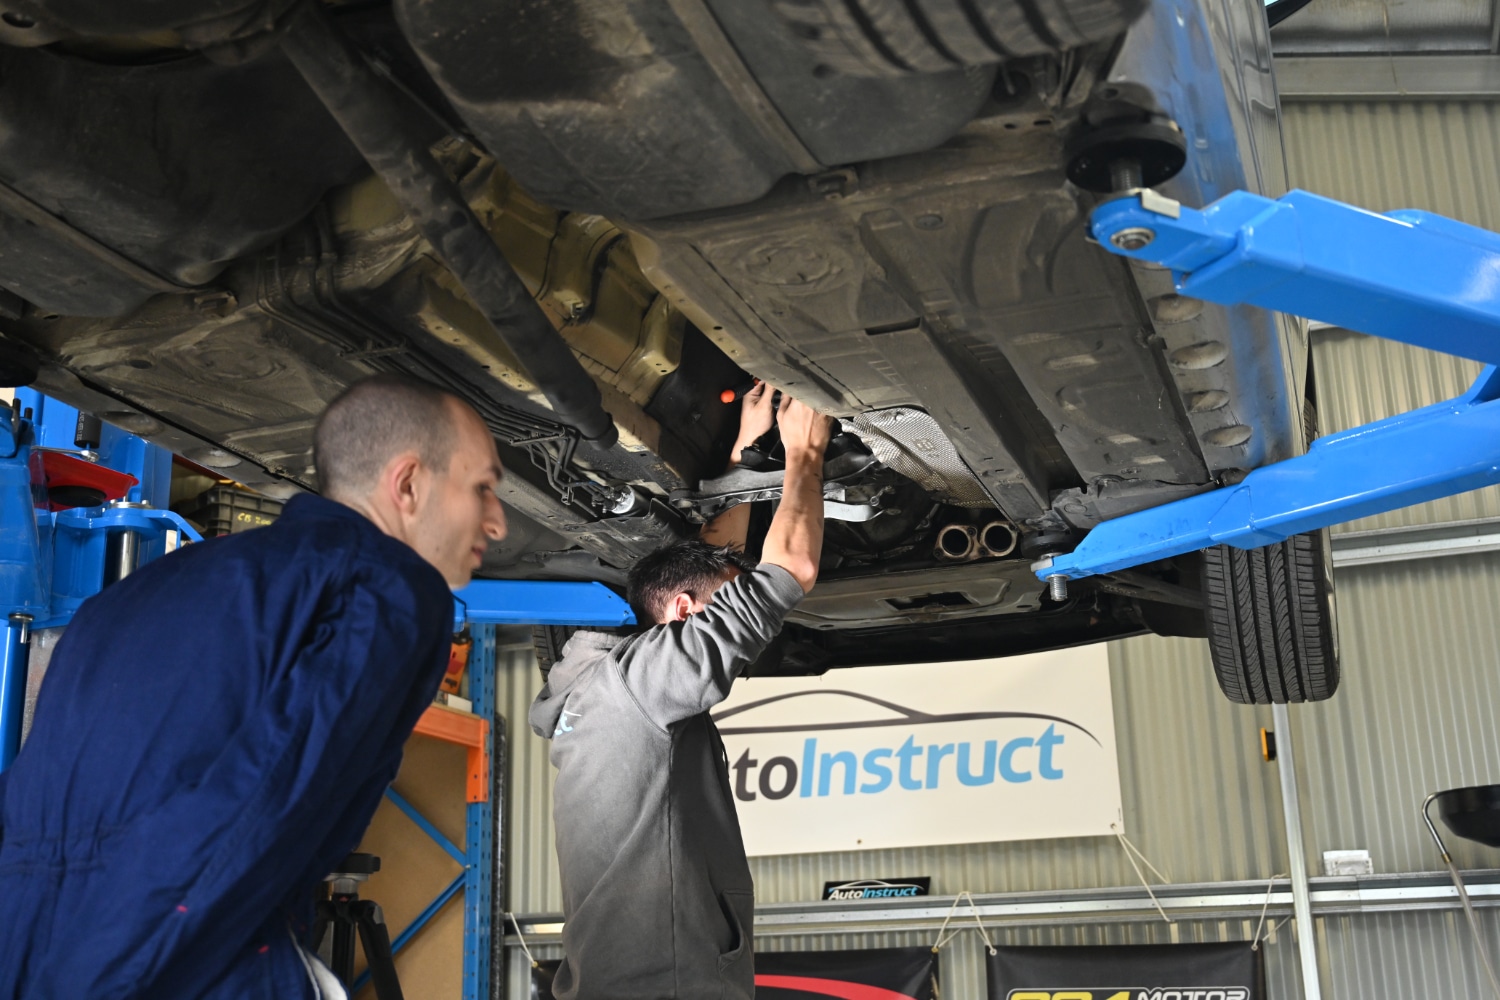
The prop shaft quickly became a hazard to our foreheads!
With the underbody work completed, we moved onto the front-end. Very quickly we learned that BMW has a (sadistic) fascination with using every bolt head size under the sun. I removed a bracket from the front of the engine with 3 different sized bolts/nuts holding it to the block – 11mm, 13mm and 10mm!! Coming from Japanese cars where everything is 10mm, 14mm or 17mm, the socket set certainly got a workout with many sockets getting used that had never been touched before.
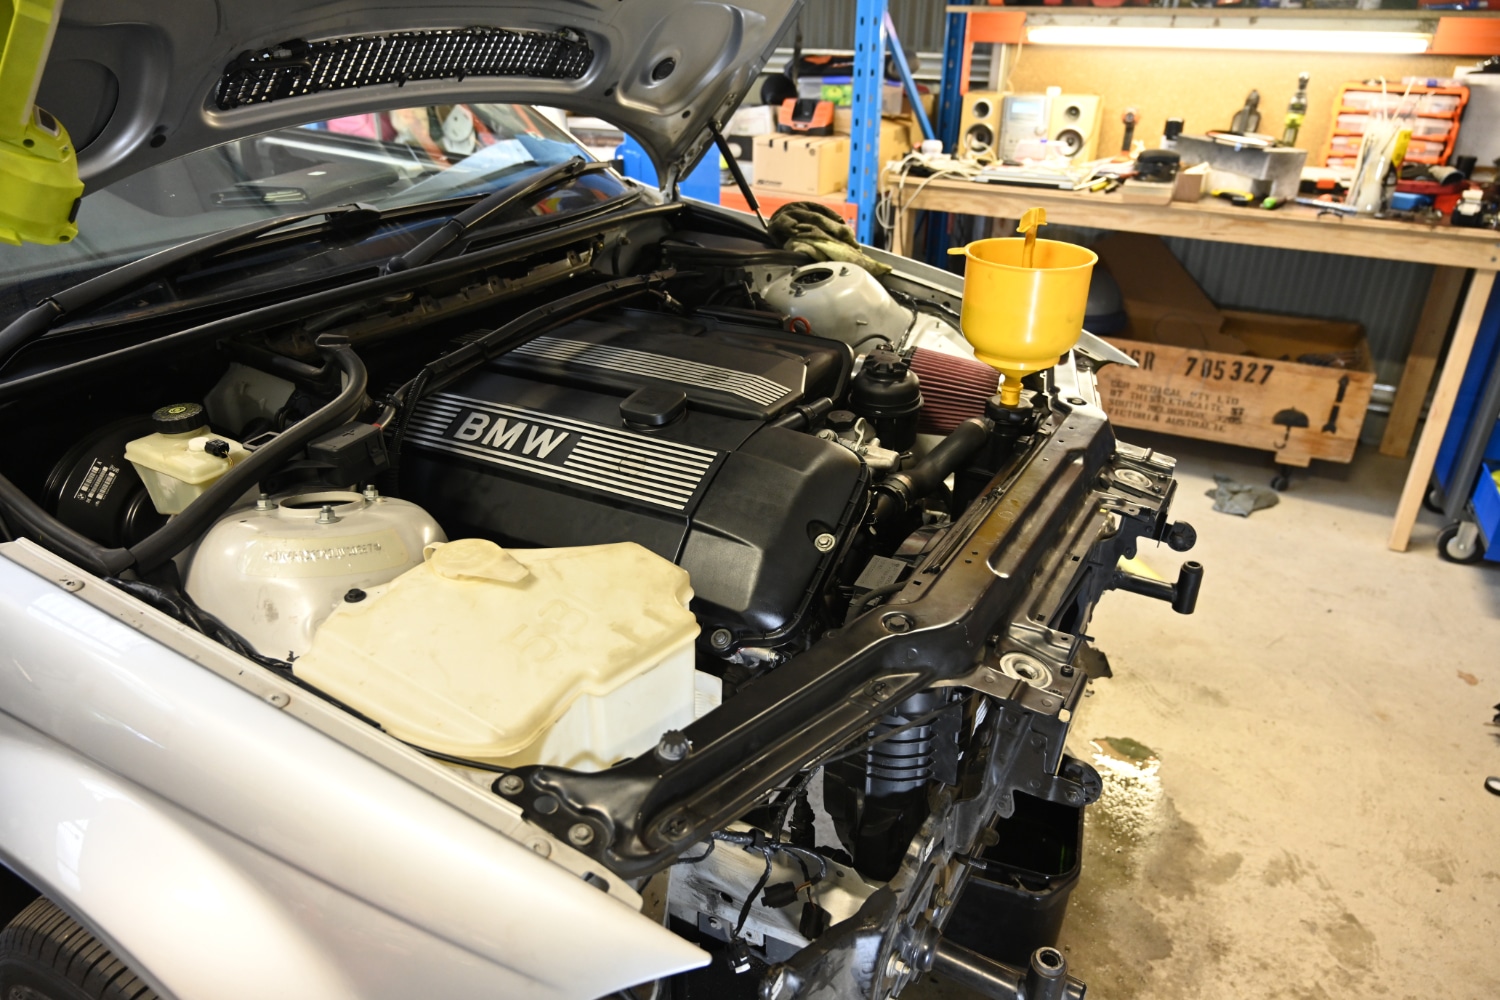
The first priority was to remove the air-conditioning system which was a relatively straight forward task surprisingly. The first step in AC removal was to get the system properly degassed, releasing R134a refrigerant into the atmosphere is harmful and illegal! On the M54 engine the AC compressor is on its own pulley, so we did not need to mess around with getting a shorter belt to keep other auxiliaries functioning. Aside from the compressor we had to remove the condenser, the hard-lines and the dryer.
While the engine bay was exposed, we noted a number of hoses and other parts that would need replacing – luckily we had enough time to source these and install them before May 4th.
With the aircon deleted we looked at the mess we had created, deciding to organise the sea of bolts and figure out where they were all meant to go. Enough work for a night, we aren’t career mechanics!
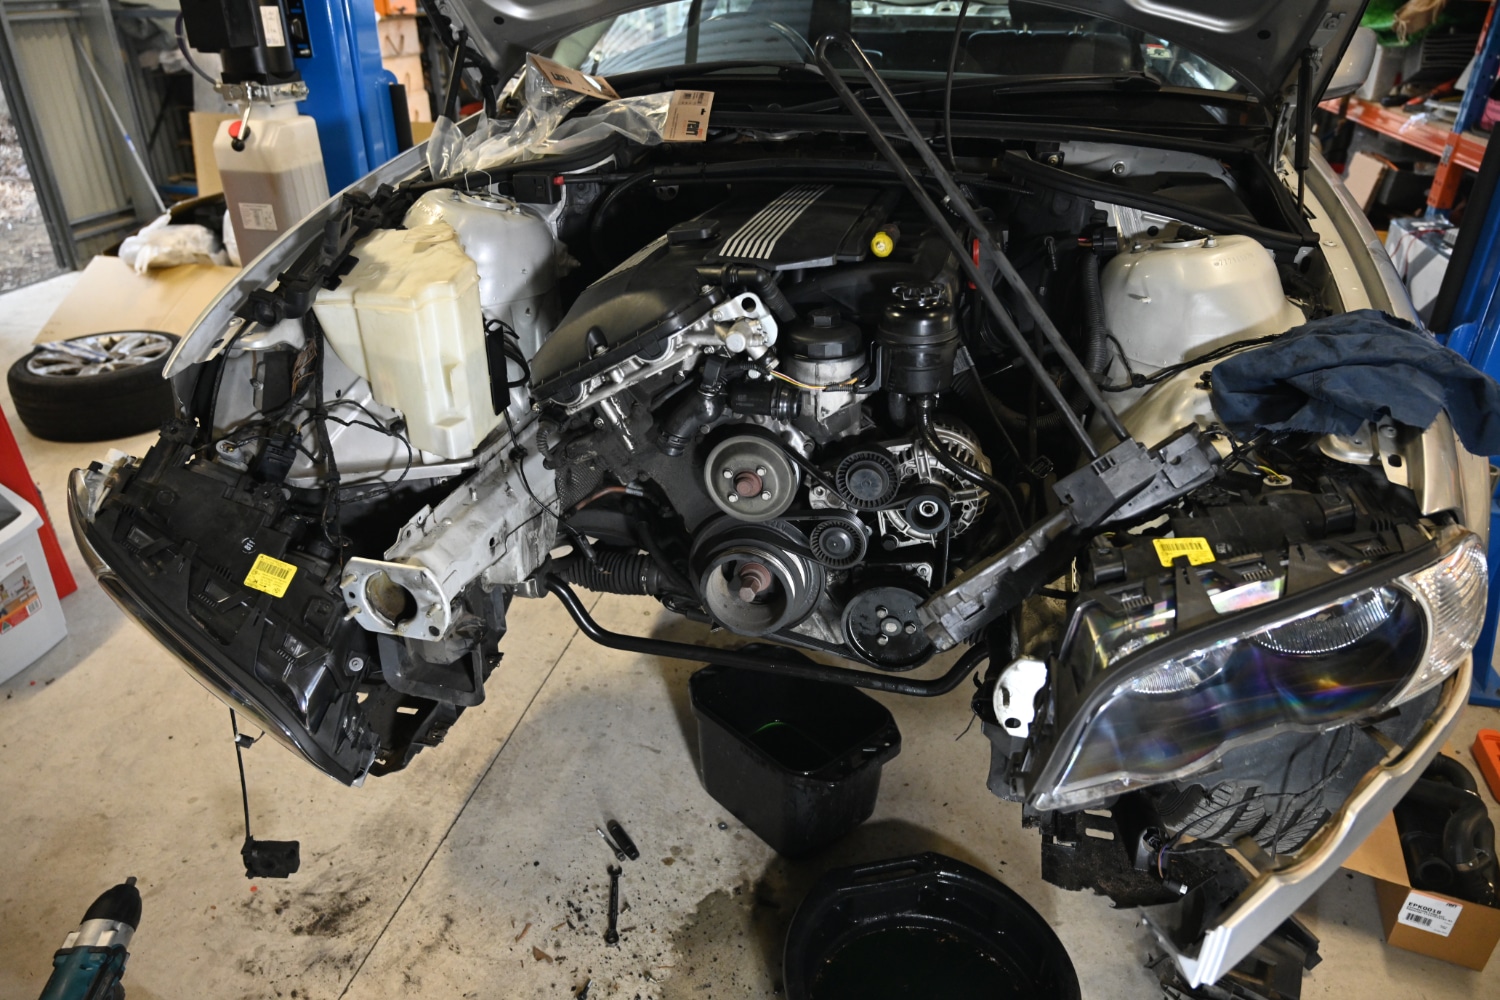
Note the gaping compressor sized hole to the left of the engine
Day 2 – Perfect Timing
Todays focus was to get the VANOS system rebuilt, access to the engine is quite easy with the frontend missing! For those of you that aren’t BMW acronym savvy, VANOS is BMW’s variable valve timing system which notoriously leaks oil and needs a rebuild in cars of this age. Our M54 engine has a dual-VANOS system, both the intake and exhaust cam timing are advanced with engine RPM. A VANOS system that does not function correctly will not advance timing as far as its designed to, losing precious kilowatts at the fun end of the tacho.
Straight into: rocker cover out, coils out, unnecessary BMW plastic covers out – a mountain of bolts between us and the VANOS goodies.
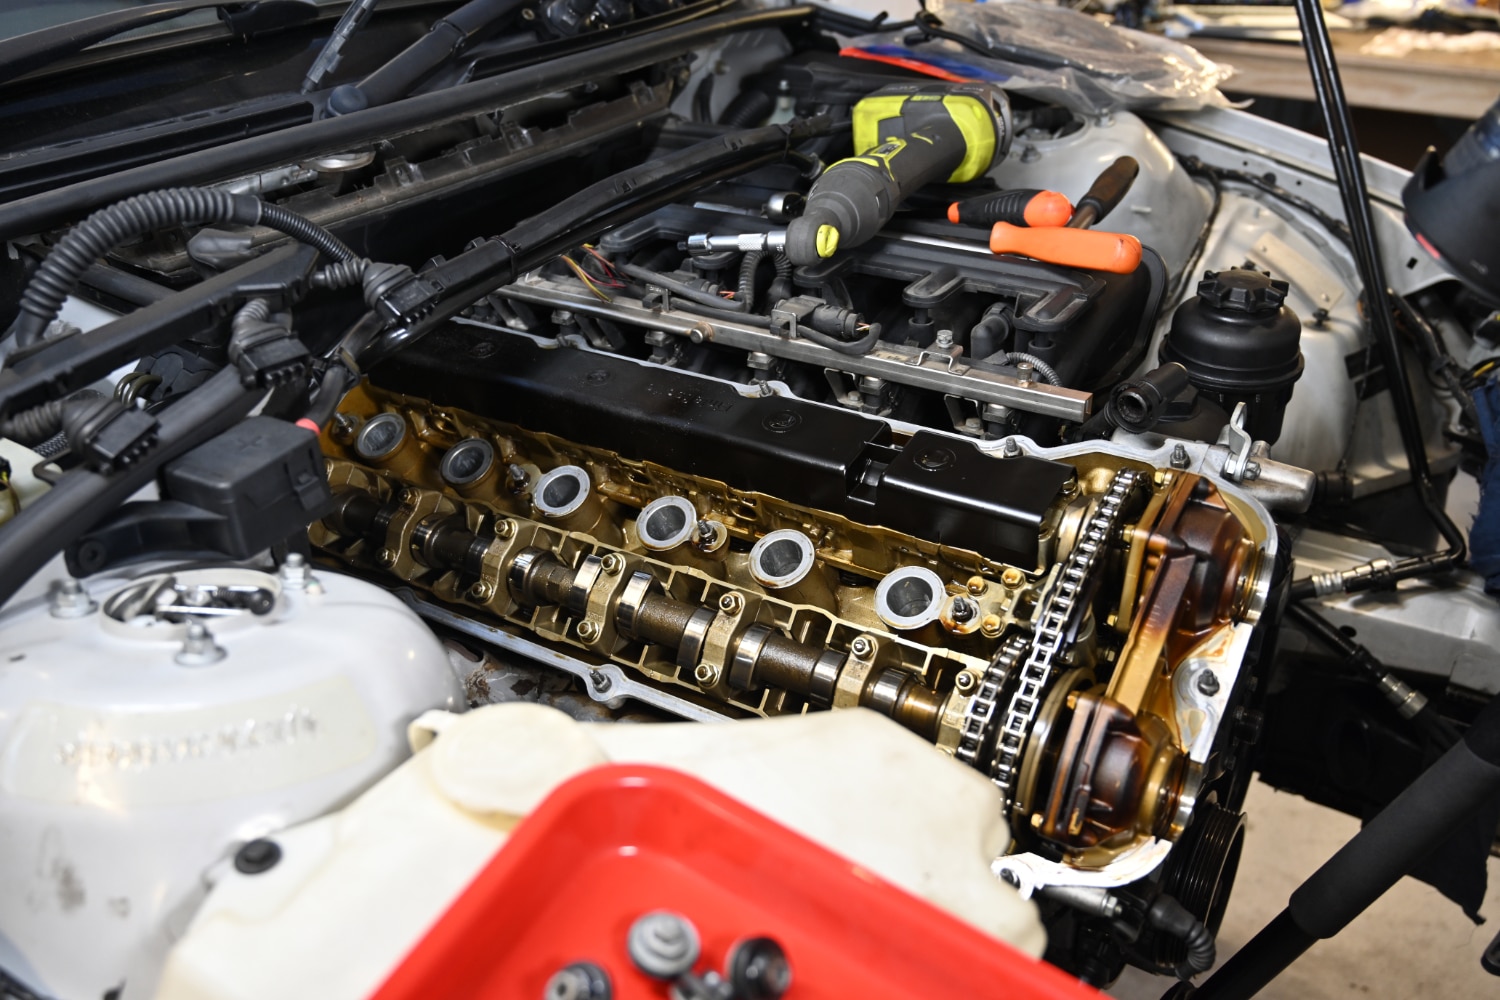
The VANOS system can be seen on the right, at the front of the engine
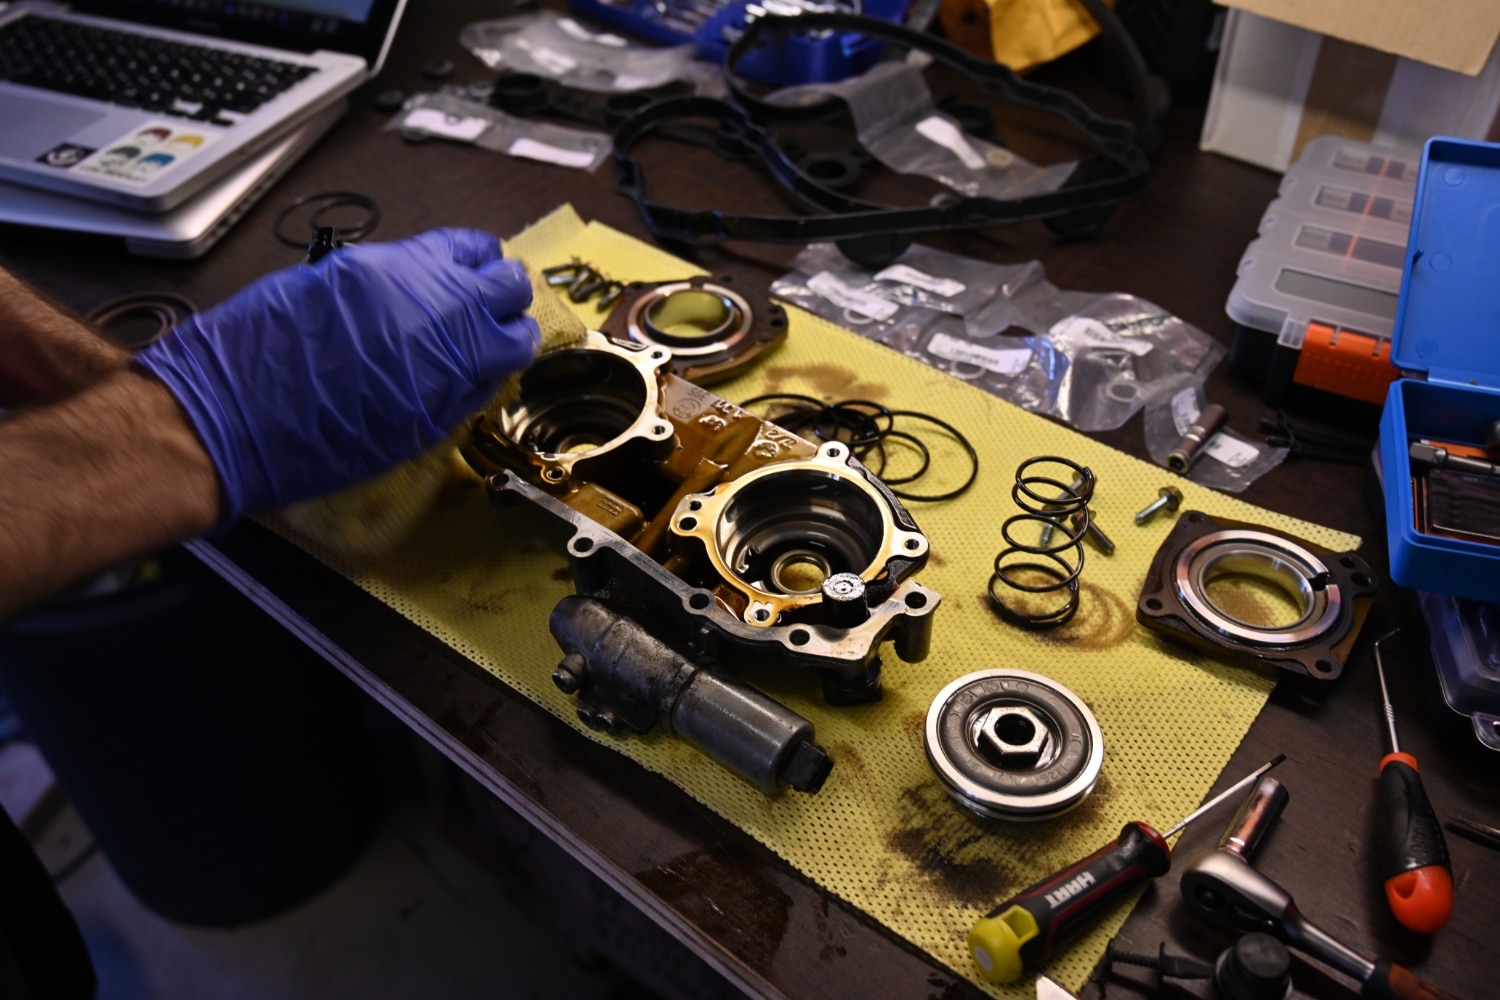
VANOS consists of a piston for each camshaft that is actuated by oil pressure. As engine RPM increases, a solenoid progressively opens letting oil into the system and forcing the piston further and further out. When the VANOS piston moves outward it rotates the camshafts relative to the crank position, advancing the timing of the intake/exhaust valves which assists with making power at higher RPM. Most commonly, if a VANOS system is worn the piston will not move as far as it can due to faulty piston rings letting oil past and reducing pressure forcing the piston forward.
Technical nonsense aside, the rebuild of these is actually a lot less difficult than it looks – though many people might be intimidated by seeing engine head internals! Rebuilding the VANOS simply means replacing a number of worn out rubber and teflon seals/piston rings. Despite having done a full oil replacement and having run the engine since, the VANOS system was full of dirty old oil, this is quite understandable as it isolated from the rest of the engine and consists of many tight oil passages. While the head was exposed a fresh set of iridium sparkplugs went in, a nice quick job.
With the valve timing system rebuilt and reinstalled (all bolts were accounted for), we ticked one more task off the list and had a rest.
Day 3 – Cooling Down
Now to the cooling system, a failure point in the E46 – while we didn’t have any leaks, its always good to replace the full system. E46 are infamous for having their cooling systems fail (water pump failure and cracks in the expansion tank are usually to blame), a failure on the track that goes unnoticed carries a risk of significant engine damage. We left the radiator that the car came with however, all other components were replaced; coolant hoses, thermostat, water pump and expansion tank.
With the cooling system replaced, the frontend was partially reinstalled and we nervously cranked over the engine to make sure that everything had gone well. With the jump starter attached and the key turned we got the engine idling with a bit of encouragement from the throttle pedal. Aside from a puff of smoke (the rocker cover was soaked in a large amount of degreaser) and one of the guys making horrible noises to trick me into thinking the engine was doing something nasty, everything went smoothly.
The frontend reinstallation went smoothly and we moved onto the brakes.
Somehow, all bolts were reused (correctly) upon frontend reinstall
Early 2000’s BMW brake caliper design is a delight to work on (read: sarcasm), okay it wasn’t that bad but it had us scratching our heads over a few design decisions. A fresh set of brake pads, brake discs and a flush of the hydraulic system was just what the car needed. The old pads and discs were far beyond a usable state, especially since the car was to go onto a track.
With one more task to do and only a few days left for the parts to arrive and to install it, we once again called it a night.
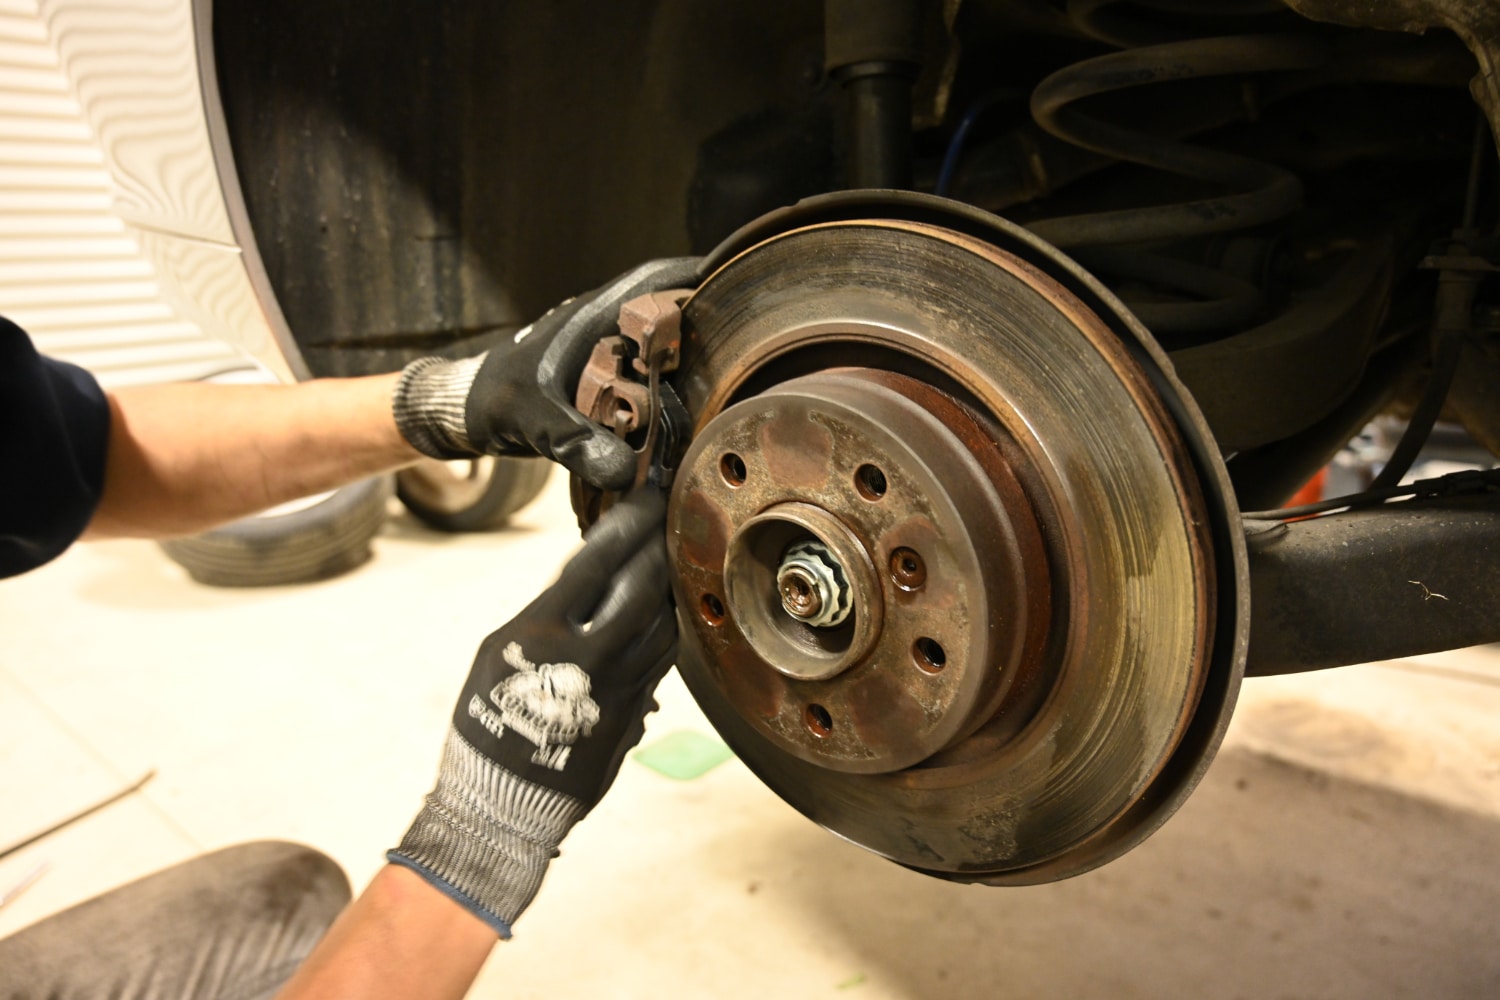
Plenty of lip on those discs!
Day 4 – The day before track day
The friday before the BMW hit Sandown, our replacement steering rack arrived. The rack that came in the car was leaky and worn and hence we decided to replace it. We opted for a “purple tag” rack which has a slightly quicker steering ratio than the one found in our car – 3.0 turns lock to lock.
Install was rushed – though not difficult. We also replaced the steering tierods while we had everything apart.
With the steering rack replaced, the car was ready to be loaded onto the trailer and ready for Sandown. Stay-tuned for our post-track experience of driving the car!

