The concept of installing a dash cam can seem quite daunting, however it is actually relatively simple with some basic tools and electrical knowledge. In the tutorial below AutoInstruct will show you how to install a front dash cam in your Mazda CX-5.
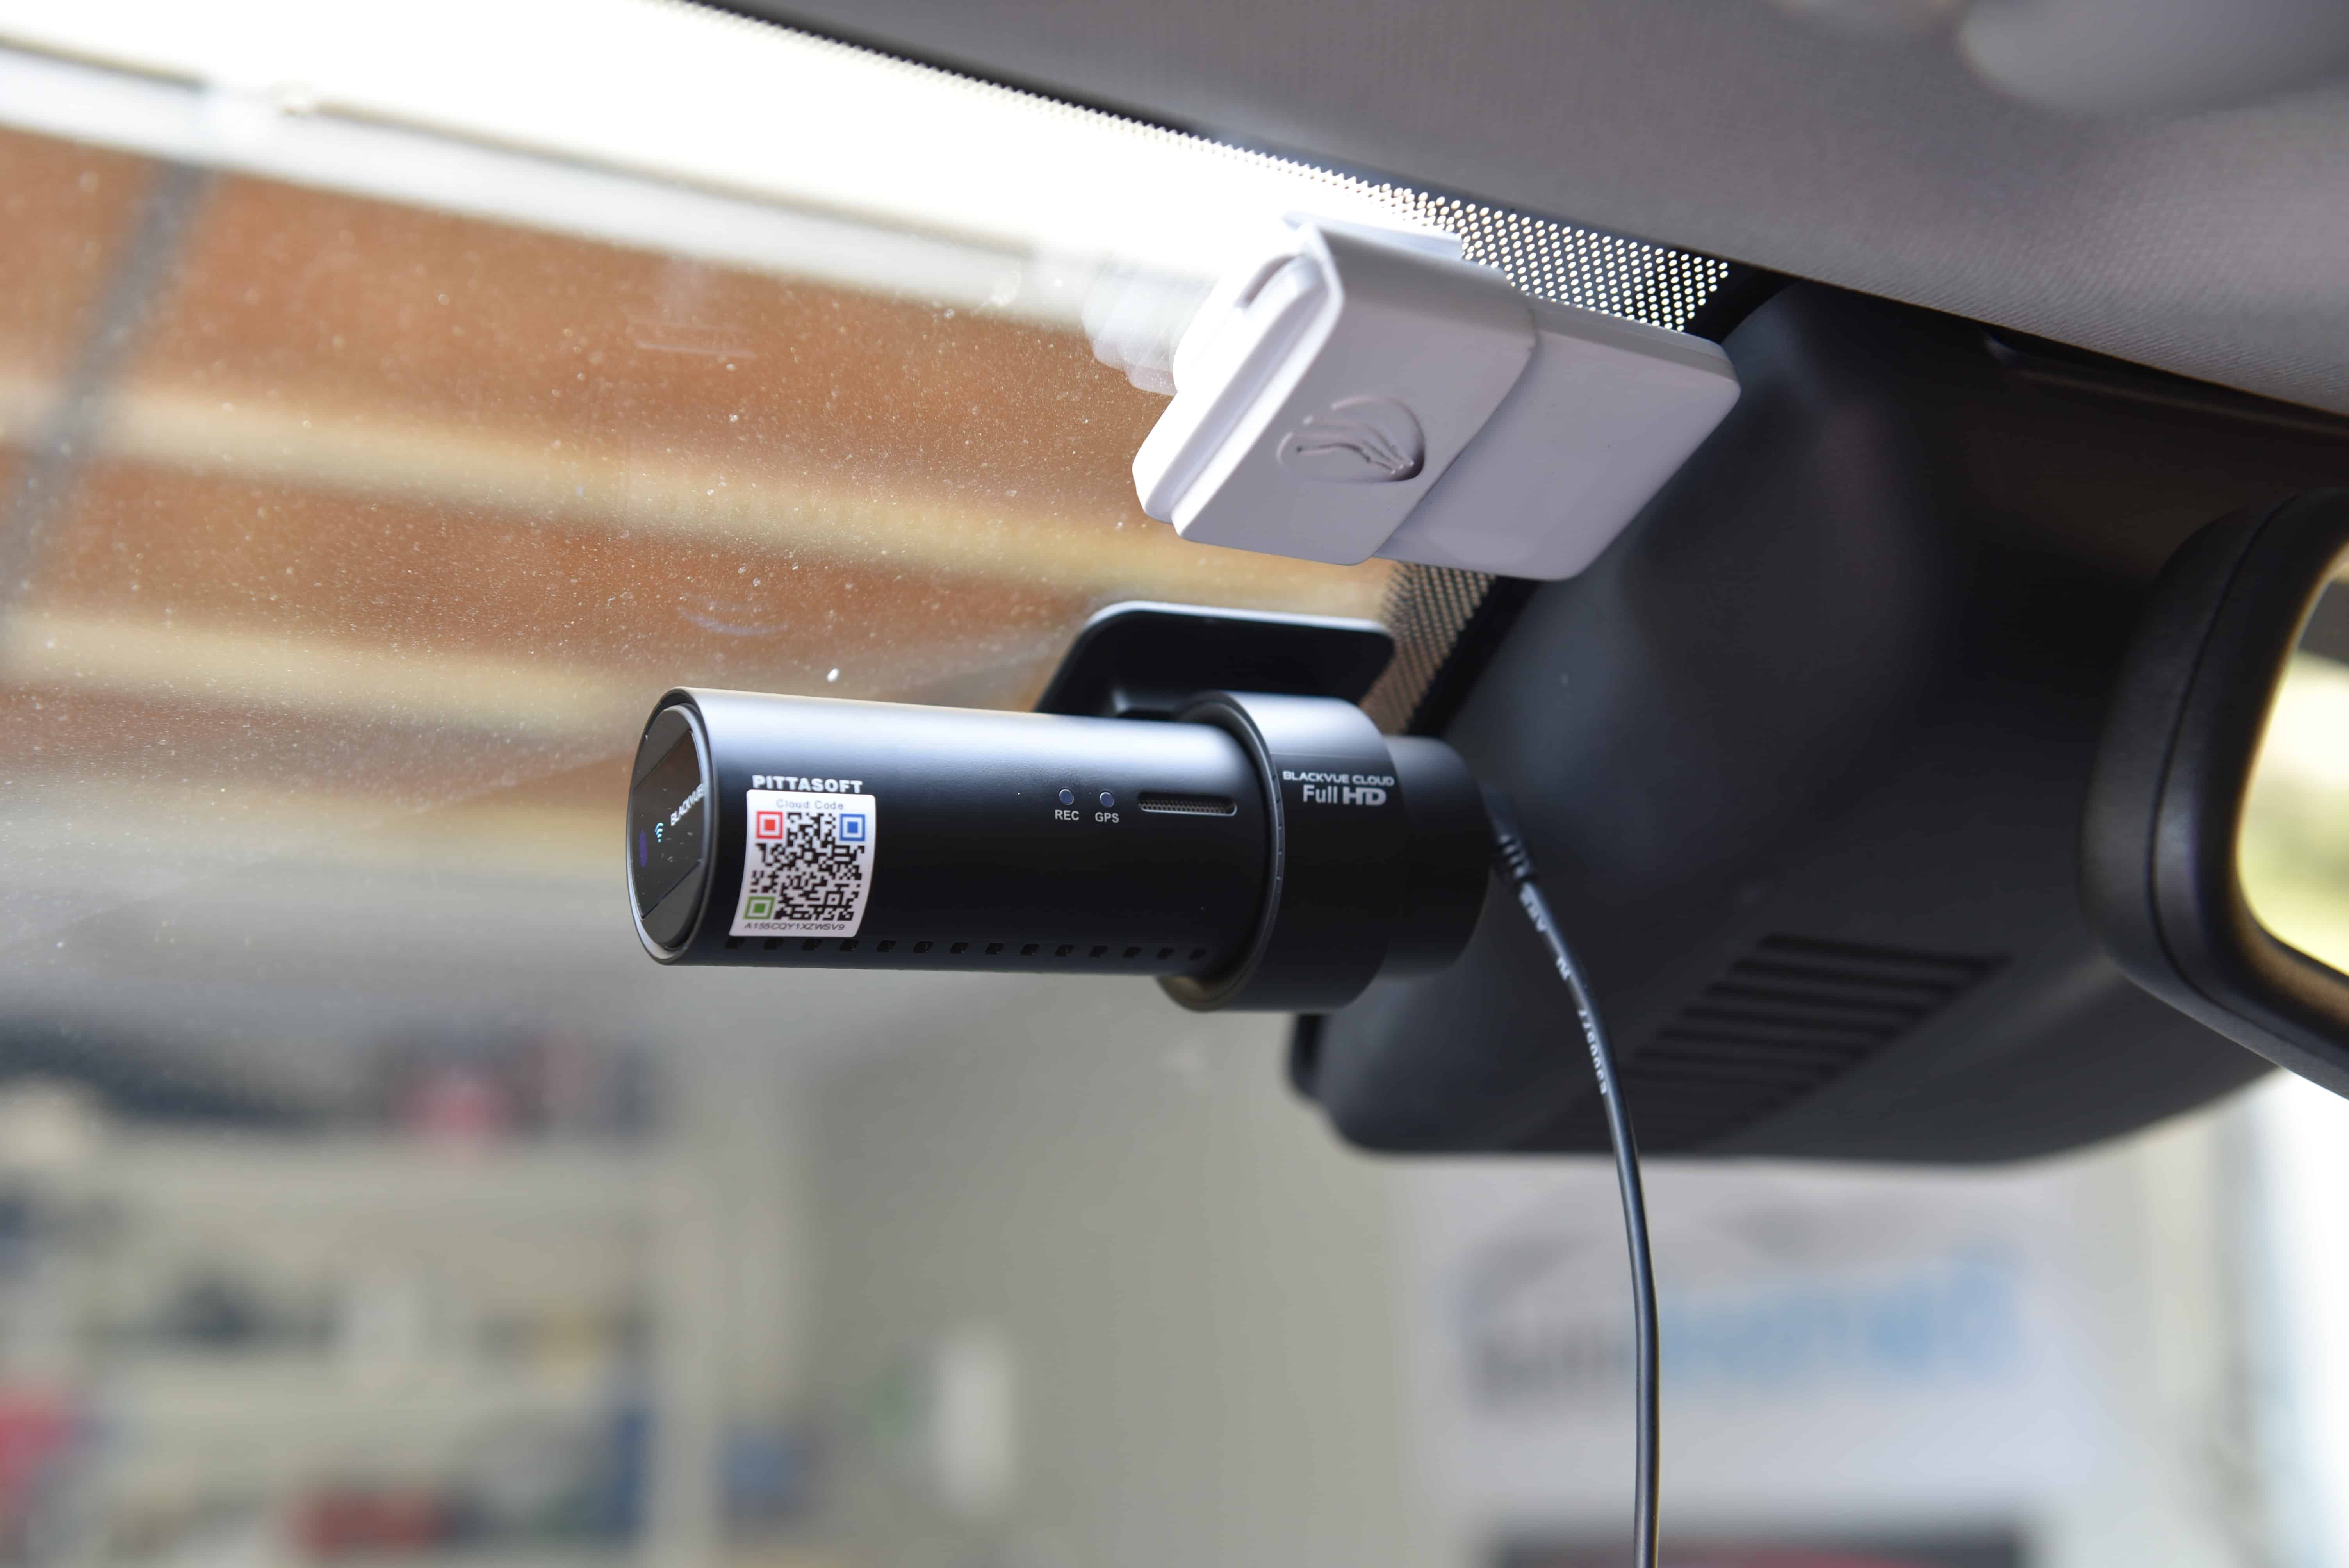
First we need to choose a suitable mounting location on the front windshield. Power on the camera using the cigarette lighter and check the footage to ensure you are happy with the position. Being a Right Hand Drive (RHD) vehicle we’ve chose to mount the camera behind the left side of the rear view mirror, therefore hiding the camera from the driver’s field of view.
Step 2
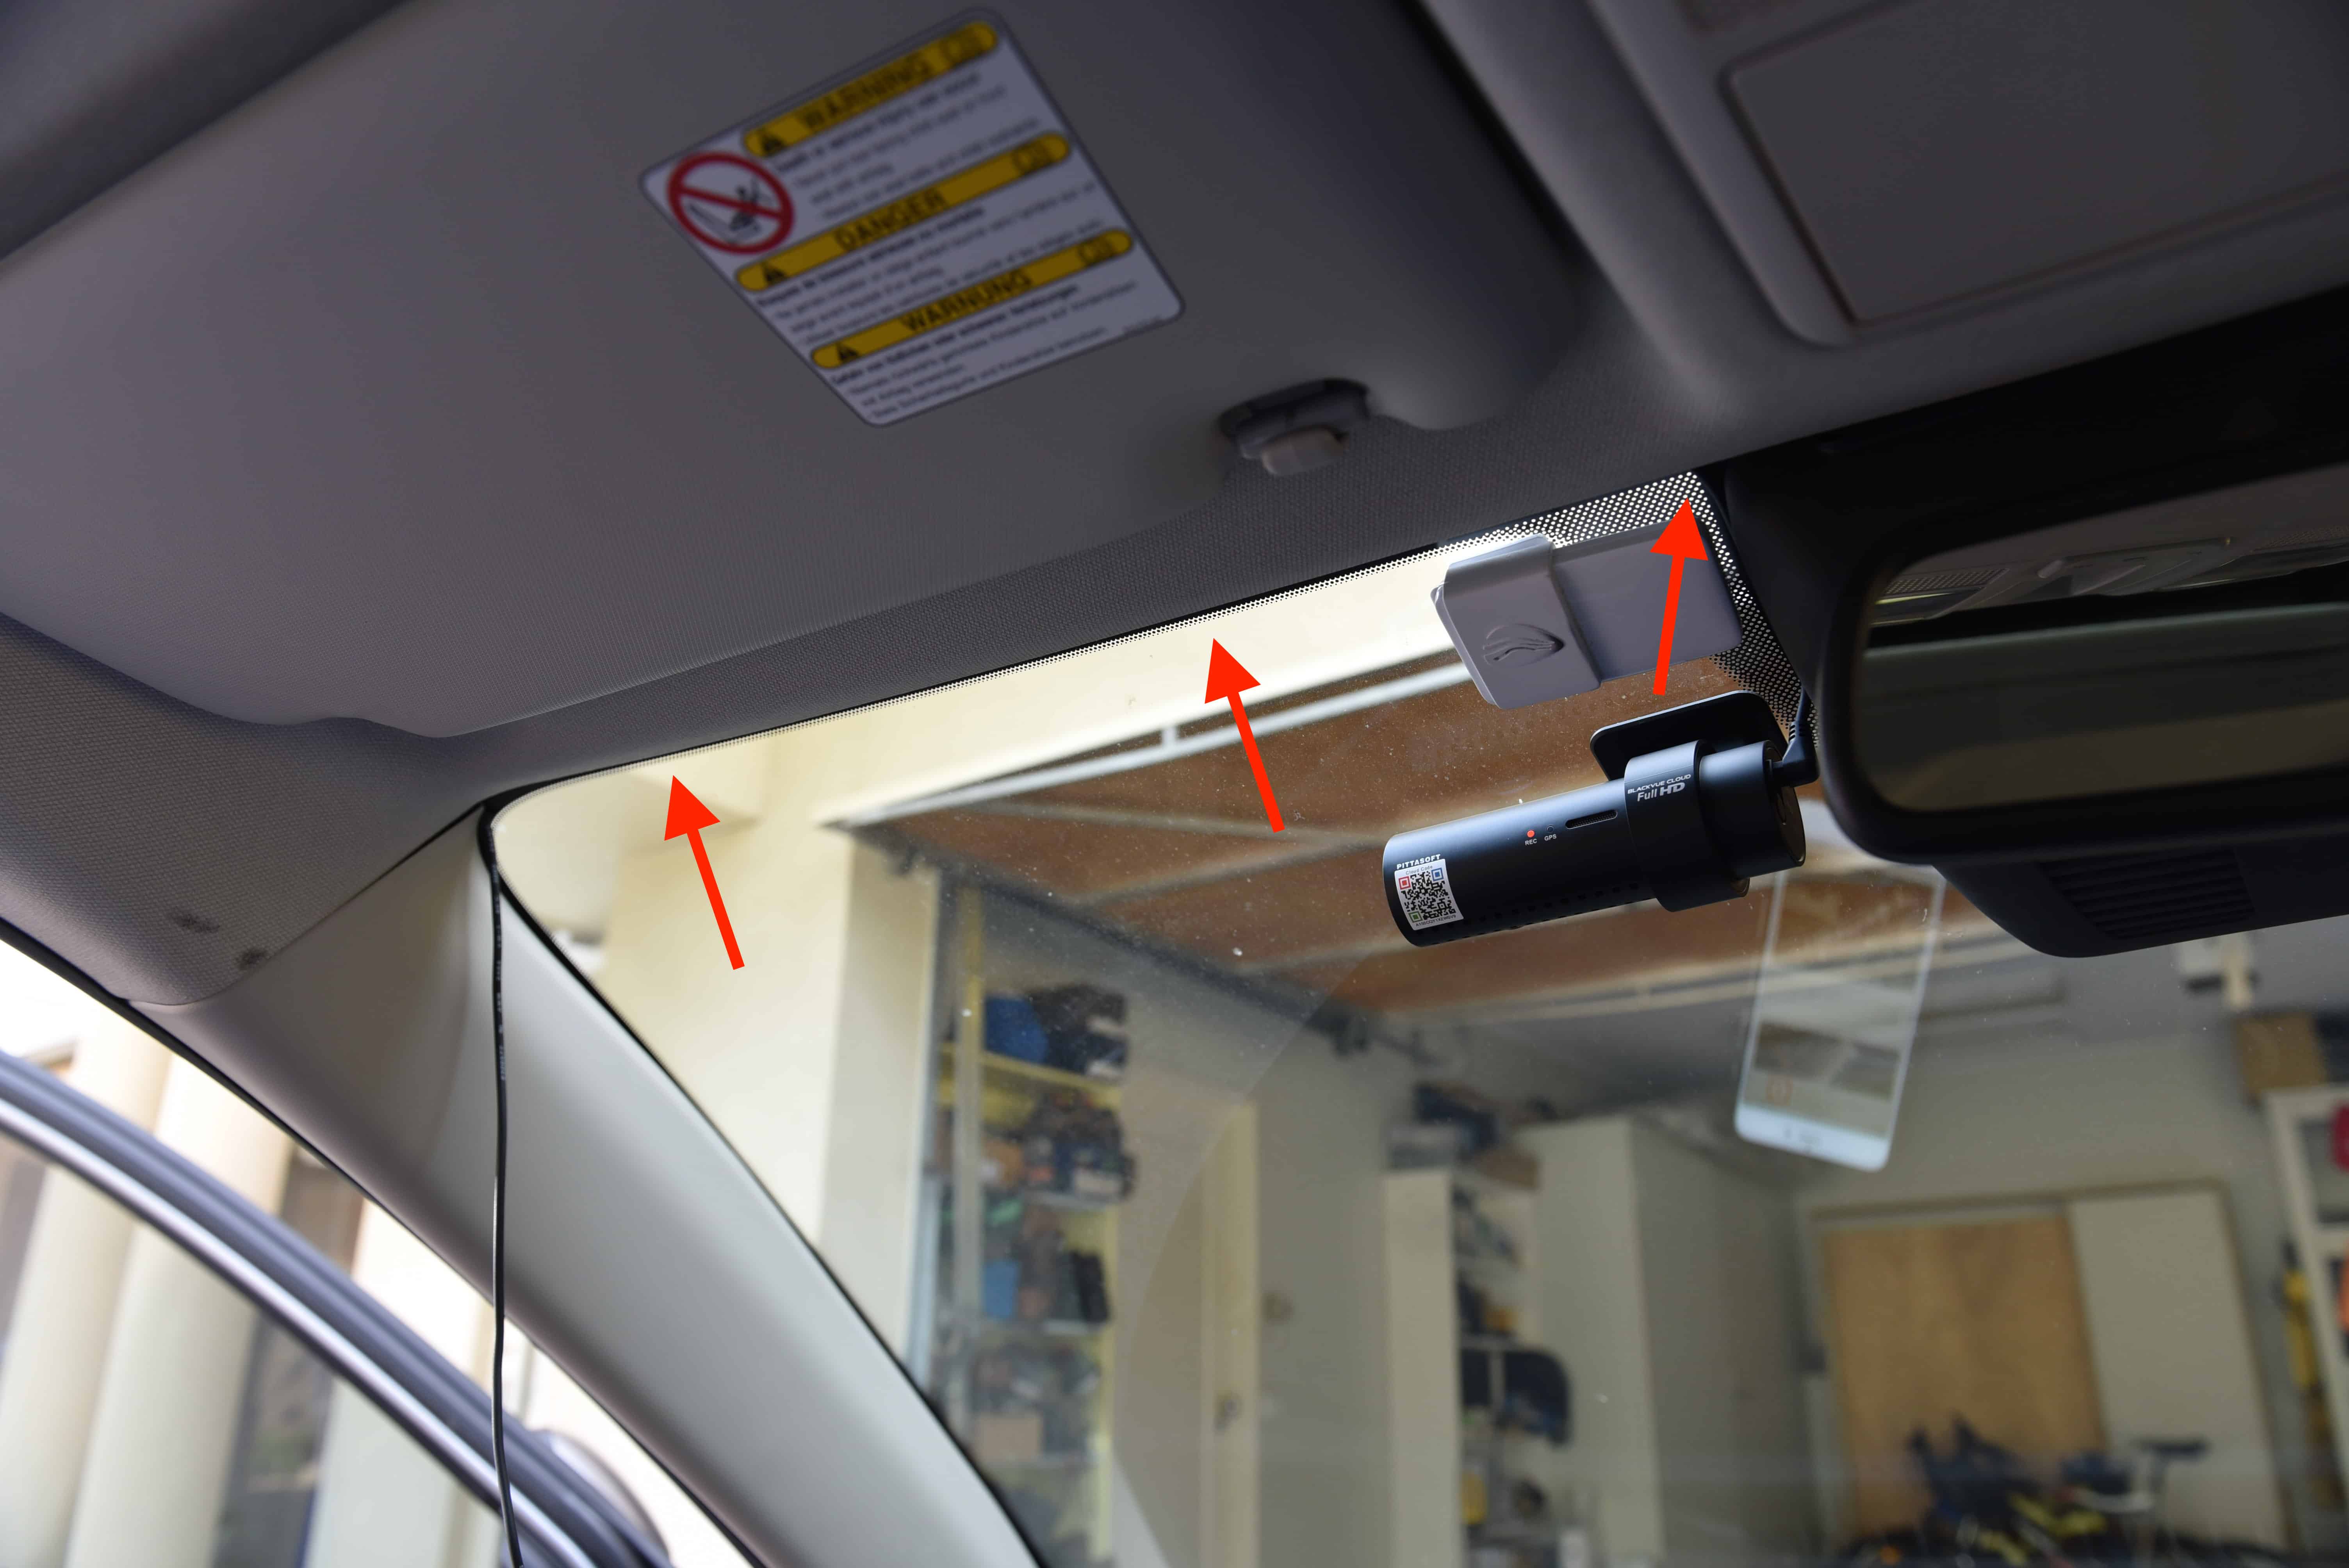
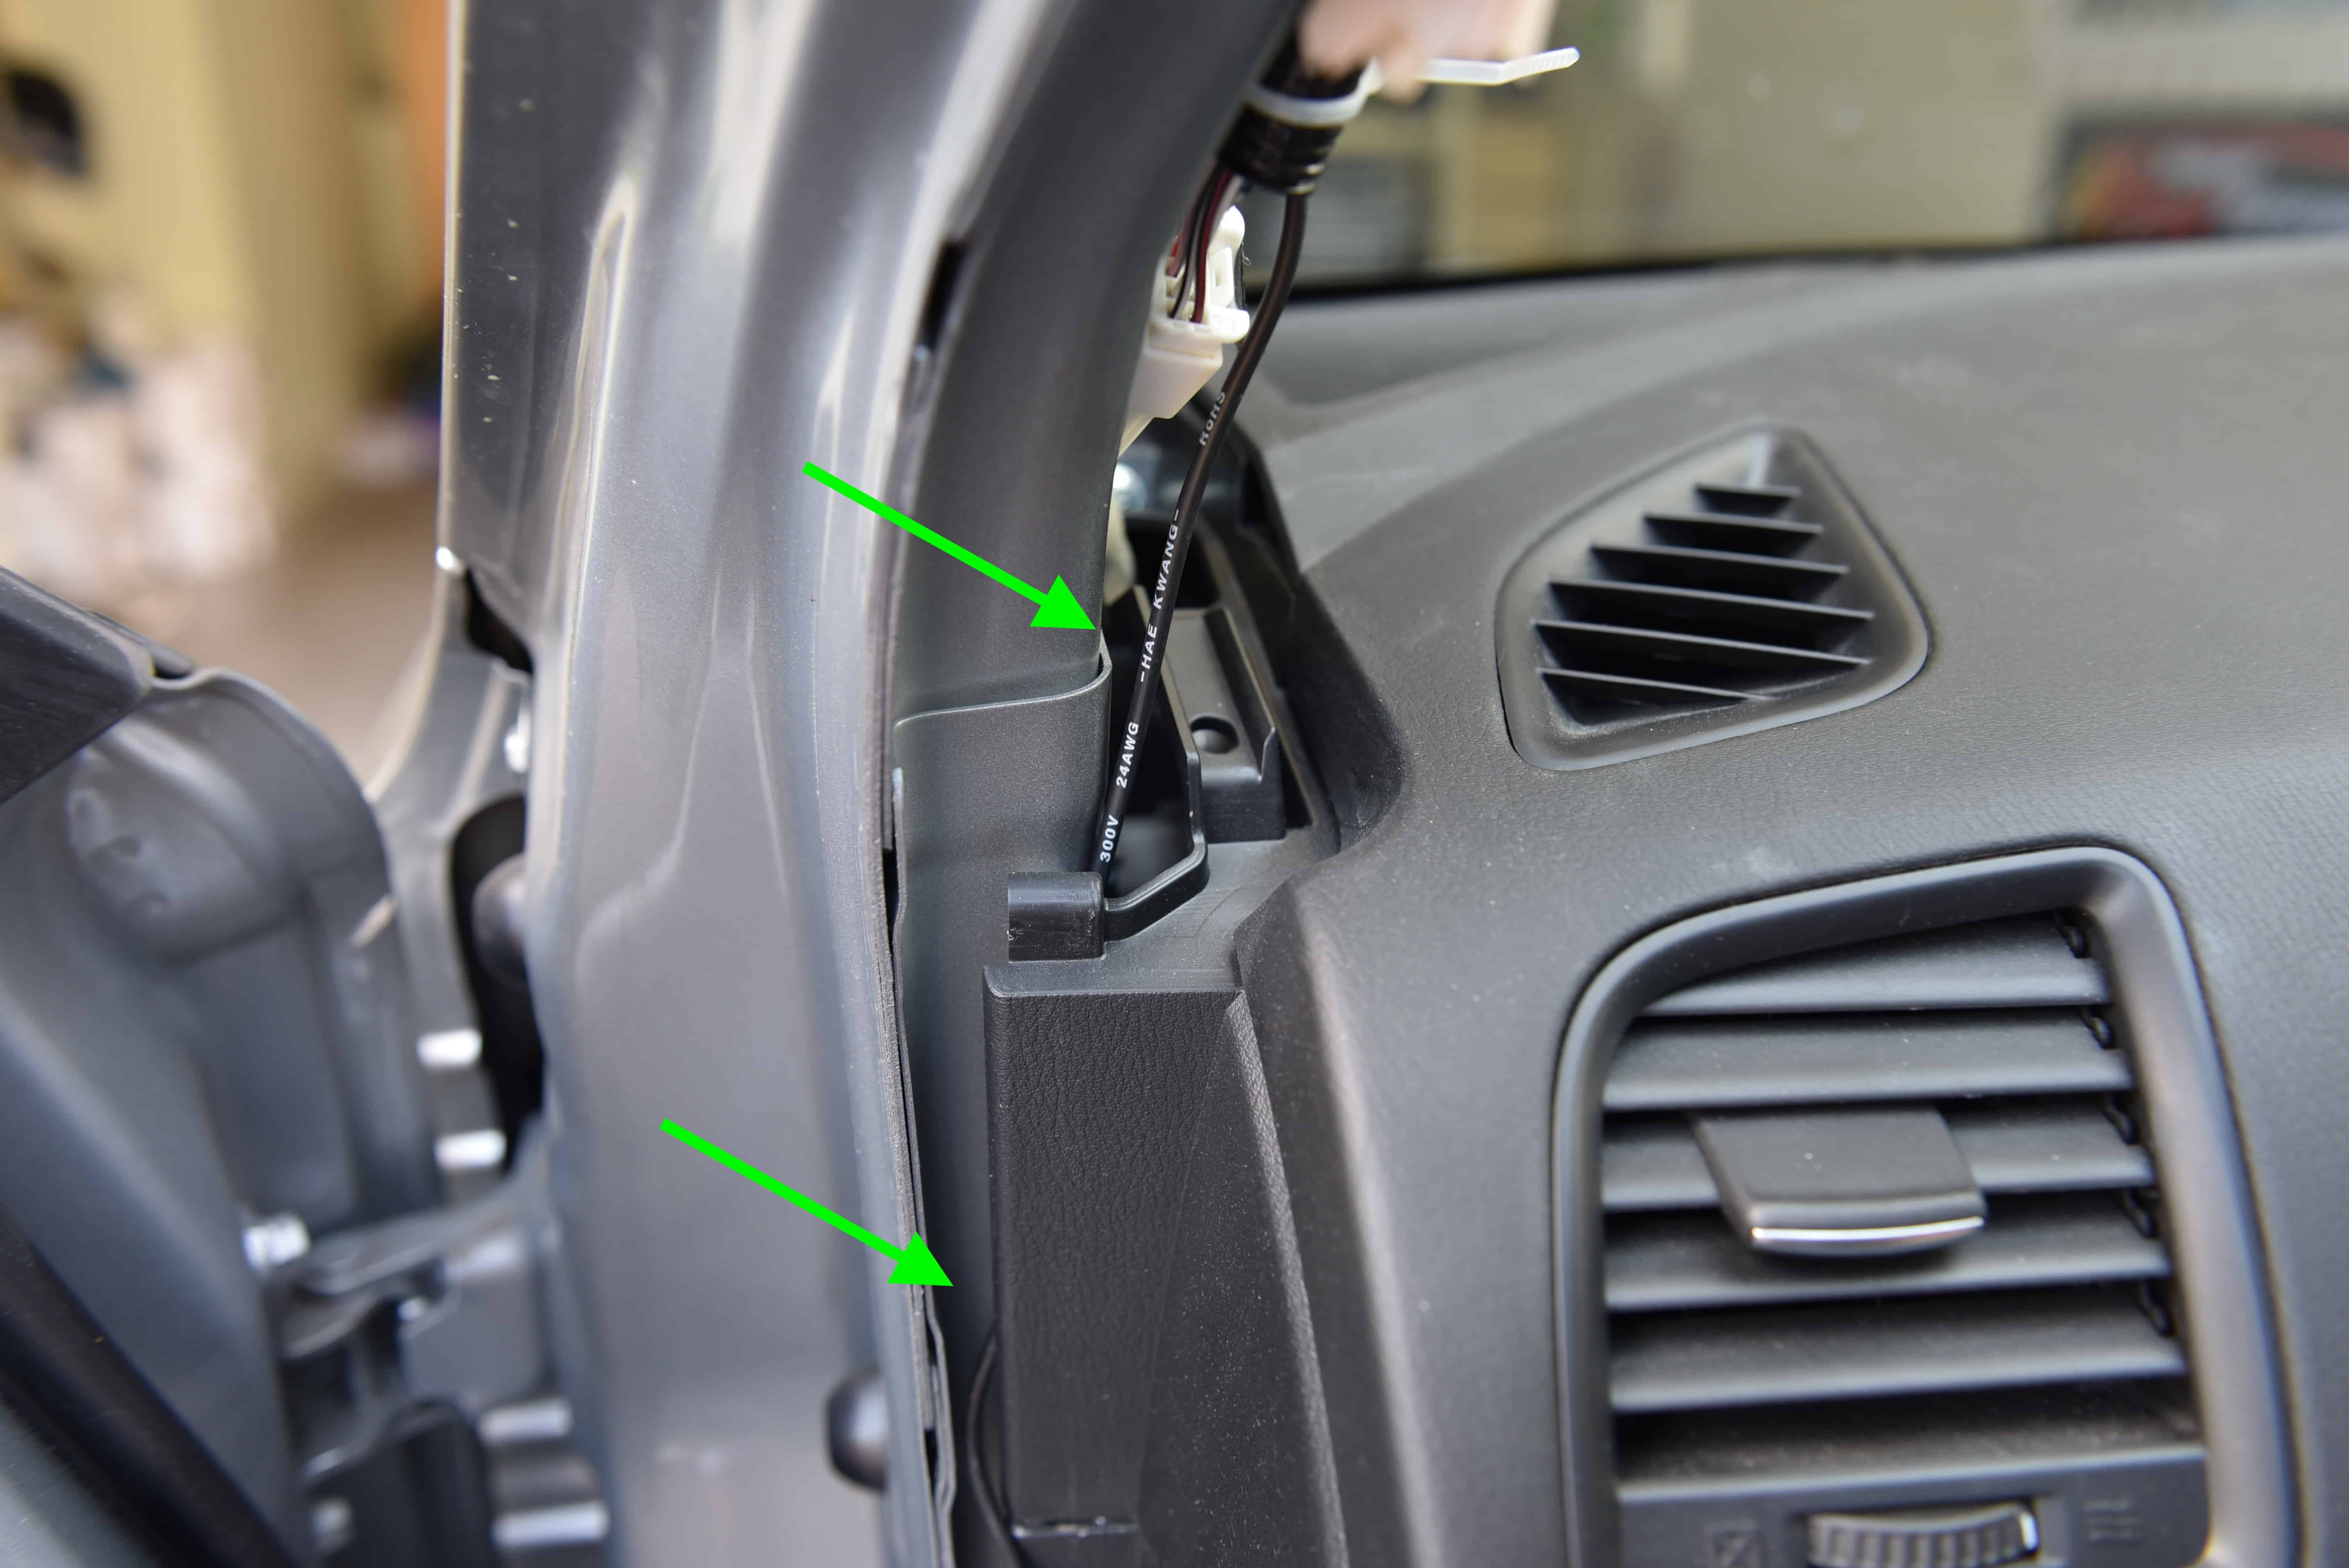
We will run the power cable in the direction shown, leading to the fuse box in the passenger kick panel. Simply pull down gently on the roof lining and feed the cable into the cavity.
Step 3
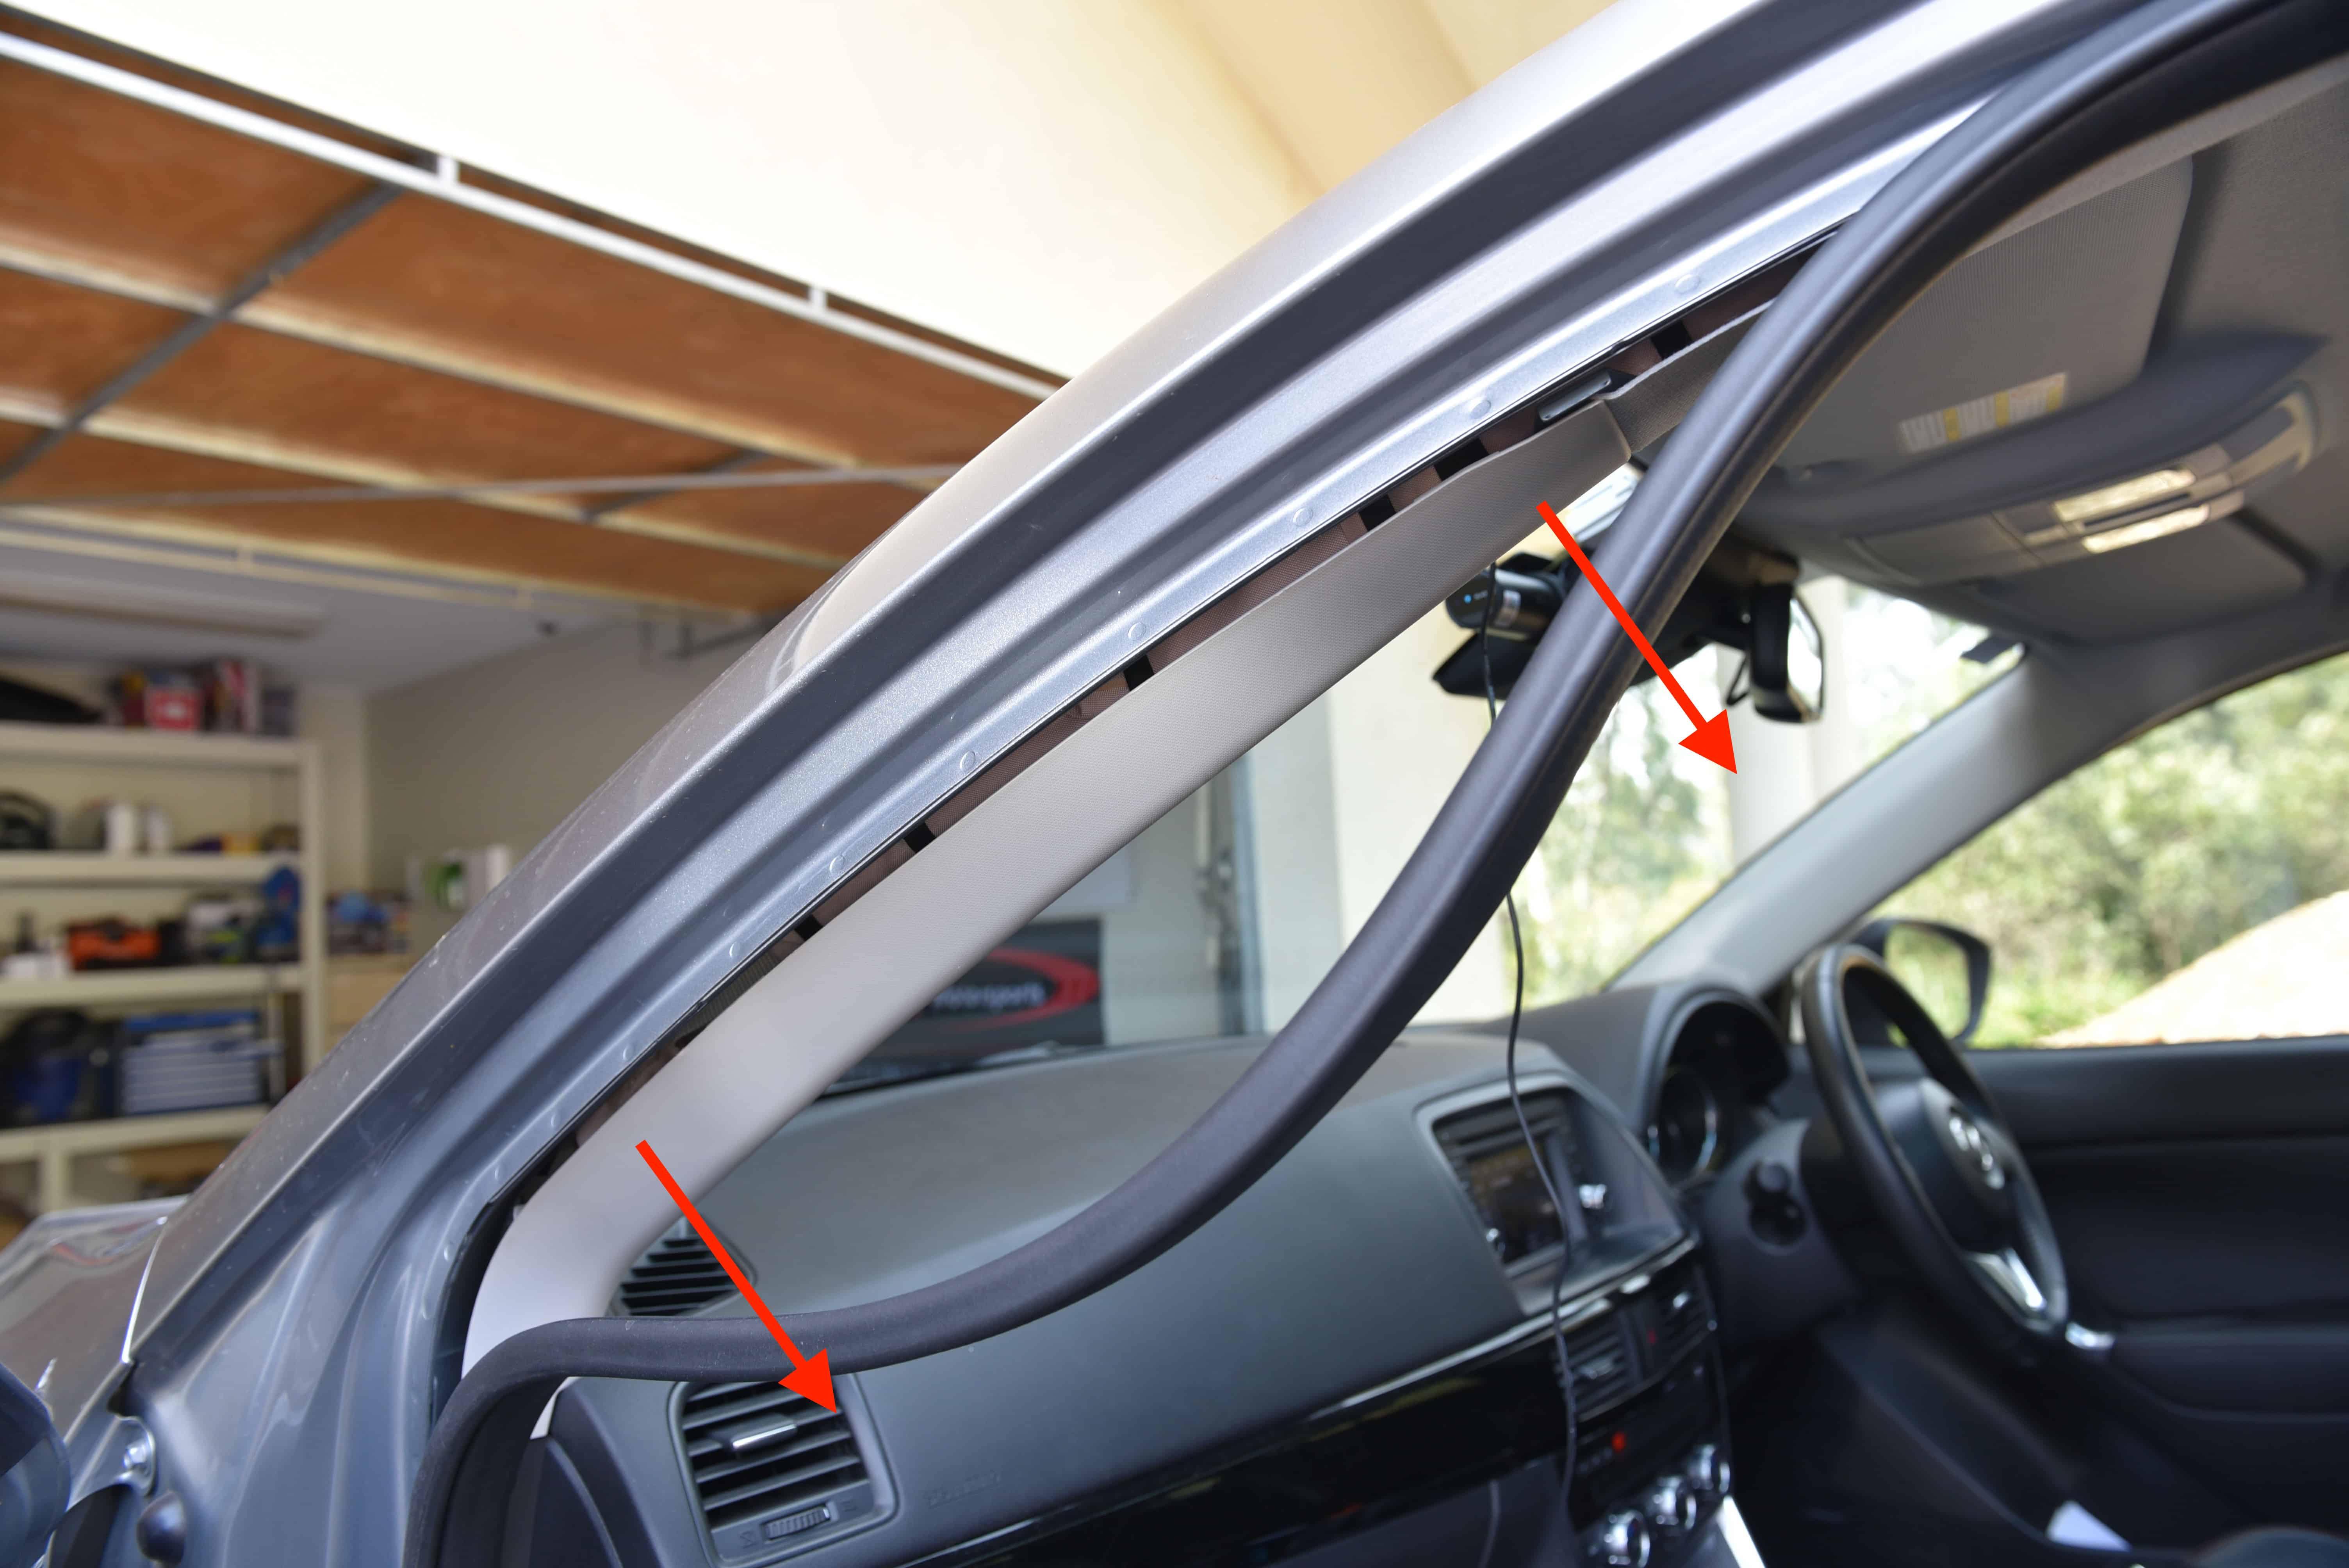
Gently peel down the door seal to expose the A-Pillar trim.
Step 4
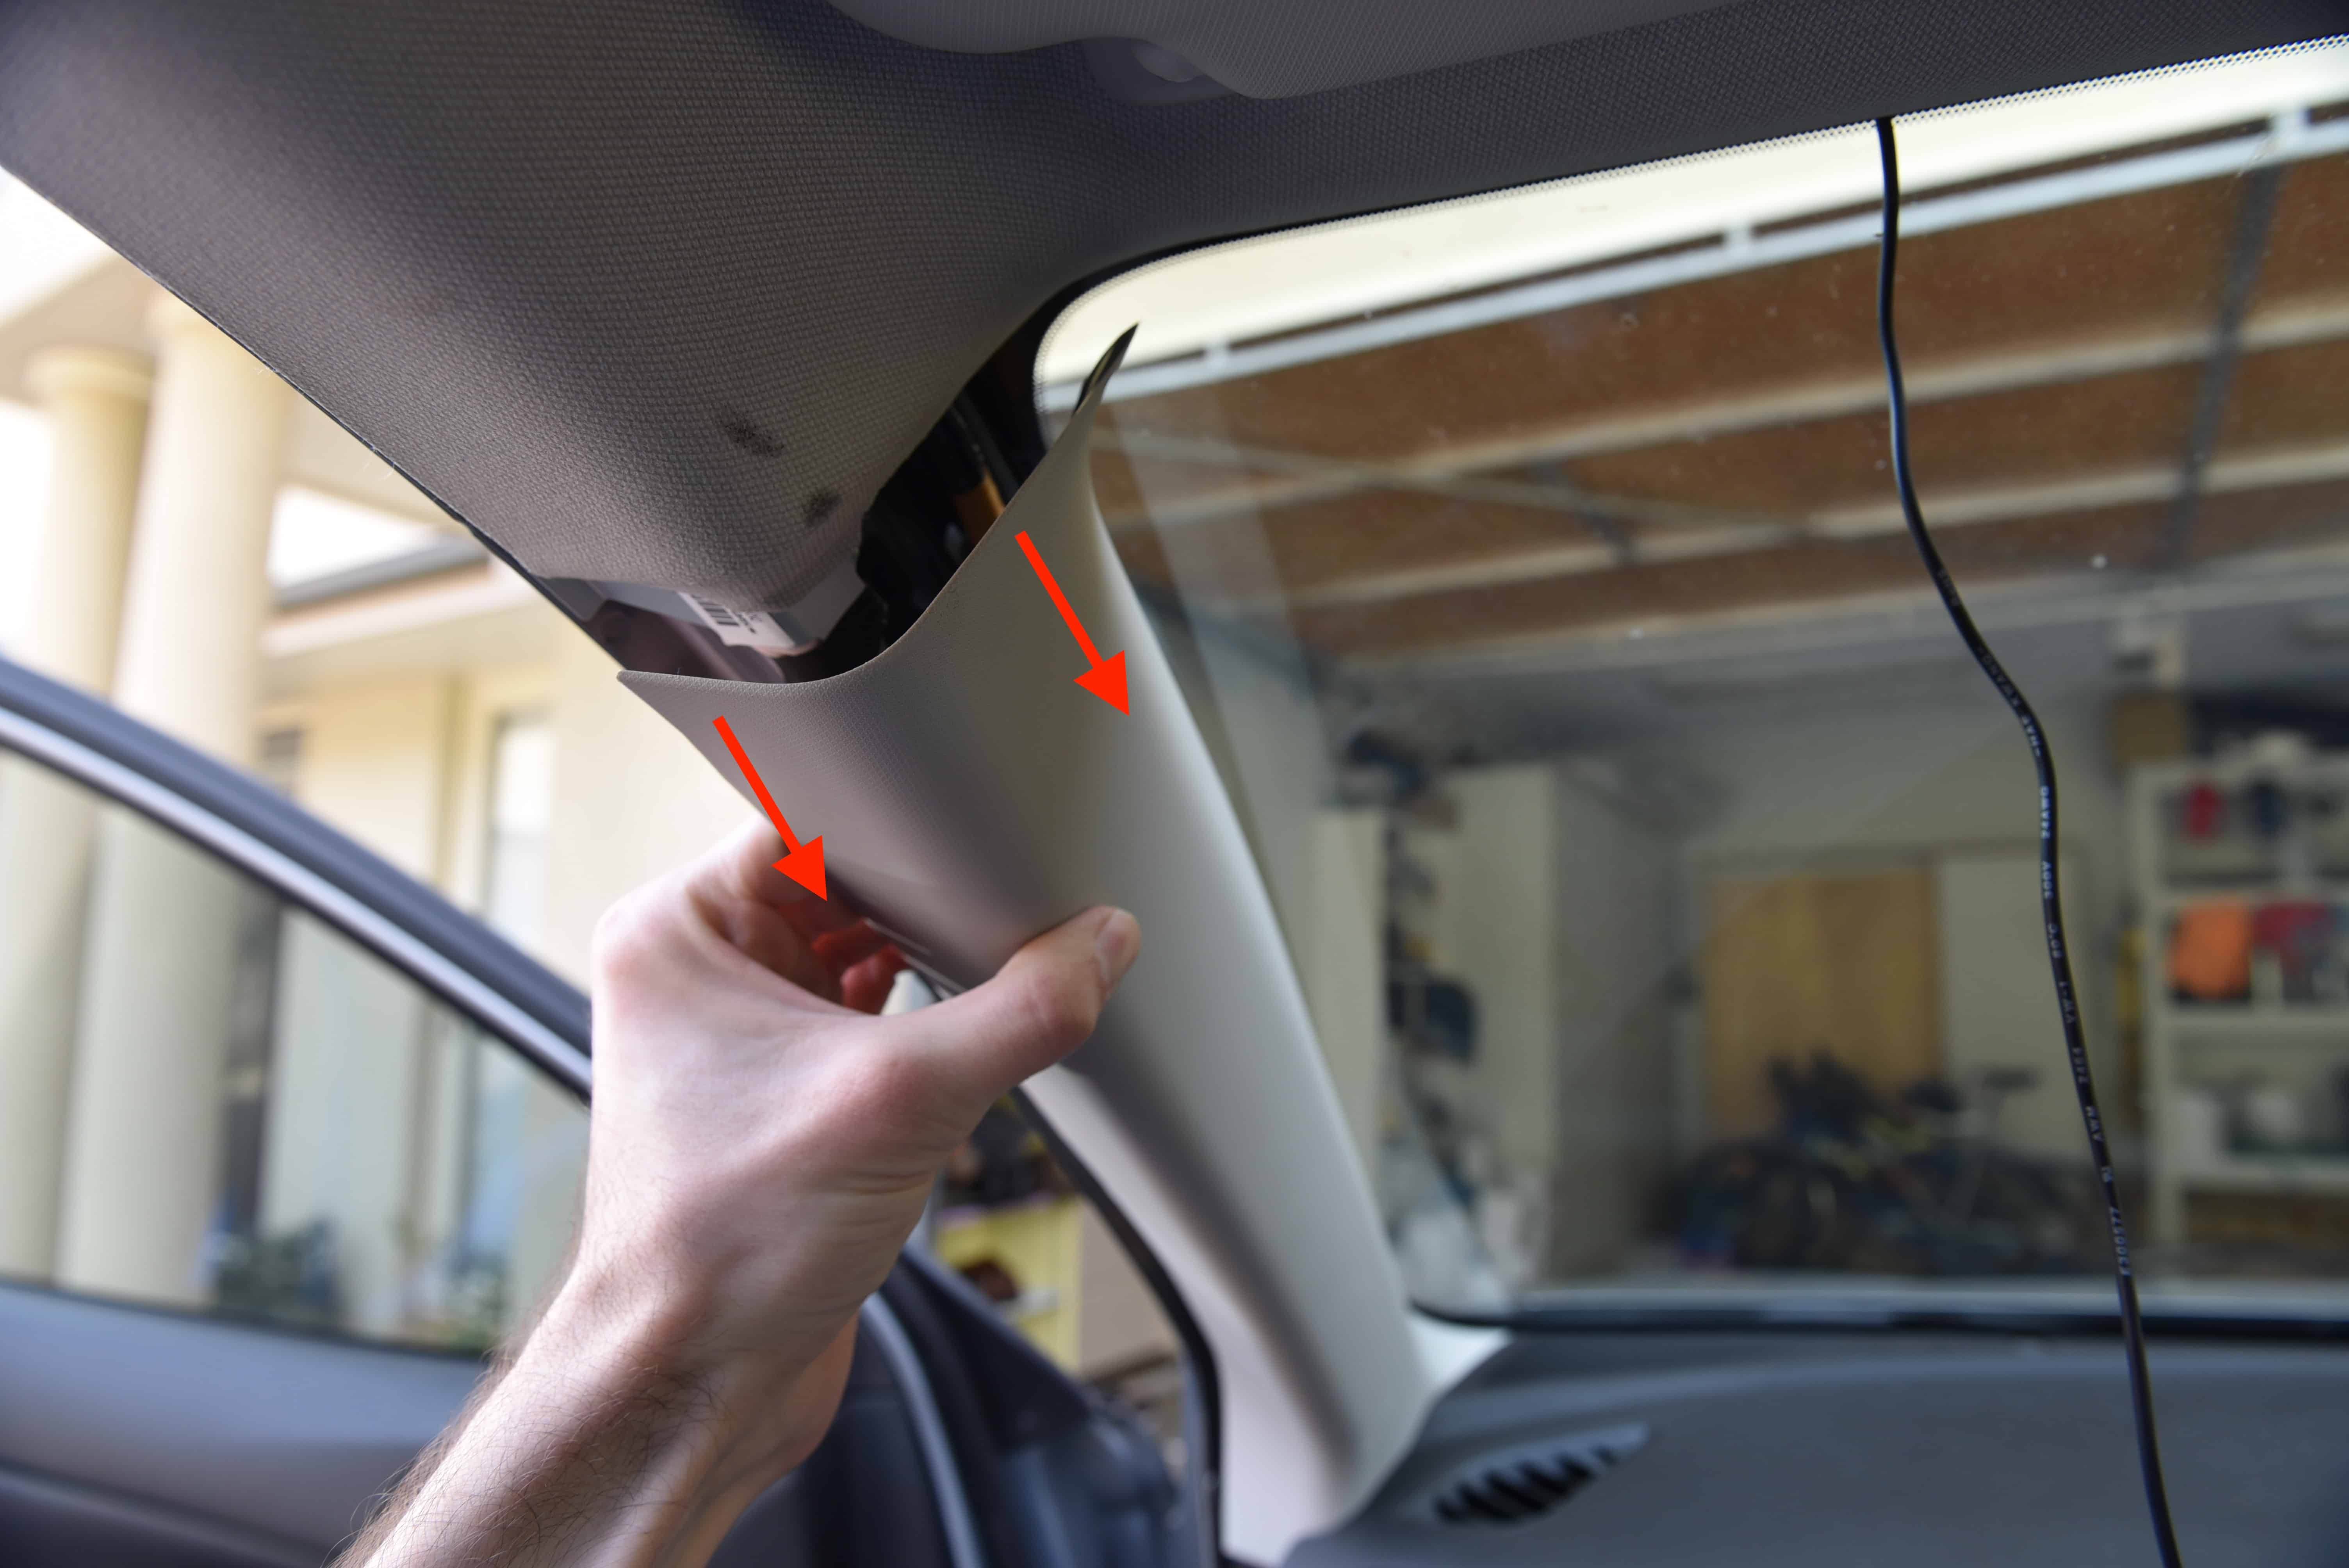
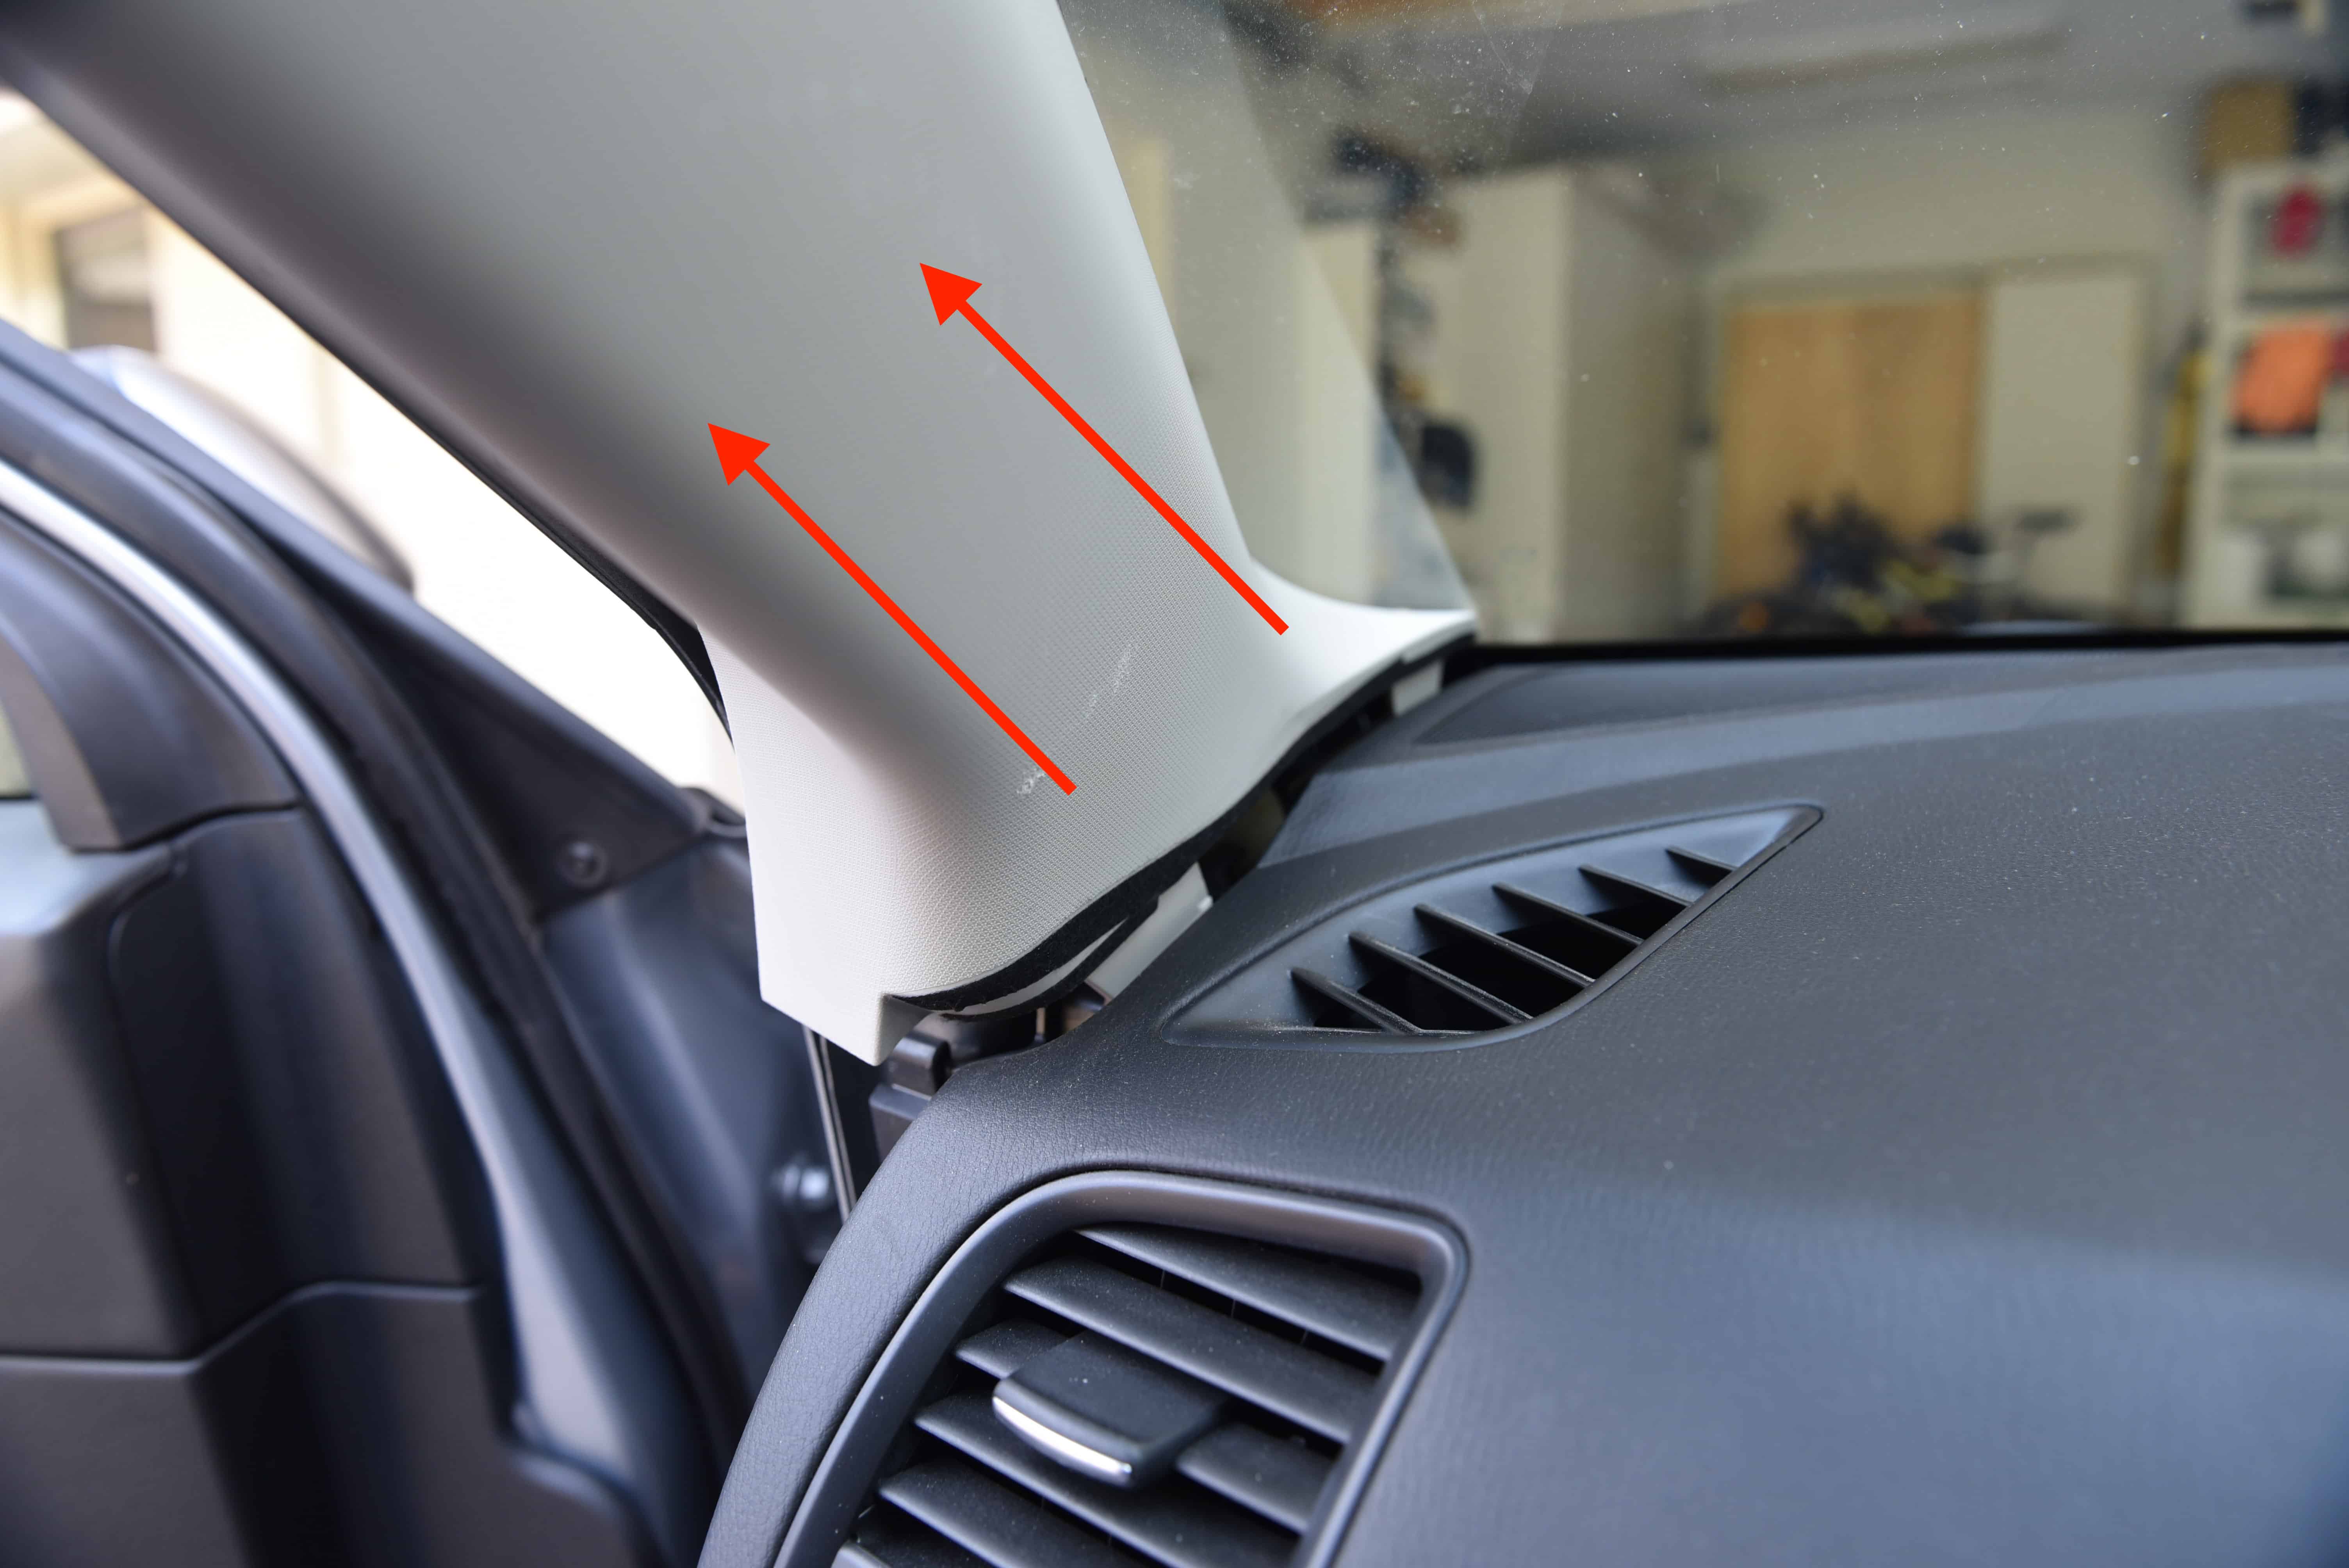
Pull outwards on the A-Pillar to release the clips. Use a trim removal tool to aid this process.
Step 5
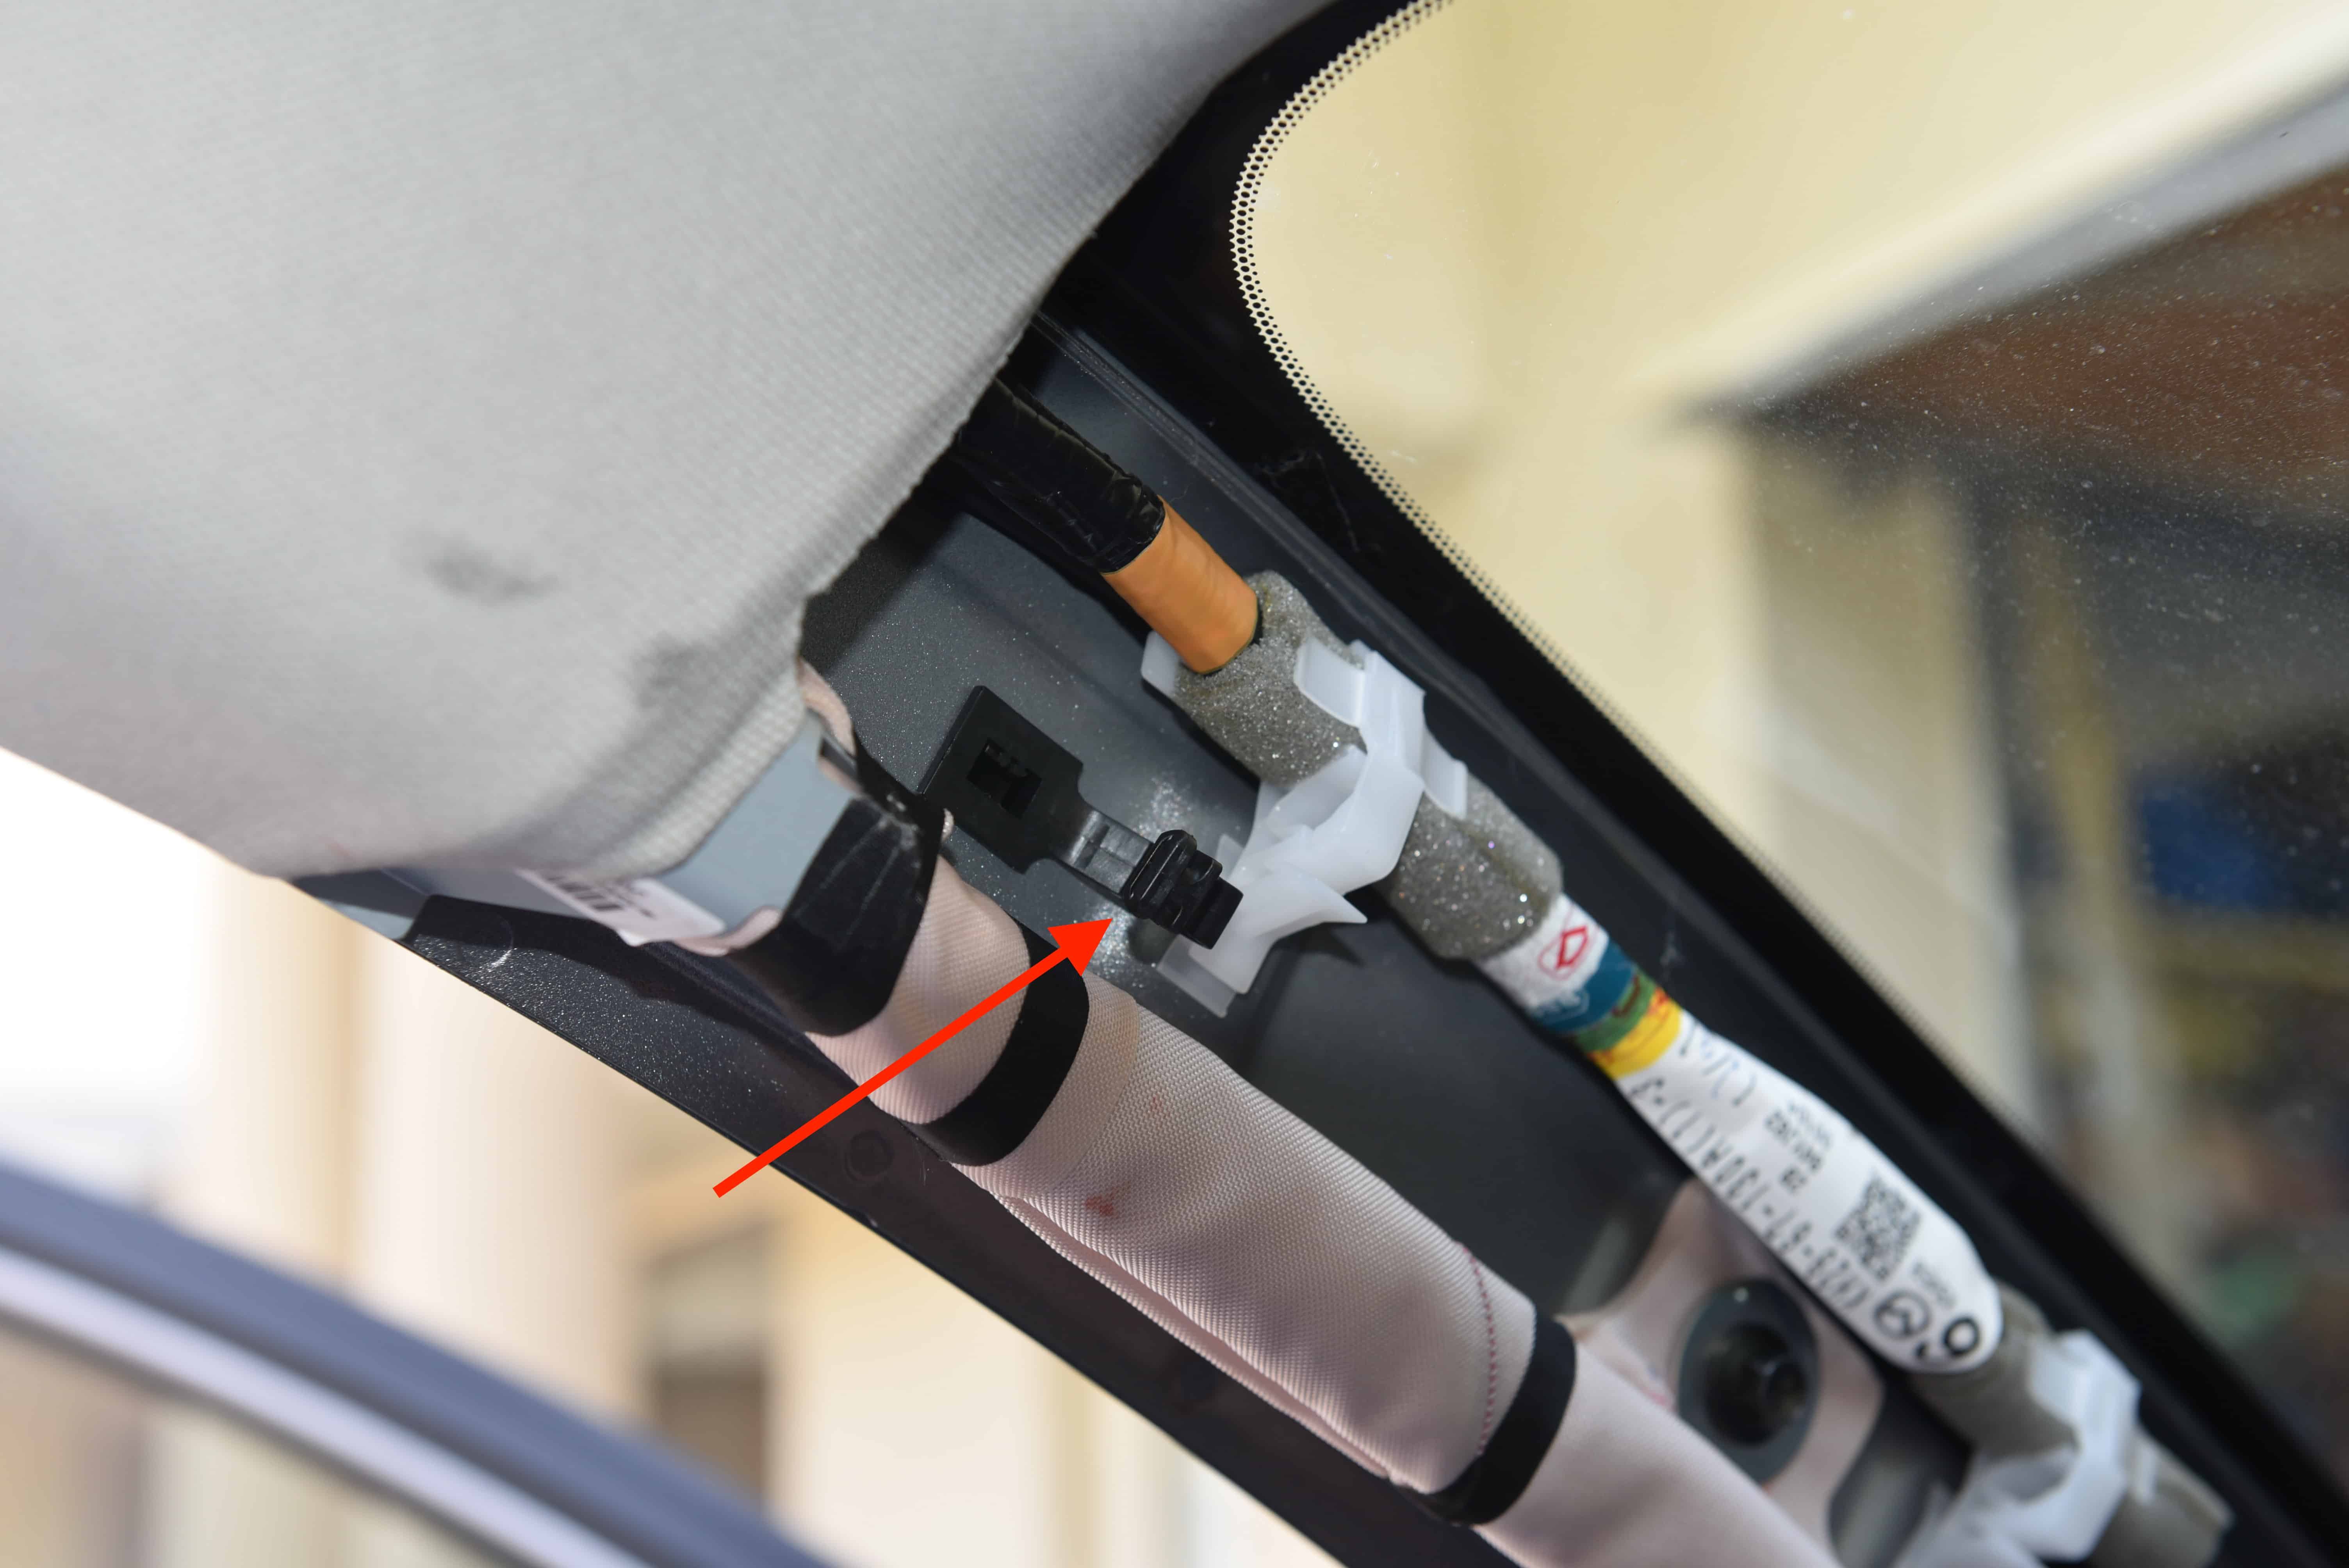
In order to completely remove the trim piece you need to release the plastic tether as pictured. Look into the trim and use your fingers or pliers to twist and unclip the tether.
This picture was taken after the tether was released.
Step 6
You can now lift the trim upwards, sliding it out from the dashboard.
Step 7
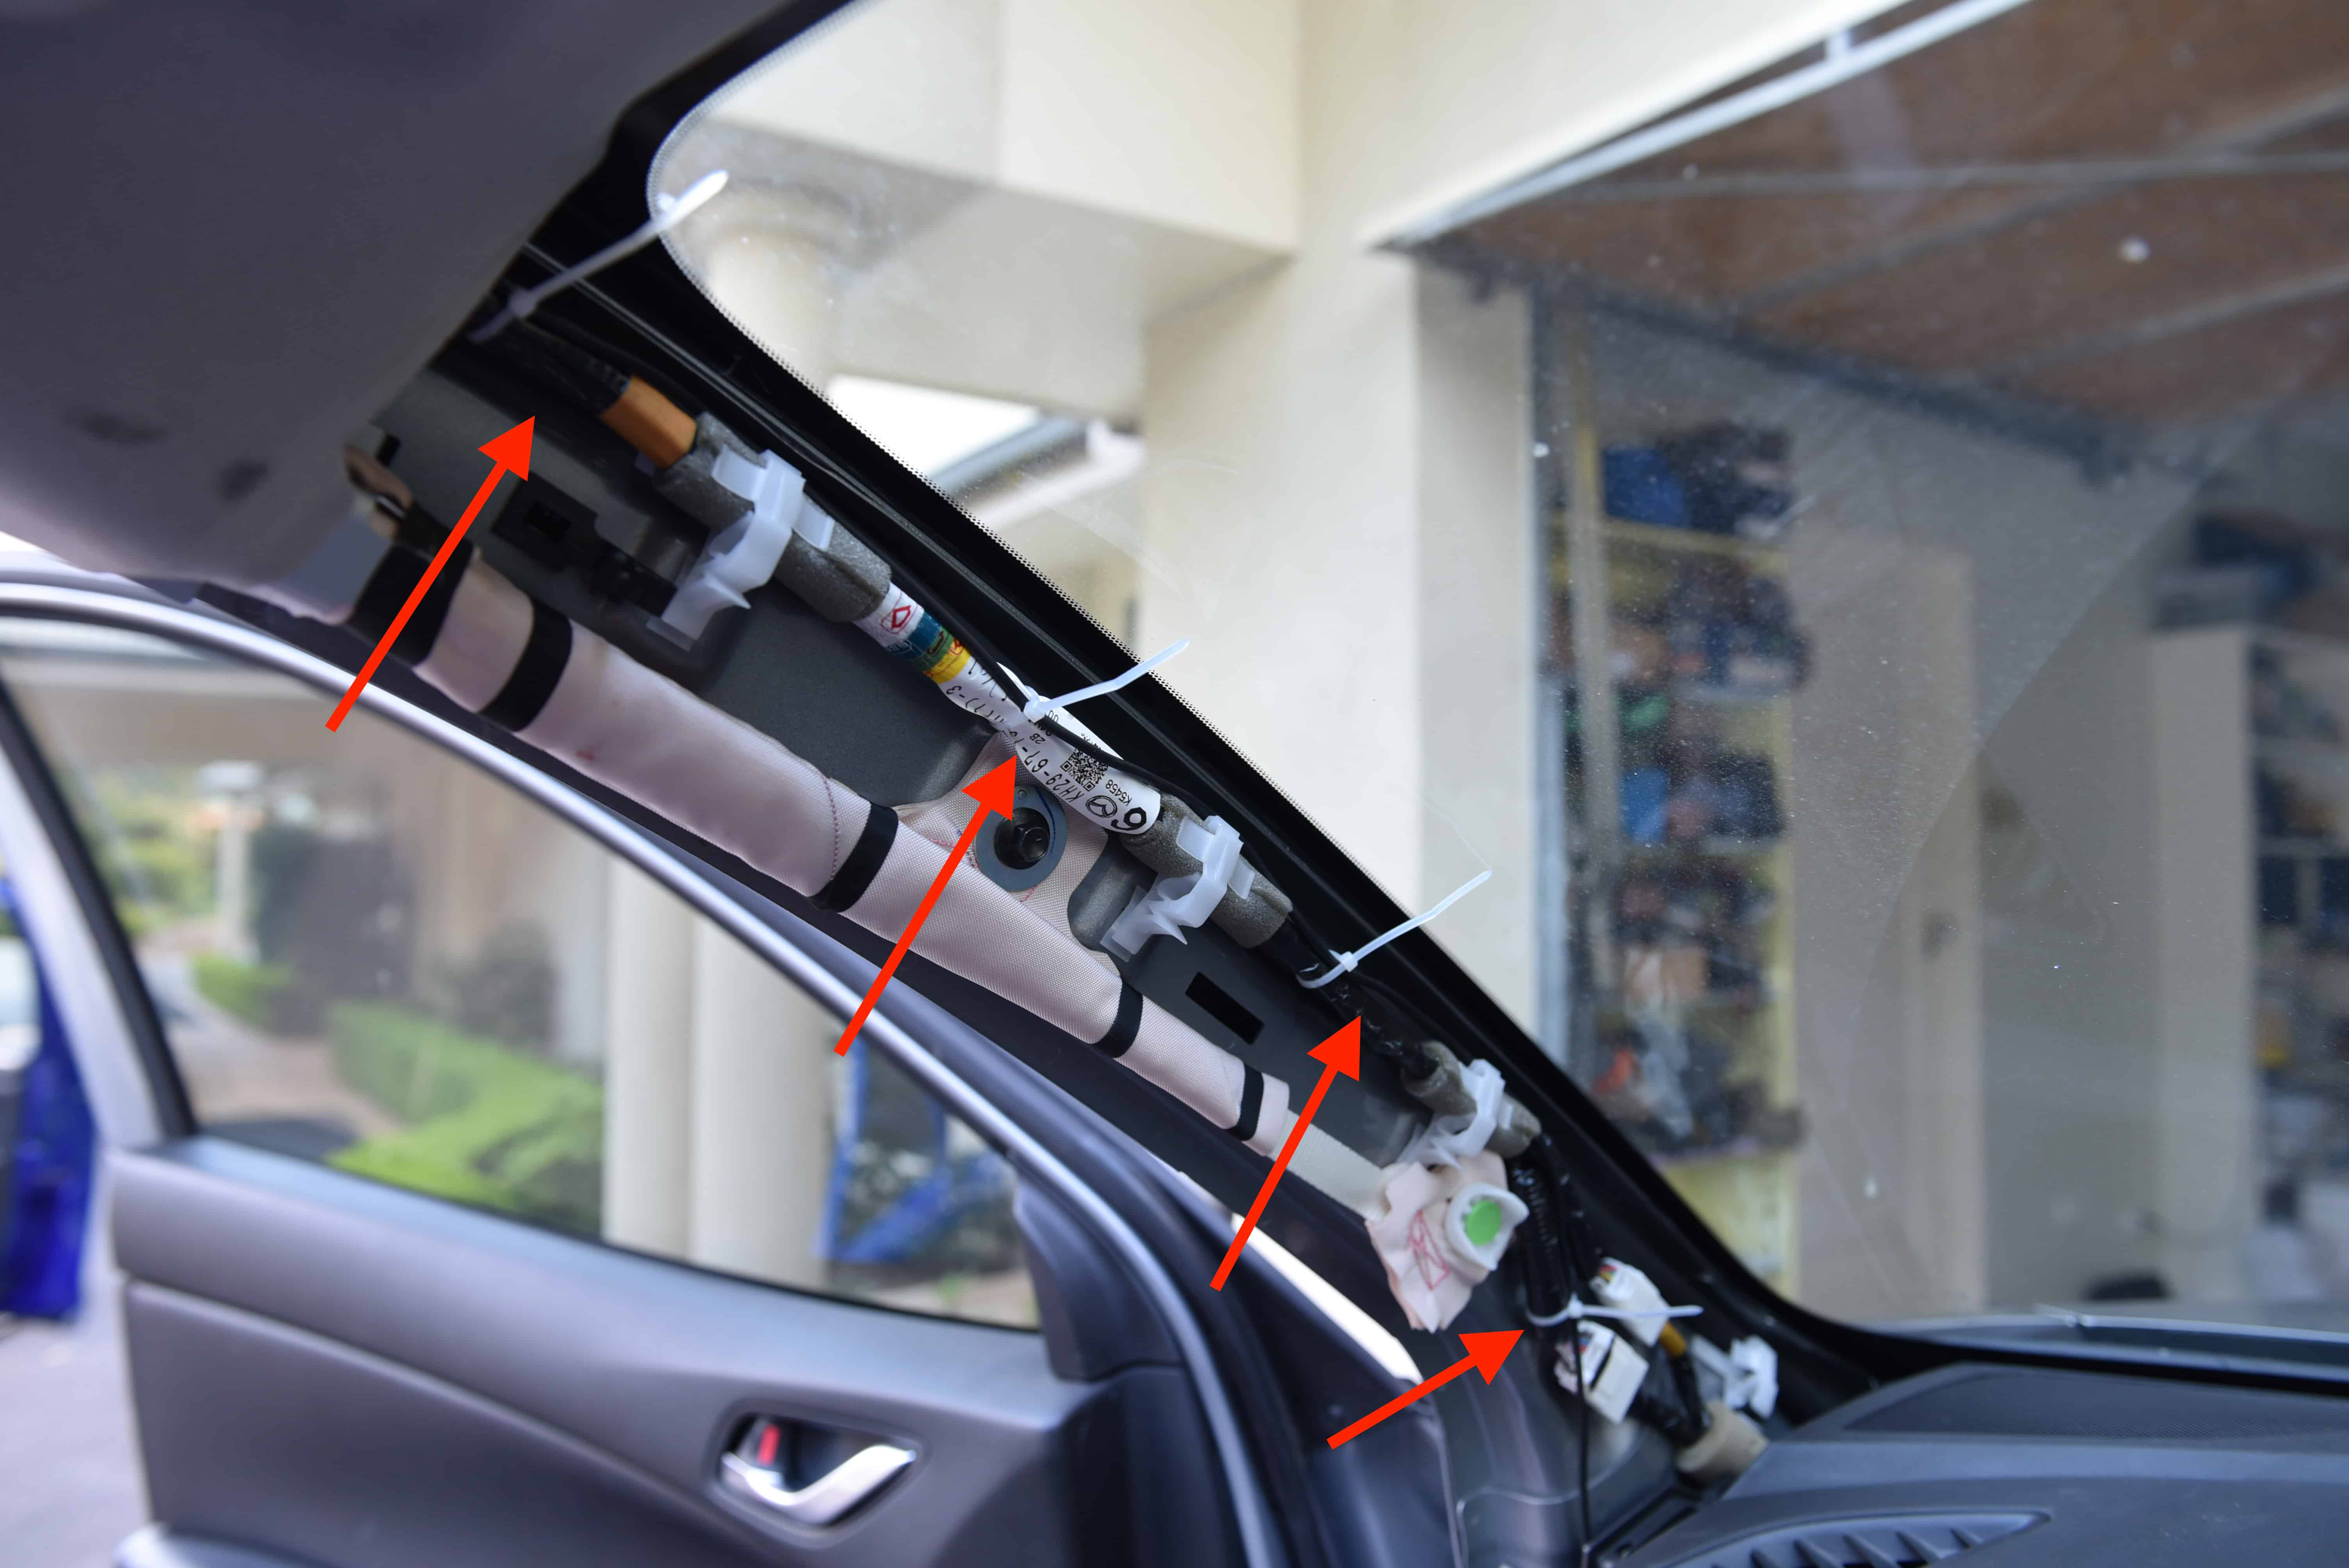
Run the power cable down the A-Pillar, following the OEM wiring loom. Use cable ties to secure the wire.
Step 8
Continue to feed the cable down the pillar as shown.
Step 9
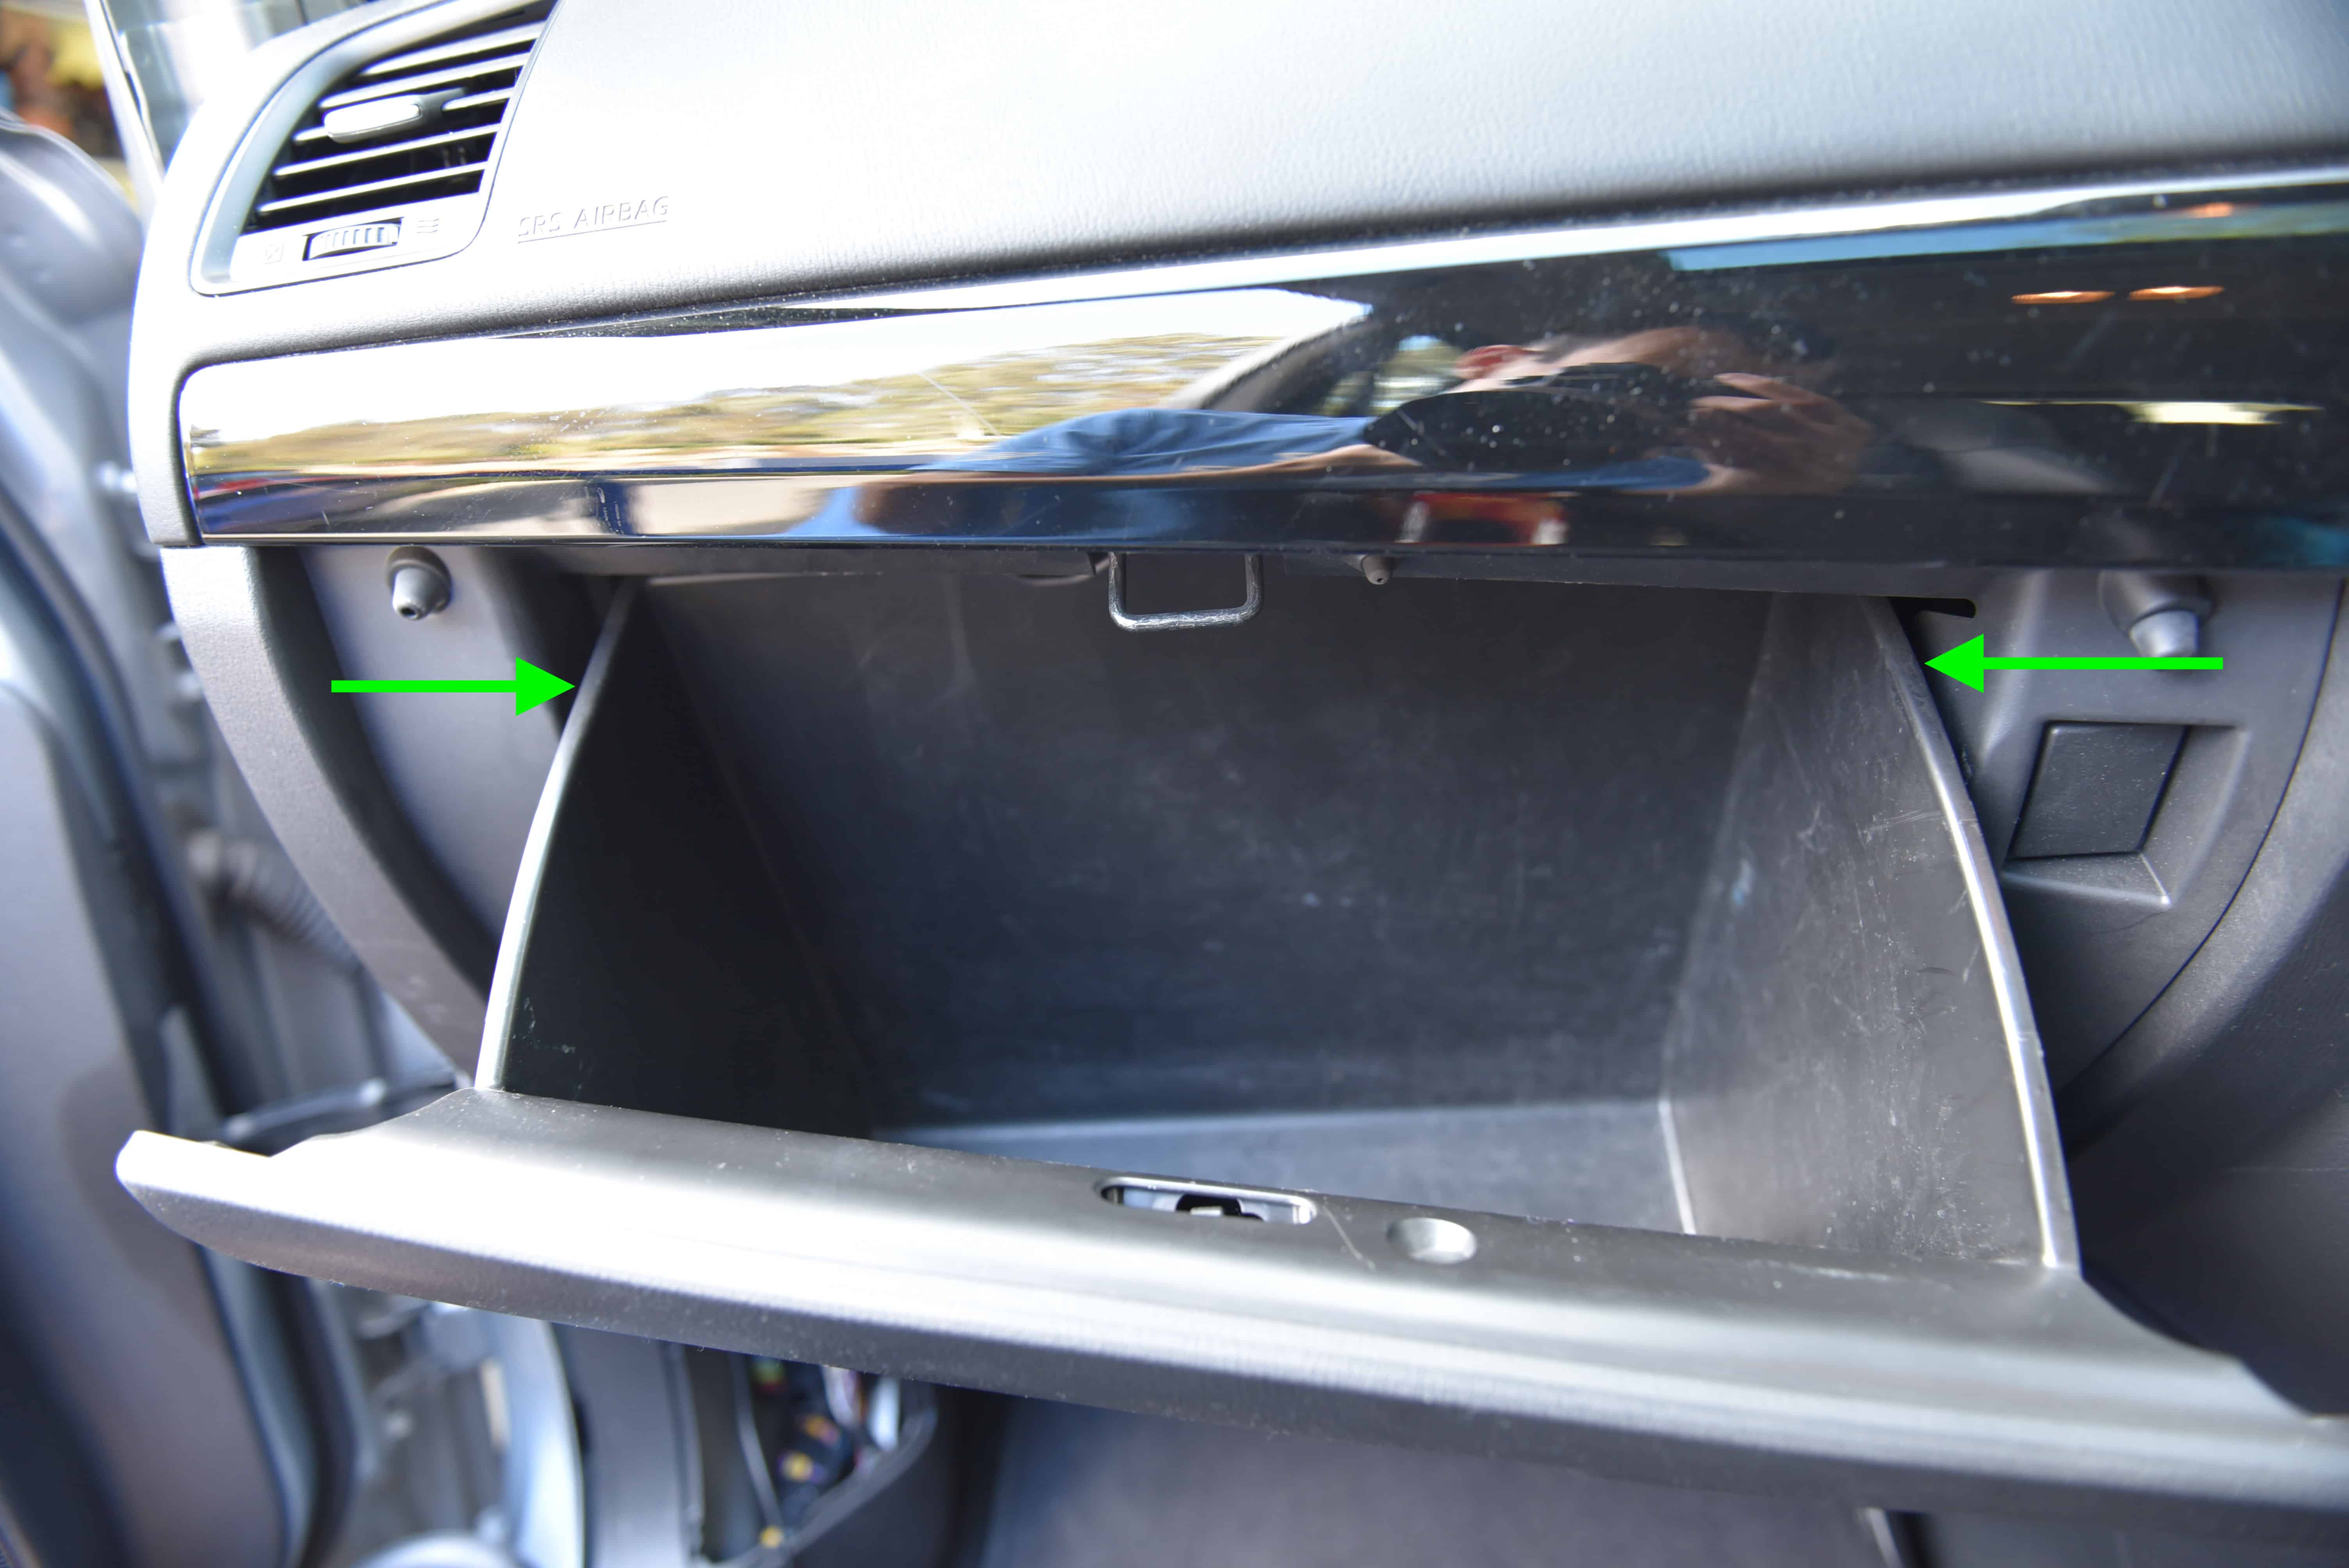
With the dashcam power wire now in the fuse box, we will position and wire the Power Magic Pro. We chose to position the Power Magic Pro in the glove box, and as a result we need to lower the glovebox to gain access.
Squeeze the sides of the glovebox to retract the pins, and gently lower.
Step 10
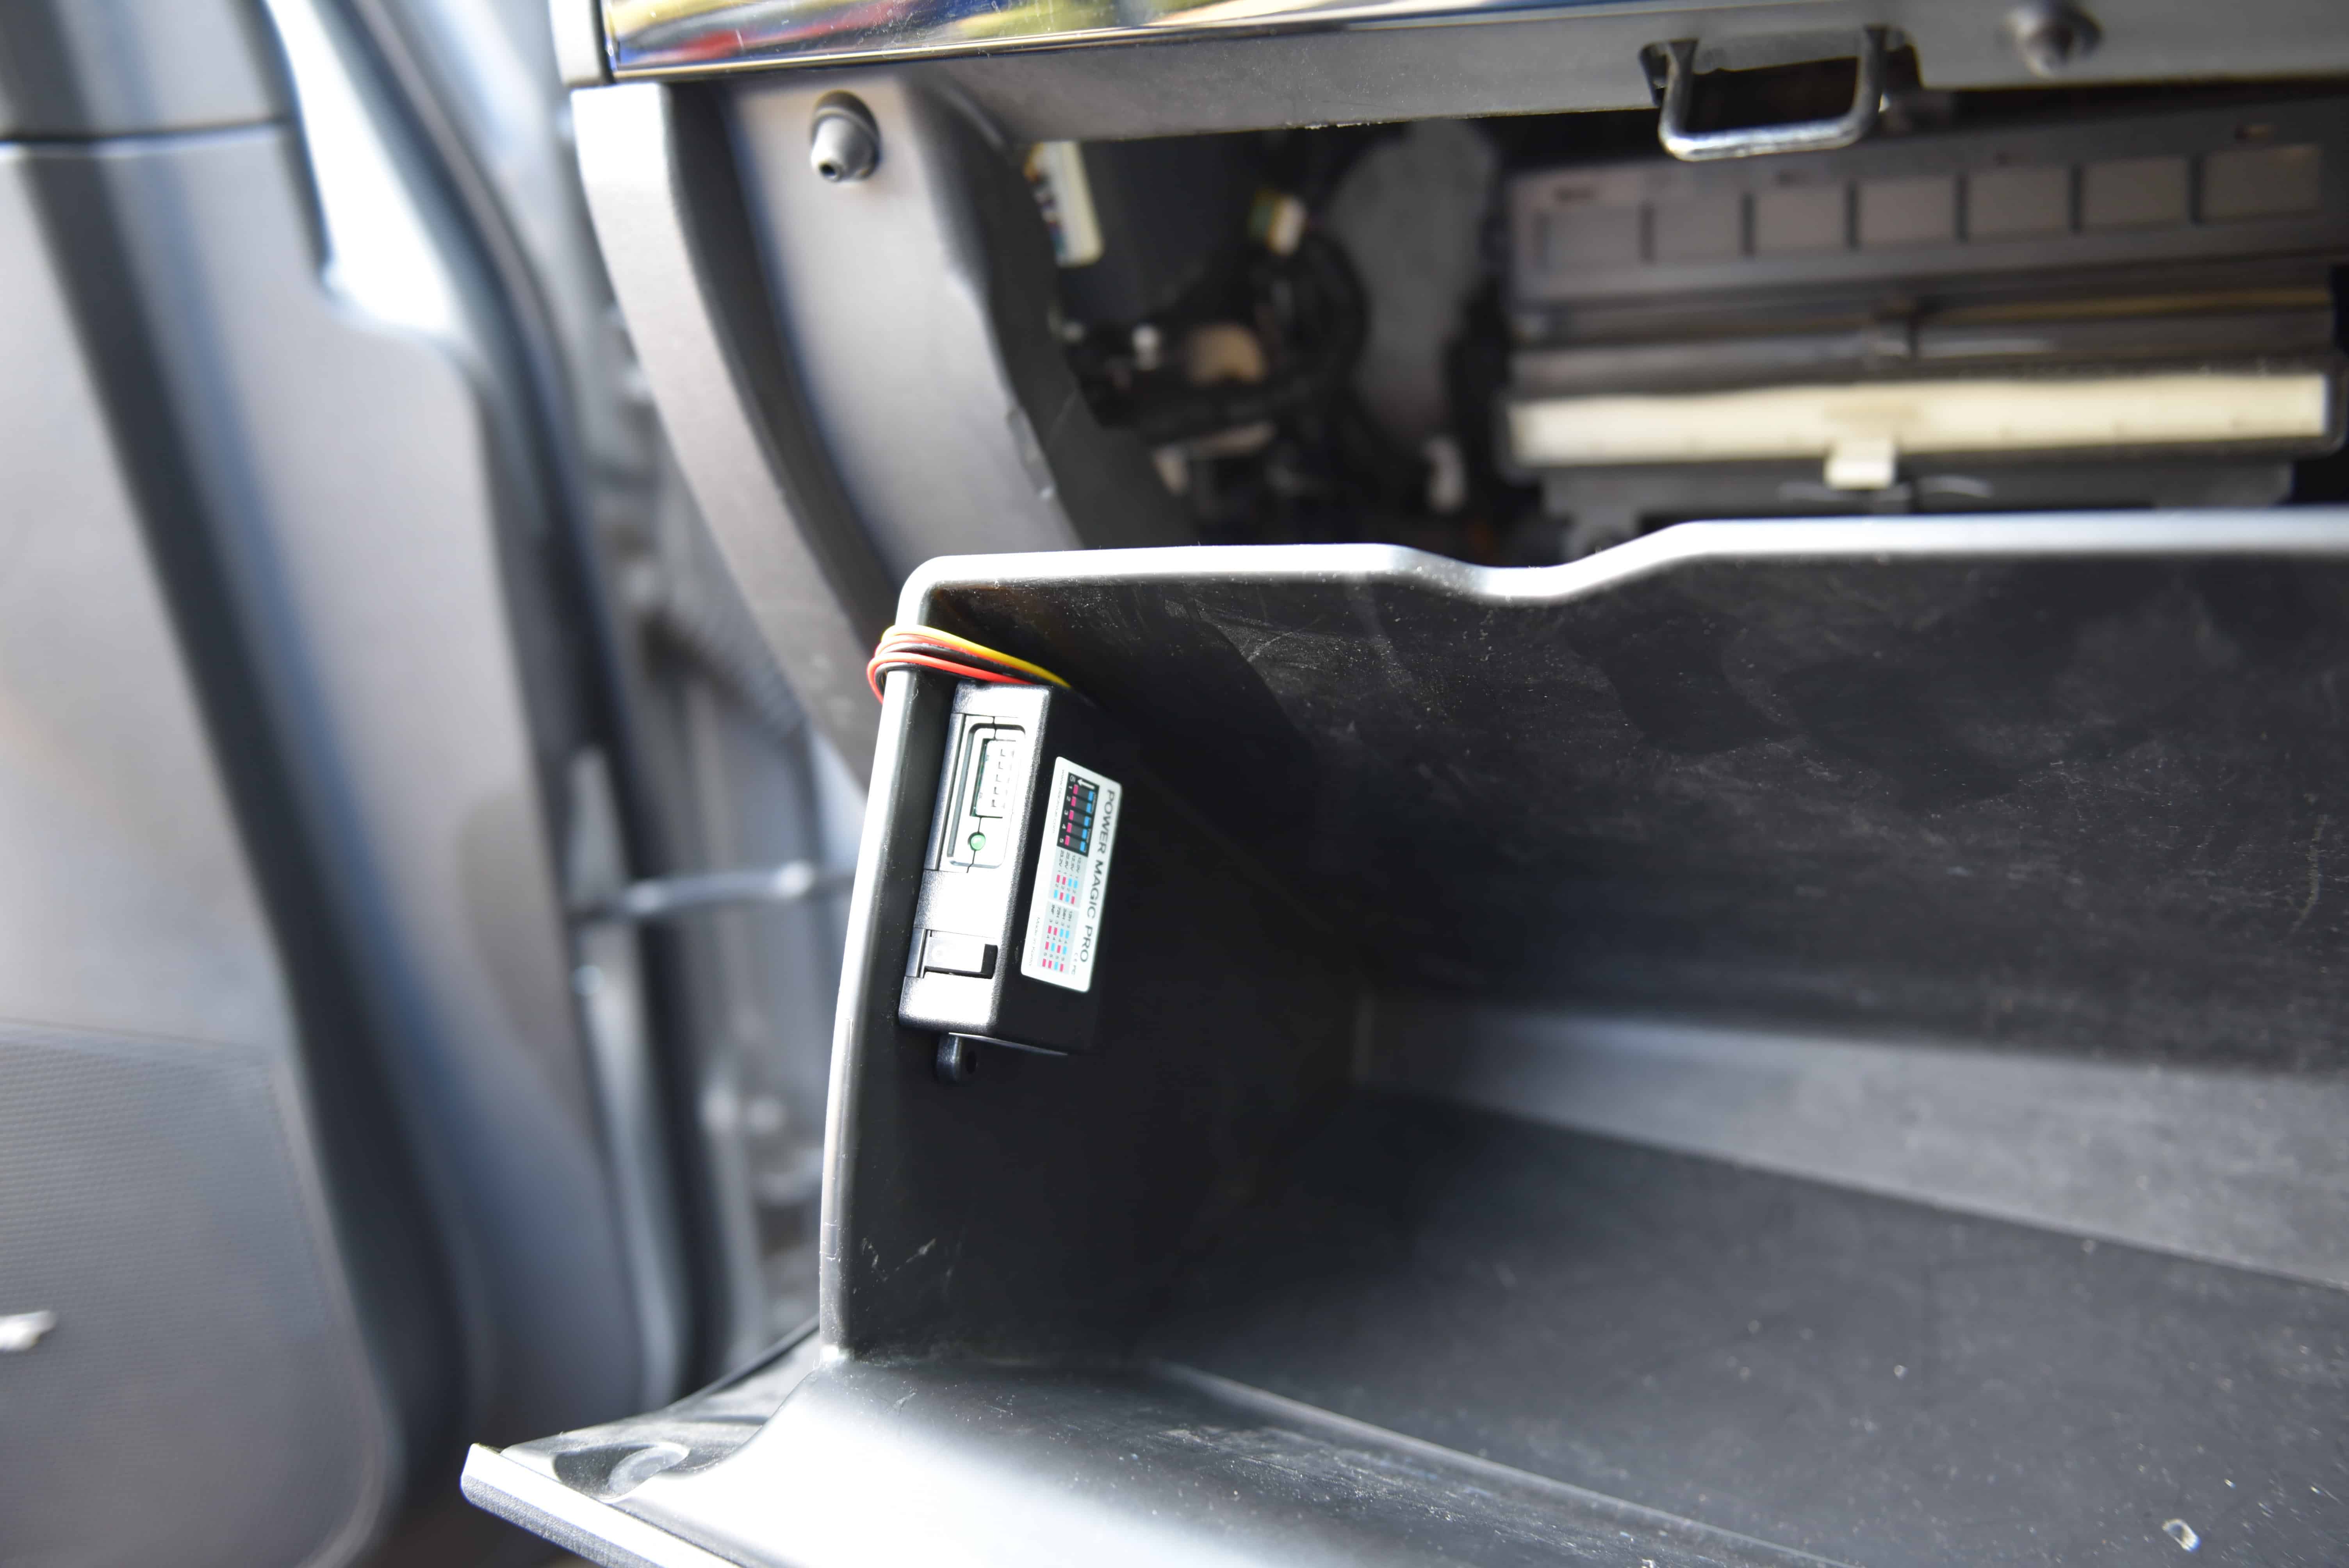
Stick the Power Magic Pro in your chosen location. The top left corner works very well.
Step 11
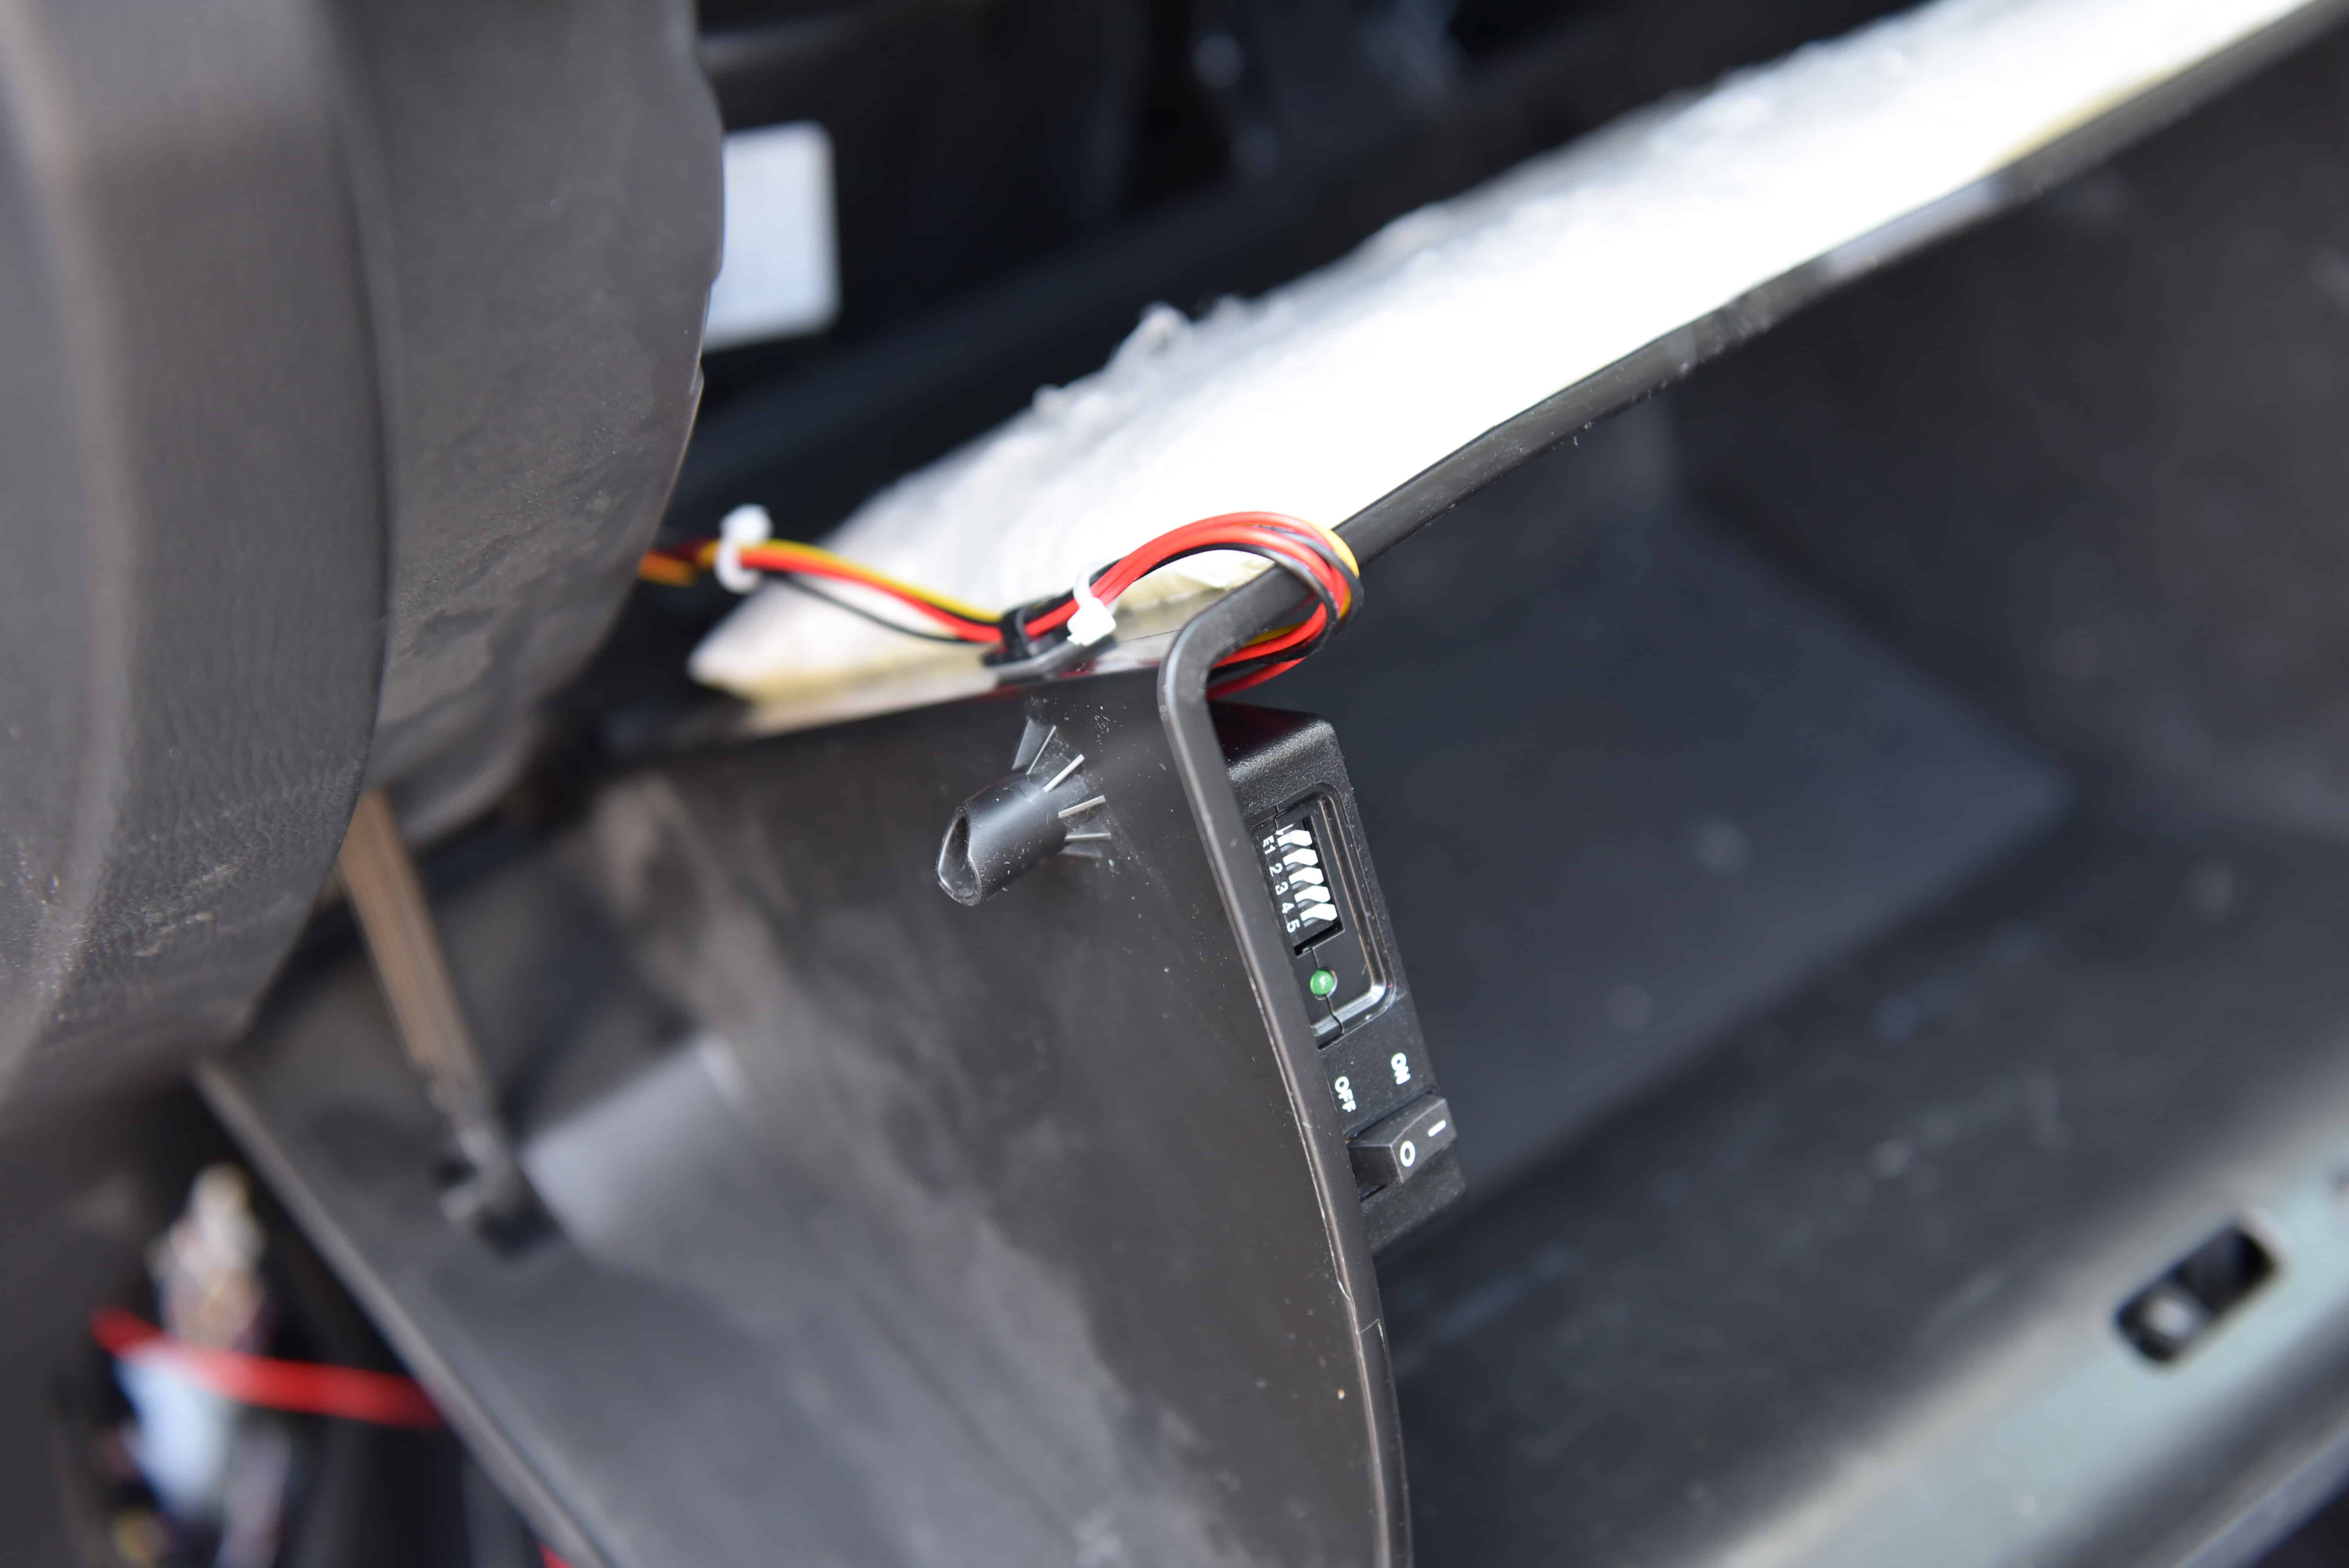
Secure the wiring so it does not interfere with the glove box operation.
Step 12
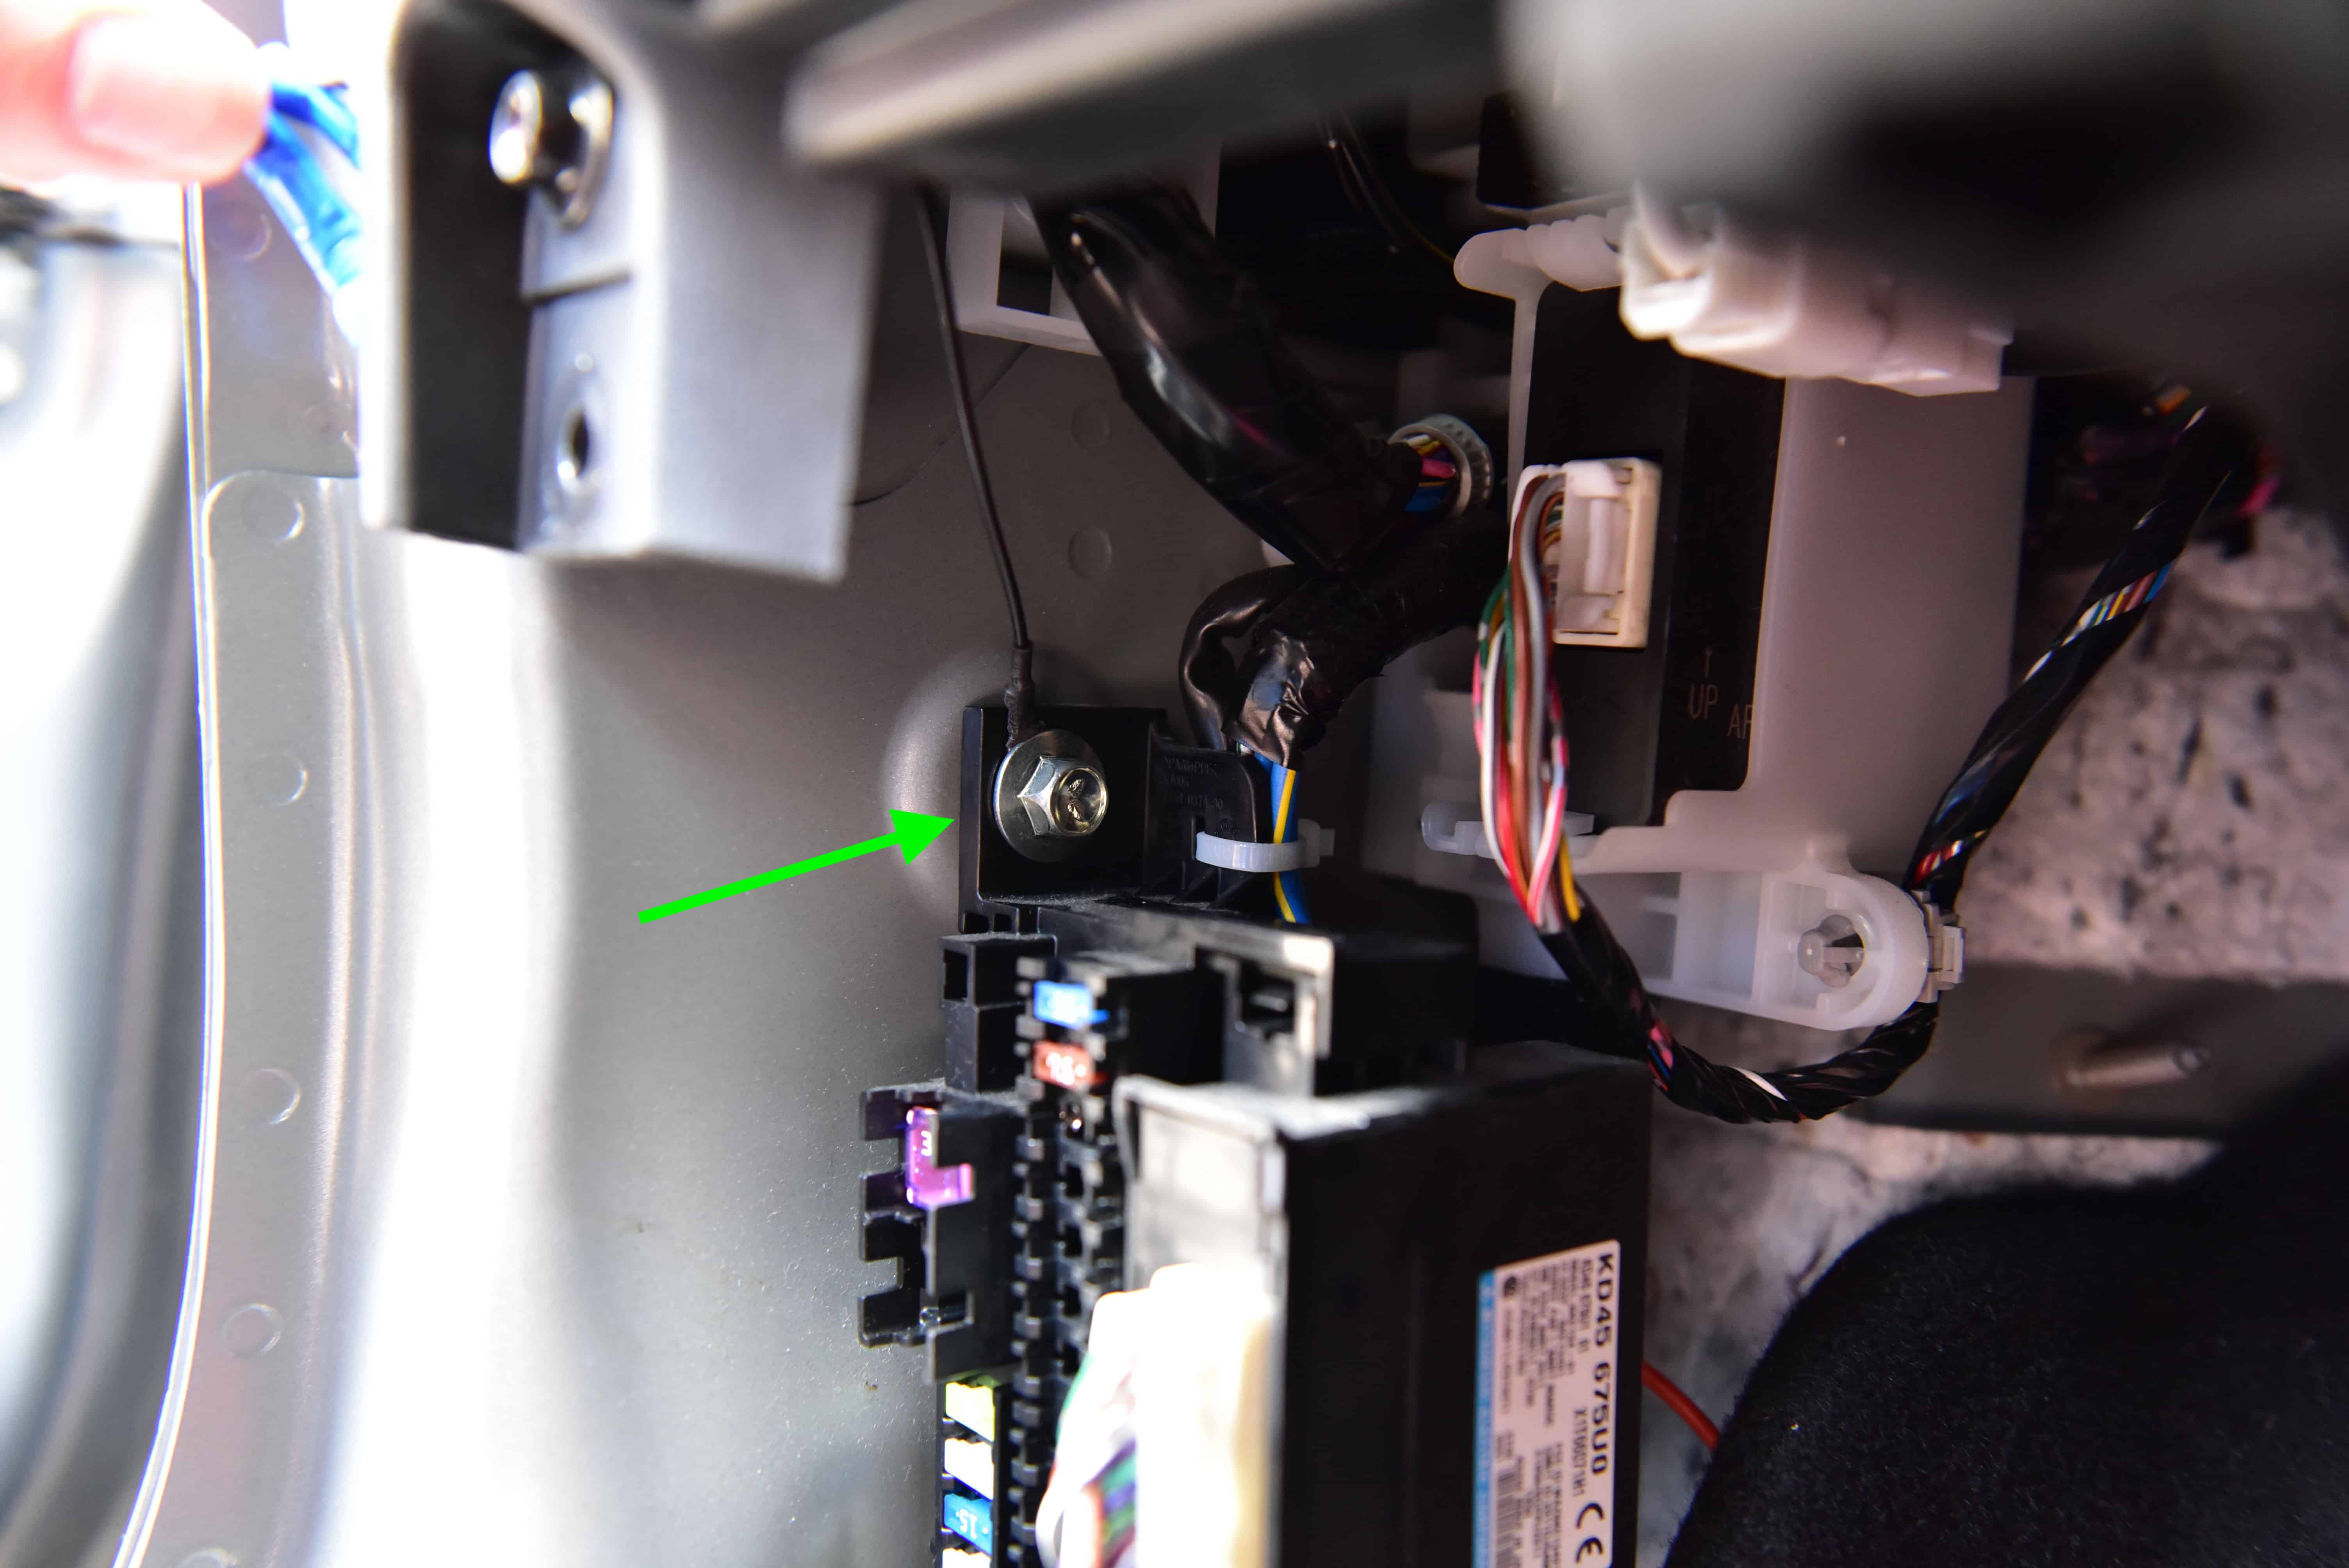
Drop the wires into the fuse panel area and connect the ground wire to the bolt indicated in the image. You will need to remove the kick panel trim to make accessibility easier. Simply unscrew the plastic nut on the right side and unclip.
Step 13
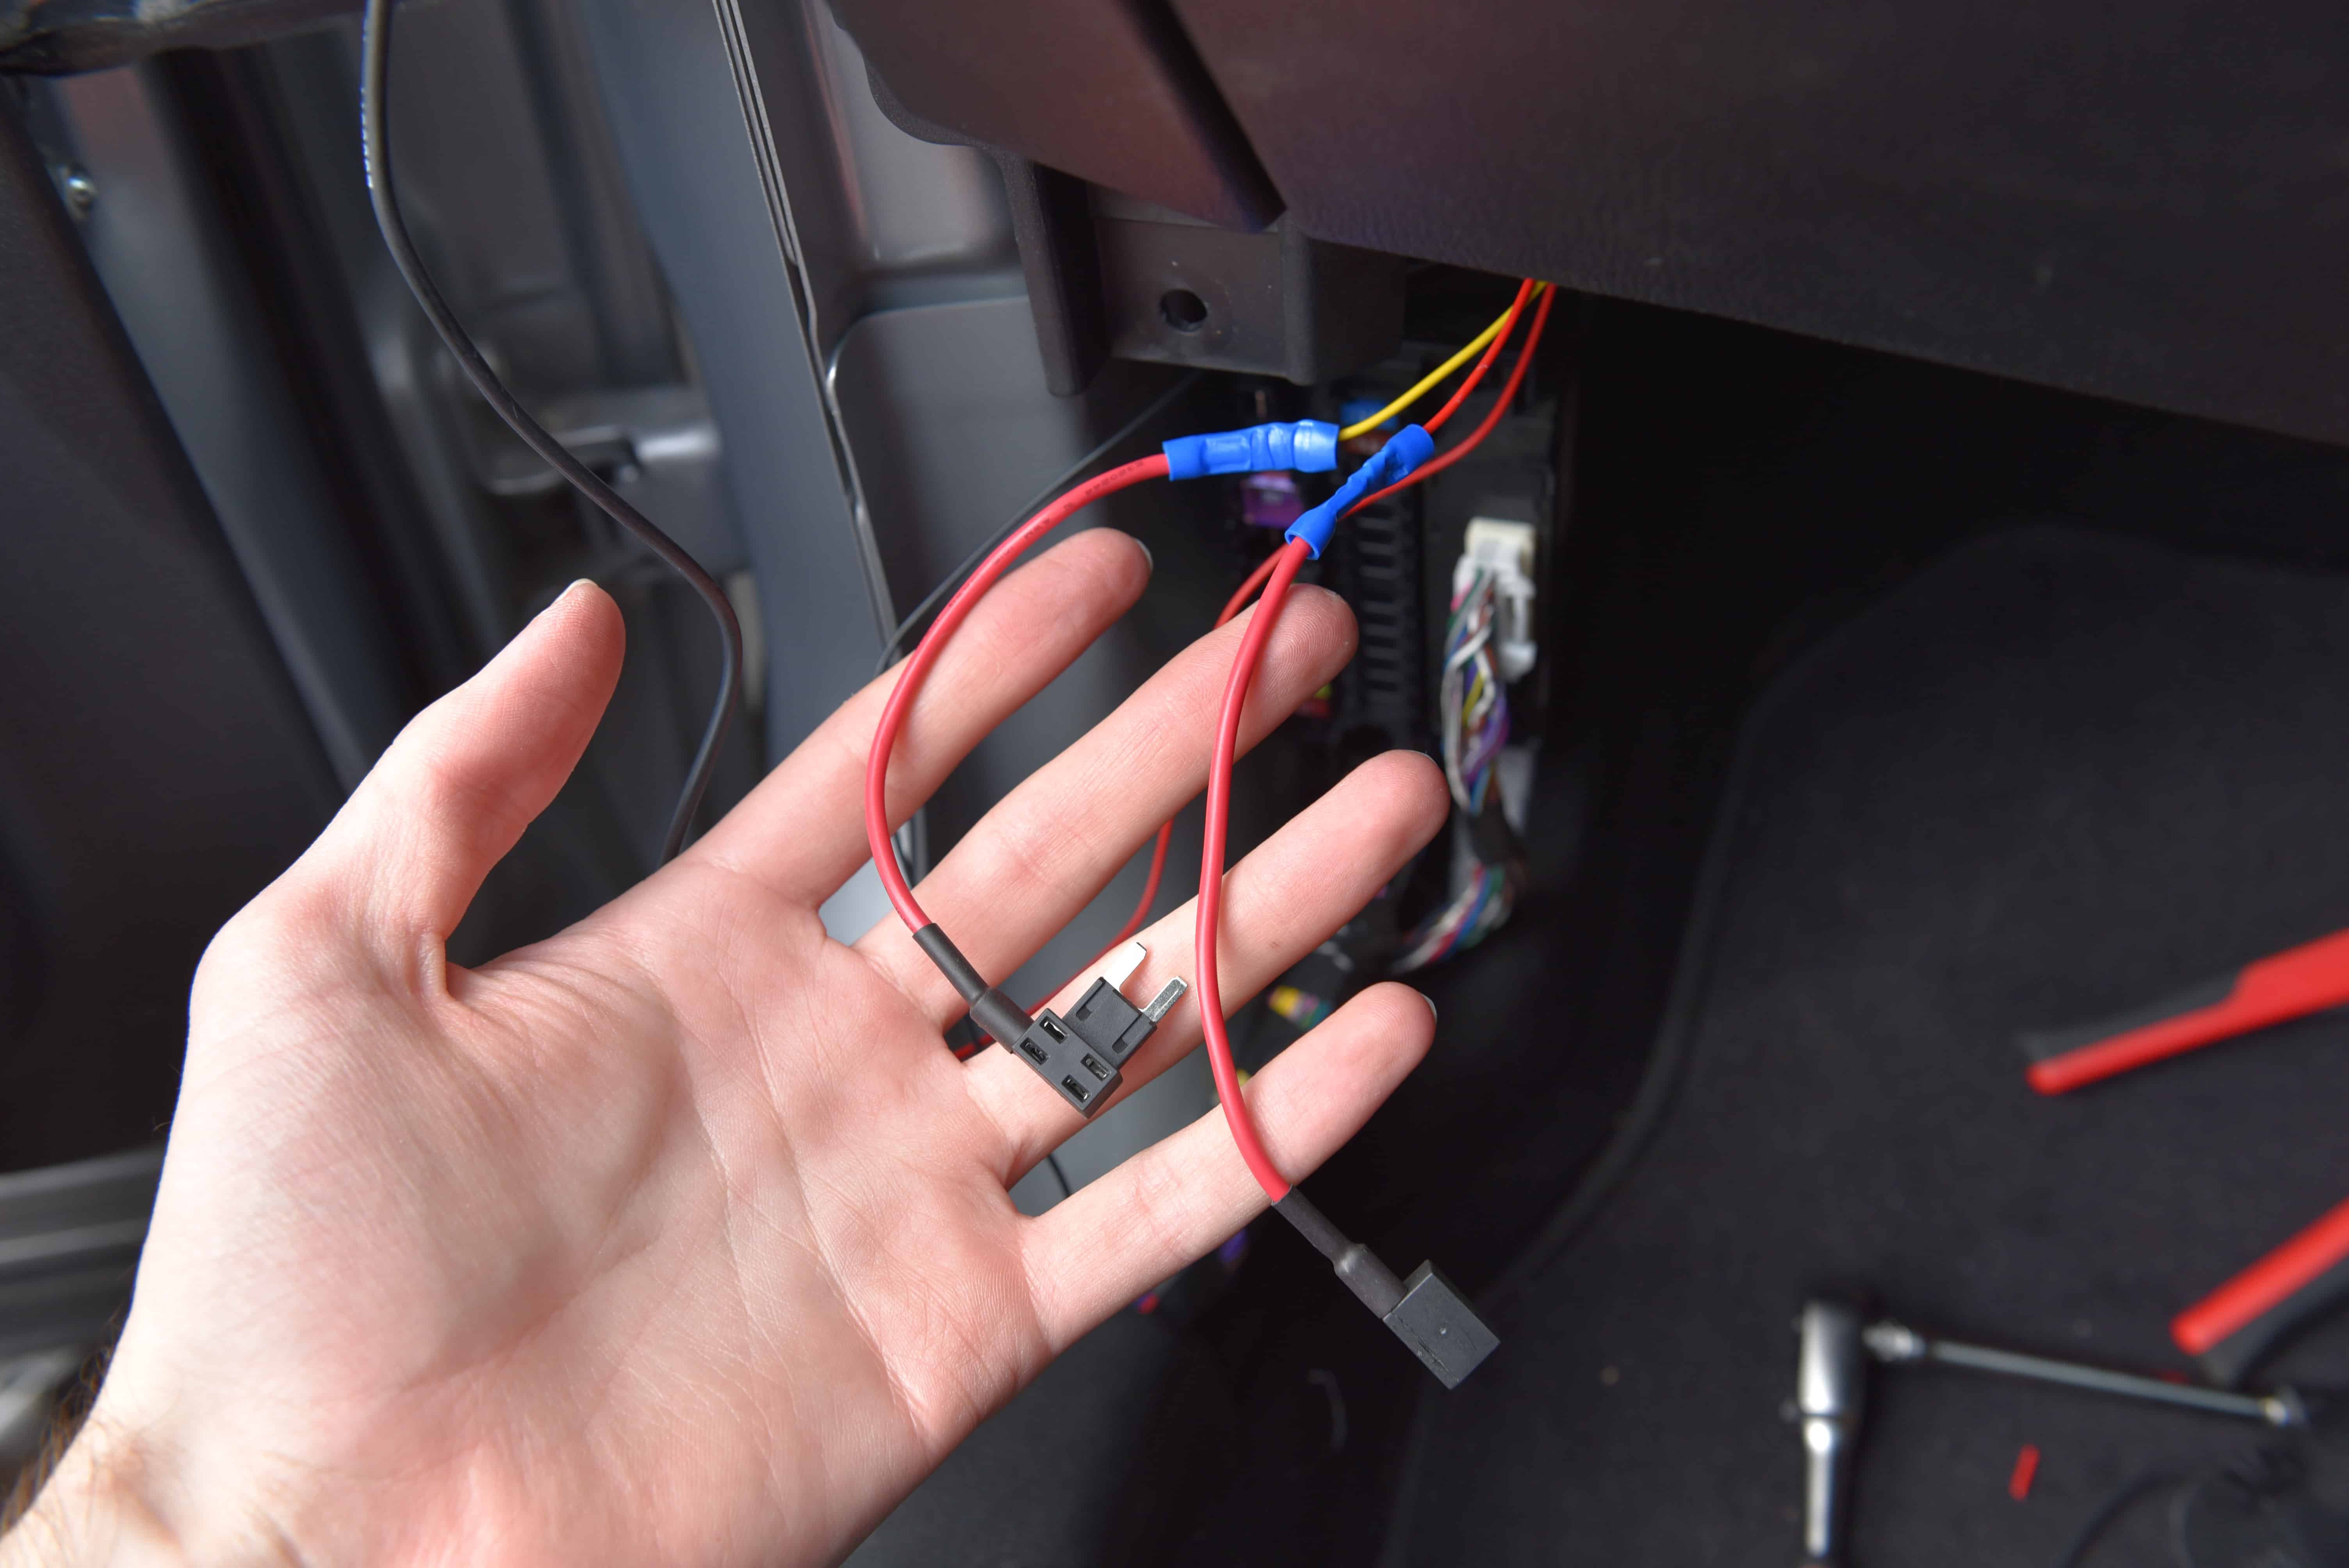
Prepare your fuse taps and crimp them to the Power Magic Pro Constant and Switched wires.
Step 14
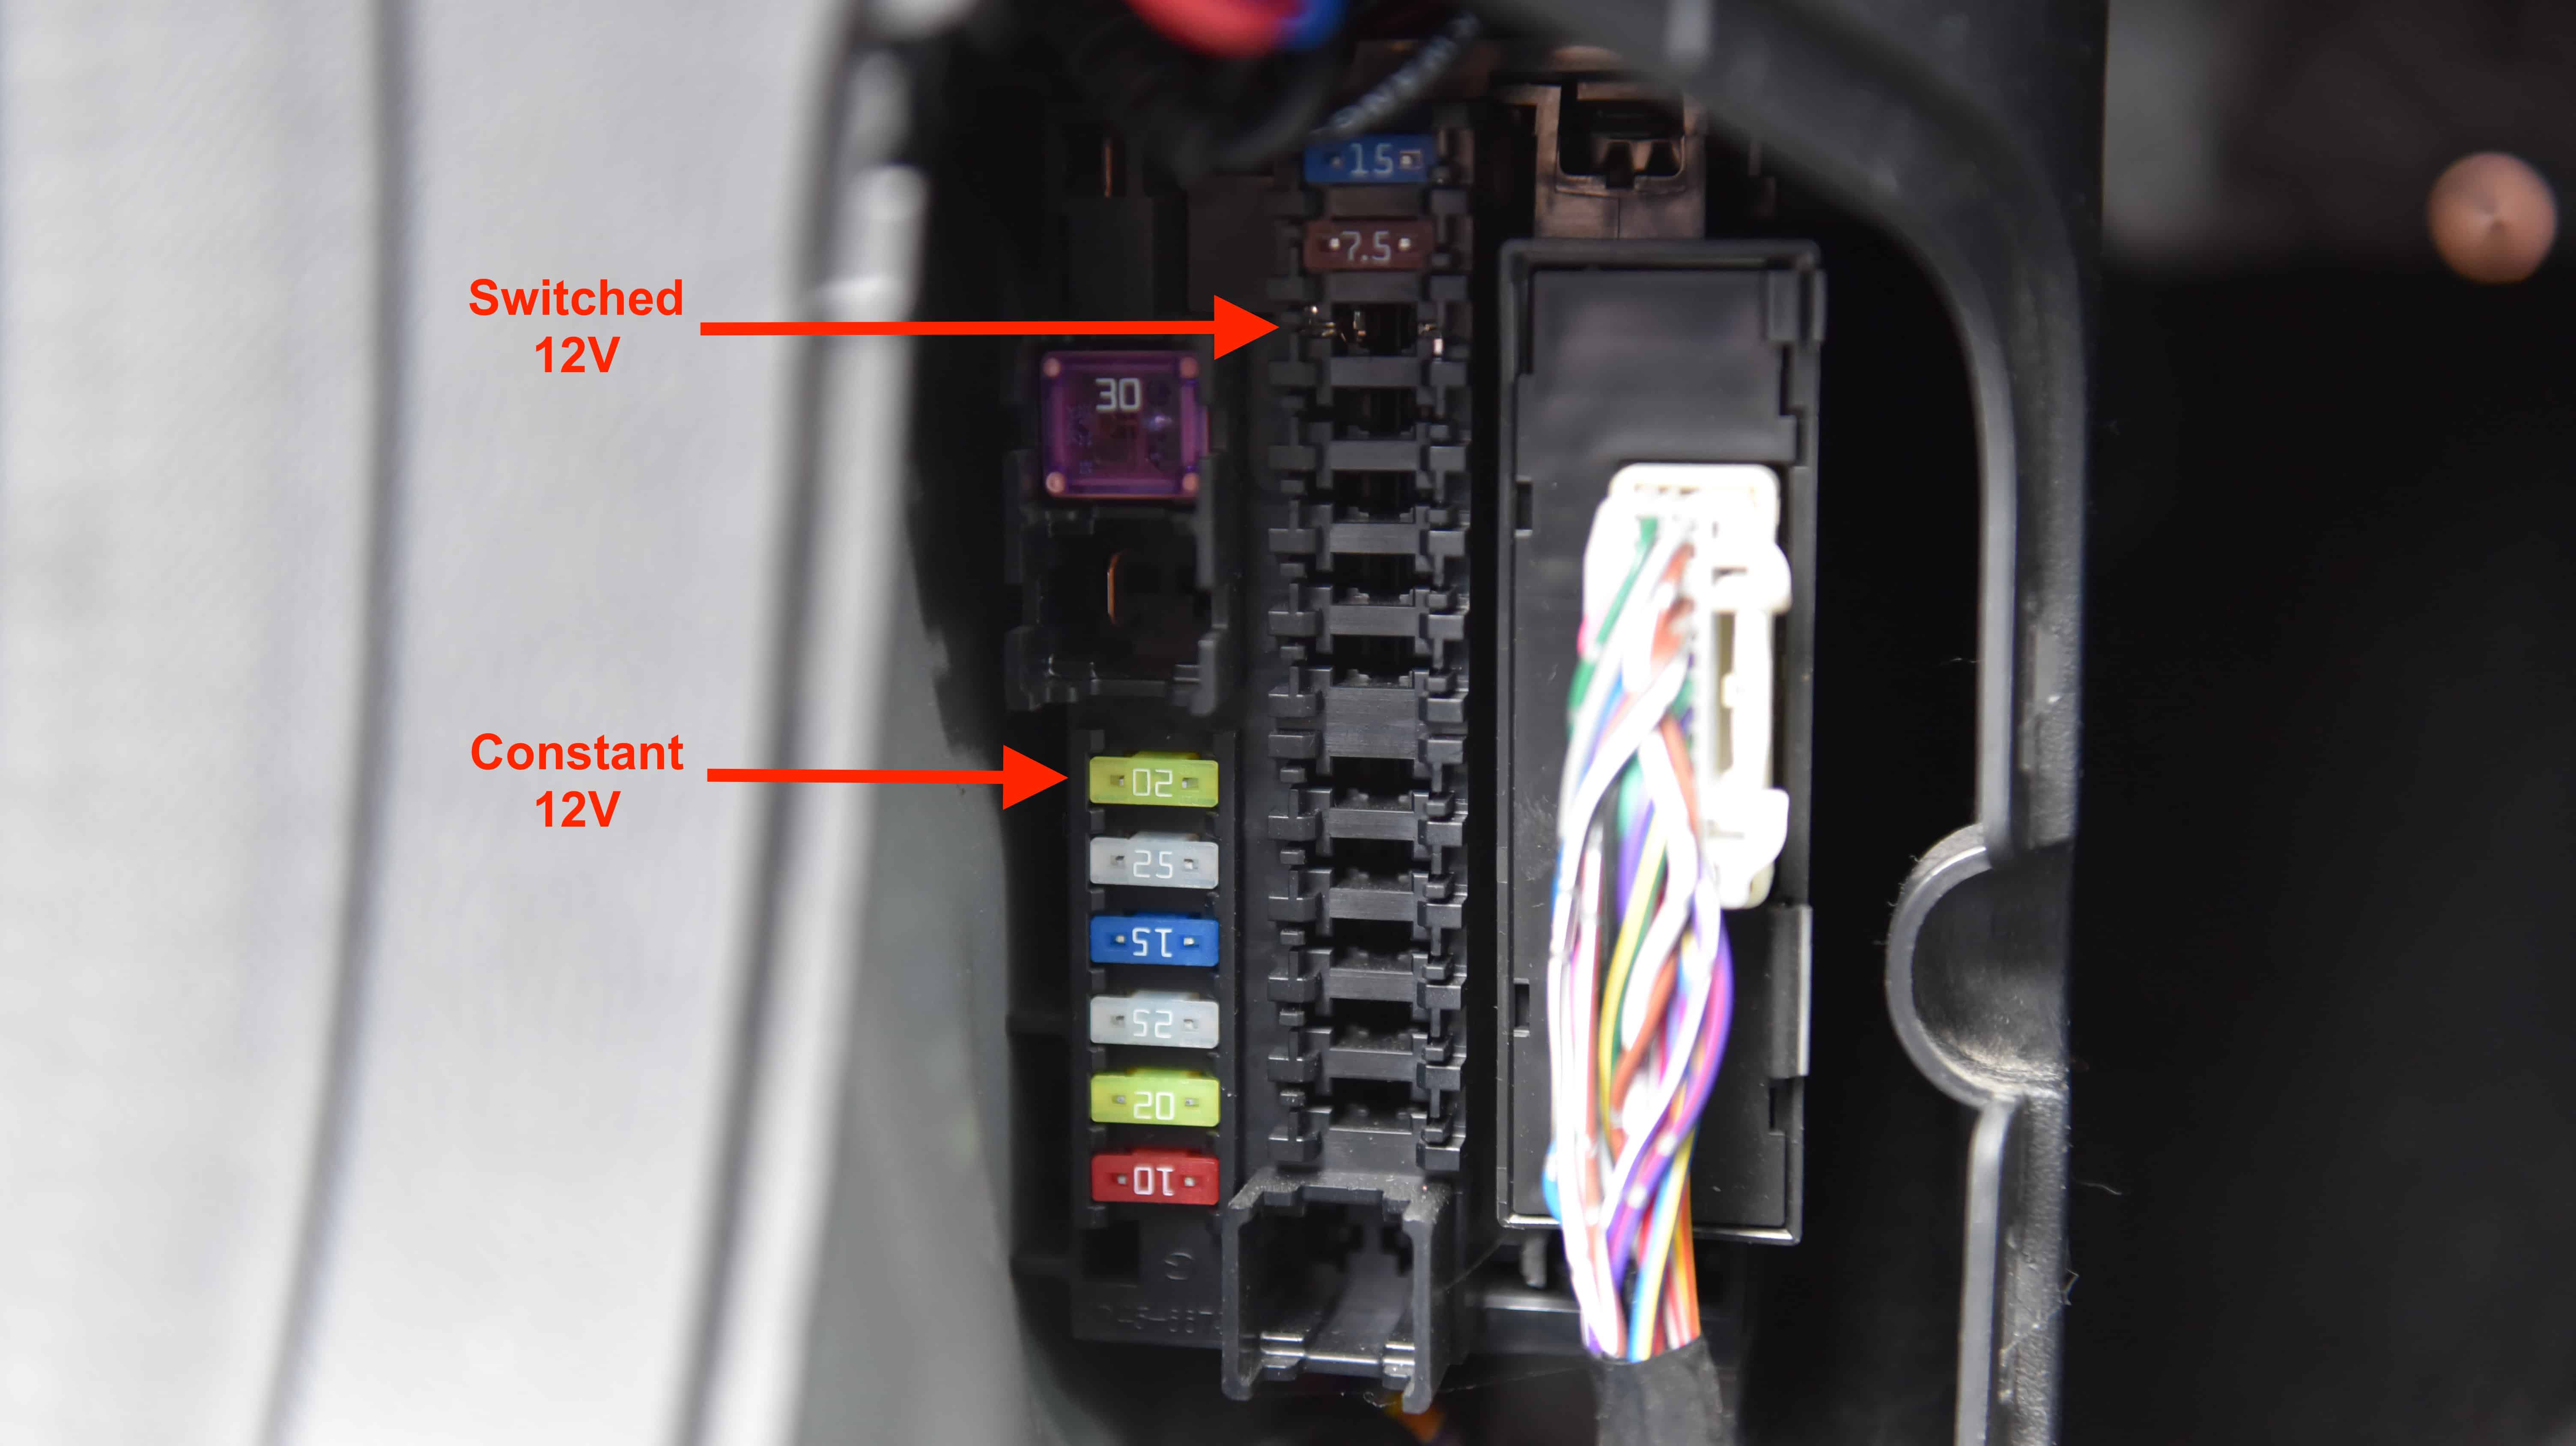
You can now connect the fuse taps to the fuse box. Where required remove the existing fuse and insert into the fuse tap. Then add a new 2.5a or 5a fuse to service the dashcam wiring.
Step 15
Turn on your vehicle (Ensure you start the engine) and test dash cam operation. You can now reinstall all trim panels and enjoy your dash cam.
Did you find this guide helpful? Consider sharing it to help other car enthusiasts