Looking to refresh the look of your Series 1 interior and upgrade the technology at the same time? Look no further than a Series 2 headunit conversion! The Series 2 parts are a direct fit onto Series 1 vehicles.
Difficulty Rating
Savage
Tools/Parts Required
Trim Removal Tools
Screwdrivers
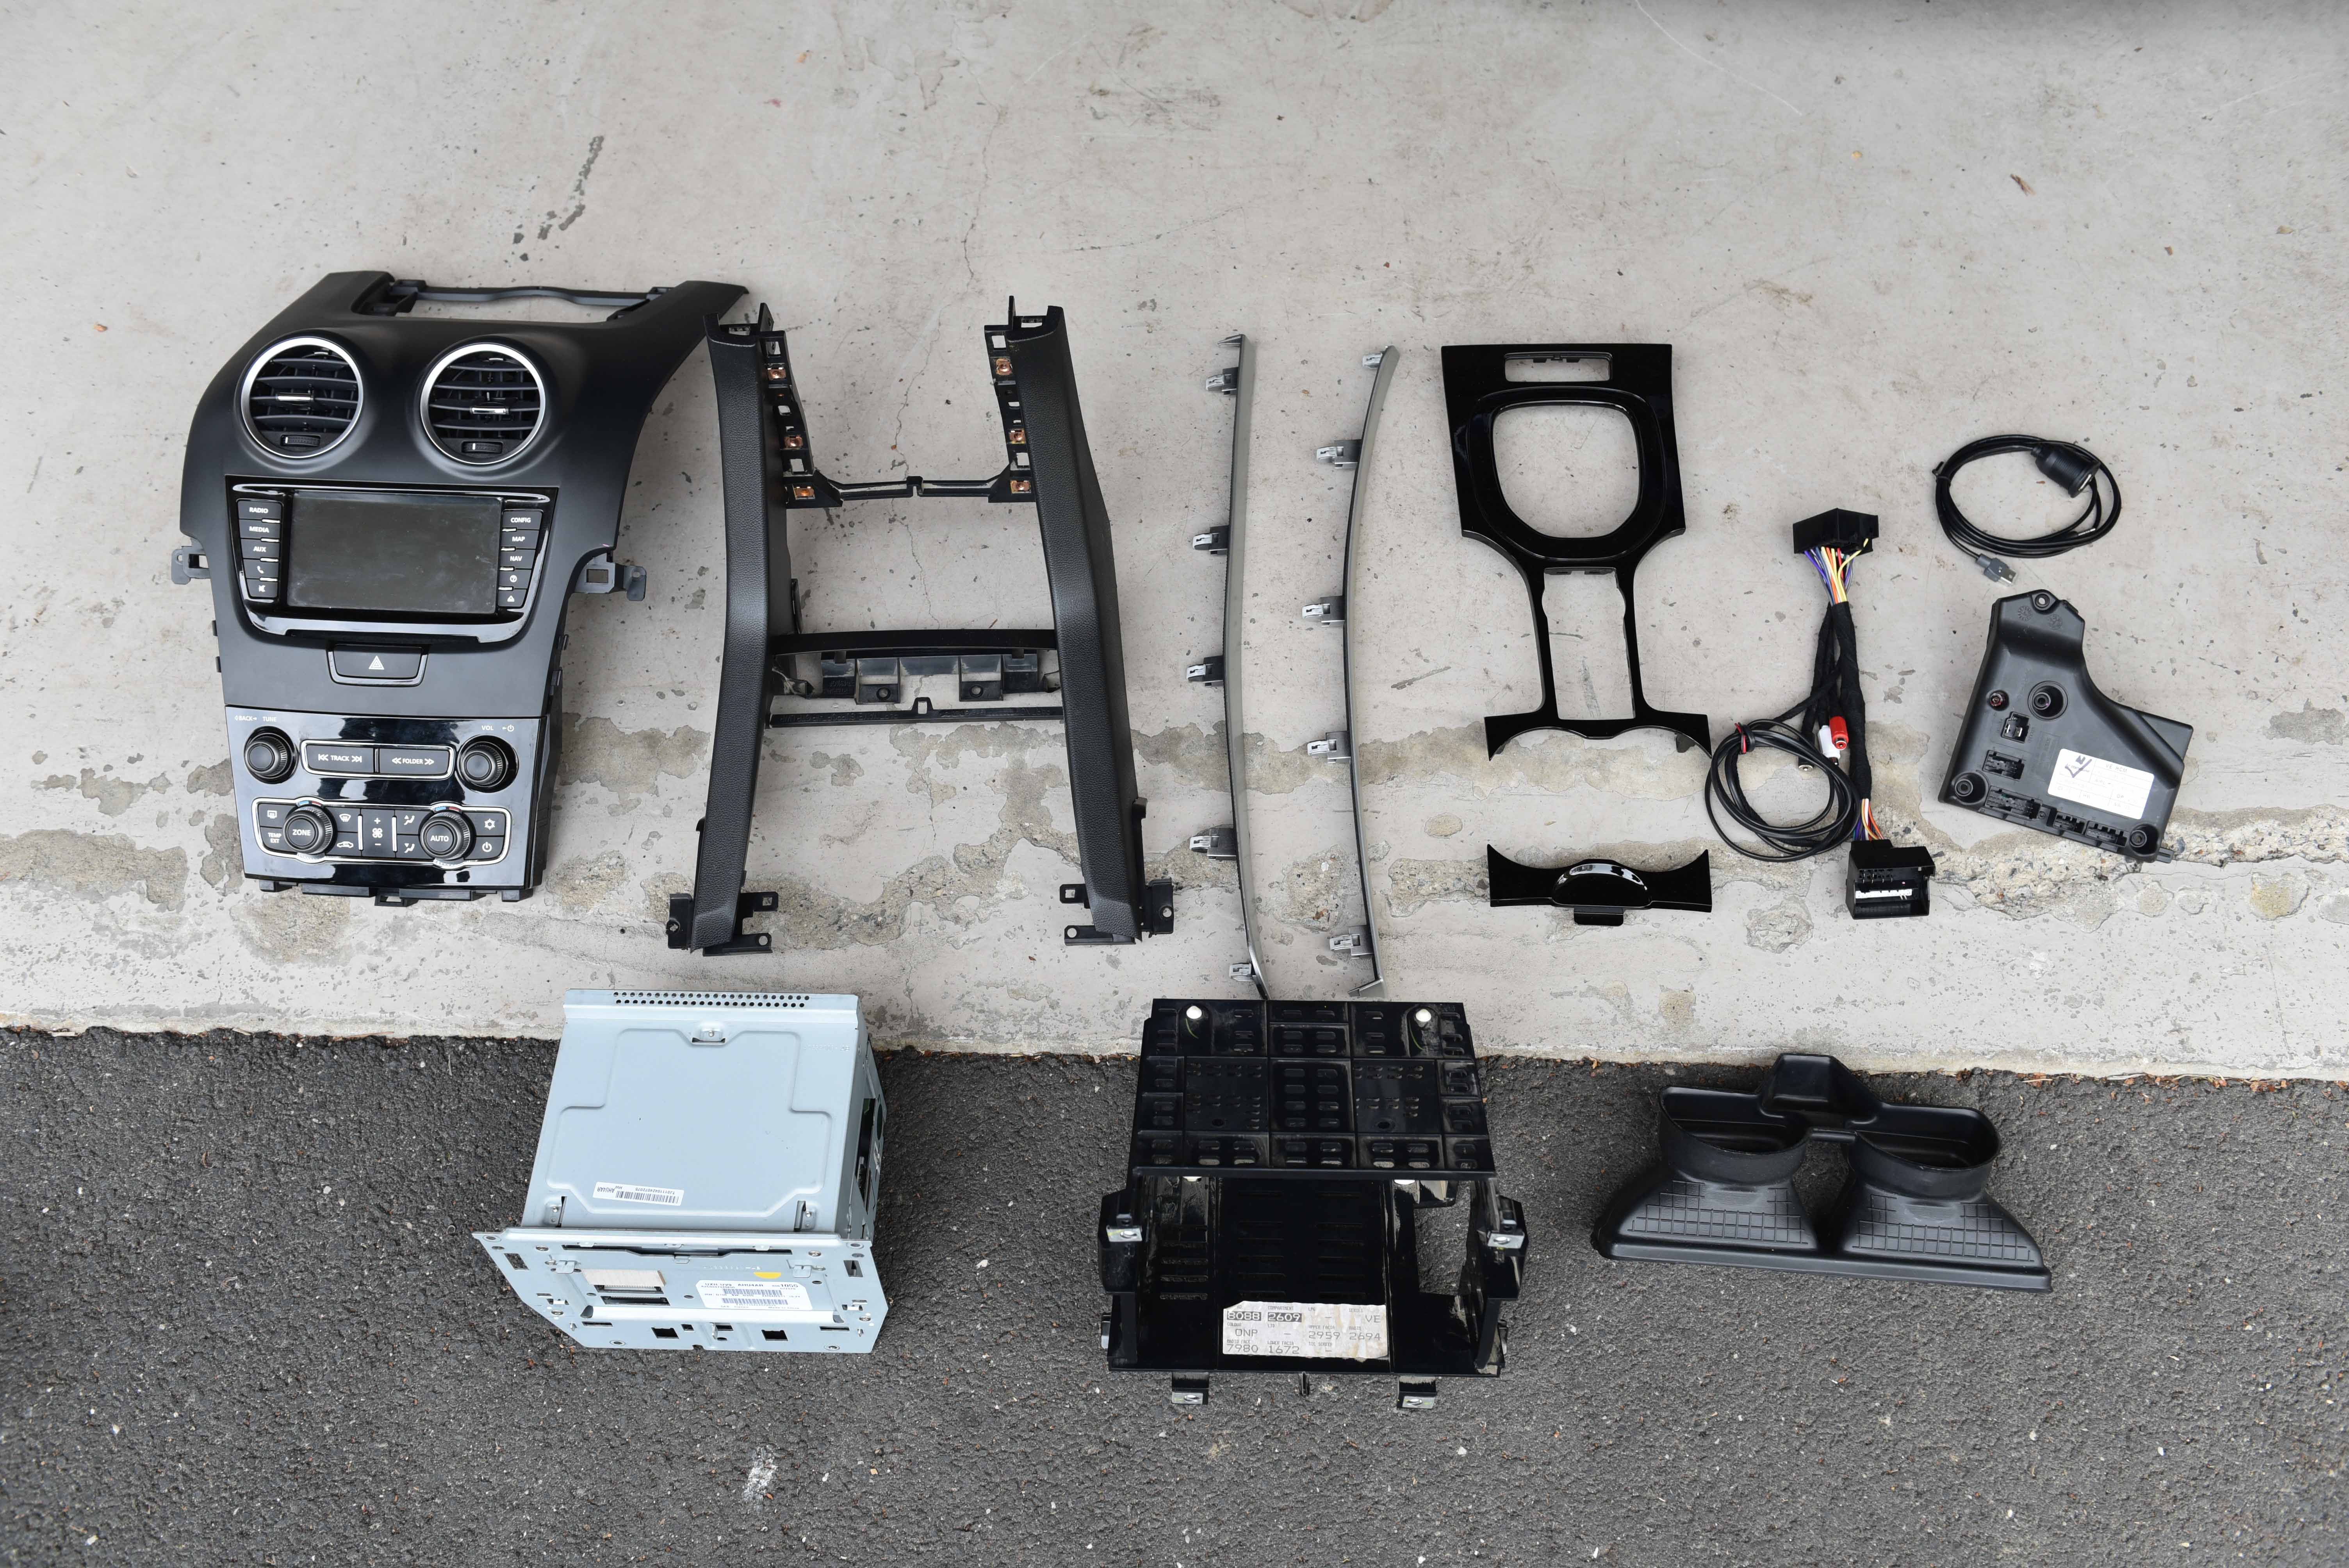
Complete Series 2 Conversion Kit Including:
VIN-Programmed Holden IQ Headunit
Holden IQ Headunit Fascia
Headunit Cage
Passenger and Drivers Dash Spears
Air Conditioner Duct
Centre Console Trim
New Harness & HVAC Controller
Surrounding Headunit Trim
Step 1
Using a trim removal tool, pop off the side trim piece. There are three clips, one on each corner.
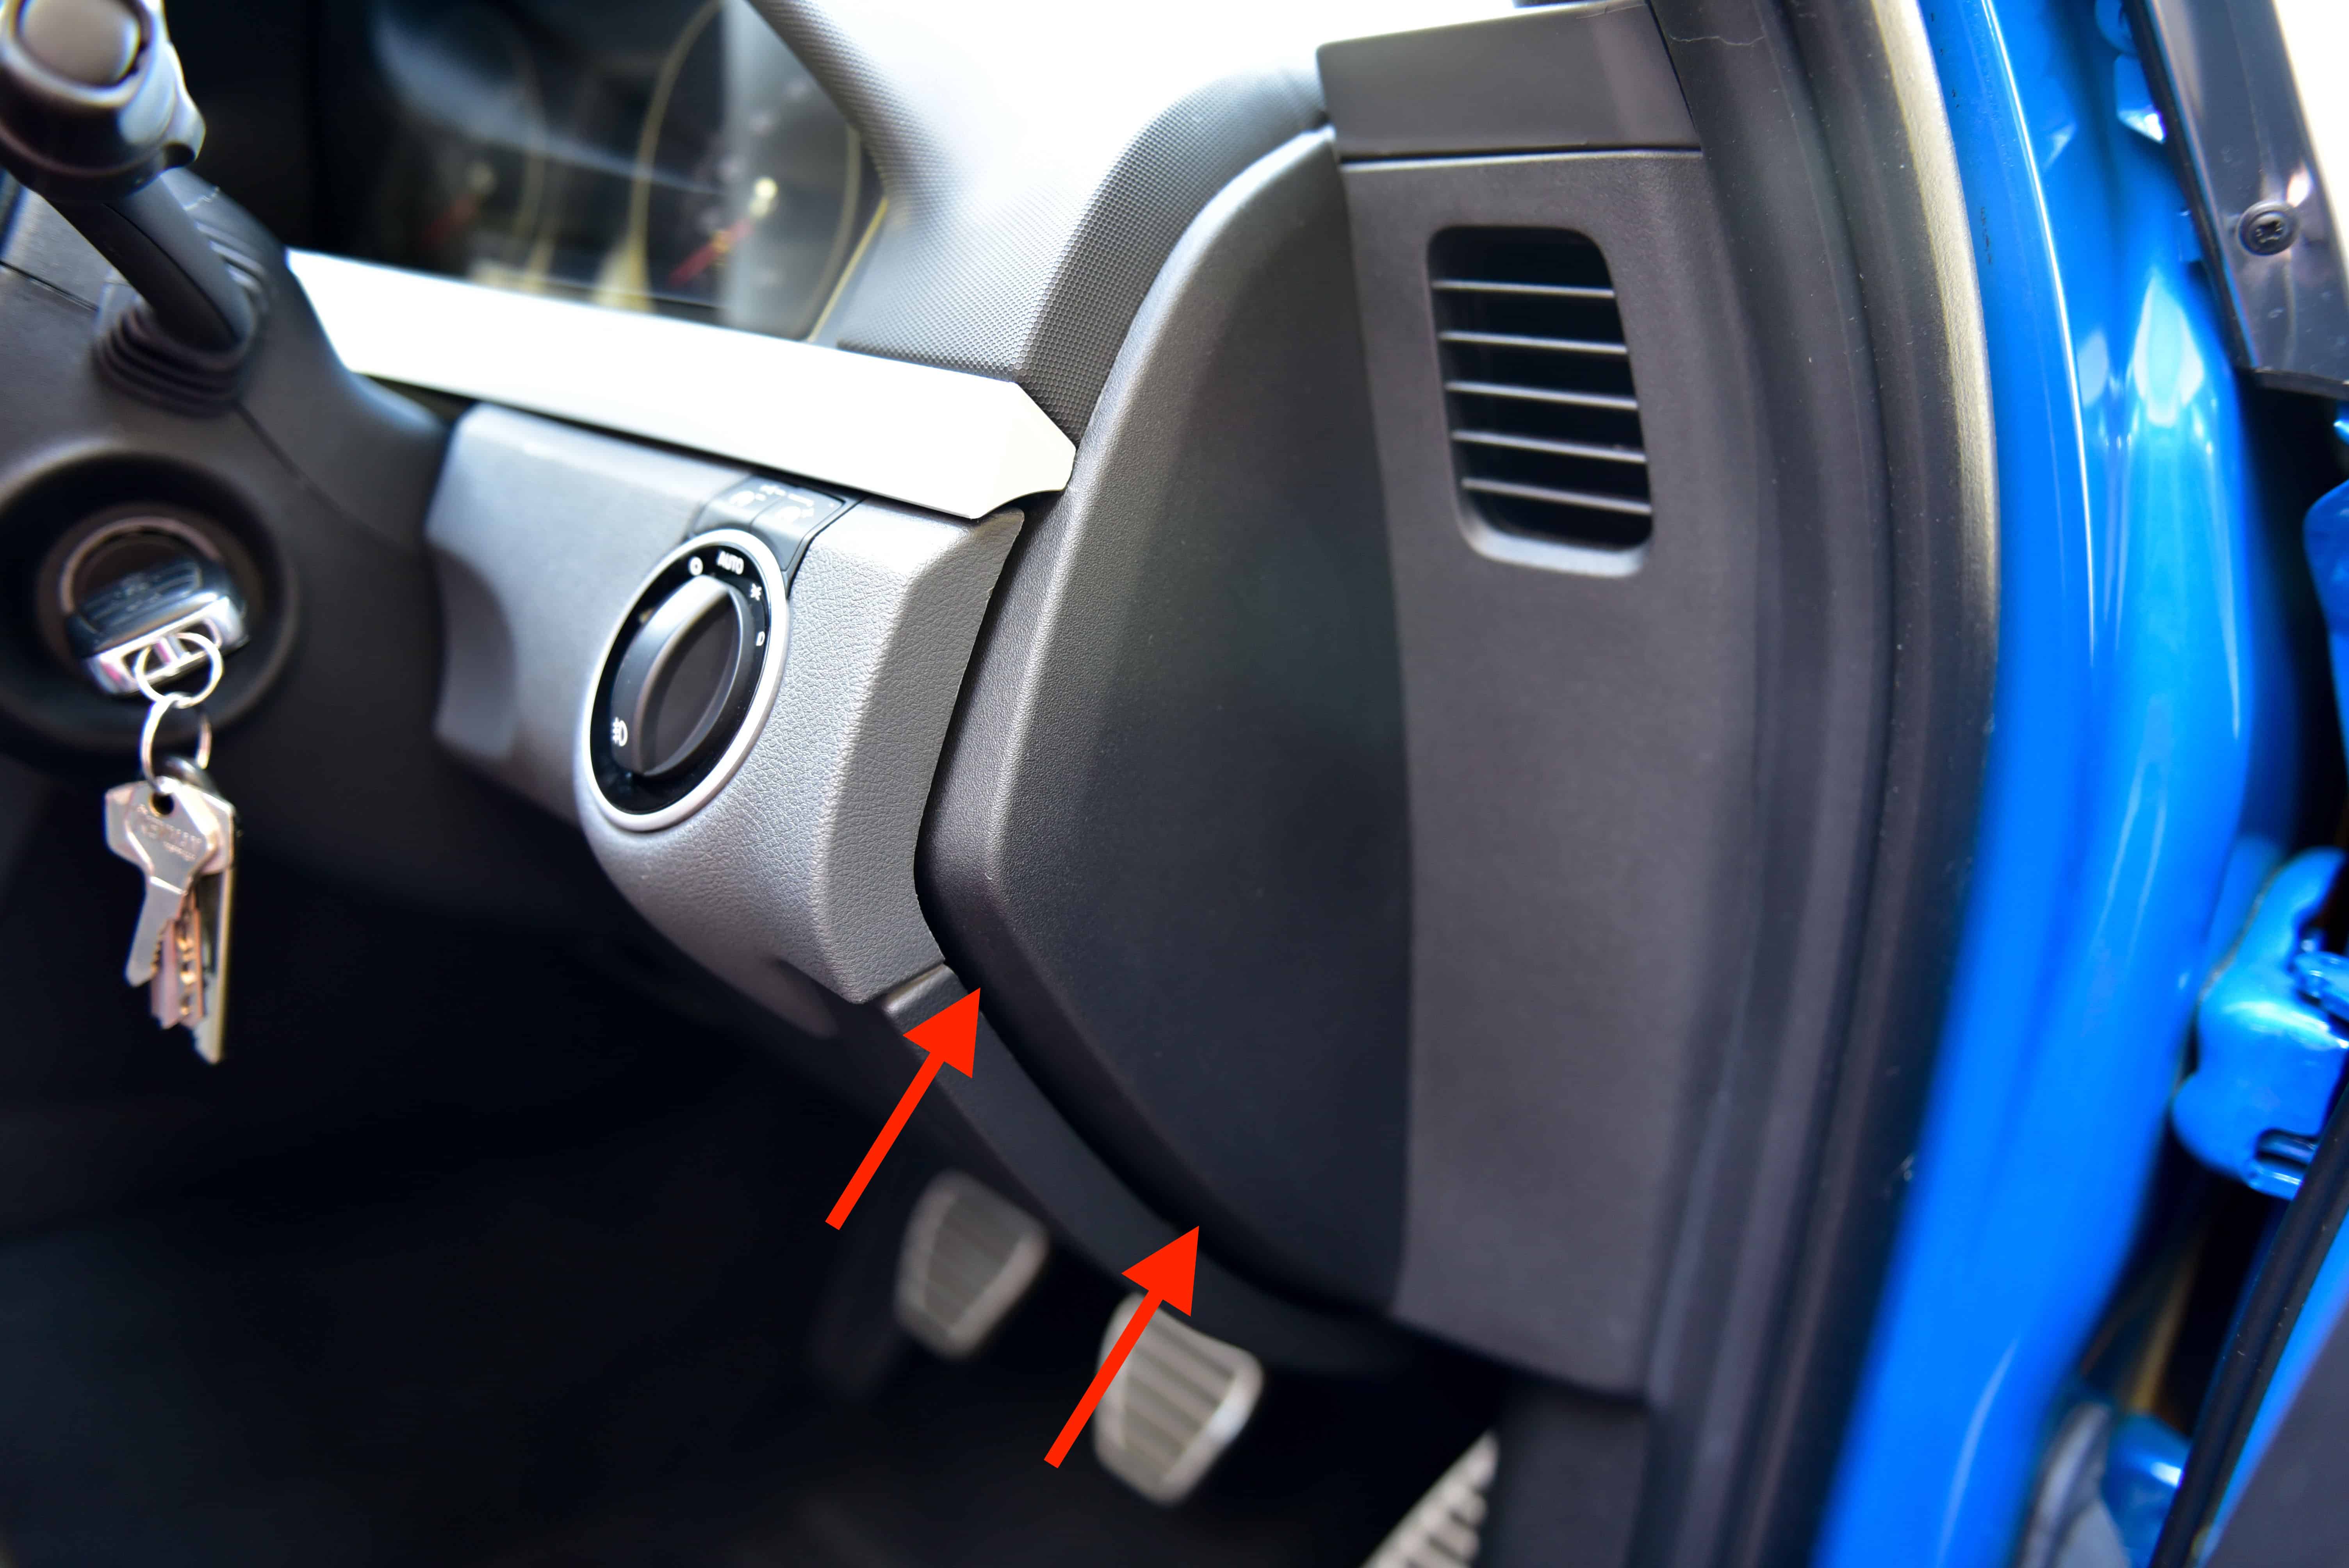
Step 2
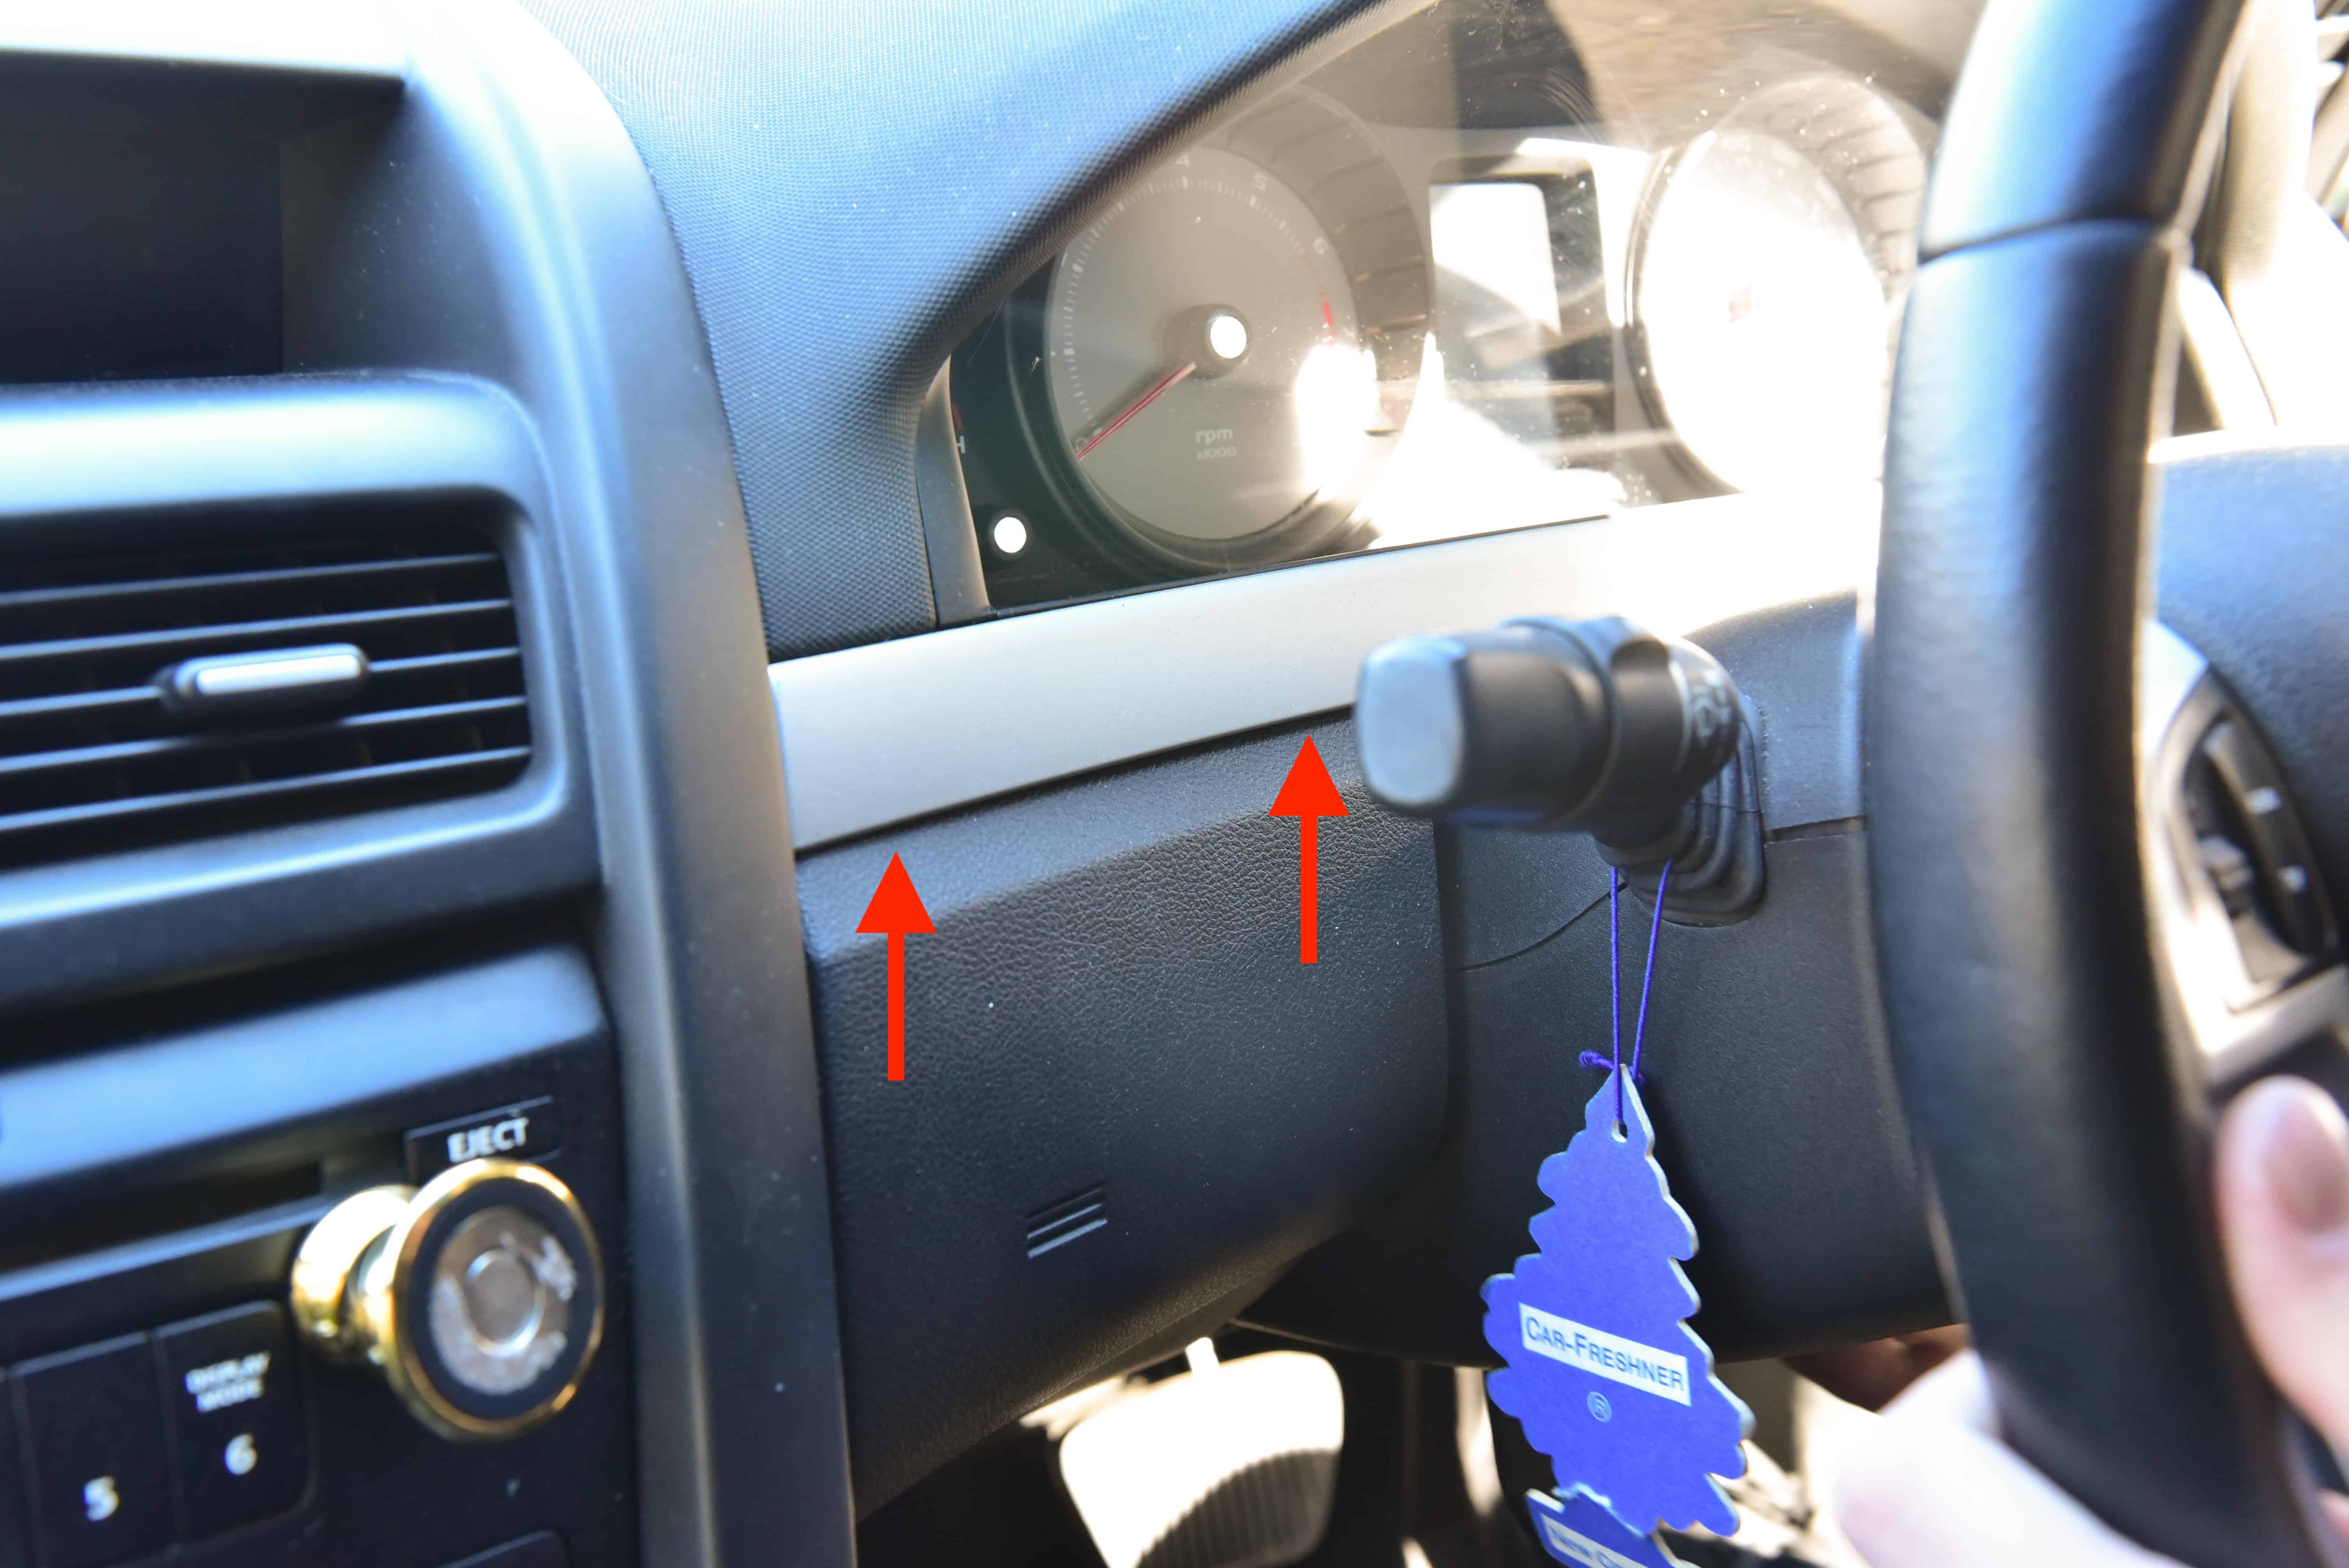
Wedge your fingers behind the lower section of the trim and firmly pull upwards as shown by the red arrows.
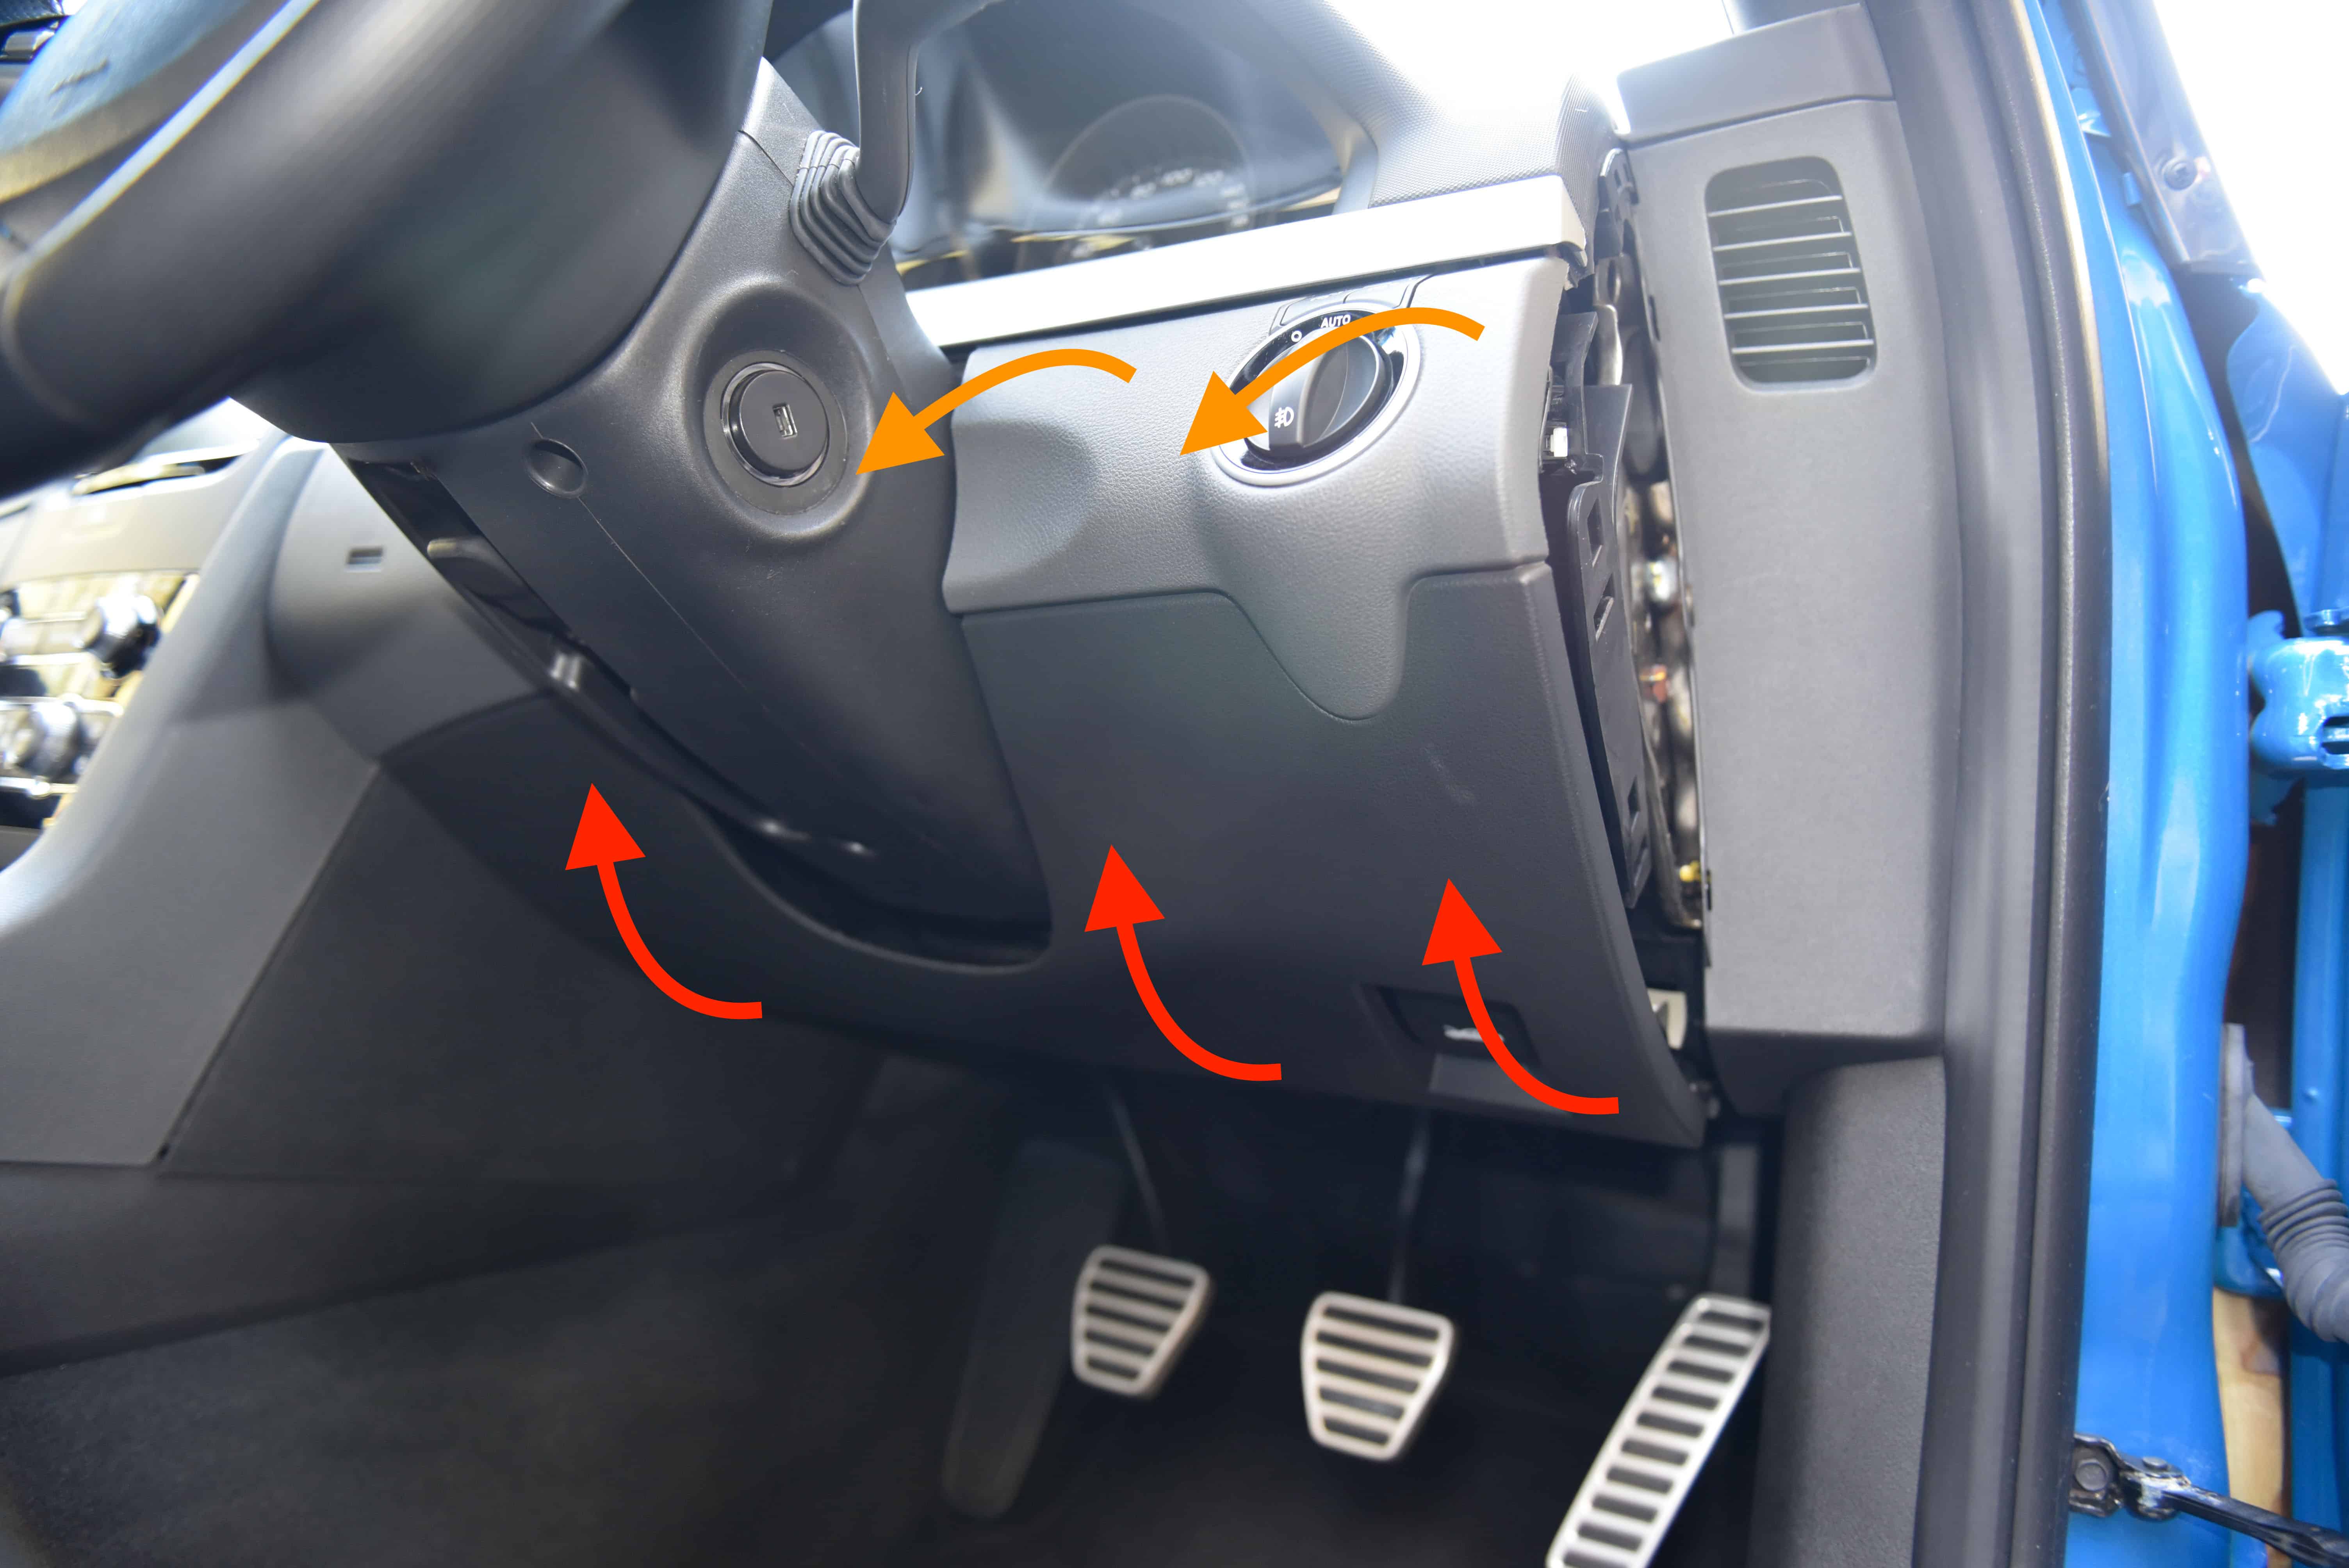
With the bottom clips released use a gentle hinging and pulling motion to release the top clips on both sides of the steering wheel. Pull away as shown by the orange arrows.
Be careful releasing the clips as the trim will drop downwards. It is quite heavy.
Step 3
As the trim is released you will need to unplug the headlight switch. Push on the clip and unplug.
Step 4
Remove the drivers side trim. Pull outwards then firmly down on both trim pieces.
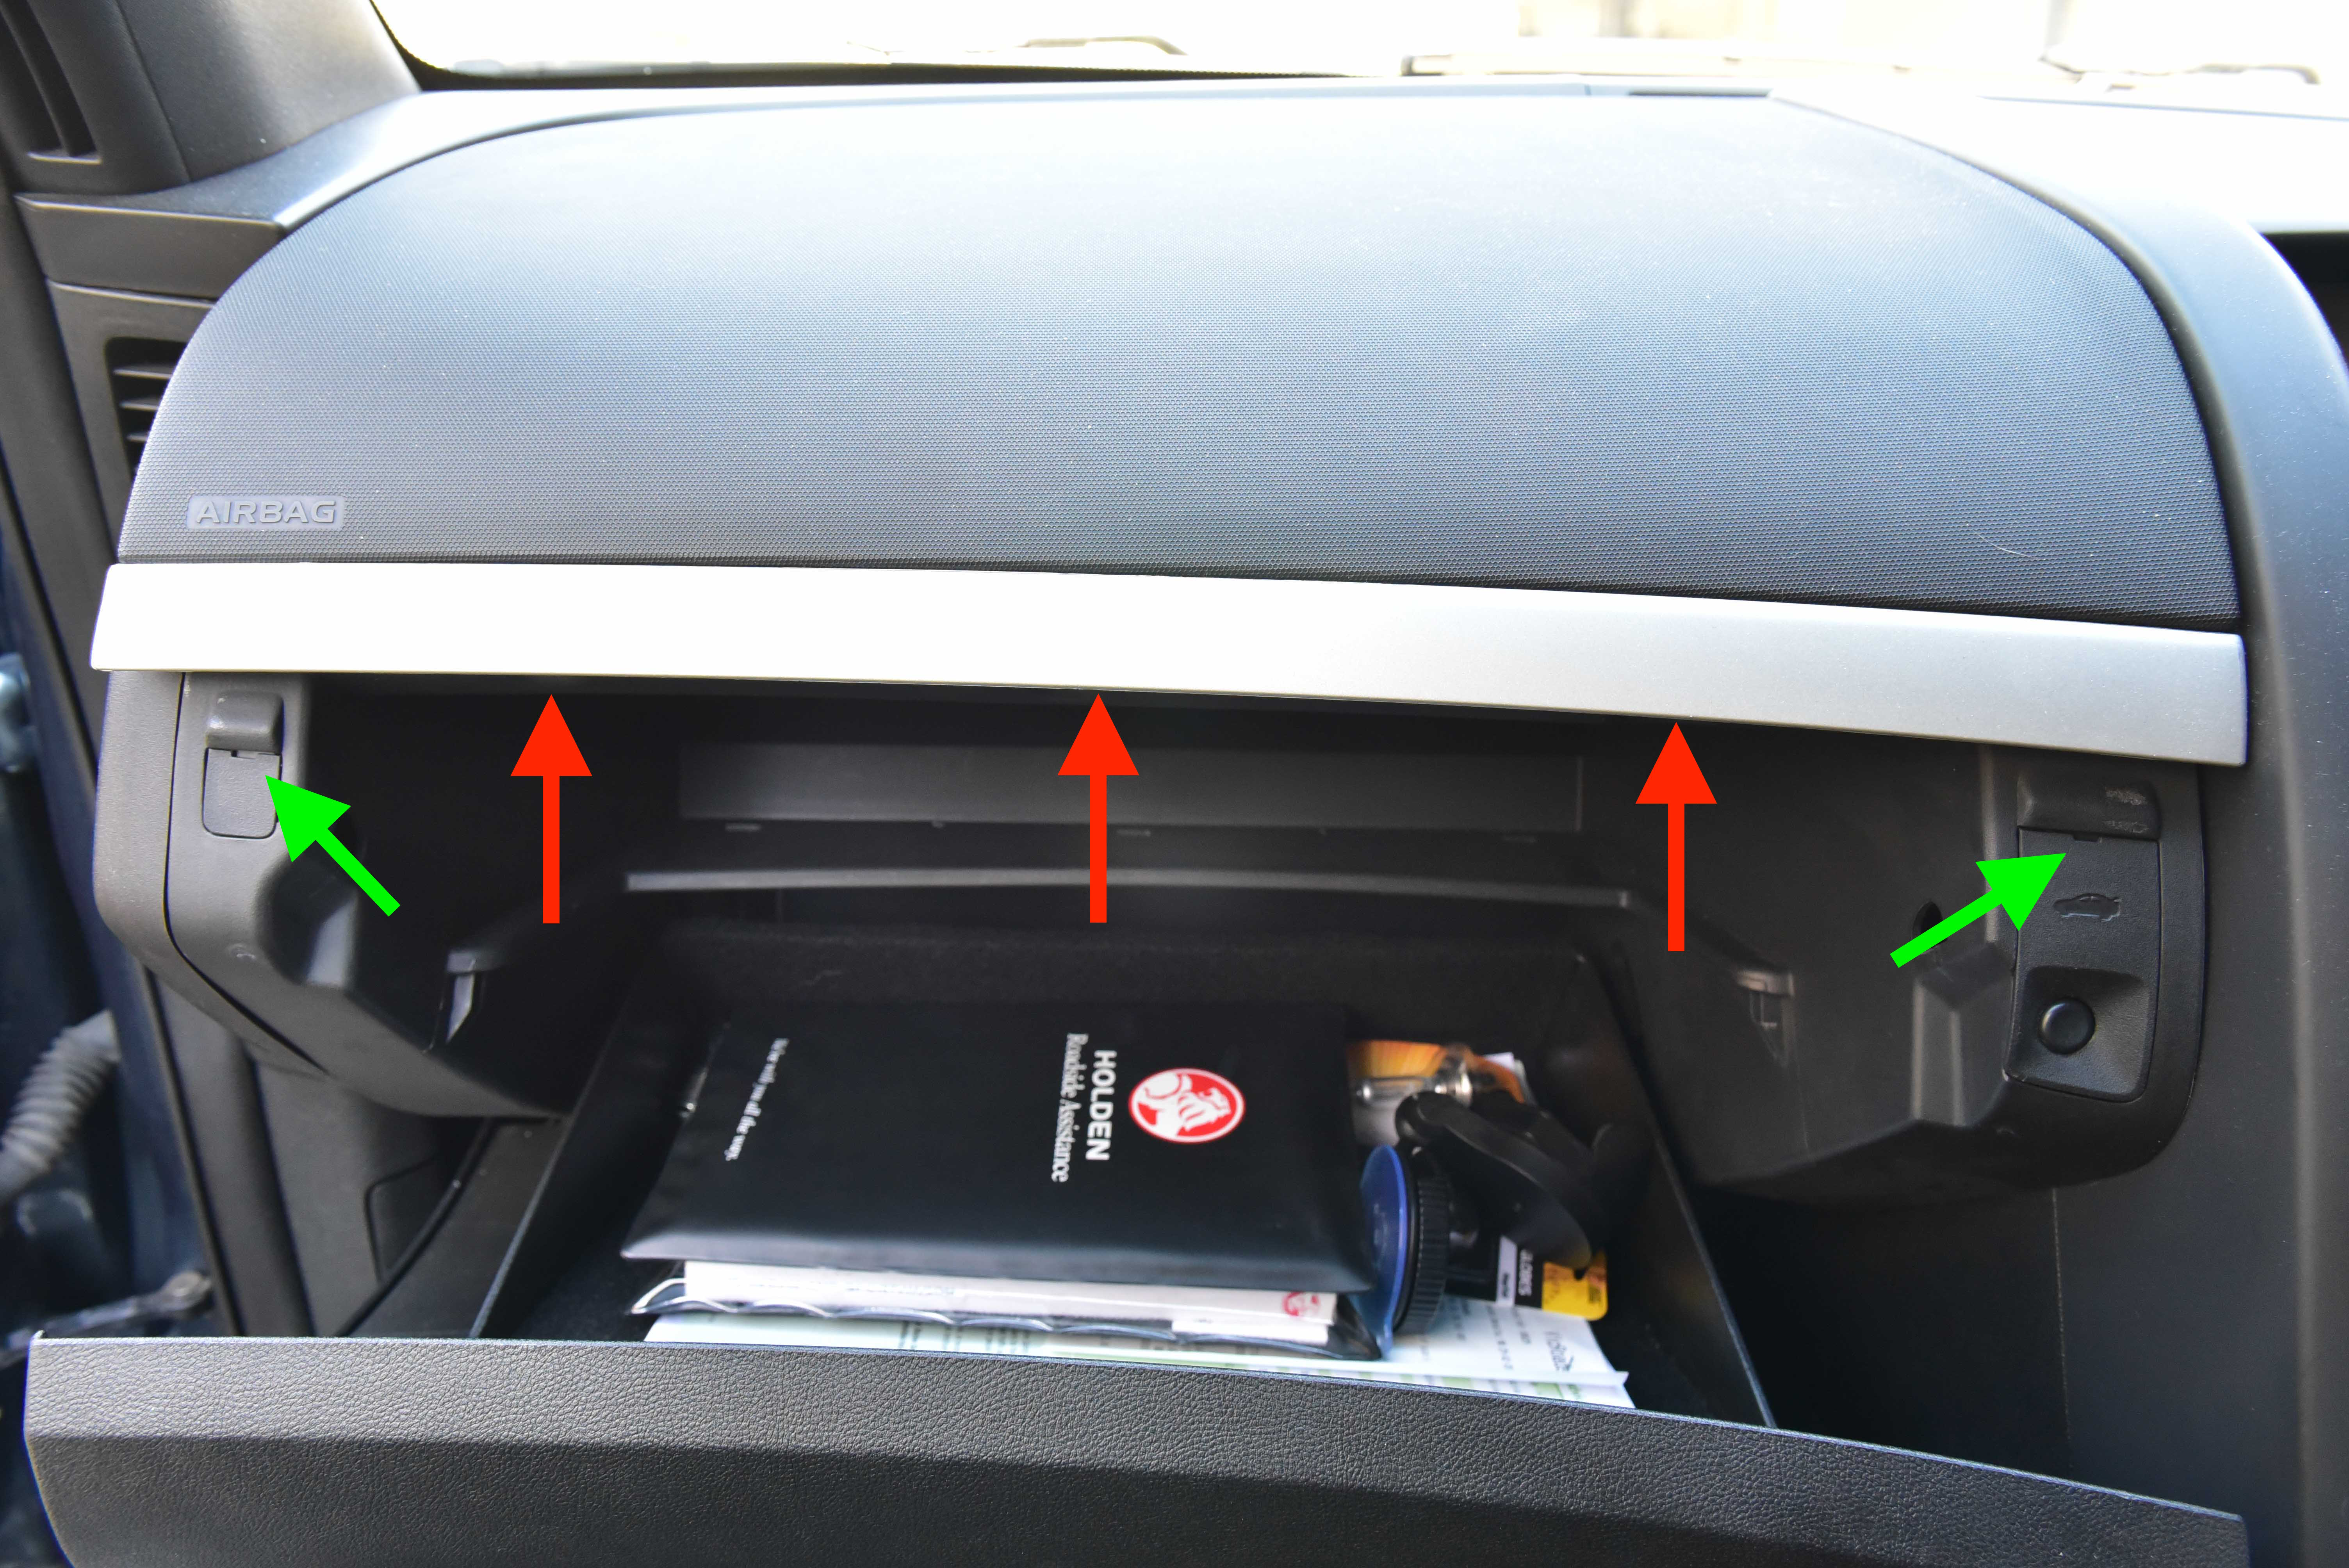
Step 5
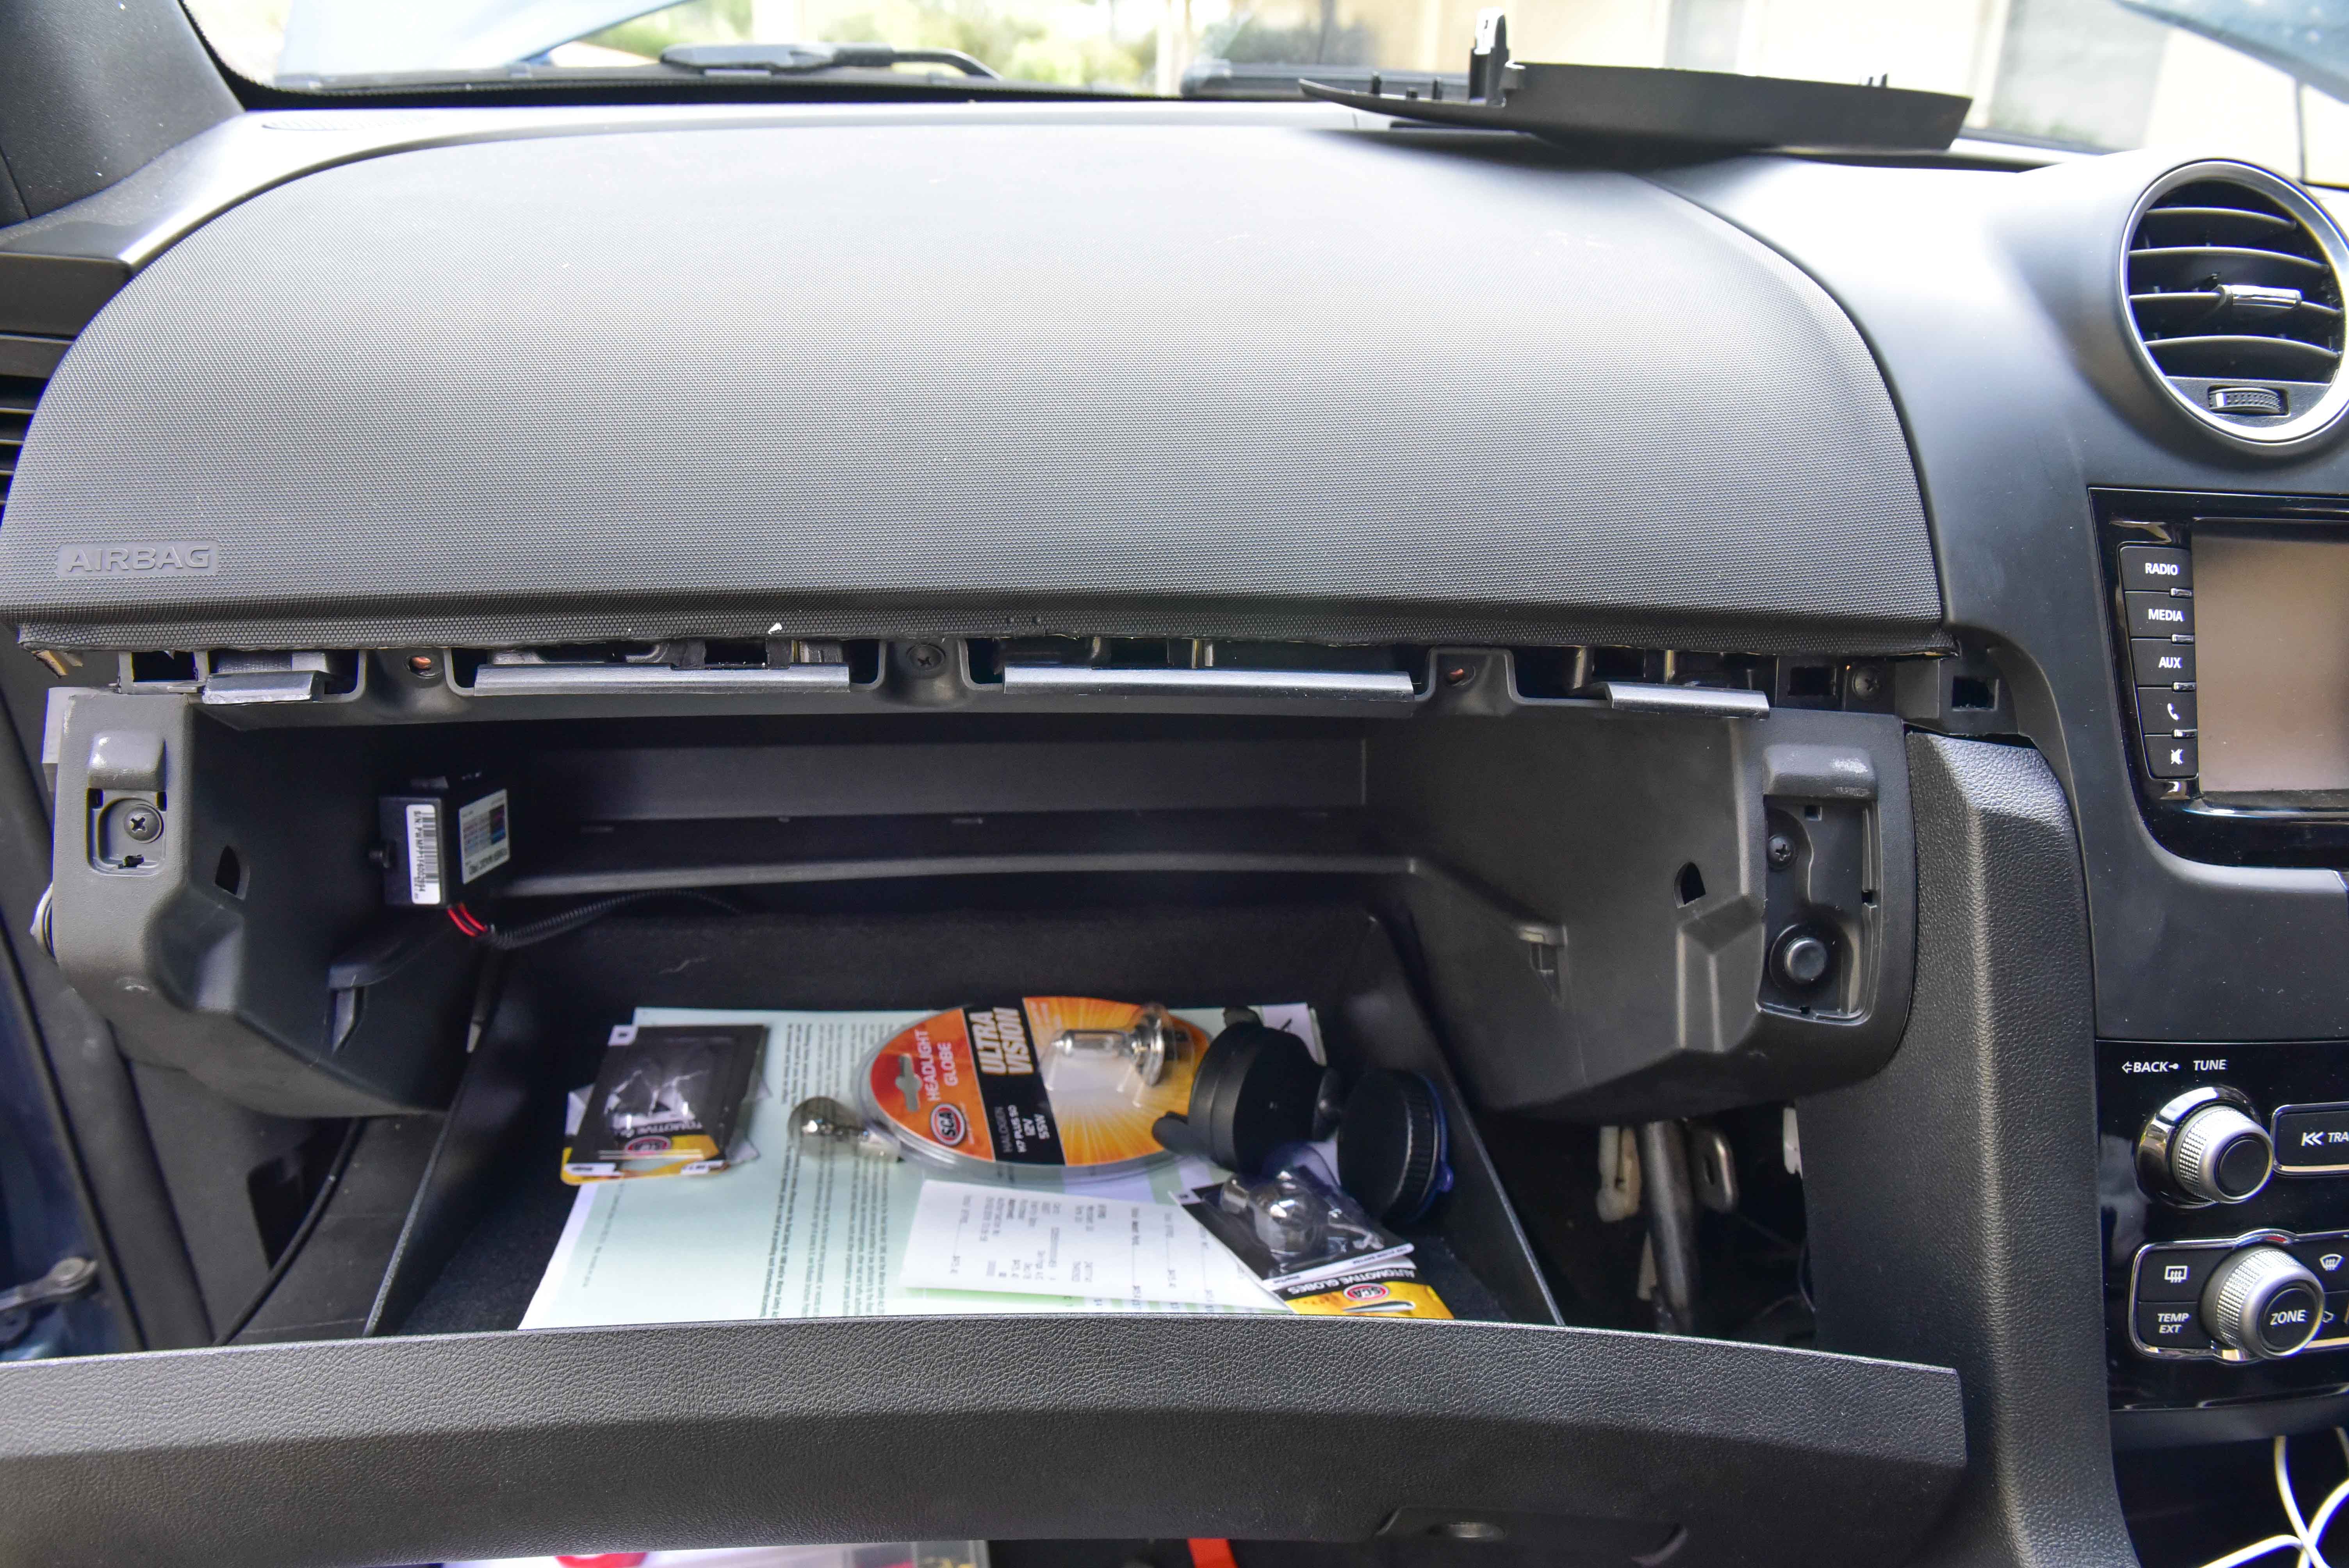
Moving over to the passenger side of the vehicle, we’re going to remove the glovebox.
Unclip the kick panel by pulling firmly downwards. This is held in place by five clips.
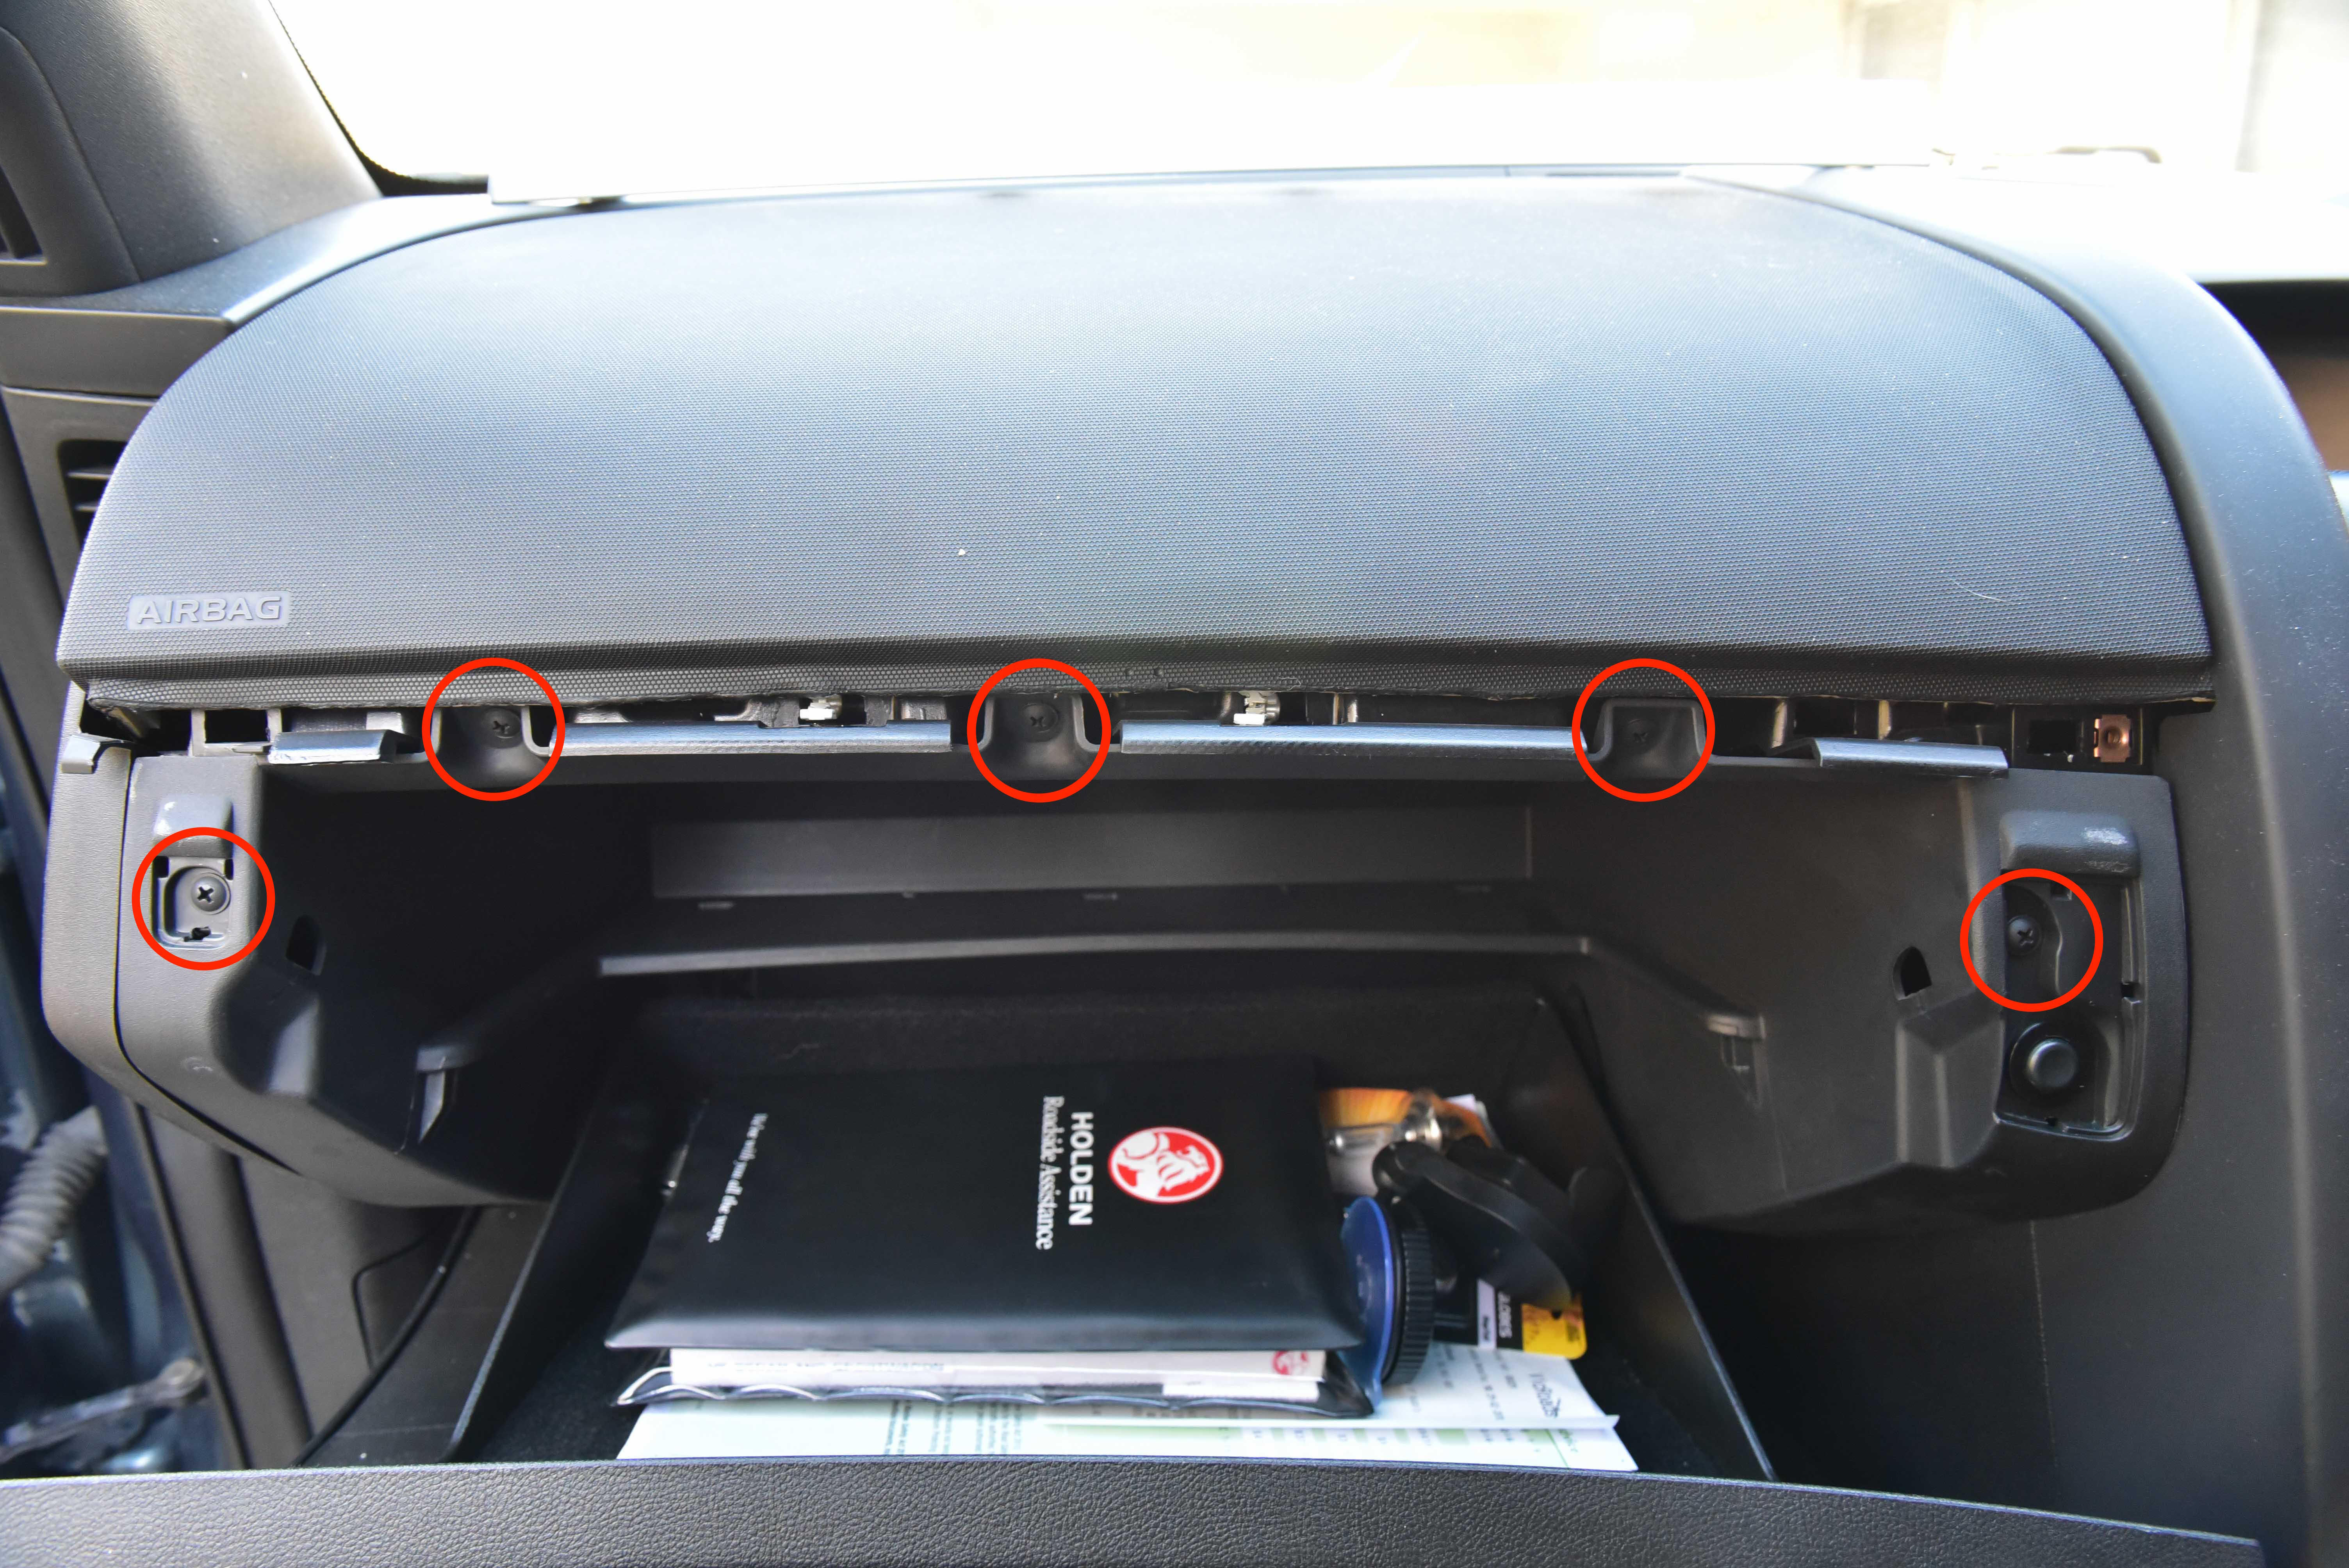
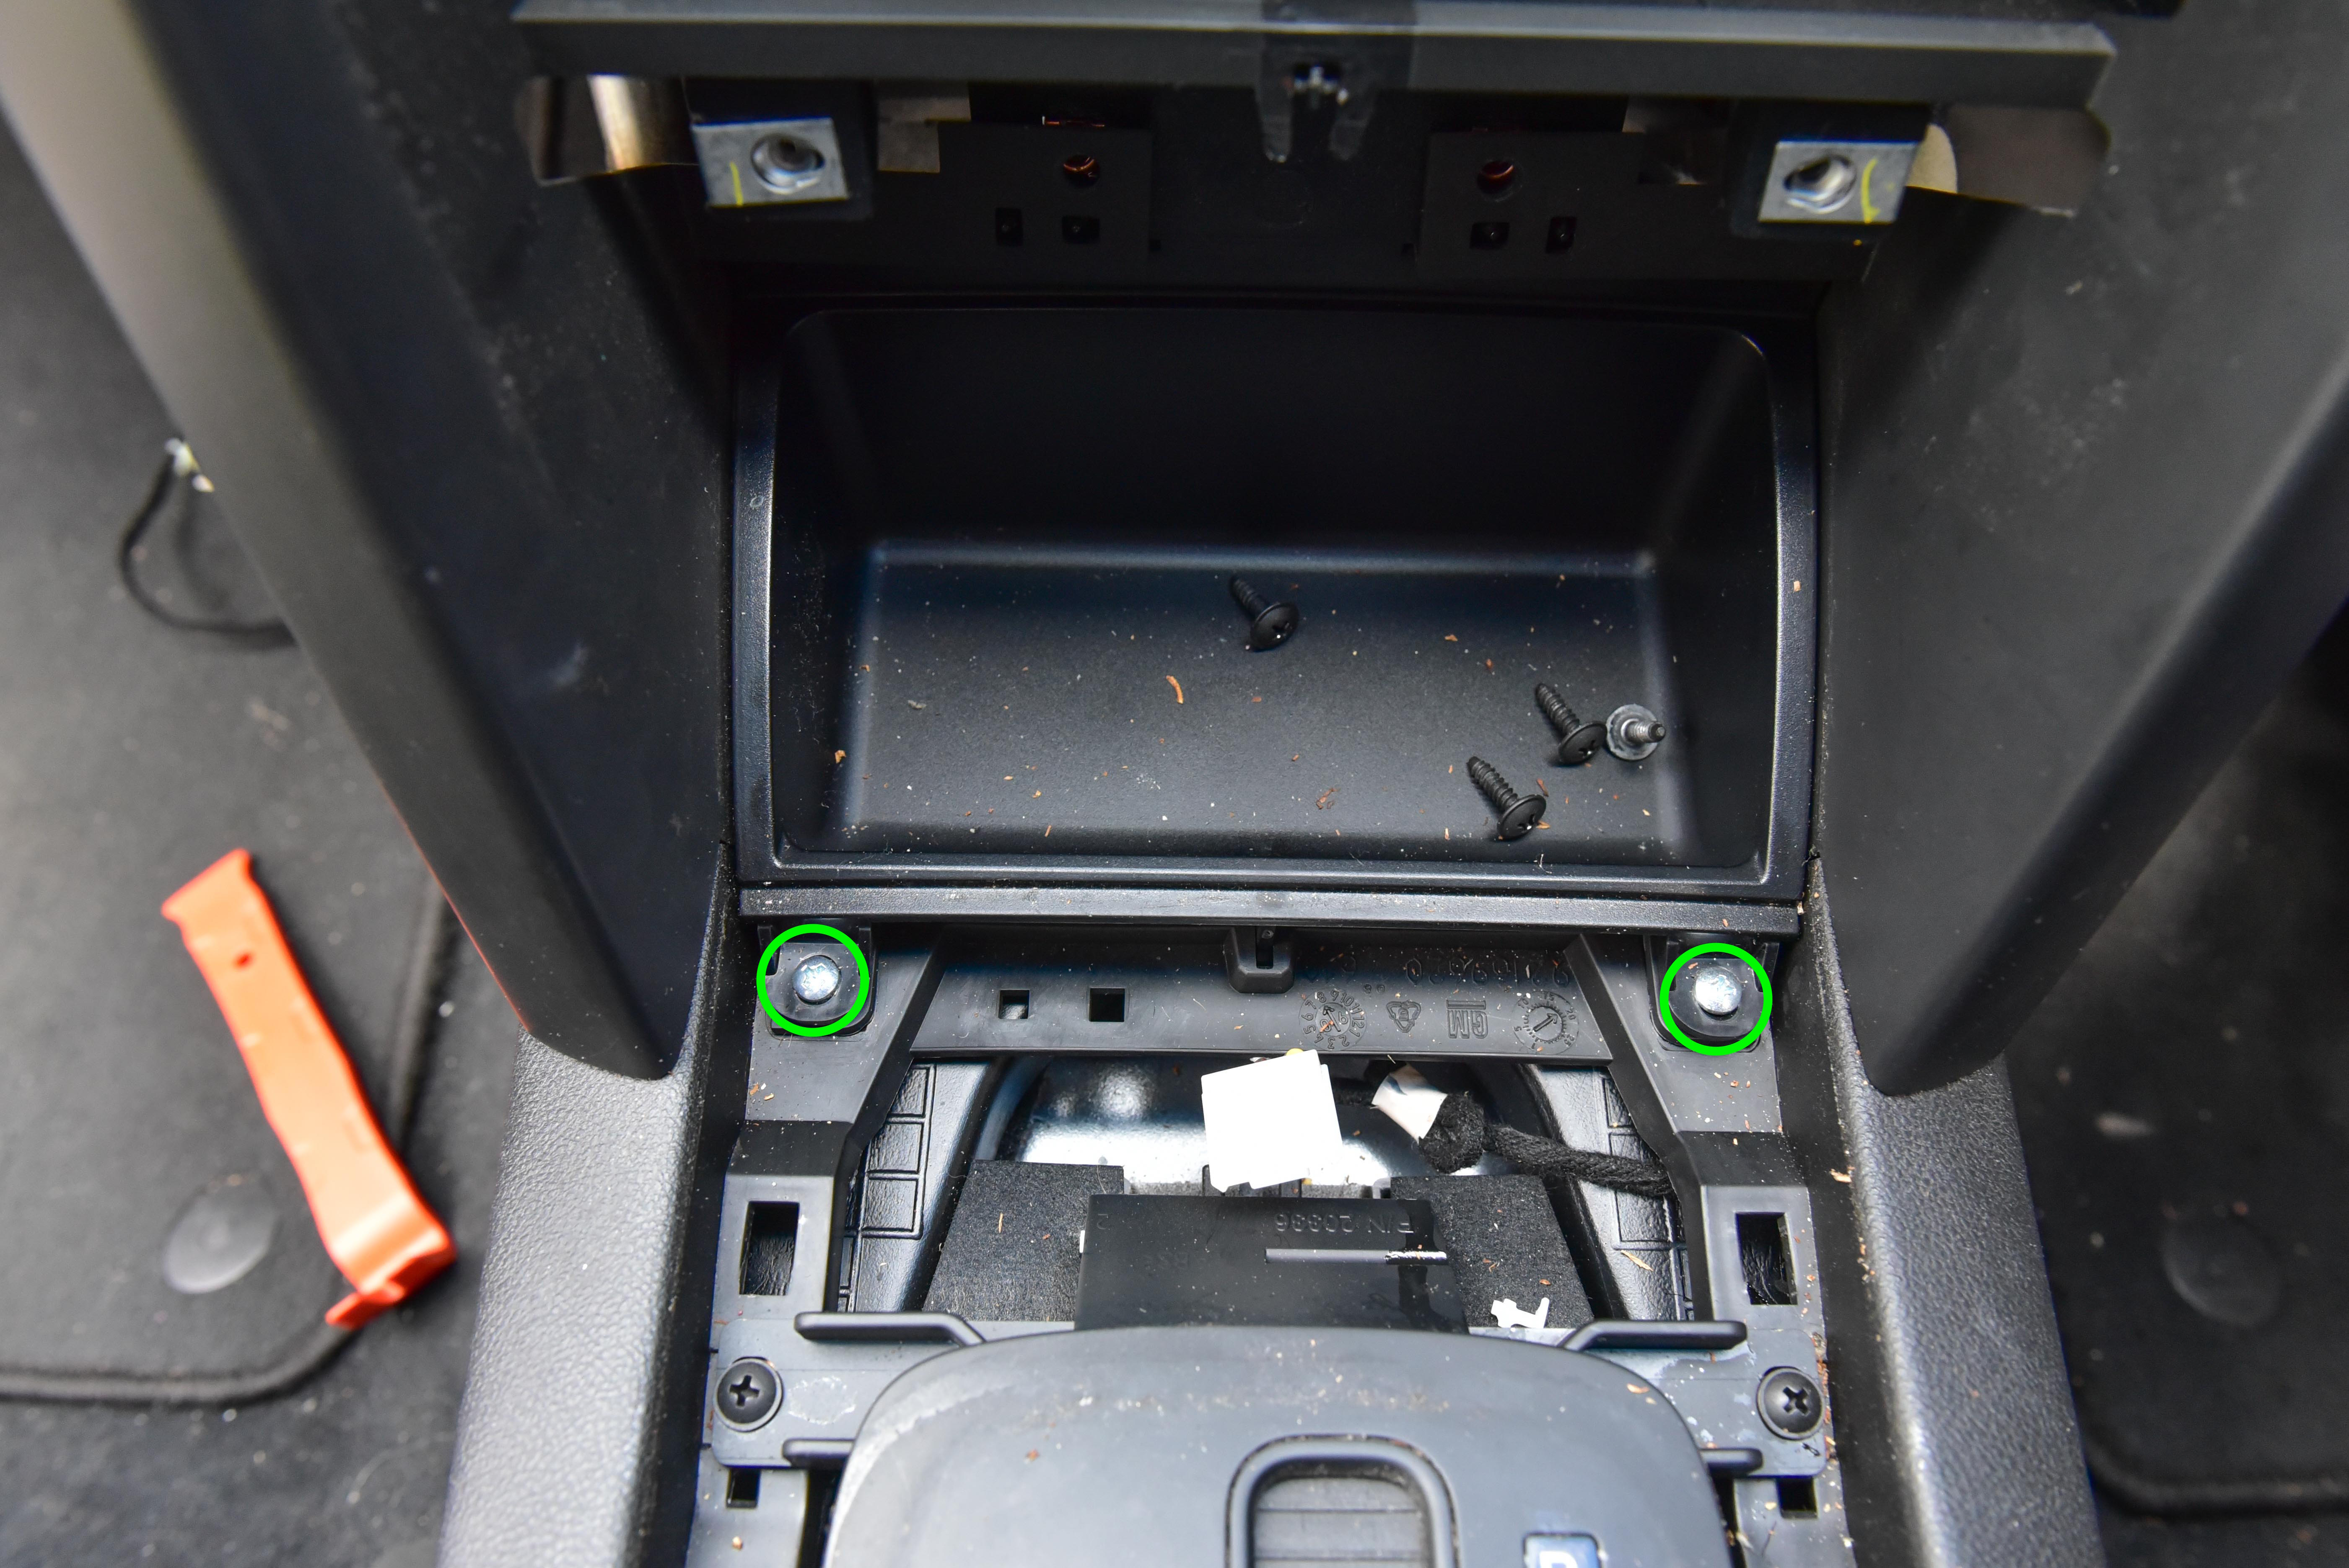
Step 6
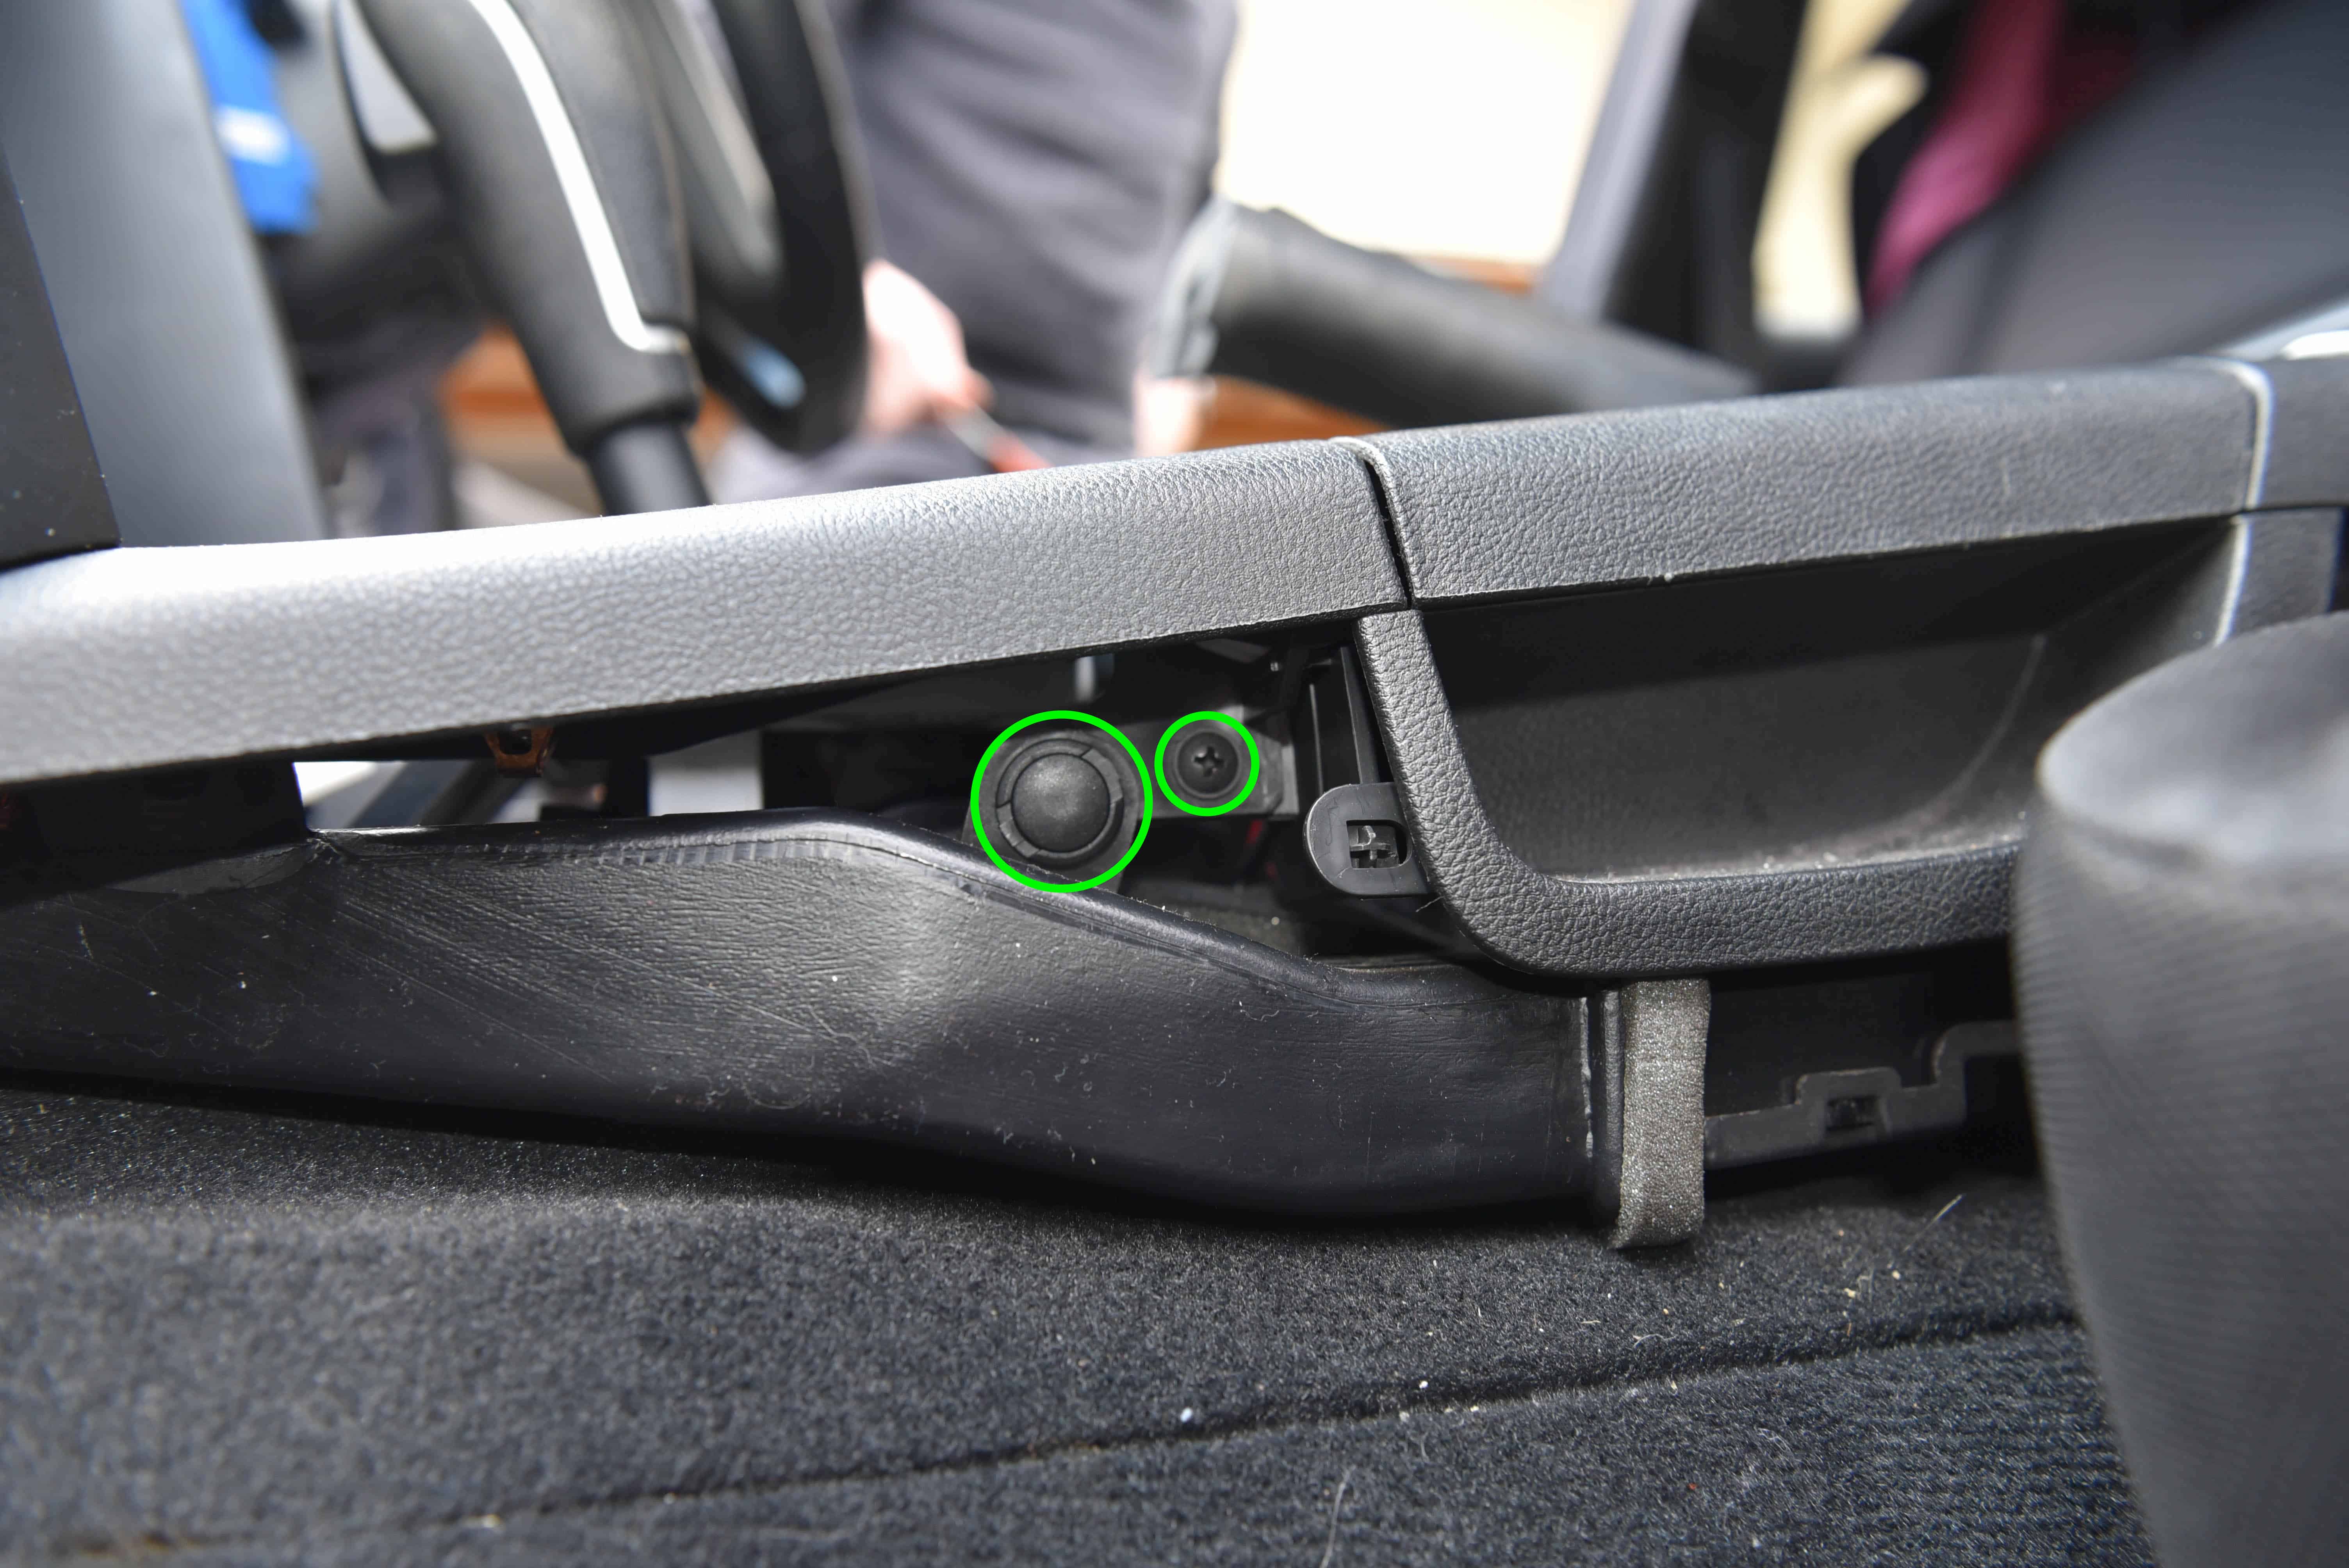
Remove the two screws which are now visible.
Step 7
Gently remove the silver dash spear with a trim removal tool. Also remove the two screw covers (Green arrows).
Step 8
Remove the five screws which are now visible.
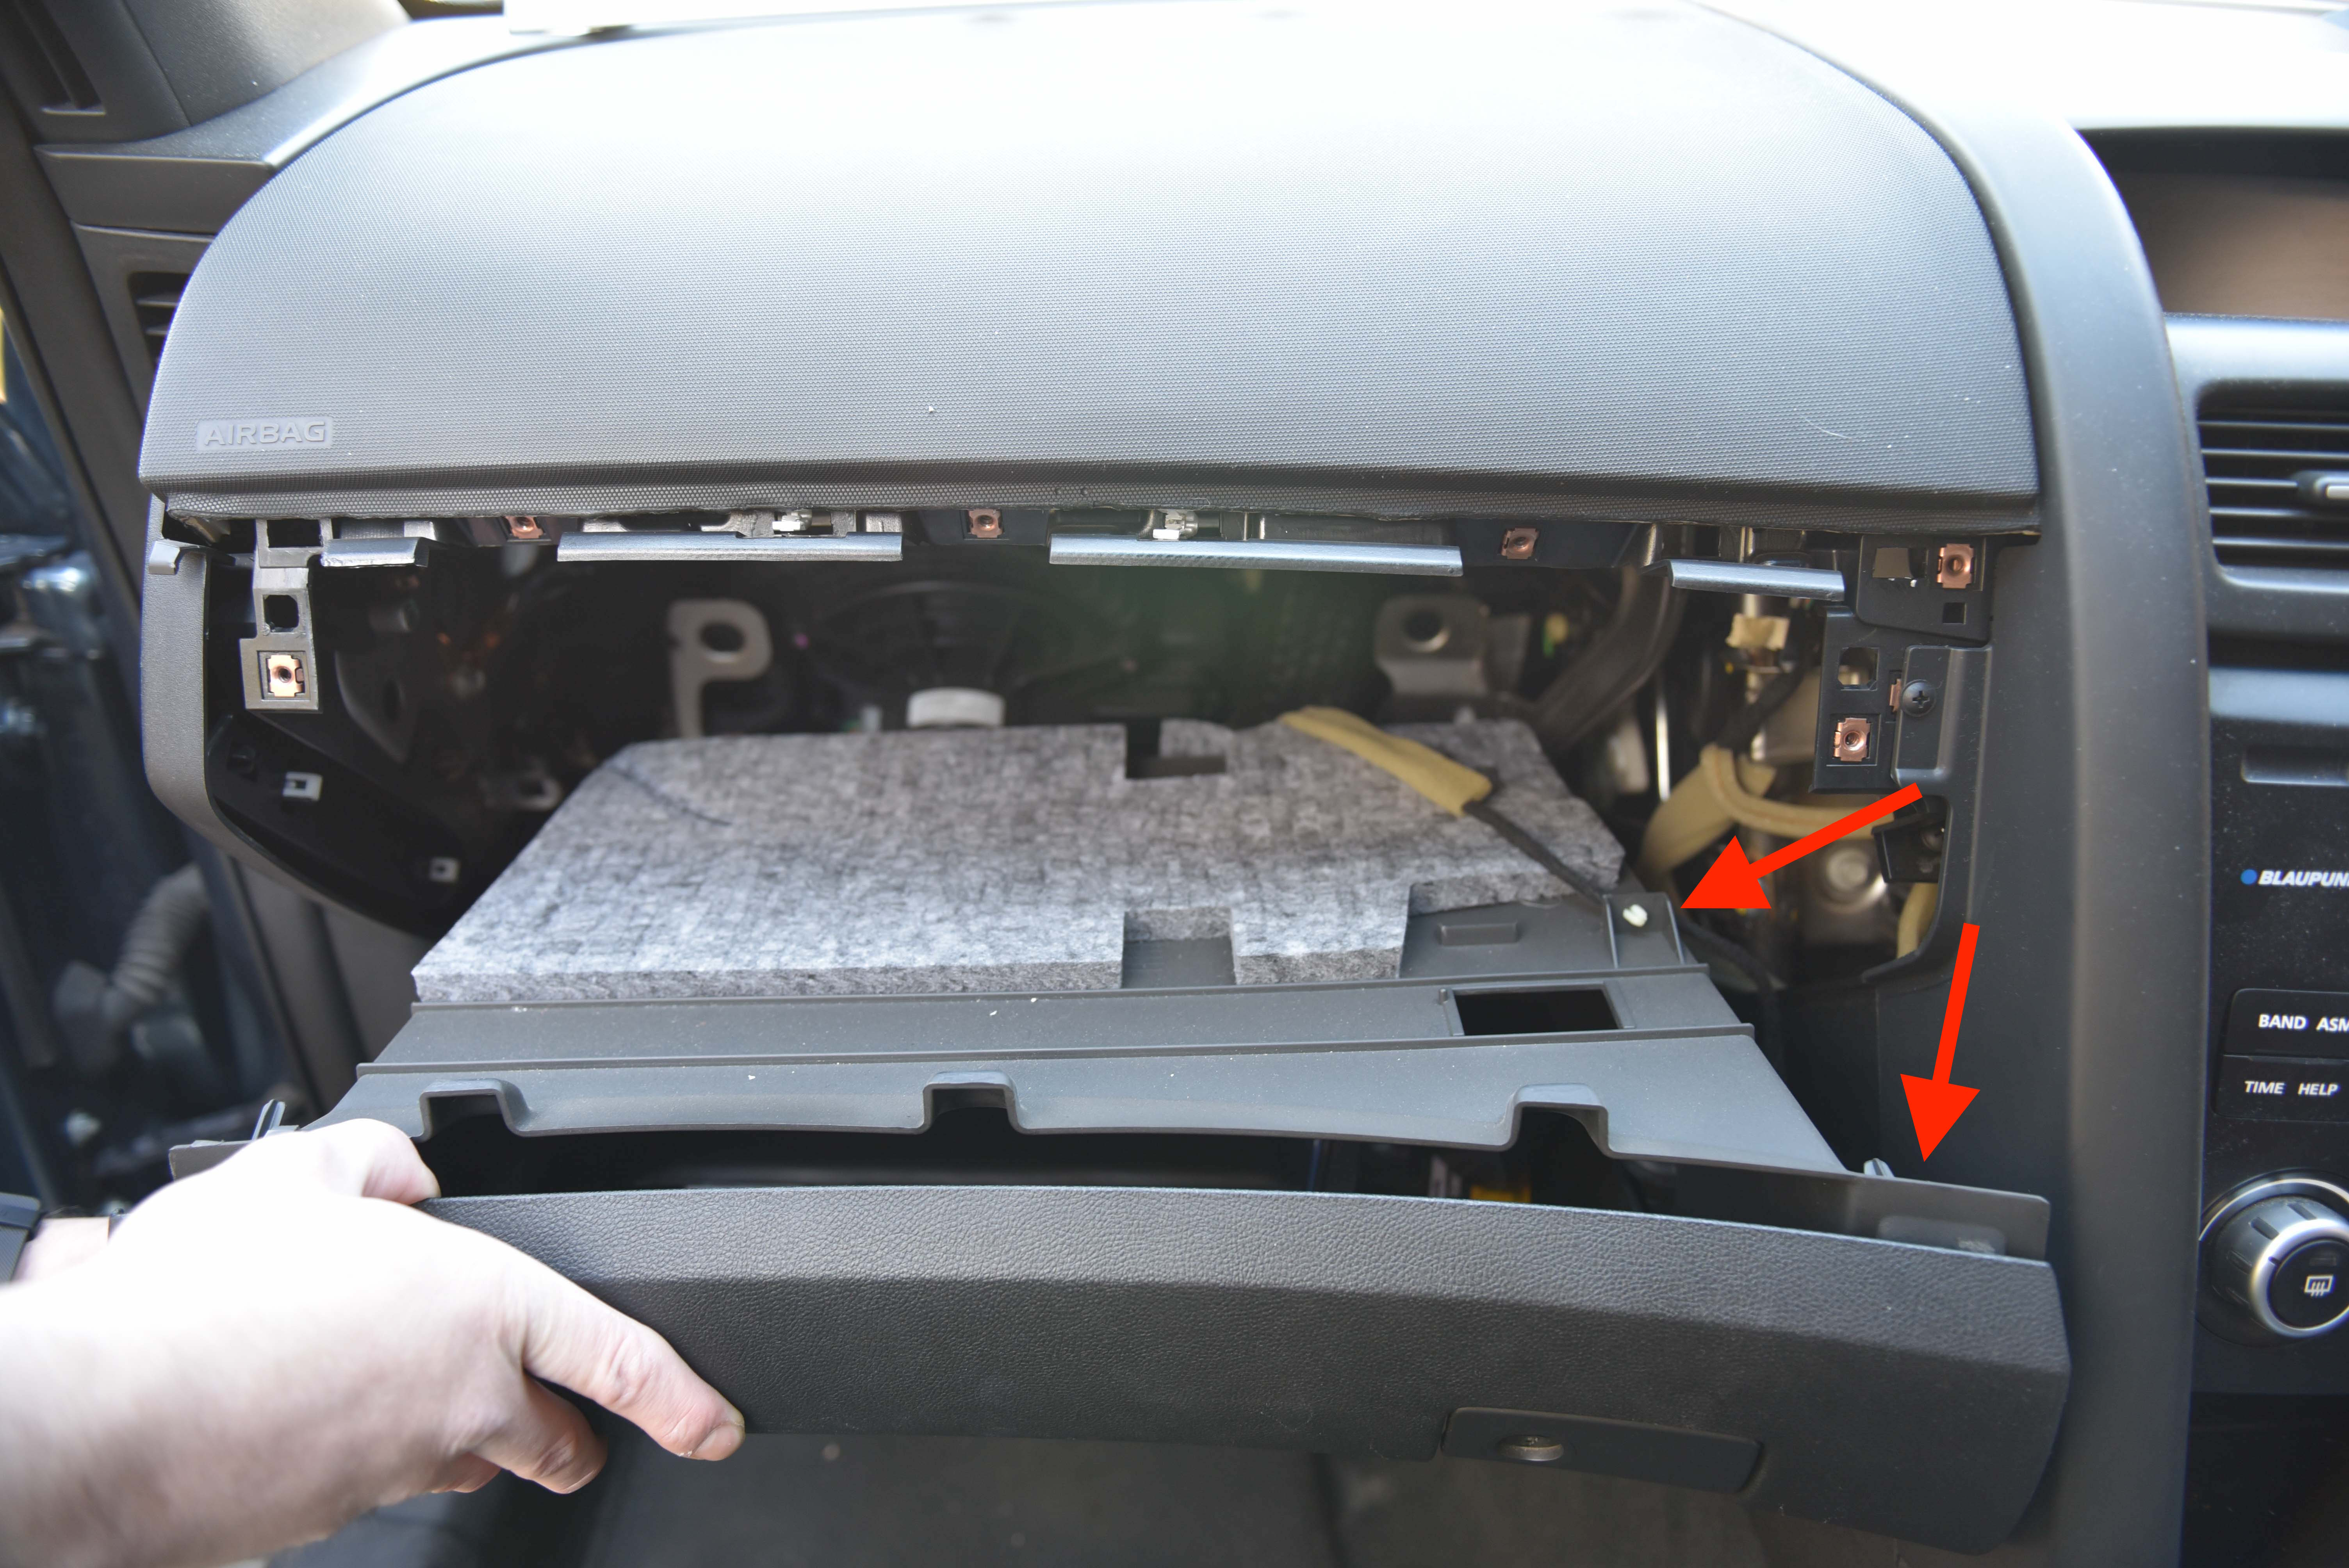
Step 9
The glovebox will now be loose. simply pull outwards and disconnect the boot release plug and loom.
Step 10
Remove the passenger side trim. Pull outwards then firmly down on both trim pieces.
Step 11
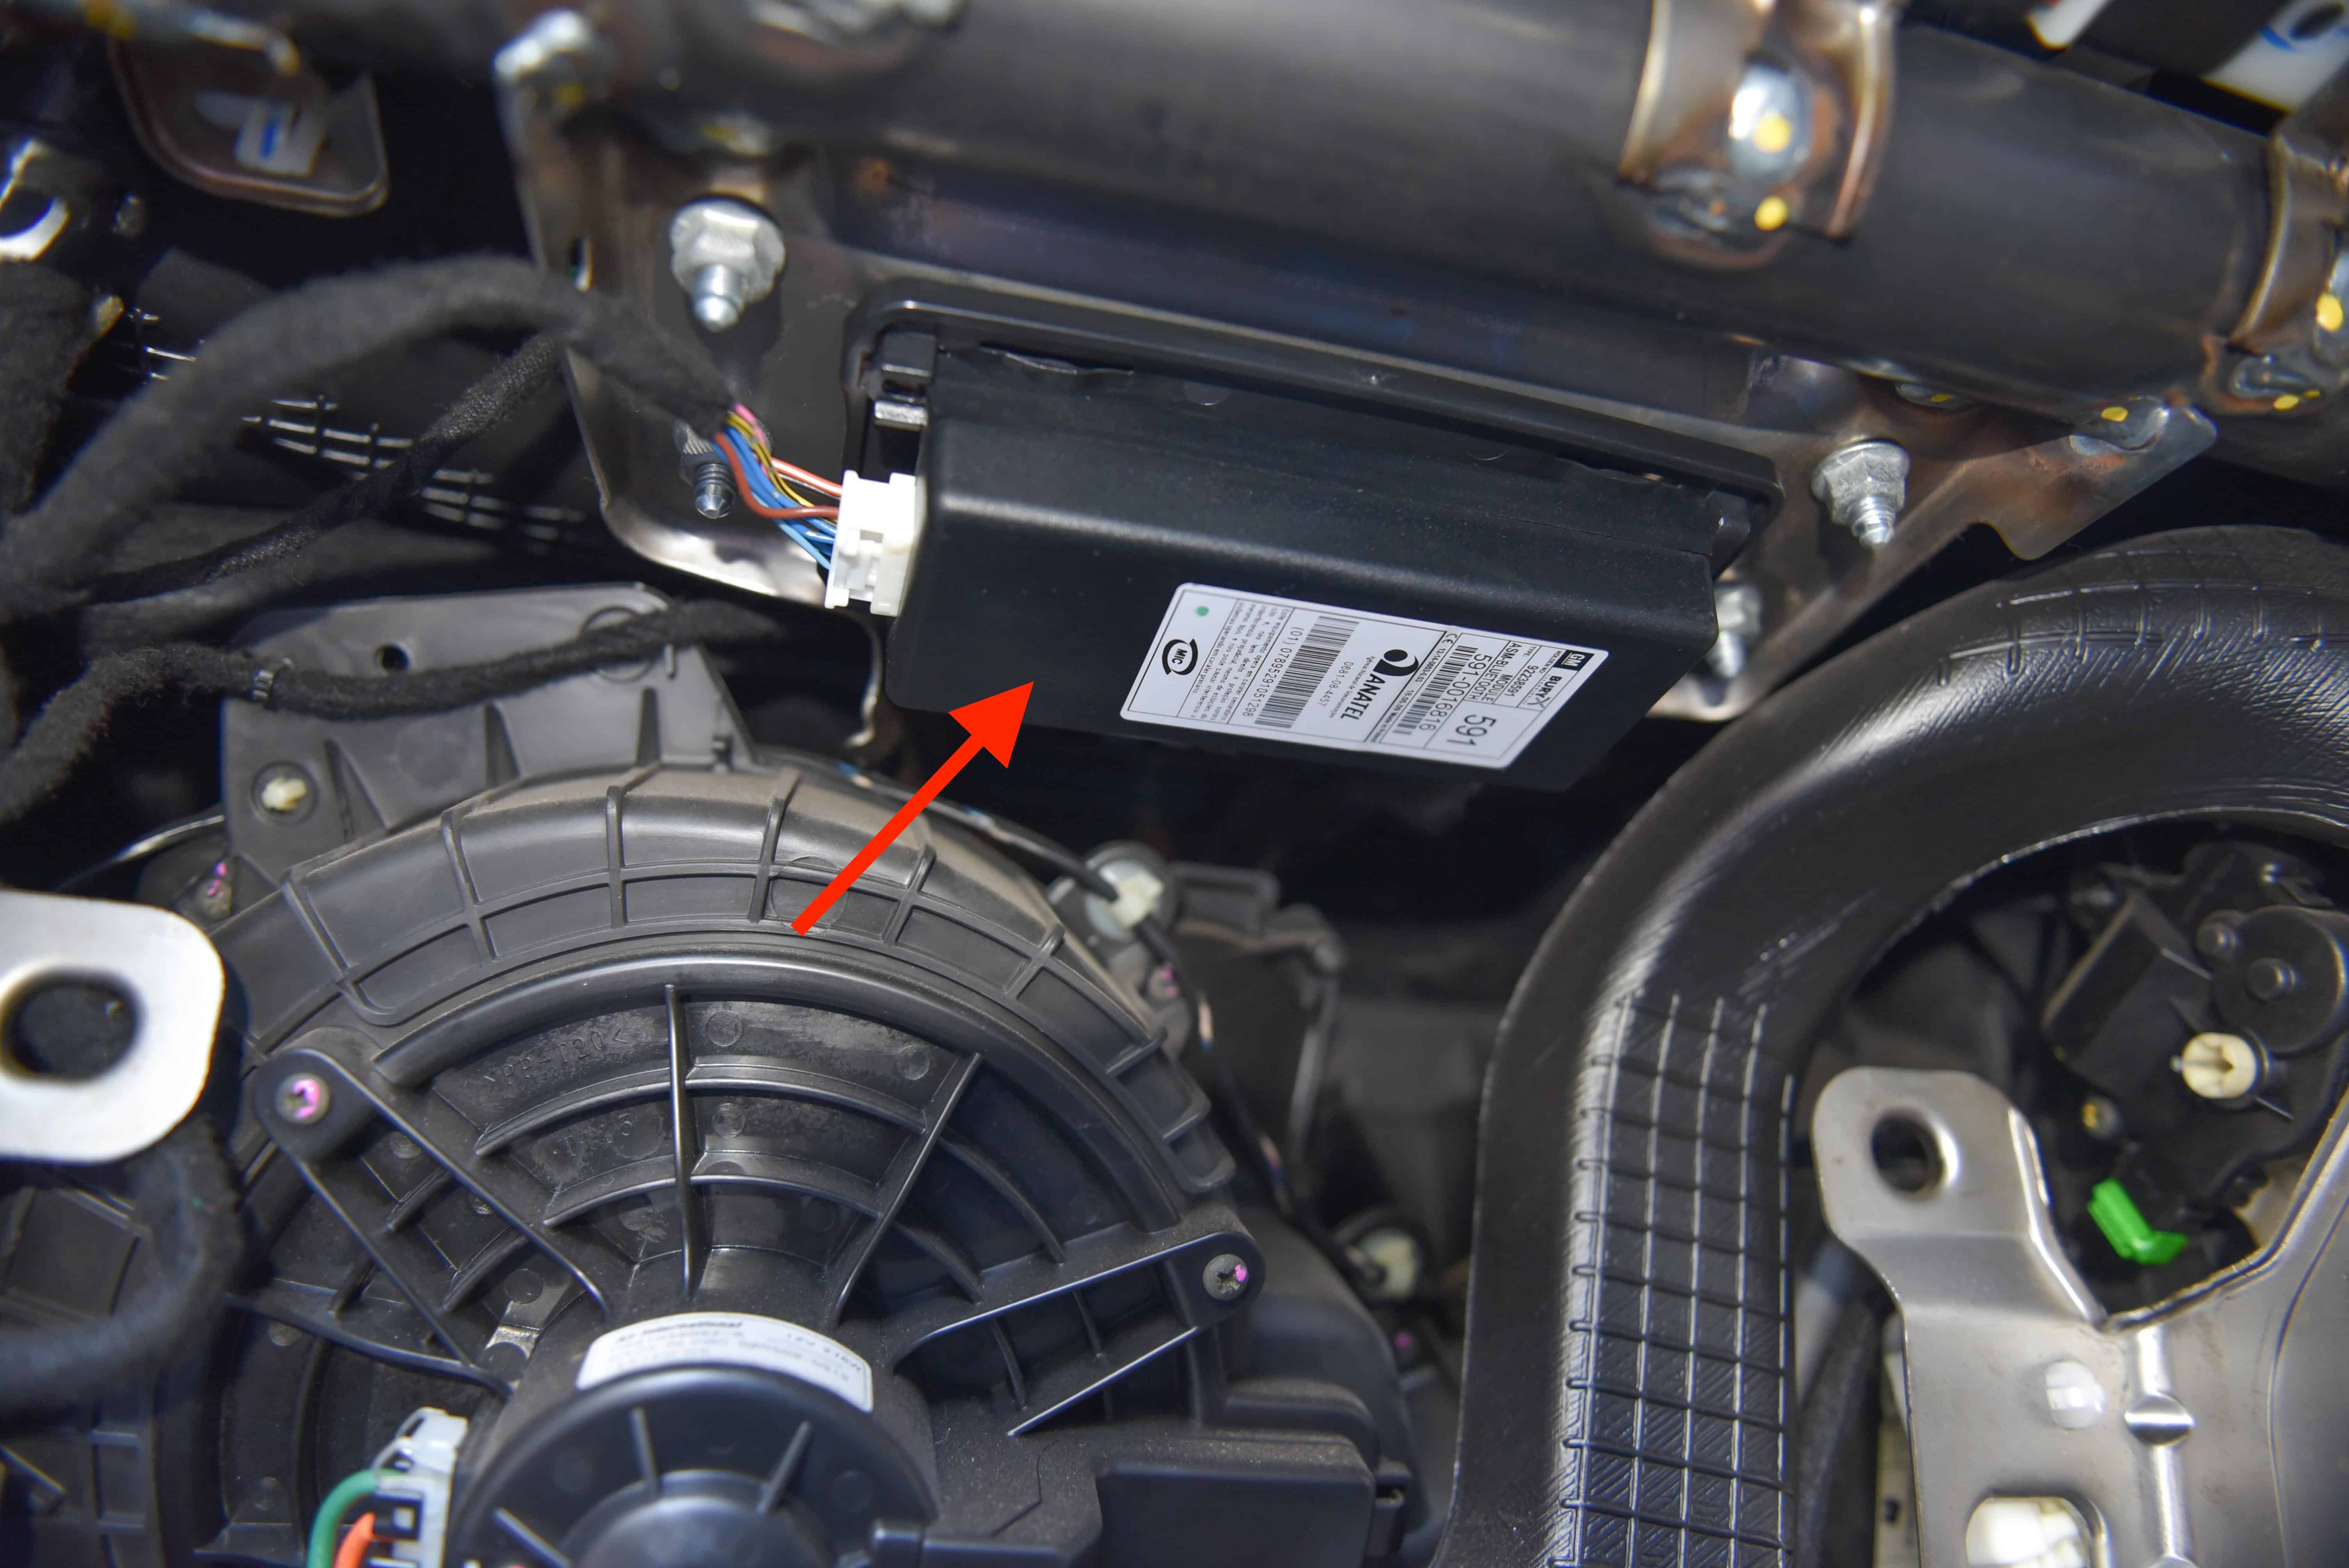
If installed, you can also remove the Bluetooth module as this is no longer required. Bluetooth is now built into the Series 2 headunit.
Follow the wiring diagram from your Series 2 conversion supplier to connect the roof microphone to the Series 2 headunit.
Step 12
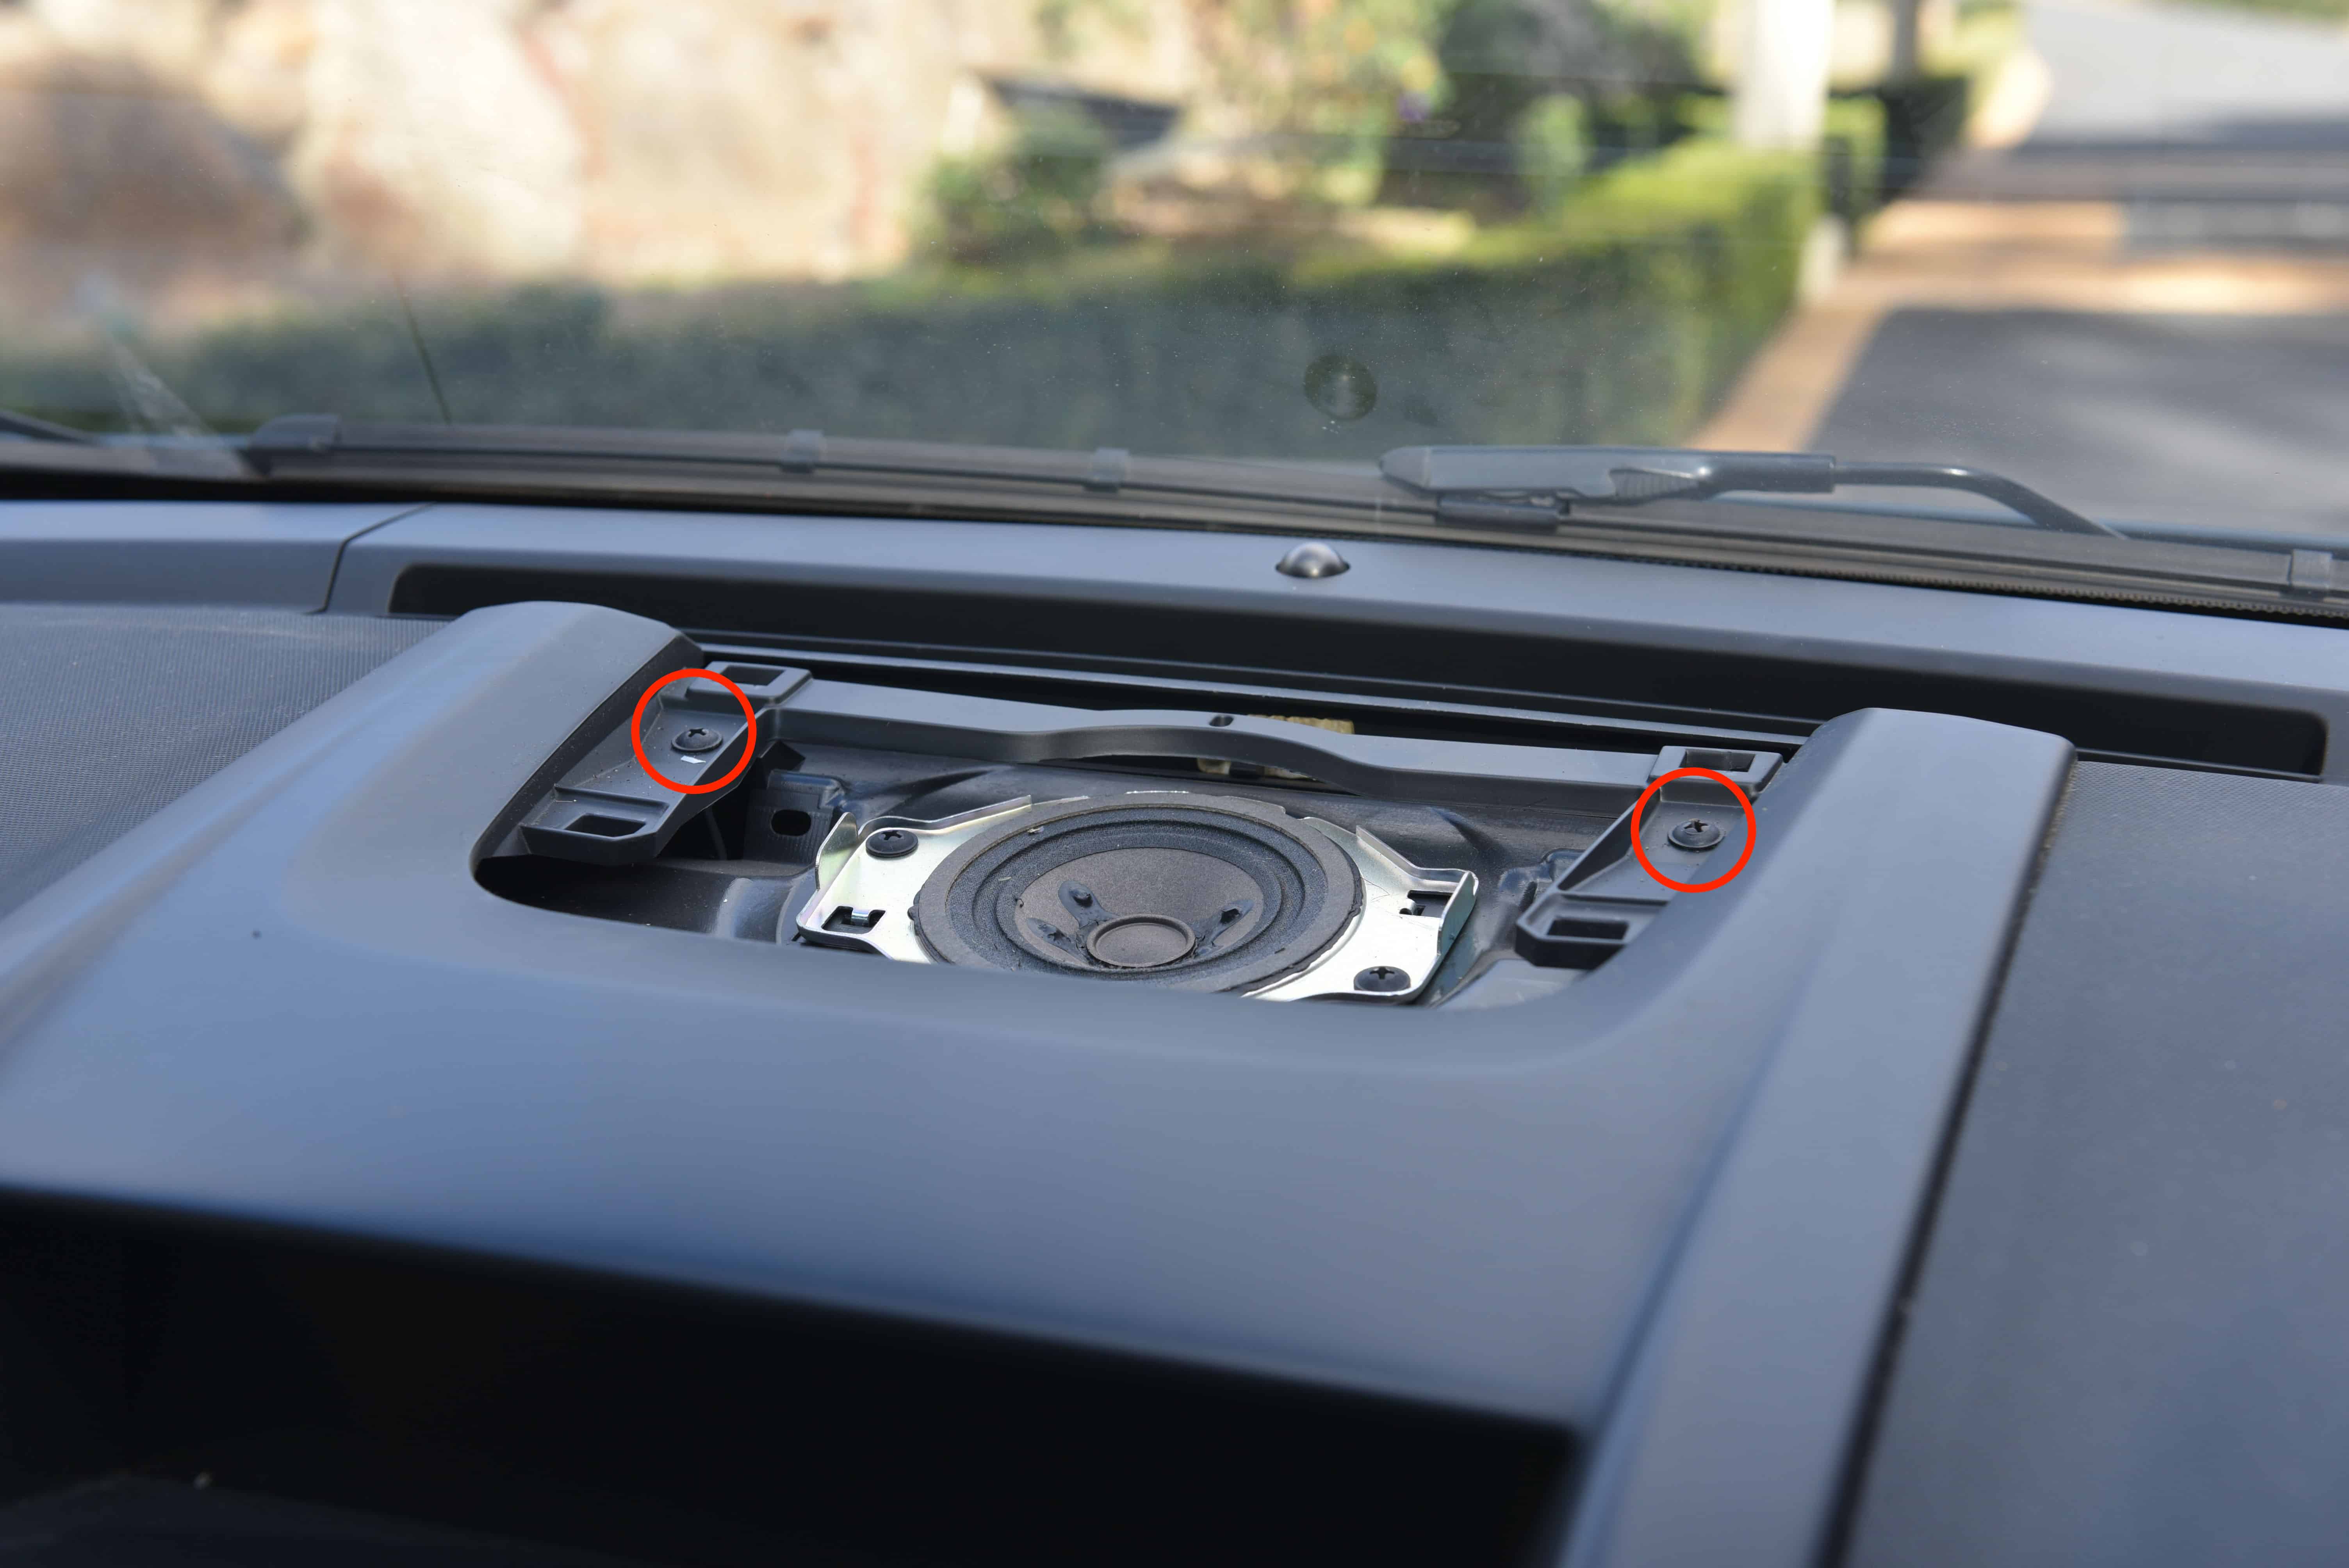
Remove the speaker grill from the centre of the dashboard. Pull firmly upwards from the back and use a trim removal tool to release the remaining clips. Be gentle as the clips are prone to break.
Once removed unscrew the two screws as circled.
Step 13
Remove the drivers side dash spear. Using a trim removal tool, gently release each clip and remove.
Step 14
Unscrew the two screws as pictured.
Step 15
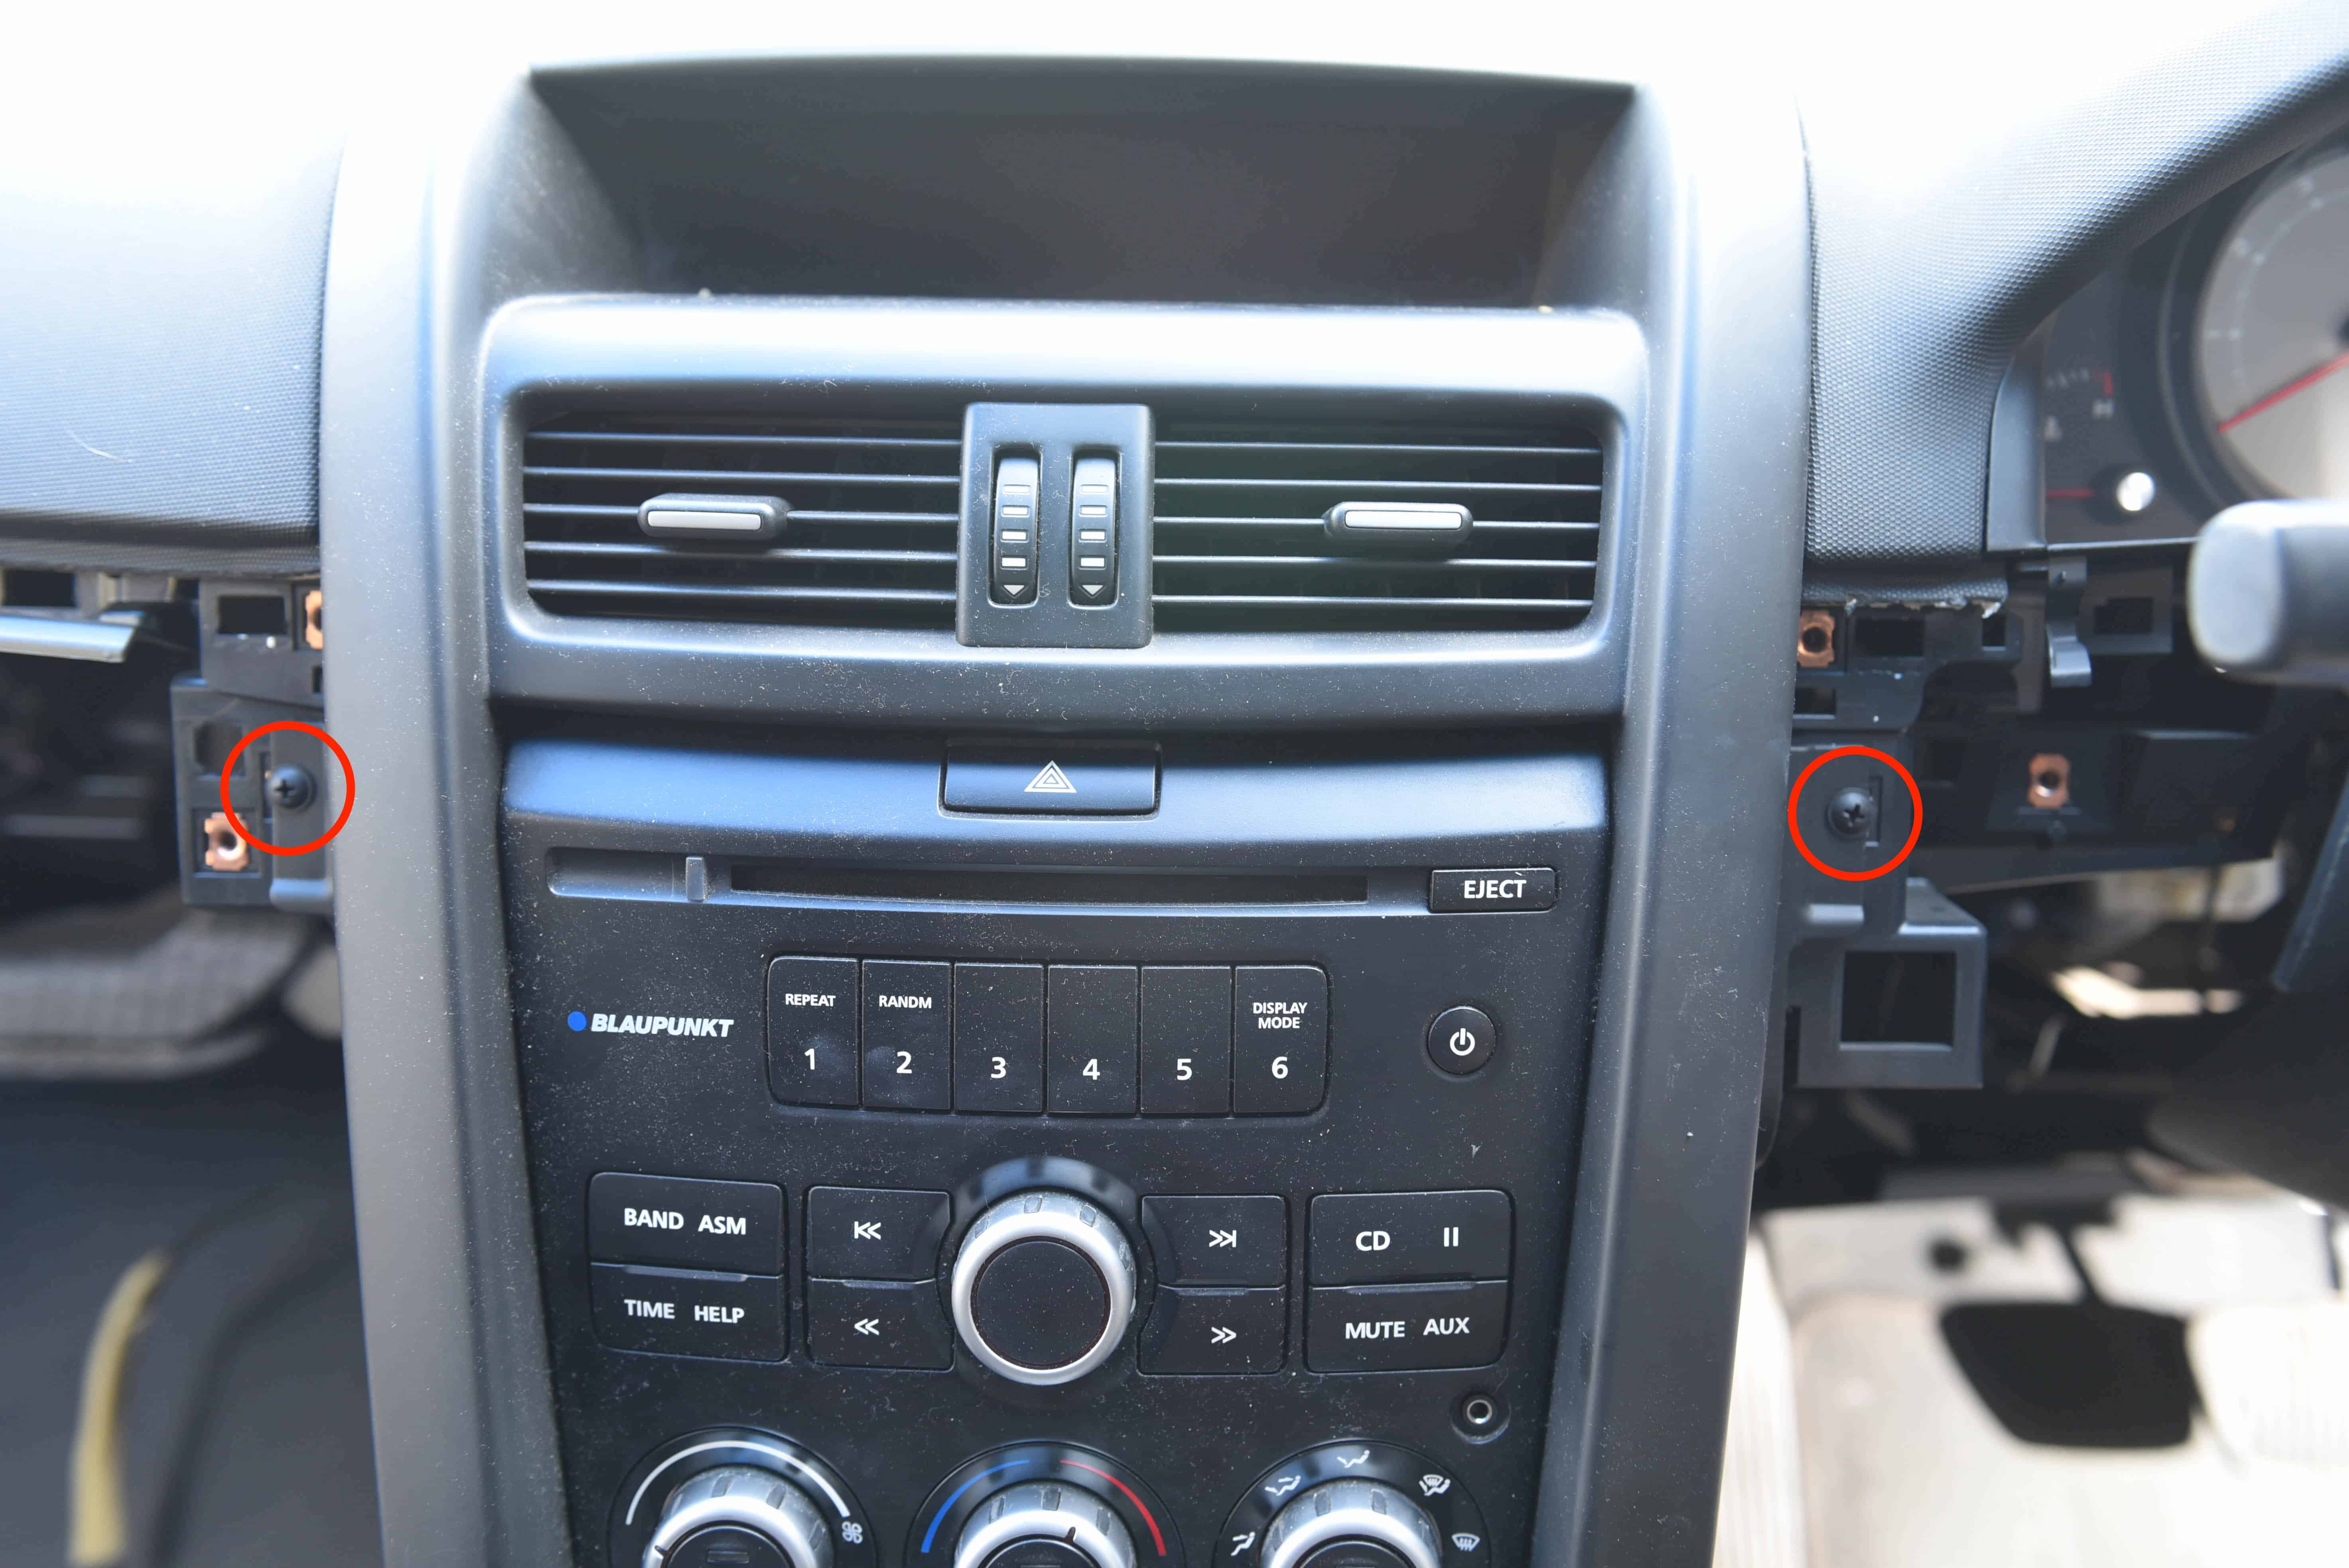
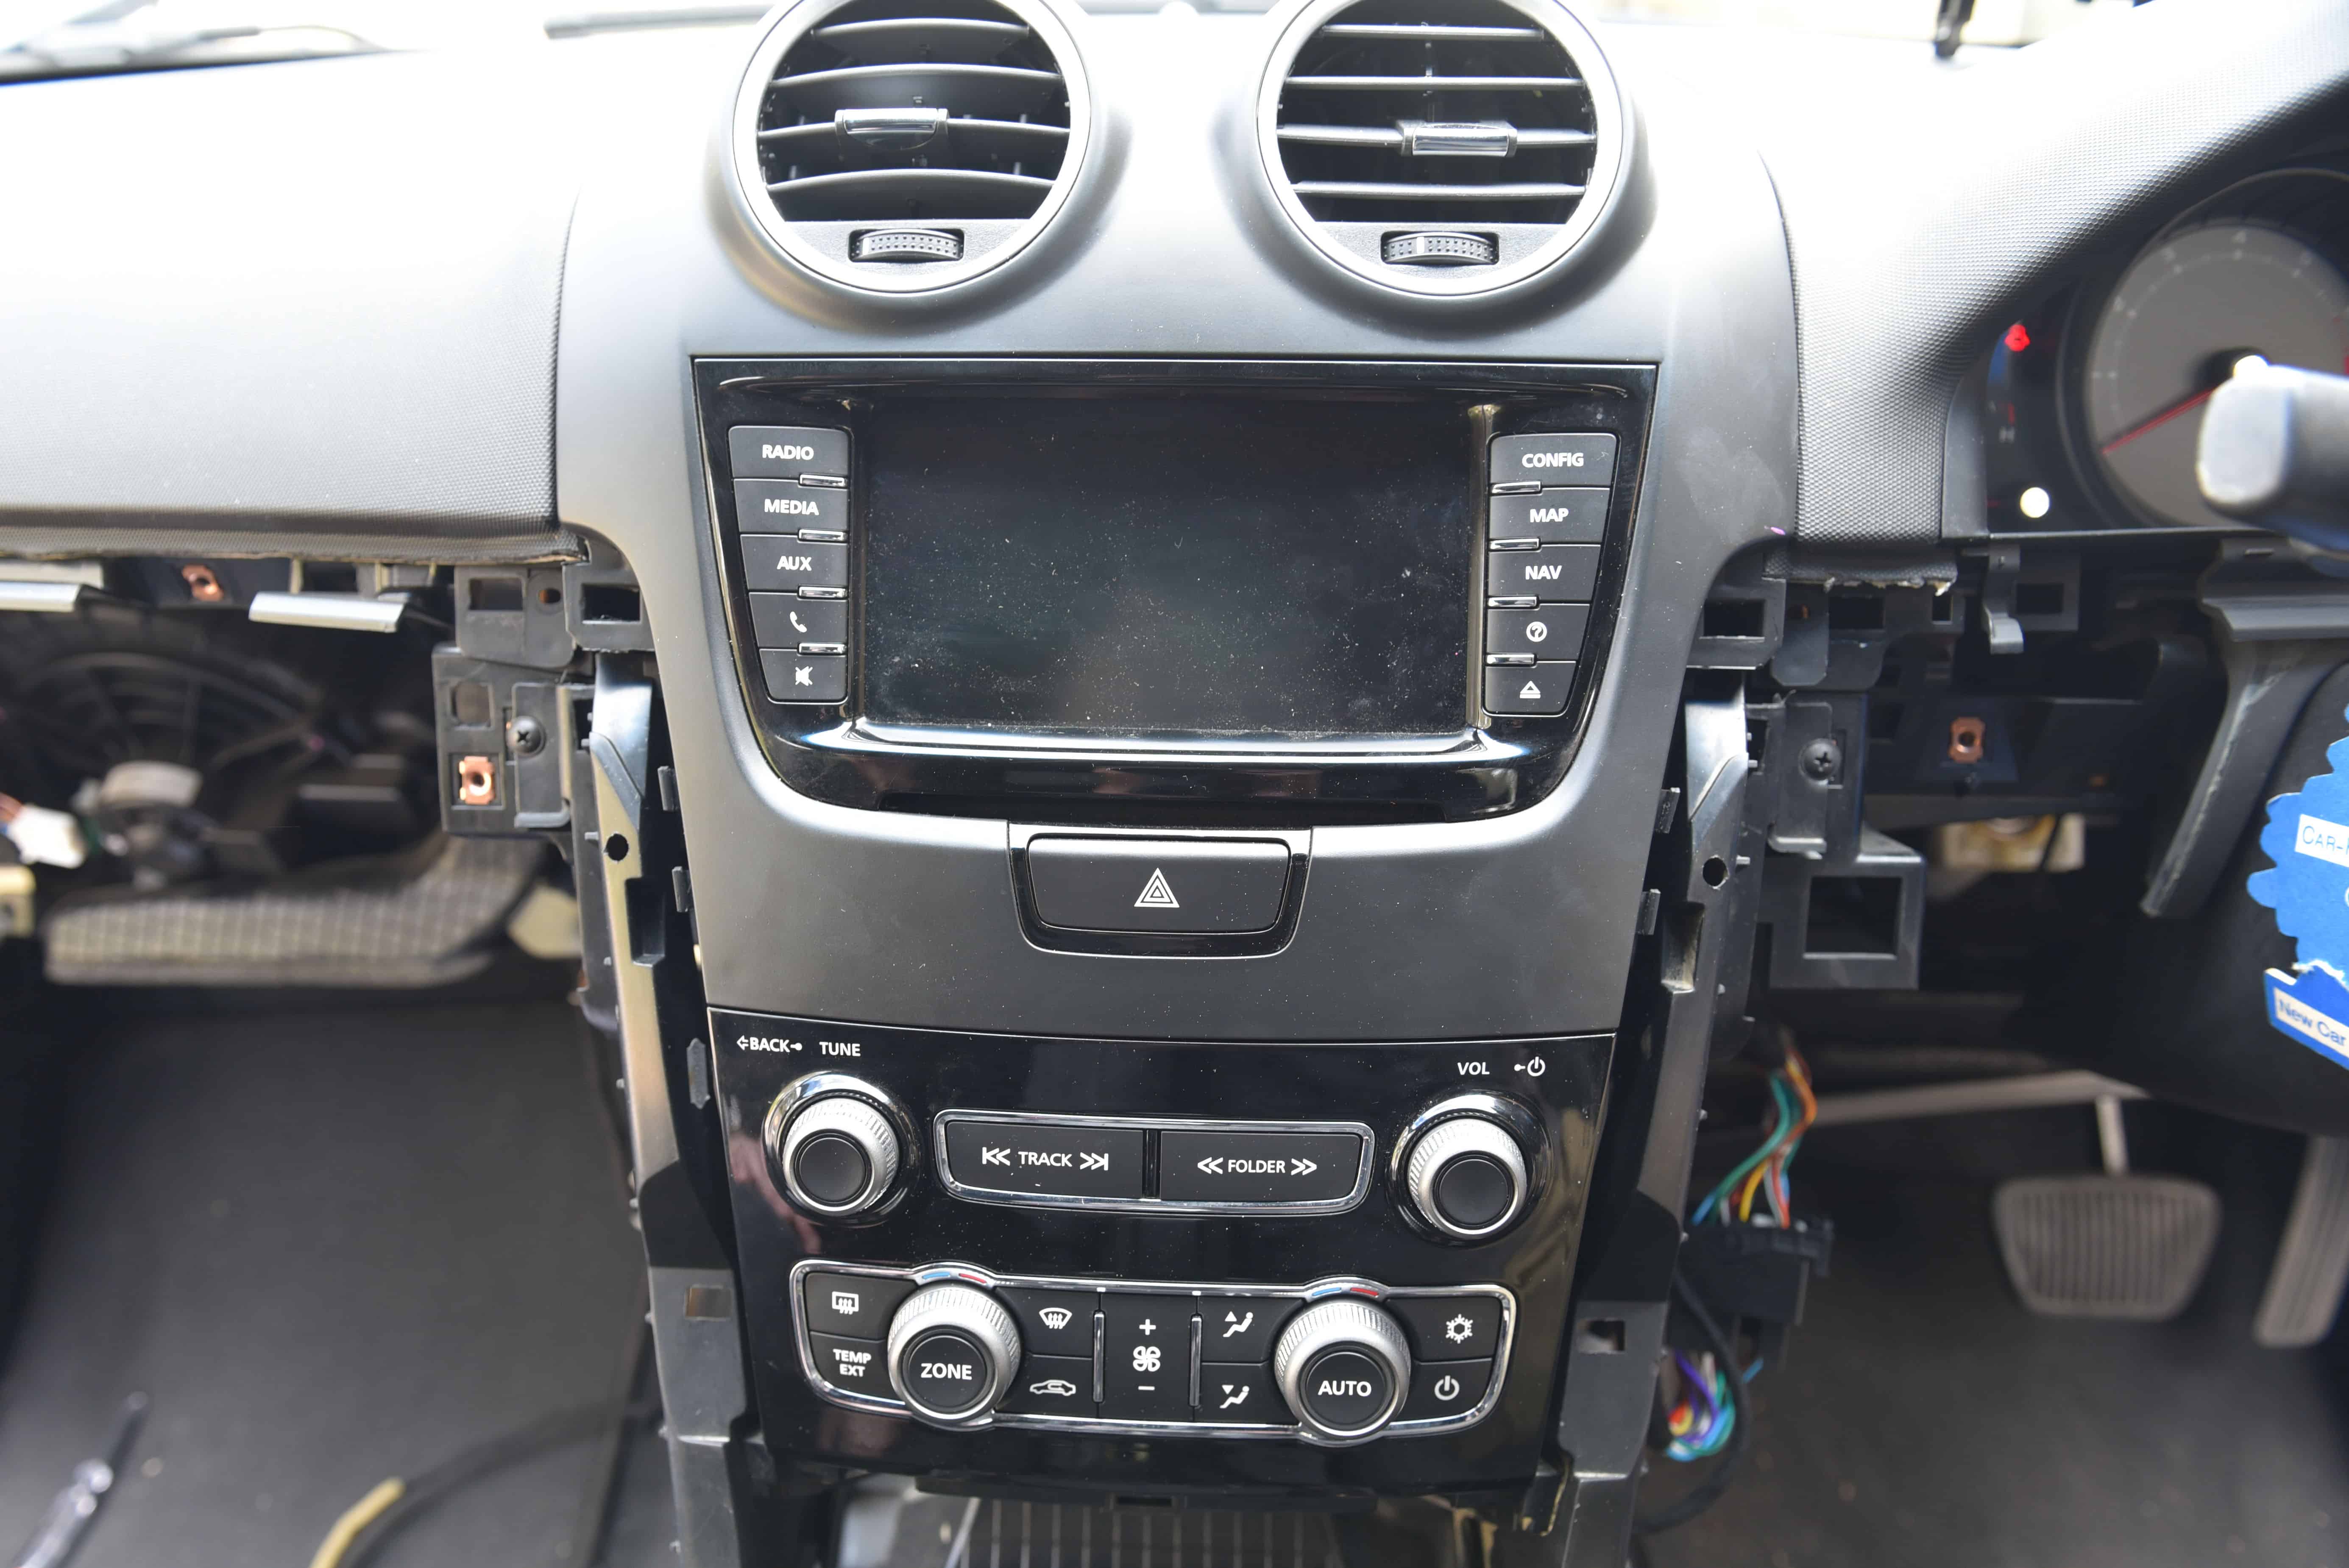
We will now remove the radio fascia. This can be quite difficult as the clips are very strong. Wedge your fingers or use an angled trim removal tool behind the fascia and pull towards you in a hinge motion. With decent force the headunit will come loose.
Step 16
Remove the four screws as highlighted.
Step 17
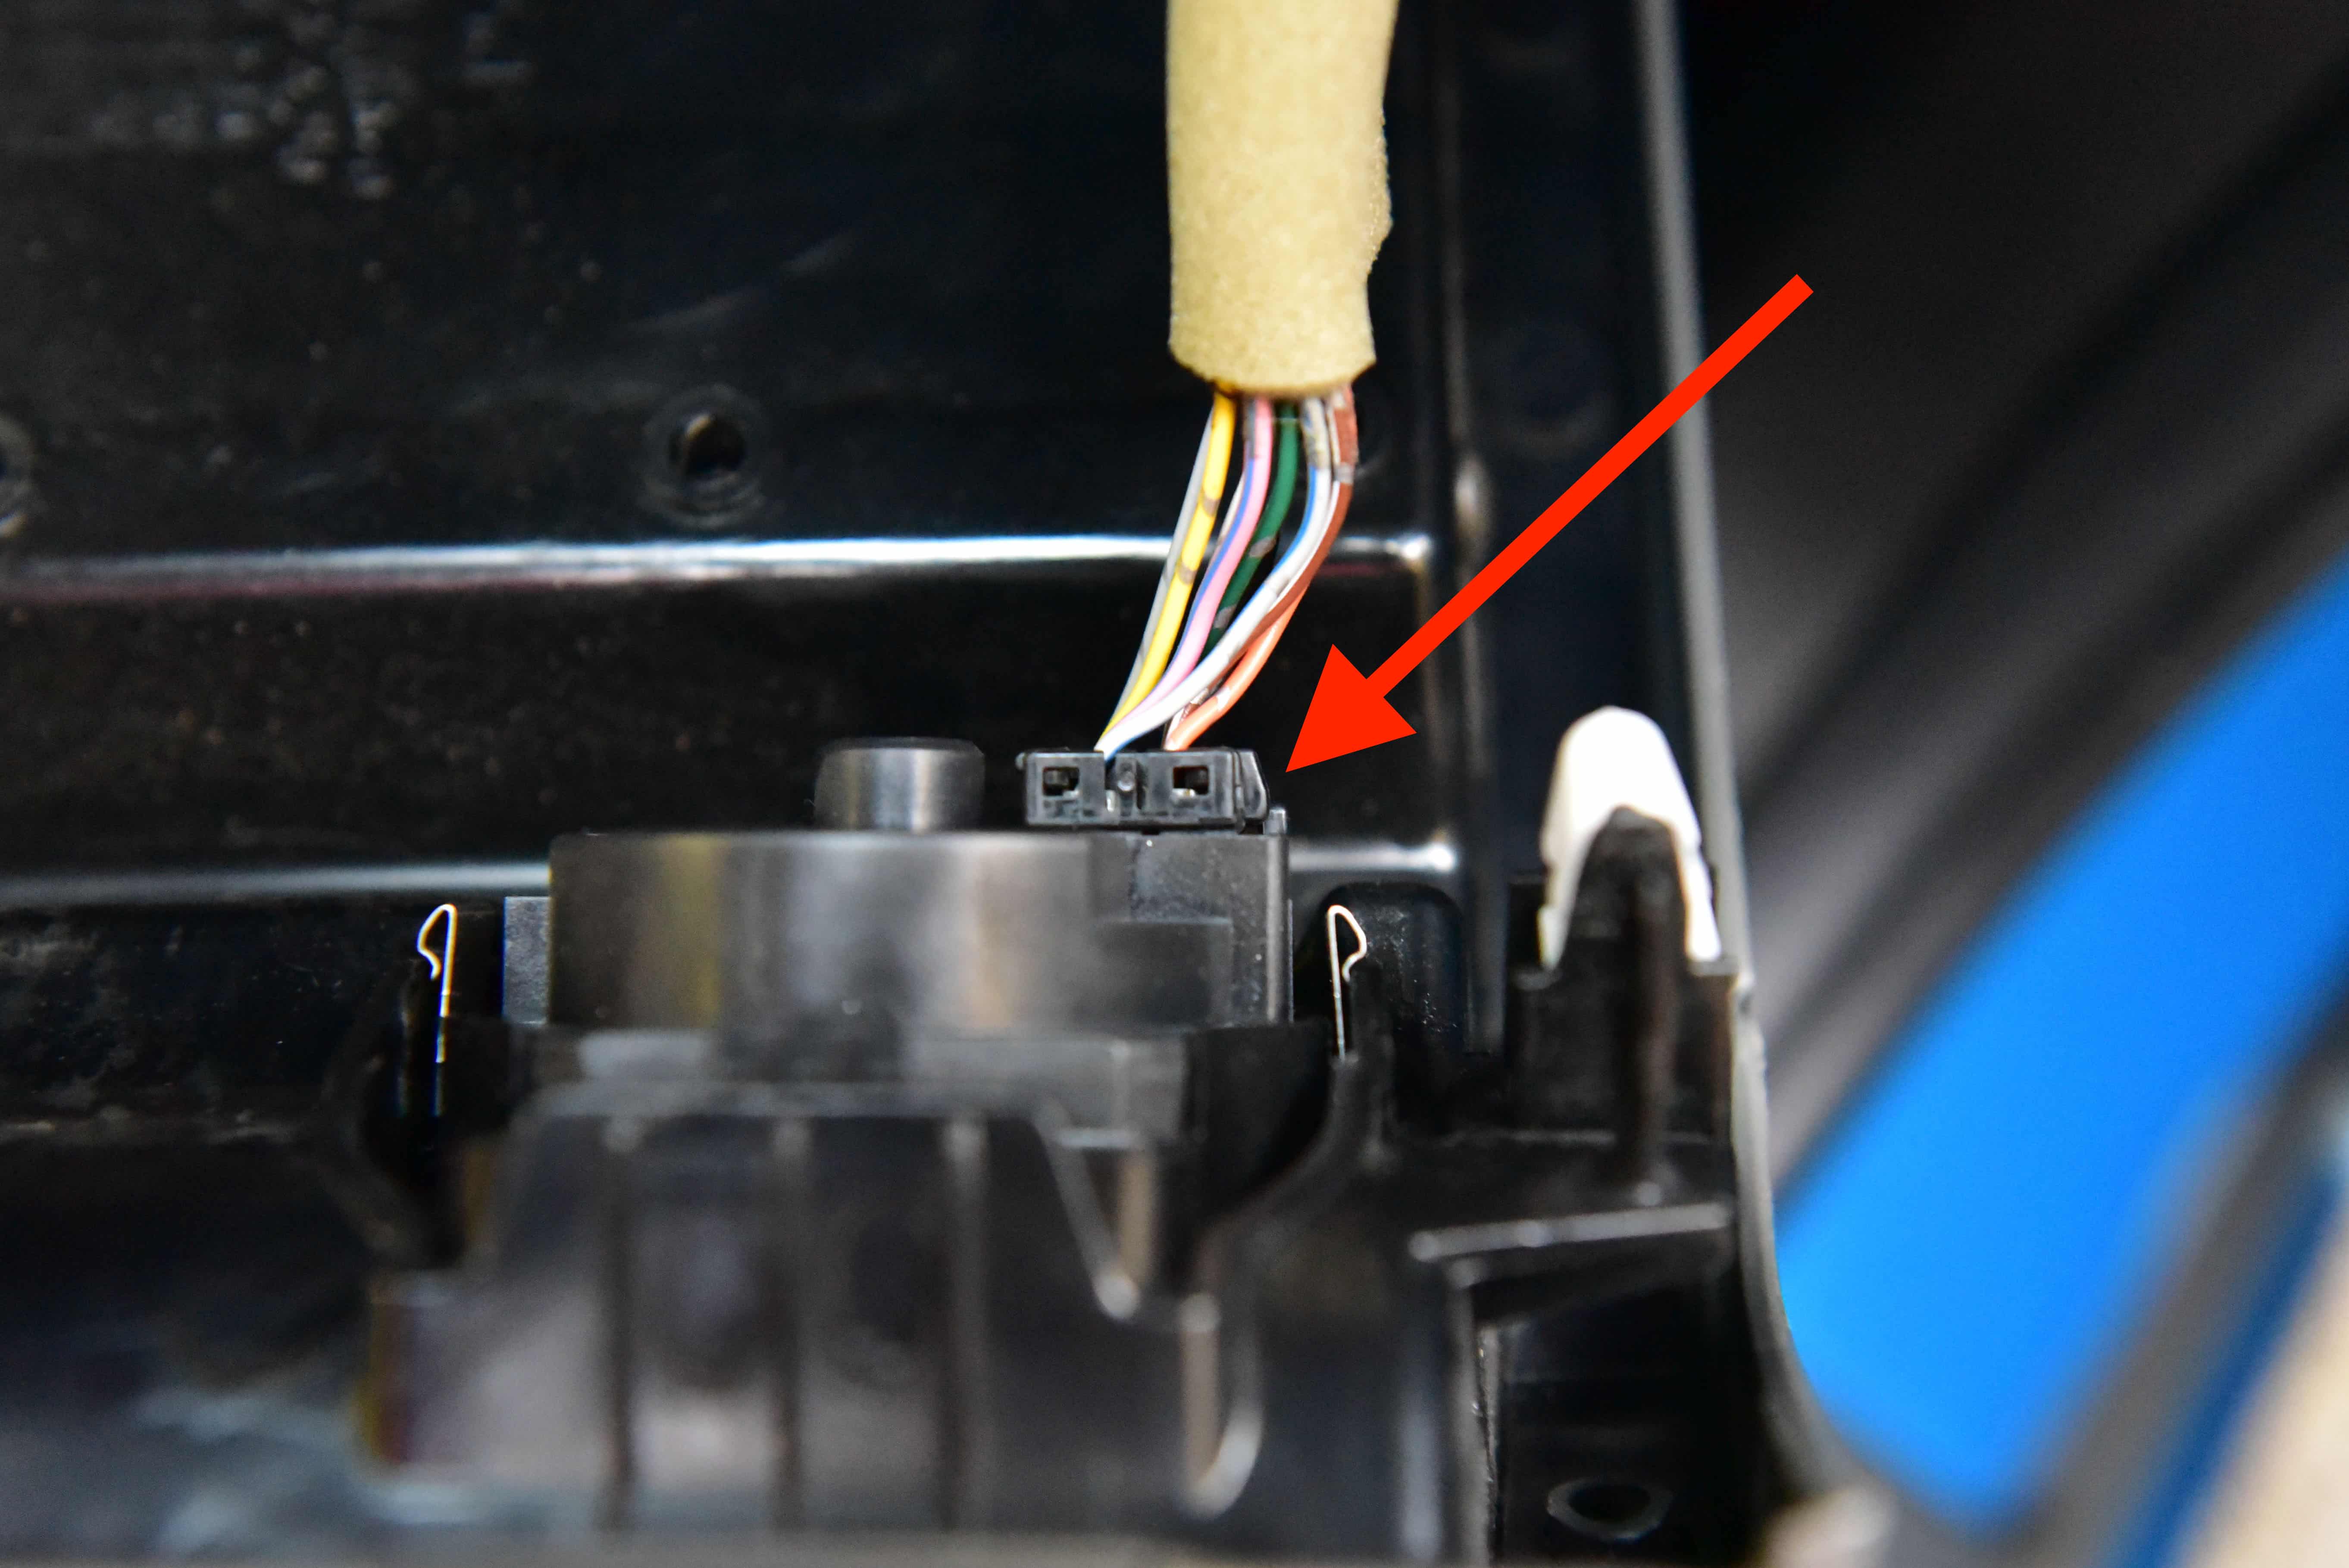
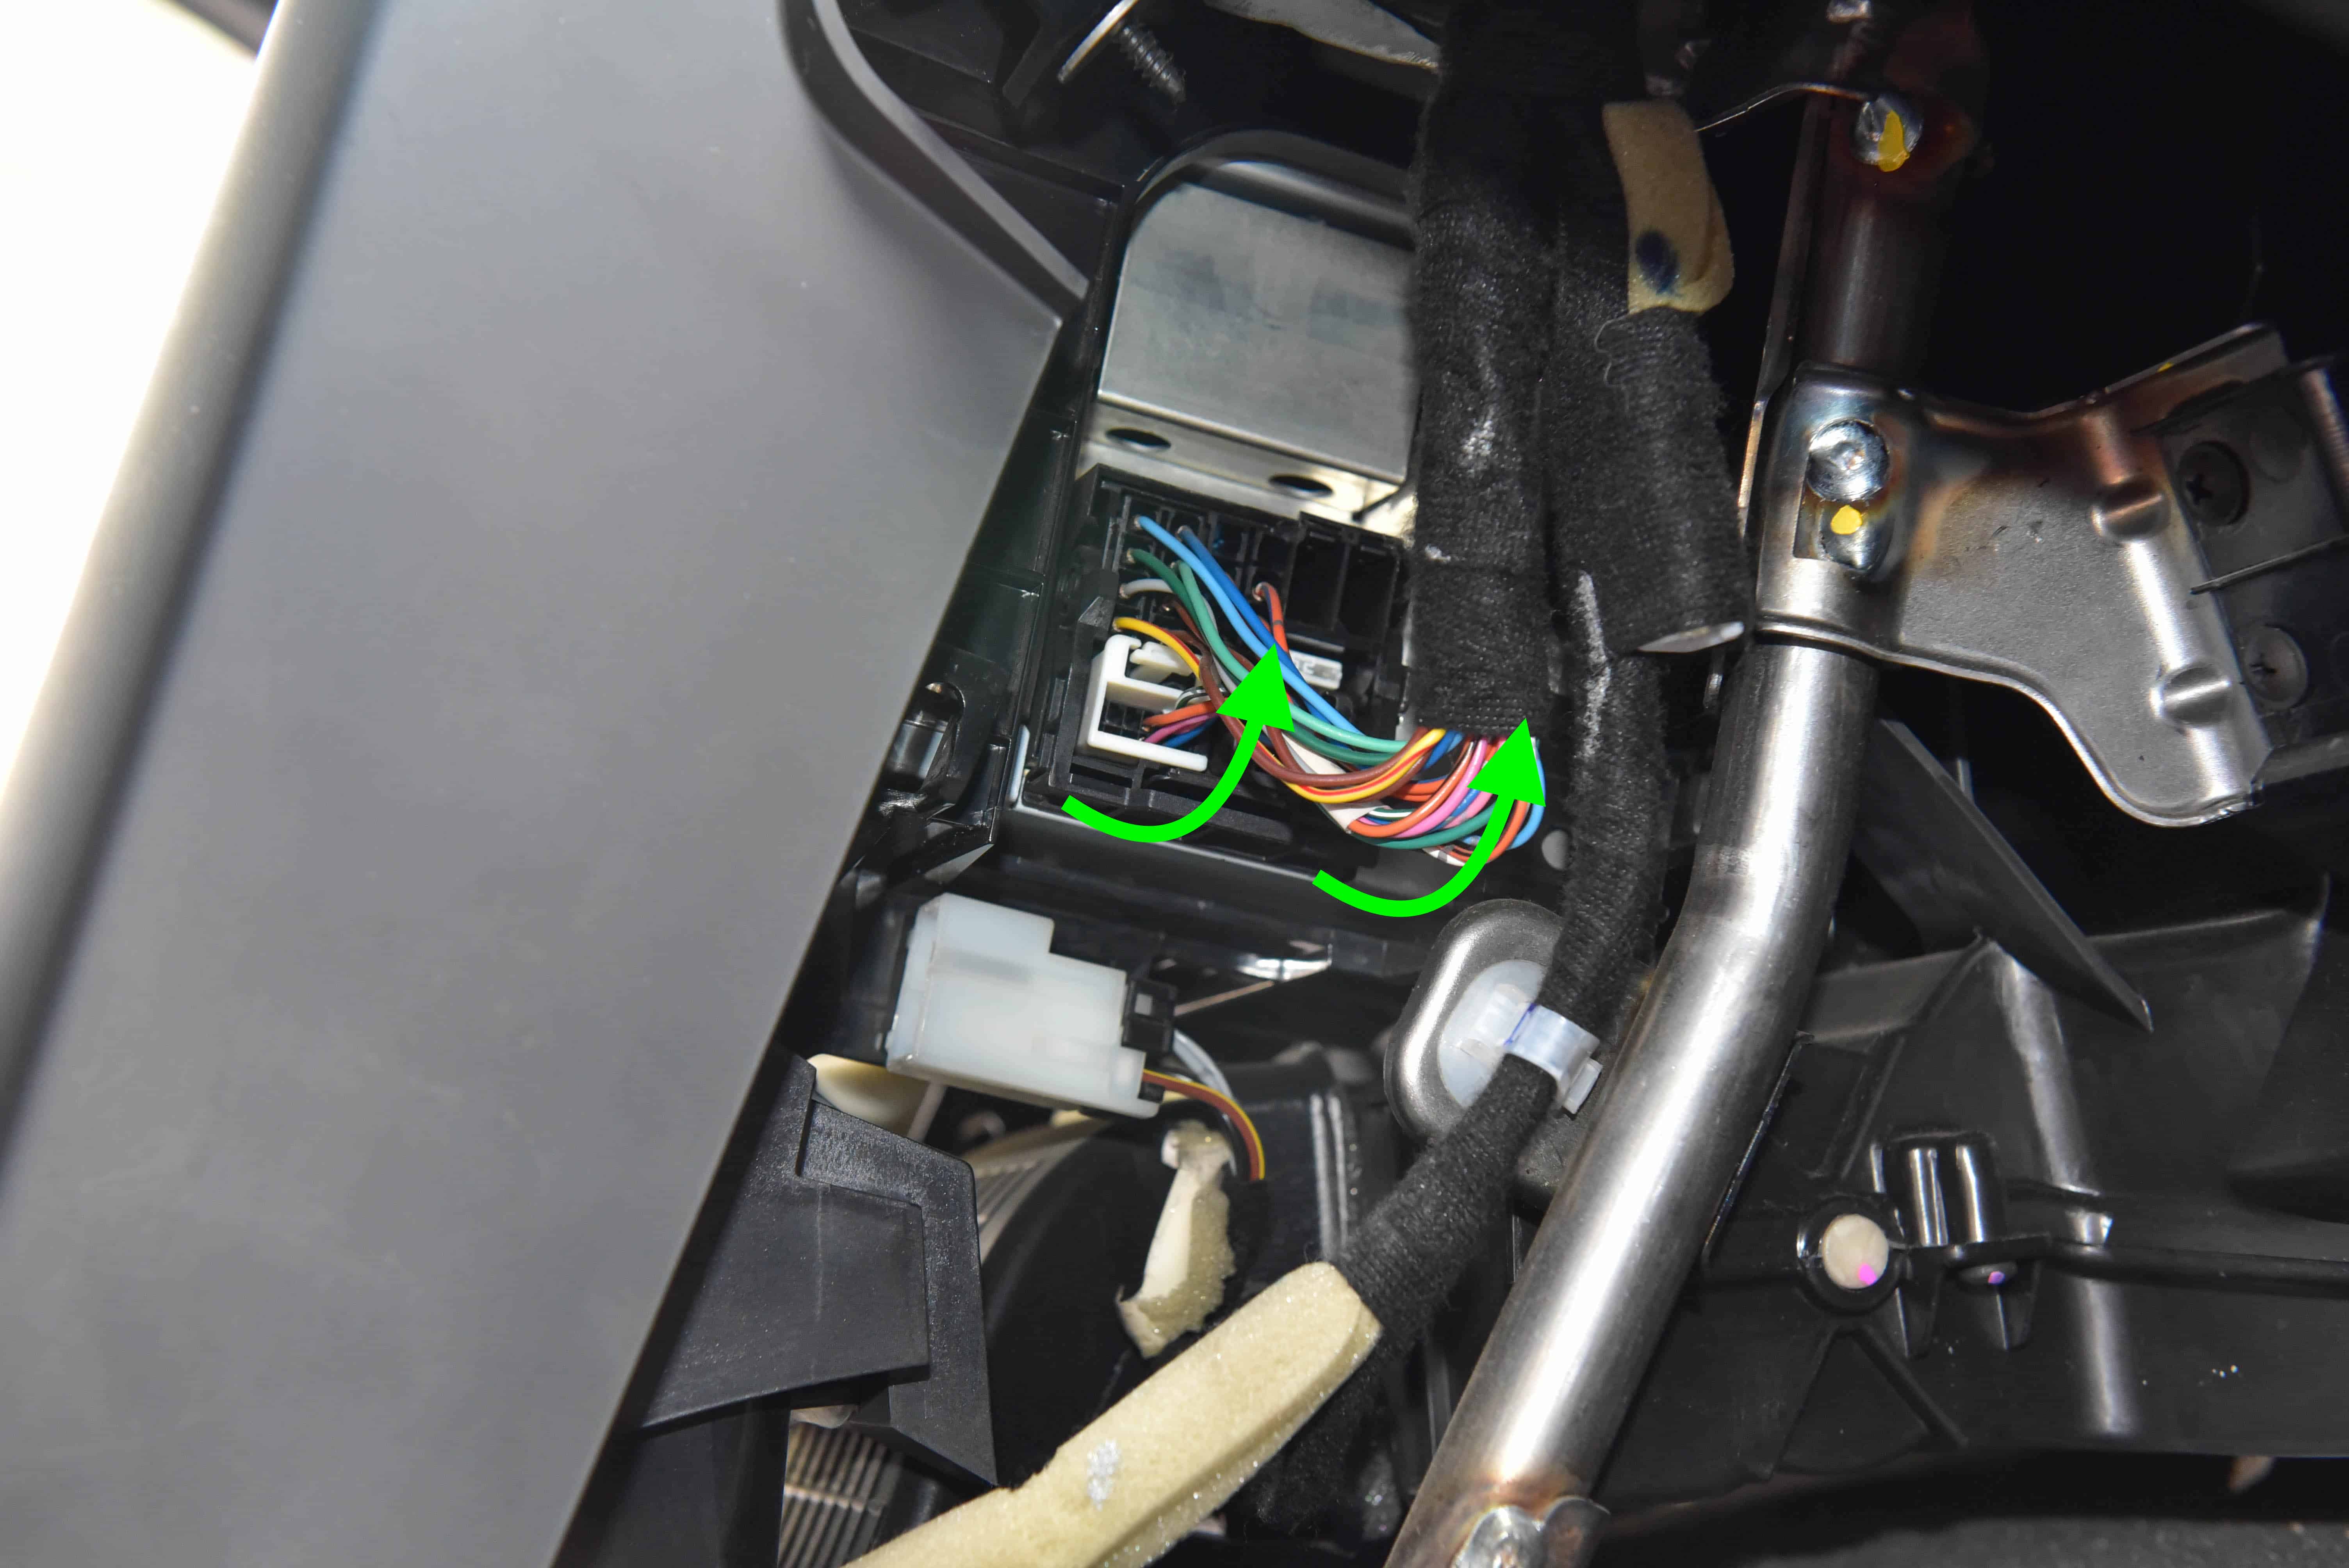
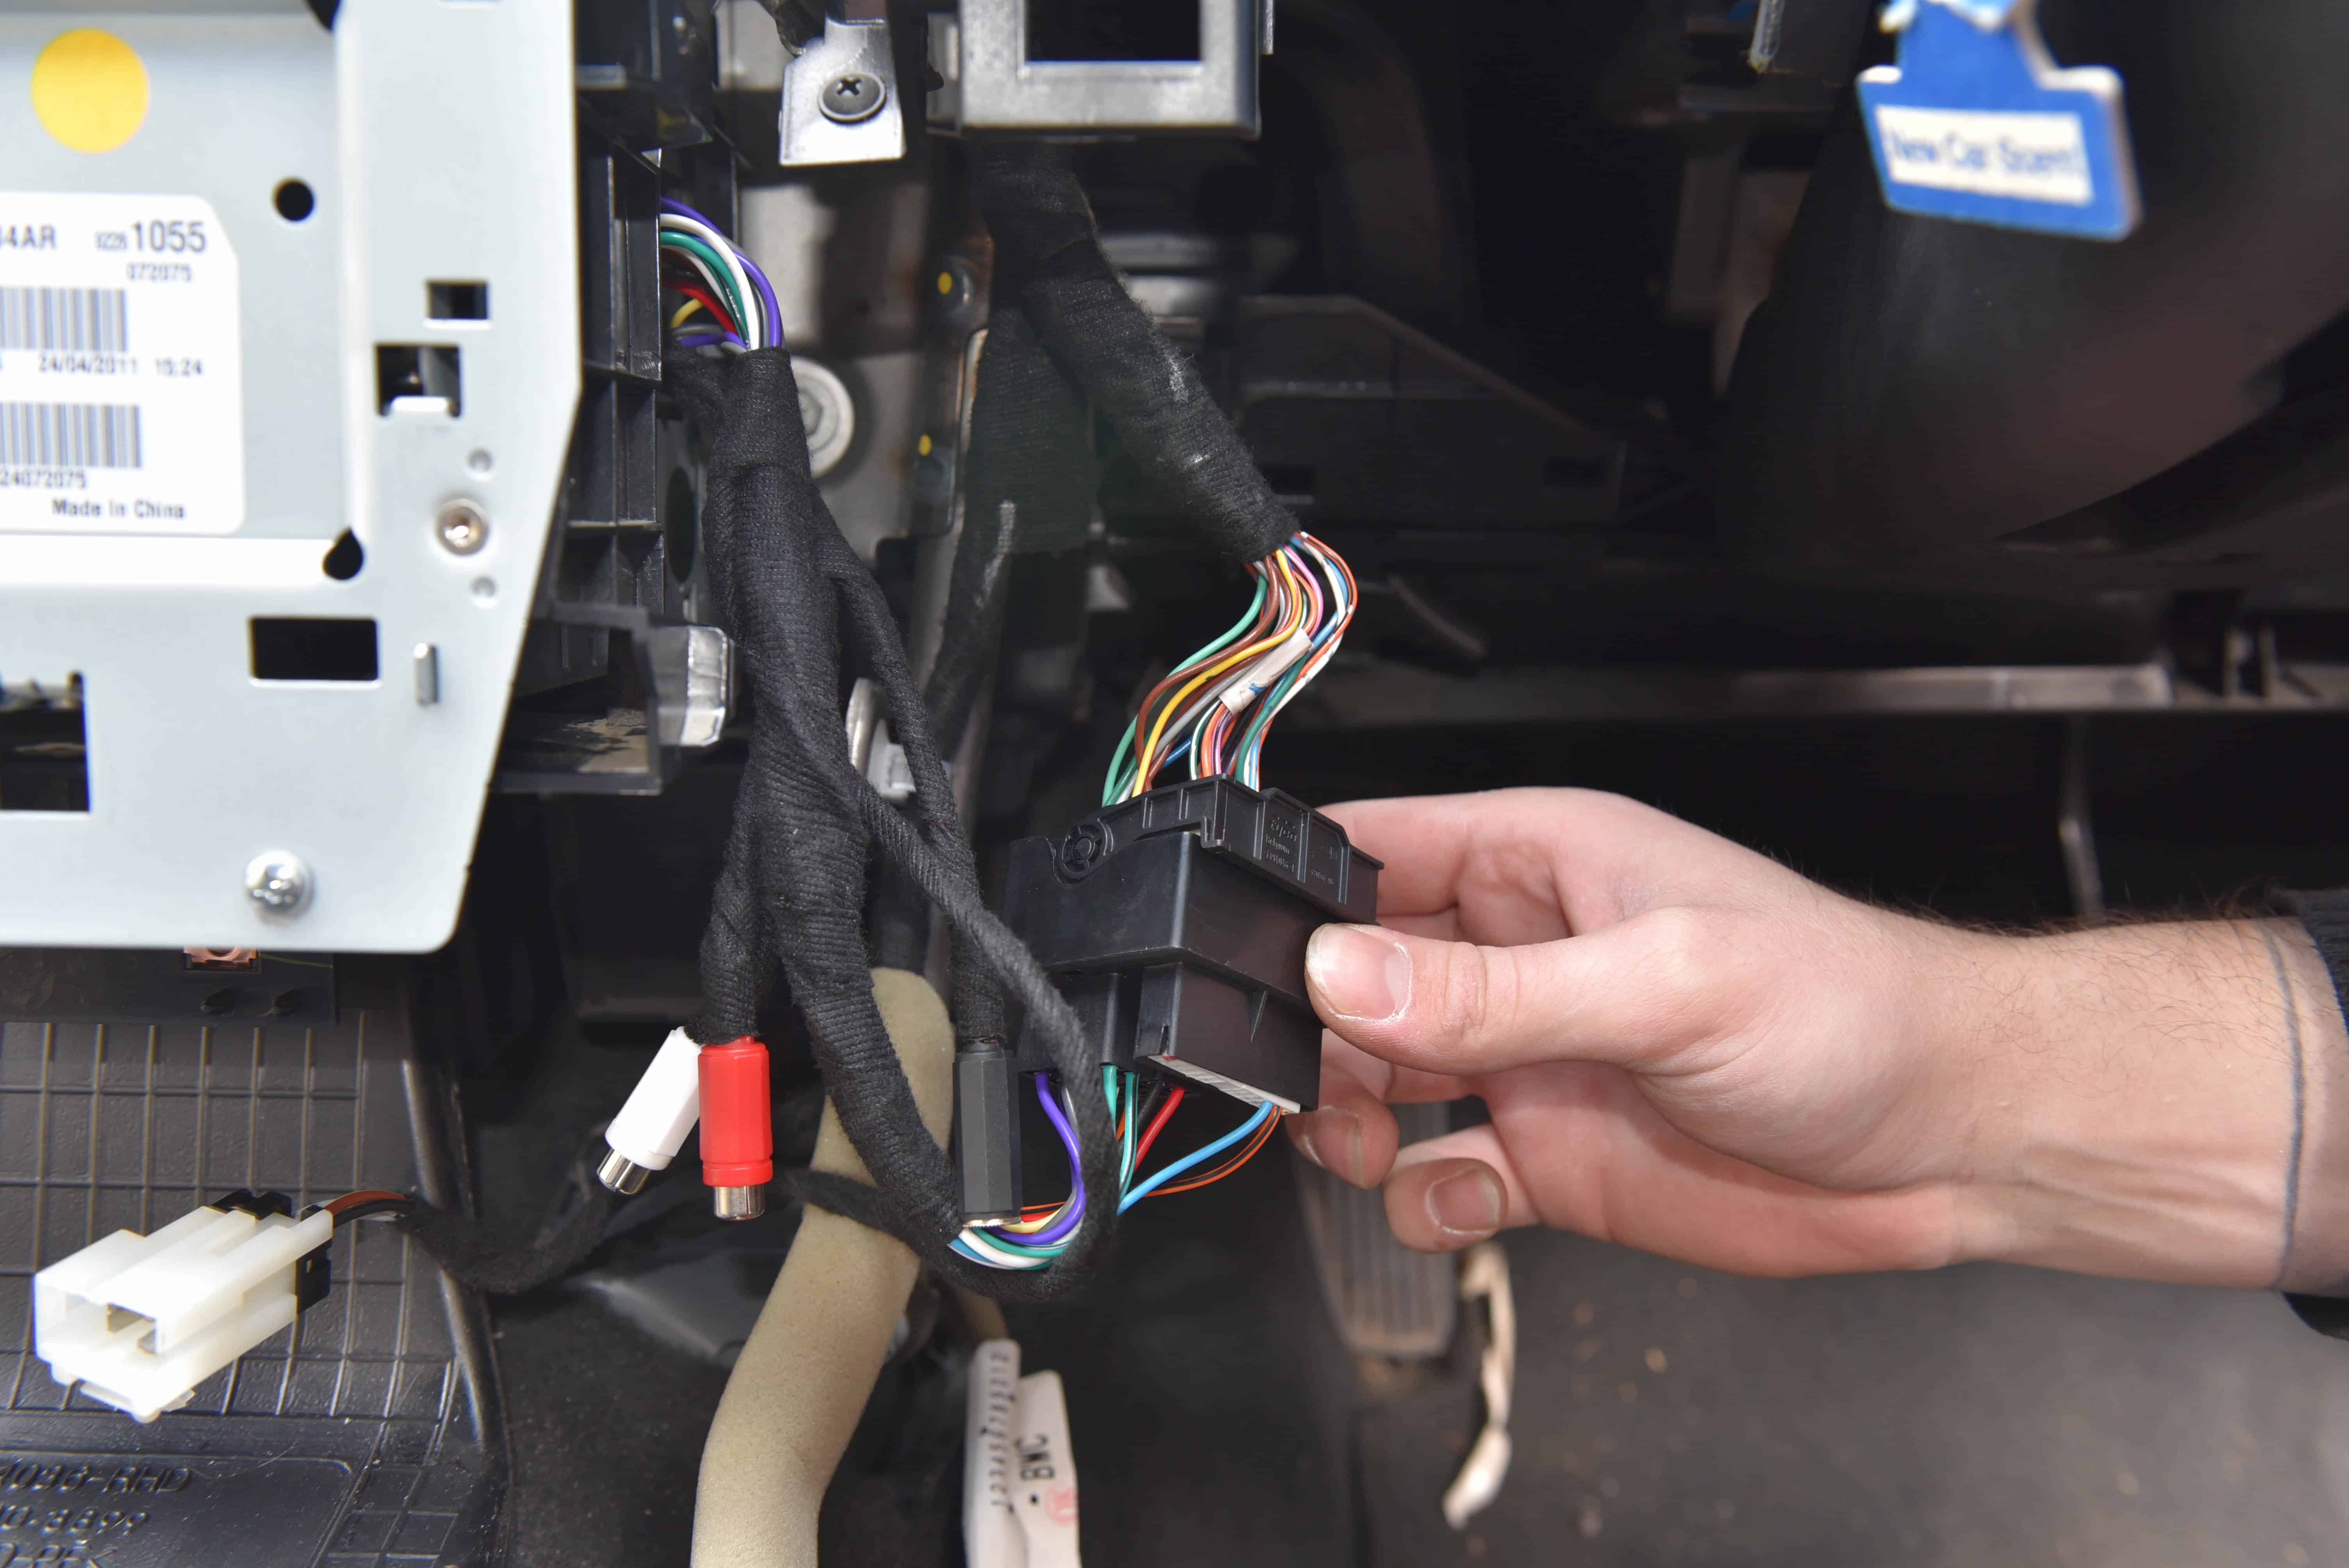
Unplug the large connector on the drivers side. Pull upwards on the lever as pictured and the connector will be released from the headunit.
Step 18
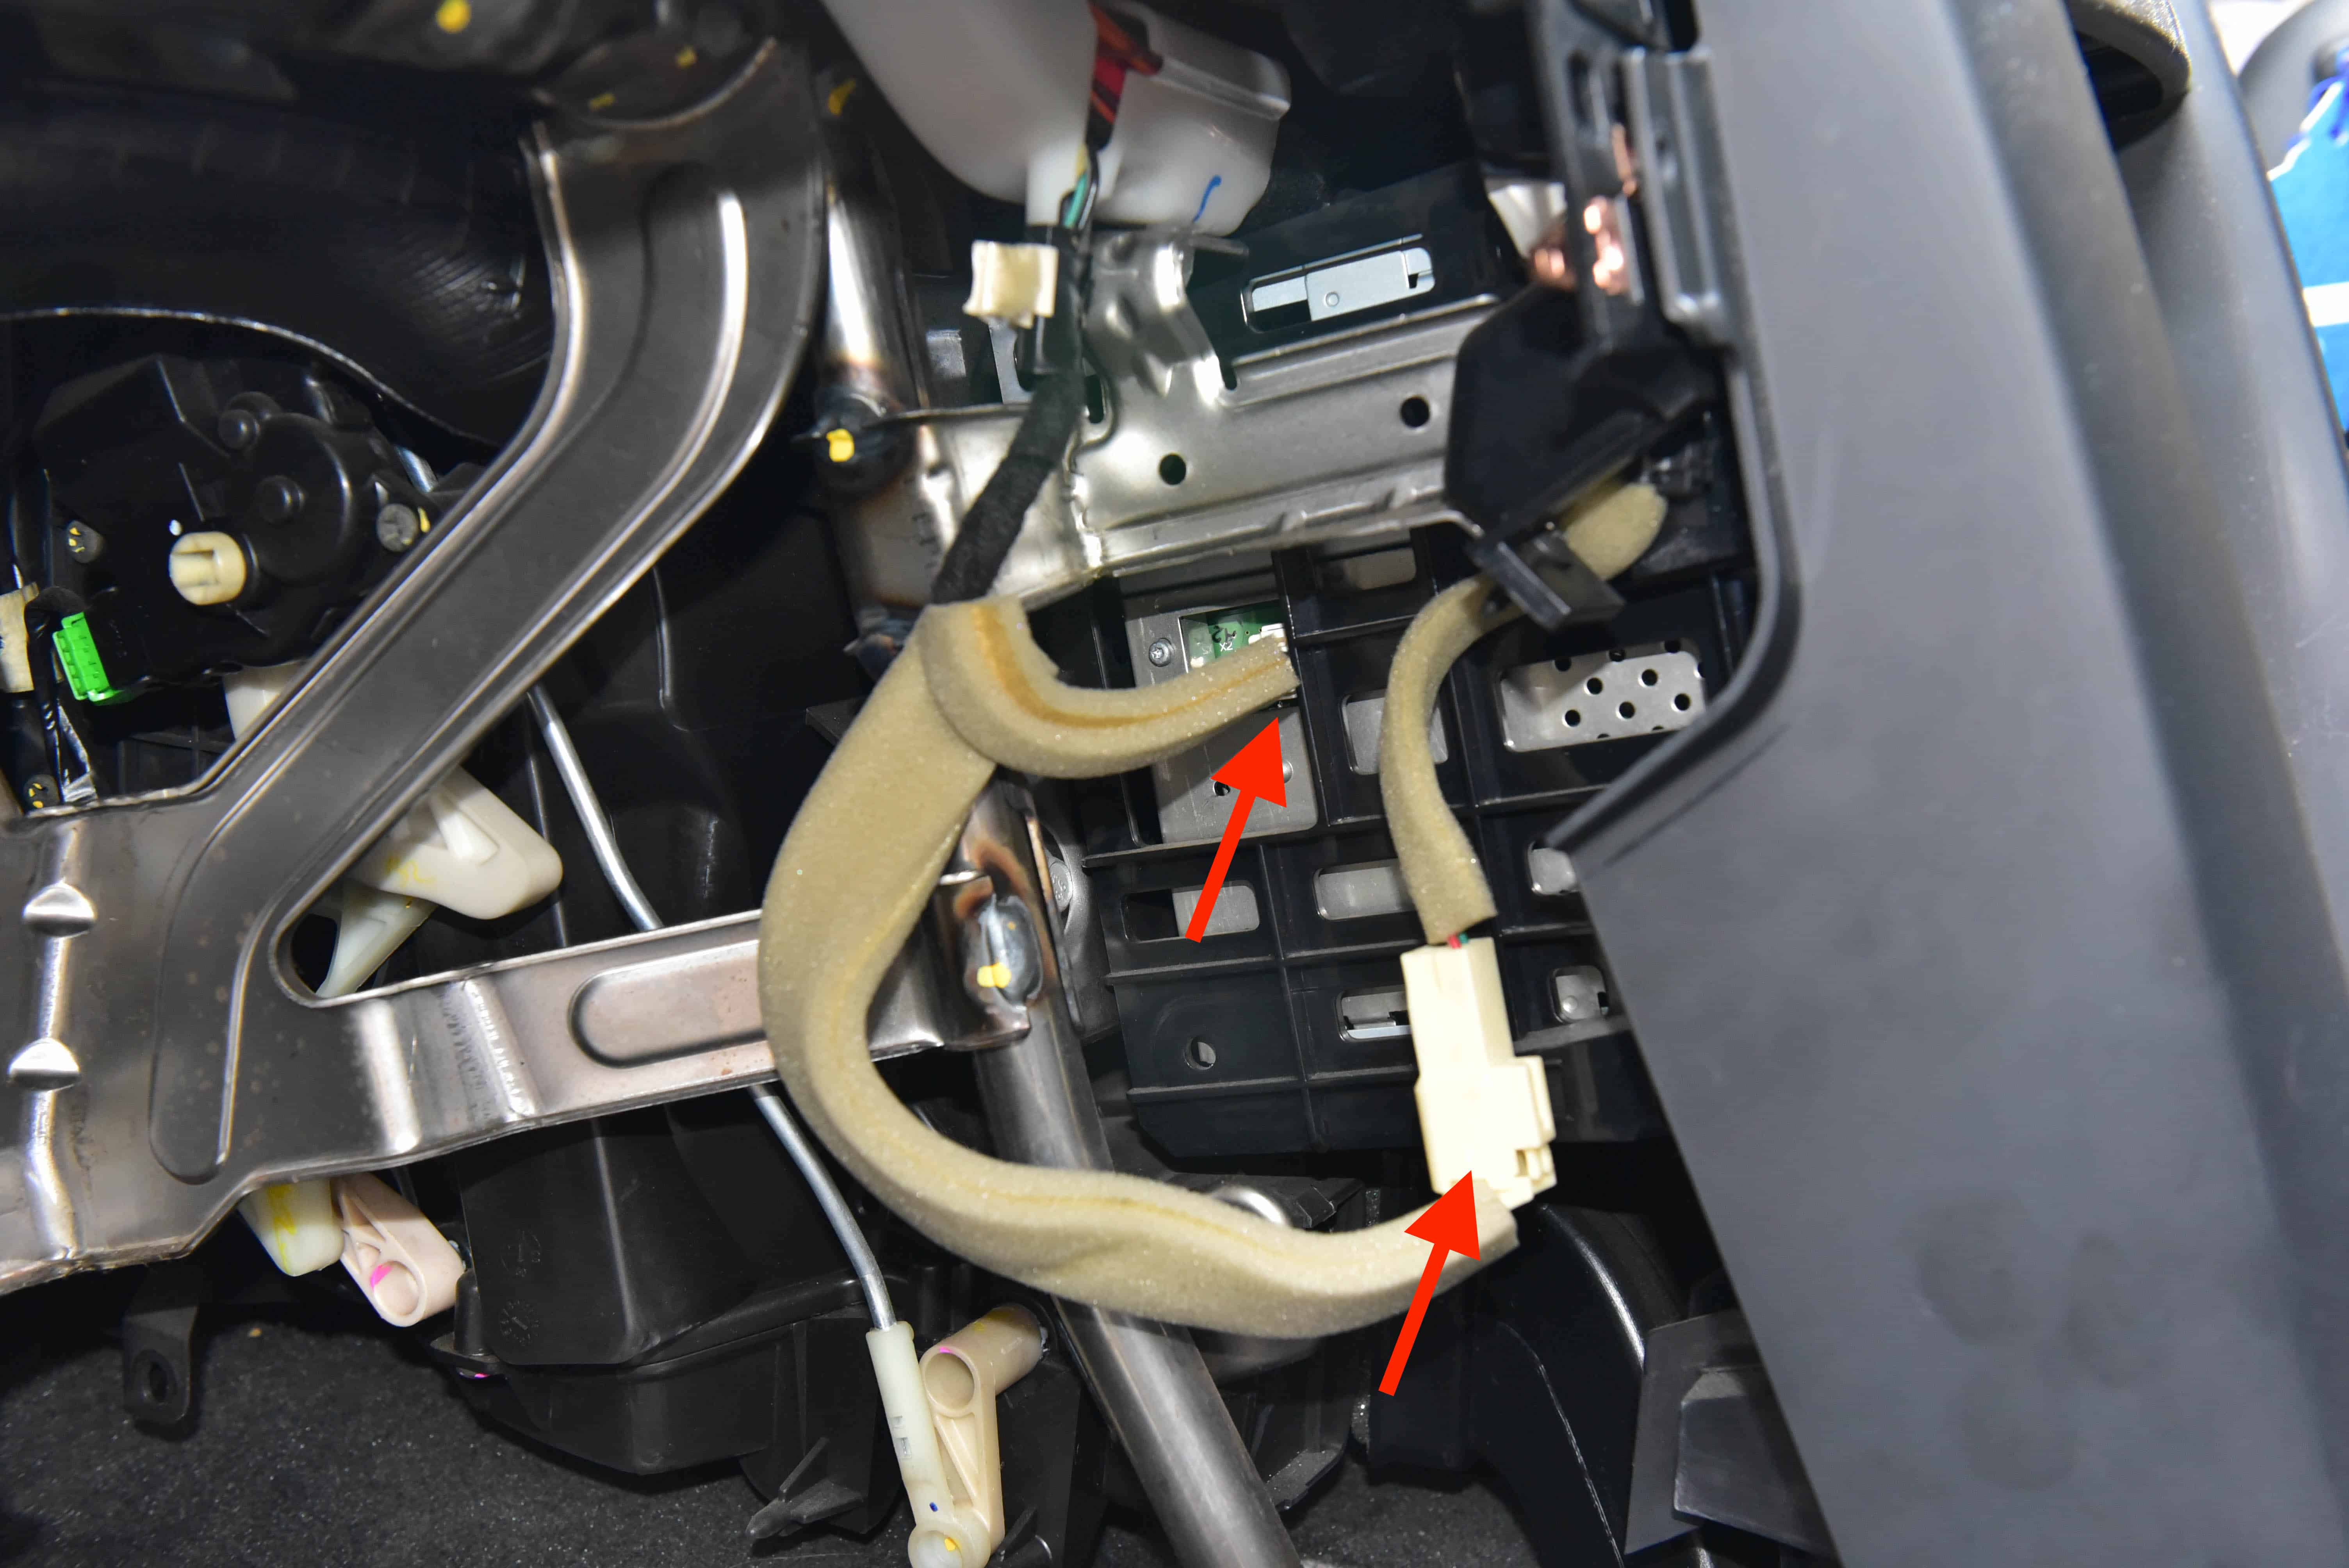
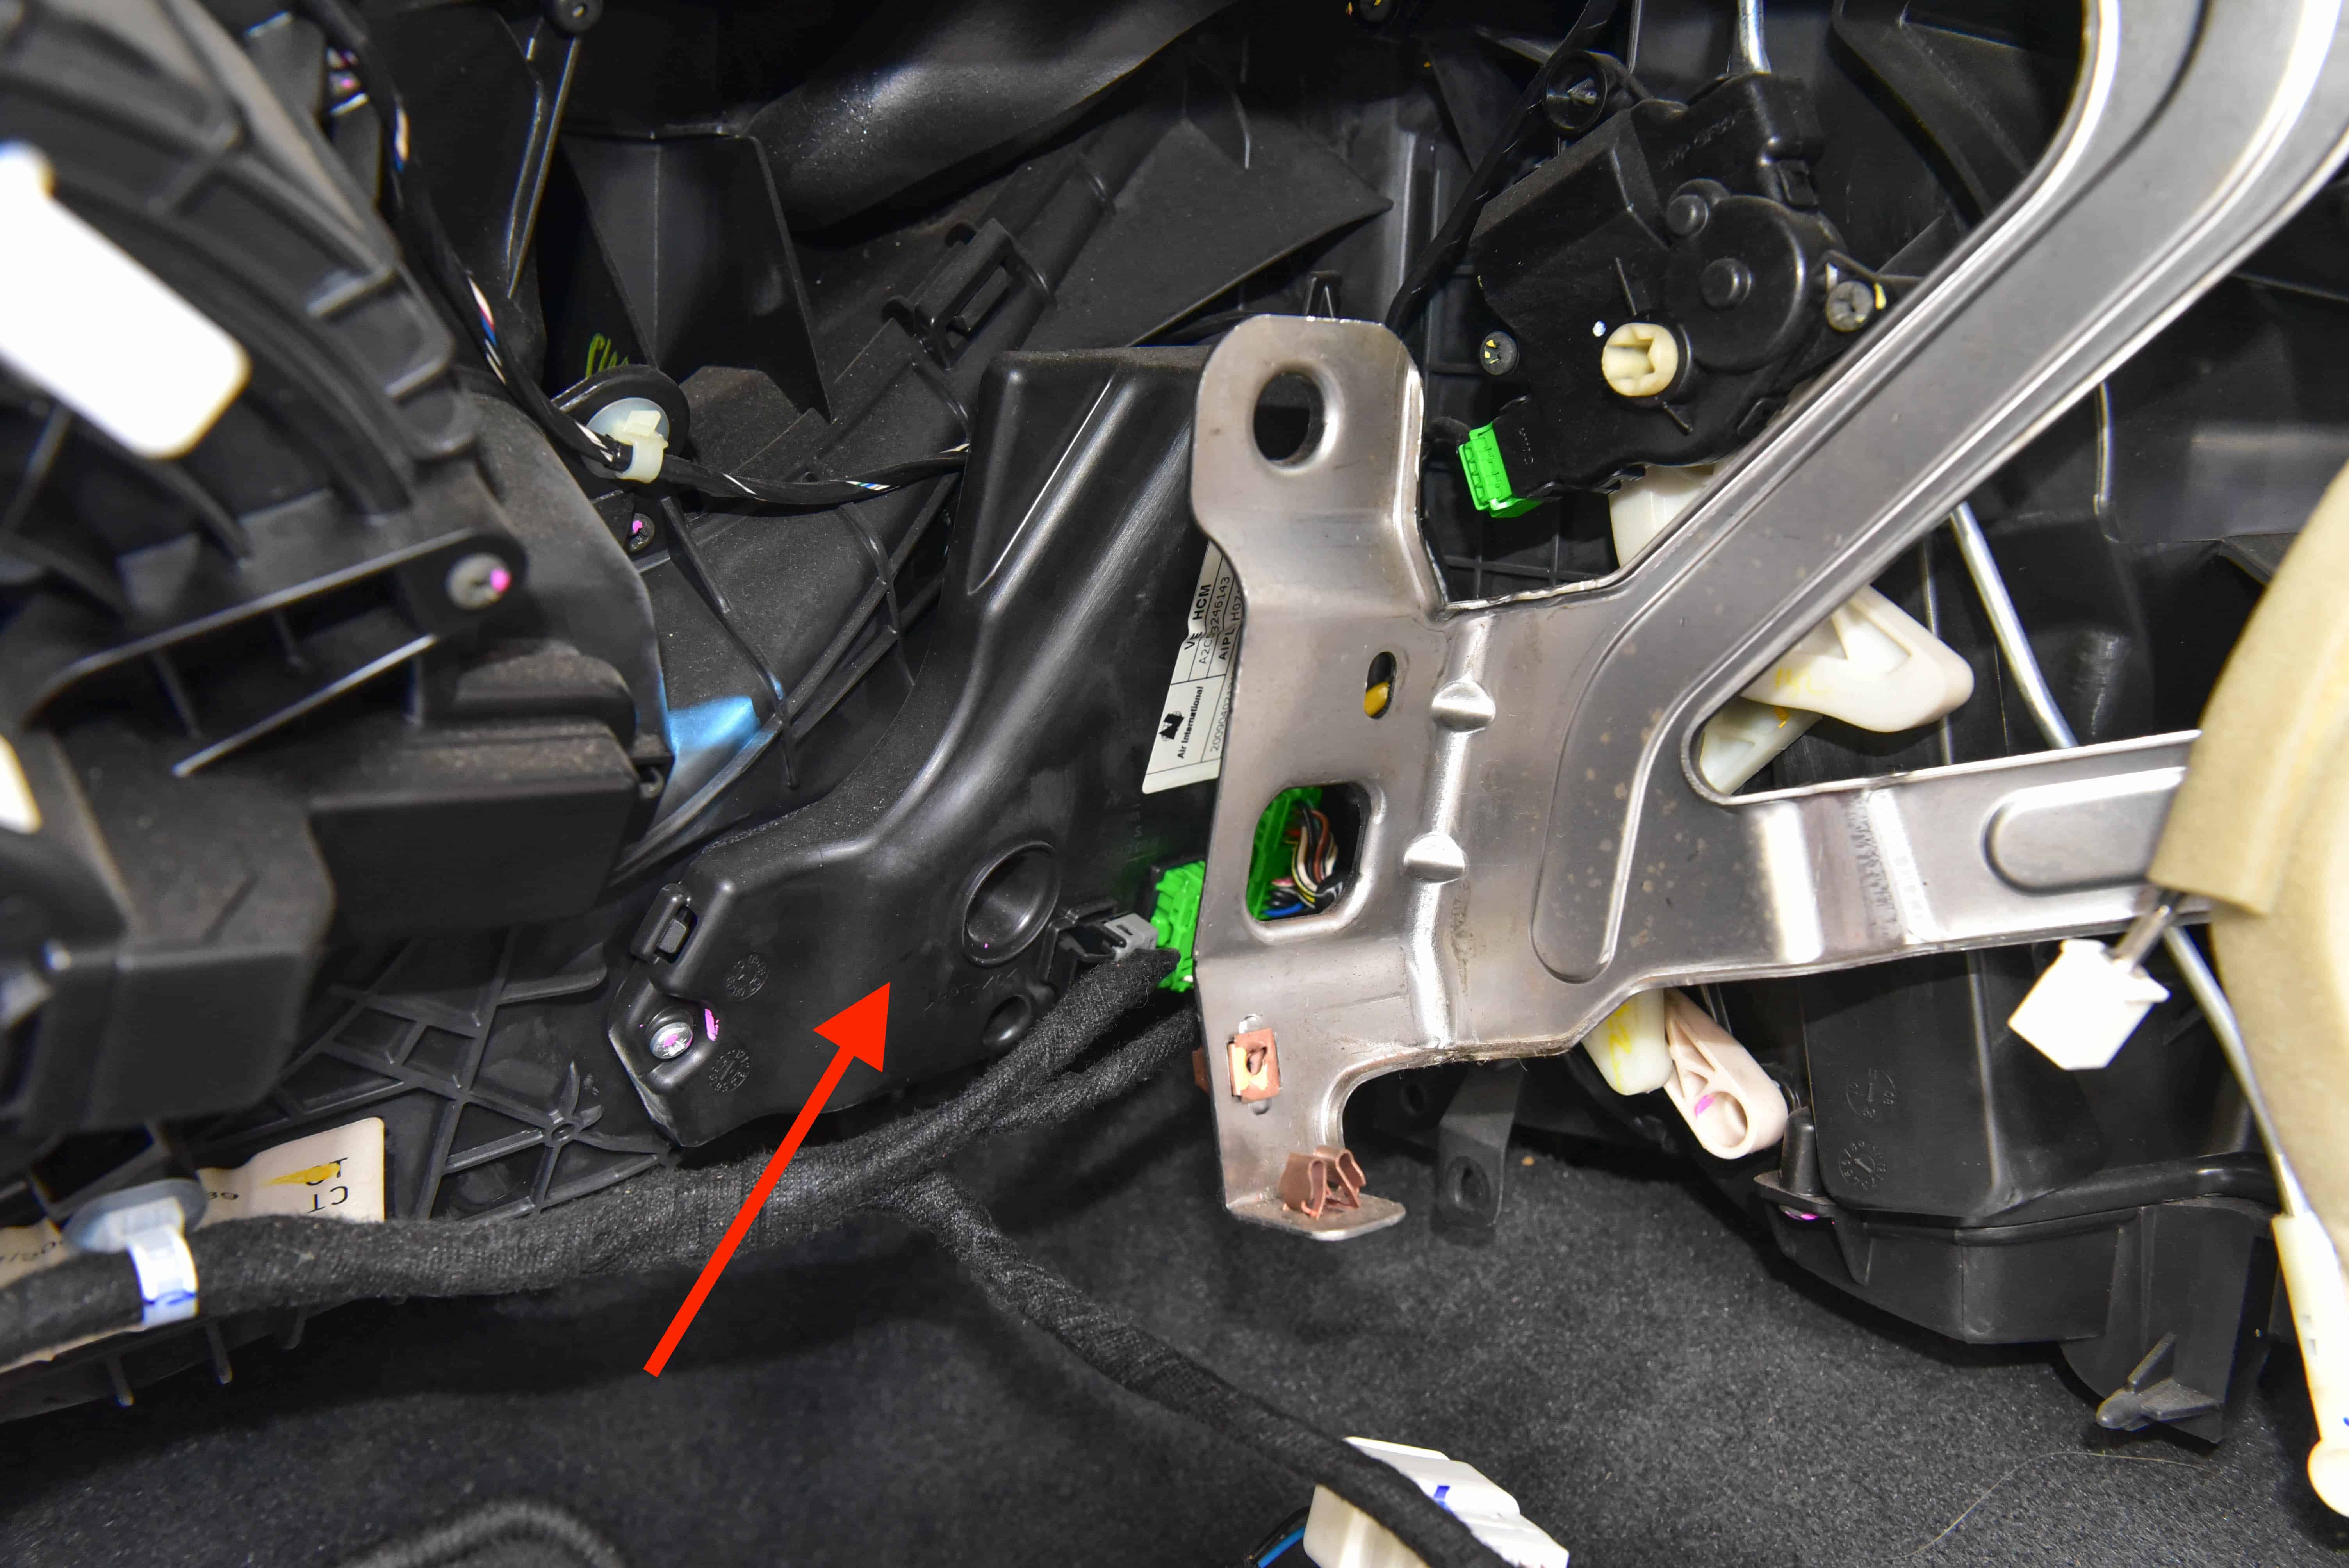
Unplug the the antenna on the passenger side. Also disconnect the harness as pictured.
The headunit ‘brain’ can now be pulled out and removed from the vehicle.
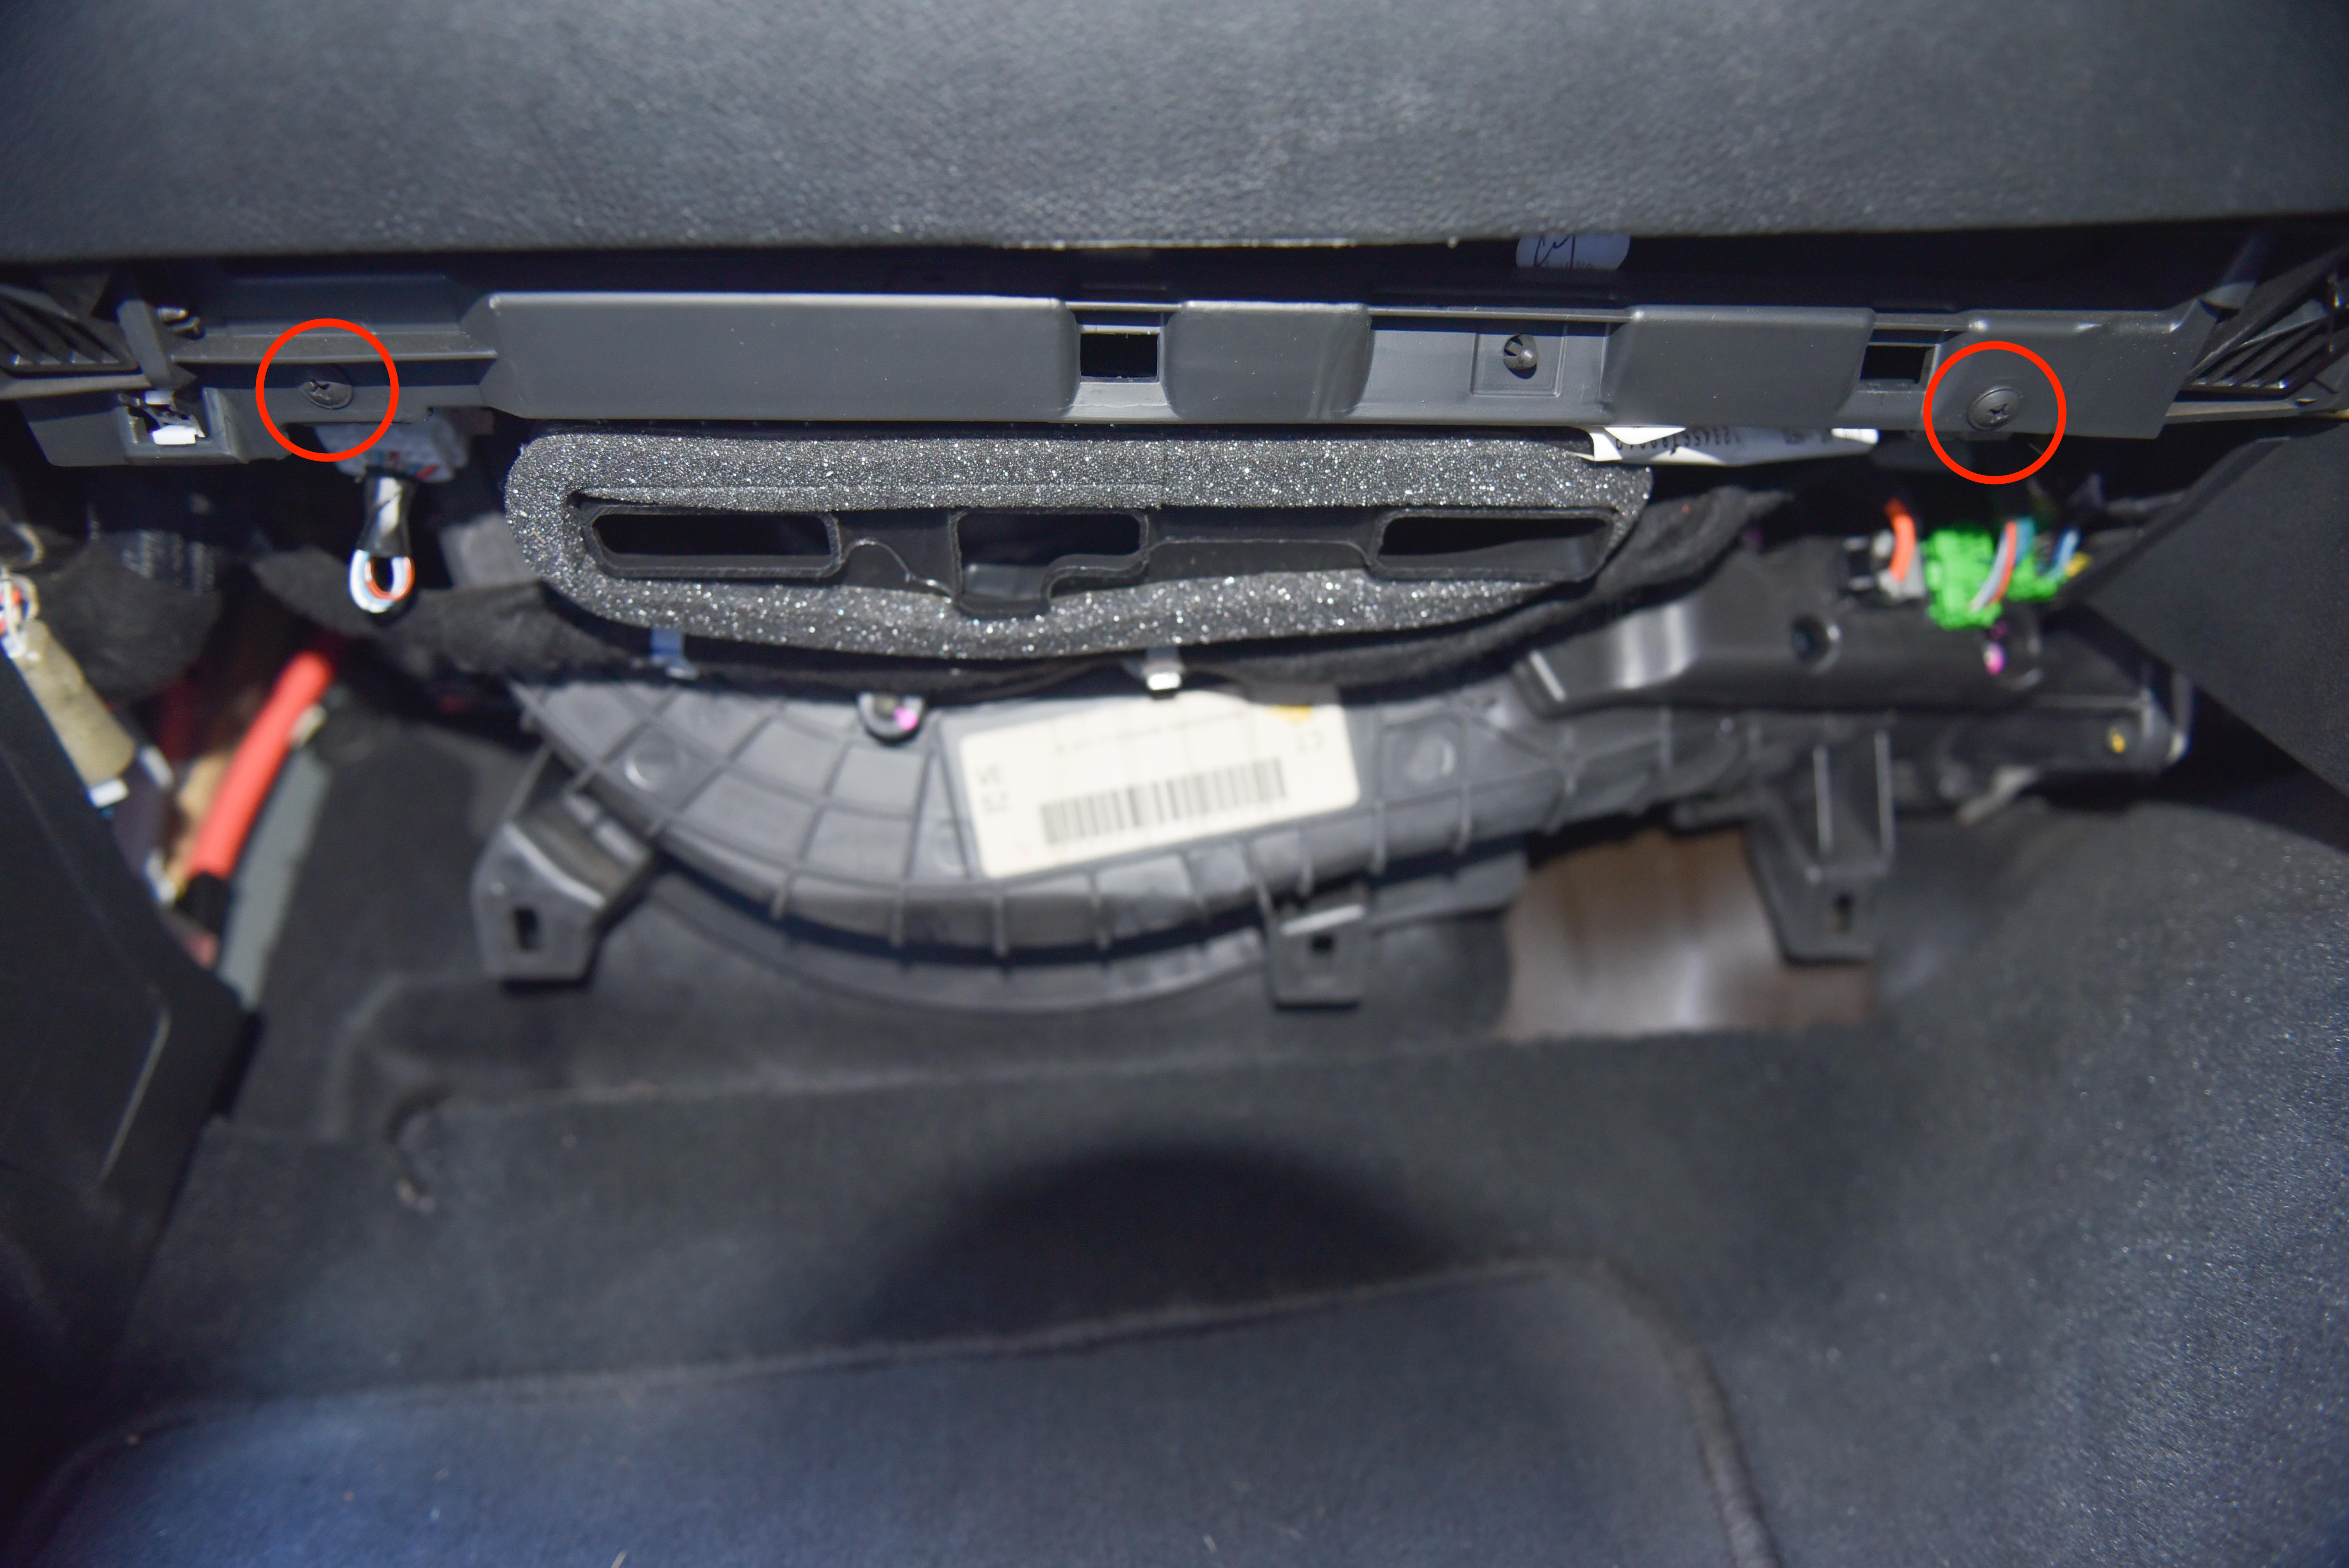
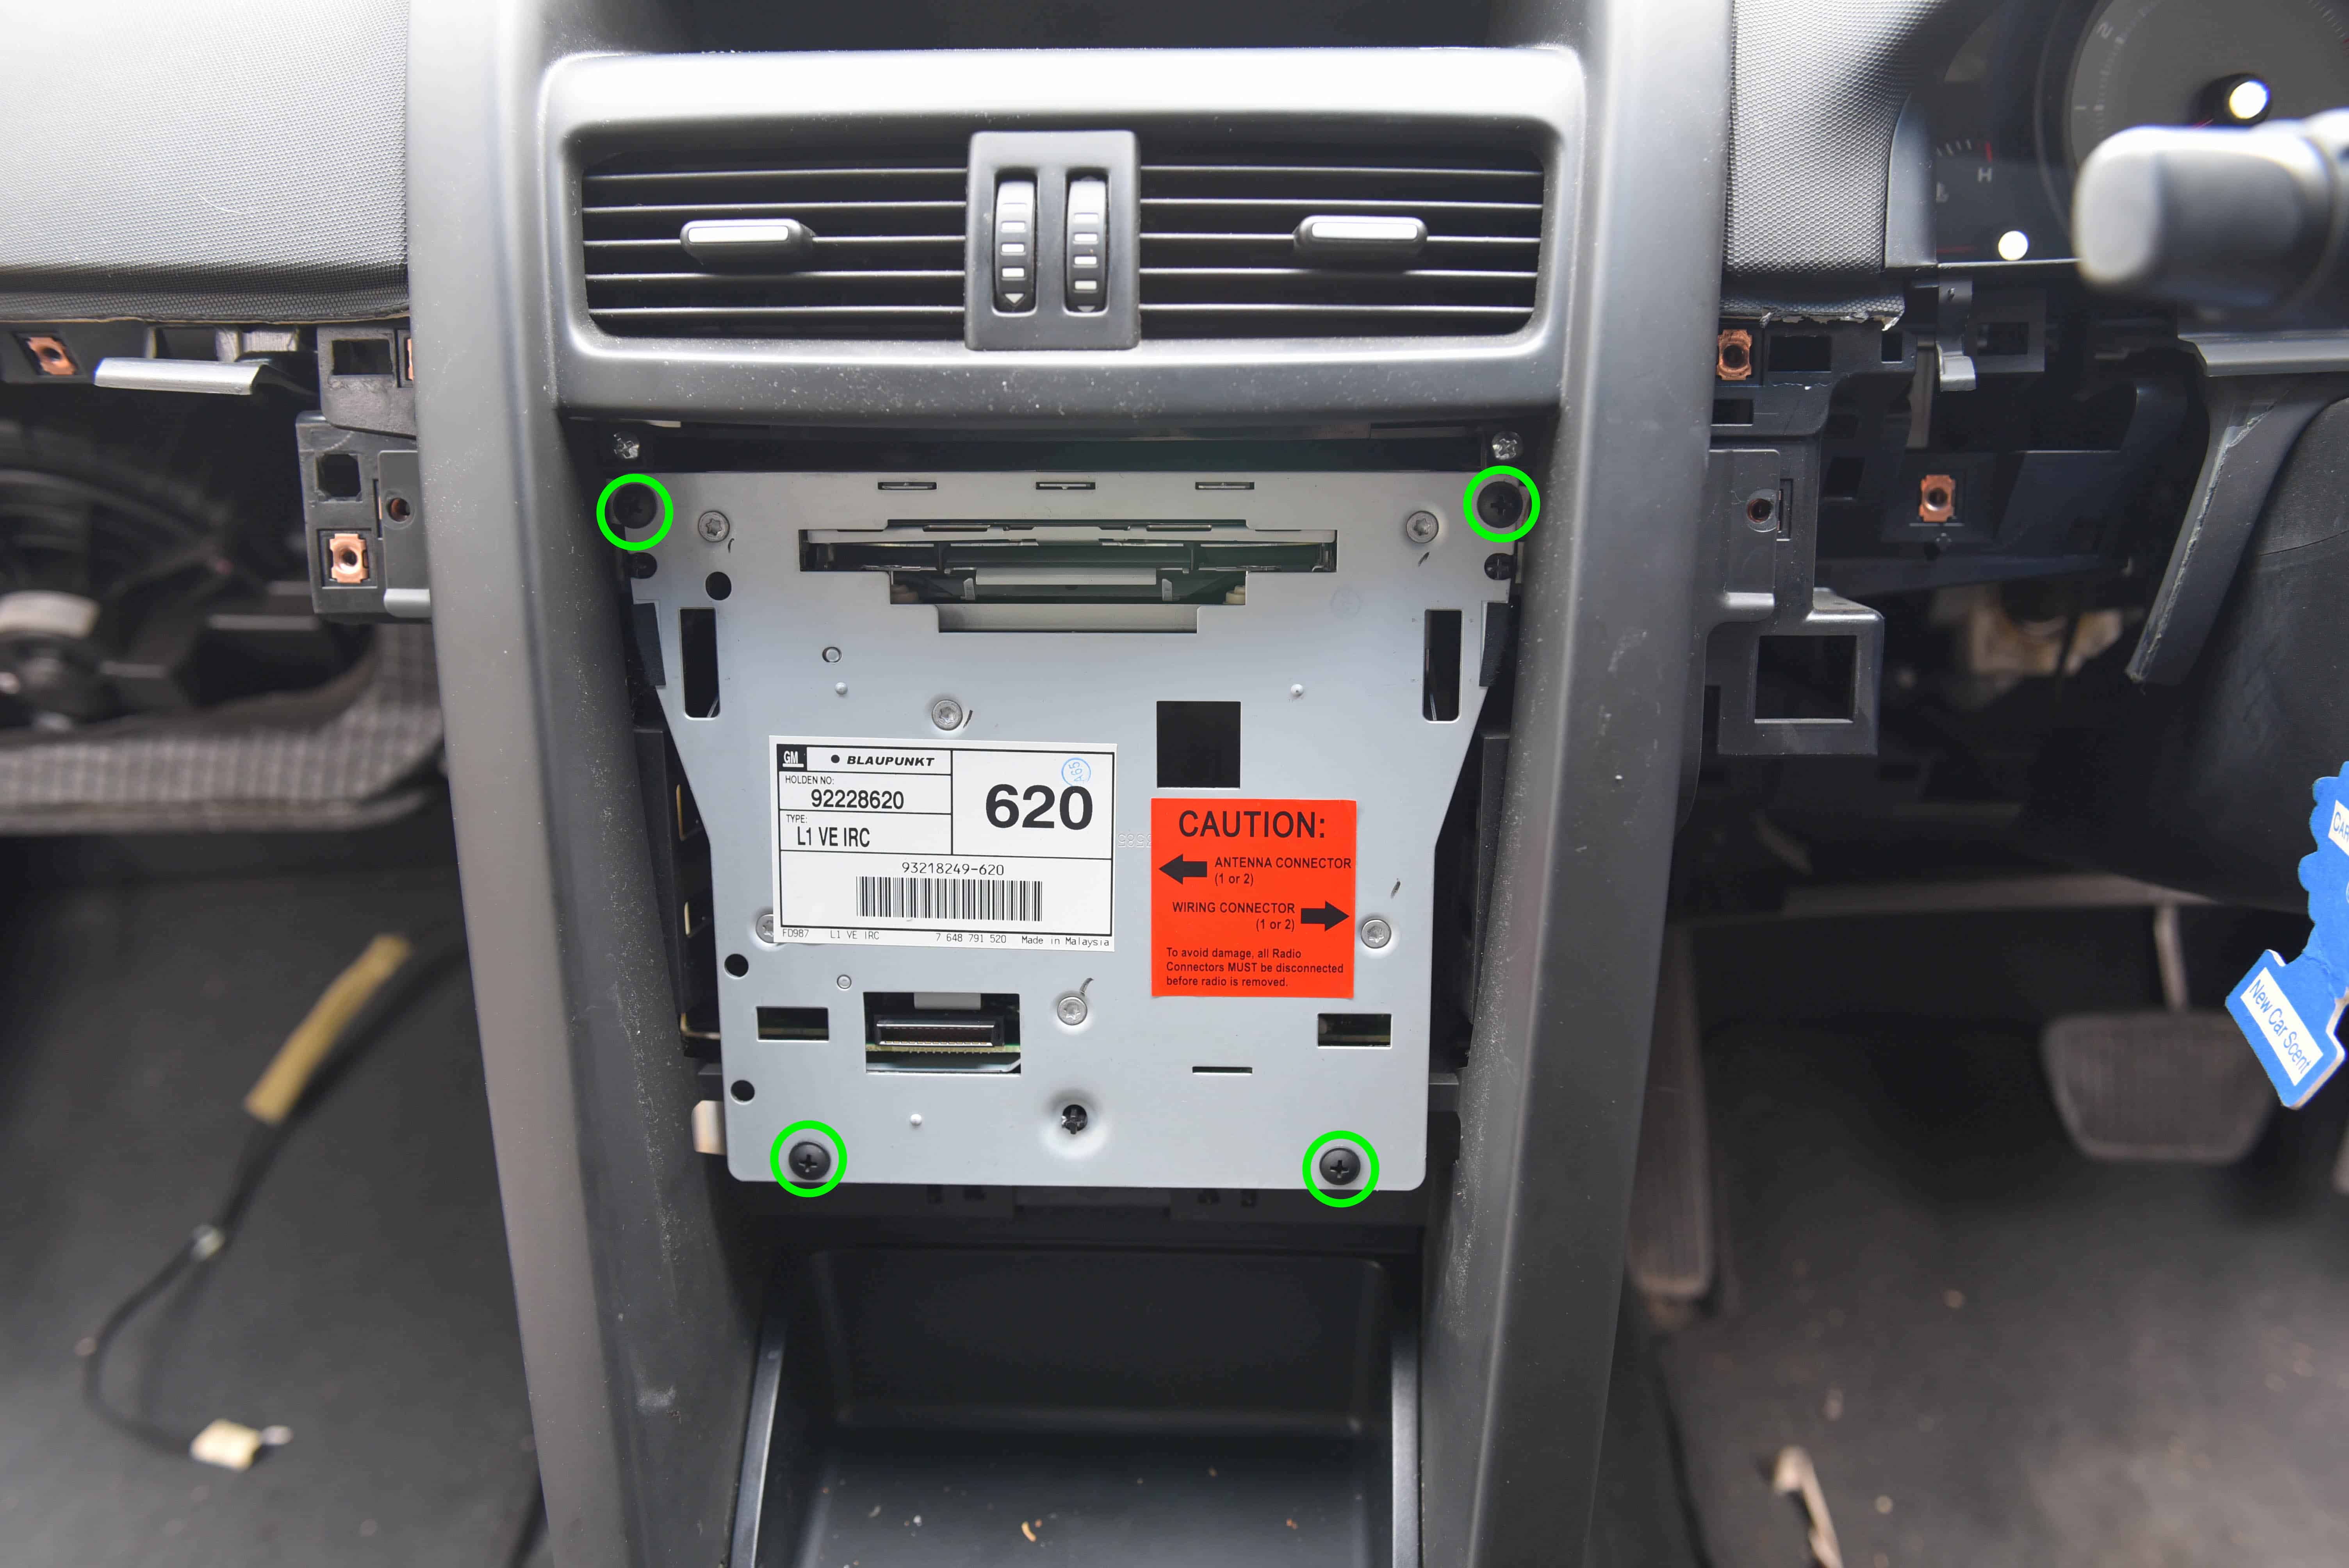
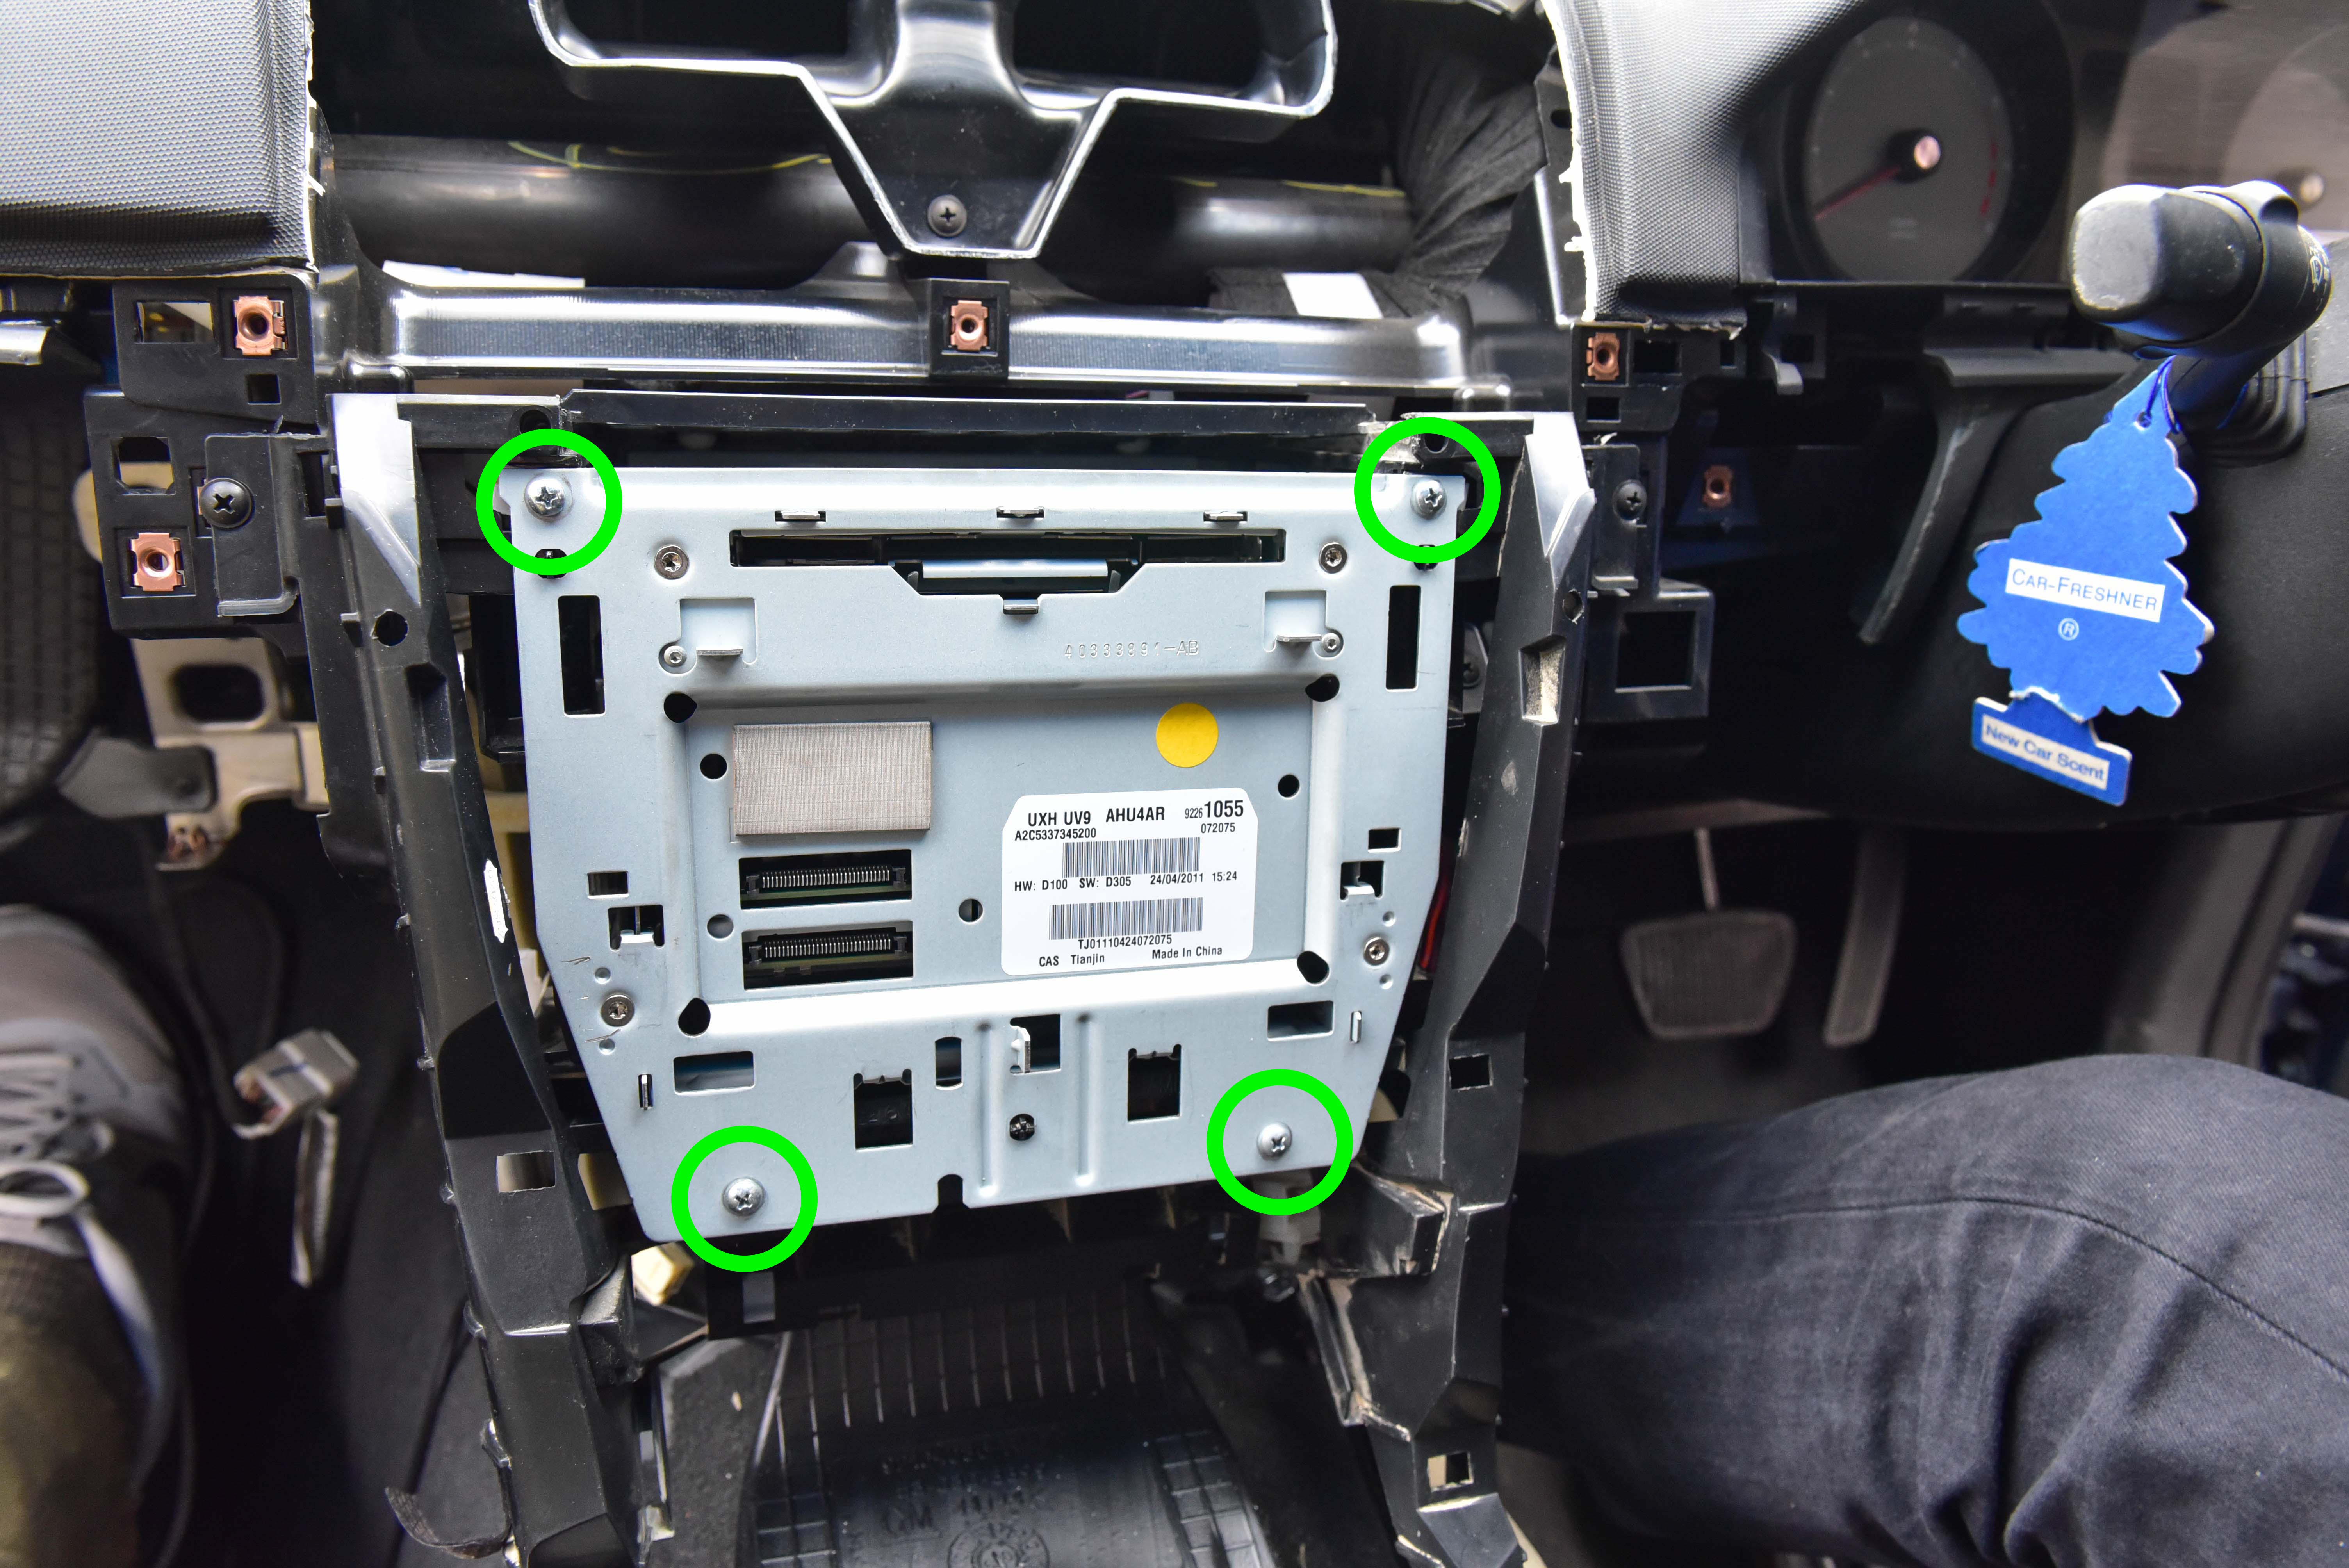
Step 19
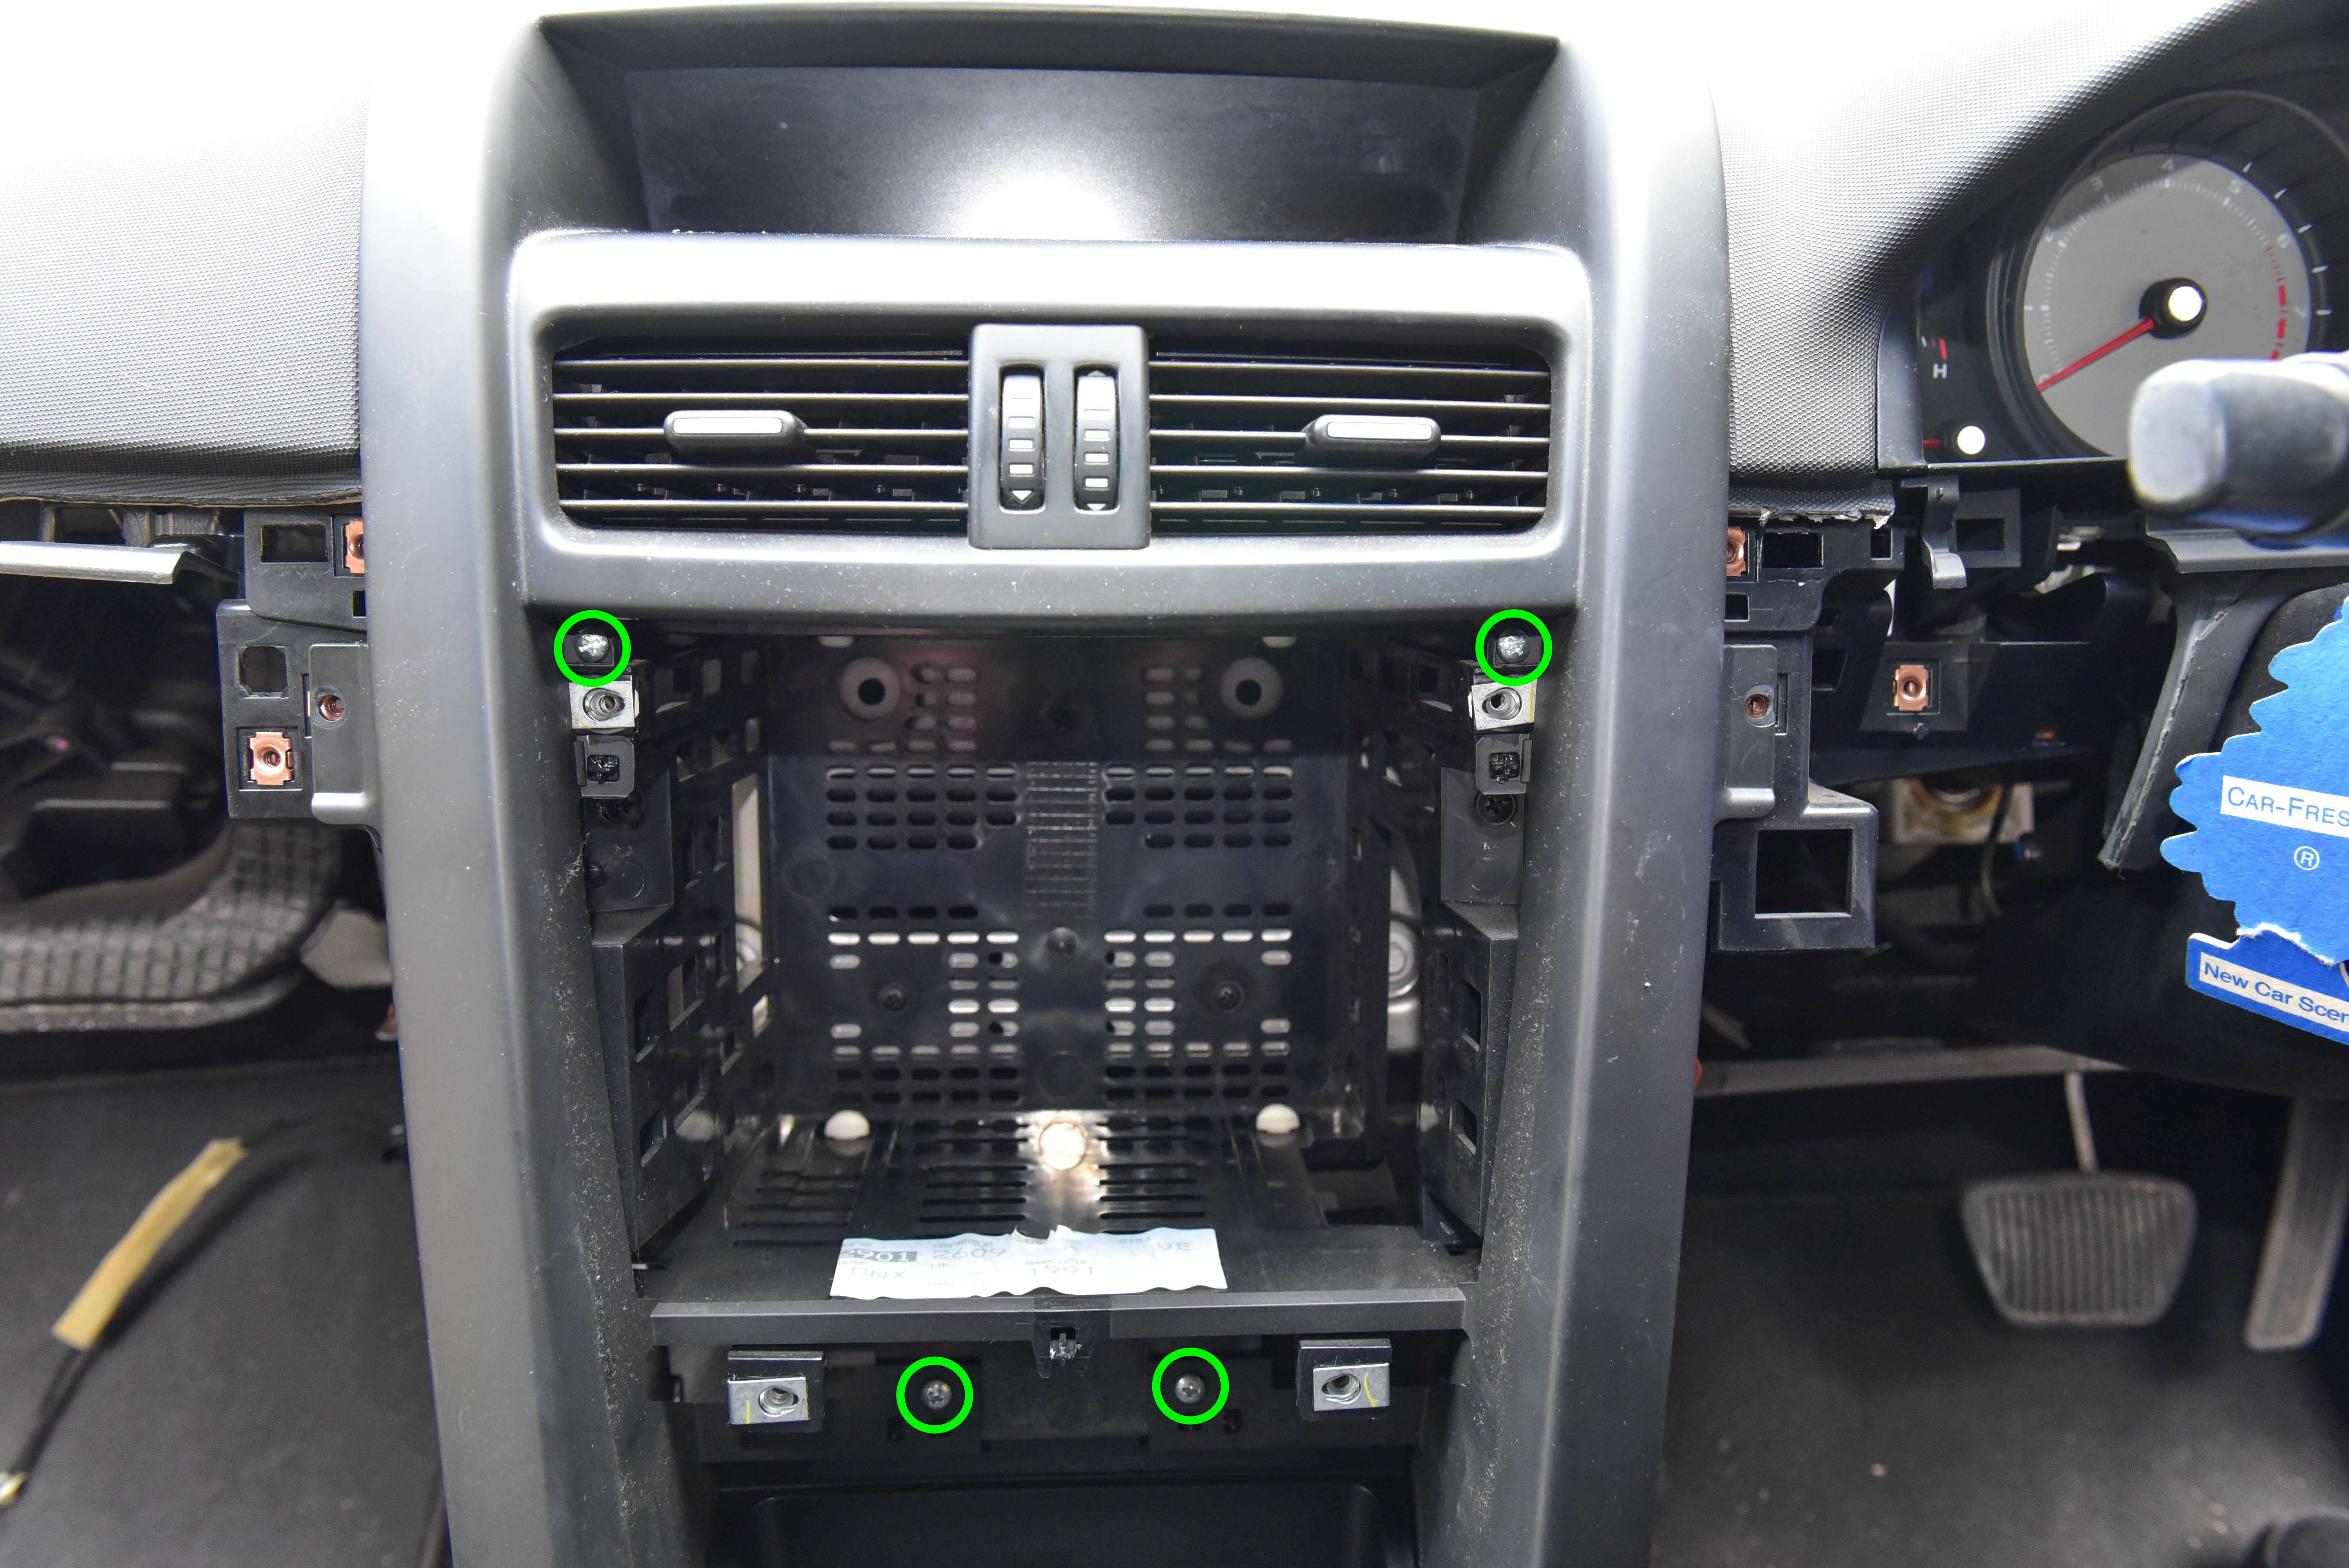
With the headunit removed, unscrew the following four screws as pictured.
Step 20
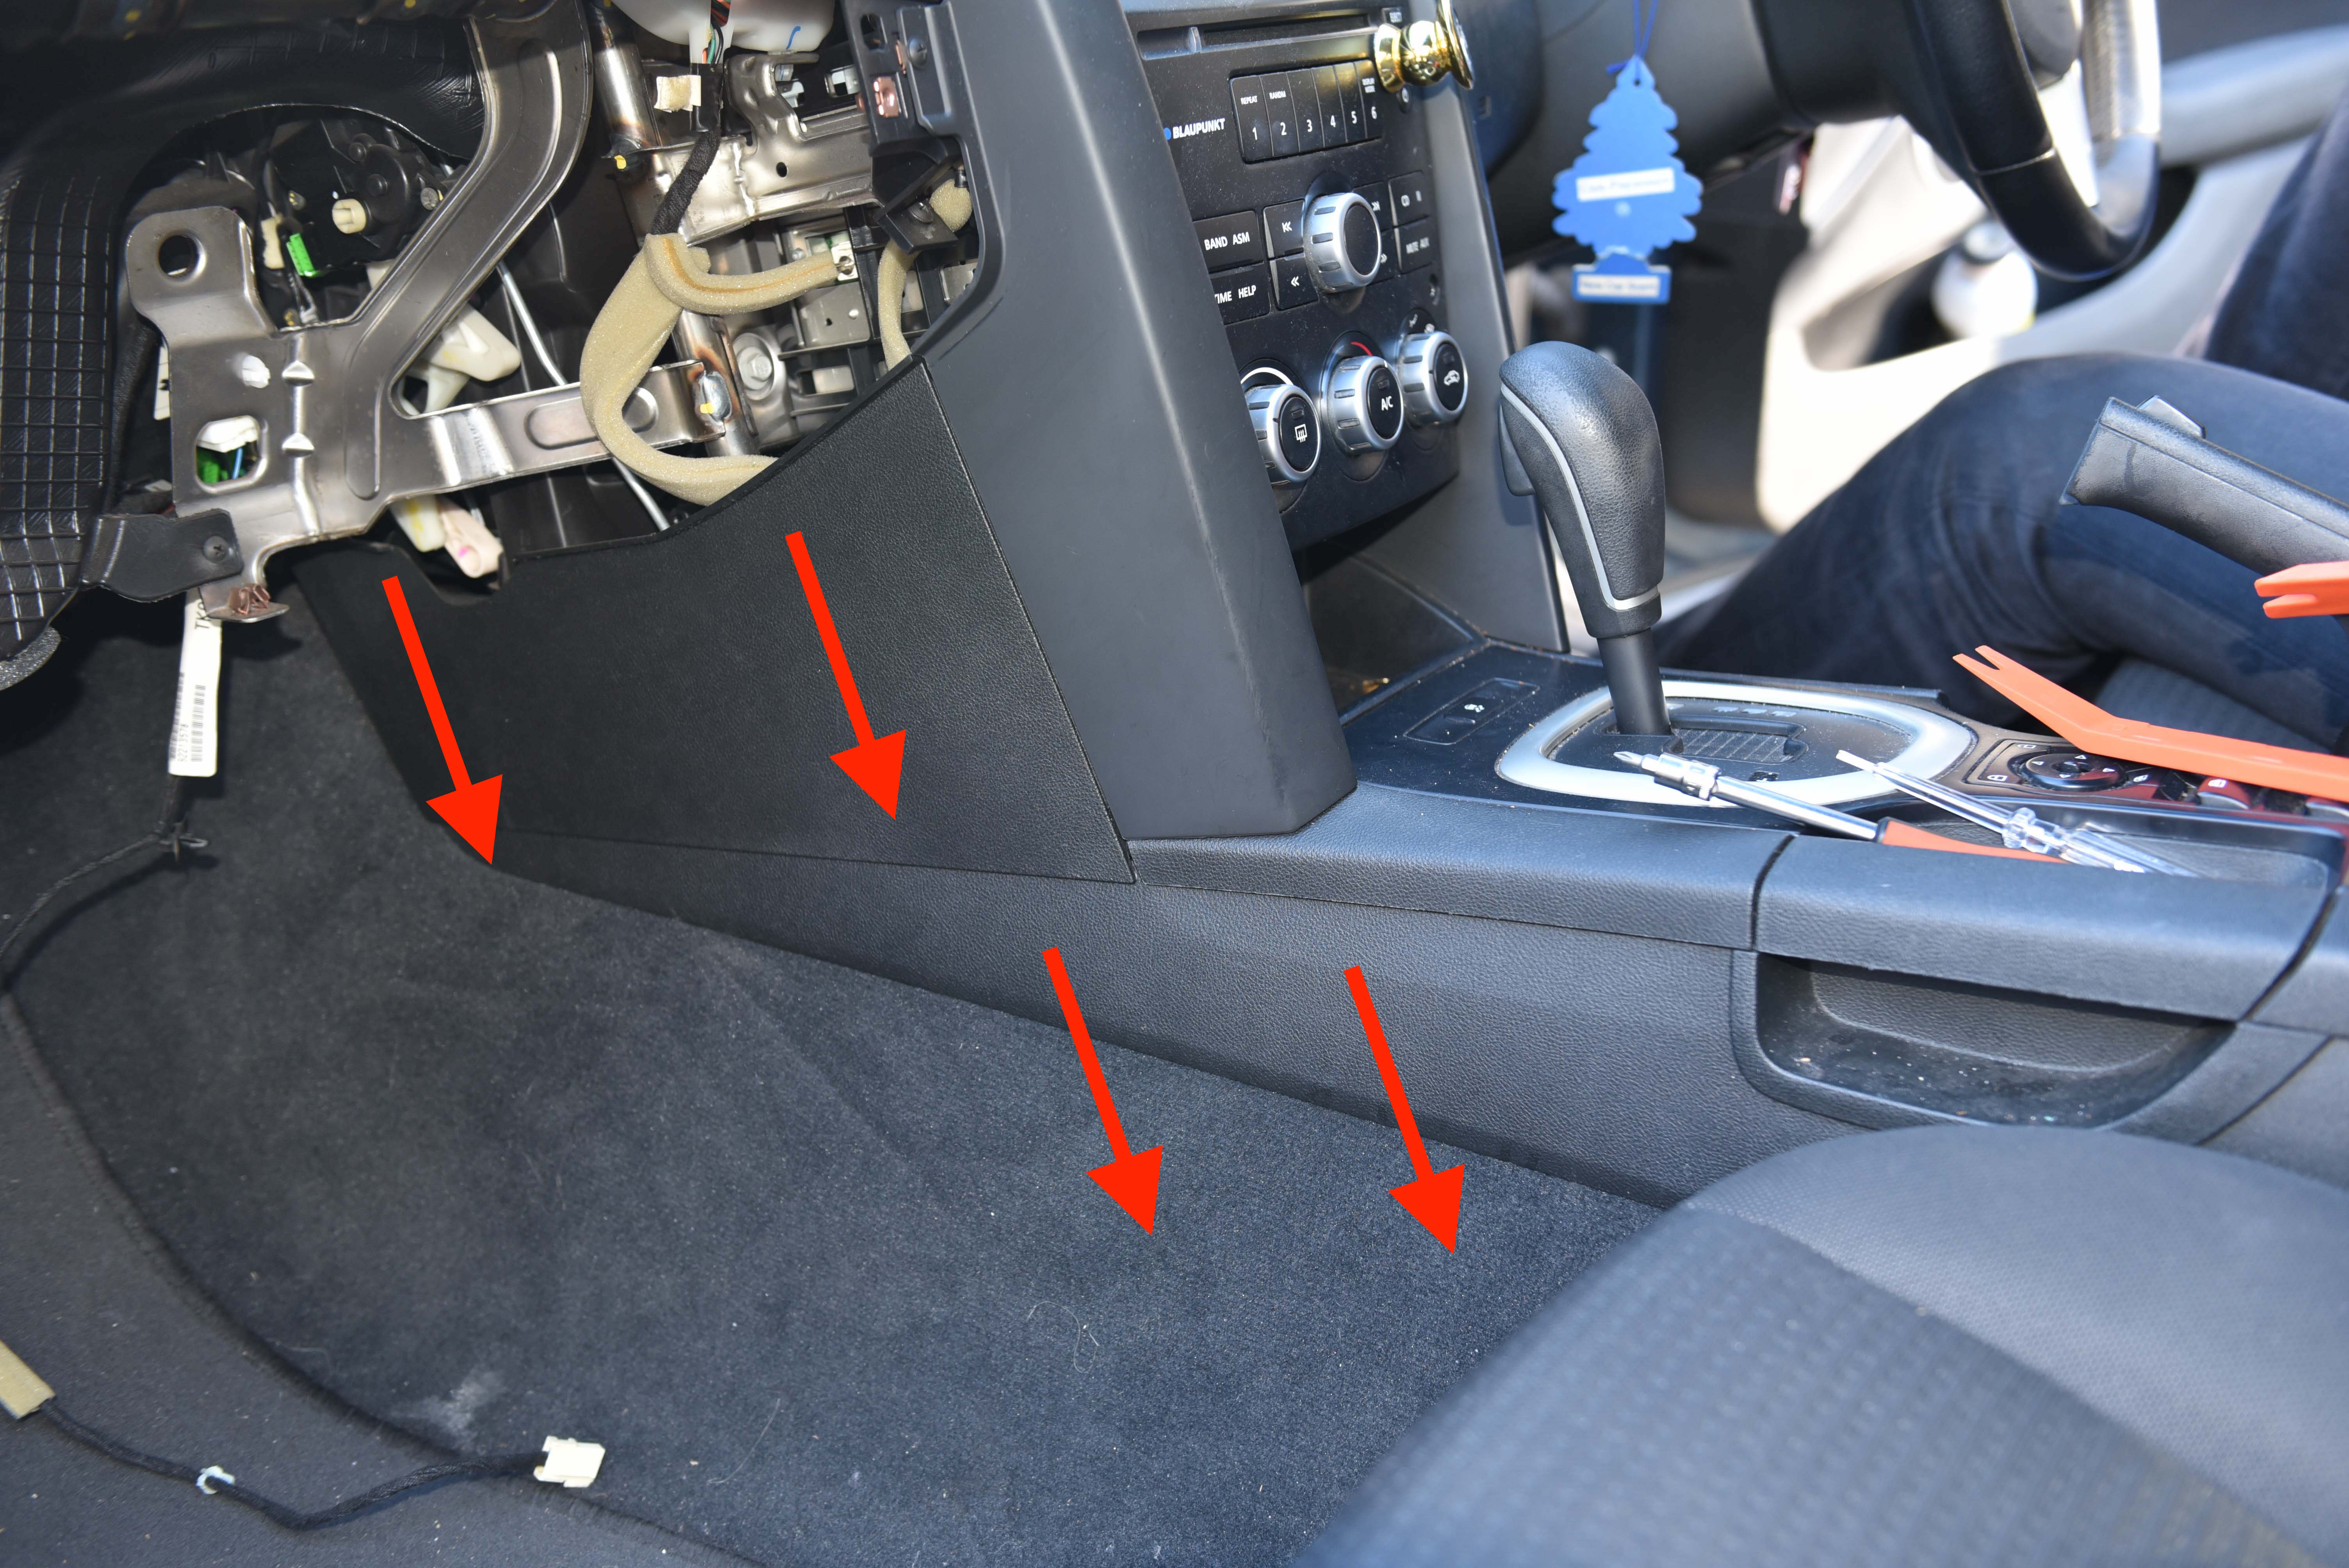
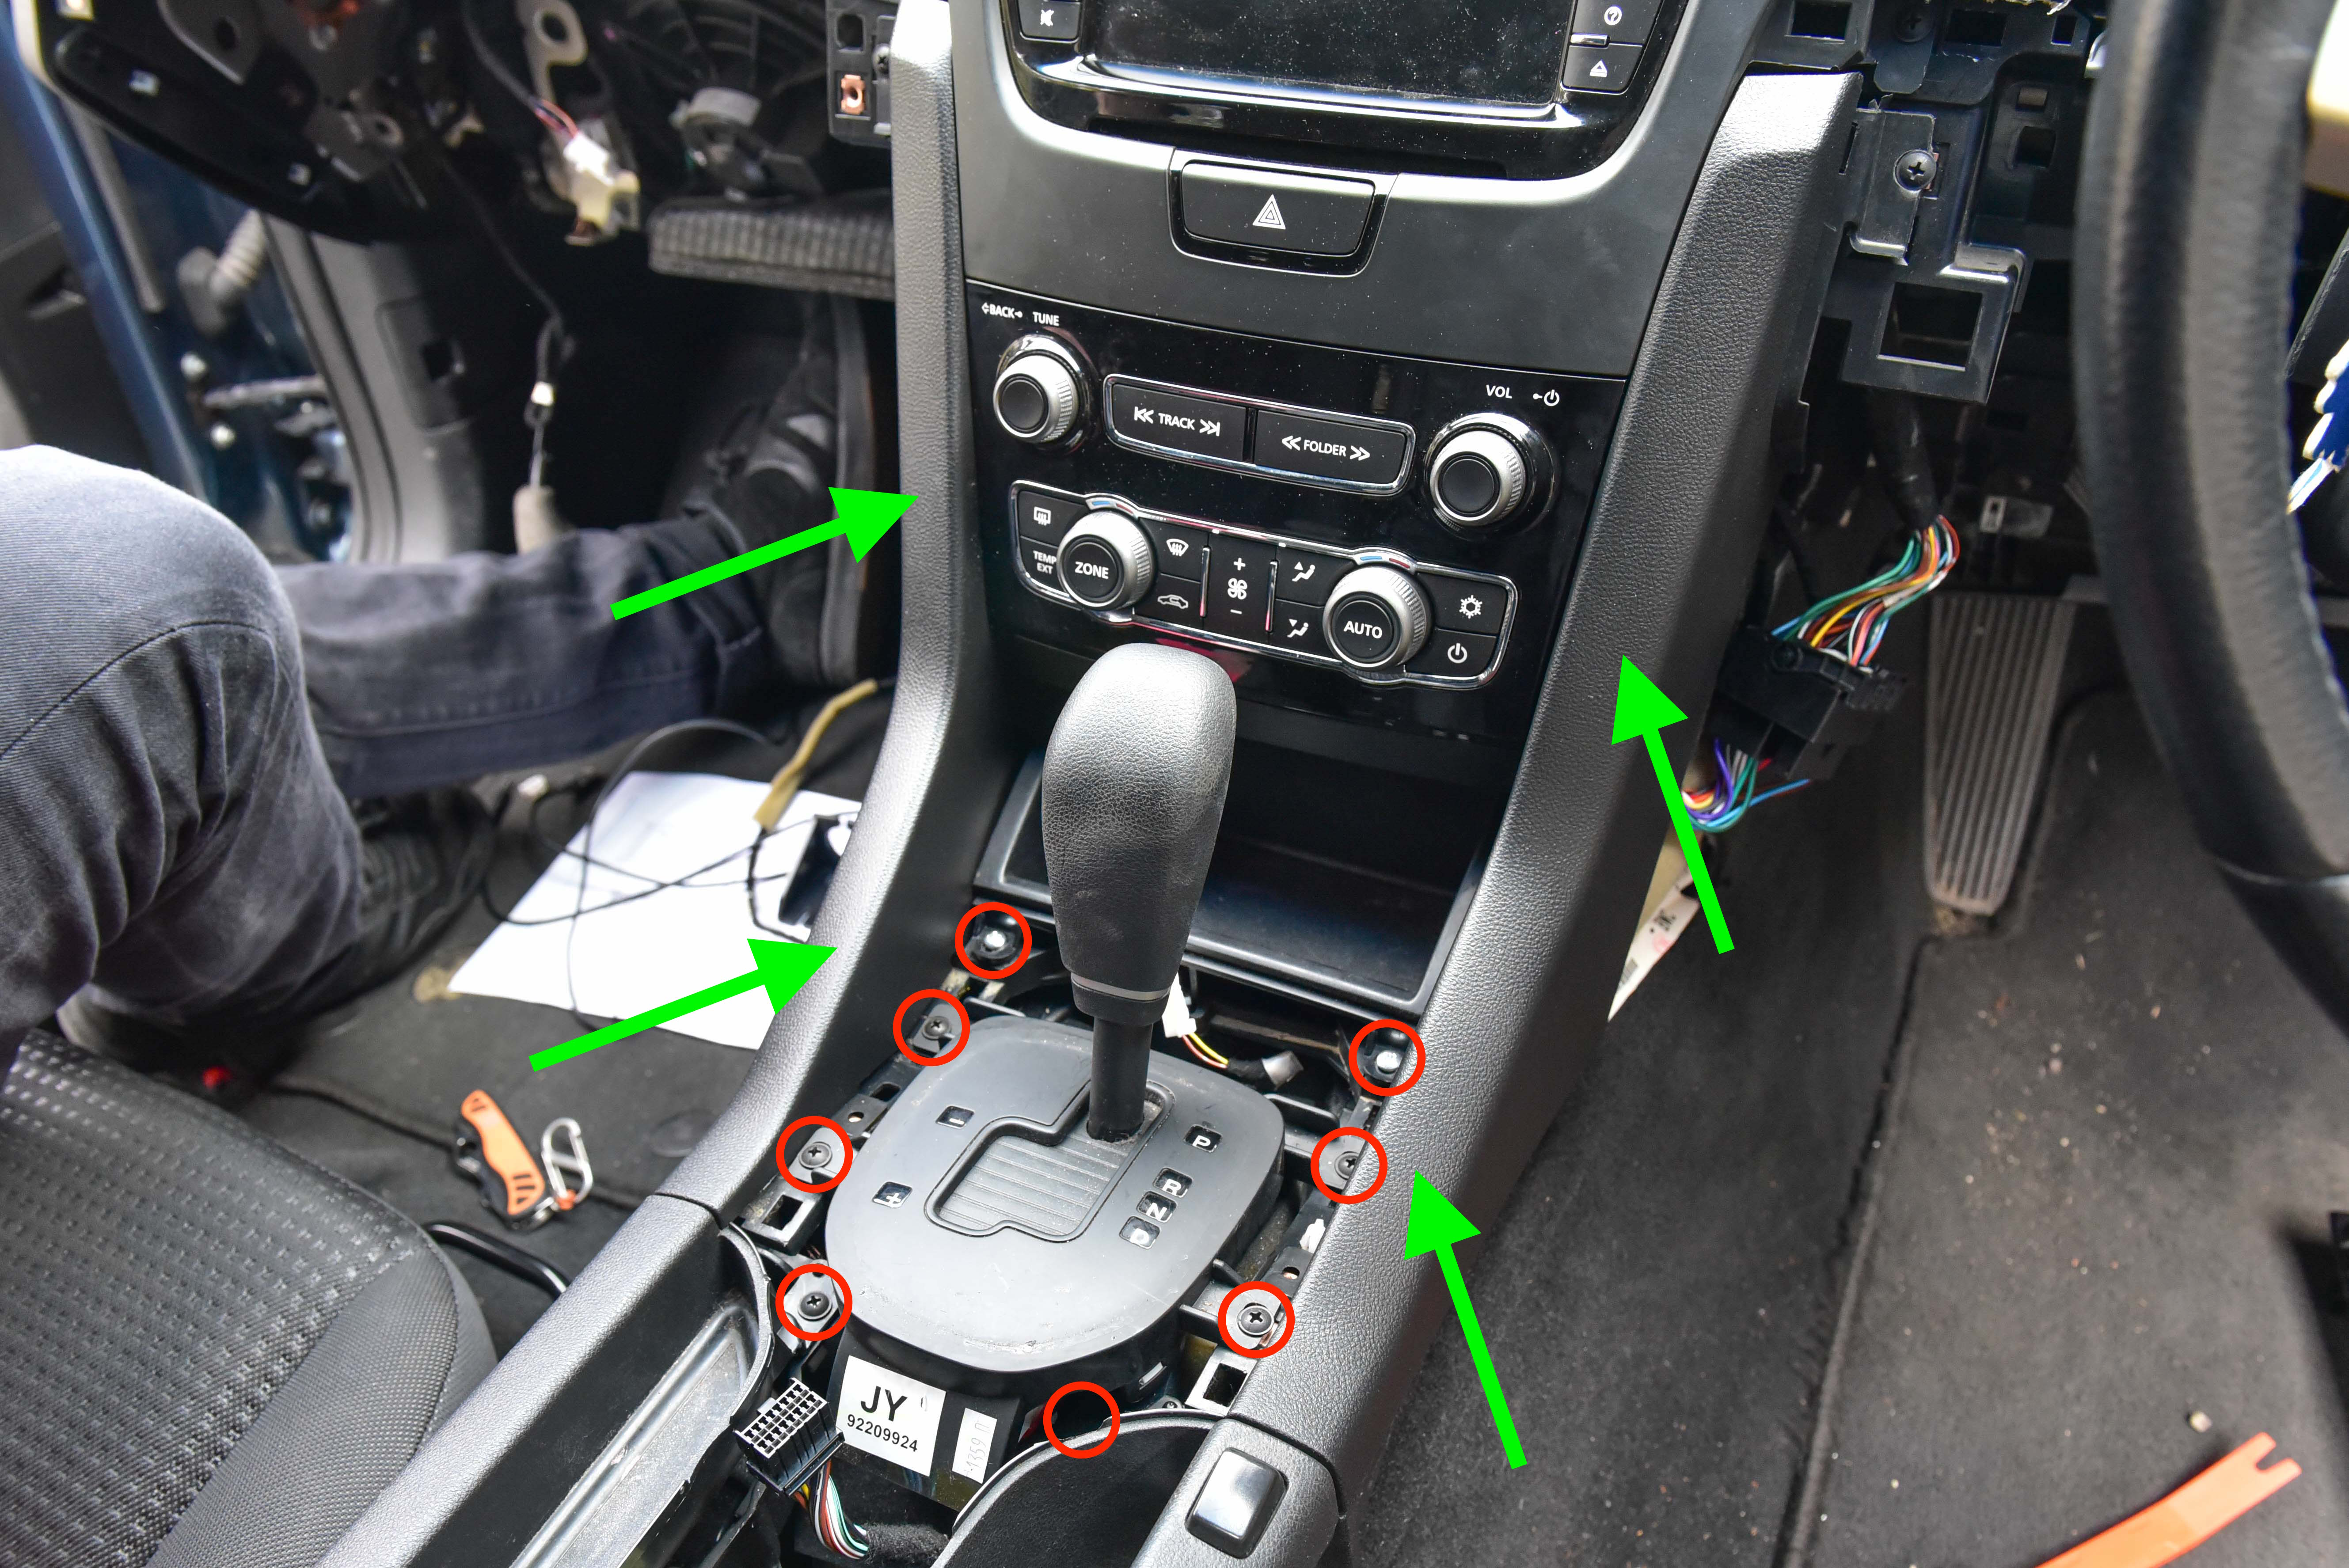
We will now remove the centre console trim.
Using a trim removal tool, unclip the black trim piece which is held in place with six clips as shown by the arrows. Alternatively you can feel the clips from underneath and push firmly upwards to release the trim. Once unclipped disconnect the wiring looms for the window switches and traction control switch.
Step 21
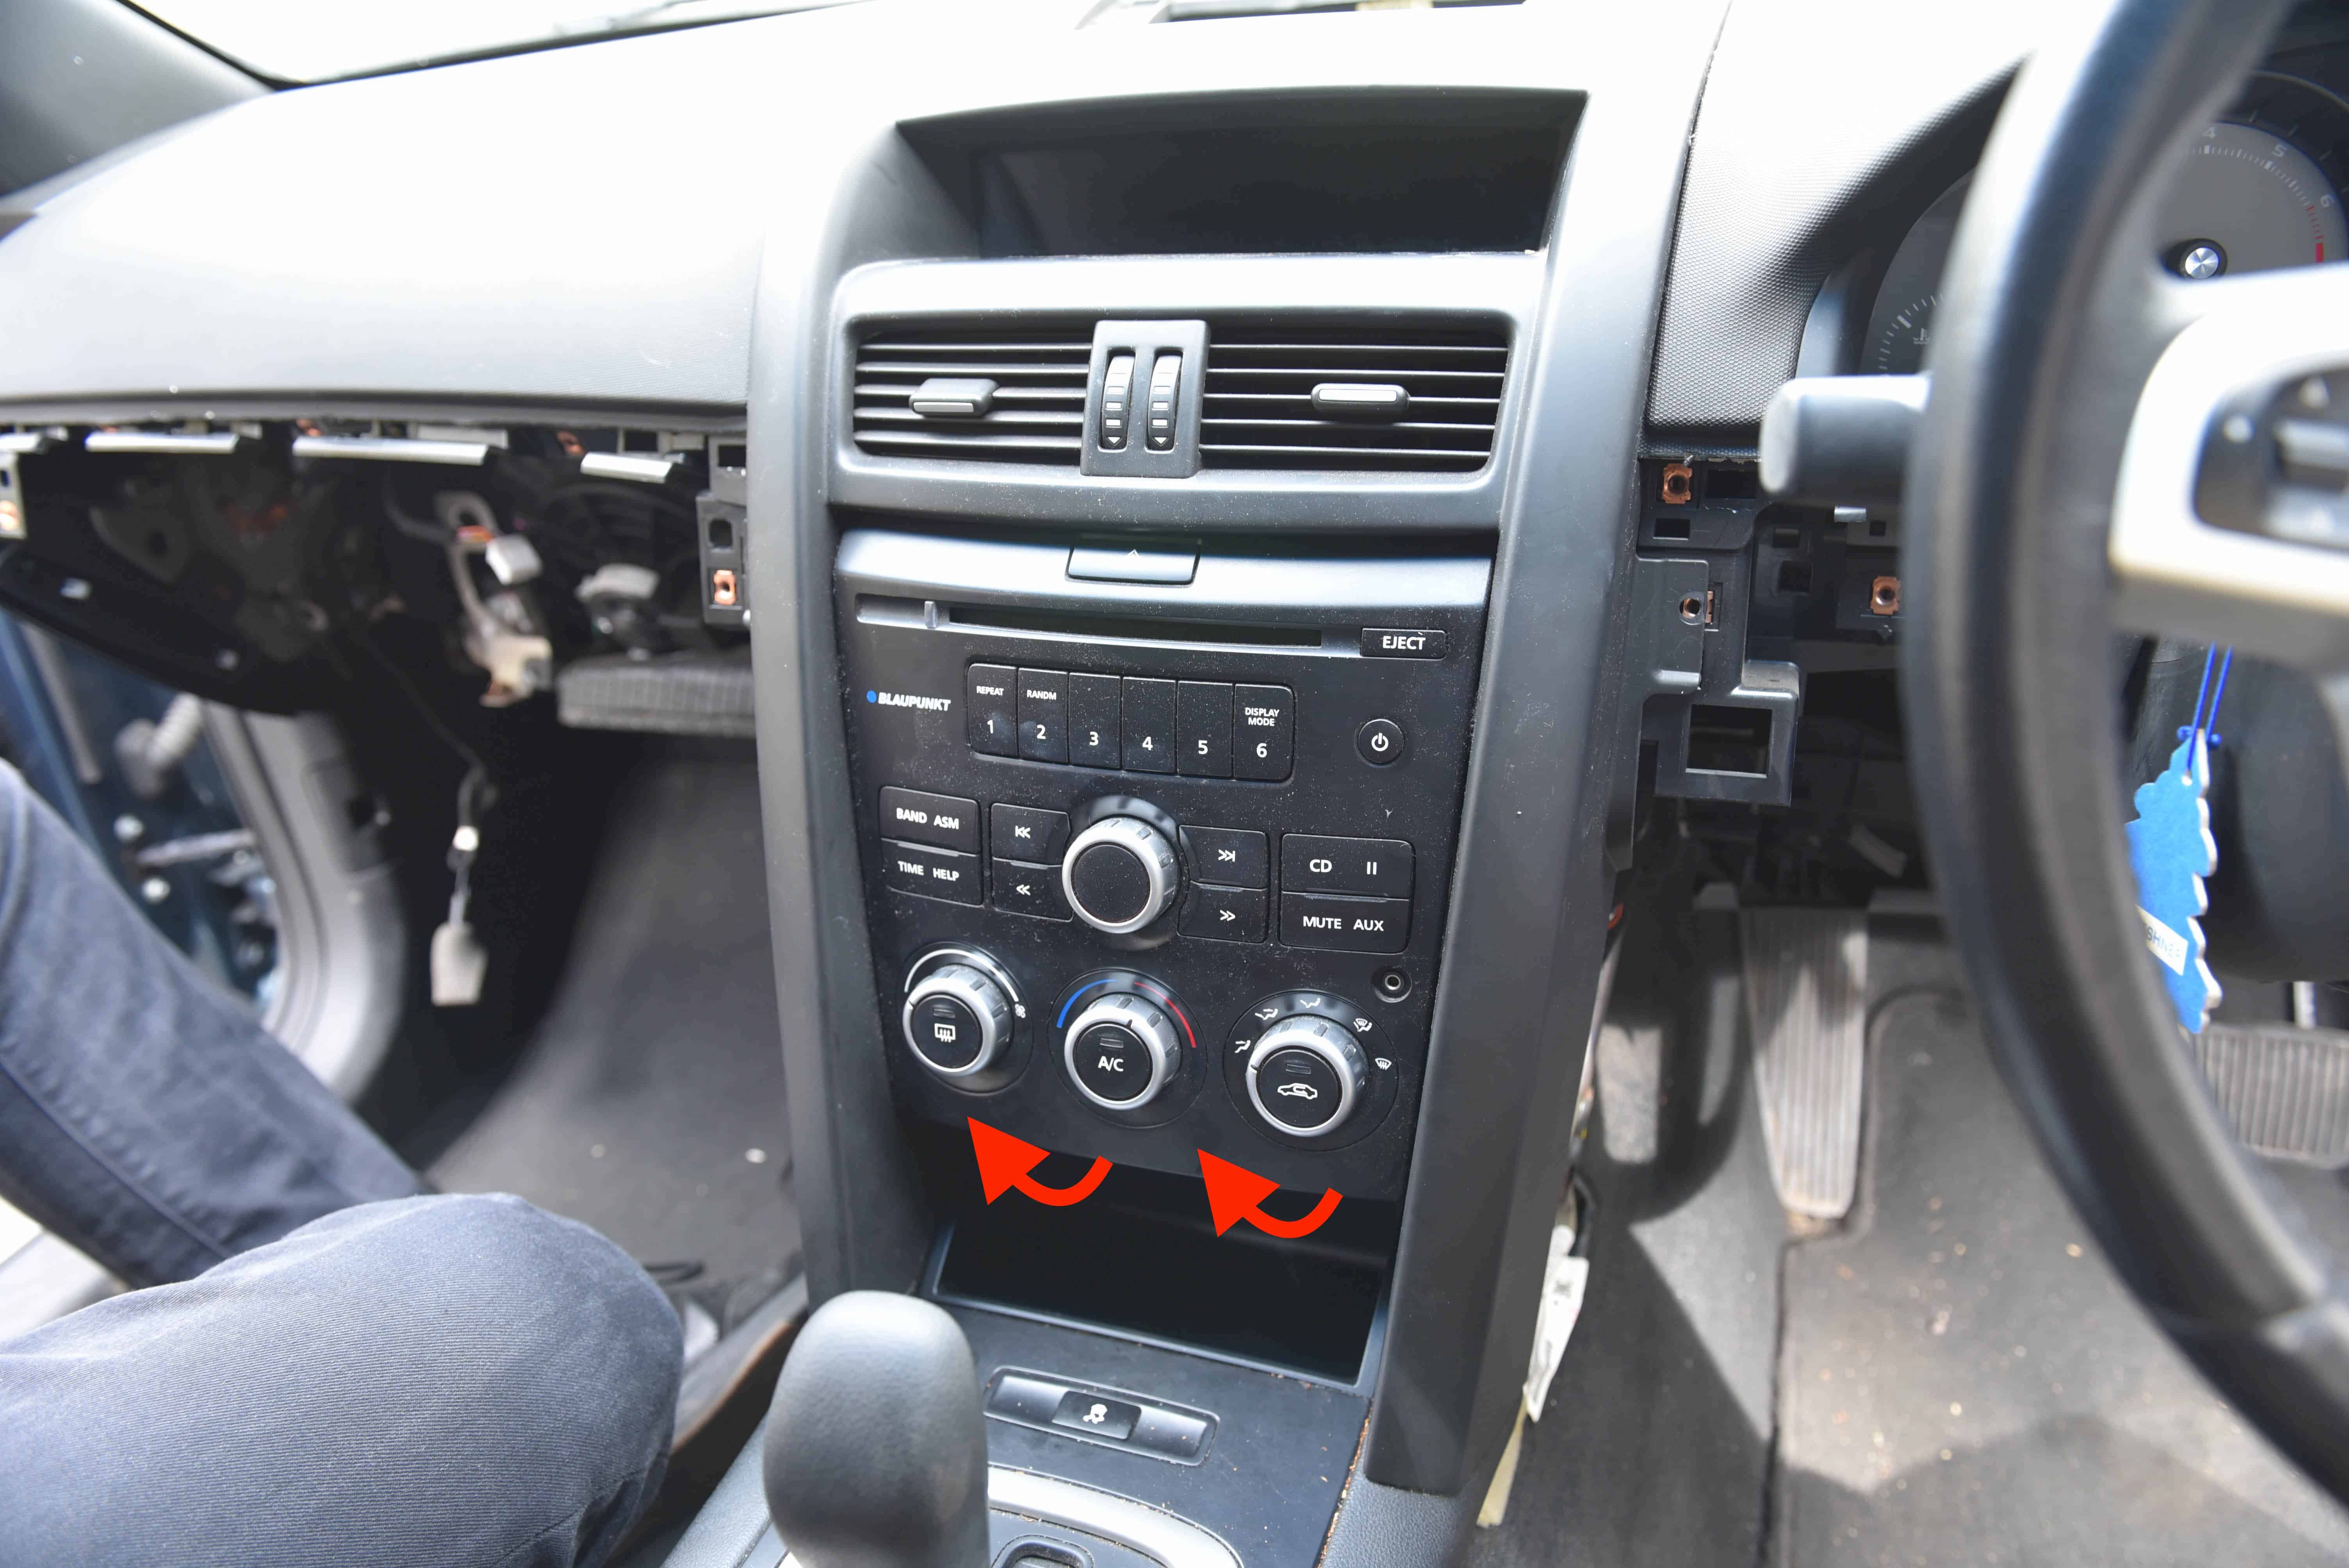
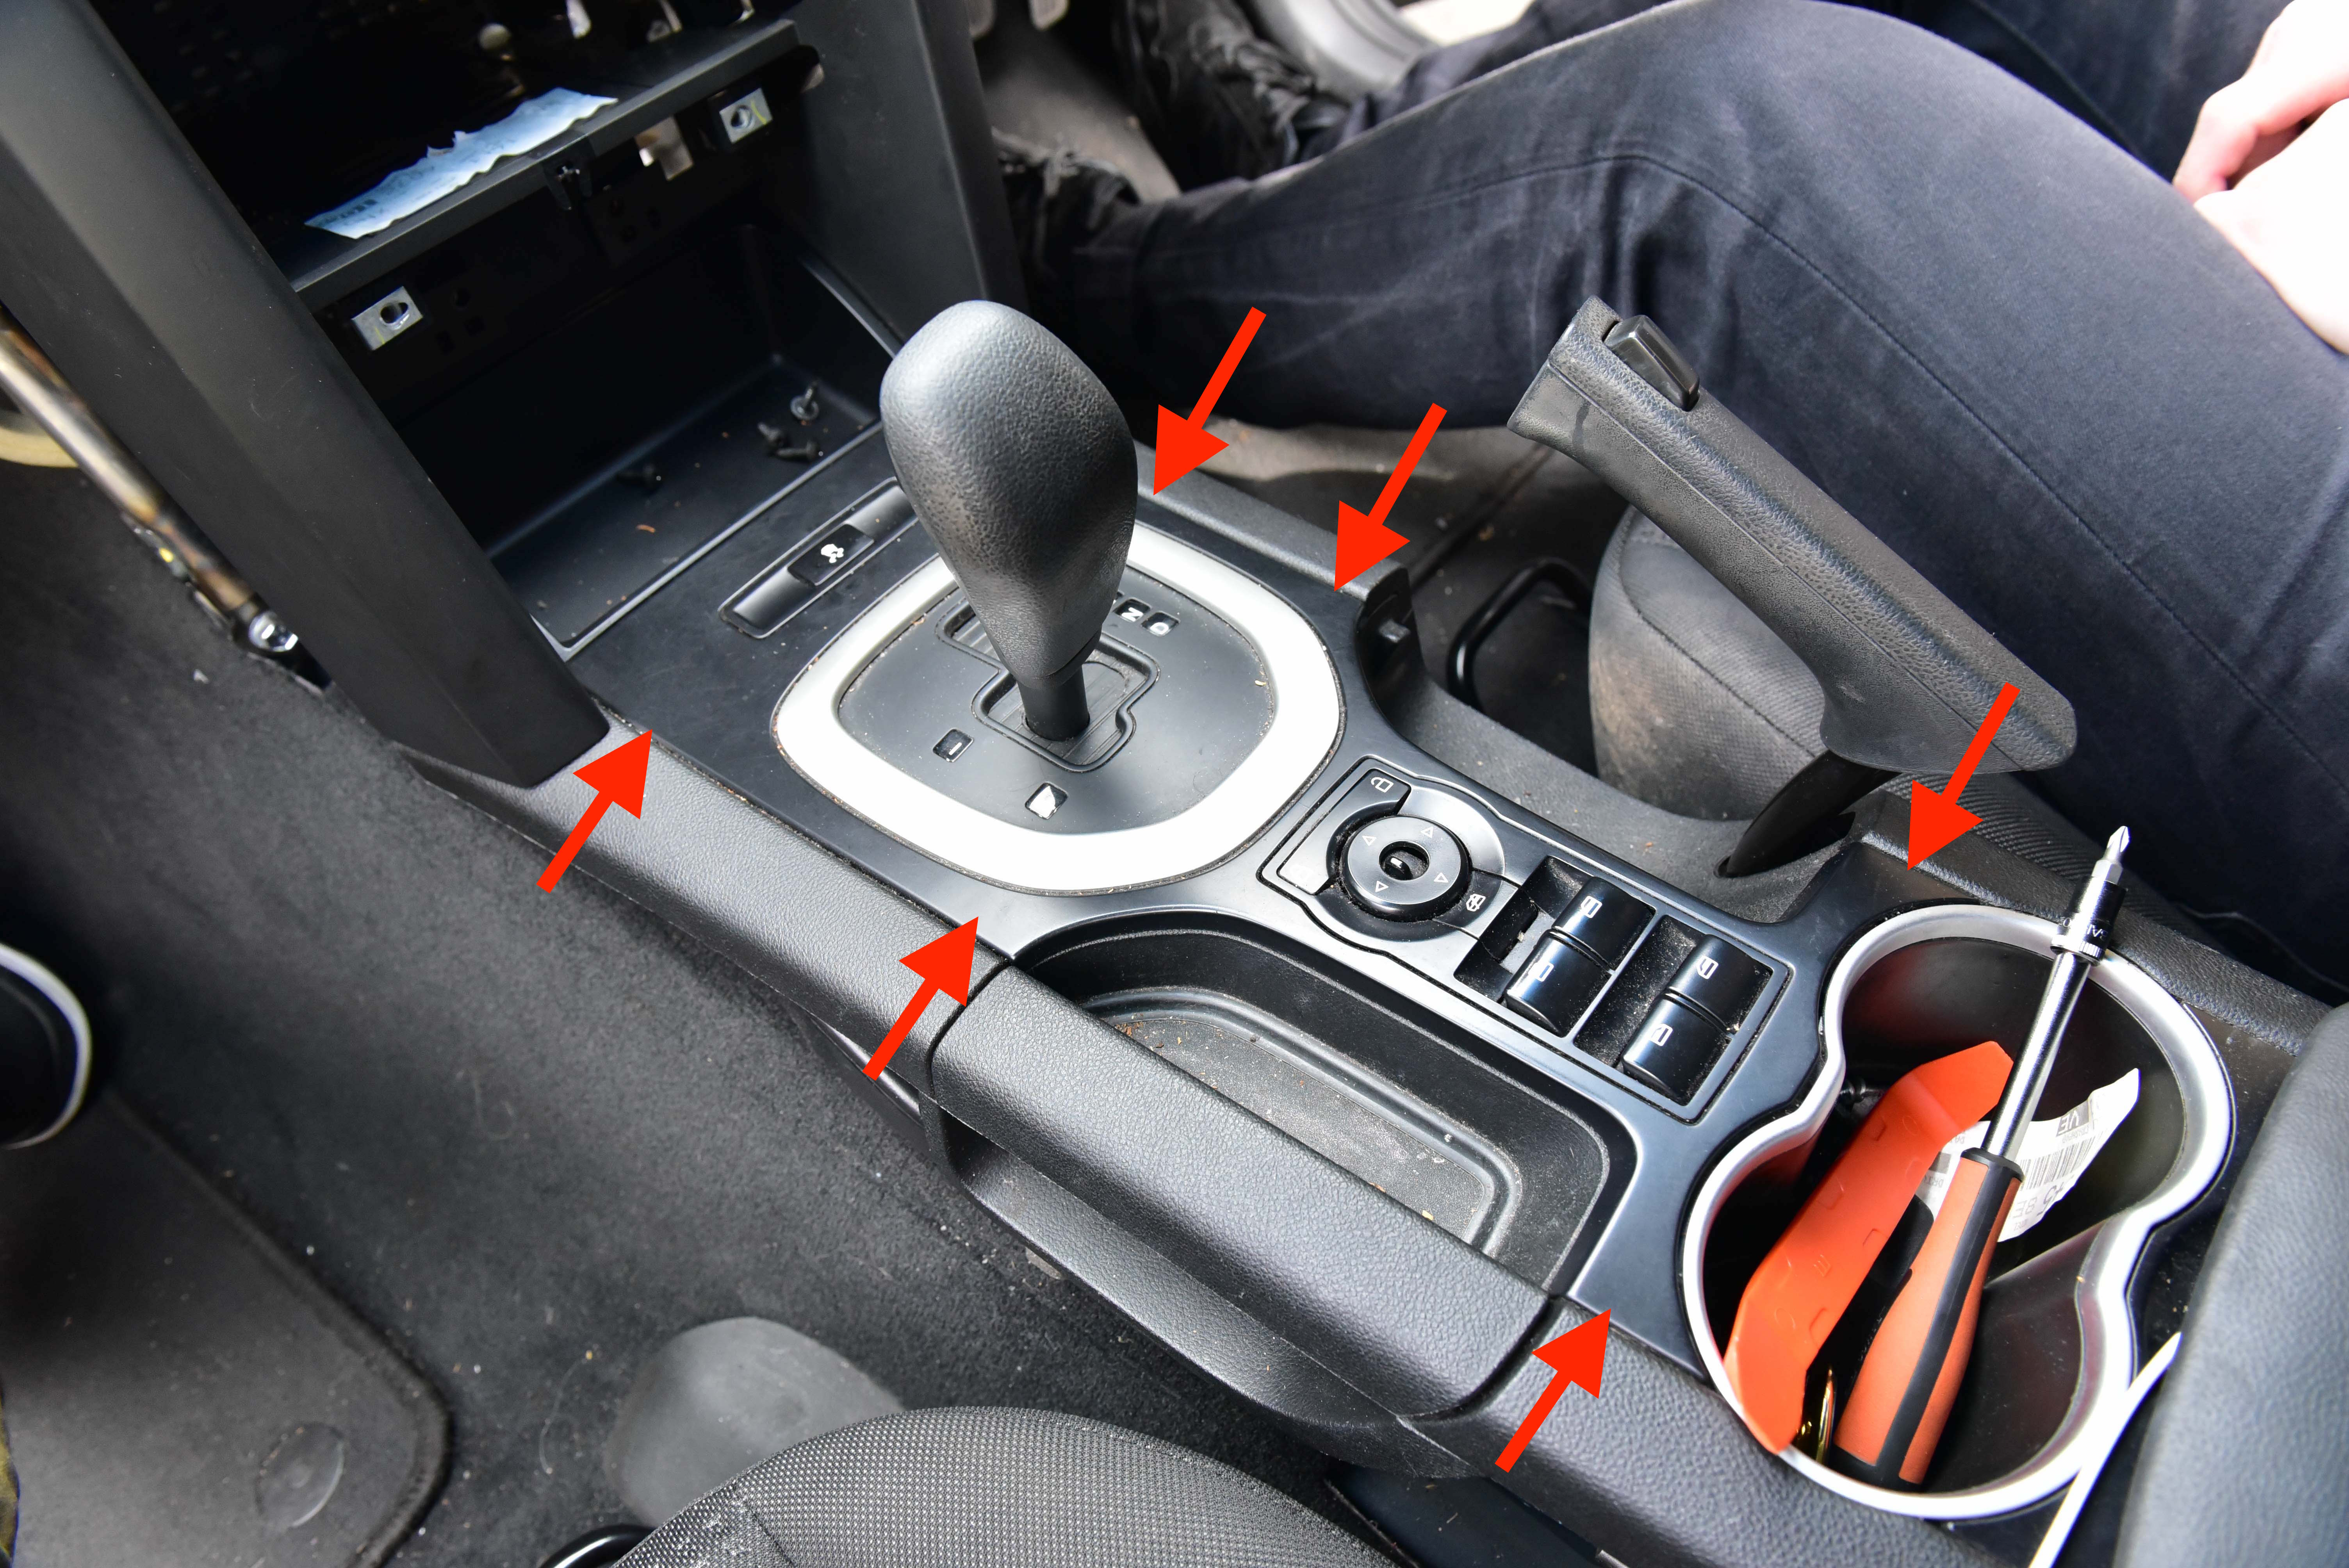
Unclip the air conditioner duct and remove the neighbouring screw on both the passenger and drivers side of the vehicle.
Unscrew the gear selector trim as pictured.
Step 22
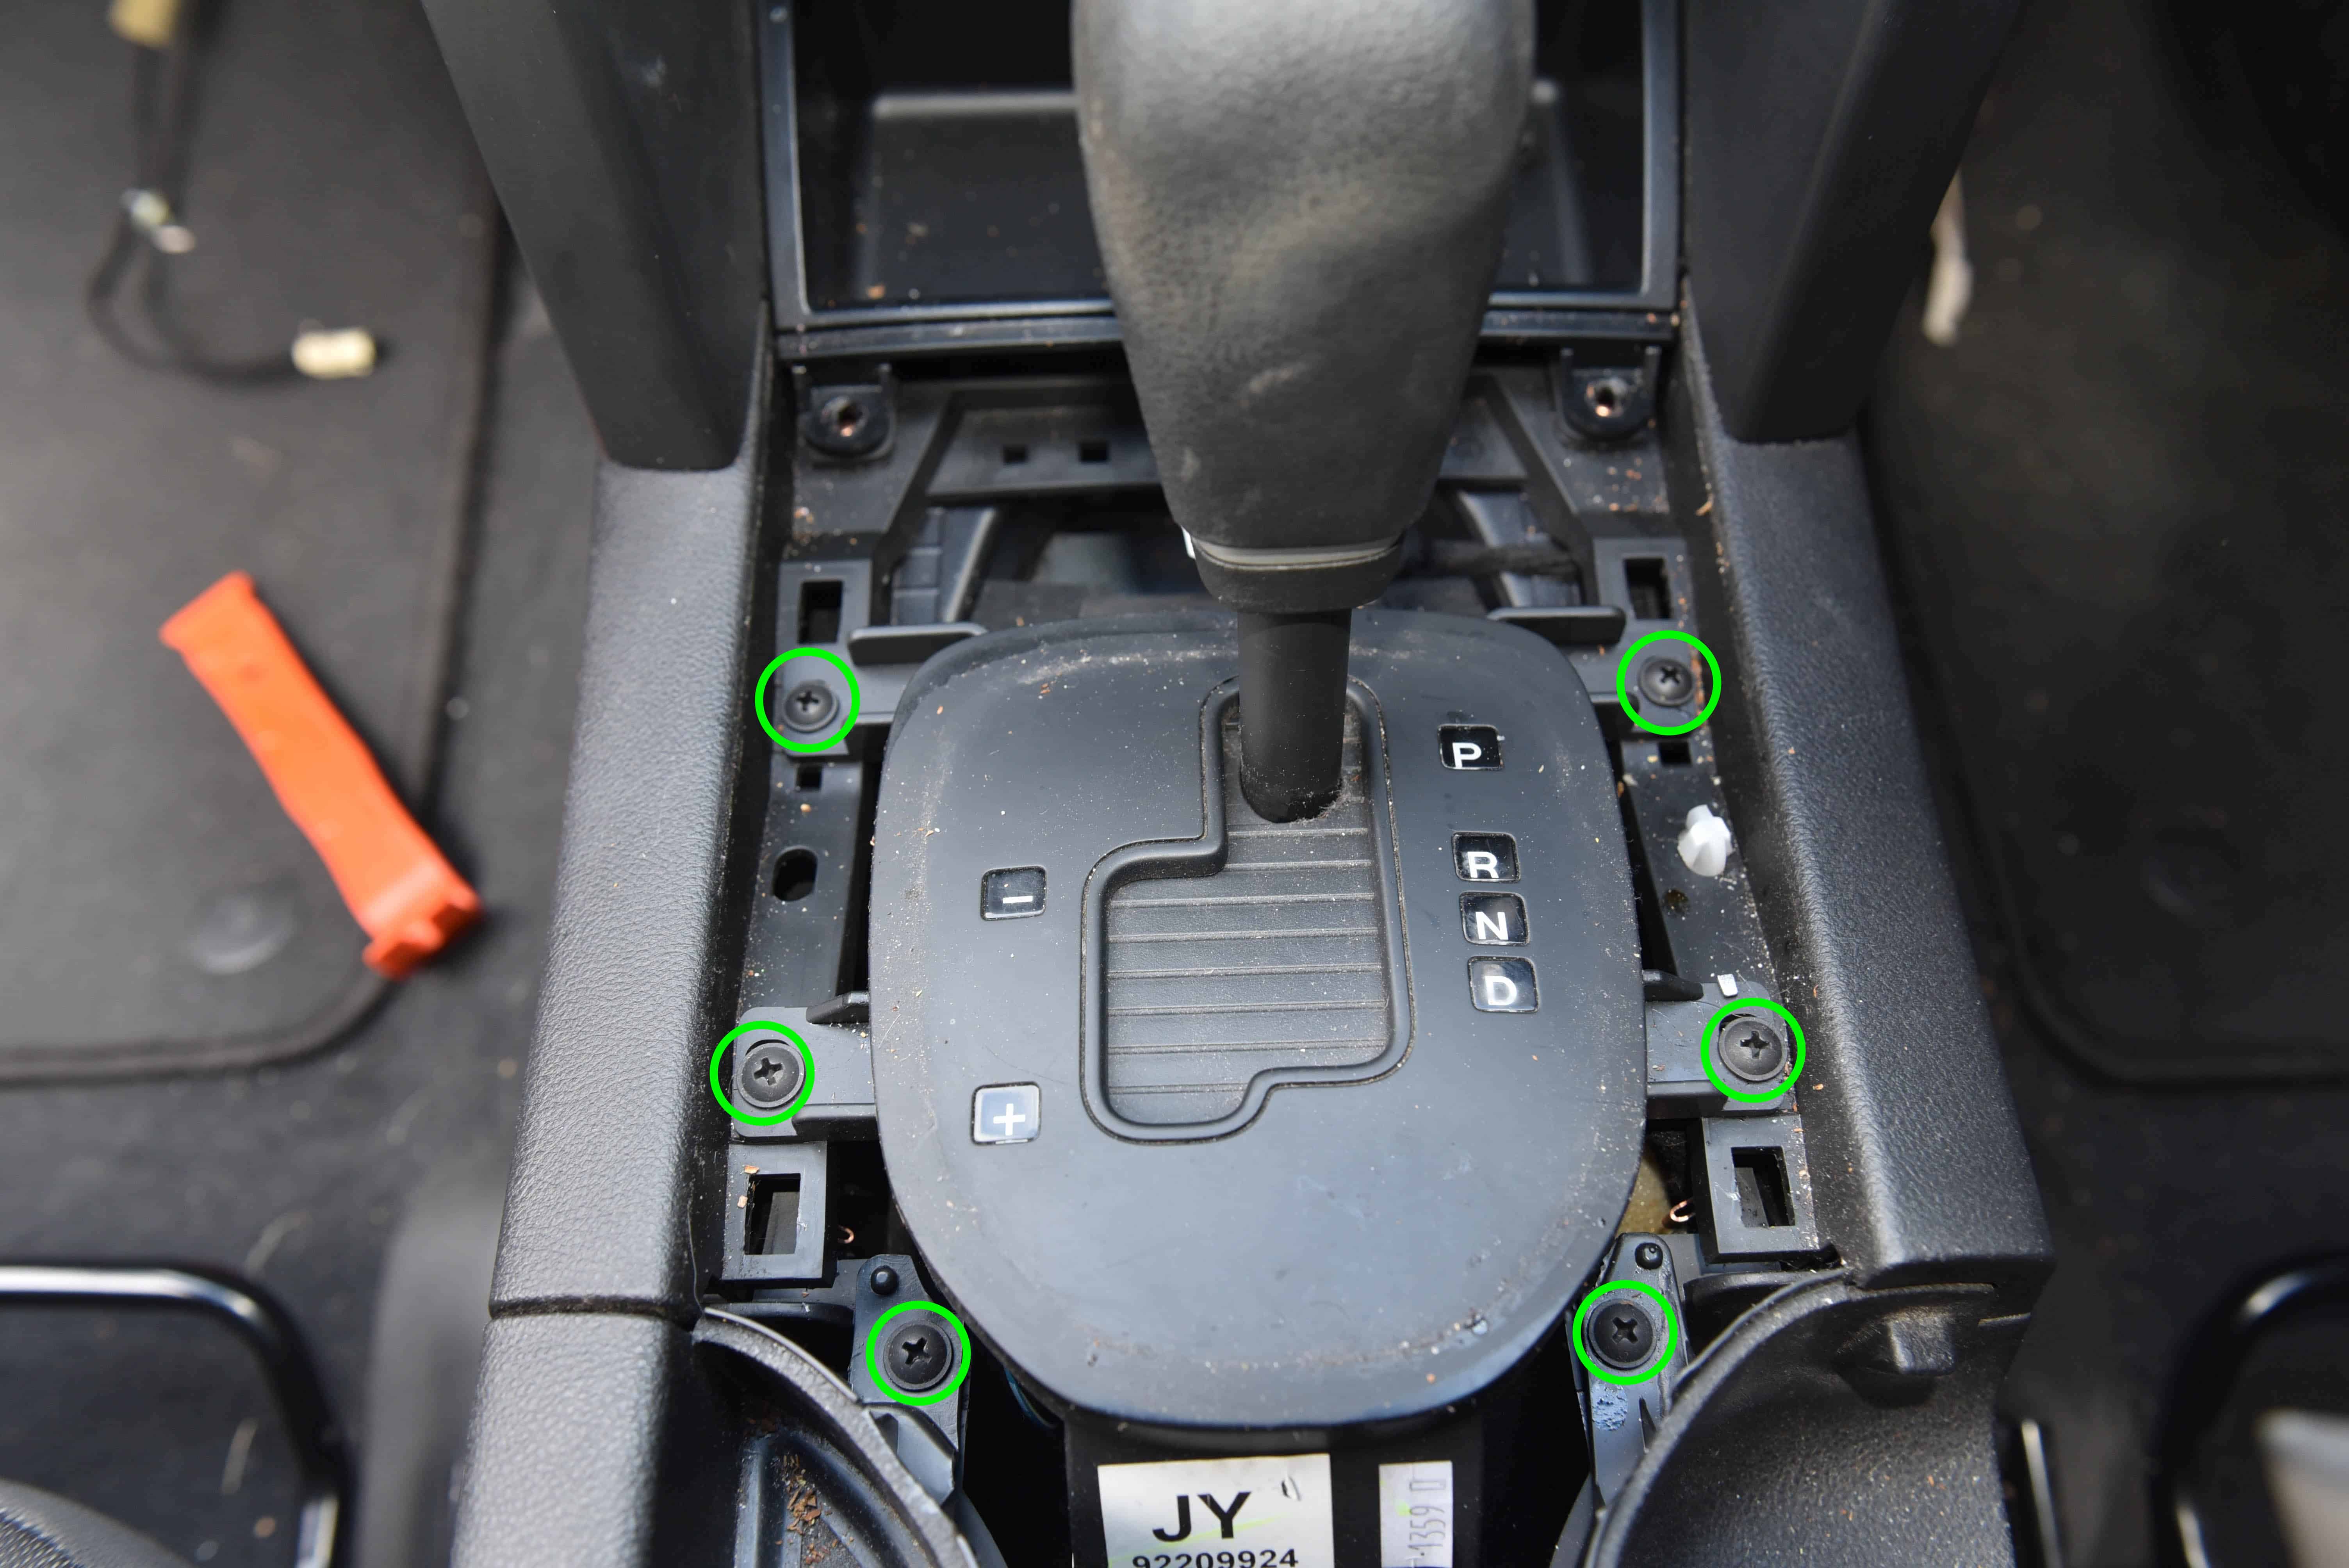
Unscrew the front storage compartment and remove.
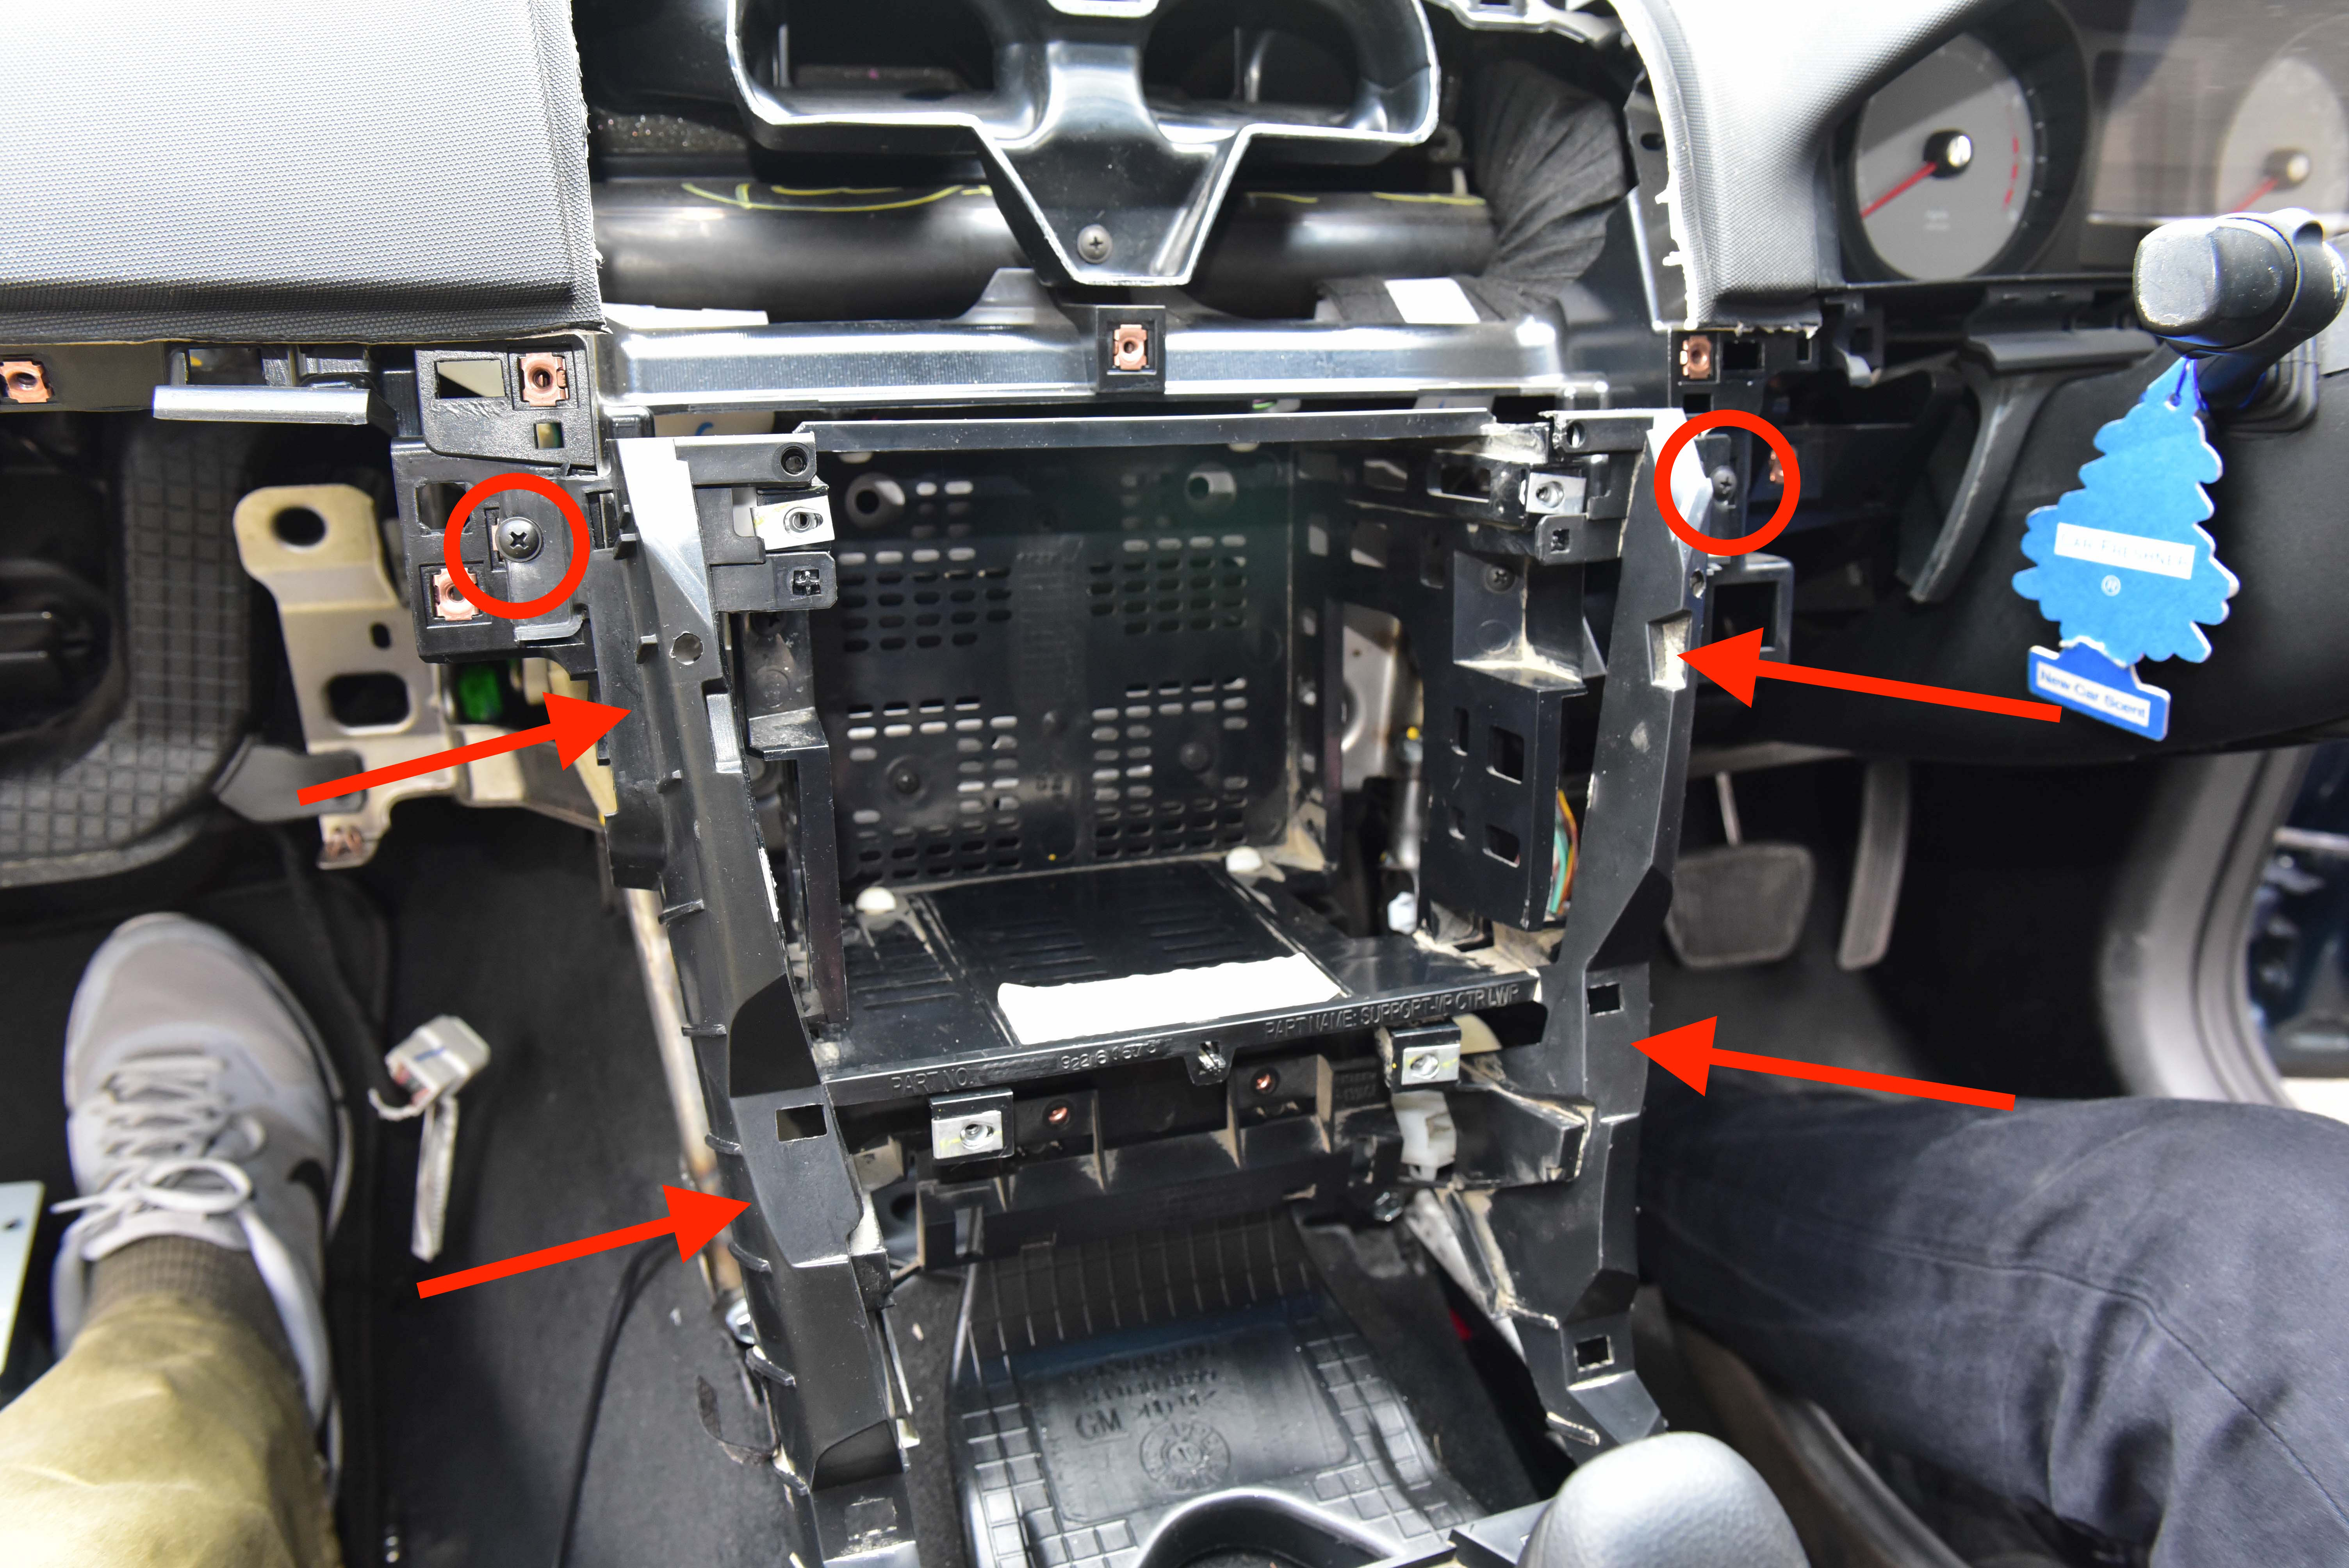
Step 23
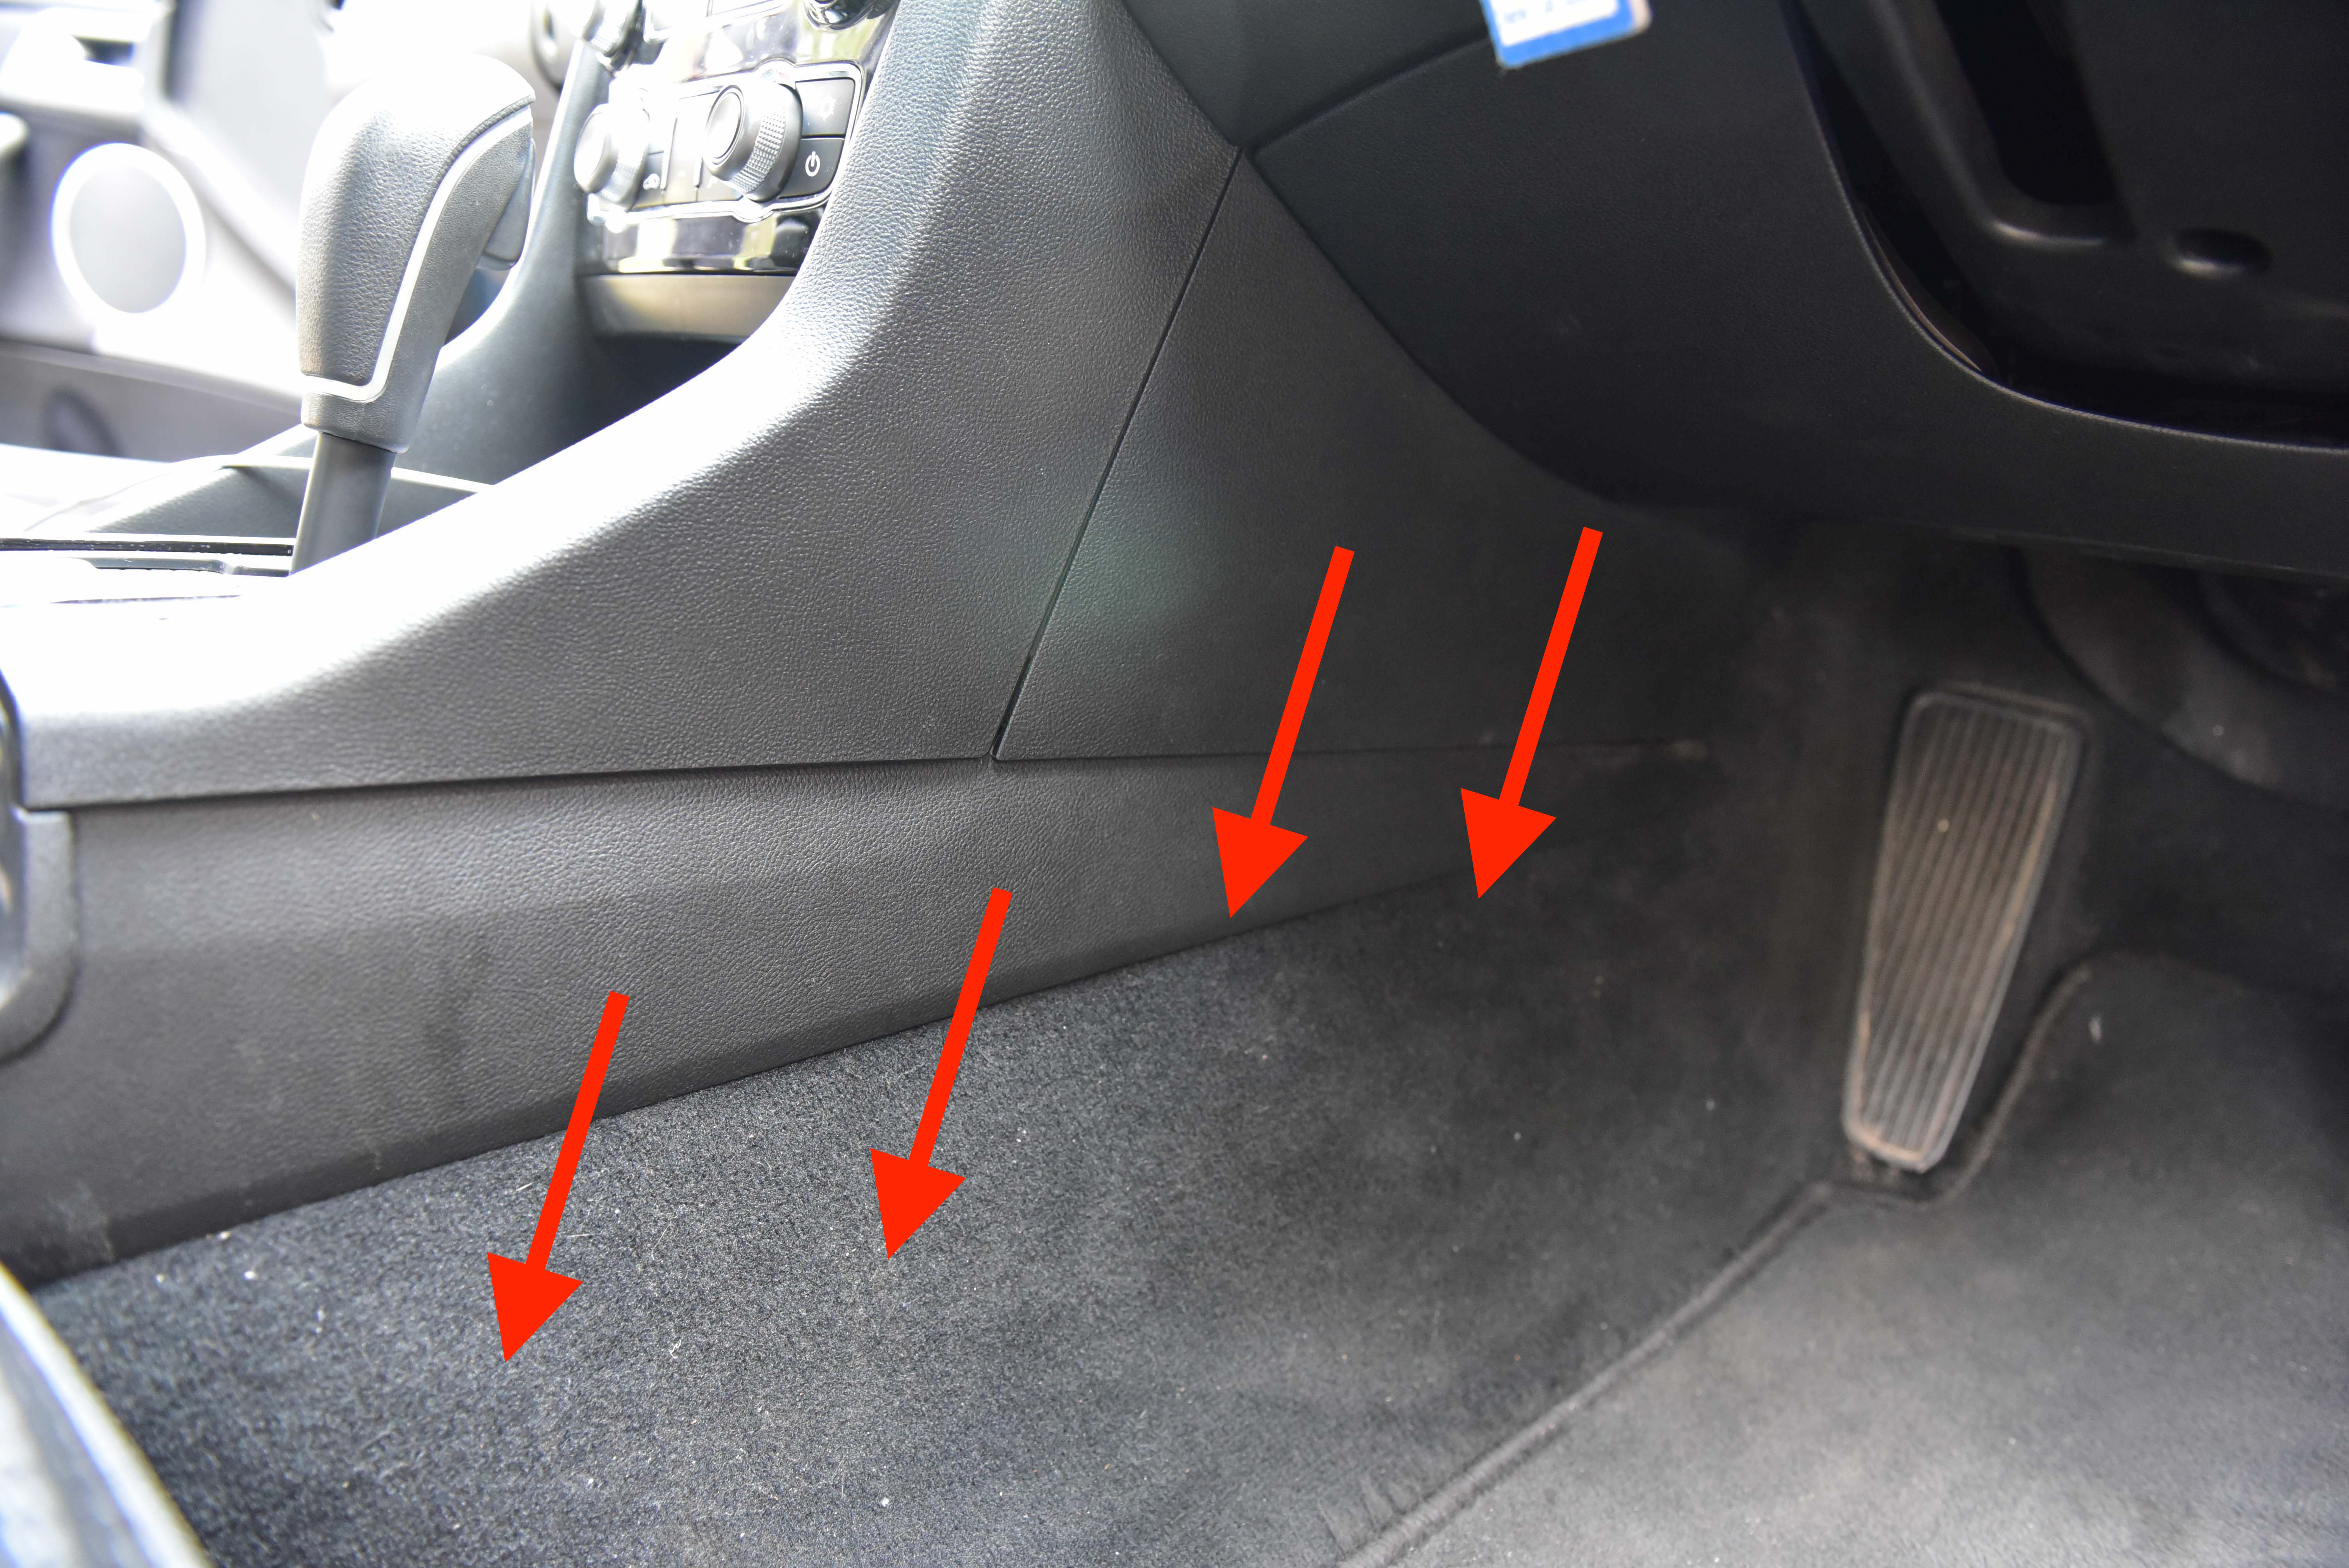
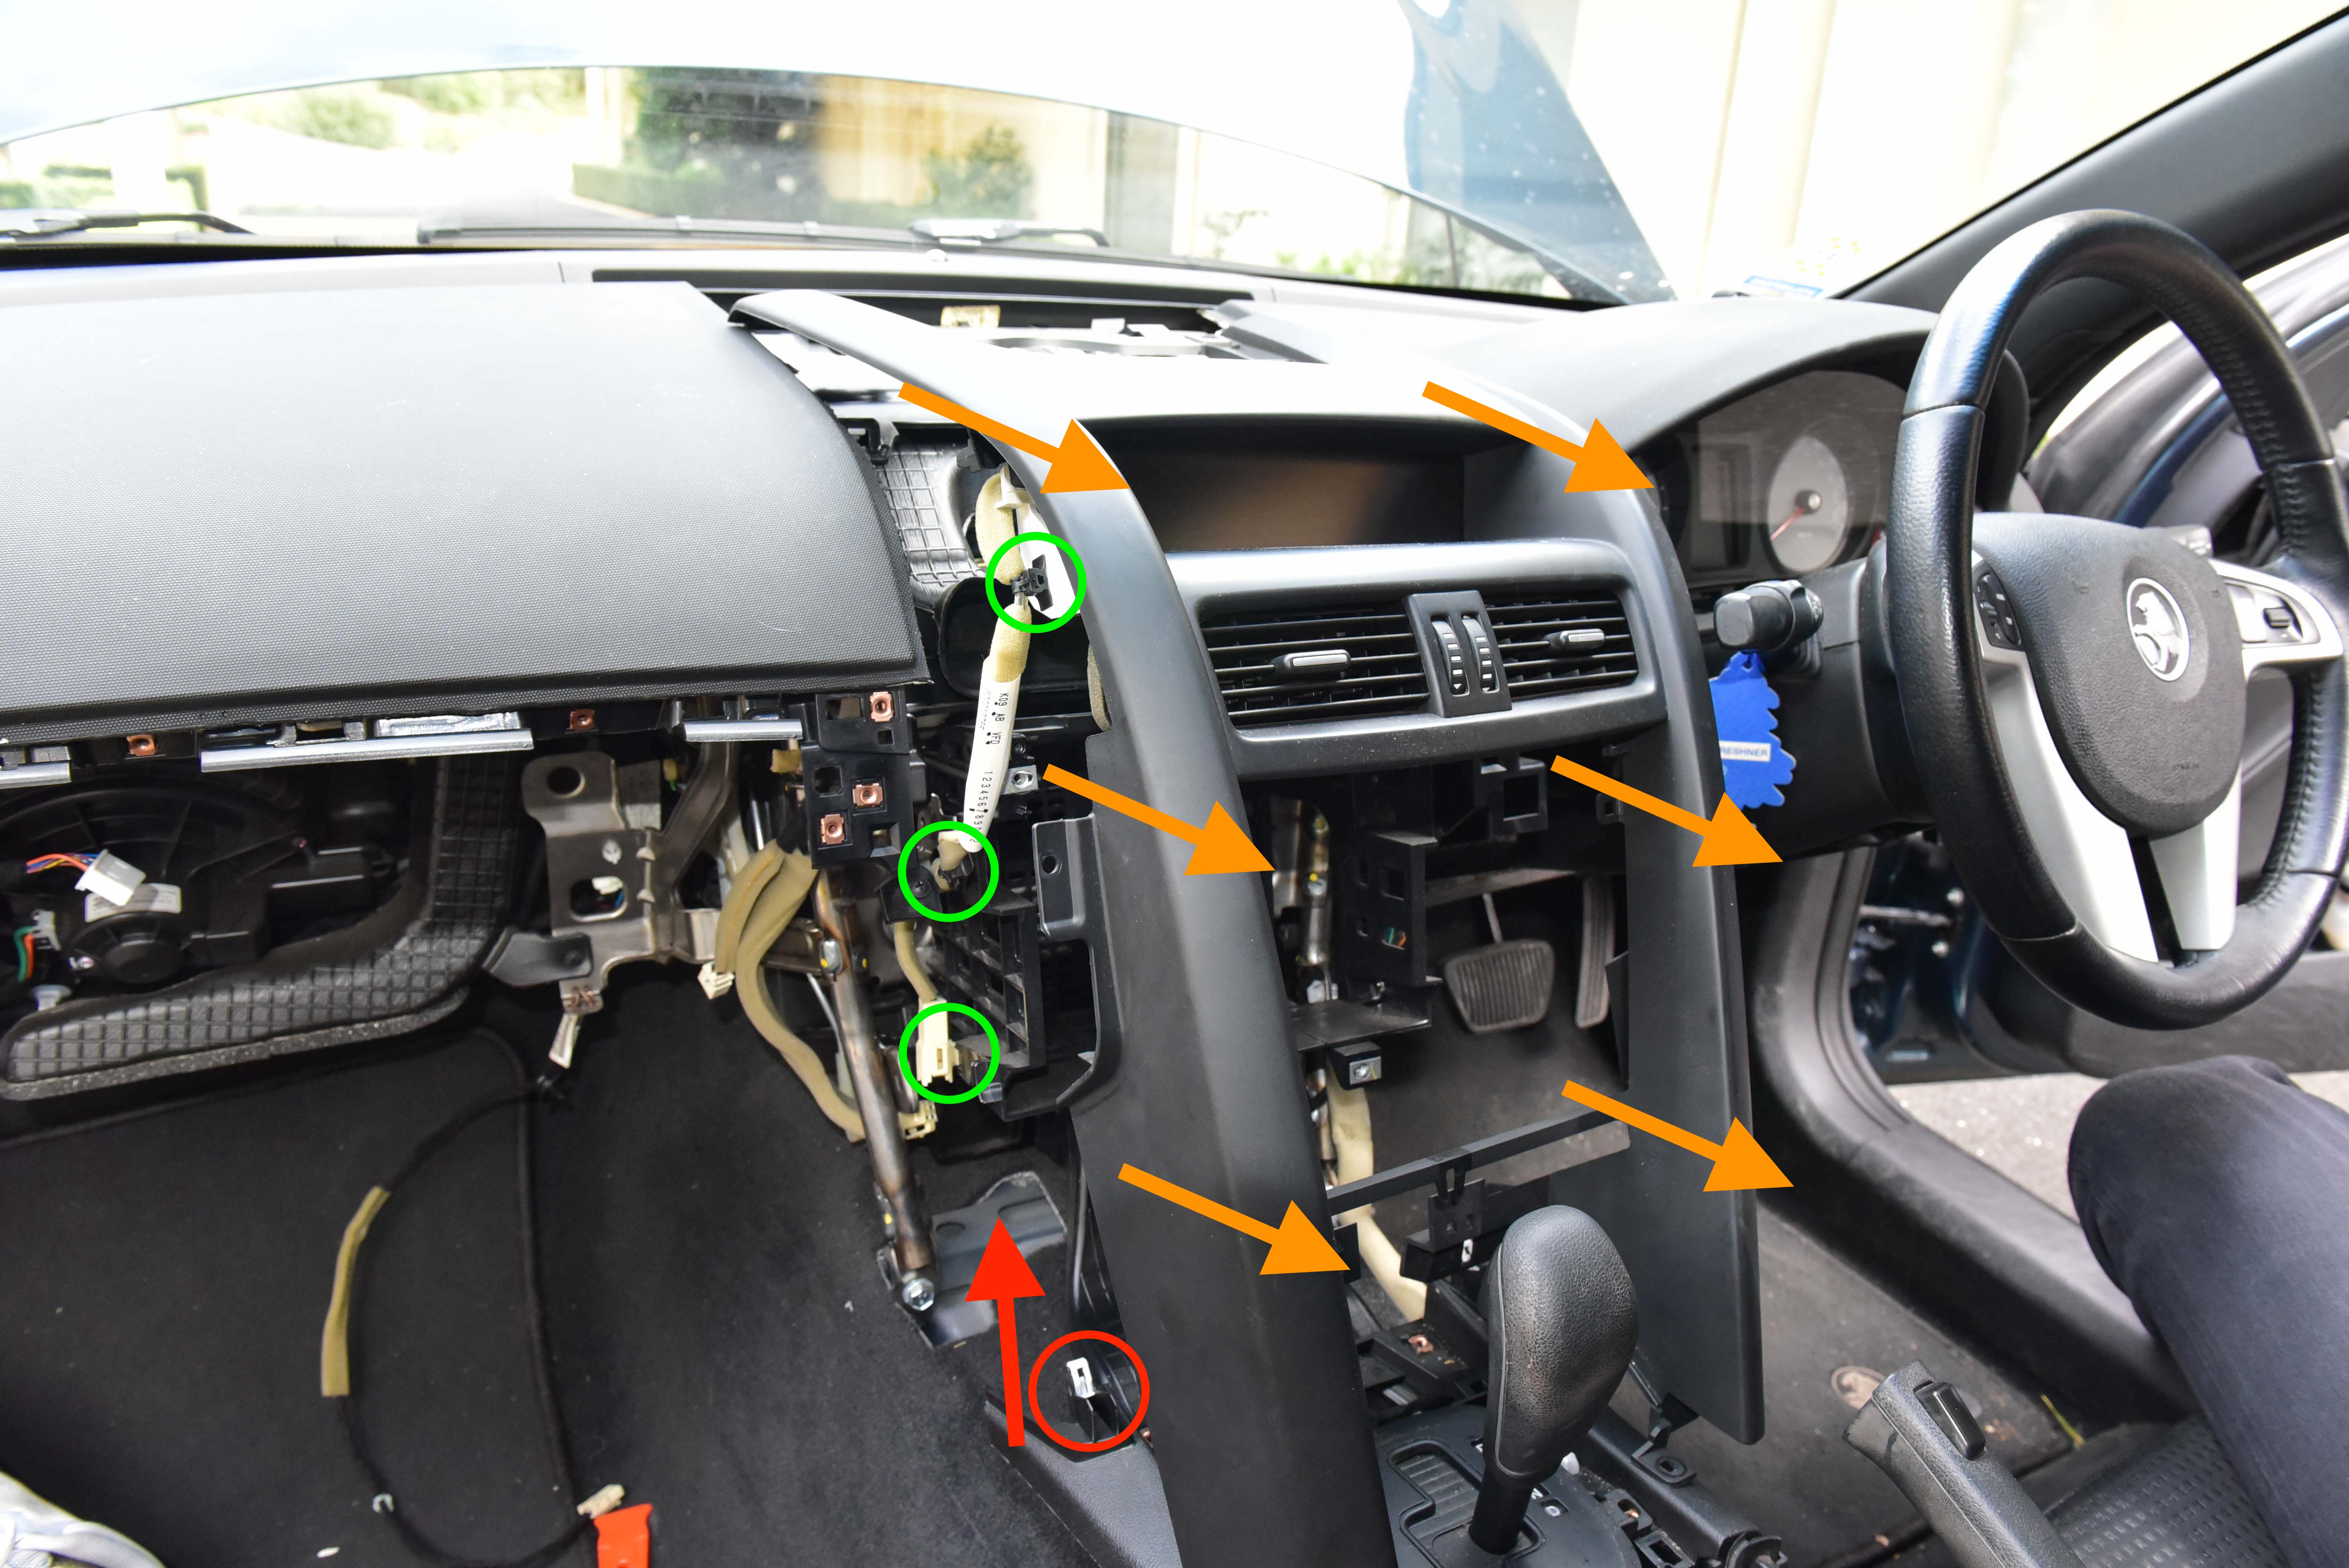
We will now remove the main trim piece surrounding the headunit. This is a four step process.
Red Arrow – Release the clip as circled, there is one on either side. You’ll need to push down on the centre console and attempt to release the clip. Some wriggling and prying with a trim removal tool is required.
Orange Arrows – Once the above clip is released, pull firmly towards towards the centre of the vehicle to release the surrounding radio trim. It helps to pull from the top of the dashboard.
Green Circles – When the trim is released, unclip the wiring loom as circled and remove the trim from the vehicle.
Remove the centre console trim surrounding the gear selector. This is the trim with the clip circled in red.
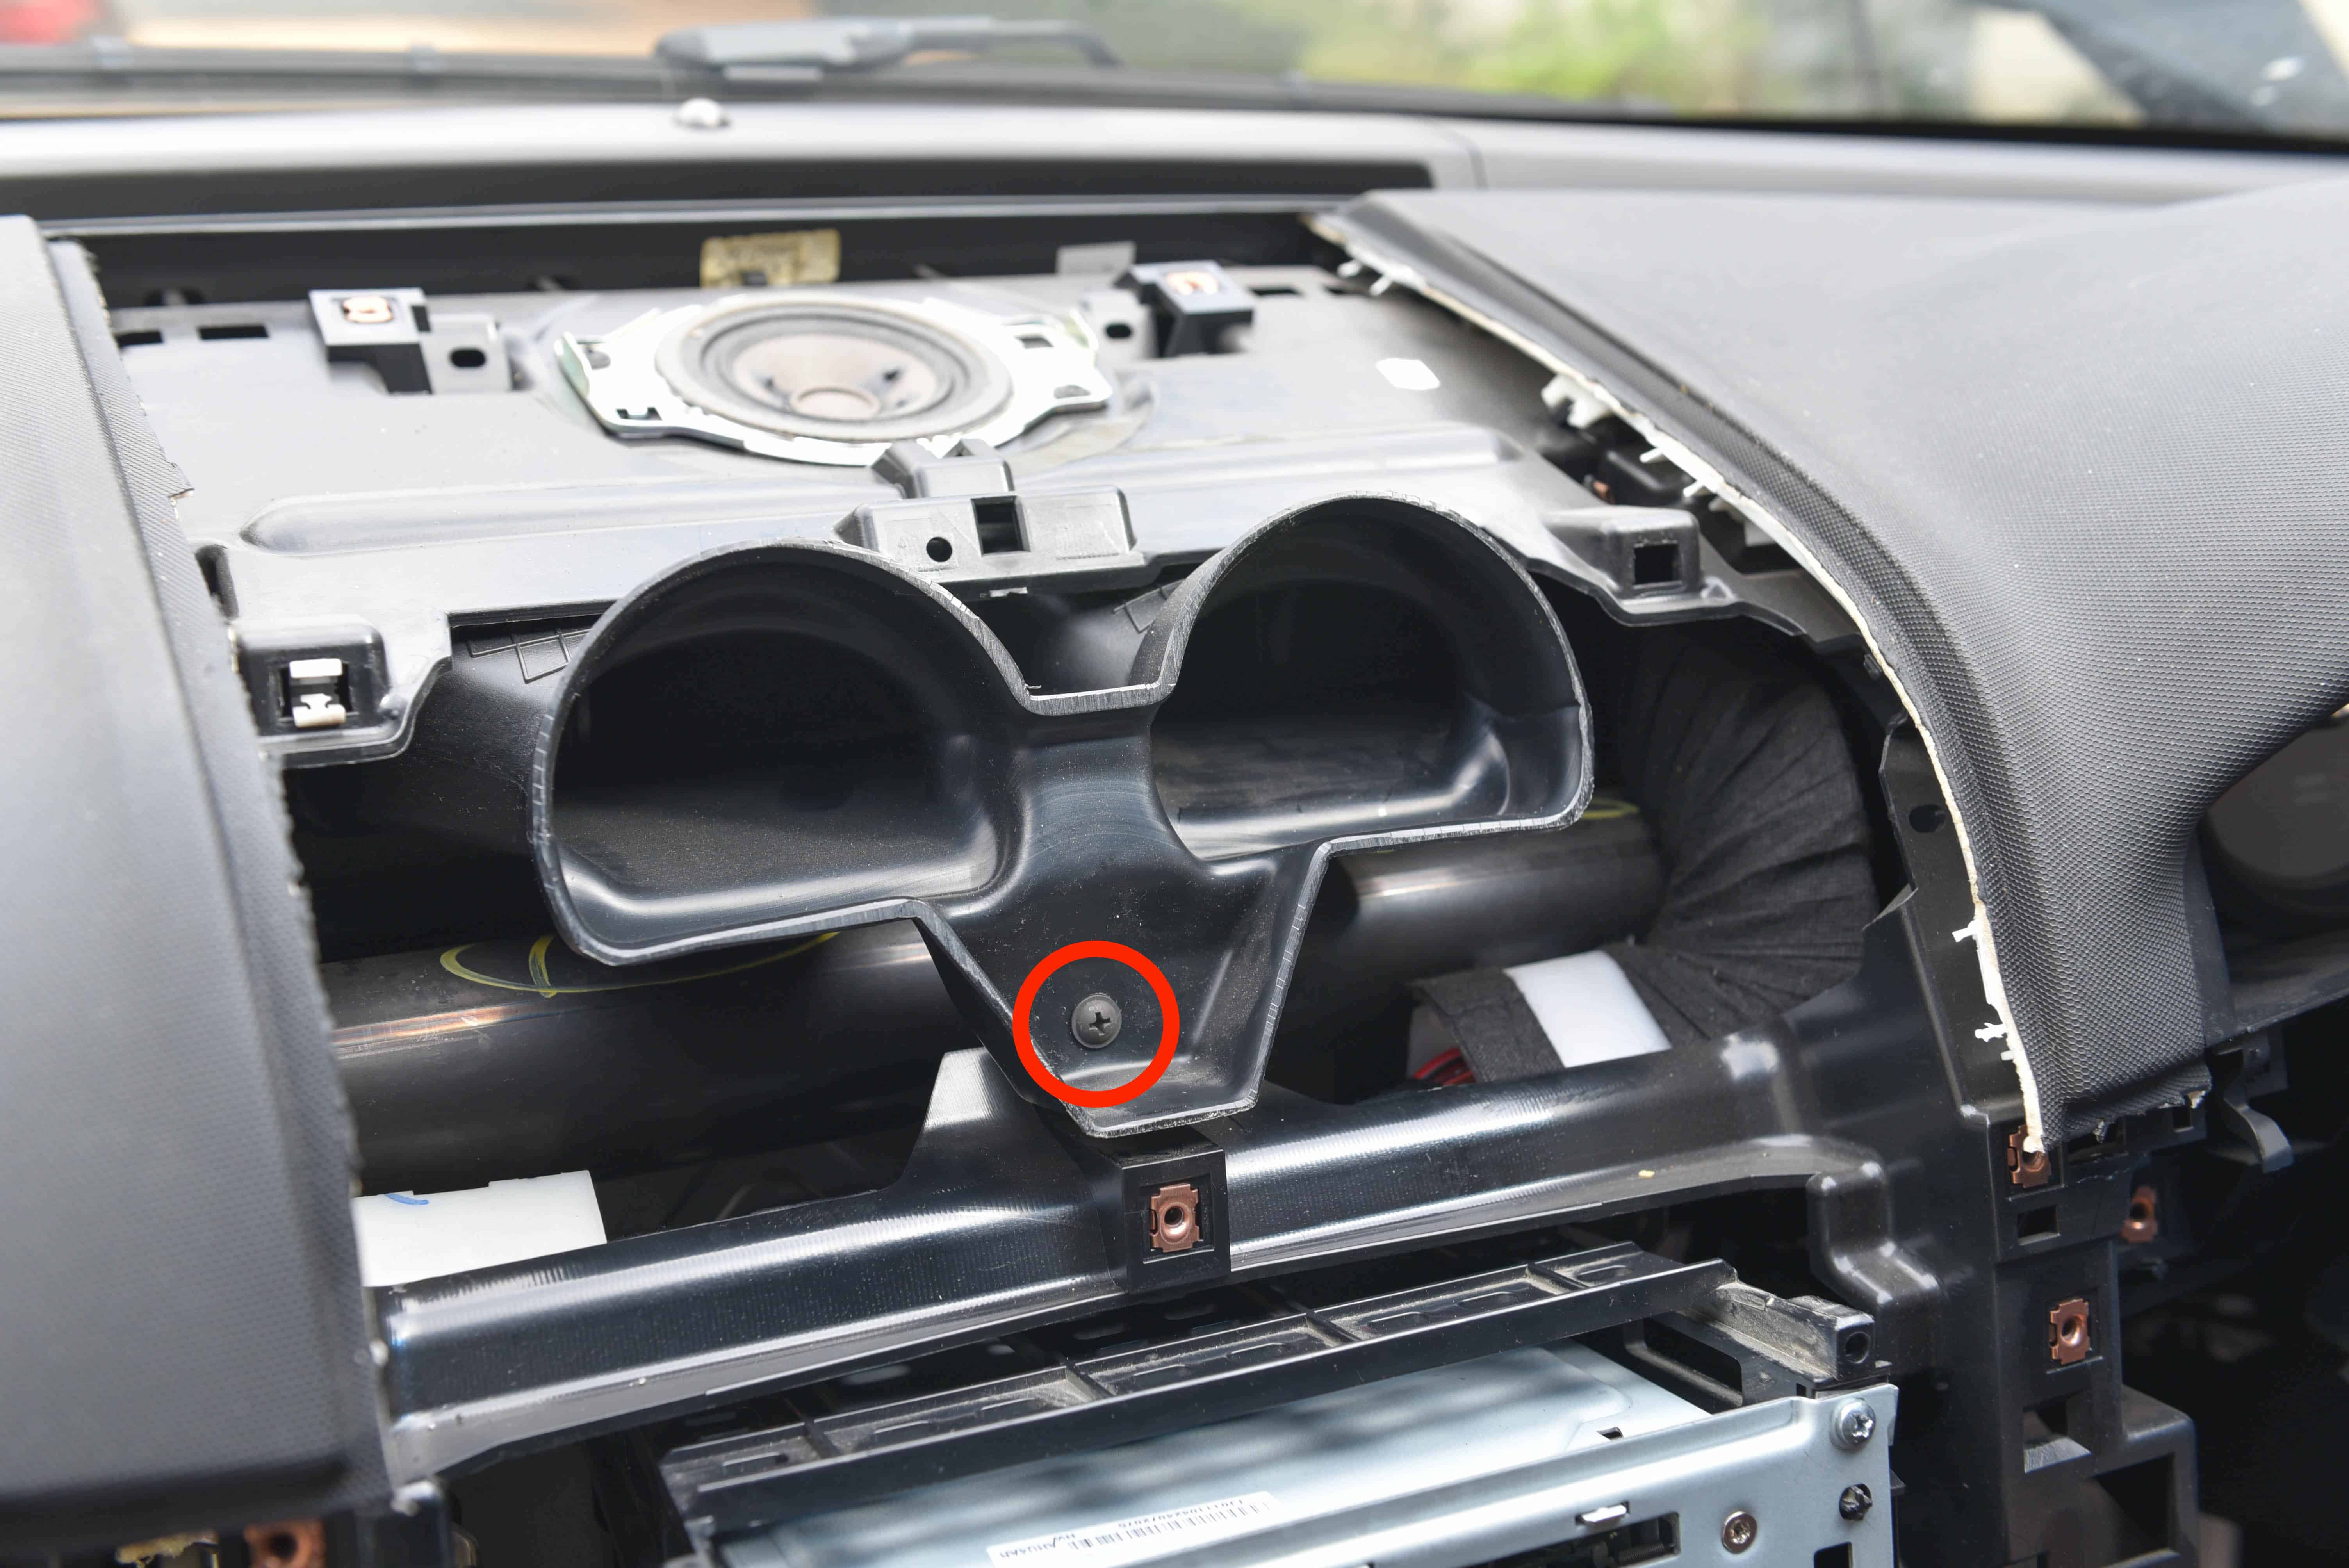
Step 24
Unscrew and remove the air conditioner vent.
Step 25
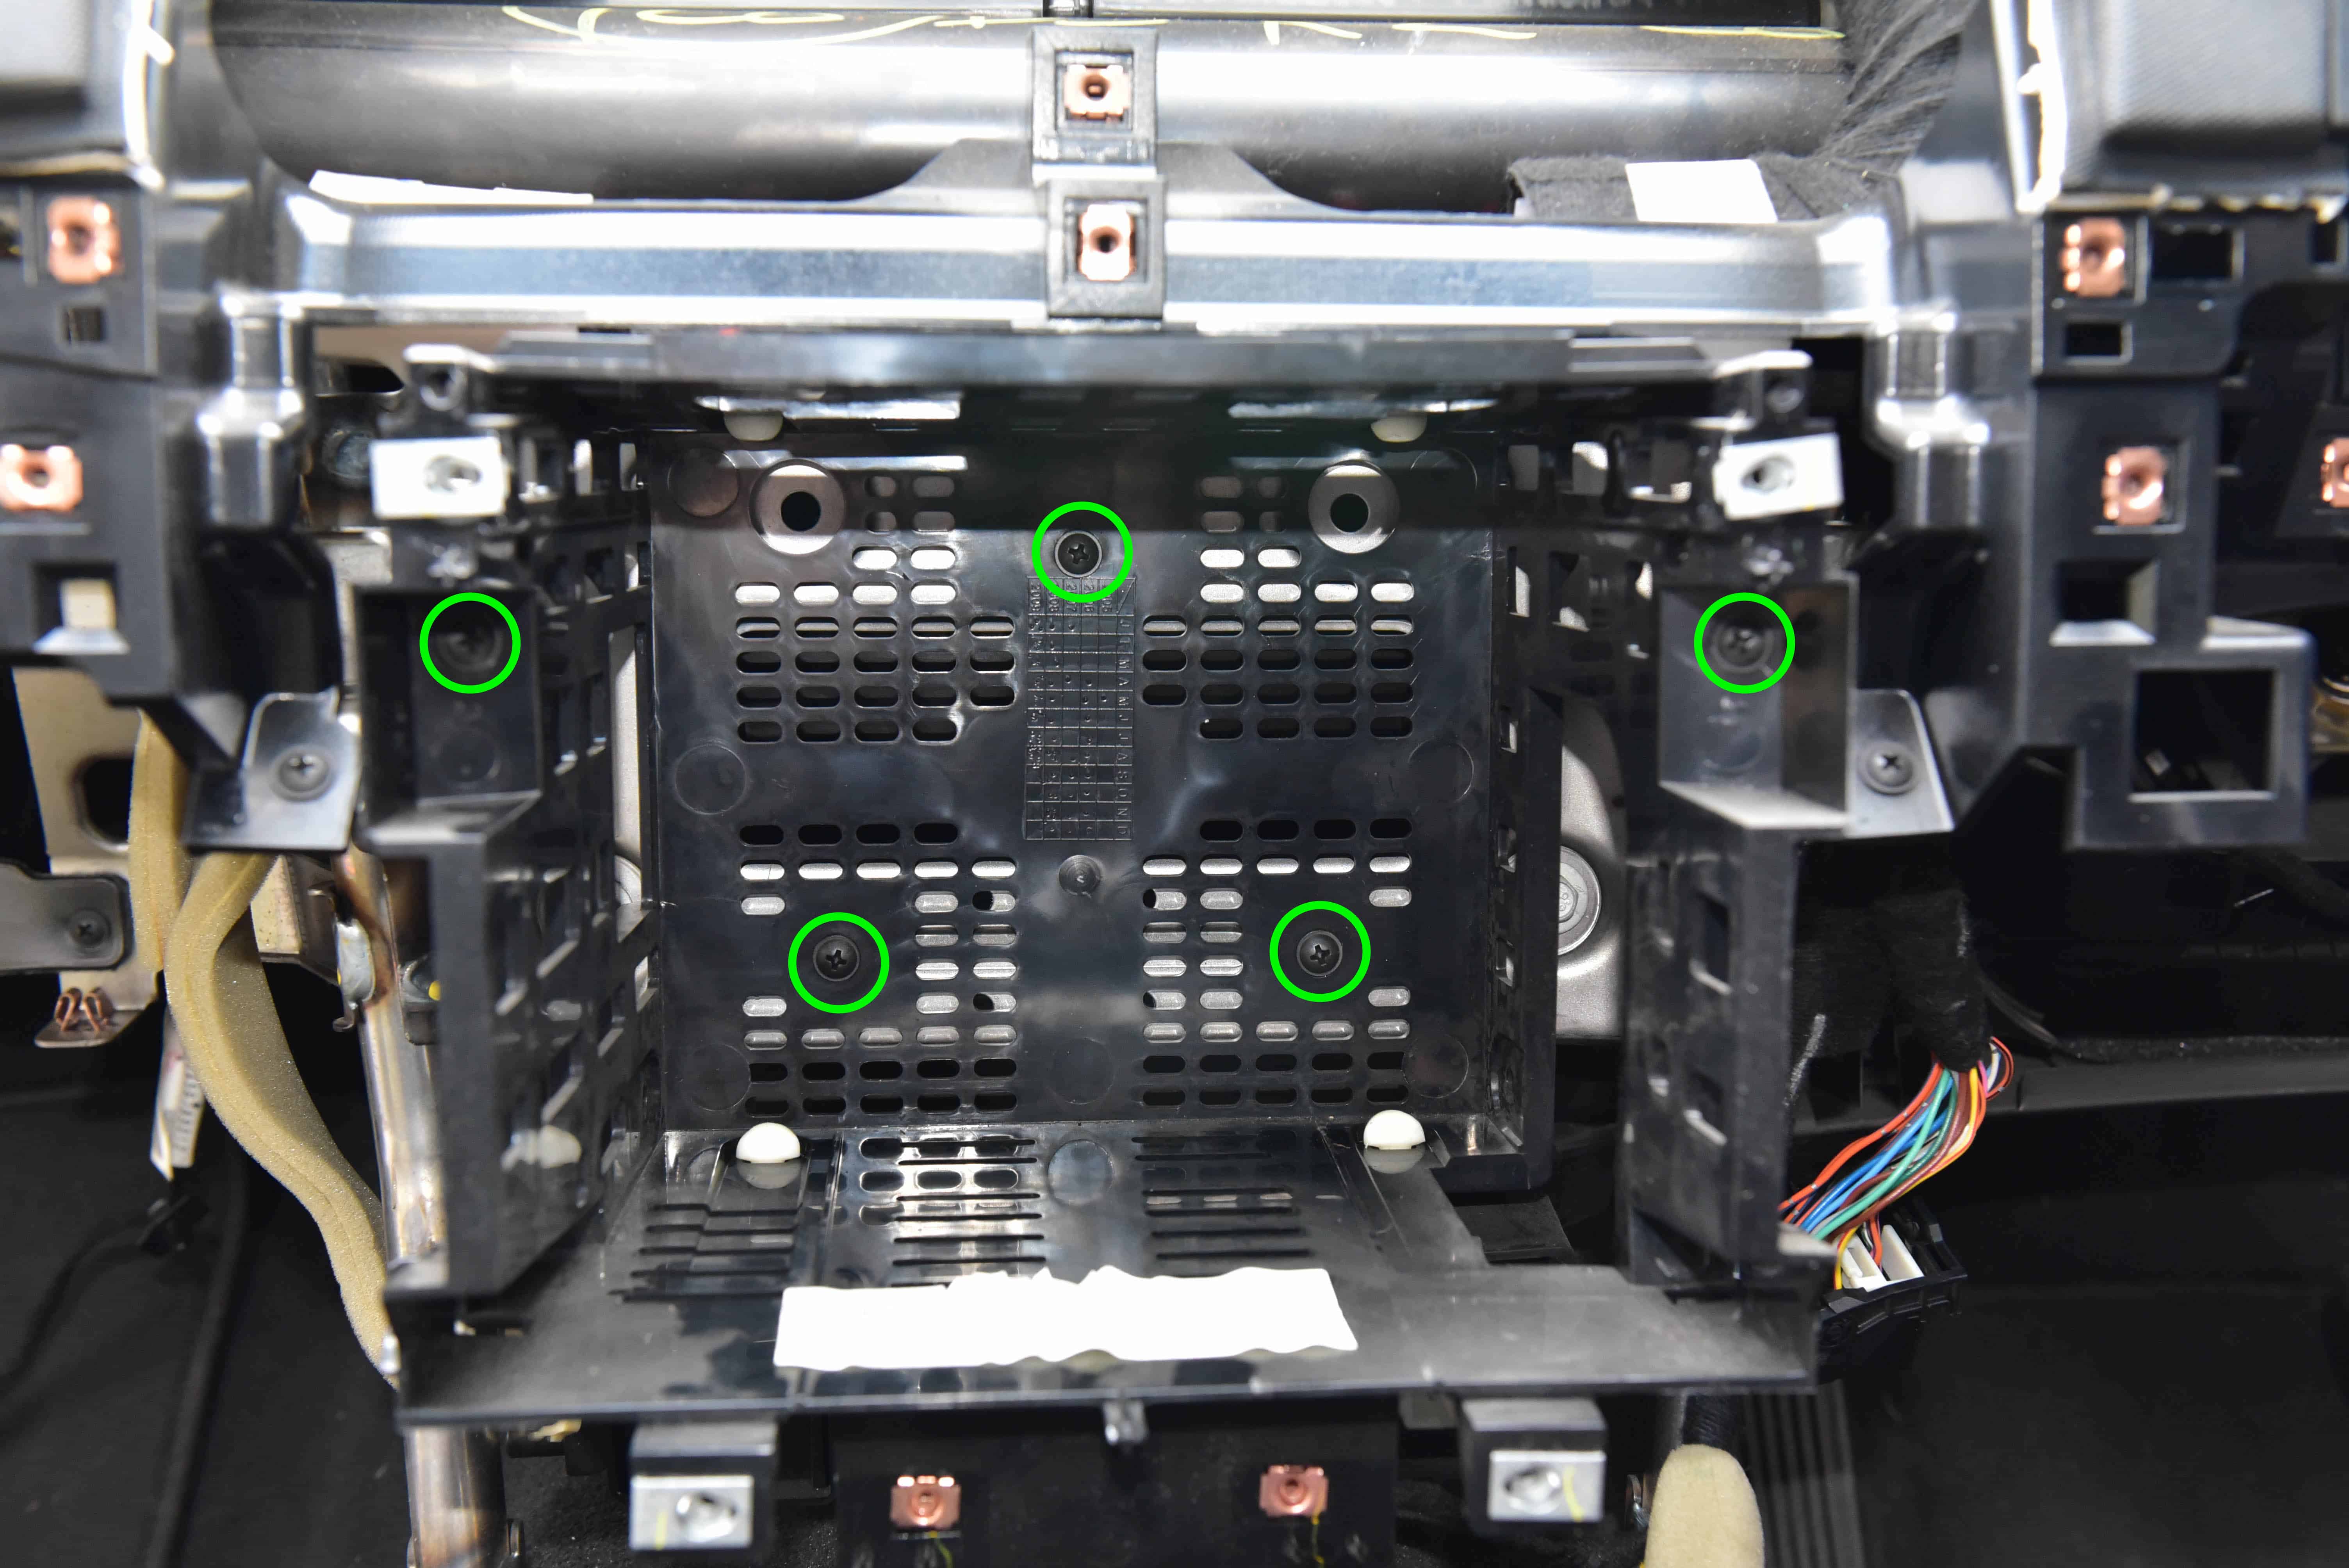
Unscrew and remove the headunit cage as pictured.
Step 26
Series 2 Holden IQ Installation
We will now commence installation of the Series 2 Holden IQ. Here’s all the parts required.
VIN-Programmed Holden IQ Headunit
Holden IQ Headunit Fascia
Headunit Cage
Passenger and Drivers Dash Spears
Air Conditioner Duct
Centre Console Trim
New Harness & HVAC Controller
Surrounding Headunit Trim
Step 27
If a modified HVAC controller has been supplied with your Series 2 Conversion, it can be replaced by removing the passenger vent ducting and unscrewing the controller.
Replace the controller and reconnect all harnesses.
Step 28
Install the new headunit cage and air conditioner ducting. Screw both into place.
Step 29
Fit the new trim frame and screw into place.
Step 30
Slide the new headunit into position and screw down as pictured.
Step 31
Connect the new wiring harness as provided with your conversion kit, then connect to the headunit. Also connect the antenna on the passenger side.
Step 32
Slide the new headunit facia and trim into place. Push down firmly on the whole trim piece to ensure the clips are secured.
Step 33
Install the storage compartment. We chose to install our USB / AUX Input here as well.
Install the surrounding trim (Green arrows) and screw the gear selector and storage compartment into place.
Step 34
Connect the window switches and traction control switch, and install the new piano black centre console trim.
Re-clip the air conditioner ducting and install the screw.
Reinstall the side trim pieces. Push upwards and clip into place.
Step 35
Reinstall the glovebox and steering column trims. Don’t forget to reconnect the boot release switch.
Install the two new silver dash spears on both the driver and passenger side.
Step 36
Screw the trim into place and reinstall the speaker grille.
Your Series 2 Holden IQ Radio Conversion is now complete!
Did you find this guide helpful? Consider sharing it to help other car enthusiasts


This Post Has 16 Comments
Just after a quote I’ve got a ve s1 calais and wanting to upgrade the dash iq to a s2 Calais
Hello, We don’t sell IQ Upgrade kits. Thanks.
is the cage different from series 1 to series 2?
also any suggestions on wreckers etc who would have all of the series 2 parts available? Thanks
I do believe the cage is different, most ‘Kits’ come with a new one. Check eBay, there’s a few sellers on there.
I’m having trouble installing the trim in step 3 of installing. Is there any tricks to doing it?
Been a while since we did this sorry! I do believe we had to force it slightly.