This guide will show you how to replace an air conditioner actuator on a VE Commodore. These actuators commonly fail on Series 1 vehicles and have been seen to fail on Series 2, however a revised unit is now being used.
There are multiple actuators behind the dashboard controlling modes, temperatures and air sources. Our guide will show you how to identify the faulty actuator and the steps to replace it.
HVAC = Heating, Ventilation and Air Conditioning
Common symptoms
Vents stuck in a certain mode such as feet, face or demister.
Loud clicking noise behind the dashboard when changing modes or temperature
Heating / Cooling not working properly. Often permanently on heat or cold.
Multiple actuators can be found on both the left and right sides of the dashboard. The same actuator units are used regardless of its purpose. Let’s go through some troubleshooting steps below:
Attempt a HVAC System Relearn
It’s possible that your actuators are not actually faulty but have ‘forgotten’ which position they are in. The relearn process runs all actuators for 10-15 seconds, allowing them to calibrate their positions.
To do this first close your doors and turn the radio off. You’ll need to listen to the motors and they’re very quiet.
Turn the Ignition to ‘on’ but do not start the car. Press and hold the rear demister button until you hear the actuators moving. After 10-15 seconds the actuators will stop and the system will be calibrated. Test the air conditioner system and check if your problem still exists. Be sure to cycle through each mode and heat / cool.
If the problem still exists or you heard loud clicking noises during this process, it is very likely that an actuator is faulty. Proceed to the next step.
Identifying the Faulty Actuator
If you heard loud clicking noises during the relearn process this will help with identification. Run the relearn again and listen for the clicking. Is it on the passenger or drivers side? Listen around the footwell area on both sides and you should be able to determine where it was louder. We now need to access that actuator.
If no clicking was heard and you still suspect the actuator is at fault, visual identification may be required to see if the motor and HVAC arms are moving when the relearn is in progress. This will involve trim removal from the drivers and/or passenger side of the vehicle. We’ll run through this process below.
Note: There is an electrical interlock between the AIR RECIRC function and the HOT/COLD mixing function. If the system detects a malfunction in the AIR RECIRC, the HOT/COLD mixing actuator is disabled. This fault is indicated by the LED on the RECIRC button blinking.When you run “relearn, if the HOT/COLD actuator is not moving, this does not necessarily indicate that the actuator has failed. It might be that the RECIRC system has failed, and the interlock has disabled the HOT/COLD mixing actuator. Confirmation of the fault is indicated by the blinking LED on the RECIRC button.
It is possible to have multiple actuators fail! Keep this in mind when performing your assessment.
Step 1
System Overview
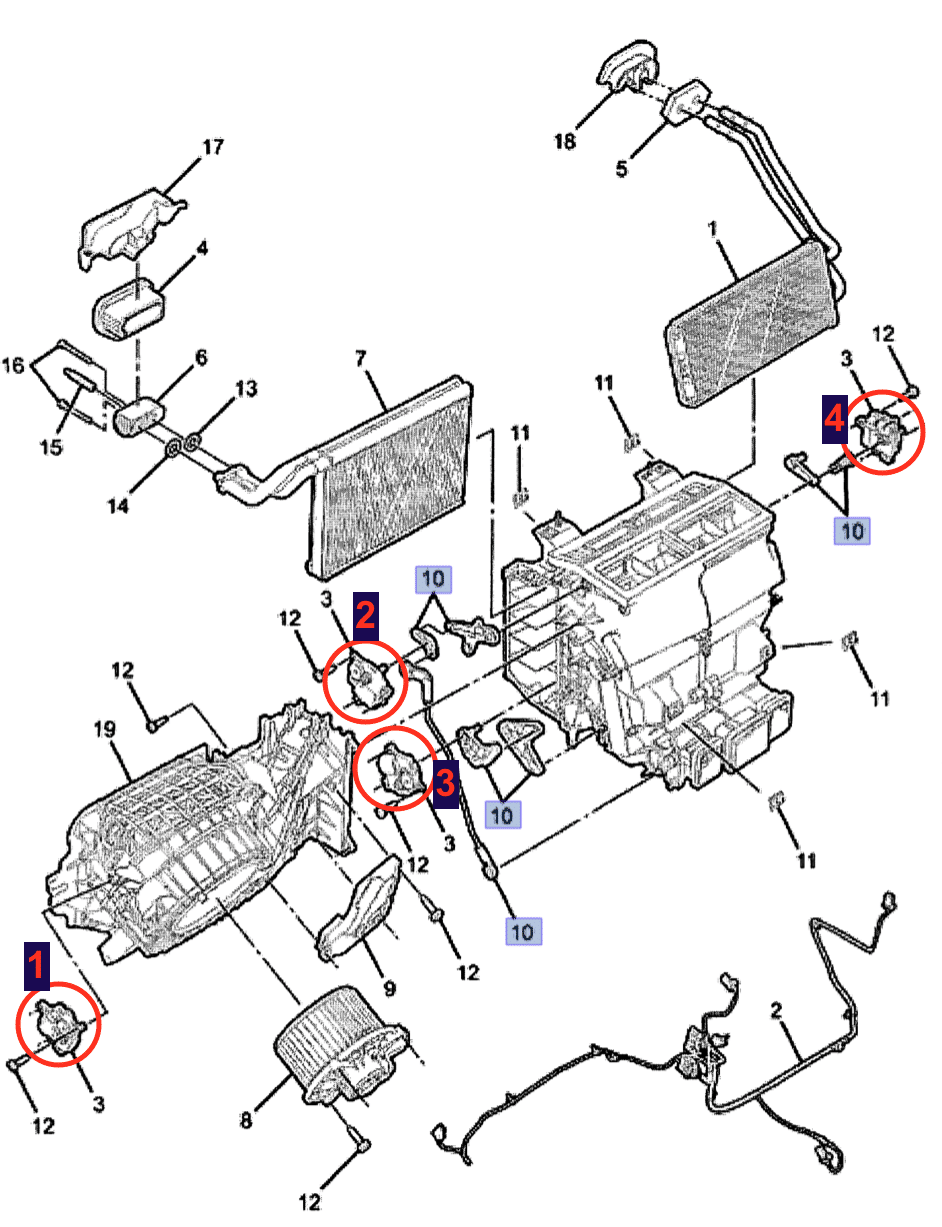
There are 4 HVAC actuators in the system, each one is identical
Air Recirculation Door Actuator – Located above the blower fan and controls the recirculation function.
Floor Vents – Upper left side of centre console (Passenger Side)
Heat/Cool – Lower left side of centre console. Uses interconnecting levers to control the butterfly valve inside the heater box
Face Vents – Upper right side of centre console (Drivers Side)
Step 2
Drivers Side Actuator
The drivers side actuator which controls the air directions between feet, face, demister is usually the faulty unit. It is often identified as the air conditioner being ‘stuck’ on feet or demister modes. The process below outlines the actuator replacement procedure.
Using a trim removal tool, pop off the side trim piece. There are three clips, one on each corner.
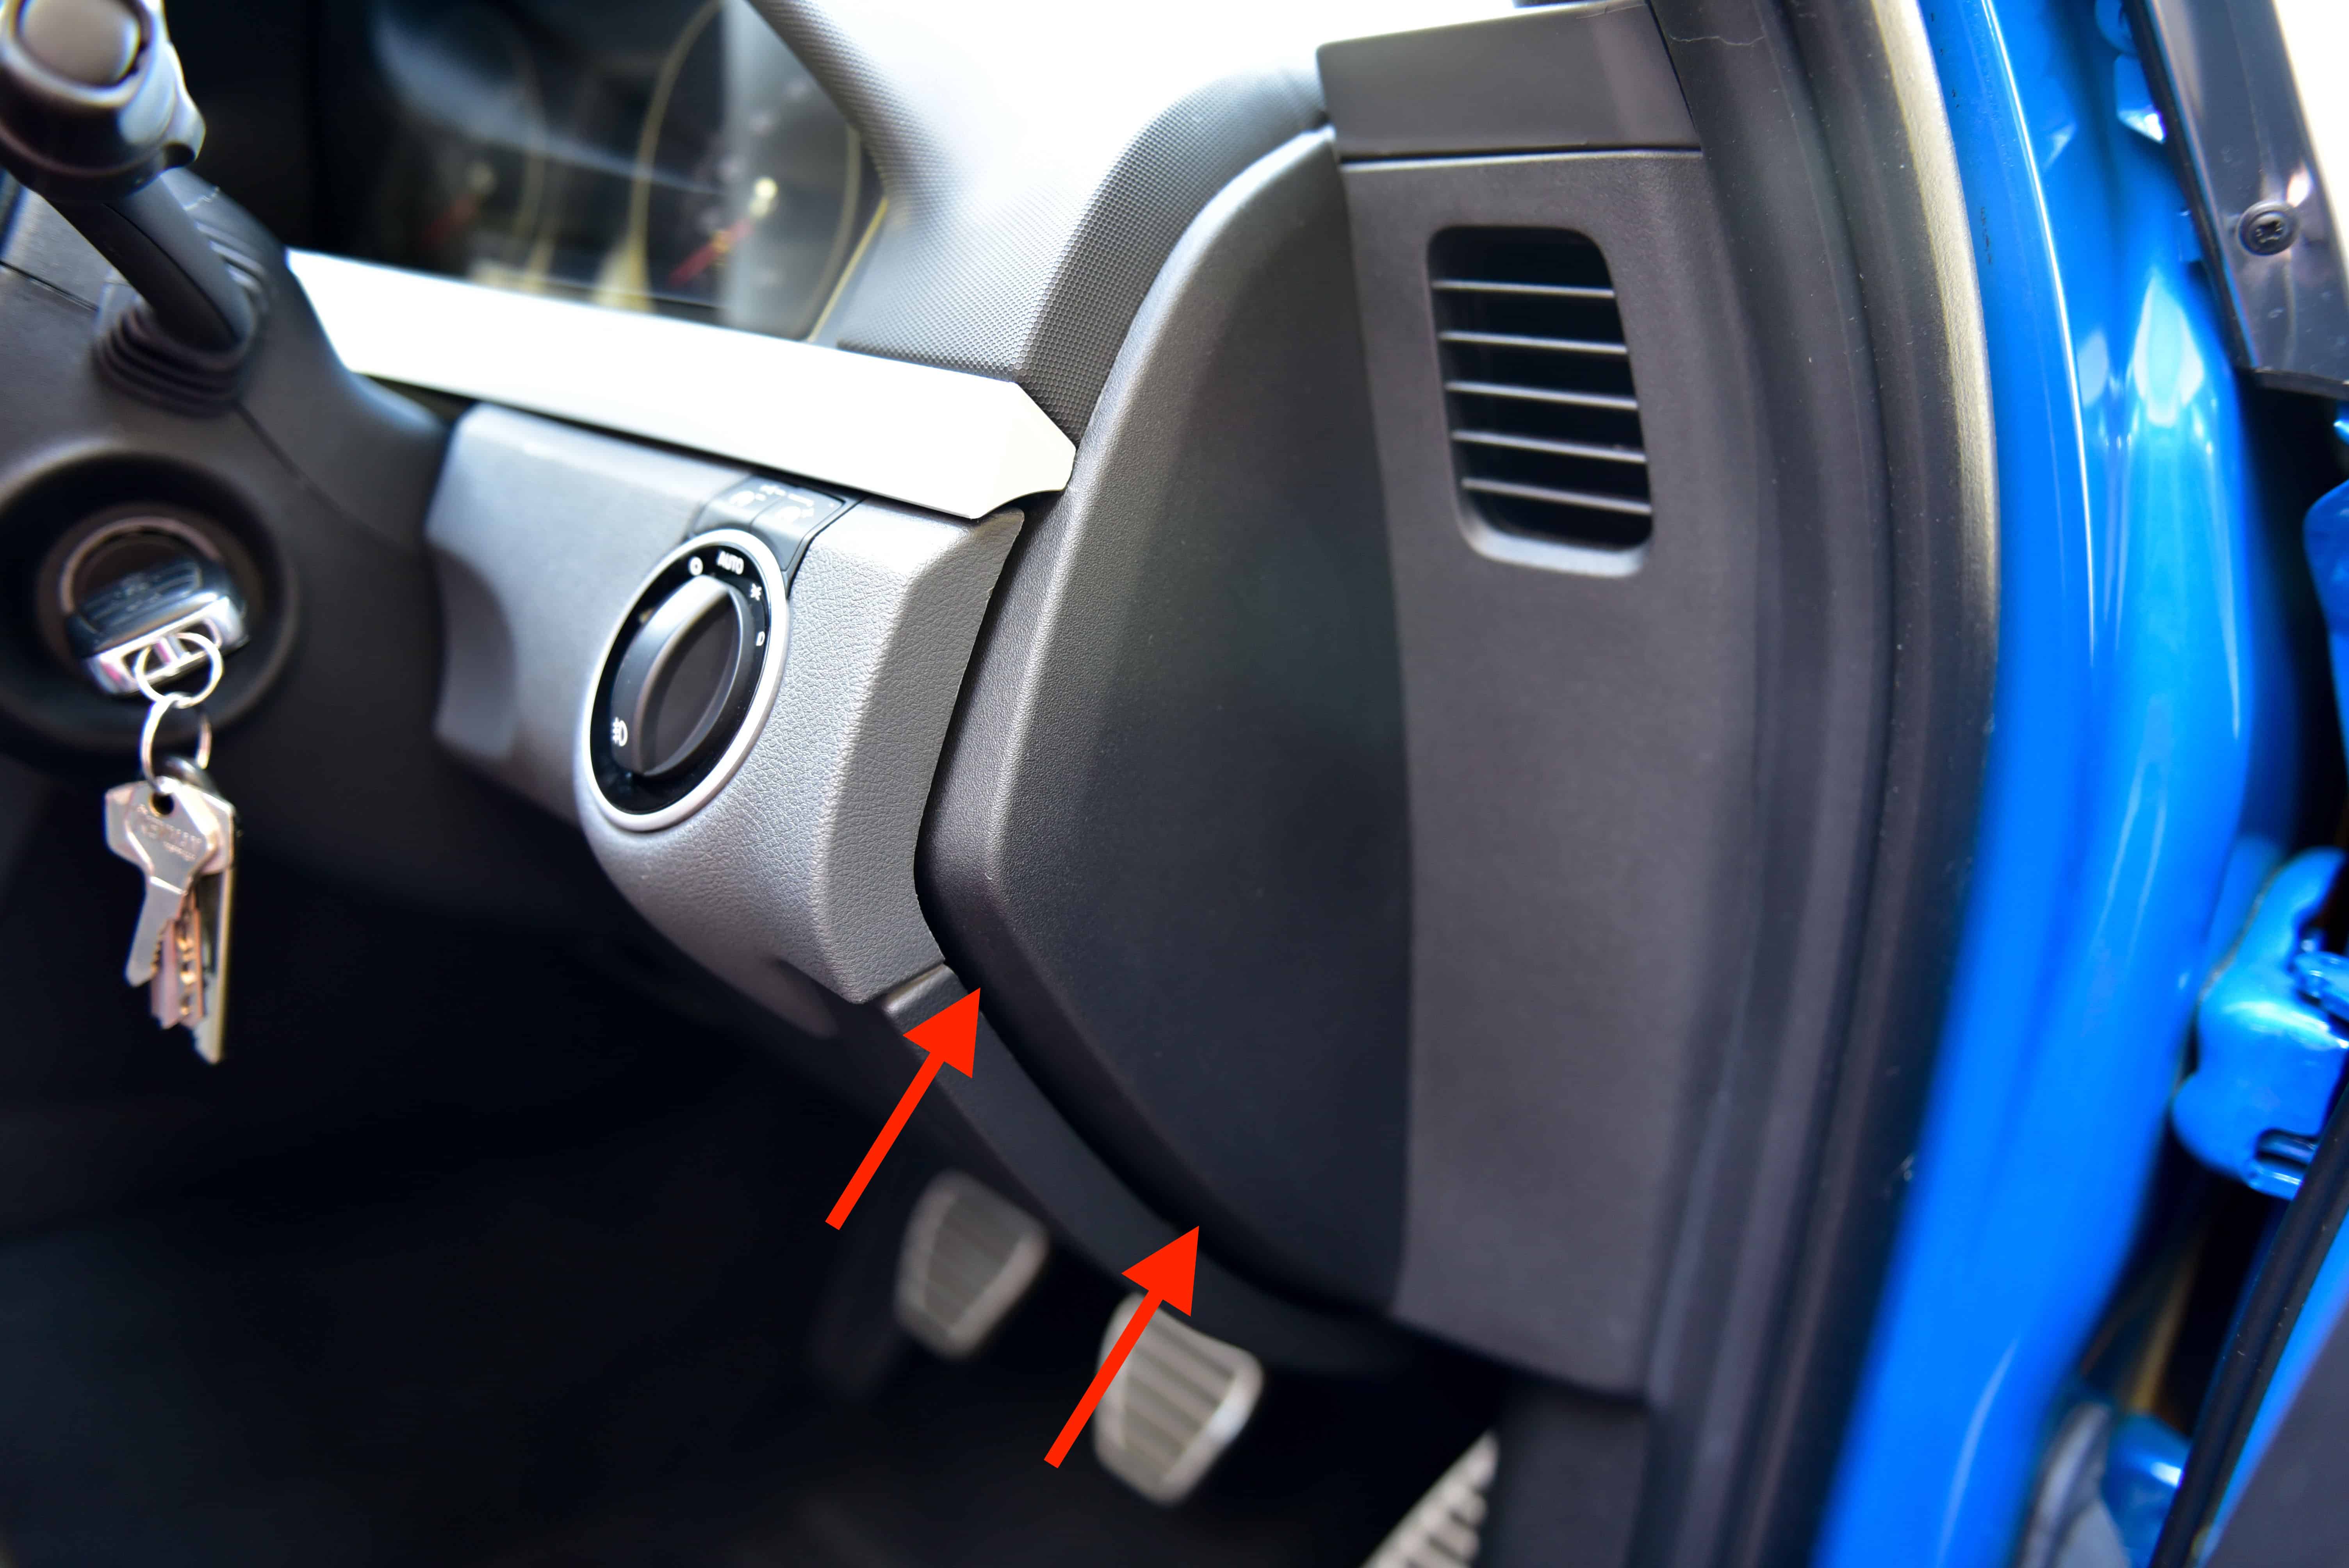
Step 3
Wedge your fingers behind the lower section of the trim and firmly pull upwards as shown by the red arrows.
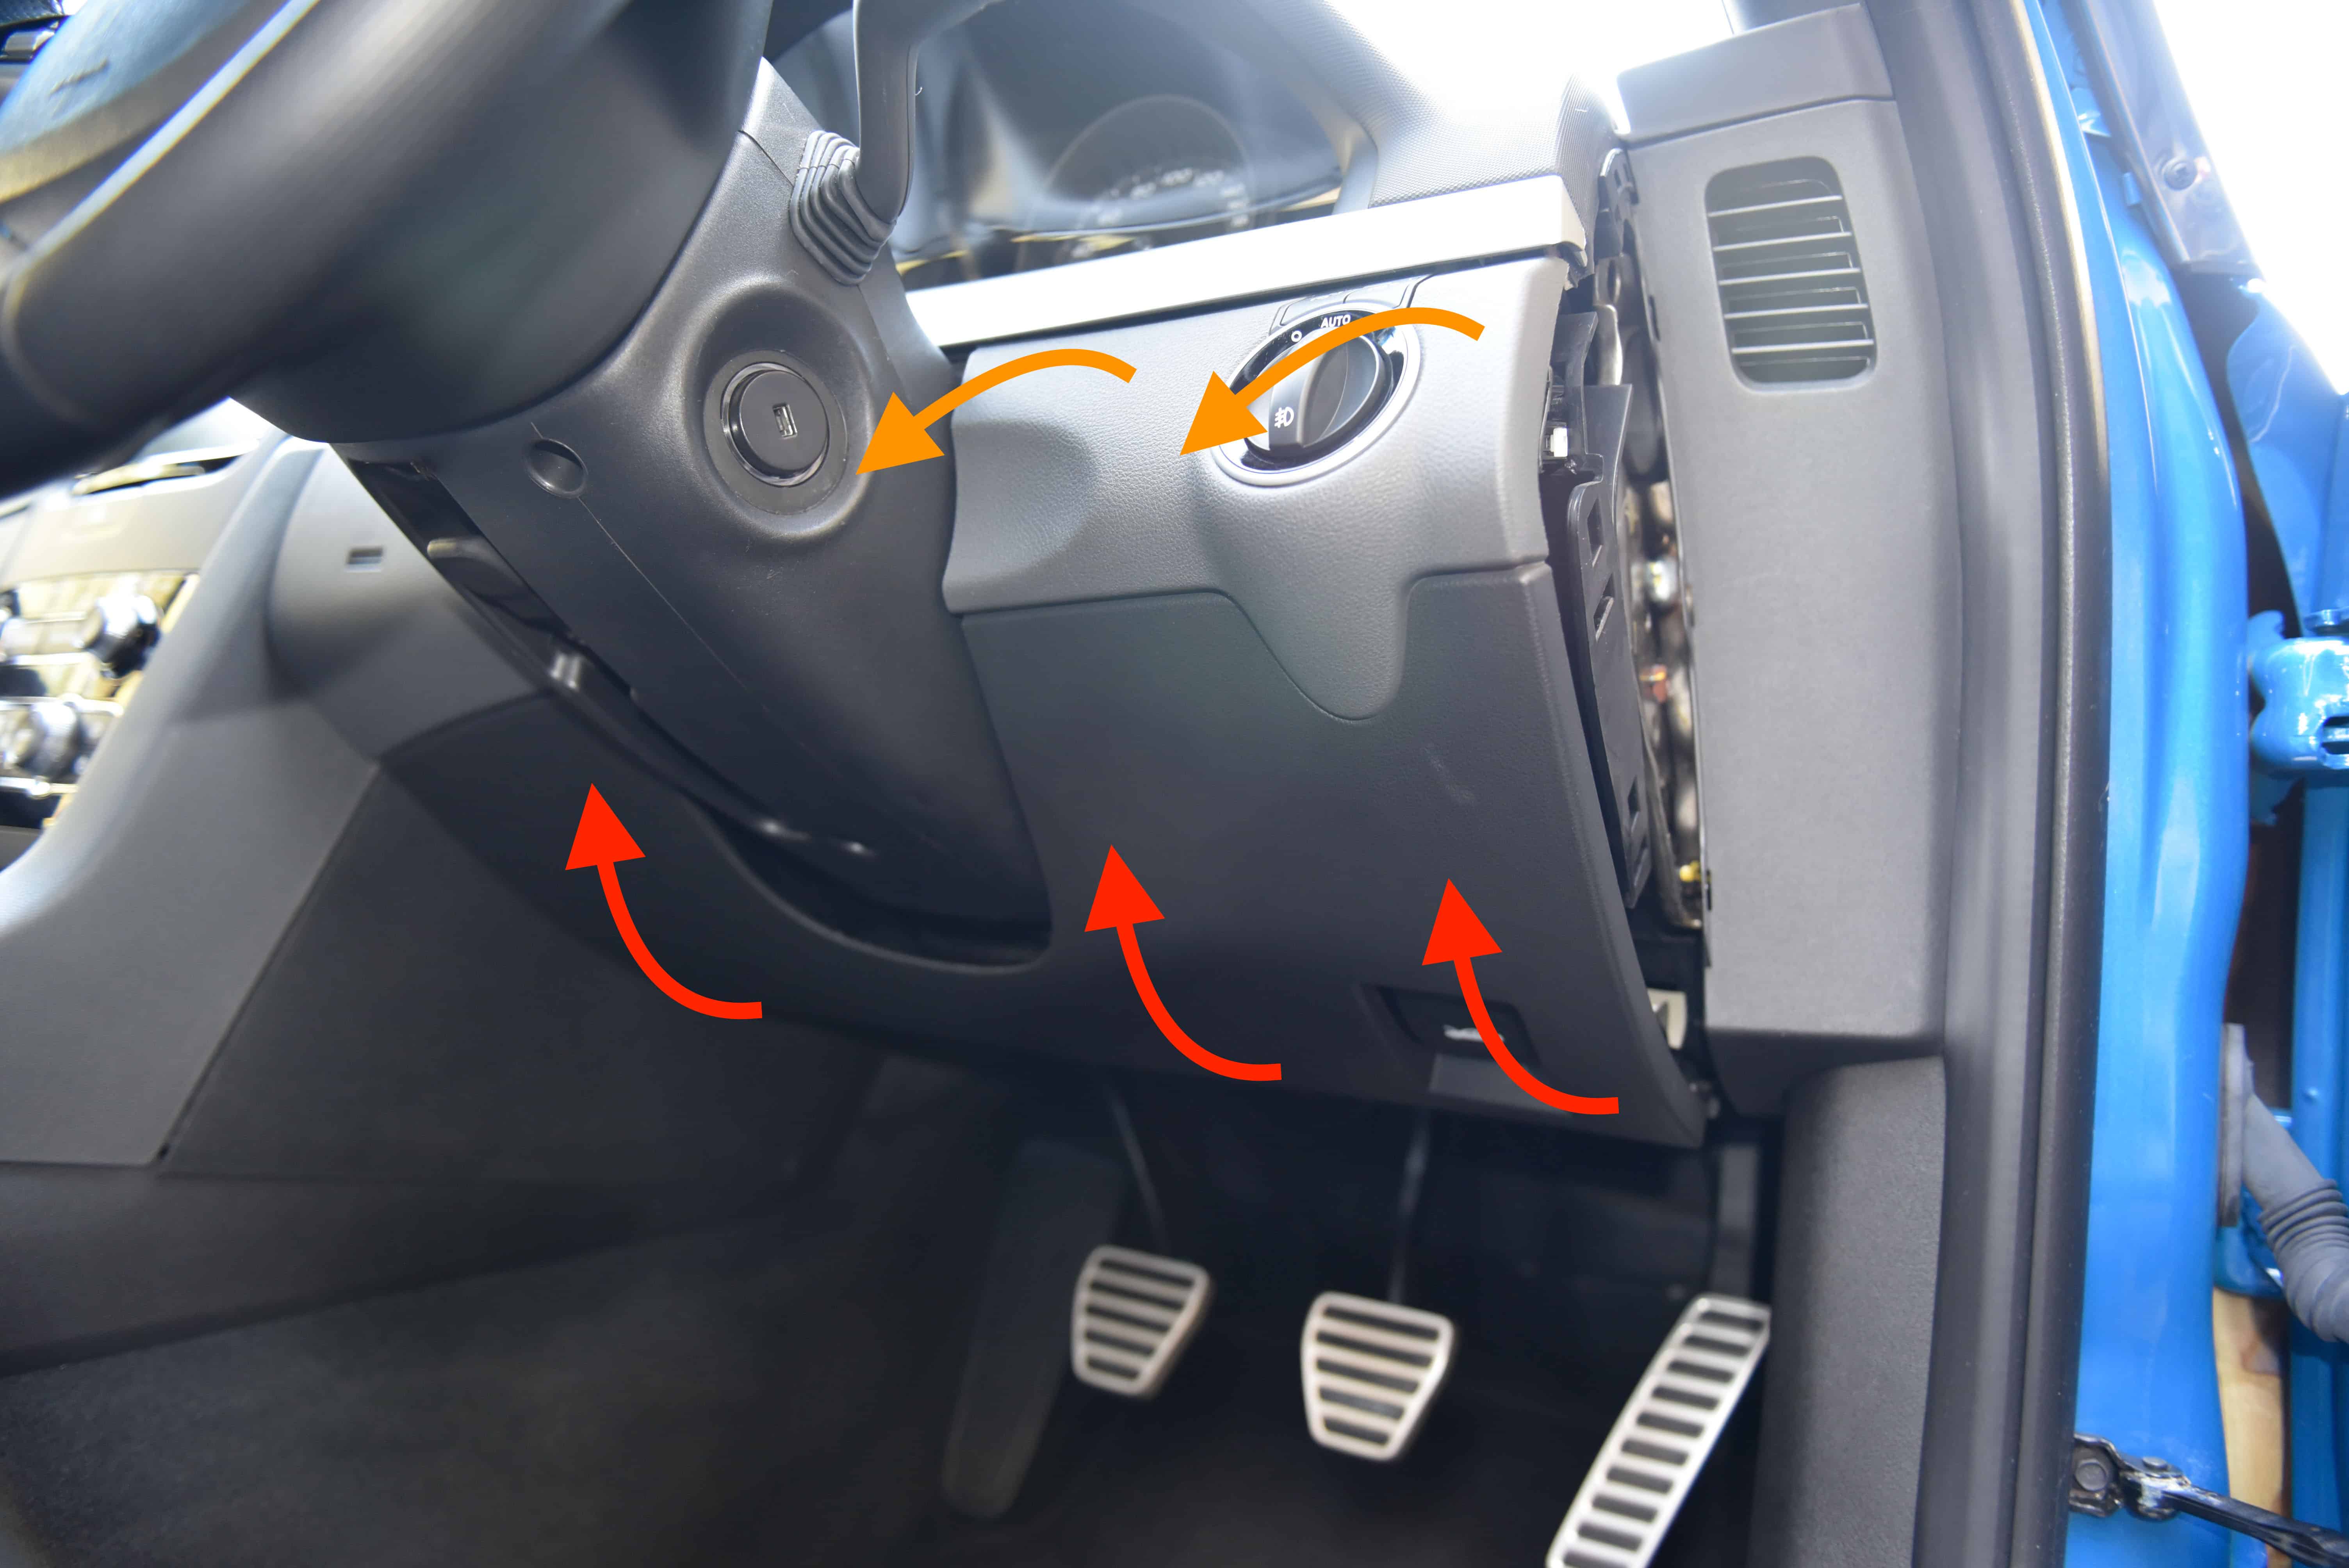
With the bottom clips released use a gentle hinging and pulling motion to release the top clips on both sides of the steering wheel. Pull away as shown by the orange arrows.
Be careful releasing the clips as the trim will drop downwards. It is quiet heavy.
Step 4
As the trim is released you will need to unplug the headlight switch. Push on the clip and unplug.
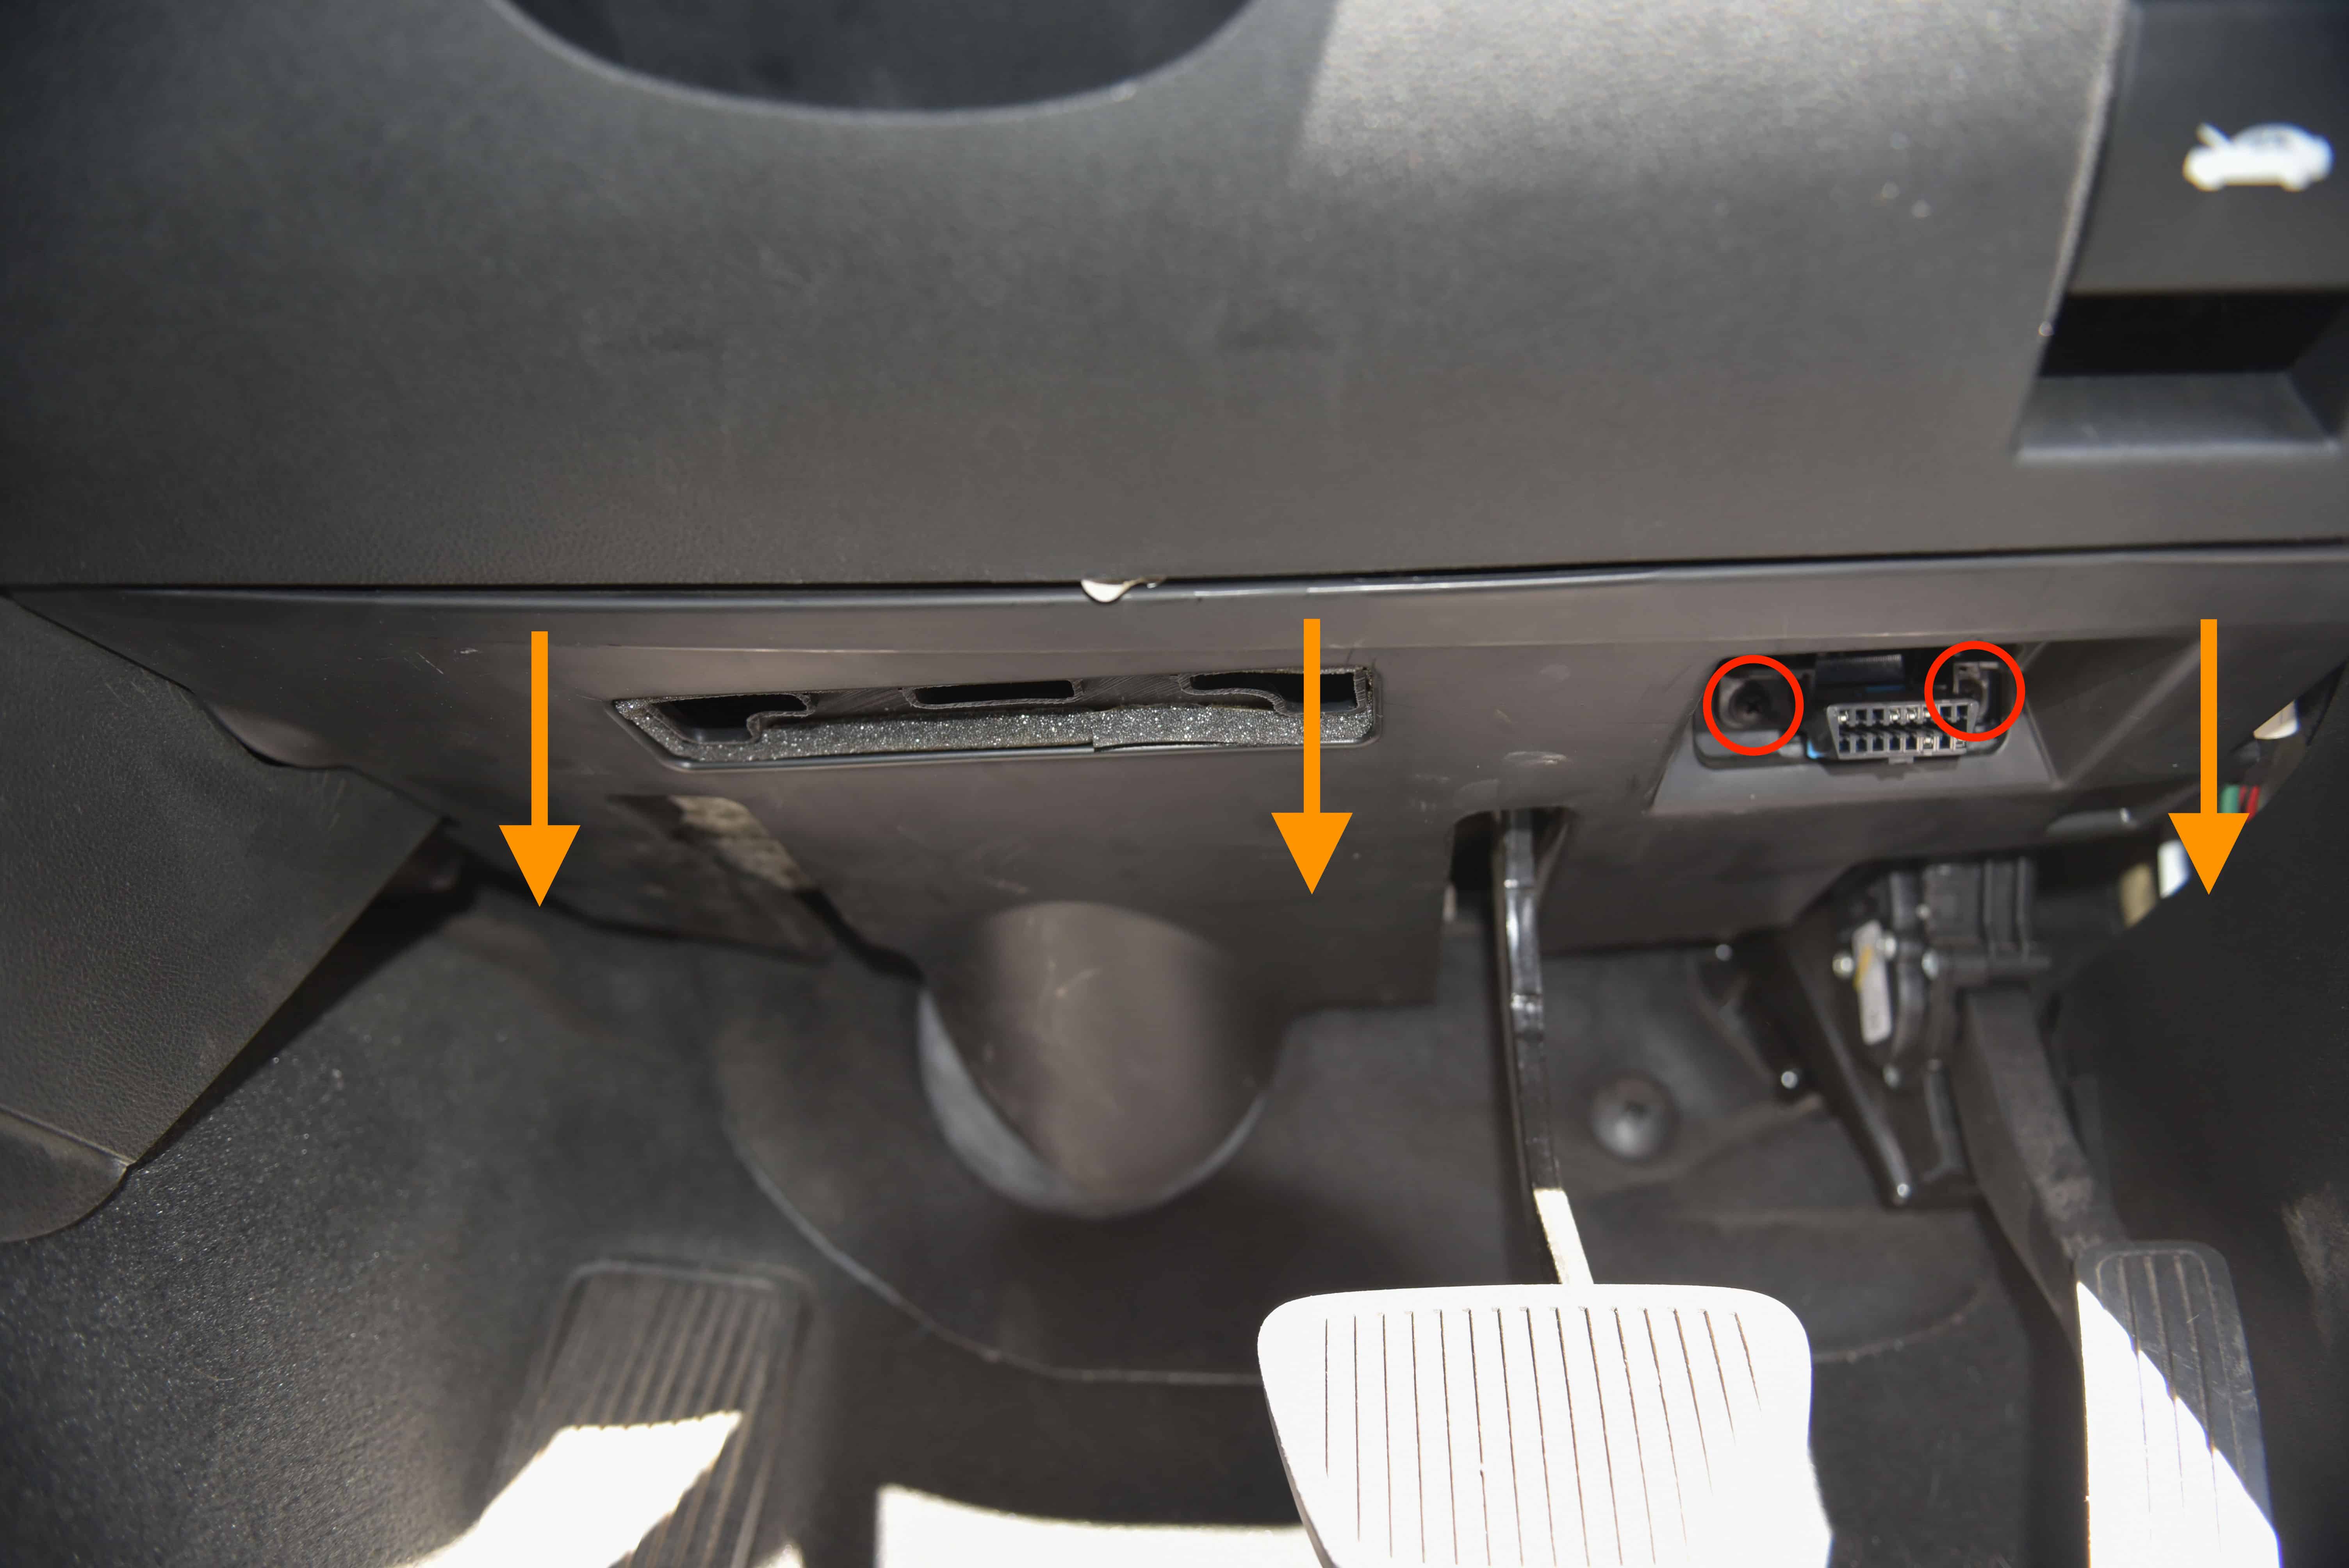
Step 5
Unscrew the OBD port as circled and pull downwards on the kick panel trim. There are approximately 5 clips holding this trim in place.
Step 6
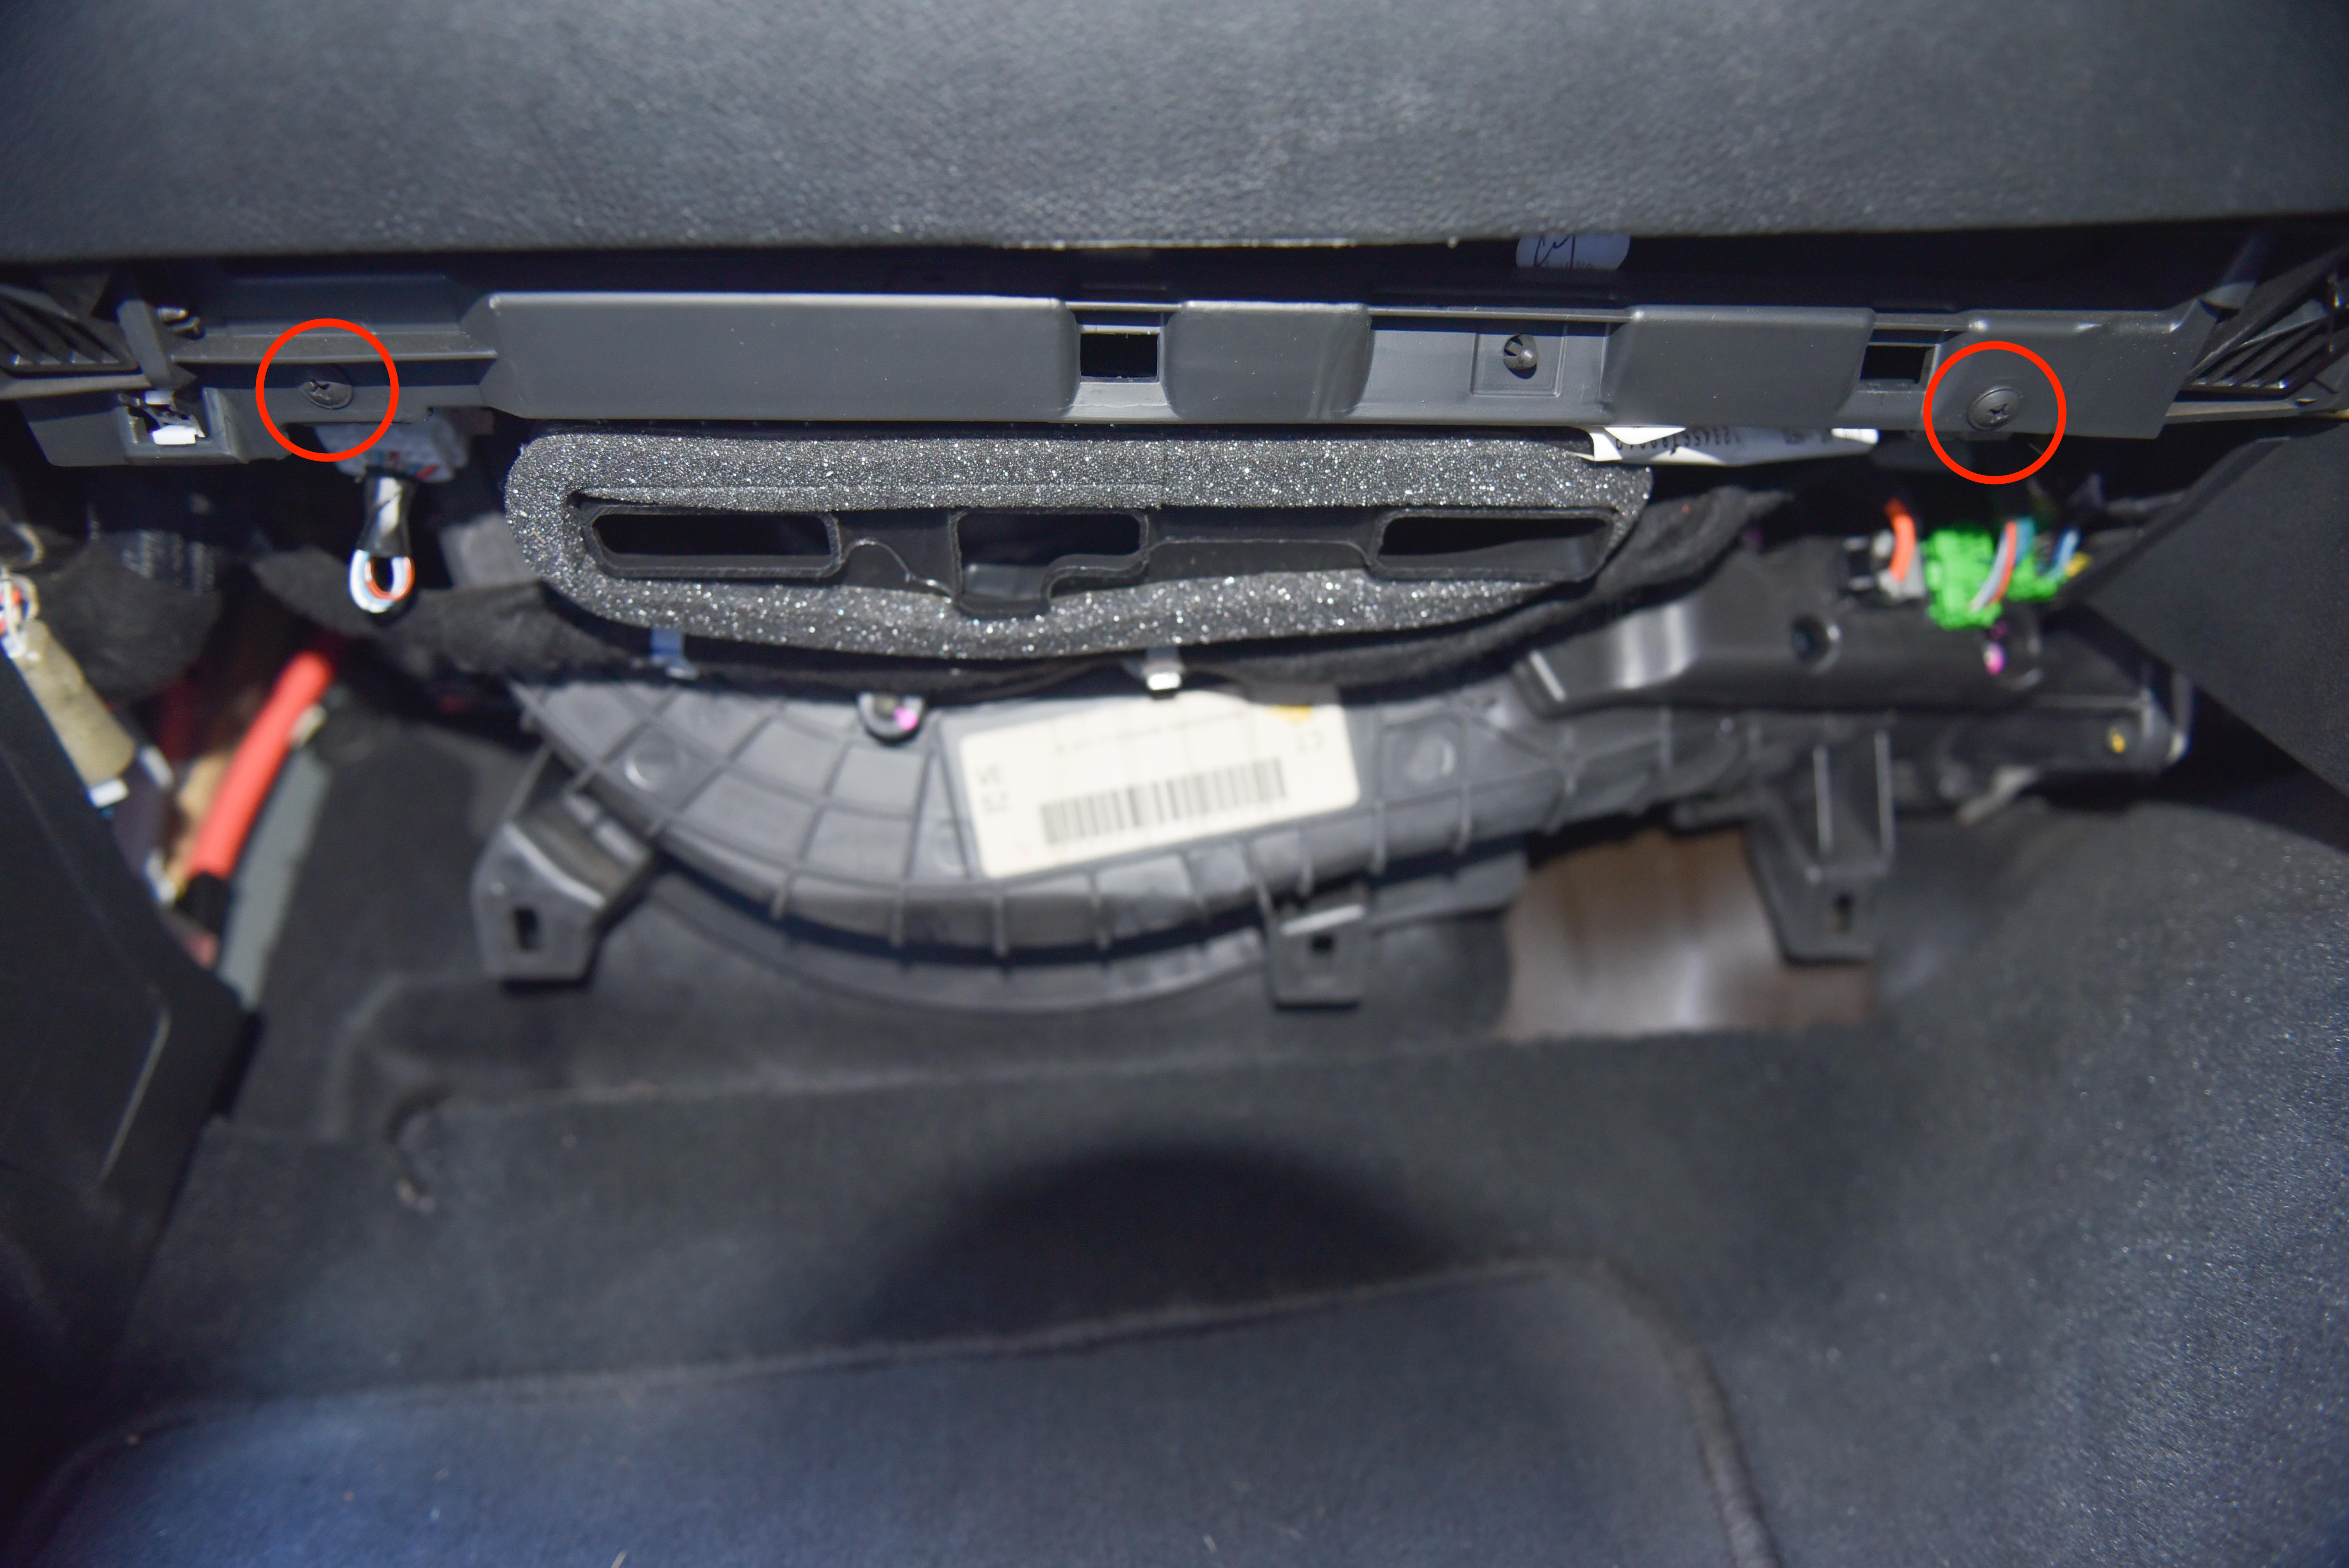
Remove the air conditioner ducting which is held in place by two screws.
Step 7
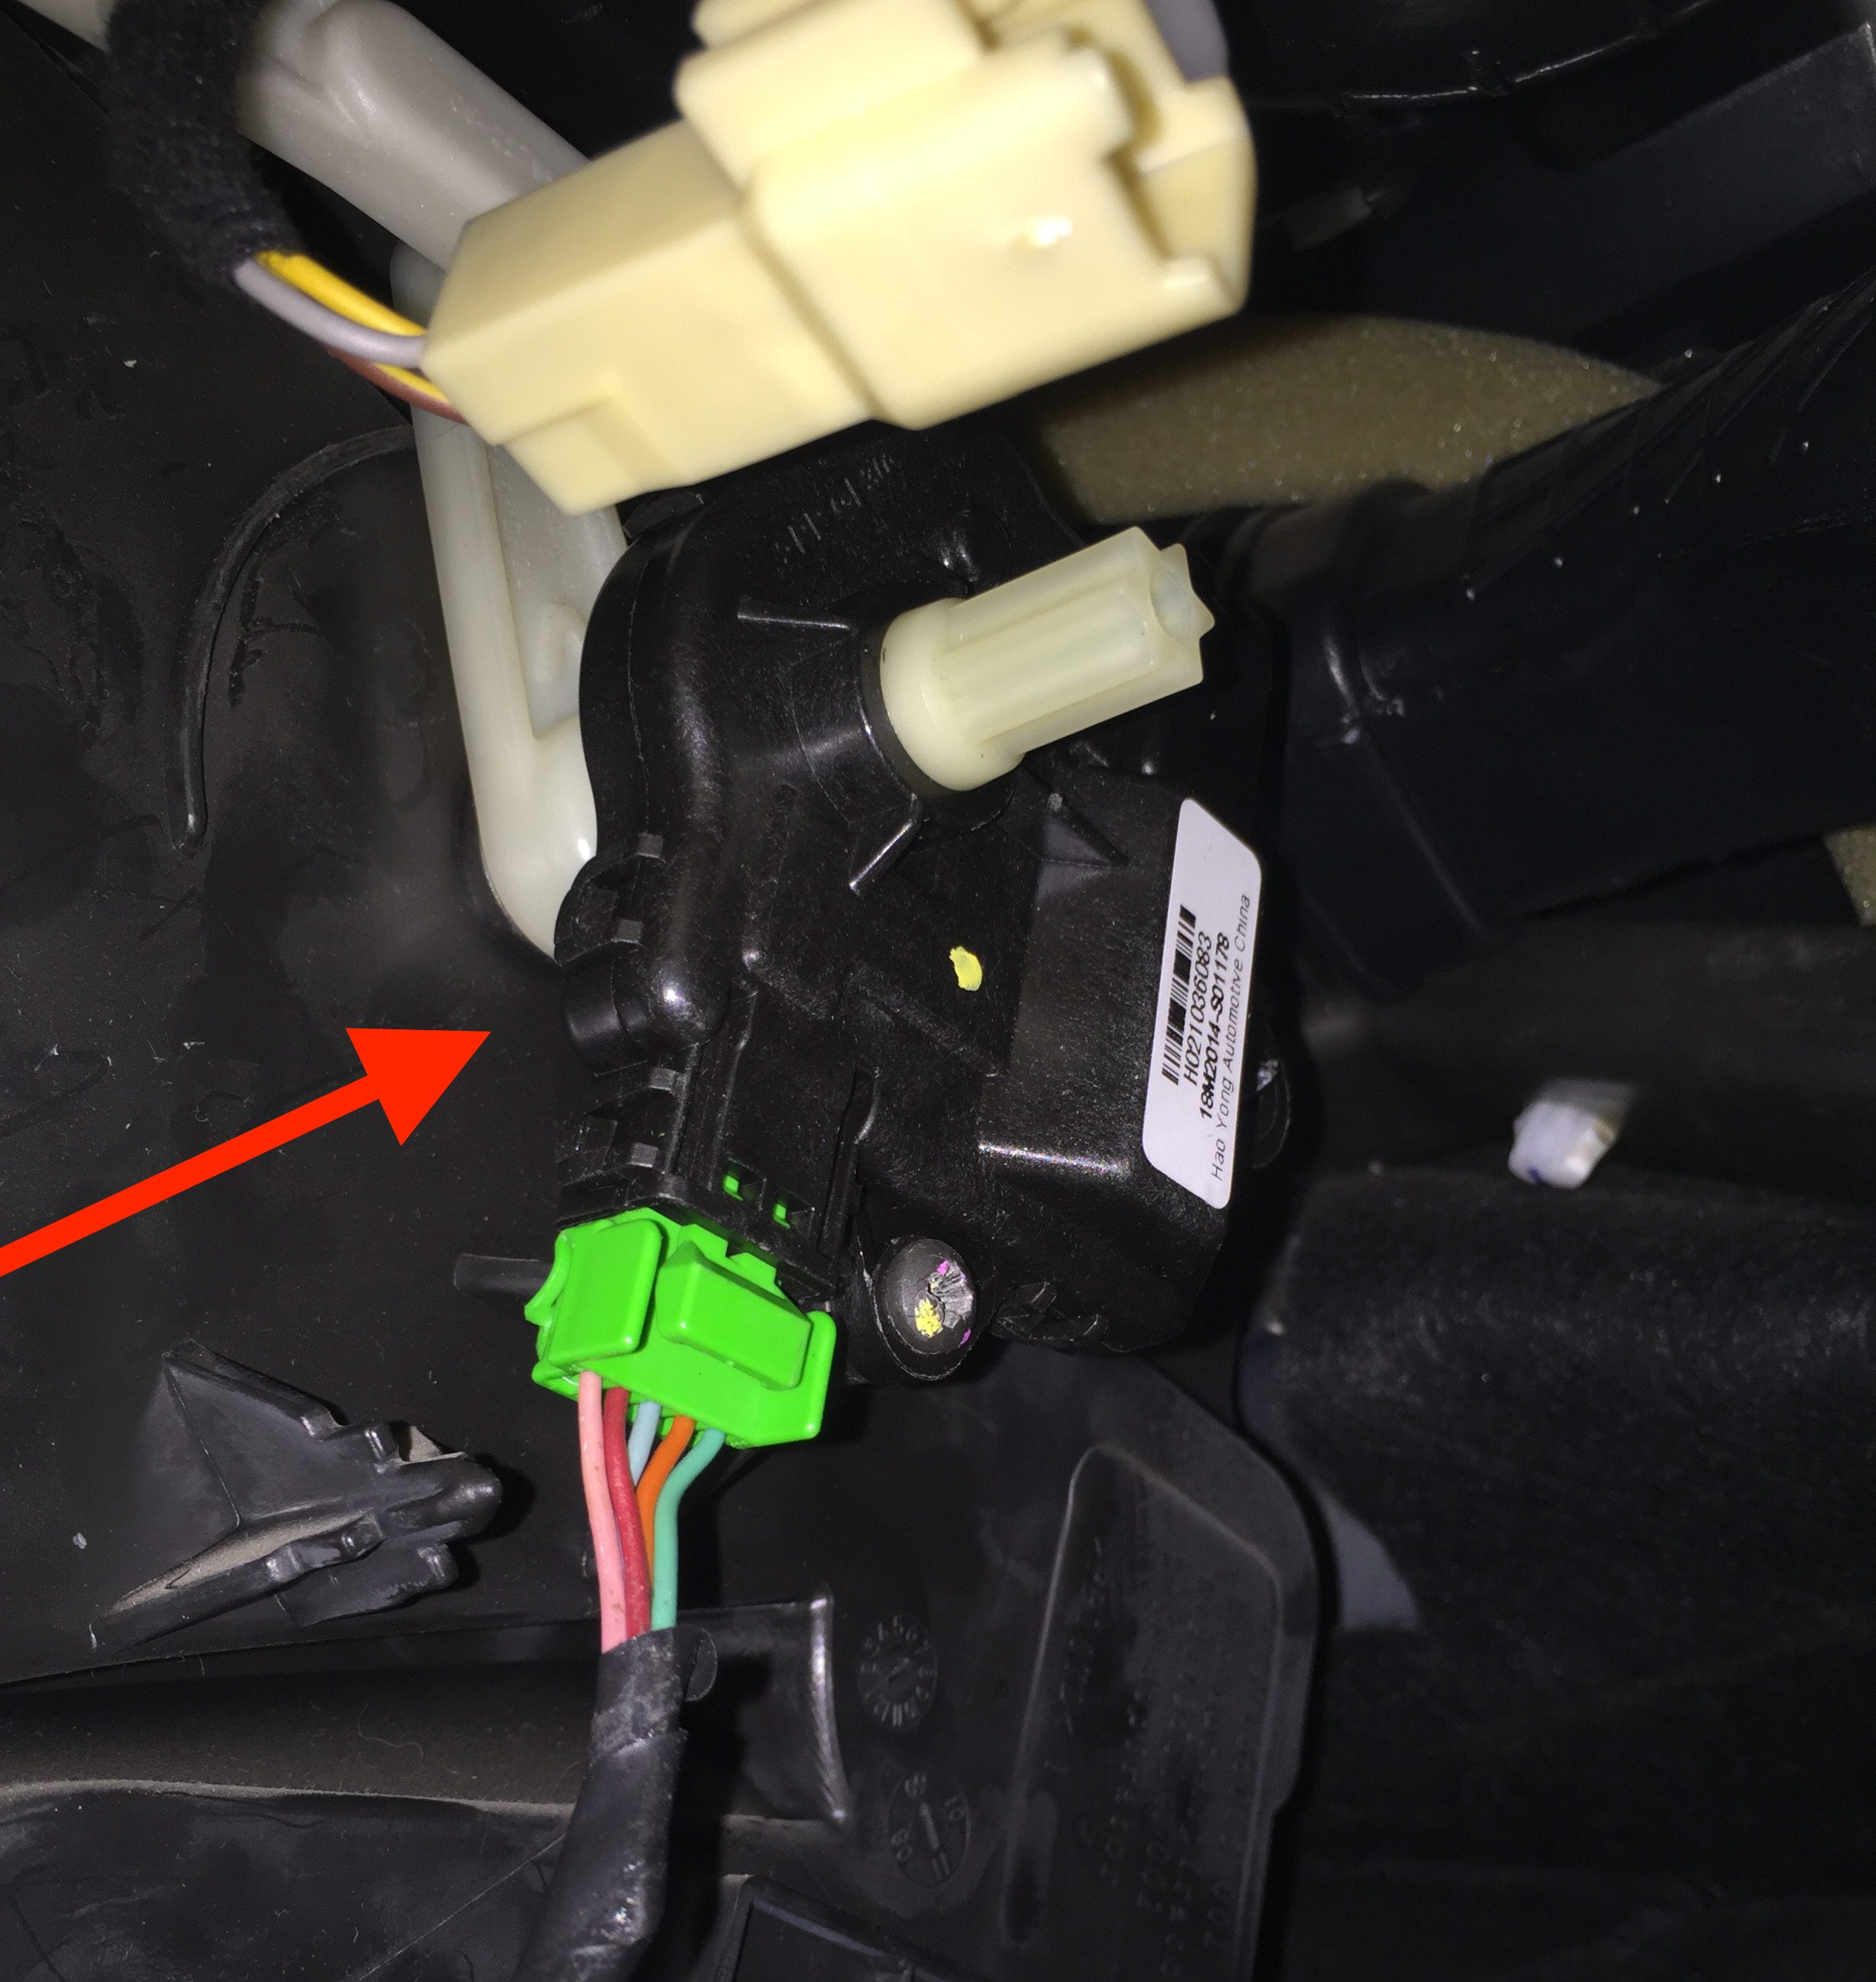
You’ll now need to locate the actuator. Look up beside the headunit and high in the dashboard your will see the actuator as pictured.
To verify the actuator is faulty, run the relearn process as described previously. If you feel or hear the actuator clicking, or the HVAC arms are not moving, the actuator is probably at fault and will need to be replaced.
Step 8
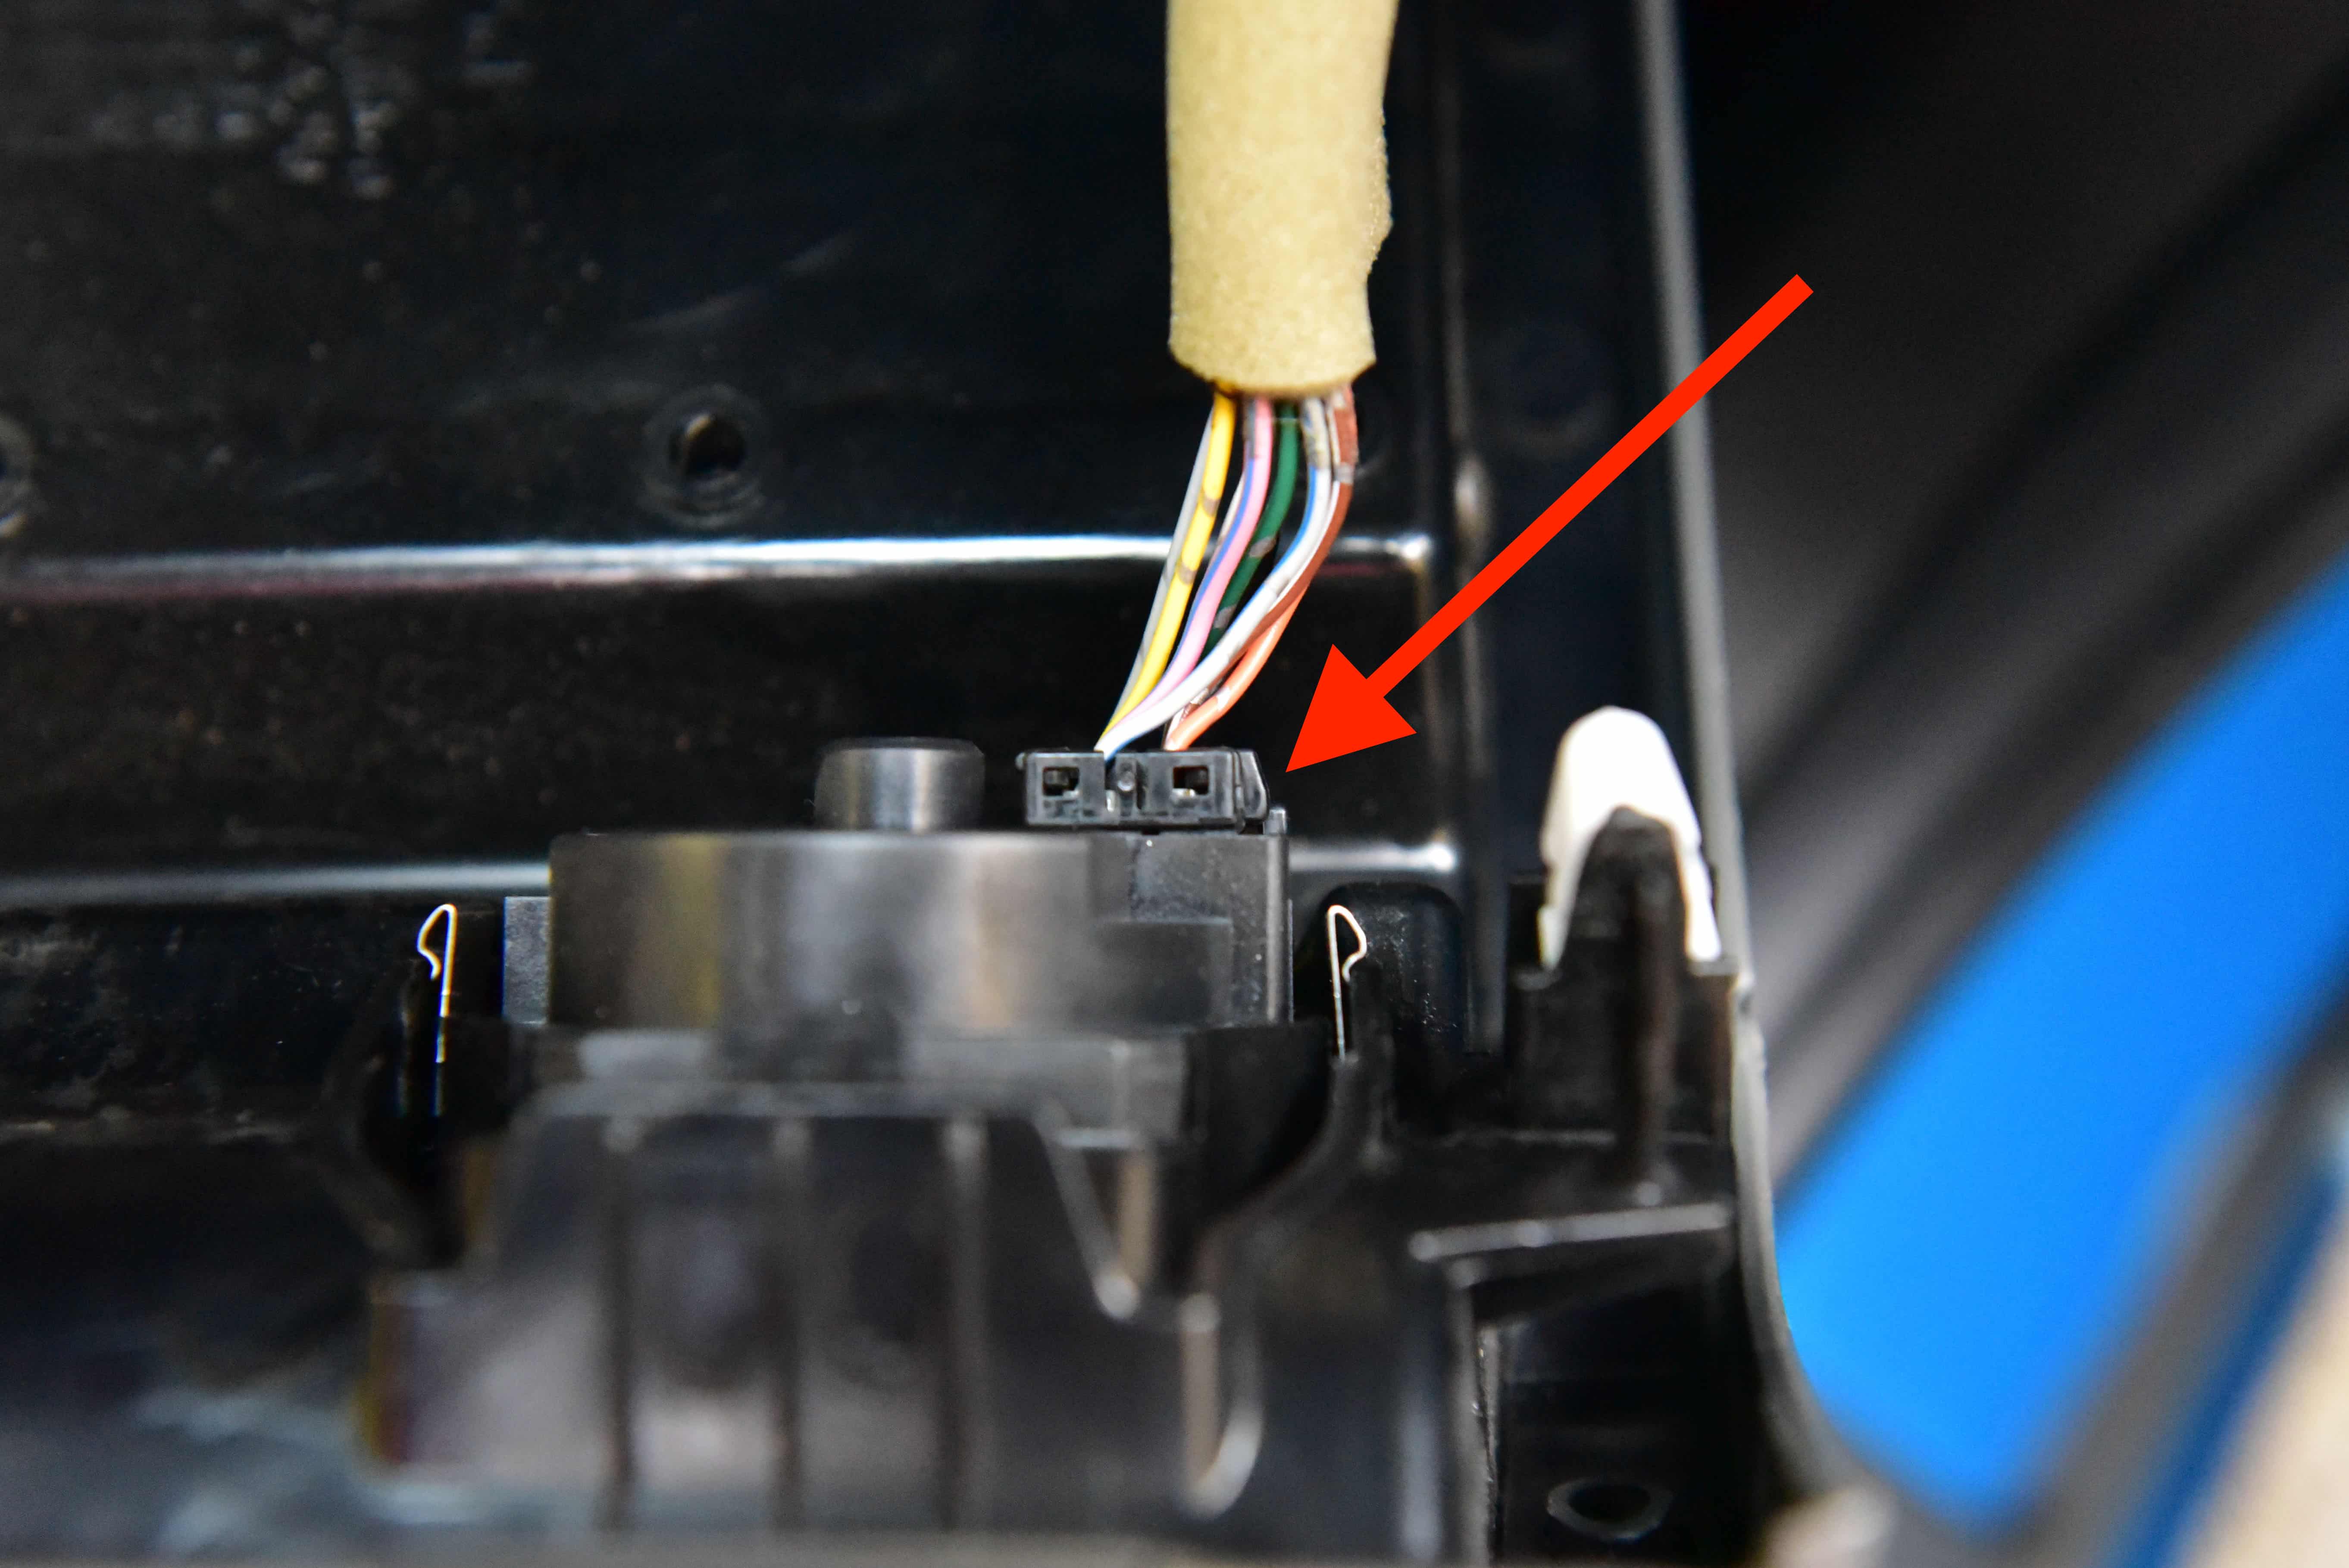
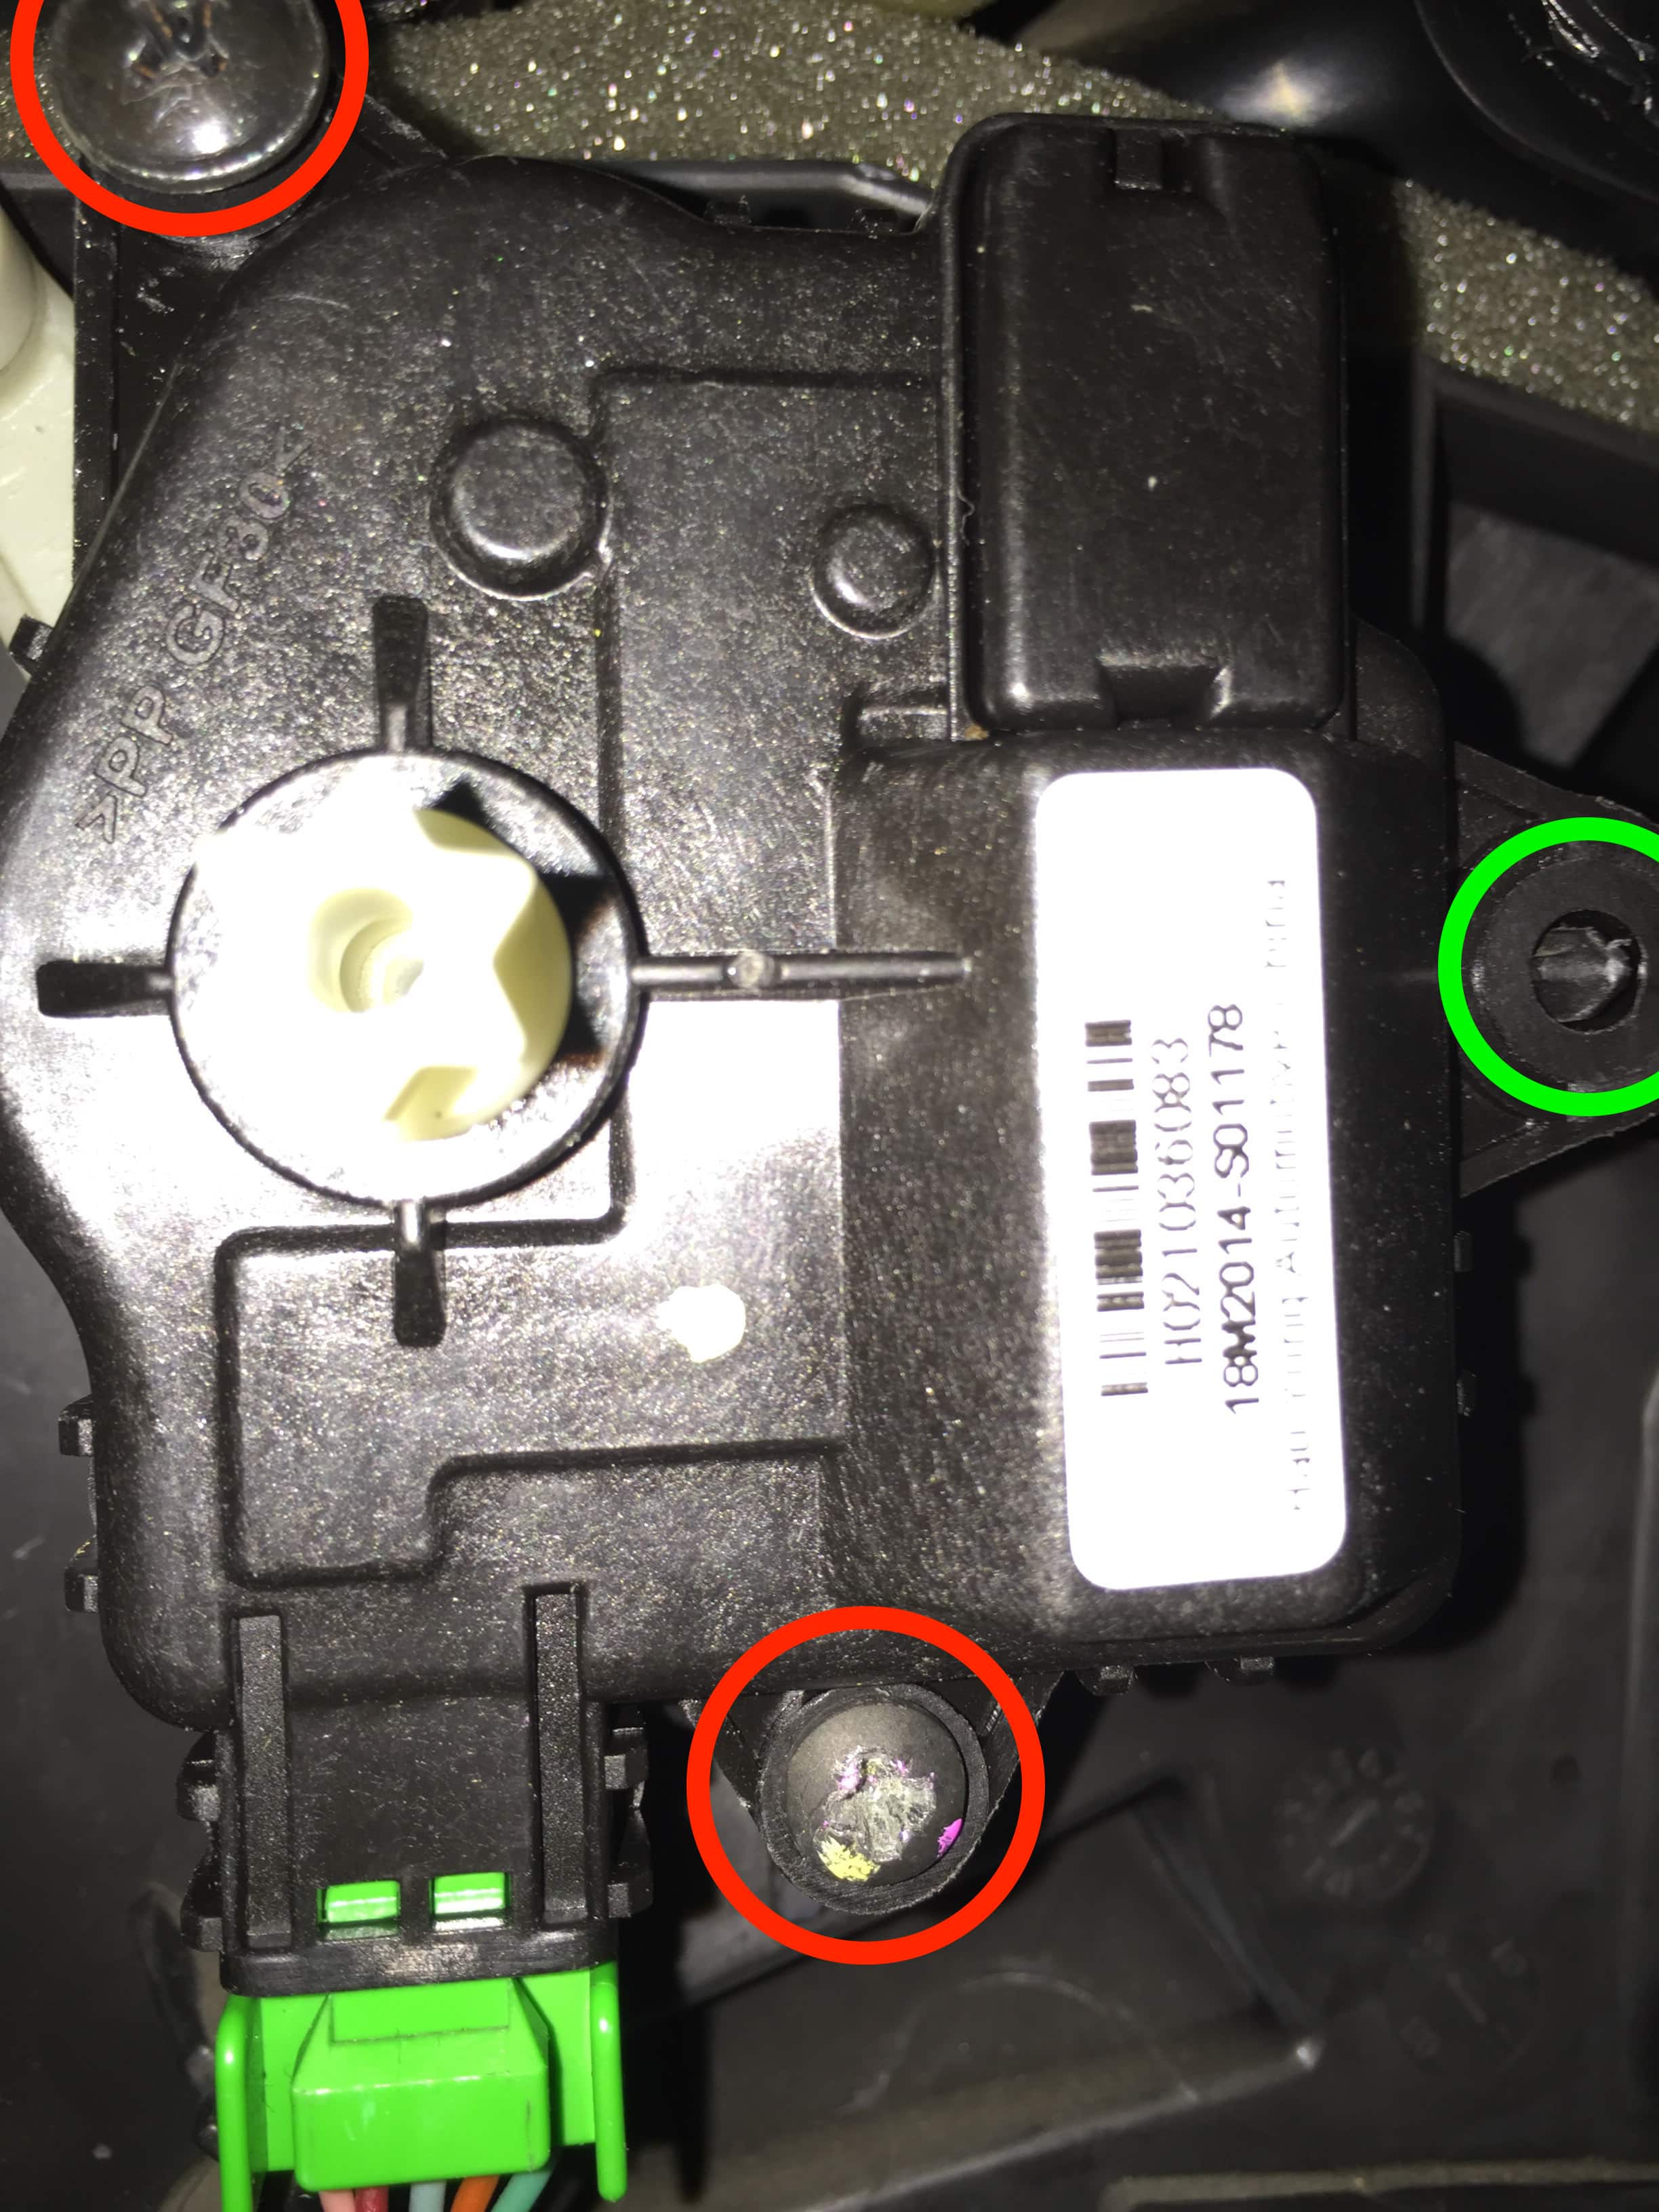
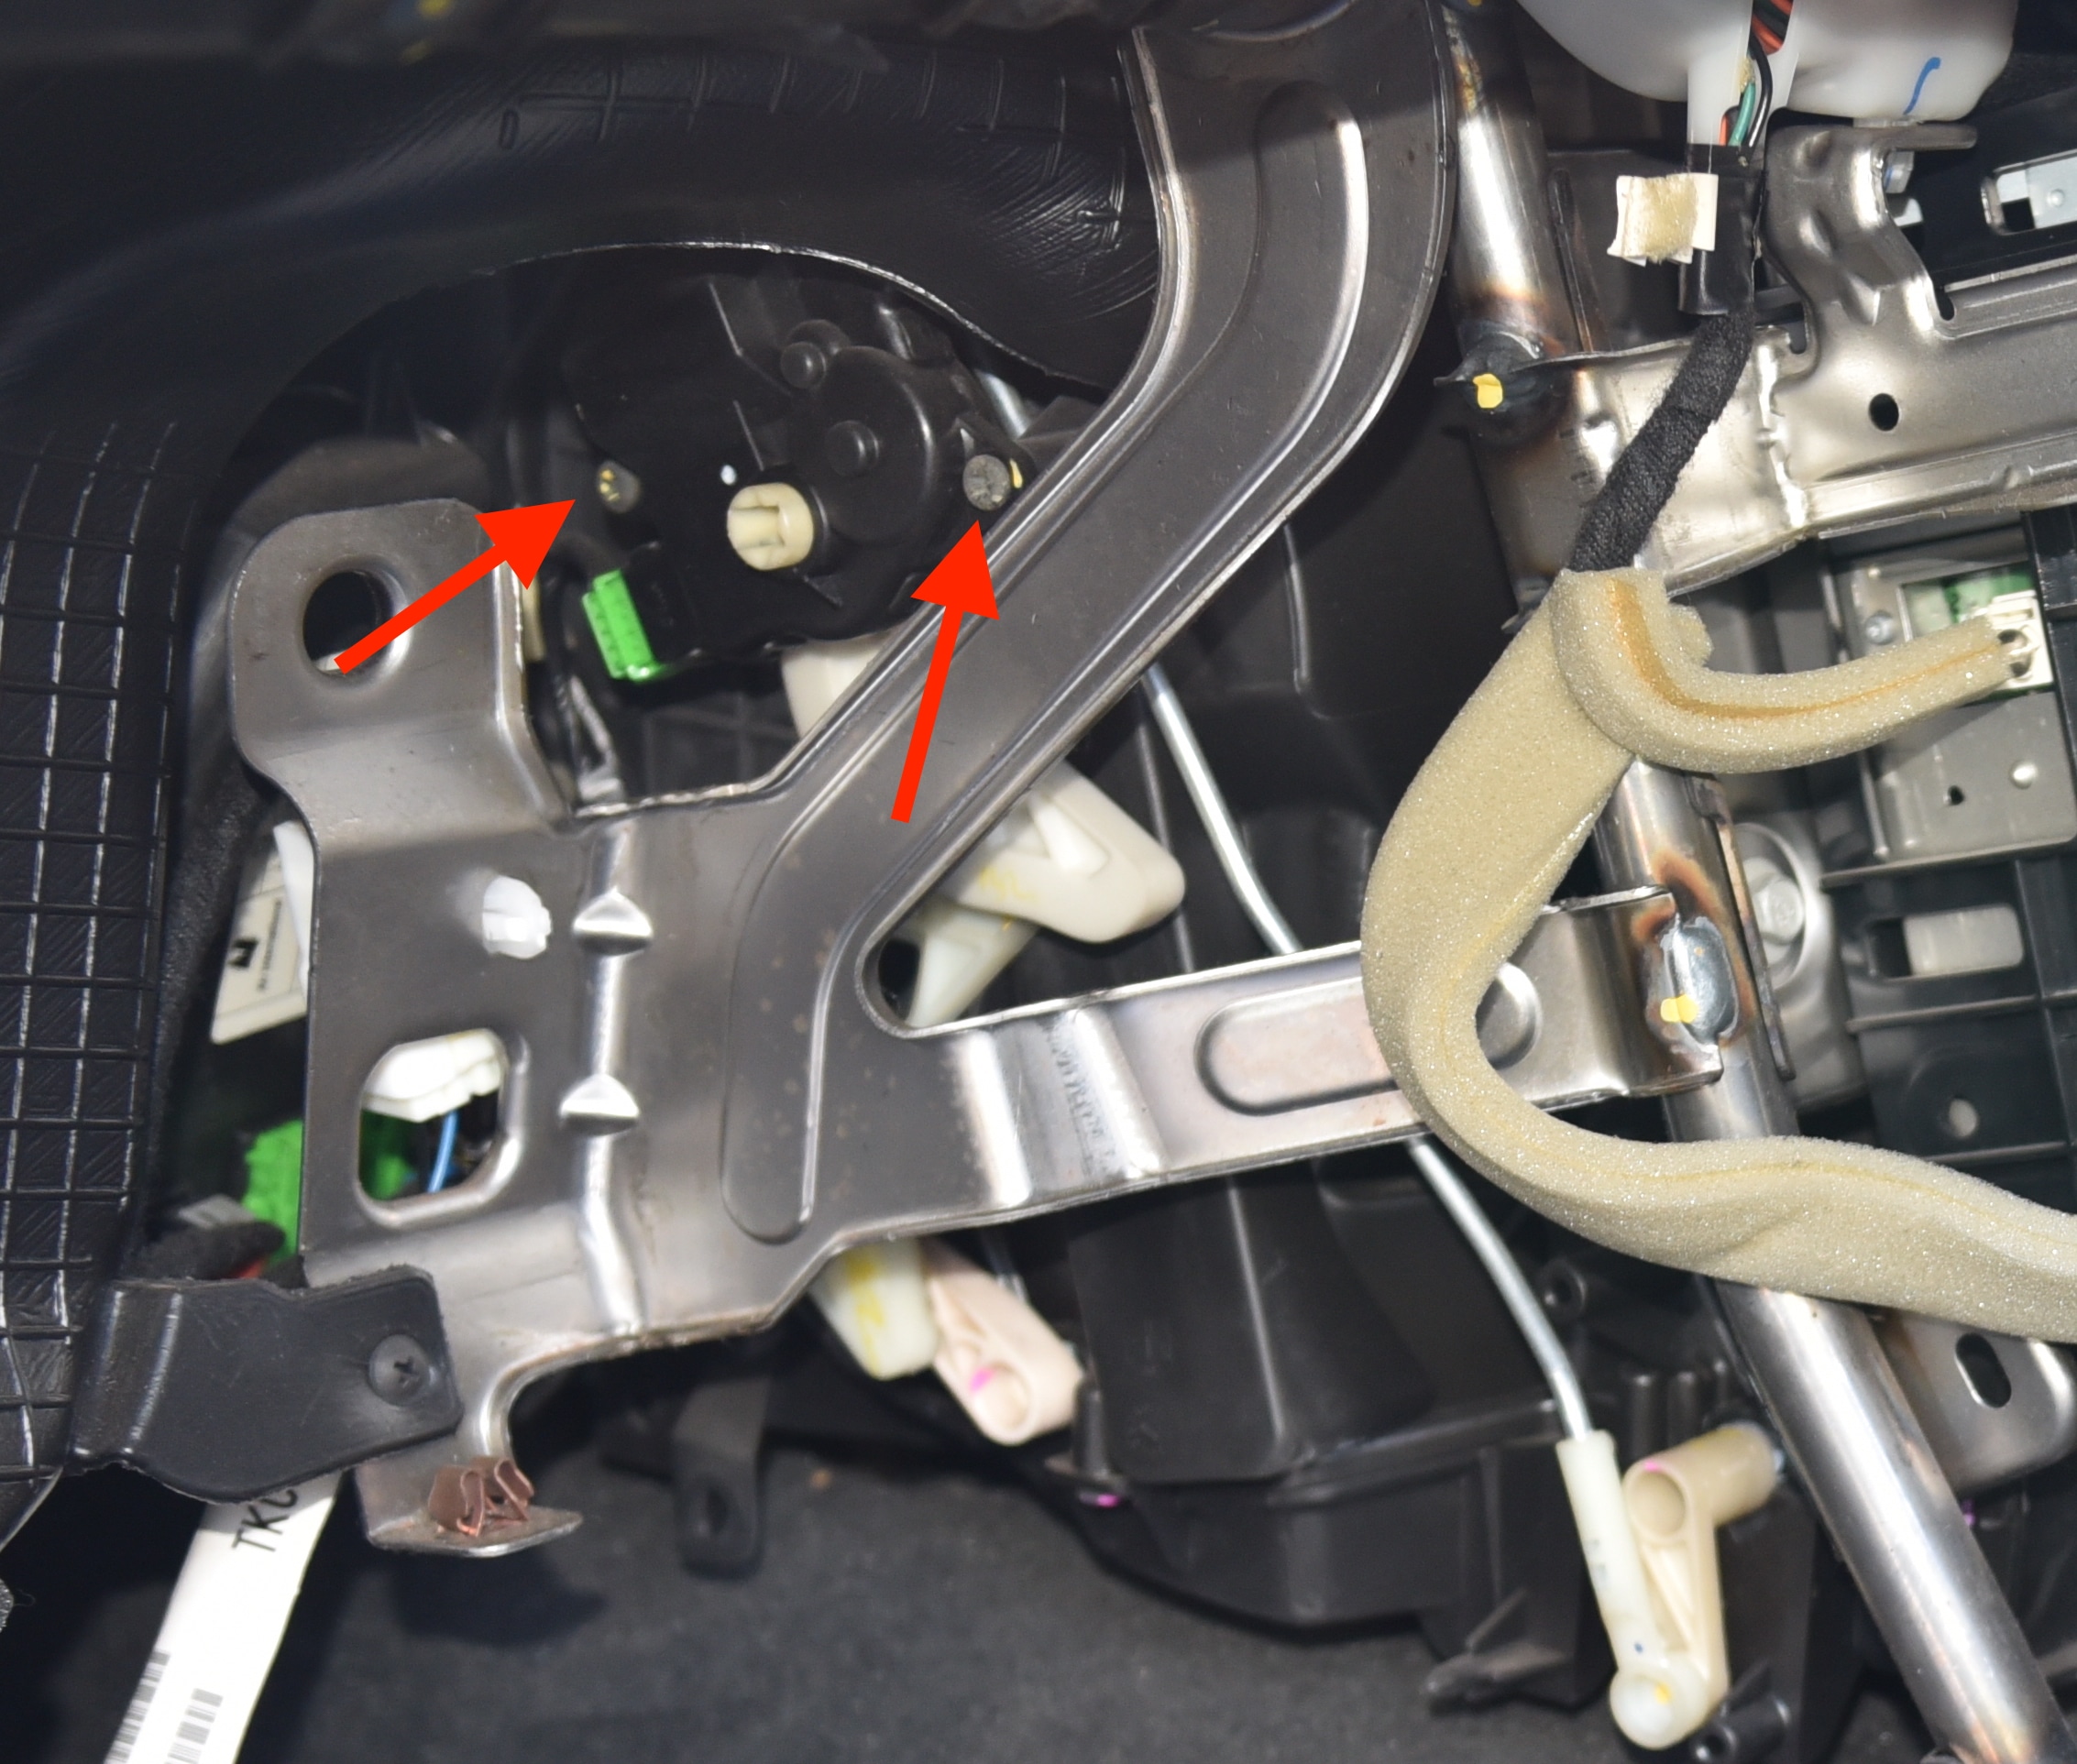
Replacing the actuator is a very difficult process due to the location in the vehicle. There are two screws (Red circles) holding the actuator in place, and one alignment pin (Green circle) to ensure the actuator is in the correct position. There is also a green wiring plug you will need to disconnect.
The bottom screw is relatively easy to access with a small stubby screwdriver or a ratcheting screwdriver set.
The top screw is extremely difficult to remove as there is limited space to operate. You may find yourself lying upside down in the footwell and painstakingly turning the screw millimetre by millimetre.
Once both screws are removed the motor will simply pull off from the HVAC arm. The HVAC arm may fall off, so take note of its orientation and position to simplify reinstallation.
Firstly reinstall any HVAC arms that may have fallen loose, then slide the arm onto the actuator – It can be in any position. Next place the actuator onto the alignment pin and begin to install the lower screw.
Commence installation of the upper screw, checking alignment and position of the actuator and HVAC arms.
Once both screws are tightened, connect the wiring harness and perform a HVAC relearn. You should now see the actuator moving smoothly without any clicking noises. When the relearn is complete, test operation between feet, face and demister. Keep in mind we have removed the ducting on the drivers feet!
Step 10
Passenger Side Actuator
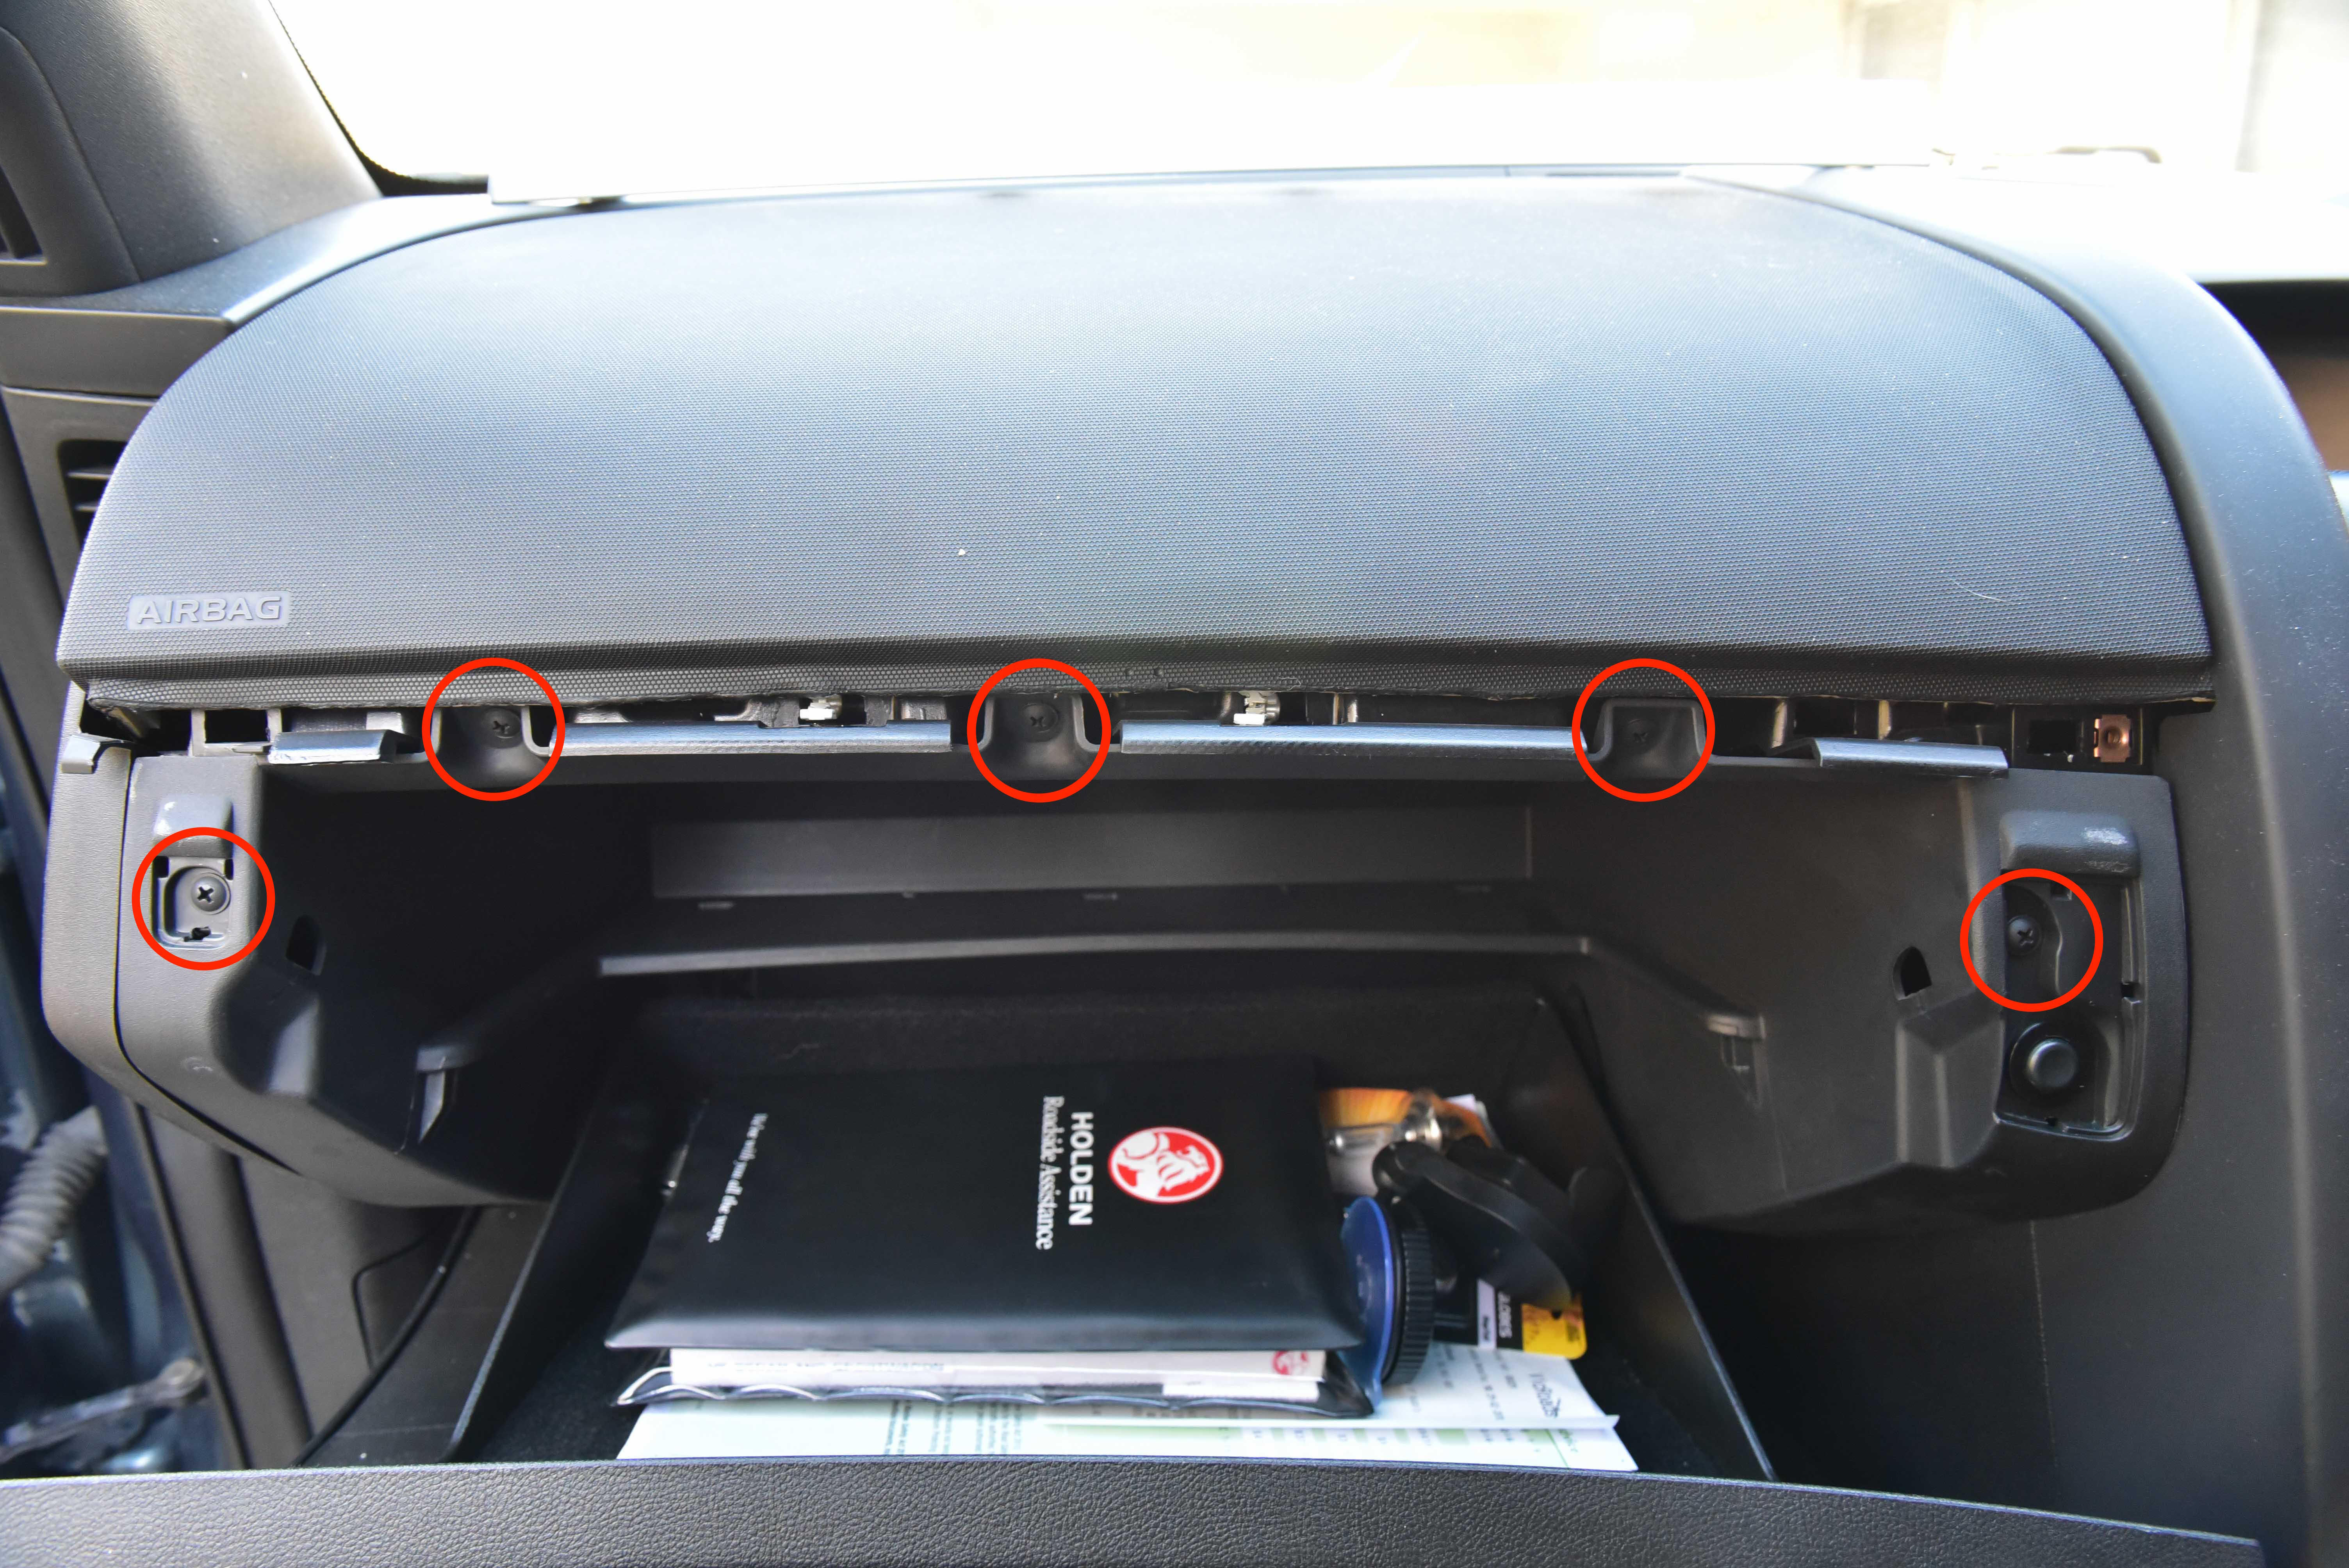
Remove the kick panel below the glove box. This is held in place by five clips.
Step 11
Remove the two screws which are now visible.
Step 12
Remove the five remaining screws. The far left and right screws are hidden behind small covers.
Step 13
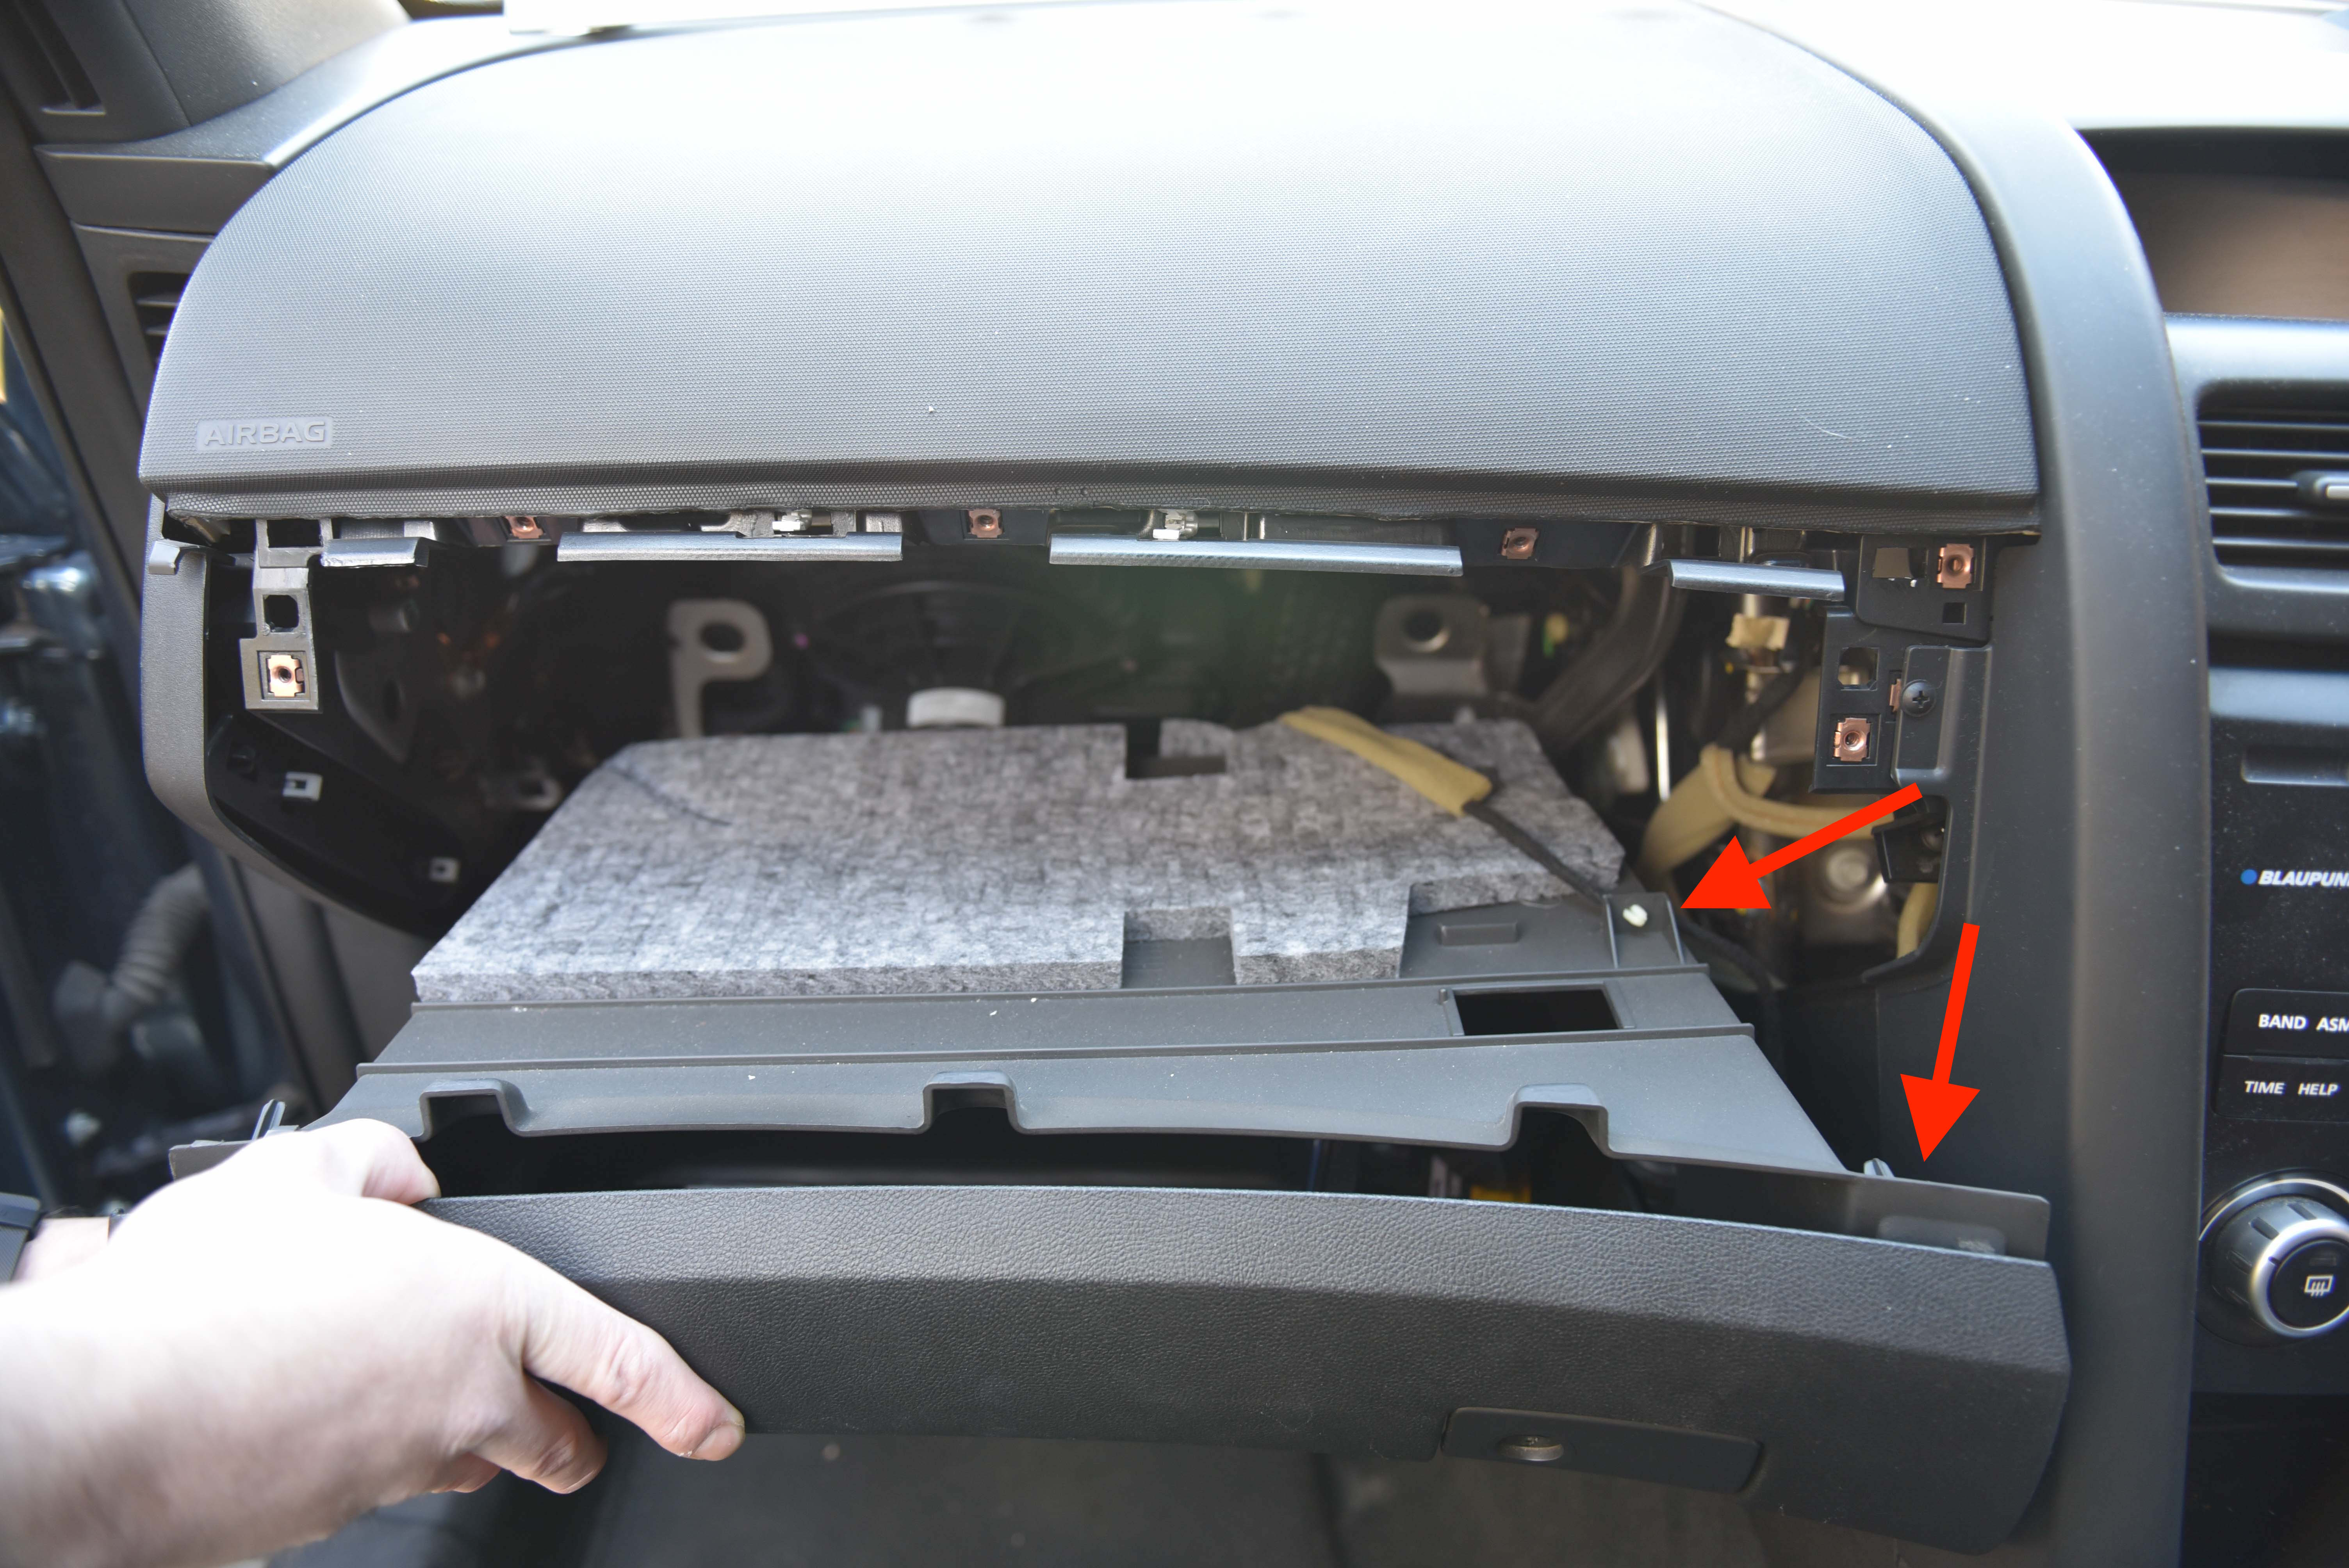
The glovebox will now be loose. simply pull outwards and disconnect the boot release plug and loom.
Step 14
Pull outwards and down the side trim piece. It will unclip.
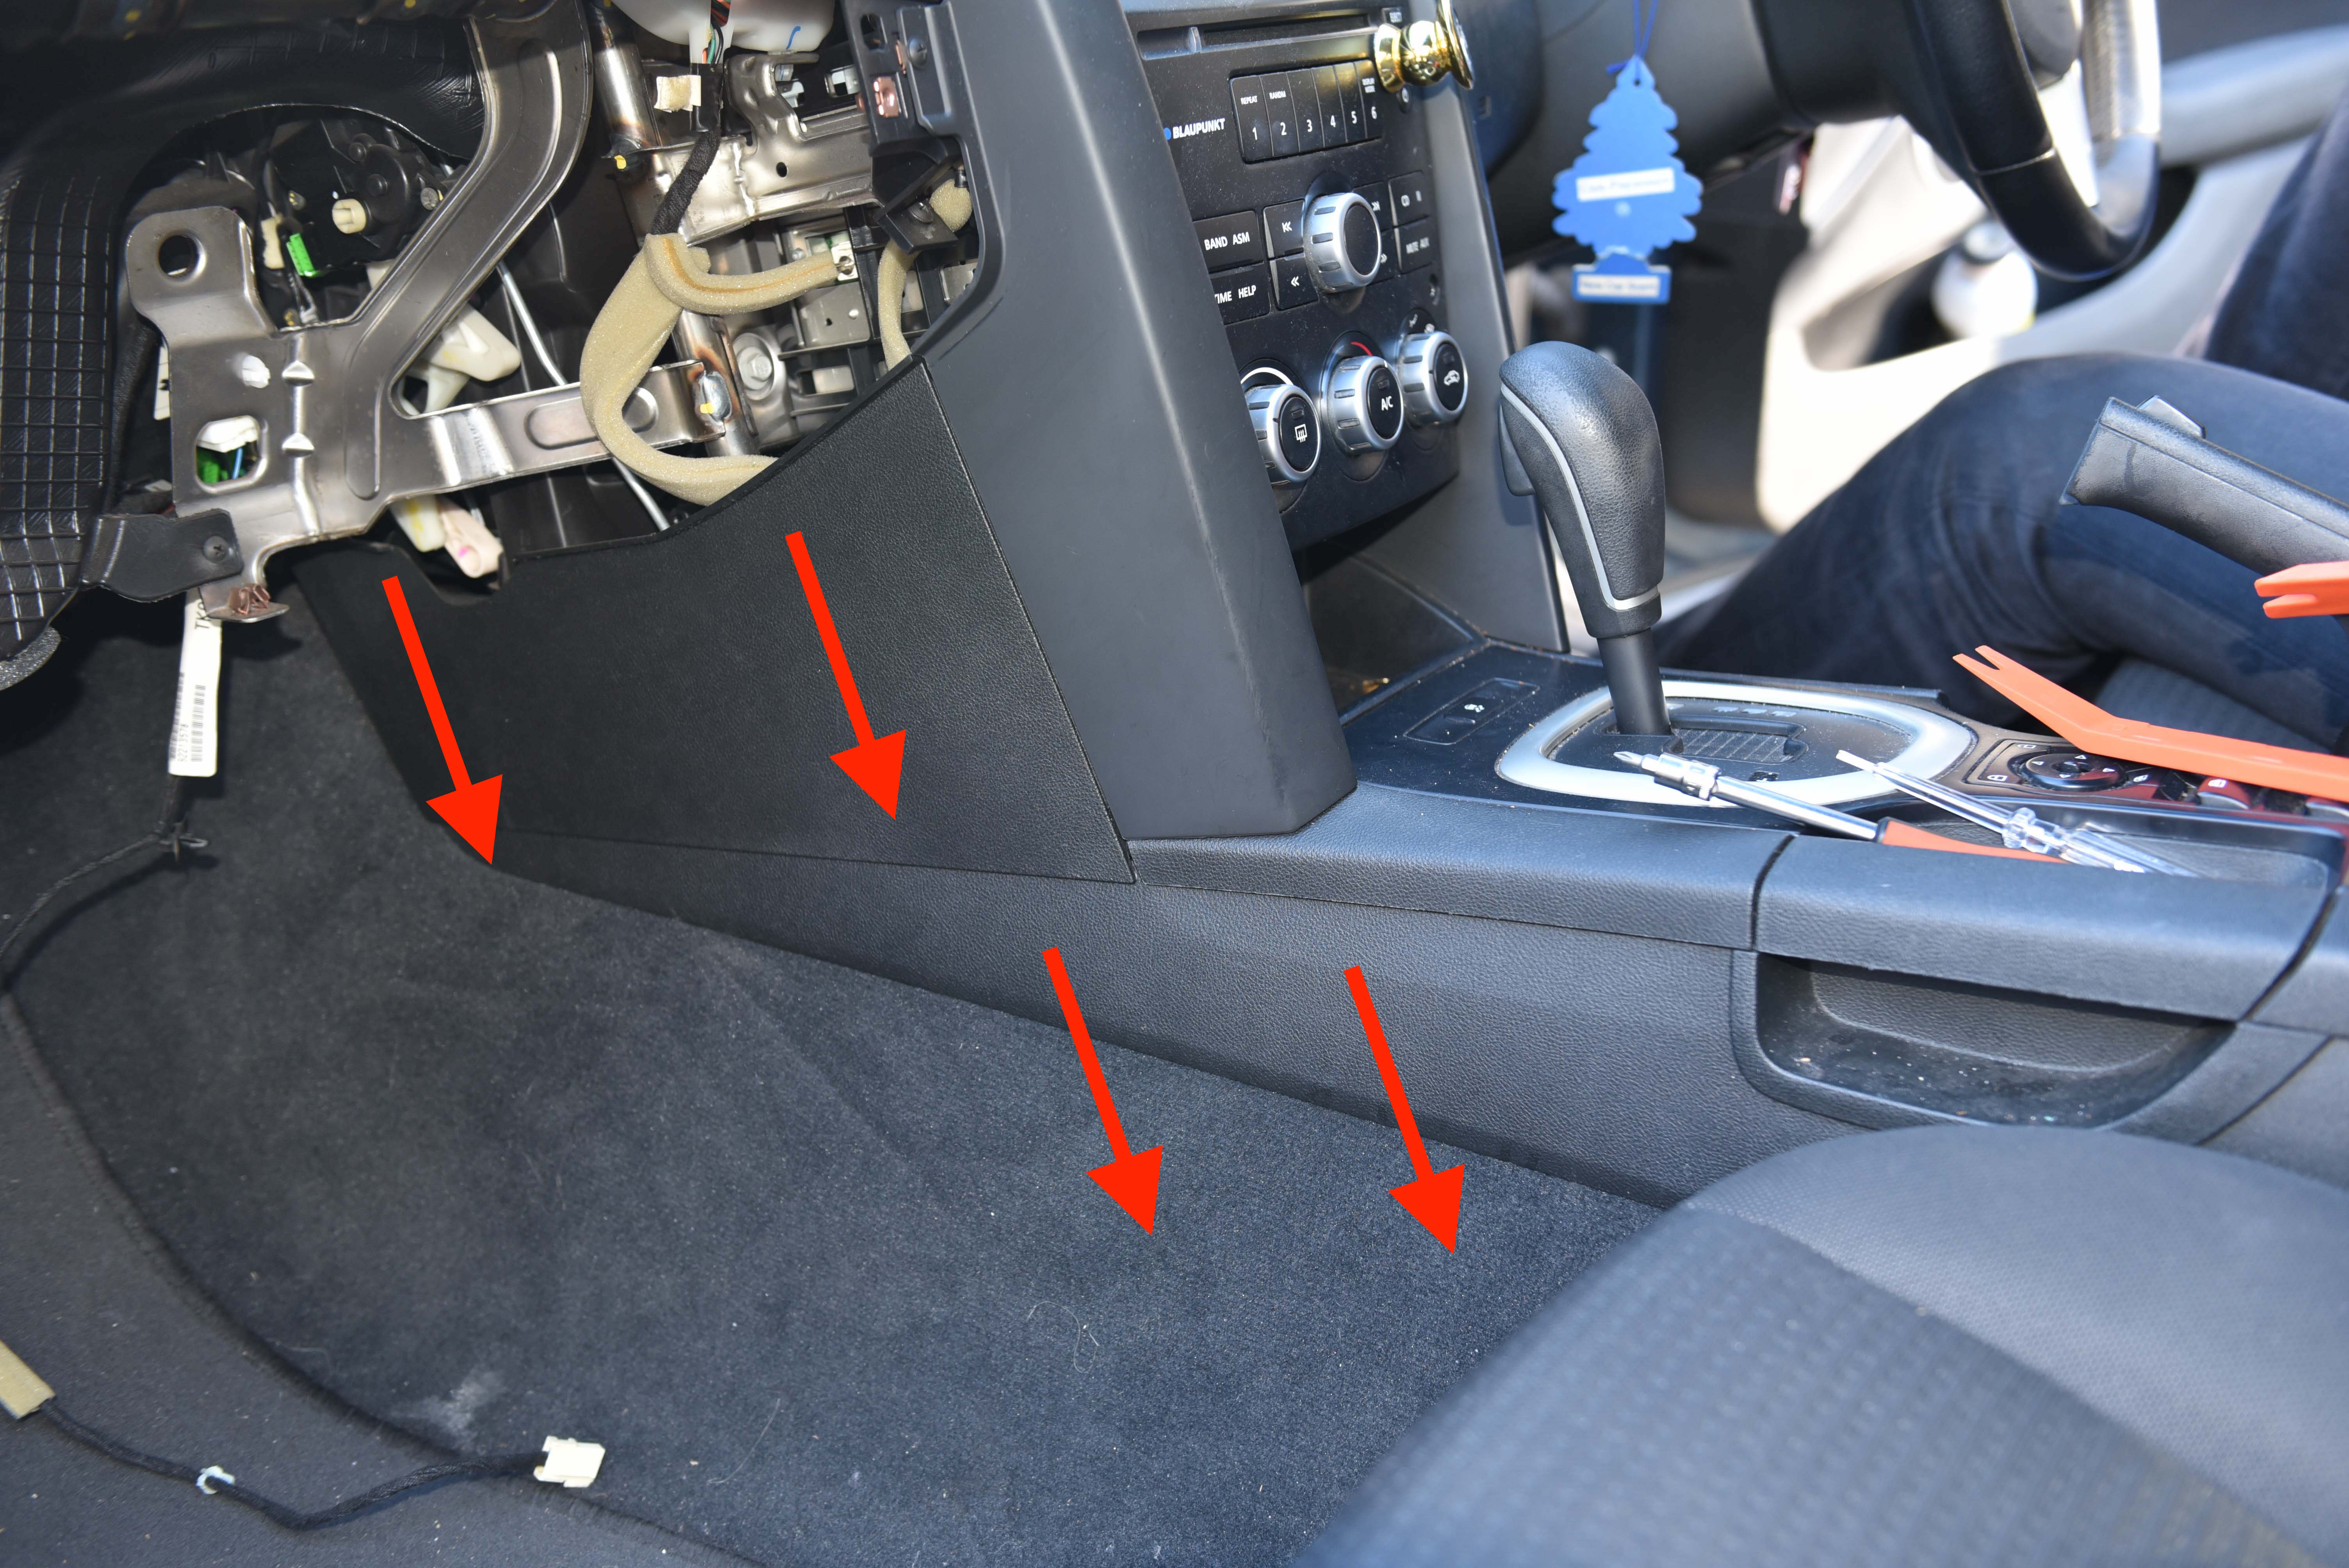
Step 15
Now we can see the passenger side actuator.
To verify the actuator is faulty, run the relearn process as described previously. If you feel or hear the actuator clicking, or the HVAC arms are not moving, the actuator is probably at fault and will need to be replaced.
Step 16
Remove the faulty actuator by unplugging the electrical connector, unscrewing the two screws and pulling the drive gear off the HVAC arm. This actuator is much easier to access compared to the drivers side.
Replace the actuator with a new unit. Screw into place and reconnect the wiring loom.
Once both screws are tightened, connect the wiring harness and perform a HVAC relearn. You should now see the actuator moving smoothly without any clicking noises. When the relearn is complete, test operation between feet, face and demister. Keep in mind we have removed the ducting on the passengers feet!
Did you find this guide helpful? Consider sharing it to help other car enthusiasts
Hi. I have a VE Series 2 SSV. I have a problem where the touch screen blacks out momentarily cutting out the radio and air conditioner/fan. The radio comes back on within a few seconds but the a/c and fan can take up to 5 minutes to come back. I have had it suggested that I may have a shorted actuator but I’ve run the relearn procedure and can’t seem to replicate the problem. Any suggestions would be welcomed.
Hi there ,,I have a VE V6 Omega 2008 model ..i have a problem with something under dash board ,,every time i start the car i hear clicking noise under dash board ..i went to holden & they say the actuator problem ..but every thing is working fine except the noise only when i start the car ..the noise is just in the center of the car ..under dash board . Holden were asking me for $250 to fix the noise problem ..any idea how to fix that problem …Thank you ..Alex
Hello,
It sounds like an actuator, they can cycle when starting the vehicle. Please follow our tutorial steps to identify and replace the faulty actuator.
Just a quick note of appreciation, this is an outstanding site and has been extremely helpful.
I have 2011 VE SSV Redline Series 2 ute and for a little while have had the aircon stuck on face only. I had consoled myself that before next summer I would have to take it back to the local Holden dealership with the expectation of having to part with a large sum of cash to repair. In desperation I checked the internet to see if anyone had the same problem and came across your website. As suggested I ran the “relearn” process which unfortunately pushed the settings to “Demist” only with hot on the passenger side and cold on the drivers side. But, it did alert me to the loud clicking behind the dash. Armed with your tremendous instructions I took the gamble an ordered a couple of actuators which arrive in three business days (thanks guys). It took me just over an hour and the loss of some skin off my knuckles to replace the driver side actuator. Yeah the top screw is a cow both coming out and going back in. My HVAC system is now back up and operating as designed. Overall it was well worth the effort even though I didn’t need to replace the passenger sid, at least I now have a spare if it ever happens again. I can’t thank you guys enough.
Hi, I have a 2007 VE and when I turn the air con on, the light on the button comes on but the compressor doesn’t engage, it’s like an electrical fault. Could any of the HVAC components be causing this. Thanks.
Have had problem with air con stuck on wind screen. Have tried relearn countless times and have heard no clicking. Figured after reading above that it had to be actuator on drivers side and ordered a new one from you. Turned up in a few days (N.T.) Had problems keeping my glasses on, holding torch in position, and after totally stuffing my back thought this is a bloody mugs game when your in your mid 60s. However i don’t like to give up and managed to get it in, made sure the arms were moving, test it and no difference. Must be the other side i decided, take it all apart, check it with relearn and moves no worries. So i’m back to where i started. Any ideas?
Hi Colin, It’s interesting that the arms are moving yet the airflow does not change at all – Is that correct? It could be that the internal HVAC doors are jammed or damaged.


This Post Has 222 Comments
Hi. I have a VE Series 2 SSV. I have a problem where the touch screen blacks out momentarily cutting out the radio and air conditioner/fan. The radio comes back on within a few seconds but the a/c and fan can take up to 5 minutes to come back. I have had it suggested that I may have a shorted actuator but I’ve run the relearn procedure and can’t seem to replicate the problem. Any suggestions would be welcomed.
Hello, We’ve never heard of this before, I would be surprised if the actuator was at fault. Sounds like a bigger electrical issue.
Hi there ,,I have a VE V6 Omega 2008 model ..i have a problem with something under dash board ,,every time i start the car i hear clicking noise under dash board ..i went to holden & they say the actuator problem ..but every thing is working fine except the noise only when i start the car ..the noise is just in the center of the car ..under dash board . Holden were asking me for $250 to fix the noise problem ..any idea how to fix that problem …Thank you ..Alex
Hello,
It sounds like an actuator, they can cycle when starting the vehicle. Please follow our tutorial steps to identify and replace the faulty actuator.
Hi AI Team,
Just a quick note of appreciation, this is an outstanding site and has been extremely helpful.
I have 2011 VE SSV Redline Series 2 ute and for a little while have had the aircon stuck on face only. I had consoled myself that before next summer I would have to take it back to the local Holden dealership with the expectation of having to part with a large sum of cash to repair. In desperation I checked the internet to see if anyone had the same problem and came across your website. As suggested I ran the “relearn” process which unfortunately pushed the settings to “Demist” only with hot on the passenger side and cold on the drivers side. But, it did alert me to the loud clicking behind the dash. Armed with your tremendous instructions I took the gamble an ordered a couple of actuators which arrive in three business days (thanks guys). It took me just over an hour and the loss of some skin off my knuckles to replace the driver side actuator. Yeah the top screw is a cow both coming out and going back in. My HVAC system is now back up and operating as designed. Overall it was well worth the effort even though I didn’t need to replace the passenger sid, at least I now have a spare if it ever happens again. I can’t thank you guys enough.
Hi Andrew – Thanks for sharing your feedback with us! Glad we could help.
Hi, I have a 2007 VE and when I turn the air con on, the light on the button comes on but the compressor doesn’t engage, it’s like an electrical fault. Could any of the HVAC components be causing this. Thanks.
Hi Robert, Best to see an A/C specialist for this issue. Typically there is a faulty sensor which is not allowing the compressor clutch to engage.
Have had problem with air con stuck on wind screen. Have tried relearn countless times and have heard no clicking. Figured after reading above that it had to be actuator on drivers side and ordered a new one from you. Turned up in a few days (N.T.) Had problems keeping my glasses on, holding torch in position, and after totally stuffing my back thought this is a bloody mugs game when your in your mid 60s. However i don’t like to give up and managed to get it in, made sure the arms were moving, test it and no difference. Must be the other side i decided, take it all apart, check it with relearn and moves no worries. So i’m back to where i started. Any ideas?
Hi Colin, It’s interesting that the arms are moving yet the airflow does not change at all – Is that correct? It could be that the internal HVAC doors are jammed or damaged.