Installing a dash cam is a relatively simple task requiring minimal tools however, it can seem daunting. In this tutorial AutoInstruct will show you how to install a dash cam in your FN Civic .
The dash cam being installed in this tutorial is a Blackvue DR650S-1CH with a Power Magic Pro, the process is very similar regardless of the dash cam being used.
Work at your own risk. This work is inherently dangerous and must only be carried out by a qualified mechanic. AutoInstruct will not be held responsible for damage to your vehicle or personal injury / death as a result of the information we provide.
Step 1
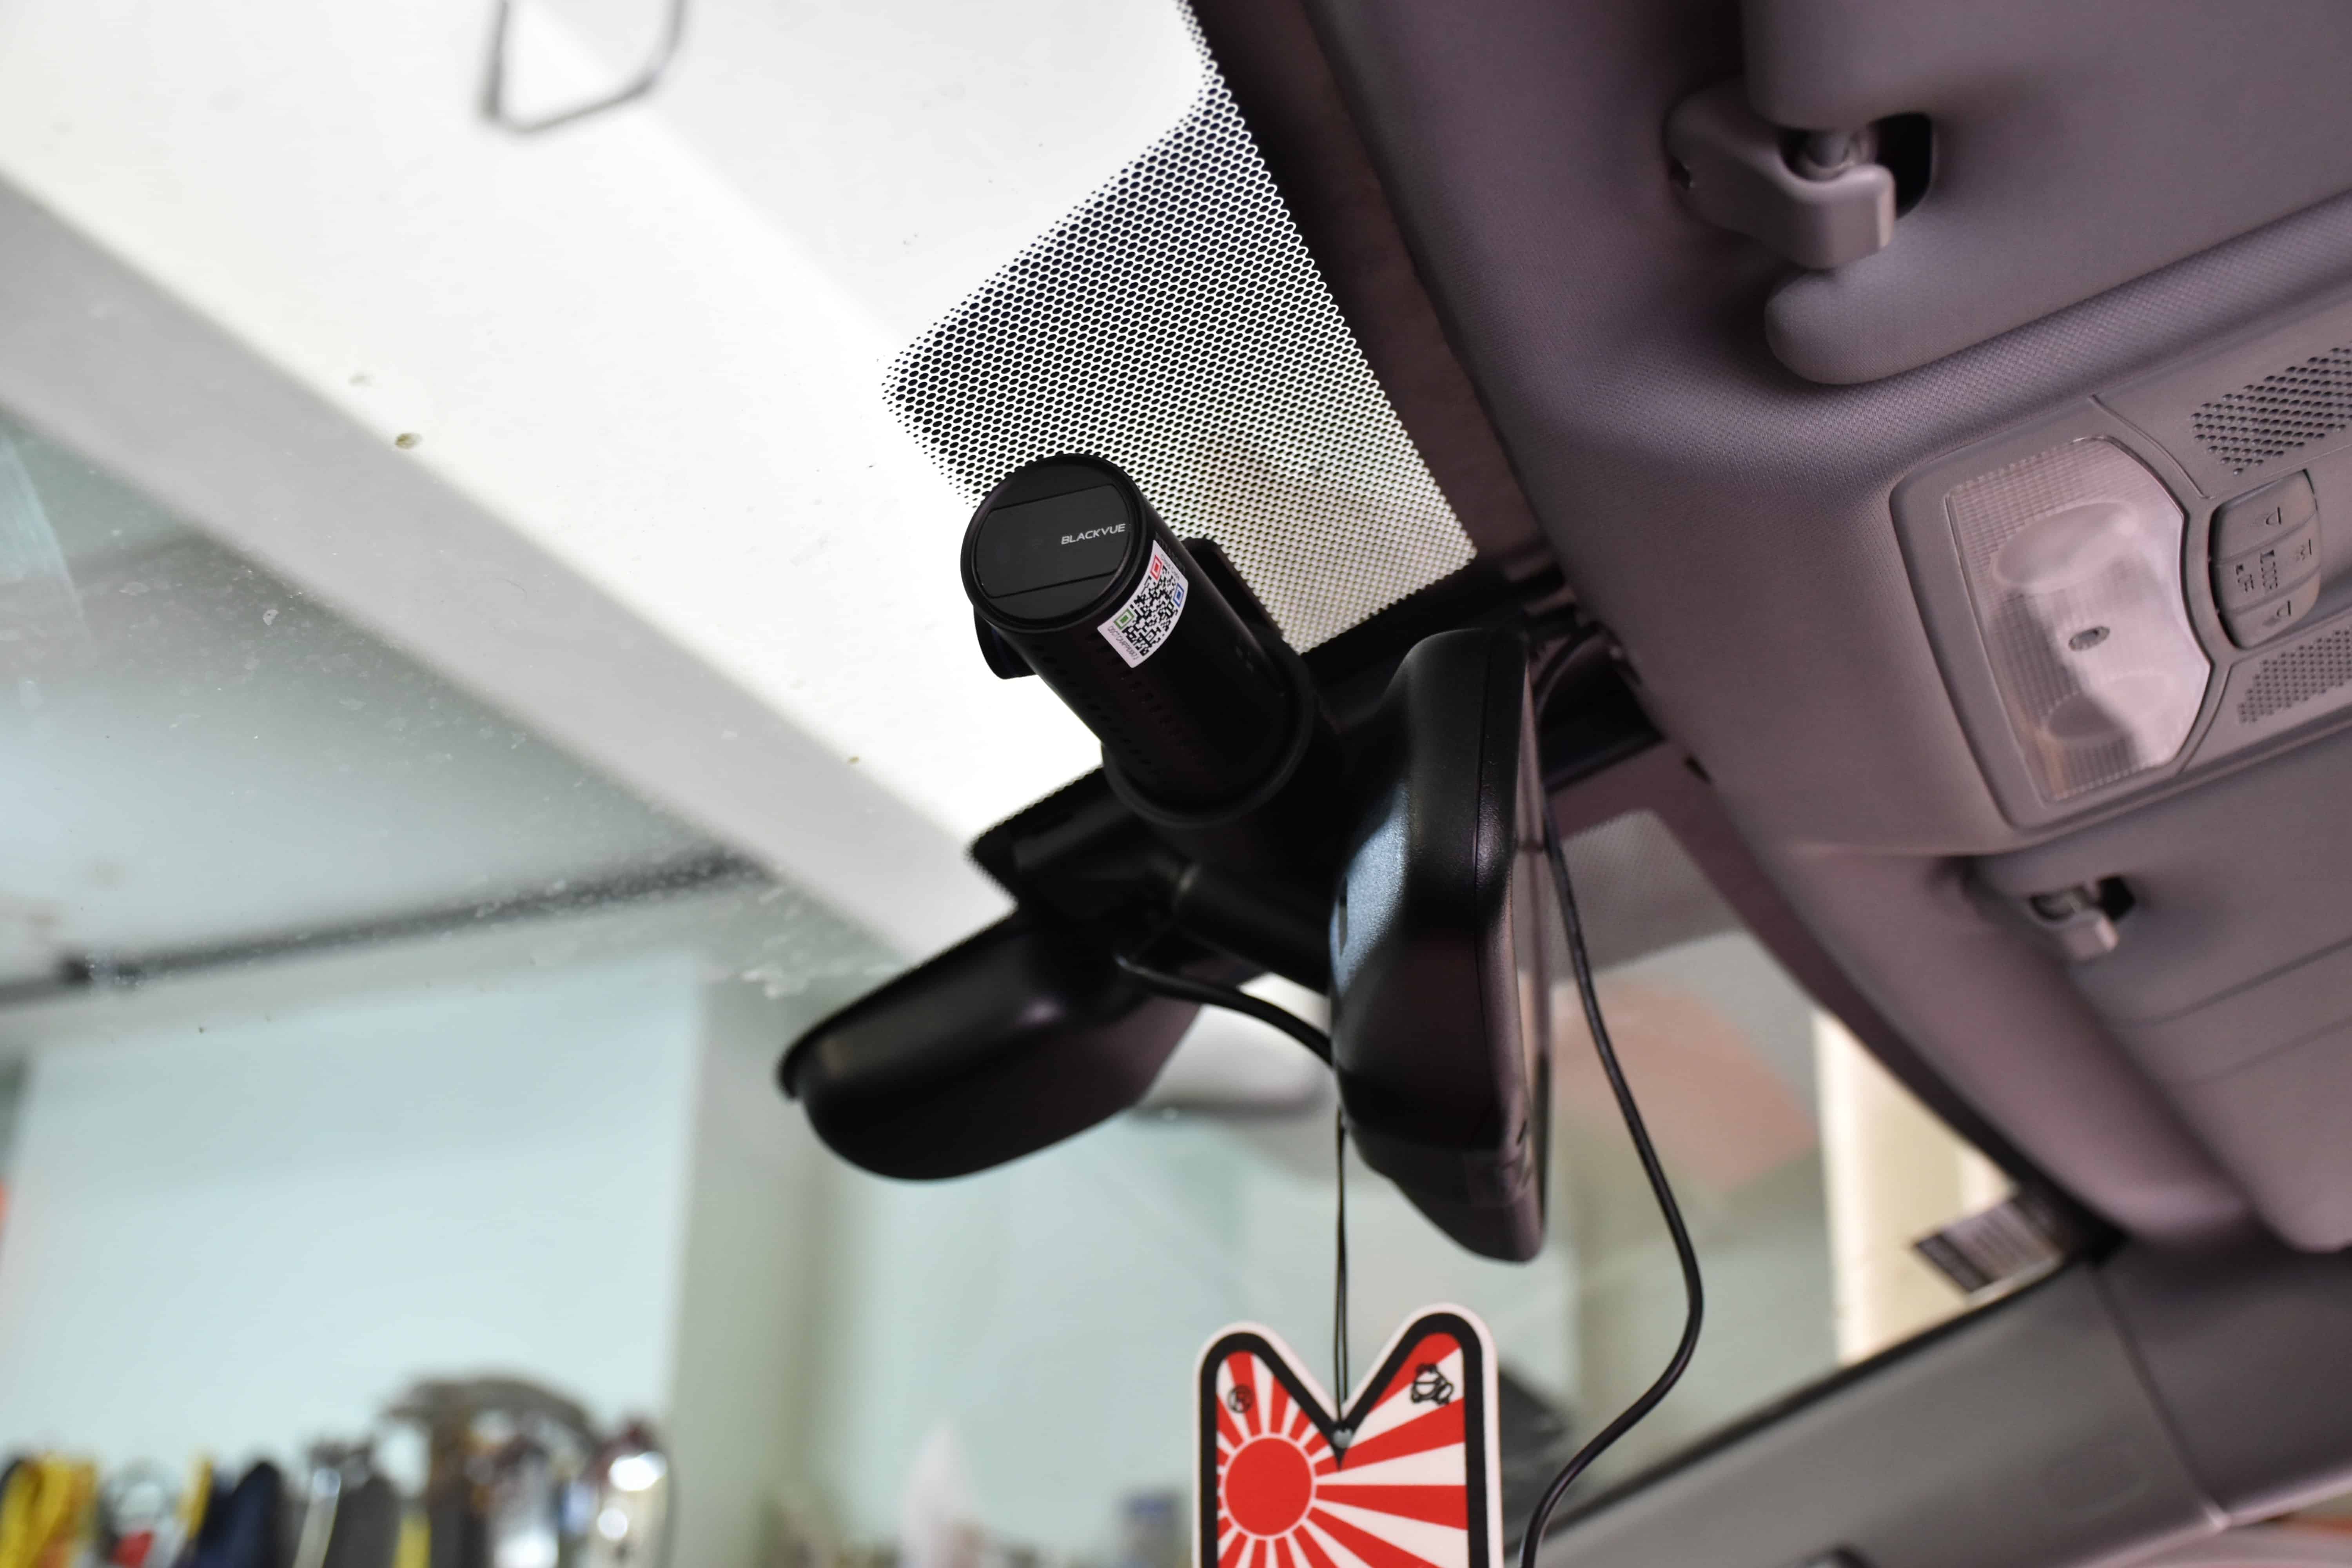
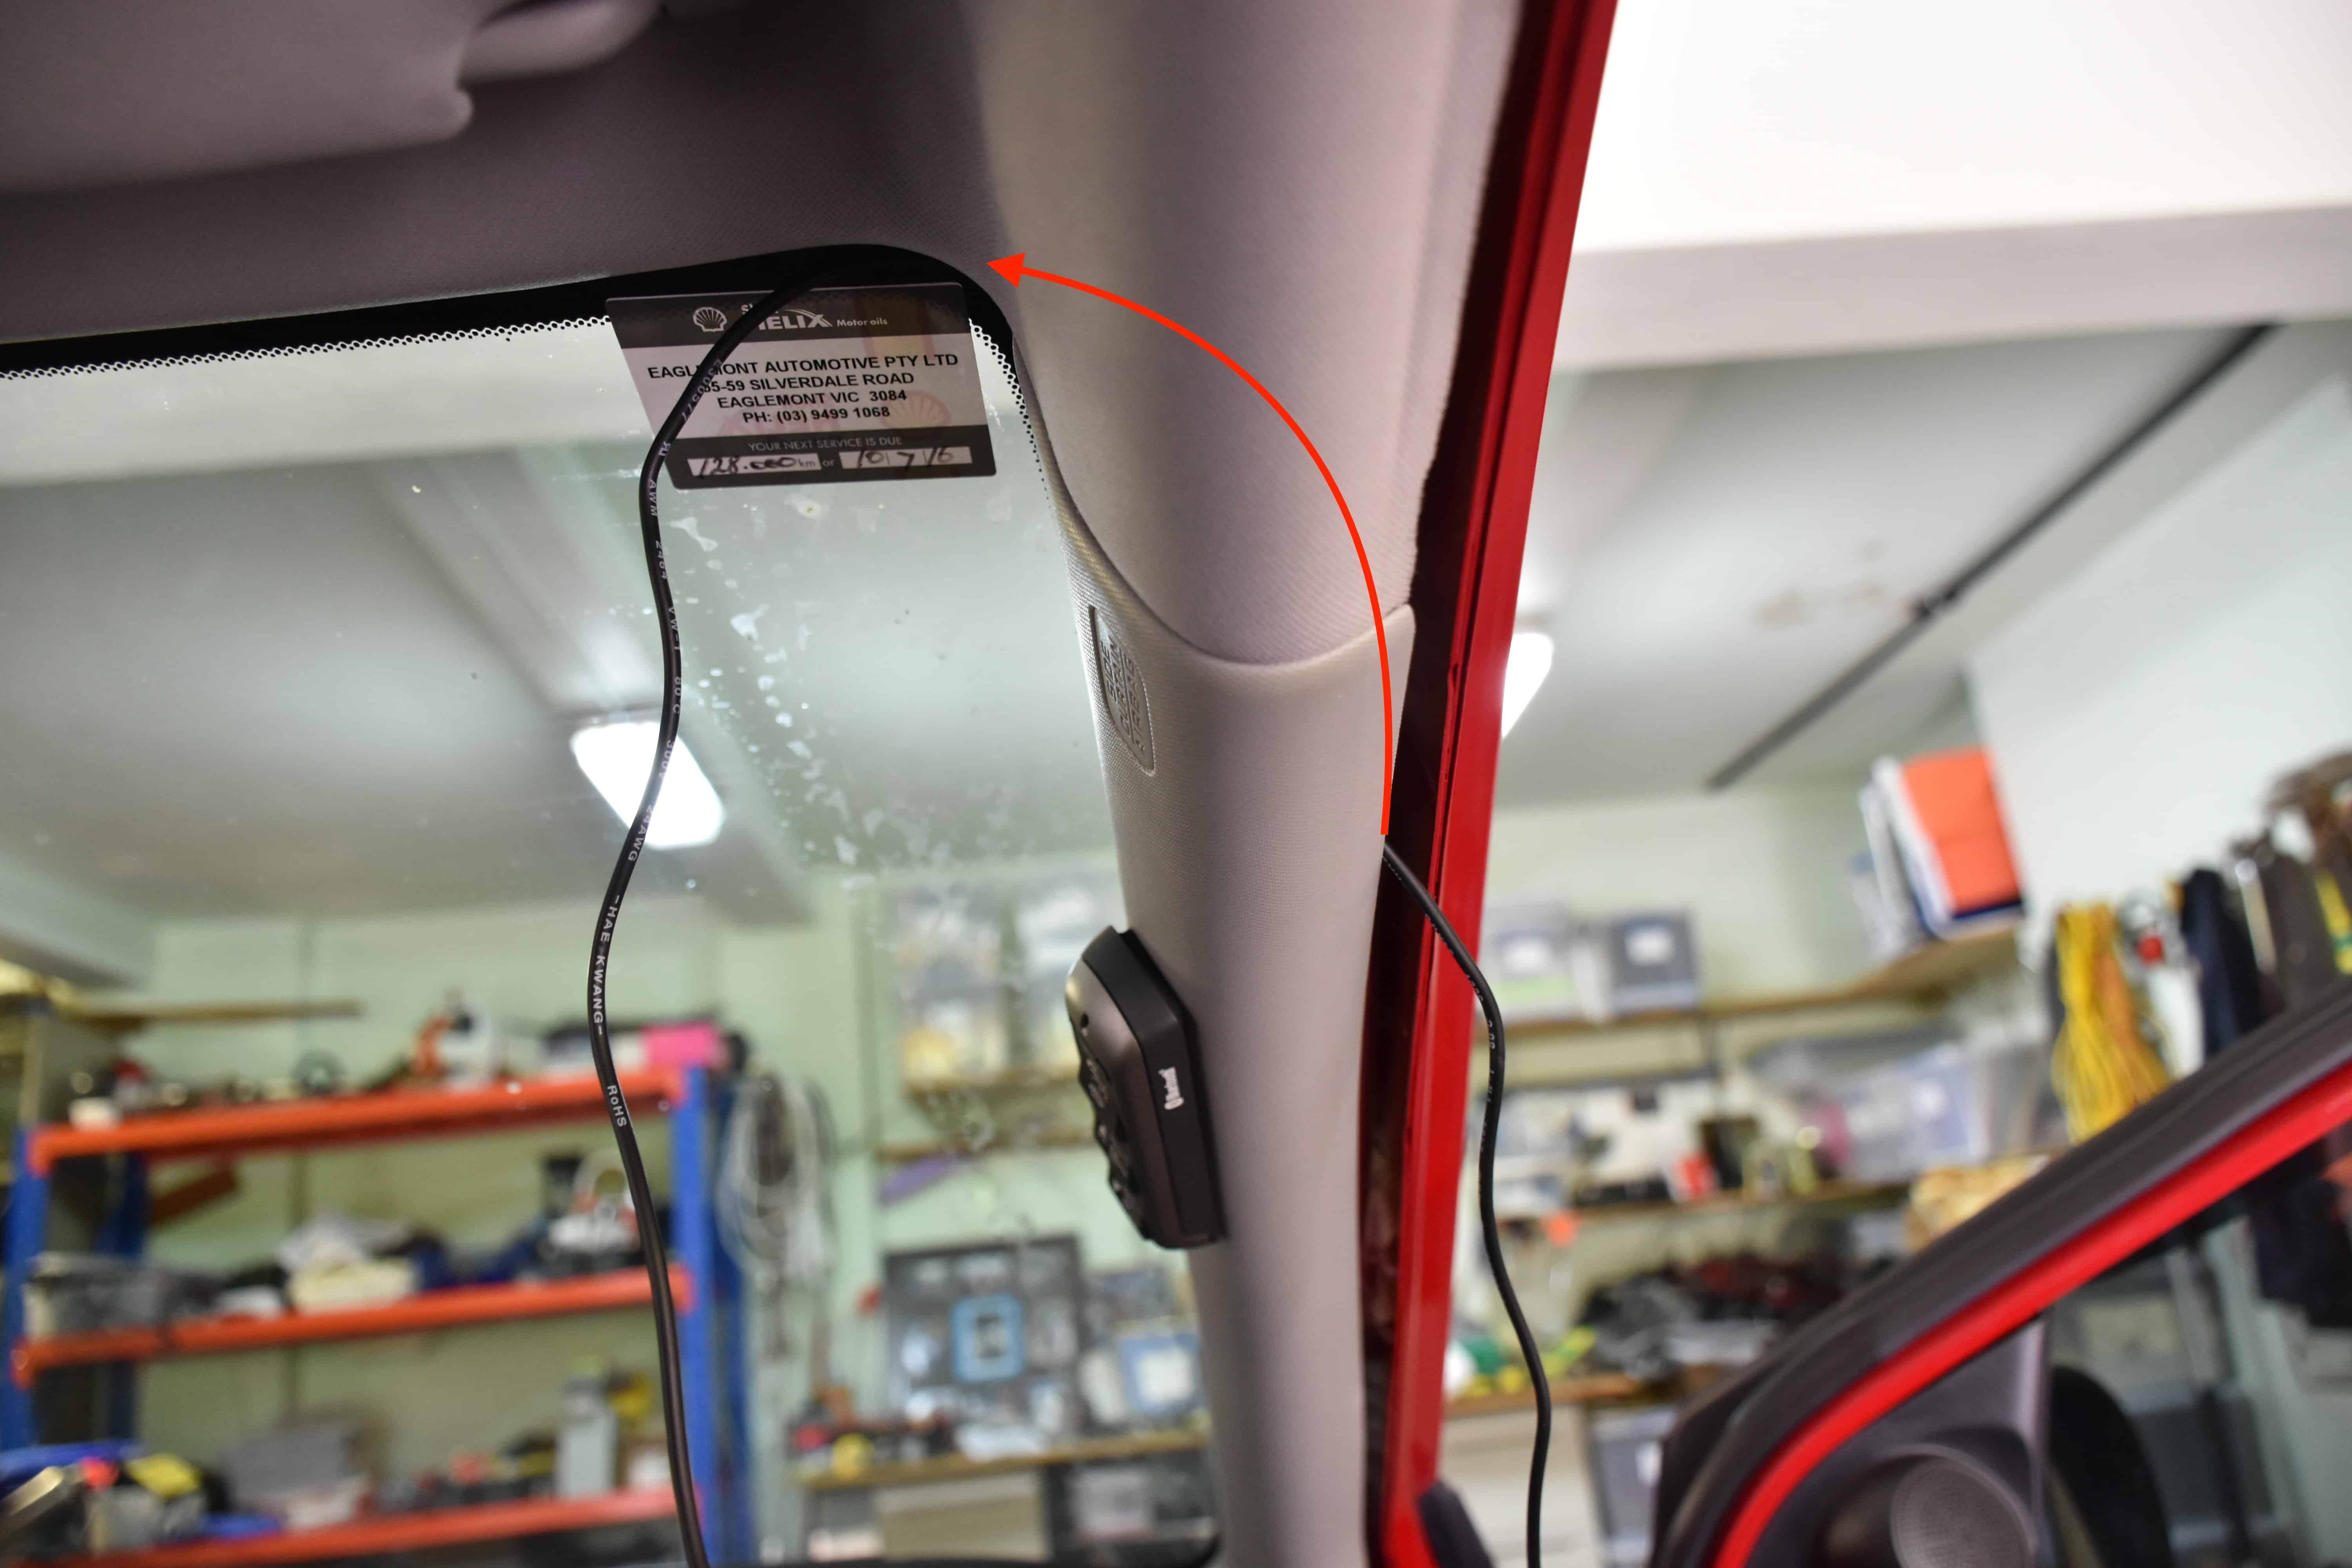
First the dash cam needs to be positioned and stuck to the windshield, most dash cams will attach via double sided tape. In order to ensure the dash cam is placed properly, power the device using a cigarette lighter socket and check the footage before sticking it to the windshield.
For a RHD car, it is best to install the dash cam to the left of the rear-view mirror as this places the camera out of the driver’s field of view. If installing the camera close to the rear-view mirror, ensure that the gap is large enough that the mirror can articulate properly without hitting the dash cam.
Step 2
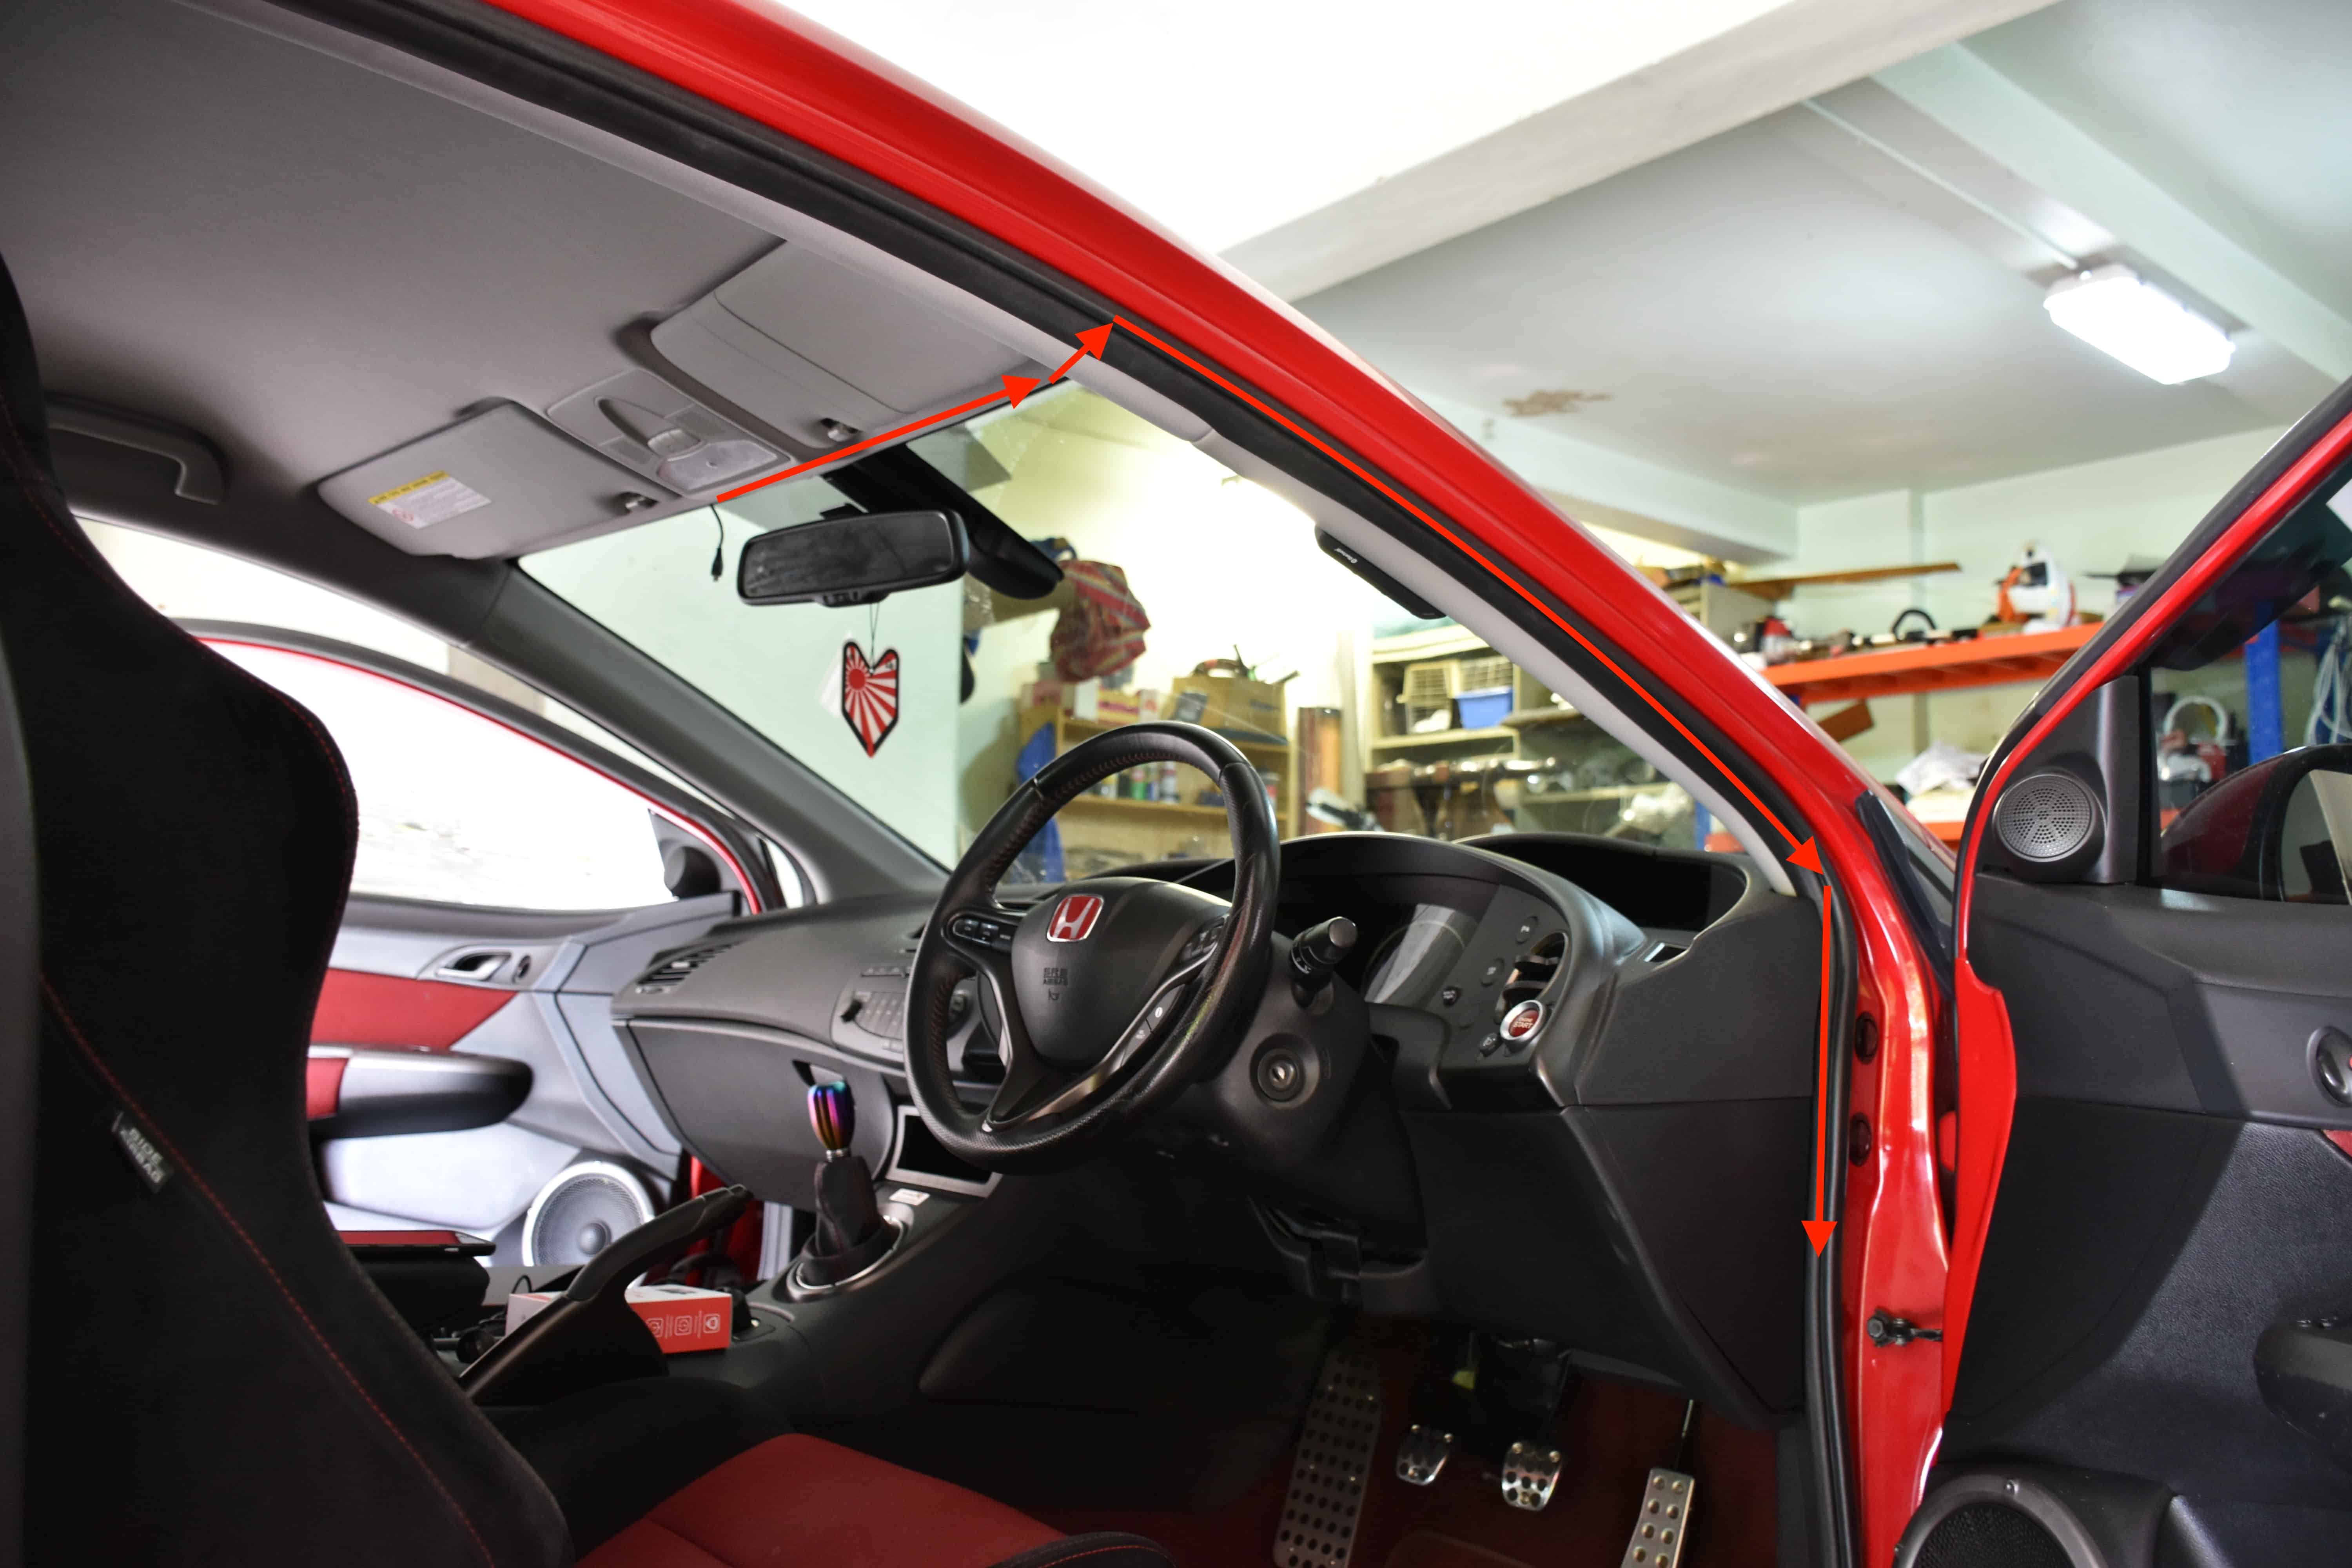
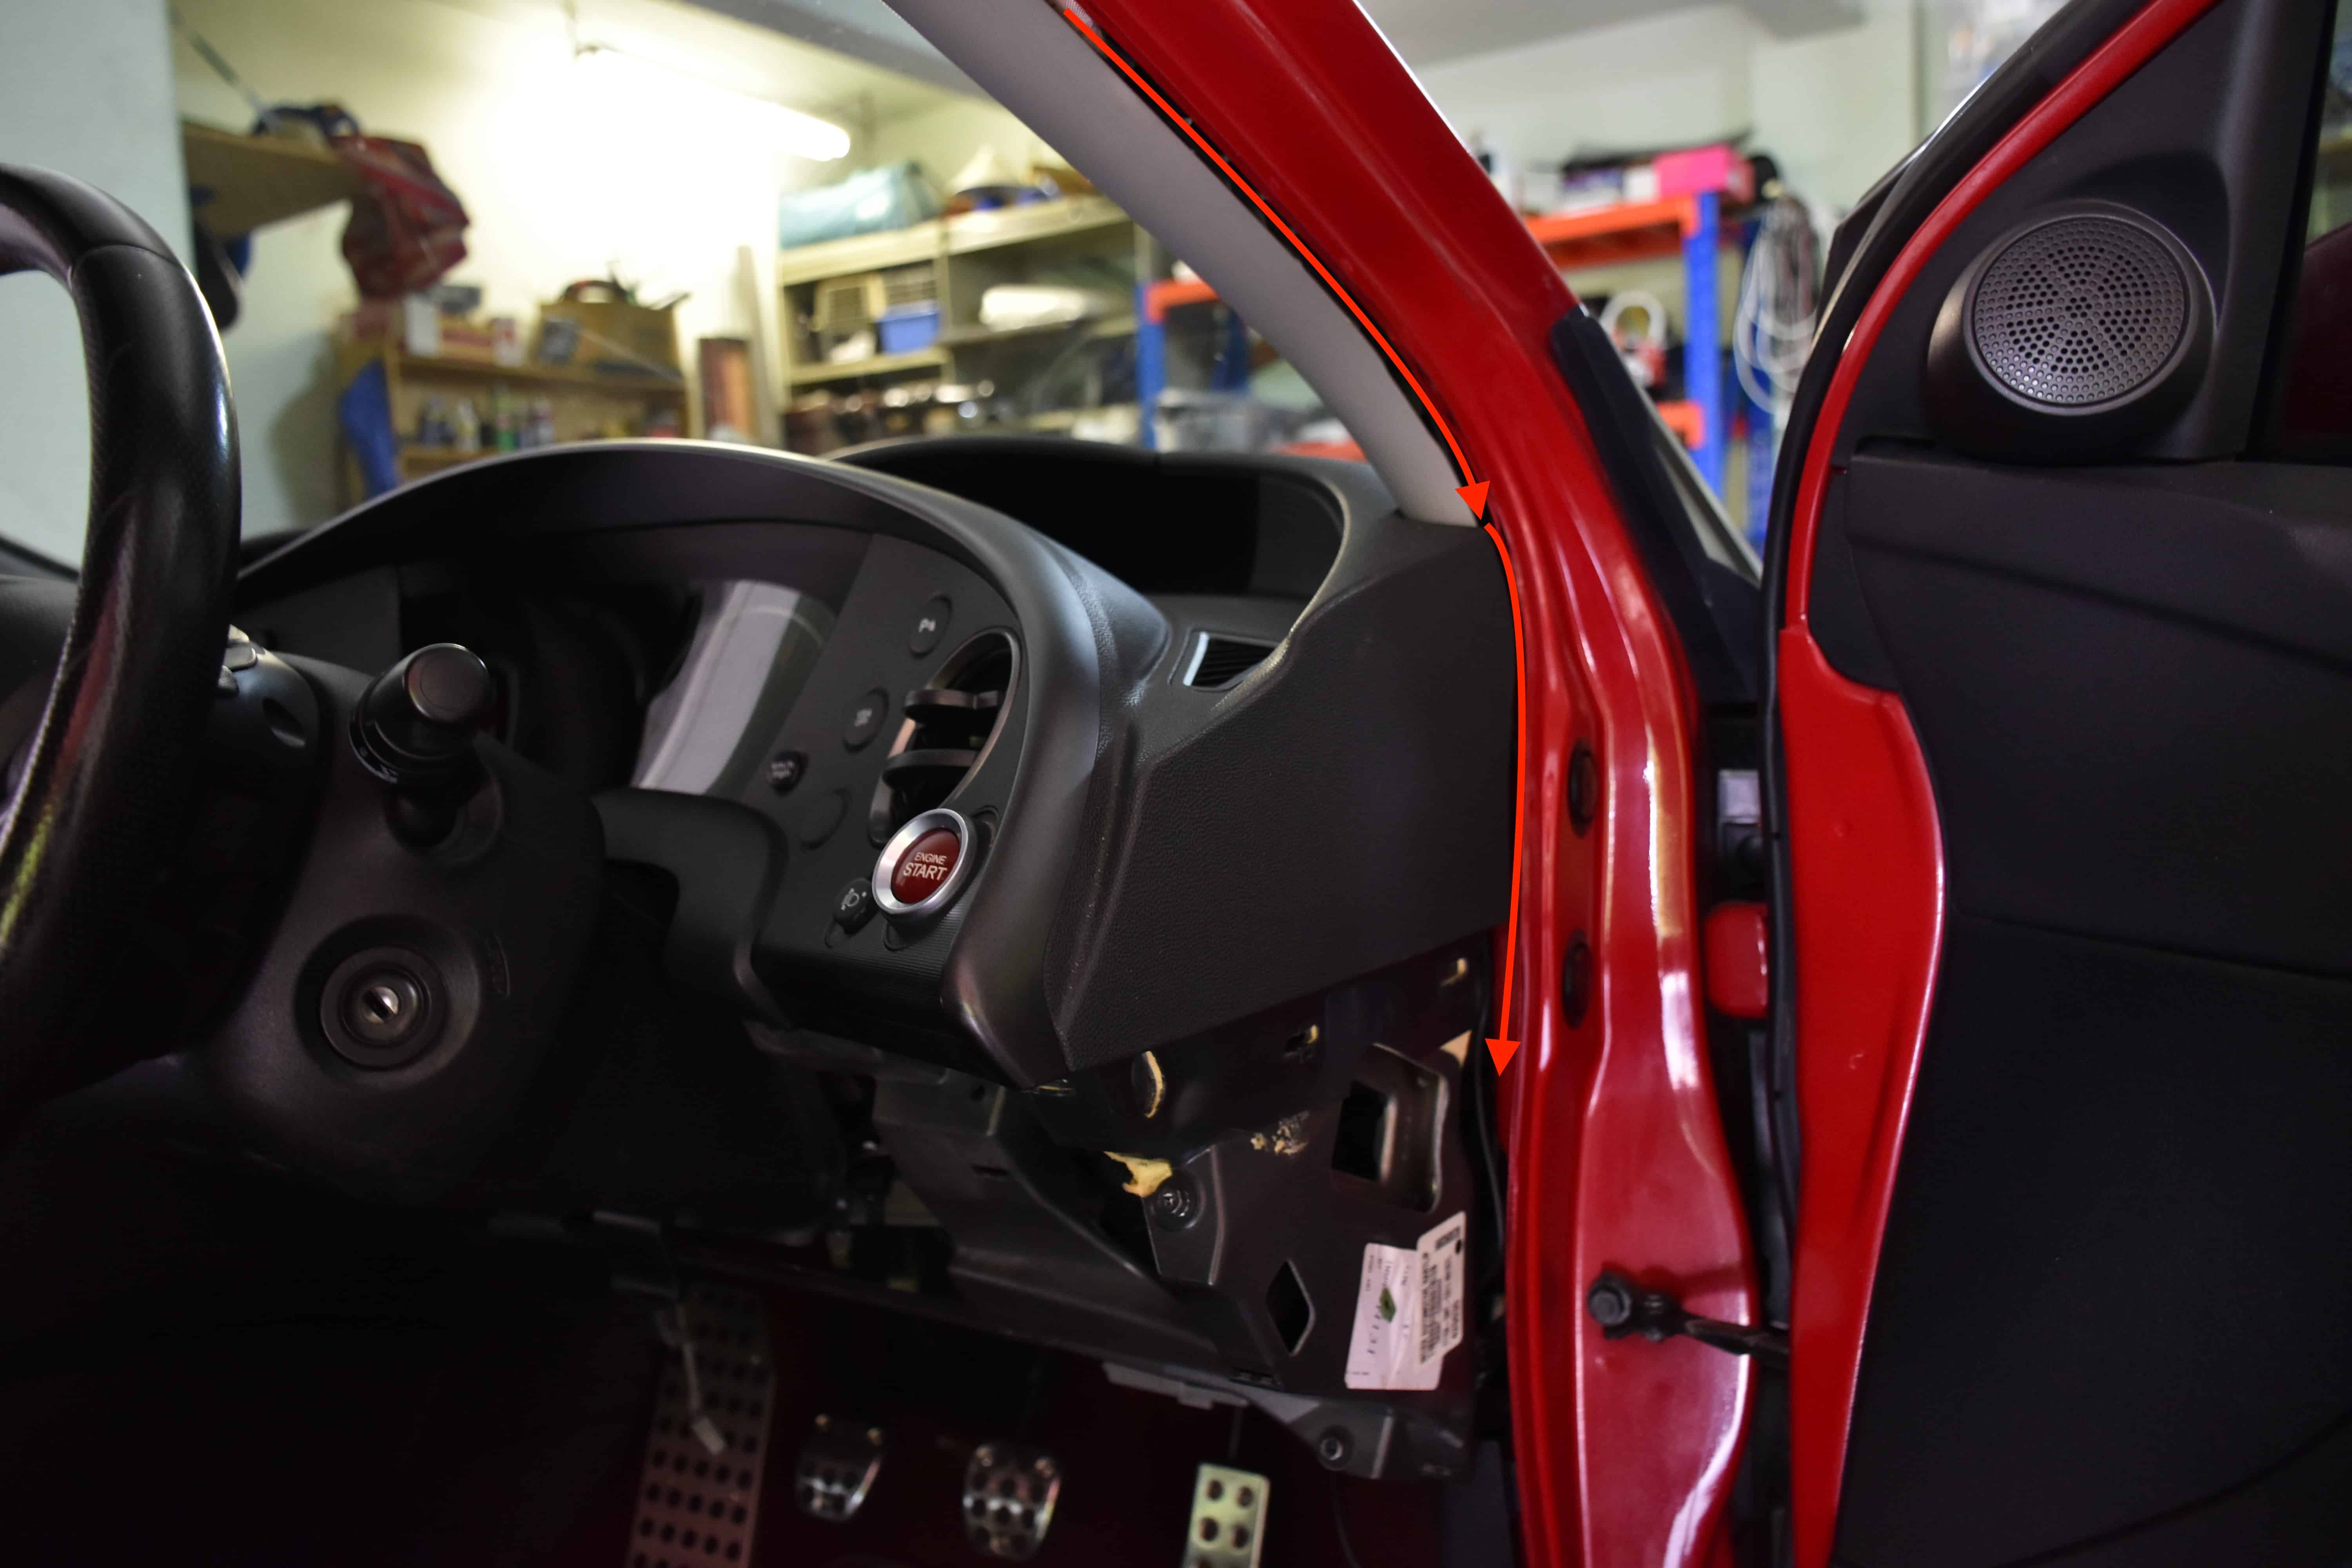
The power cable will be run down to the fuse box via the route shown in the photo.
For LHD models, the fuse box will be located on the passenger side.
Step 3
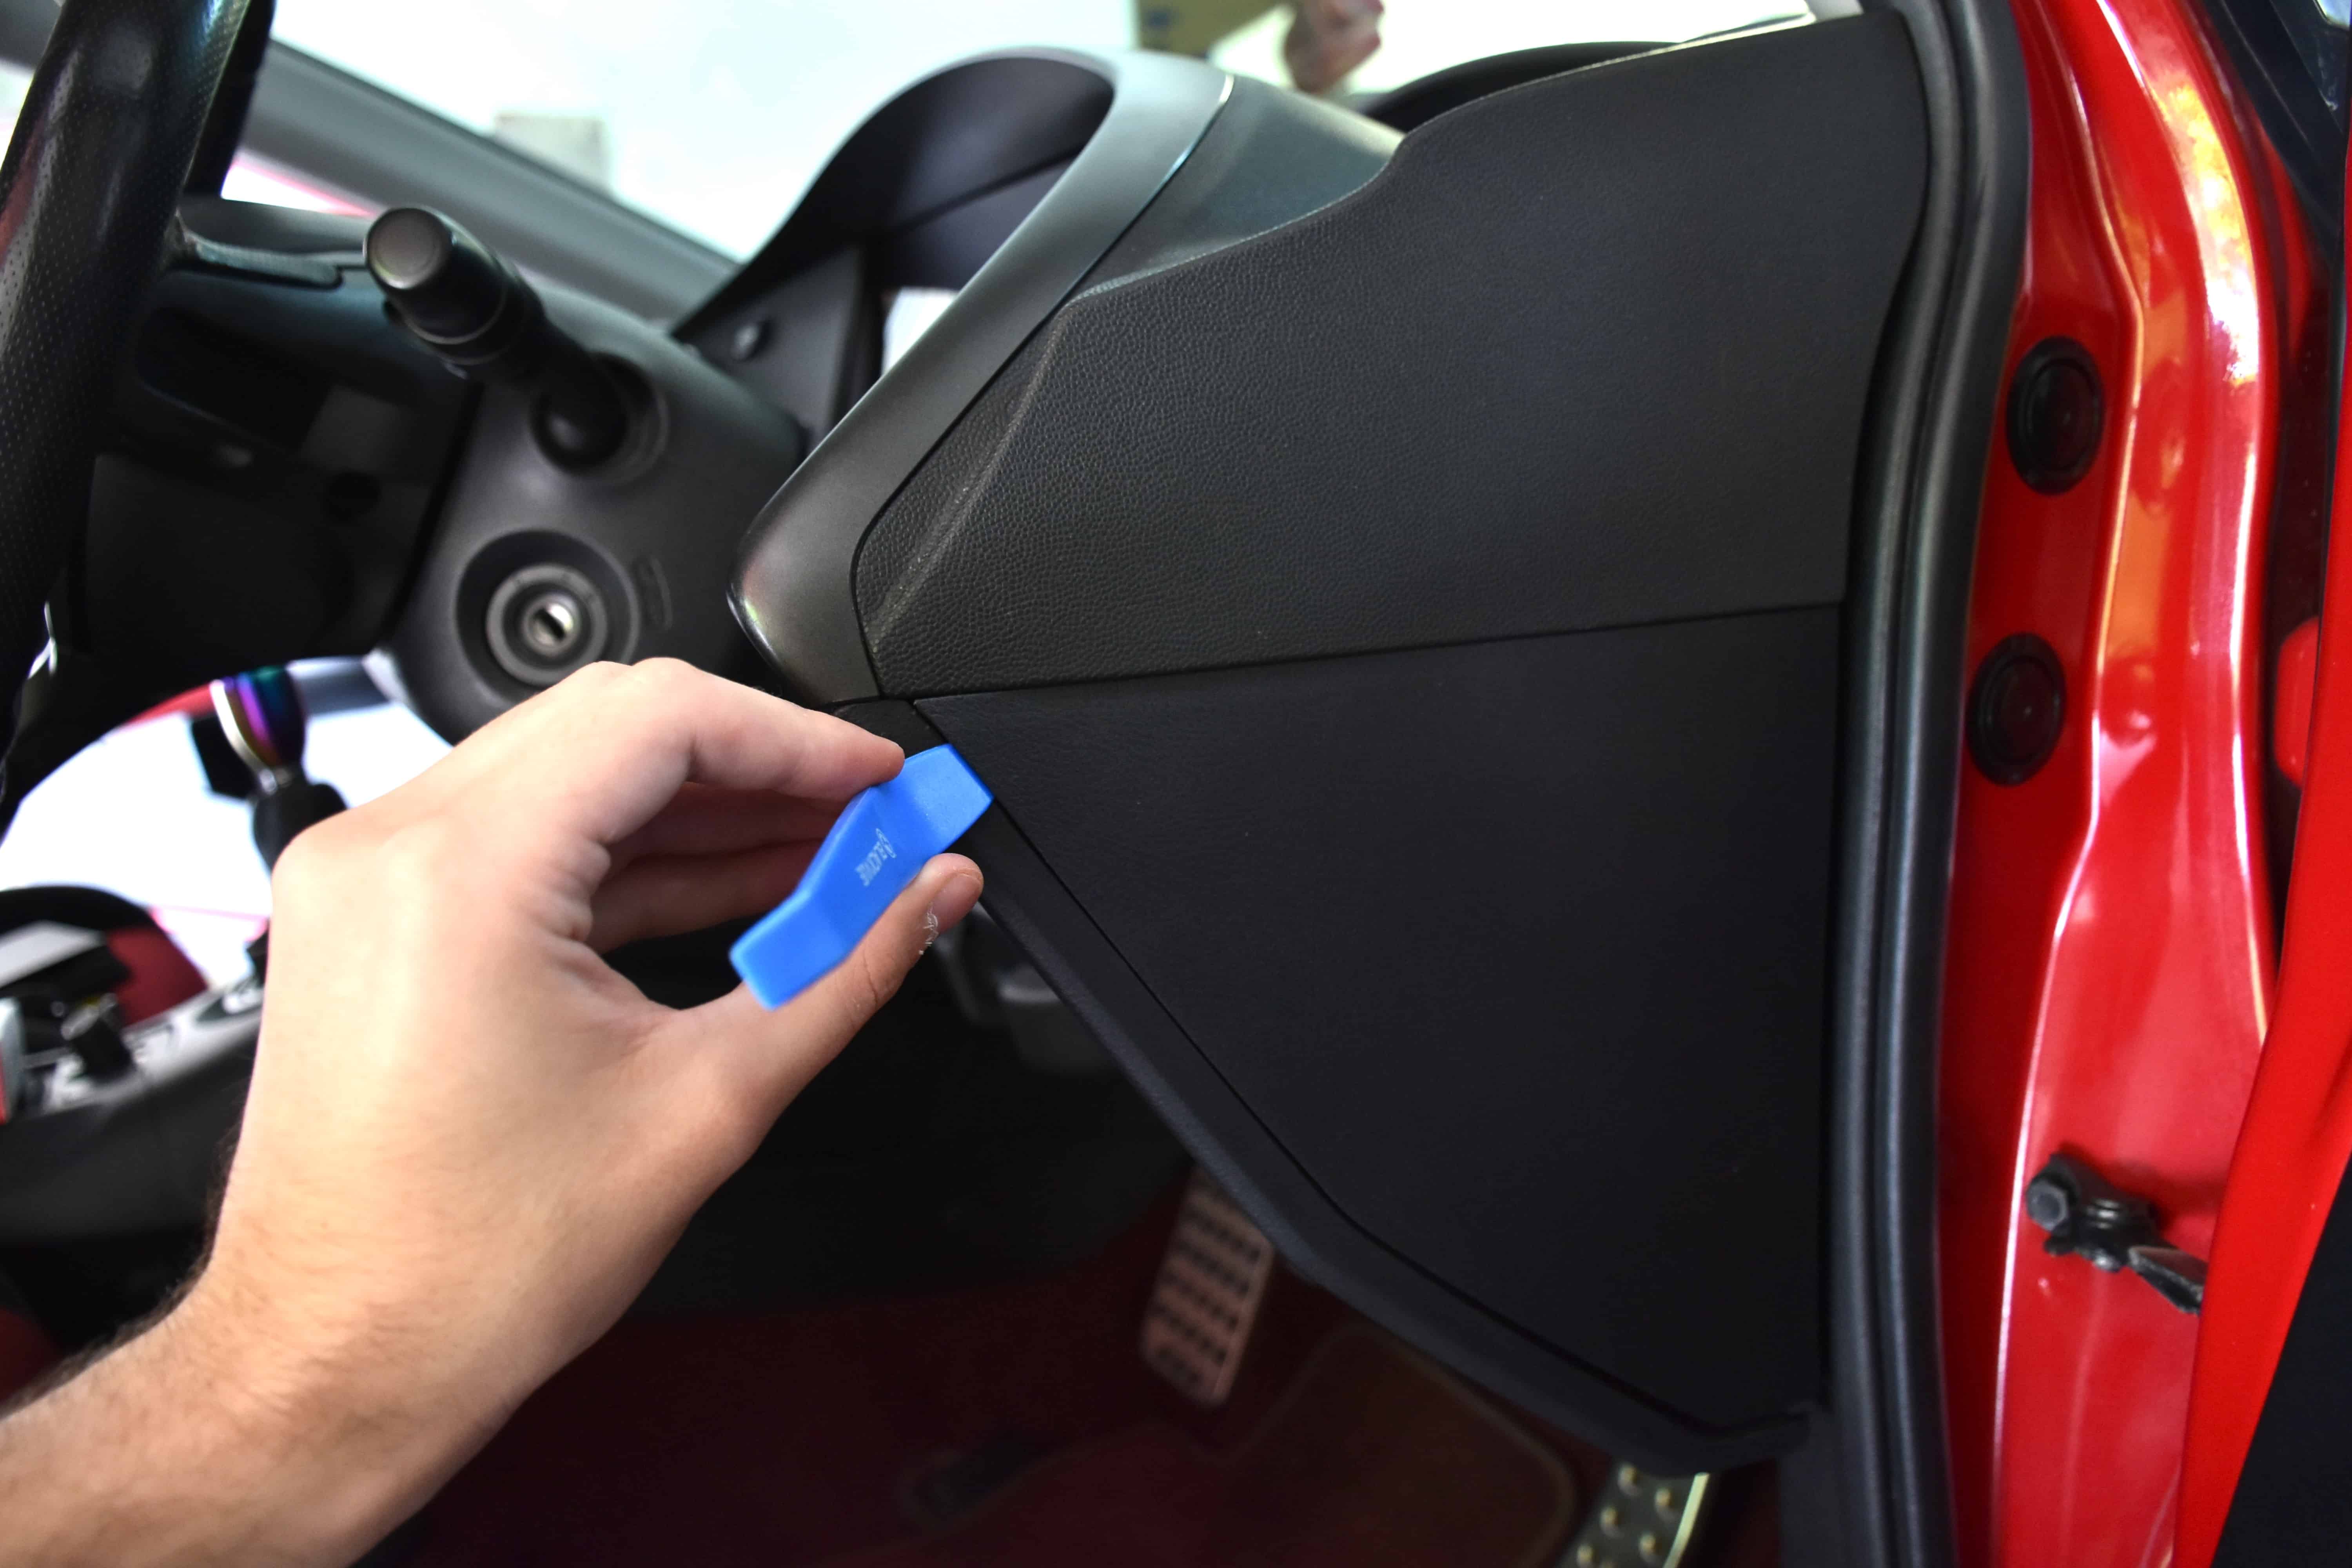
Using a trim removal tool gently remove the side cover of the glove box. There are 5 clips holding this in place.
Step 4
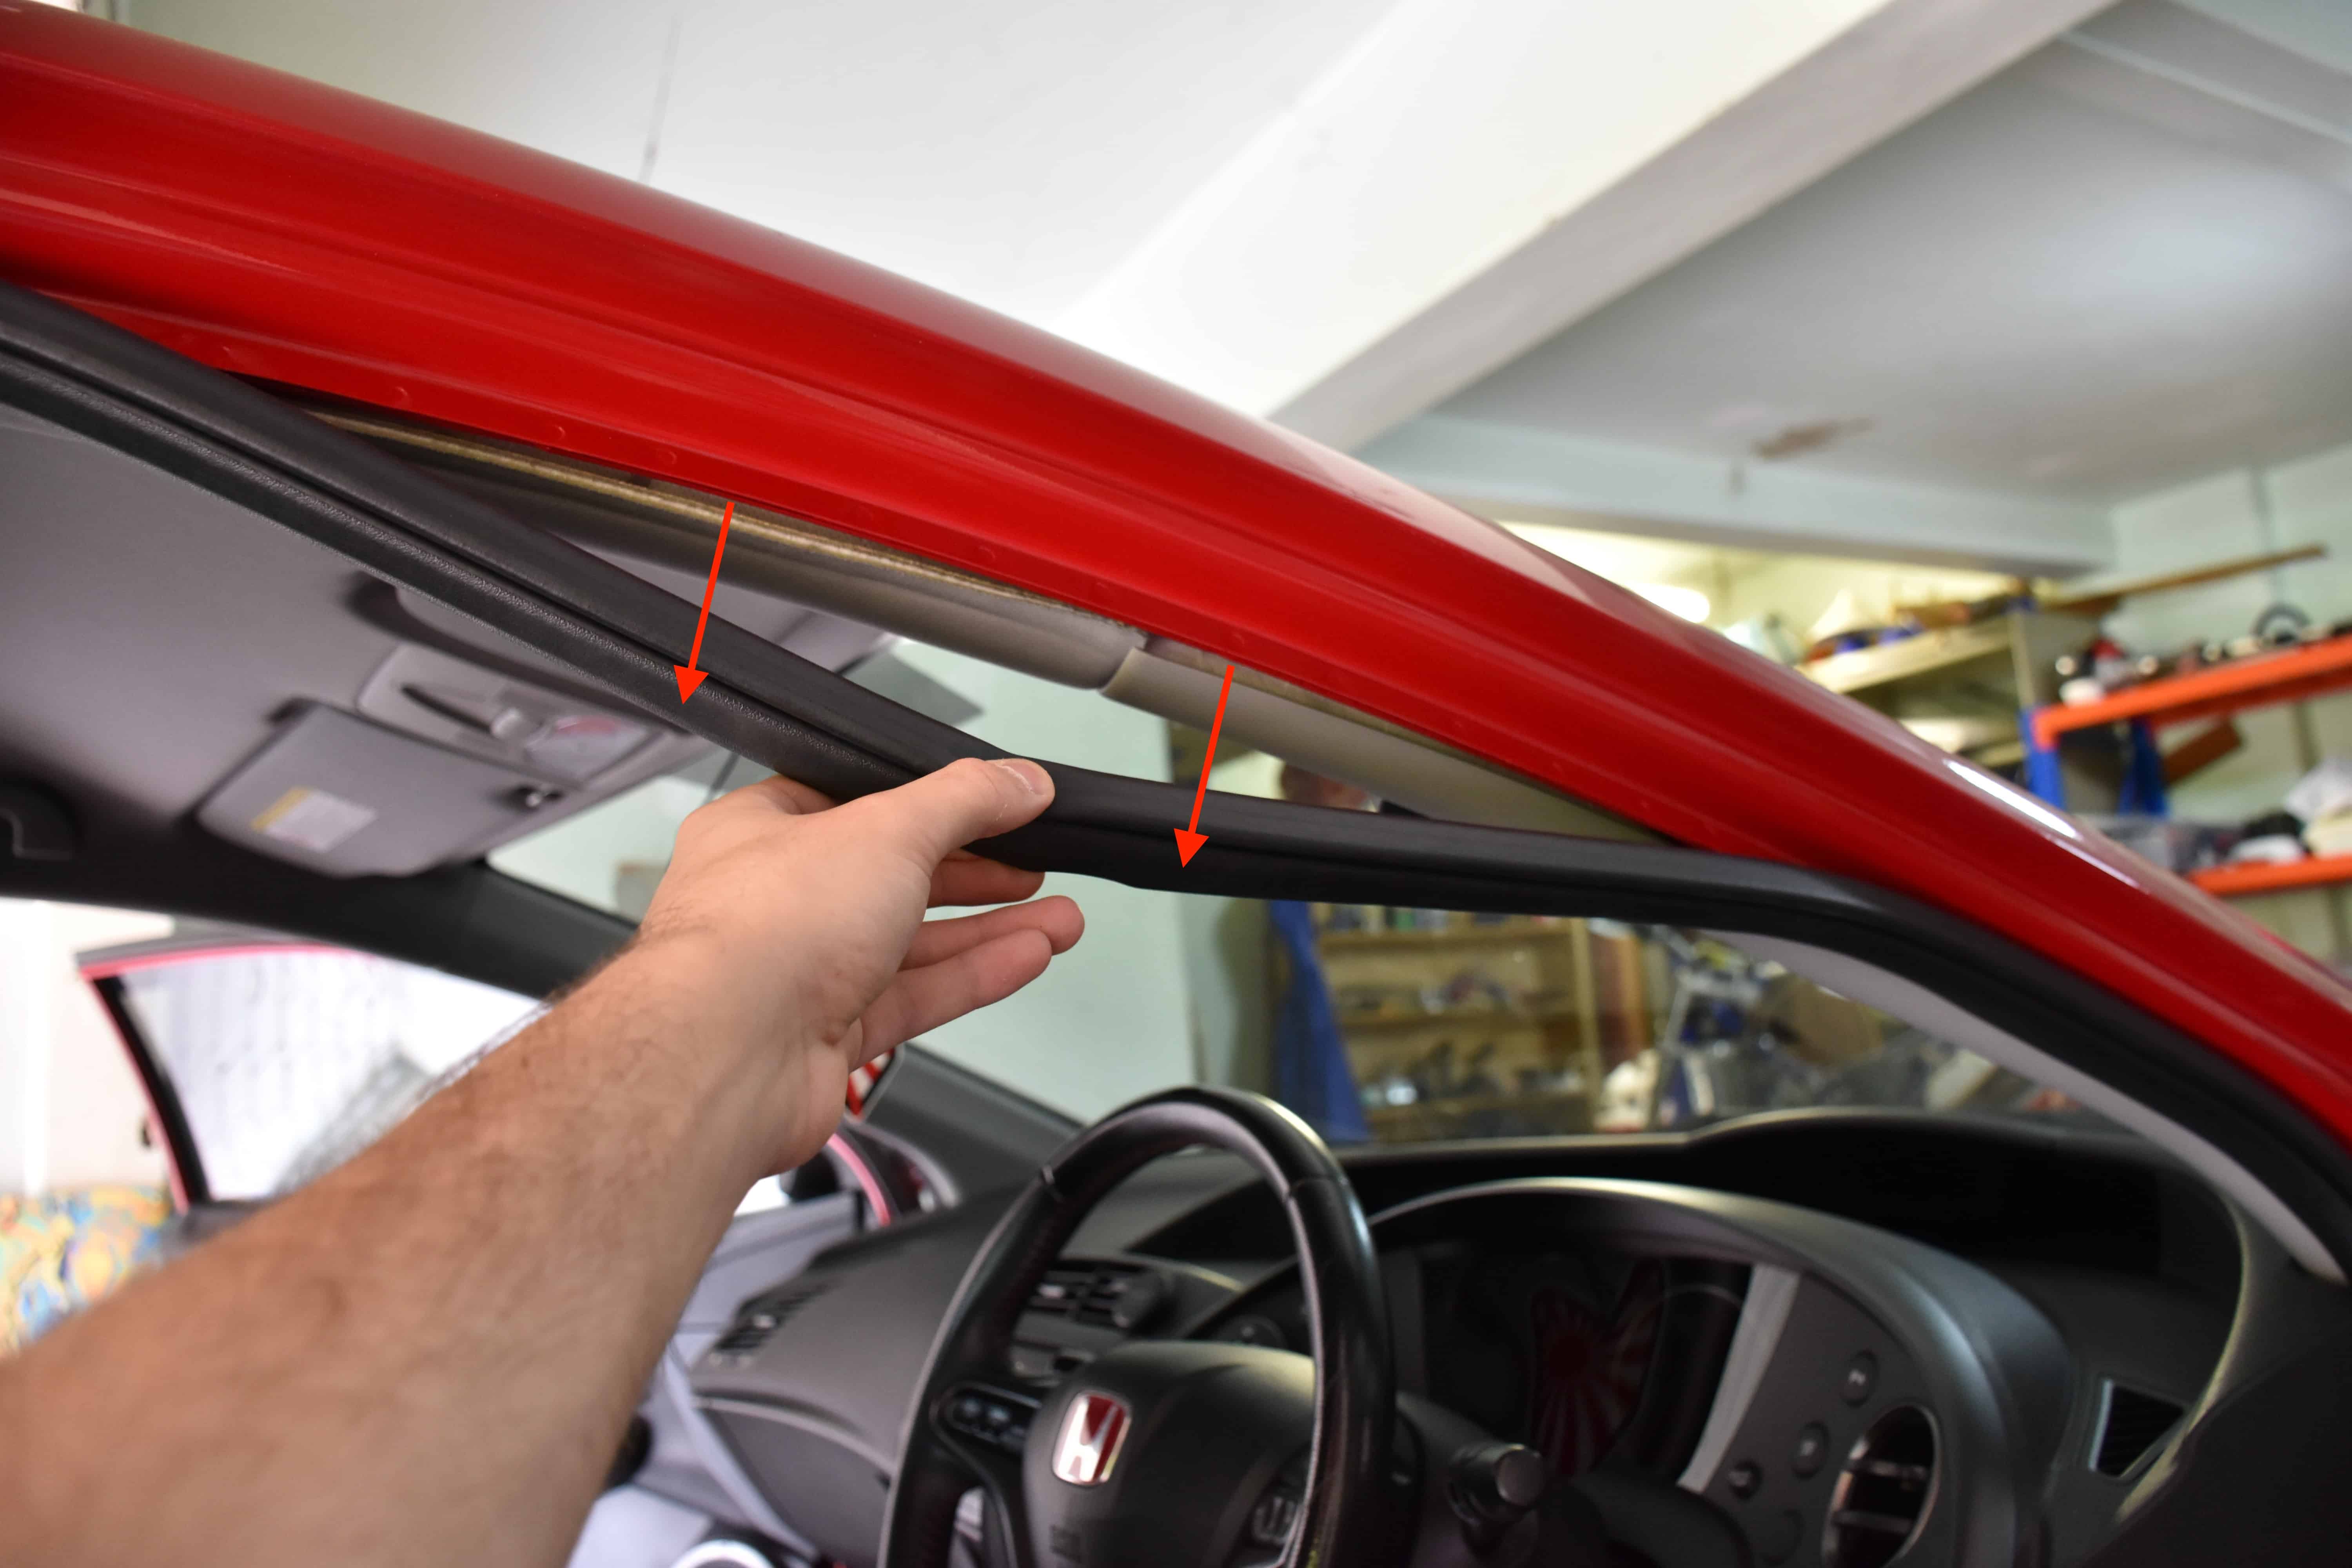
Remove the door seal by simply pulling downward as shown in the photo. Pull the seal off so that the entire path shown in Step 2 is visible.
Step 5
The cable must now be fed from the fuse box to the dash cam. When running the cable you must ensure that it sits behind the curtain airbag so that it does not impede the function of the airbag if it deploys. You will be able to see the airbag through the gap created by removing the door seal, feed the connector over airbag. You may need to use a trim removal tool to pry the A-pillar trim back enough in order to feed the connector out the other side.
Run the cable just inside the roof lining to the dash cam, there is a large enough gap that it is easy enough to simply place the cable just inside the trim without much effort.
Step 6
Tuck the remaining cable into the A-pillar trim as shown in the photo, once the door seal is reinstalled it will hold the cable in.
Step 7
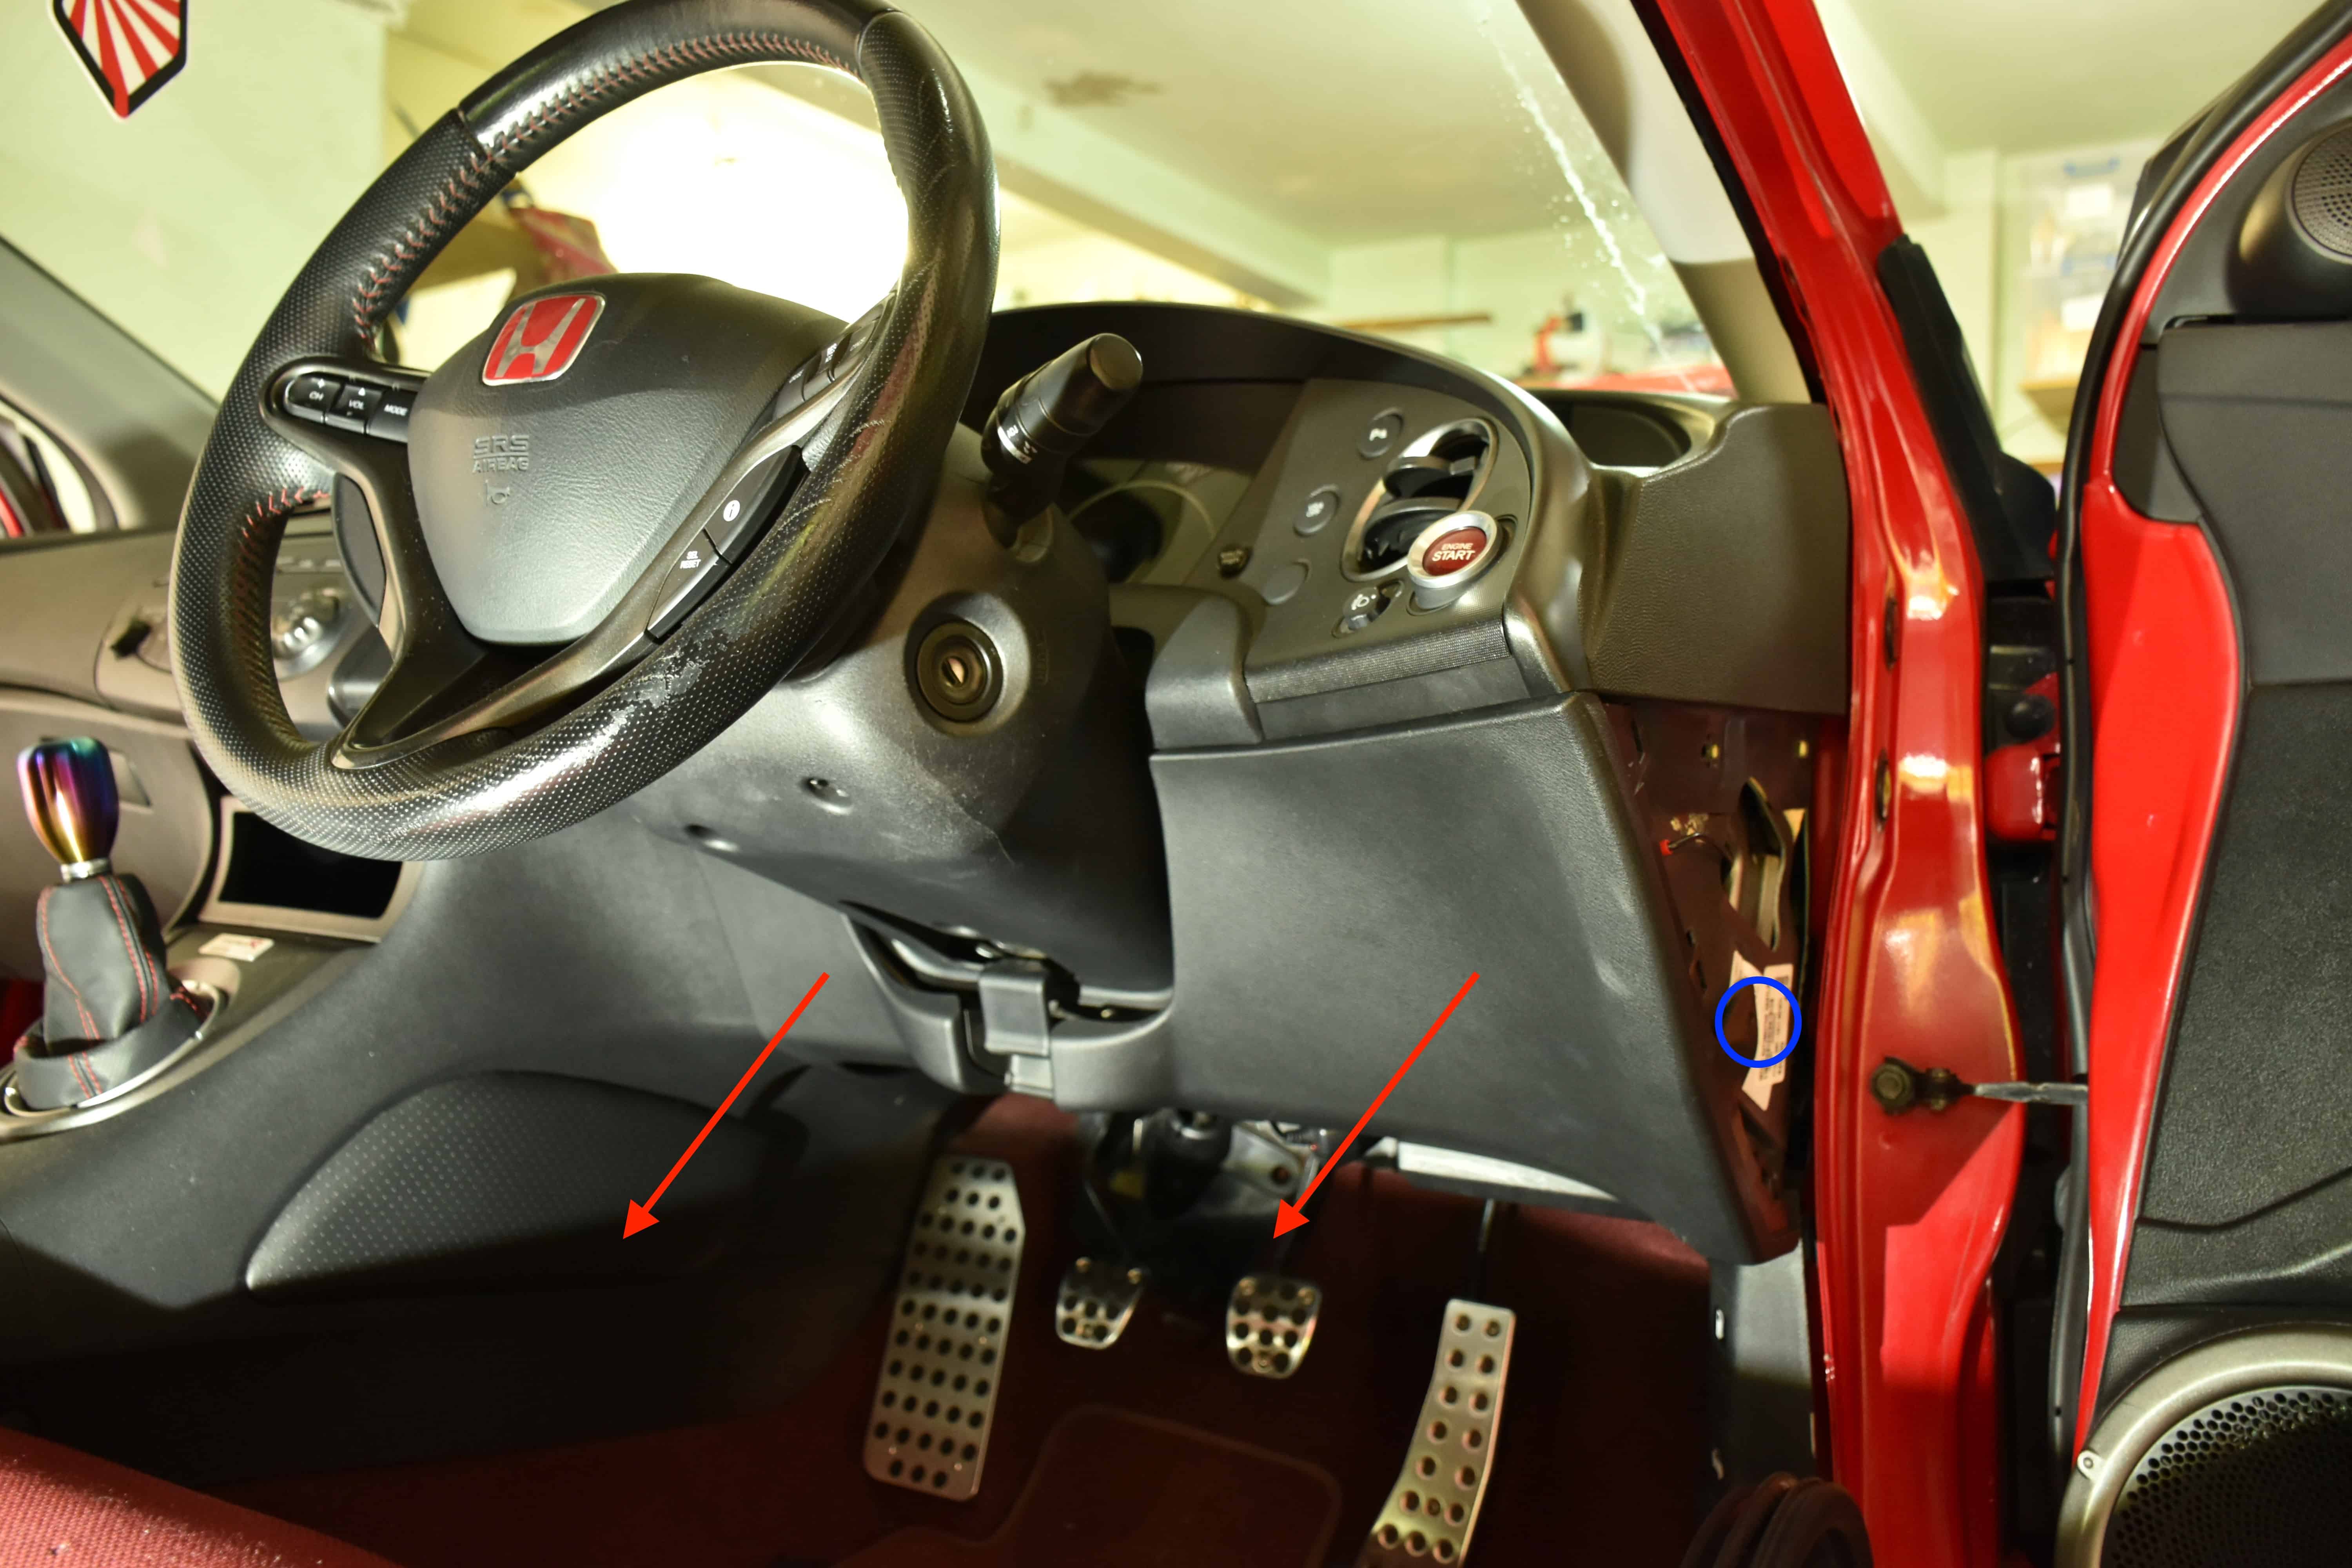
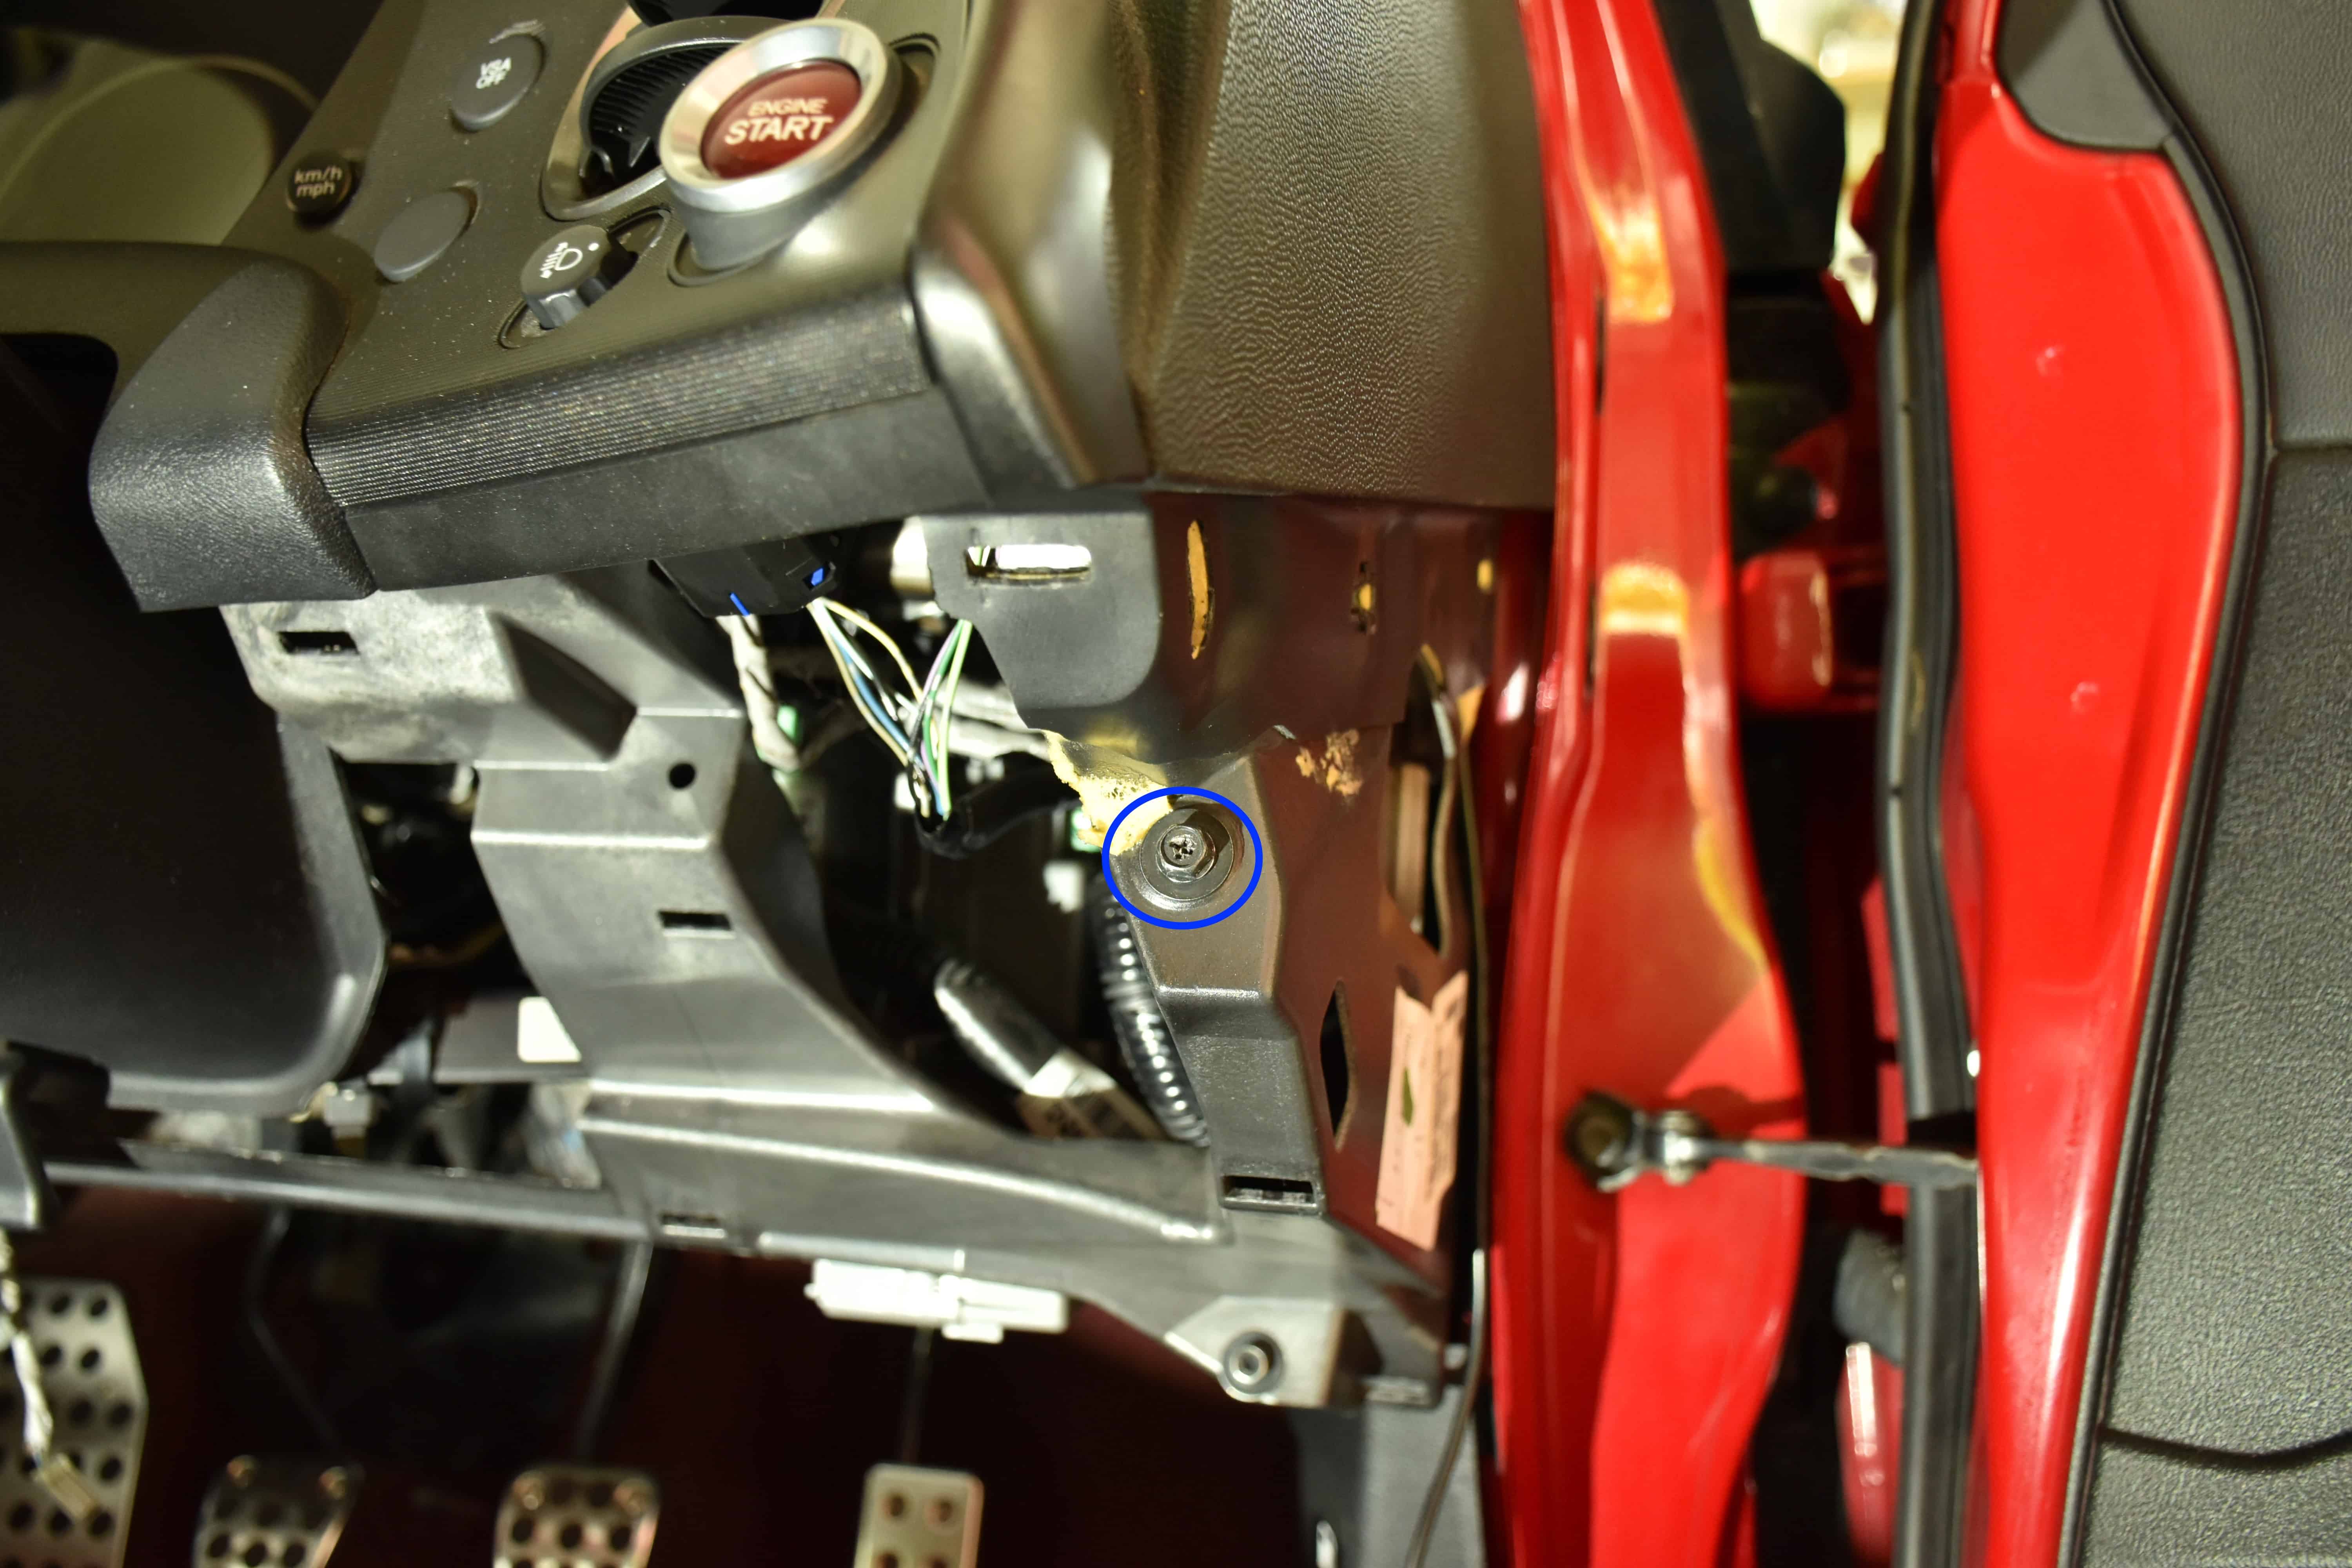
Next we must remove the plastic panel covering the fuse box for ease of access. First, remove the single philips screw (Blue circle in photo) then, pull the panel outwards from the dash as indicated by the arrows. There are several clips holding this panel in however, they will not be too firm.
Step 8
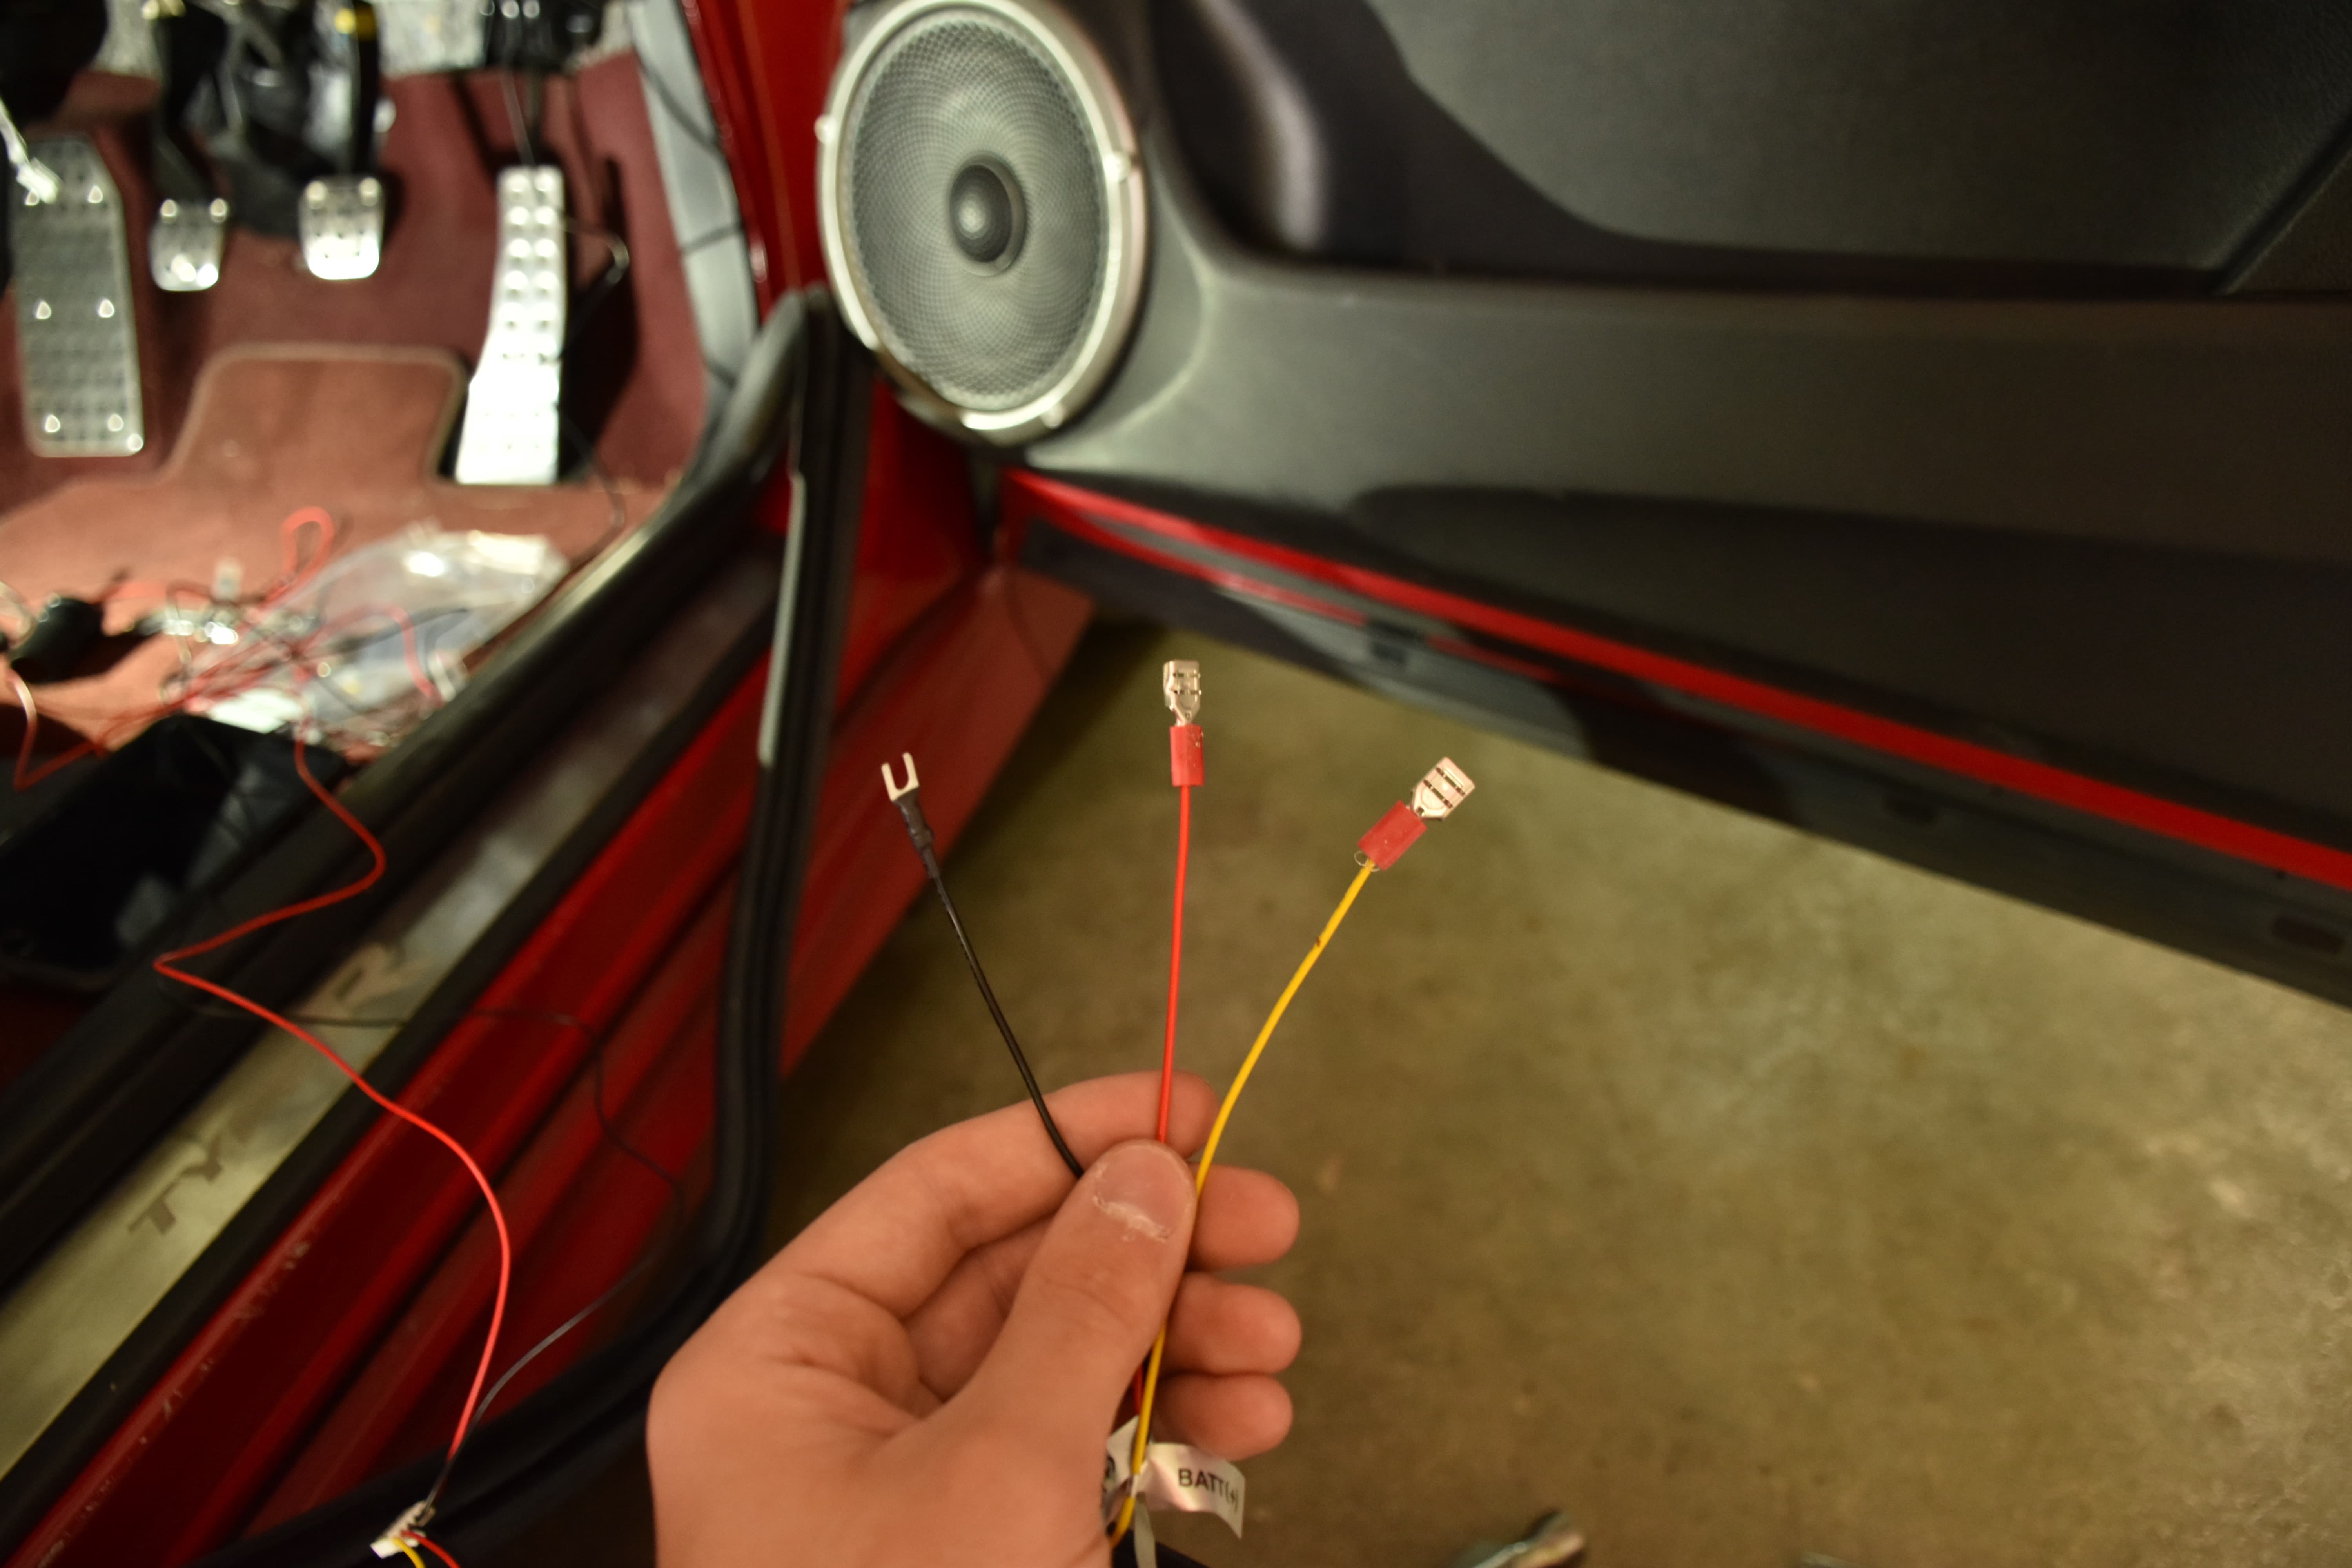
Now the cables must be prepared to be plugged into the fuse box and ground. The active cable must have a female spade connector crimped on whilst the ground requires an eyelet as shown in the photo.
Note that the Blackvue Power Magic Pro requires two active cables for parking mode, switched power and non-switched power. Both active cables in our case should have female spade connectors.
Wiring for the Power Magic Pro is as follows:
Yellow – Permanent (Non-Switched) Active
Red – Switched Active
Black – Ground
Step 9
The ground cable can be installed to any metal bolt that attaches to other metal pieces. For ease, we used the small bolt that sits somewhat below the ‘Engine Start’ button at the edge of the dash.
Loosen the bolt with your 8mm tool and place the eyelet underneath, then tighten the bolt down ensuring that the cable is secured firmly. Do not over-tighten the bolt.
Step 10
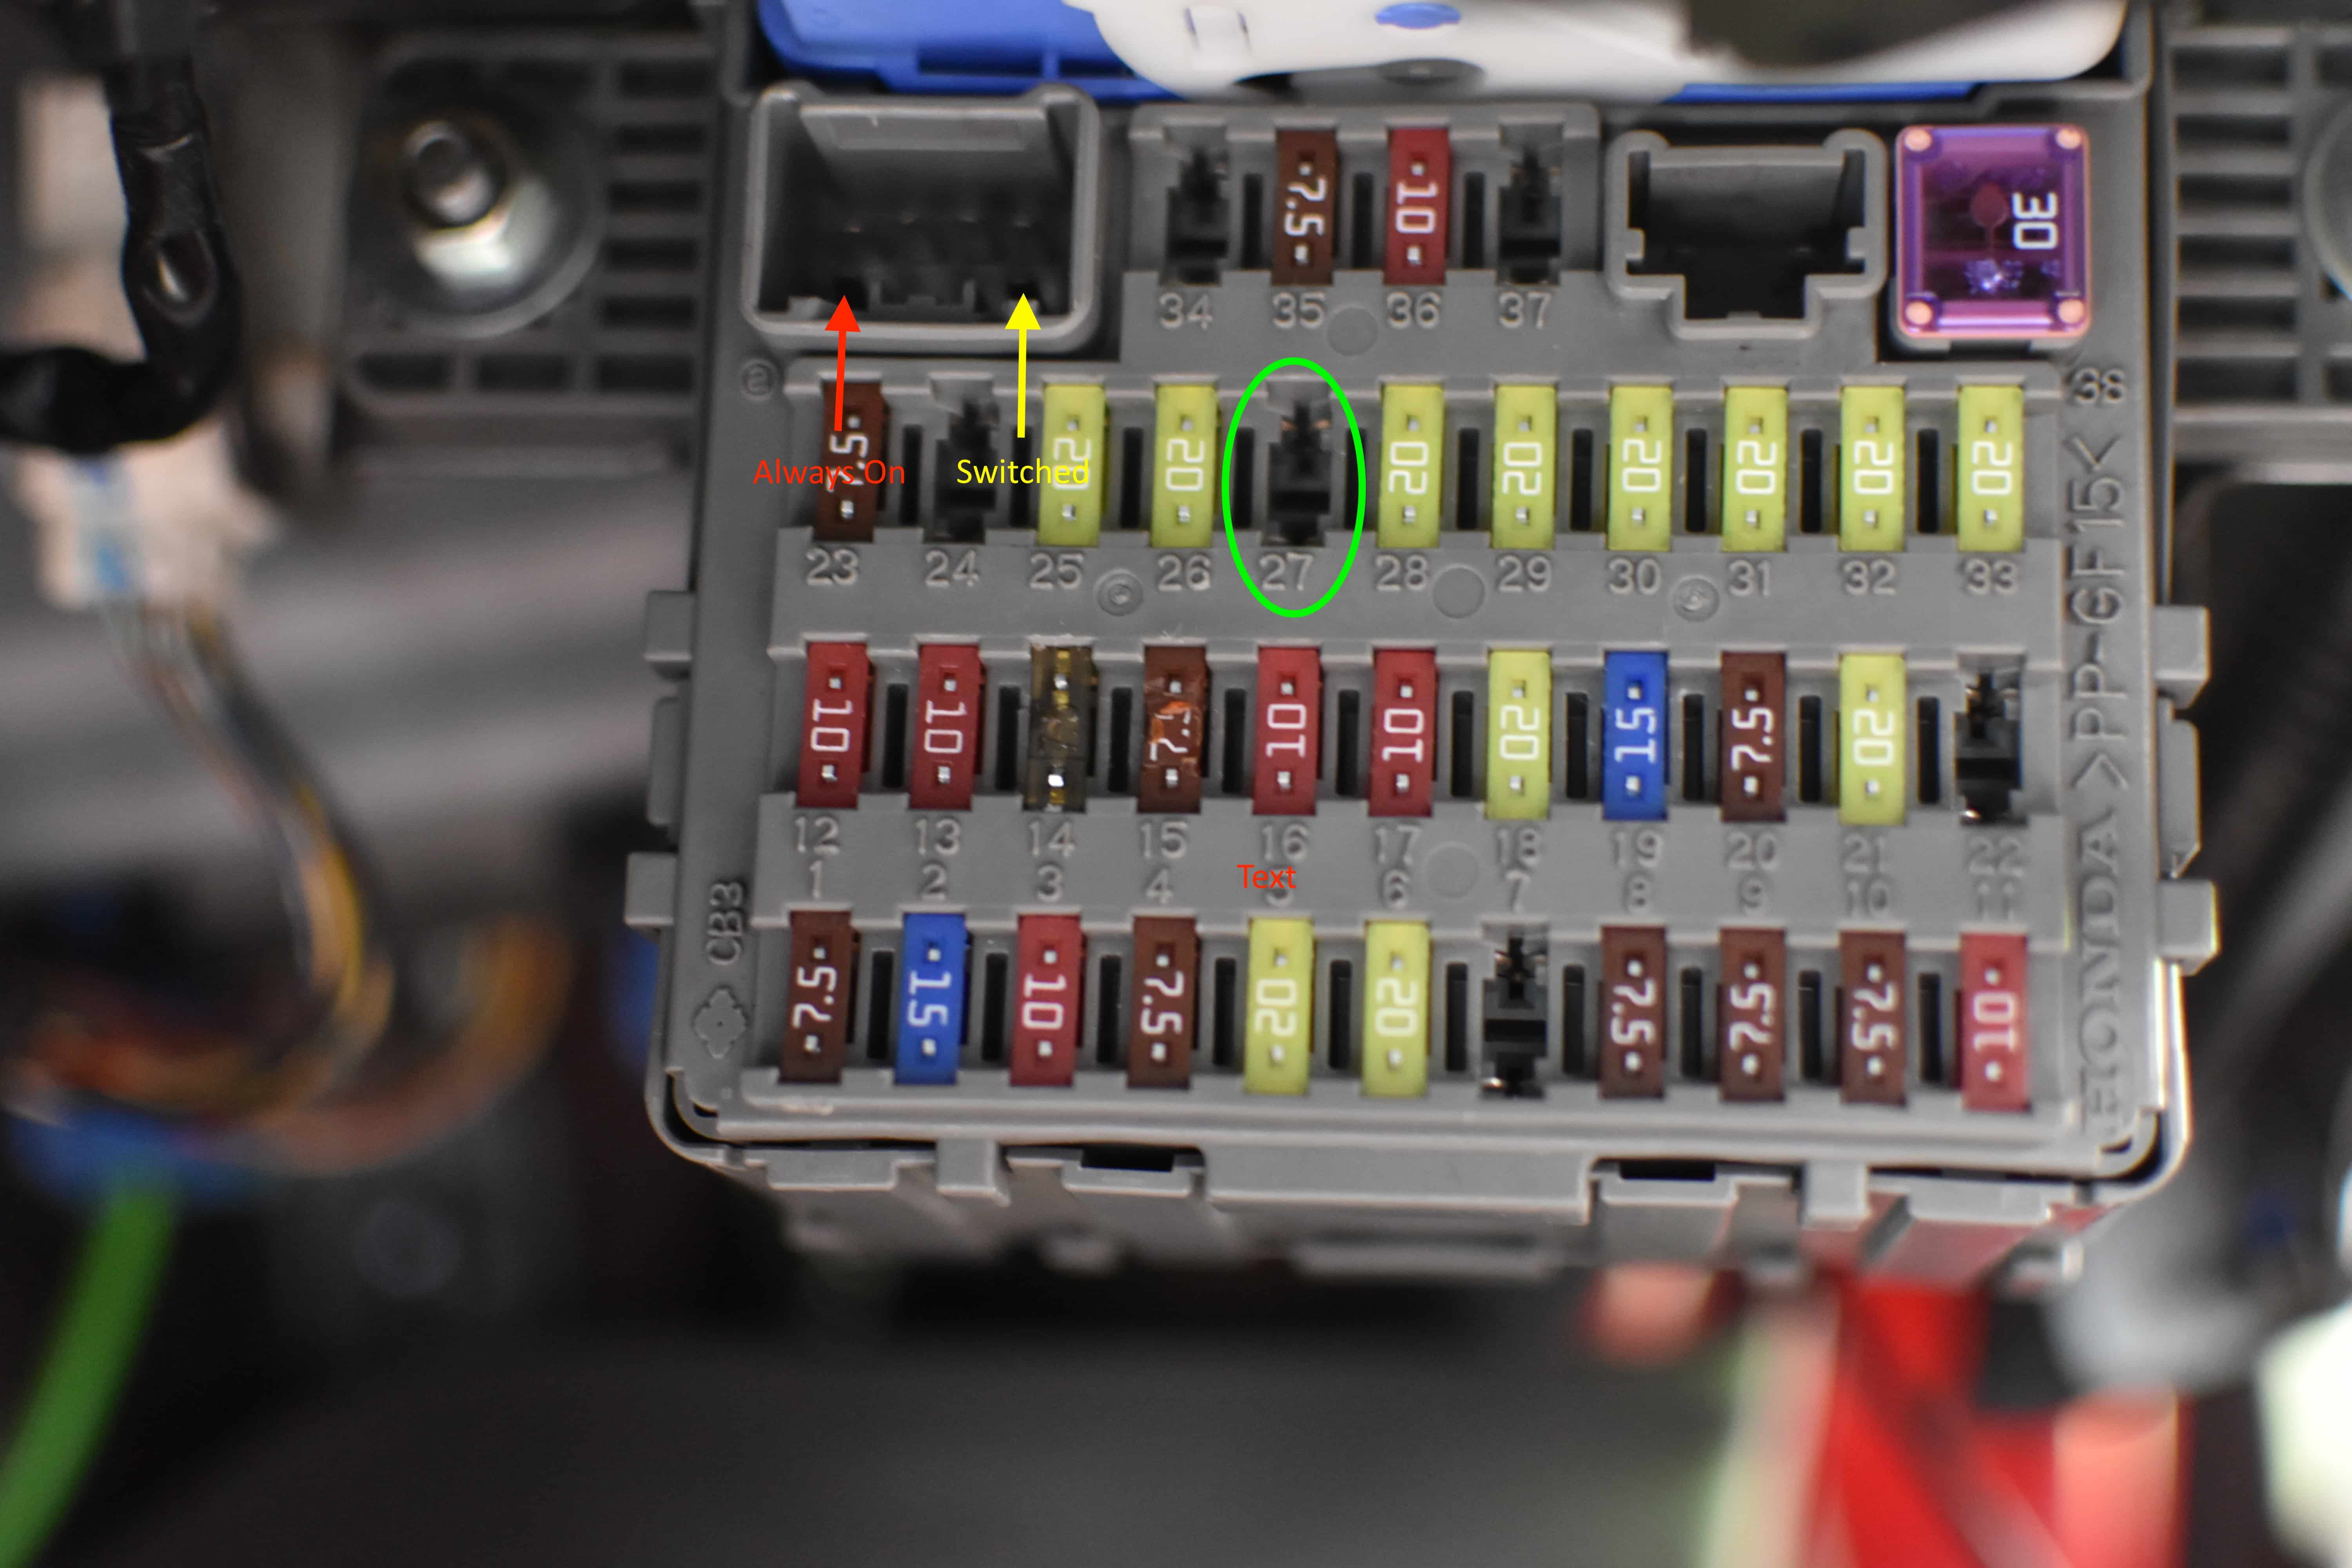
The upper left hand portion of the fuse box contains an unused slot with 8 pins. The lower right-hand pin is switched power and the lower left-hand pin is permanent power. You may need to squeeze your spade connectors with pliers to tighten up the connection as the pins are fairly small. Ensure that the connectors hold onto the pins tightly.
If your dash cam has a parking mode you may need to insert a fuse into slot 27, a 7.5A fuse should be enough.
Step 11
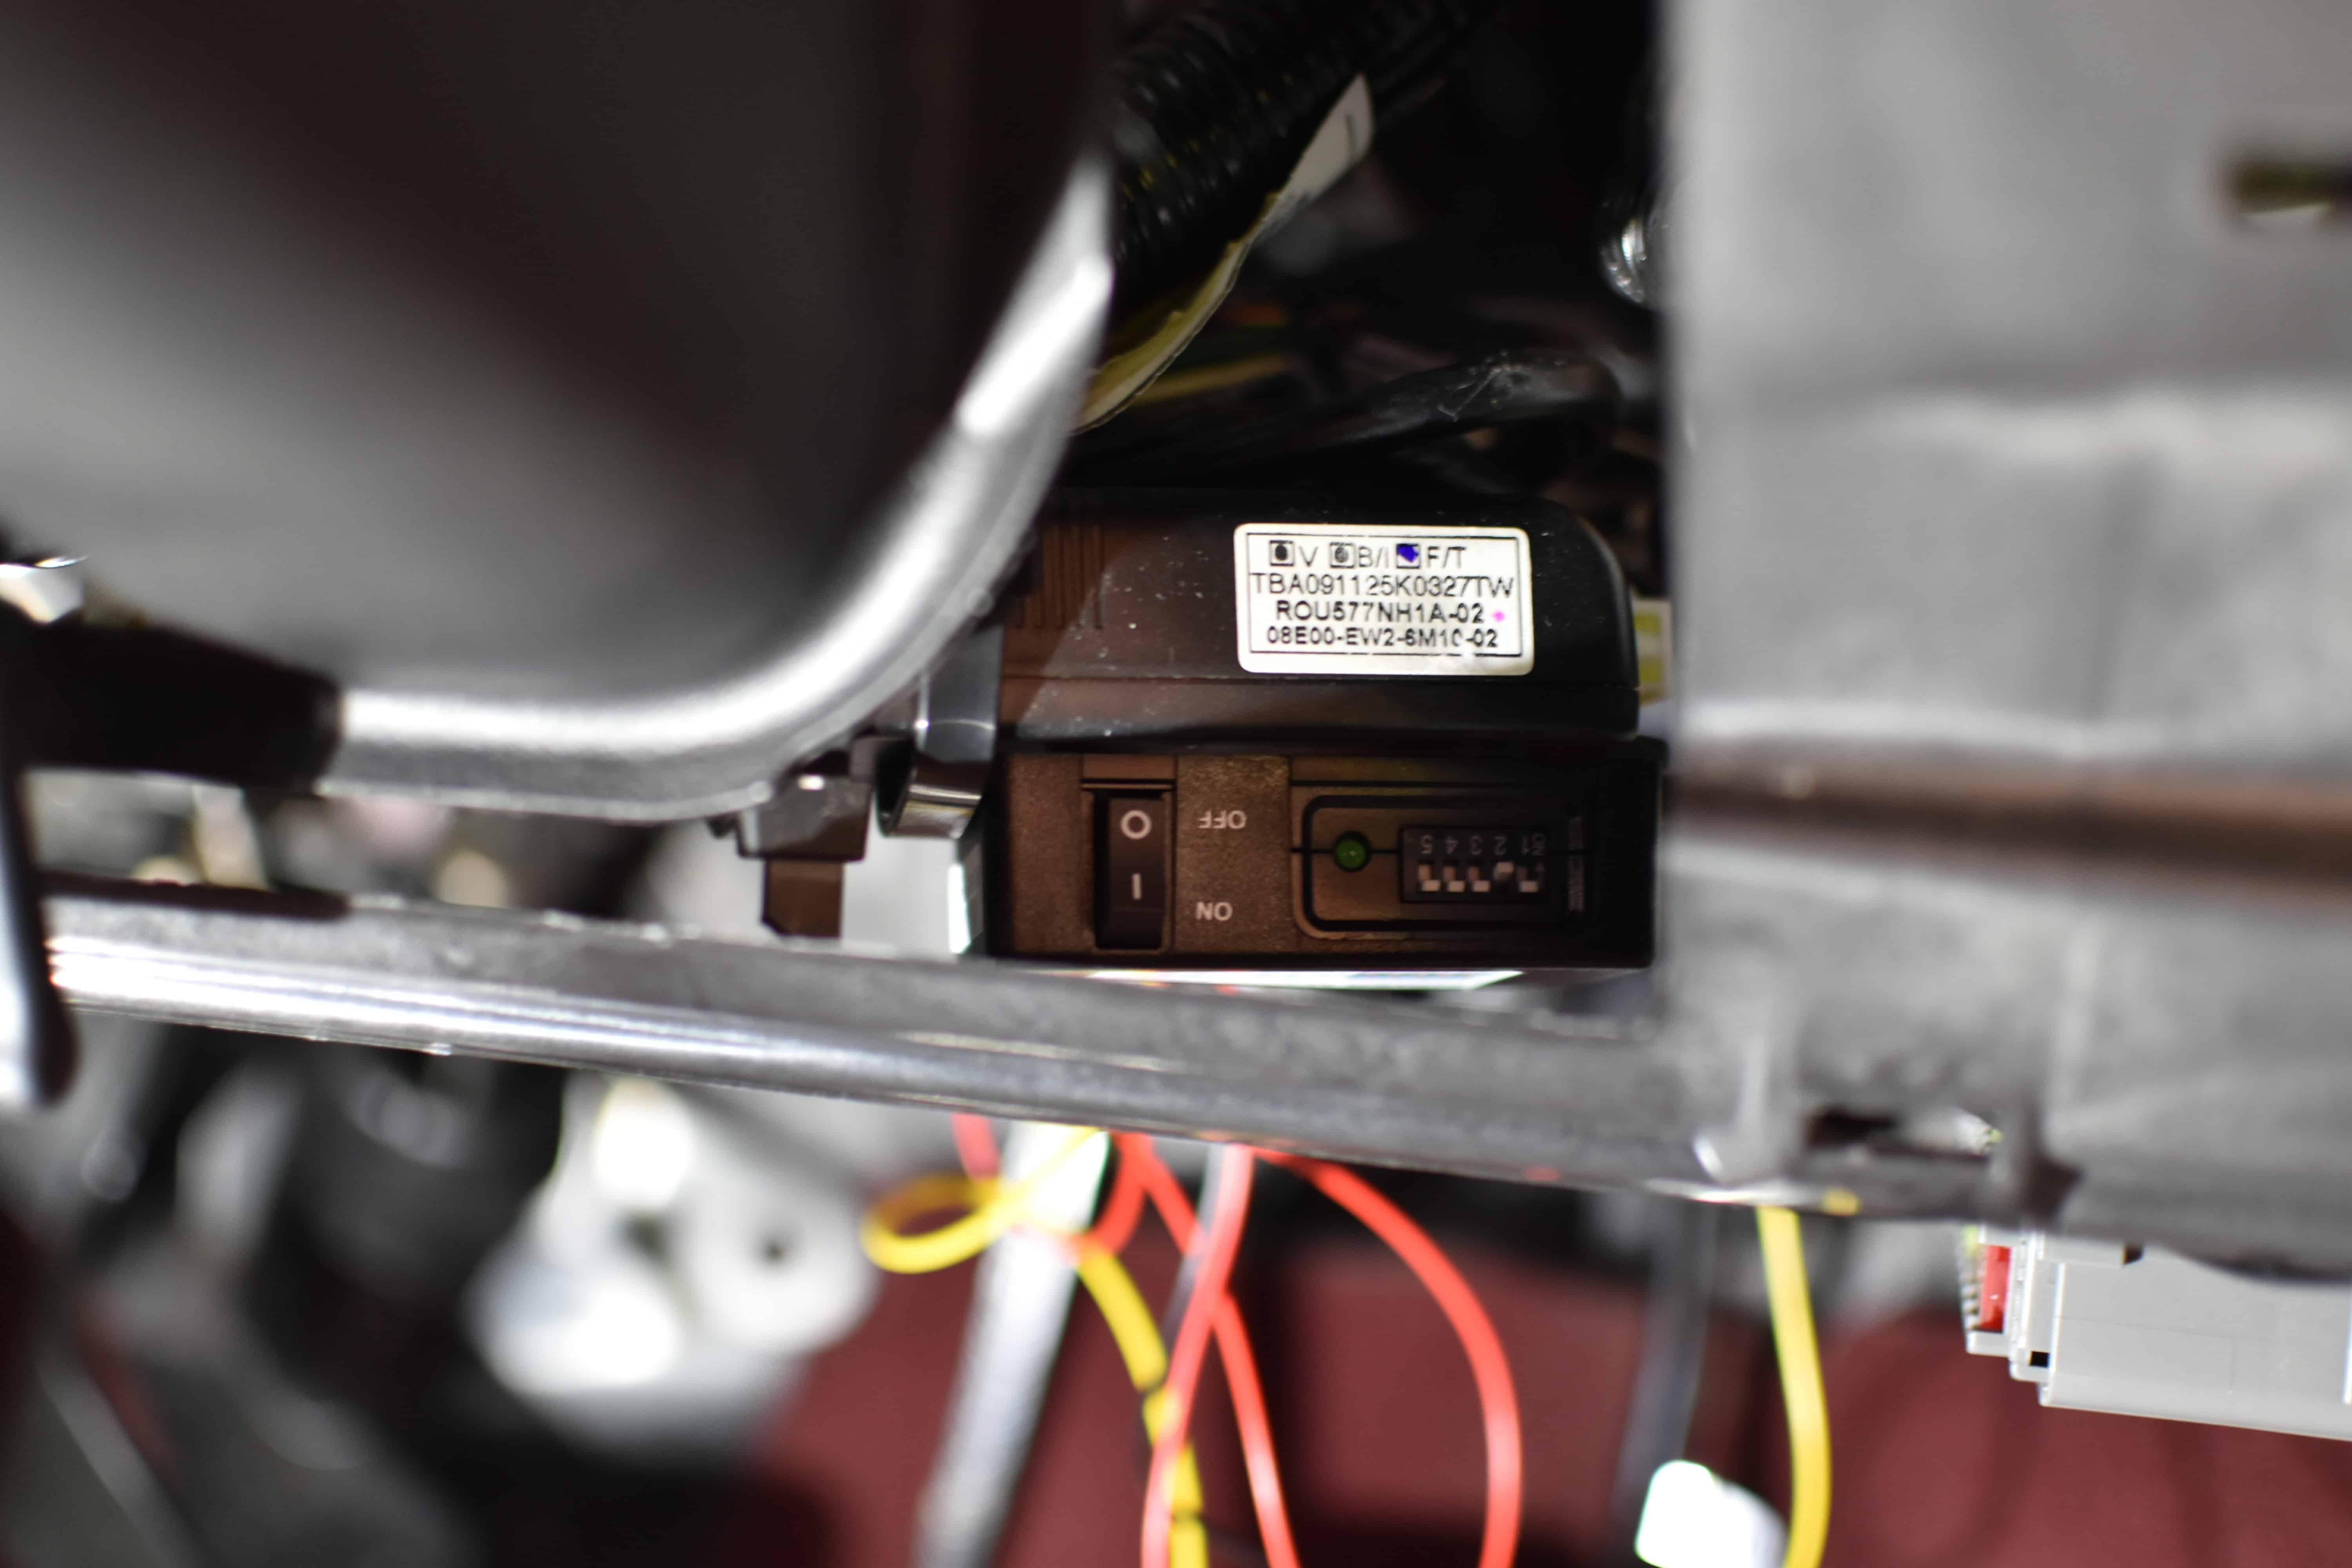
The Power Magic Pro (PMP) should sit somewhere it can be accessed in order to switch off parking mode if required. Using double-sided tape stick the PMP to a panel within the dashboard, ensuring that it will not interfere with the plastic panel we removed earlier.
Once connected to power, turn the car on and make sure that the dash cam is powering up. If the dash cam powers up with no issues then simply use cable ties to tuck excess wires away and ensure they do not drop into the footwell. Reinstall all panels that have been removed in reverse.
Did you find this guide helpful? Consider sharing it to help other car enthusiasts
Thanks for the feedback! Fusing is a good idea, the Blackvue camera I use in this guide has an inline fuse in its power cable. I believe the Blackvue cameras no longer come with this inline fuse so an alternative install method would be to buy a fuse tap and wire into one of the other empty slots.
That makes sense thanks for the reply, I’m going to add an inline fuse to the power cable of my camera in that case. Not sure about what rating it’ll need so guess I’ll mimic the cigarette lighter?


This Post Has 4 Comments
This is great guide but do you need to fit a fuse for the camera? The slot mentioned doesn’t seem to be fused?
Hi Josh,
Thanks for the feedback! Fusing is a good idea, the Blackvue camera I use in this guide has an inline fuse in its power cable. I believe the Blackvue cameras no longer come with this inline fuse so an alternative install method would be to buy a fuse tap and wire into one of the other empty slots.
That makes sense thanks for the reply, I’m going to add an inline fuse to the power cable of my camera in that case. Not sure about what rating it’ll need so guess I’ll mimic the cigarette lighter?
Hey Josh, 2.5 or 5.0 Amp is usually the best choice!