The FN Civic gives the driver multiple settings to access and change within the car’s Multi-Information Display located within the tachometer, this guide will show you how to navigate through the menu system and explain what each setting does.
Difficulty Rating
Easy
Tools/Parts Required
None
Step 1
Insert your key into the ignition and turn to Position II. The engine does not need to be started for this process.
Step 2
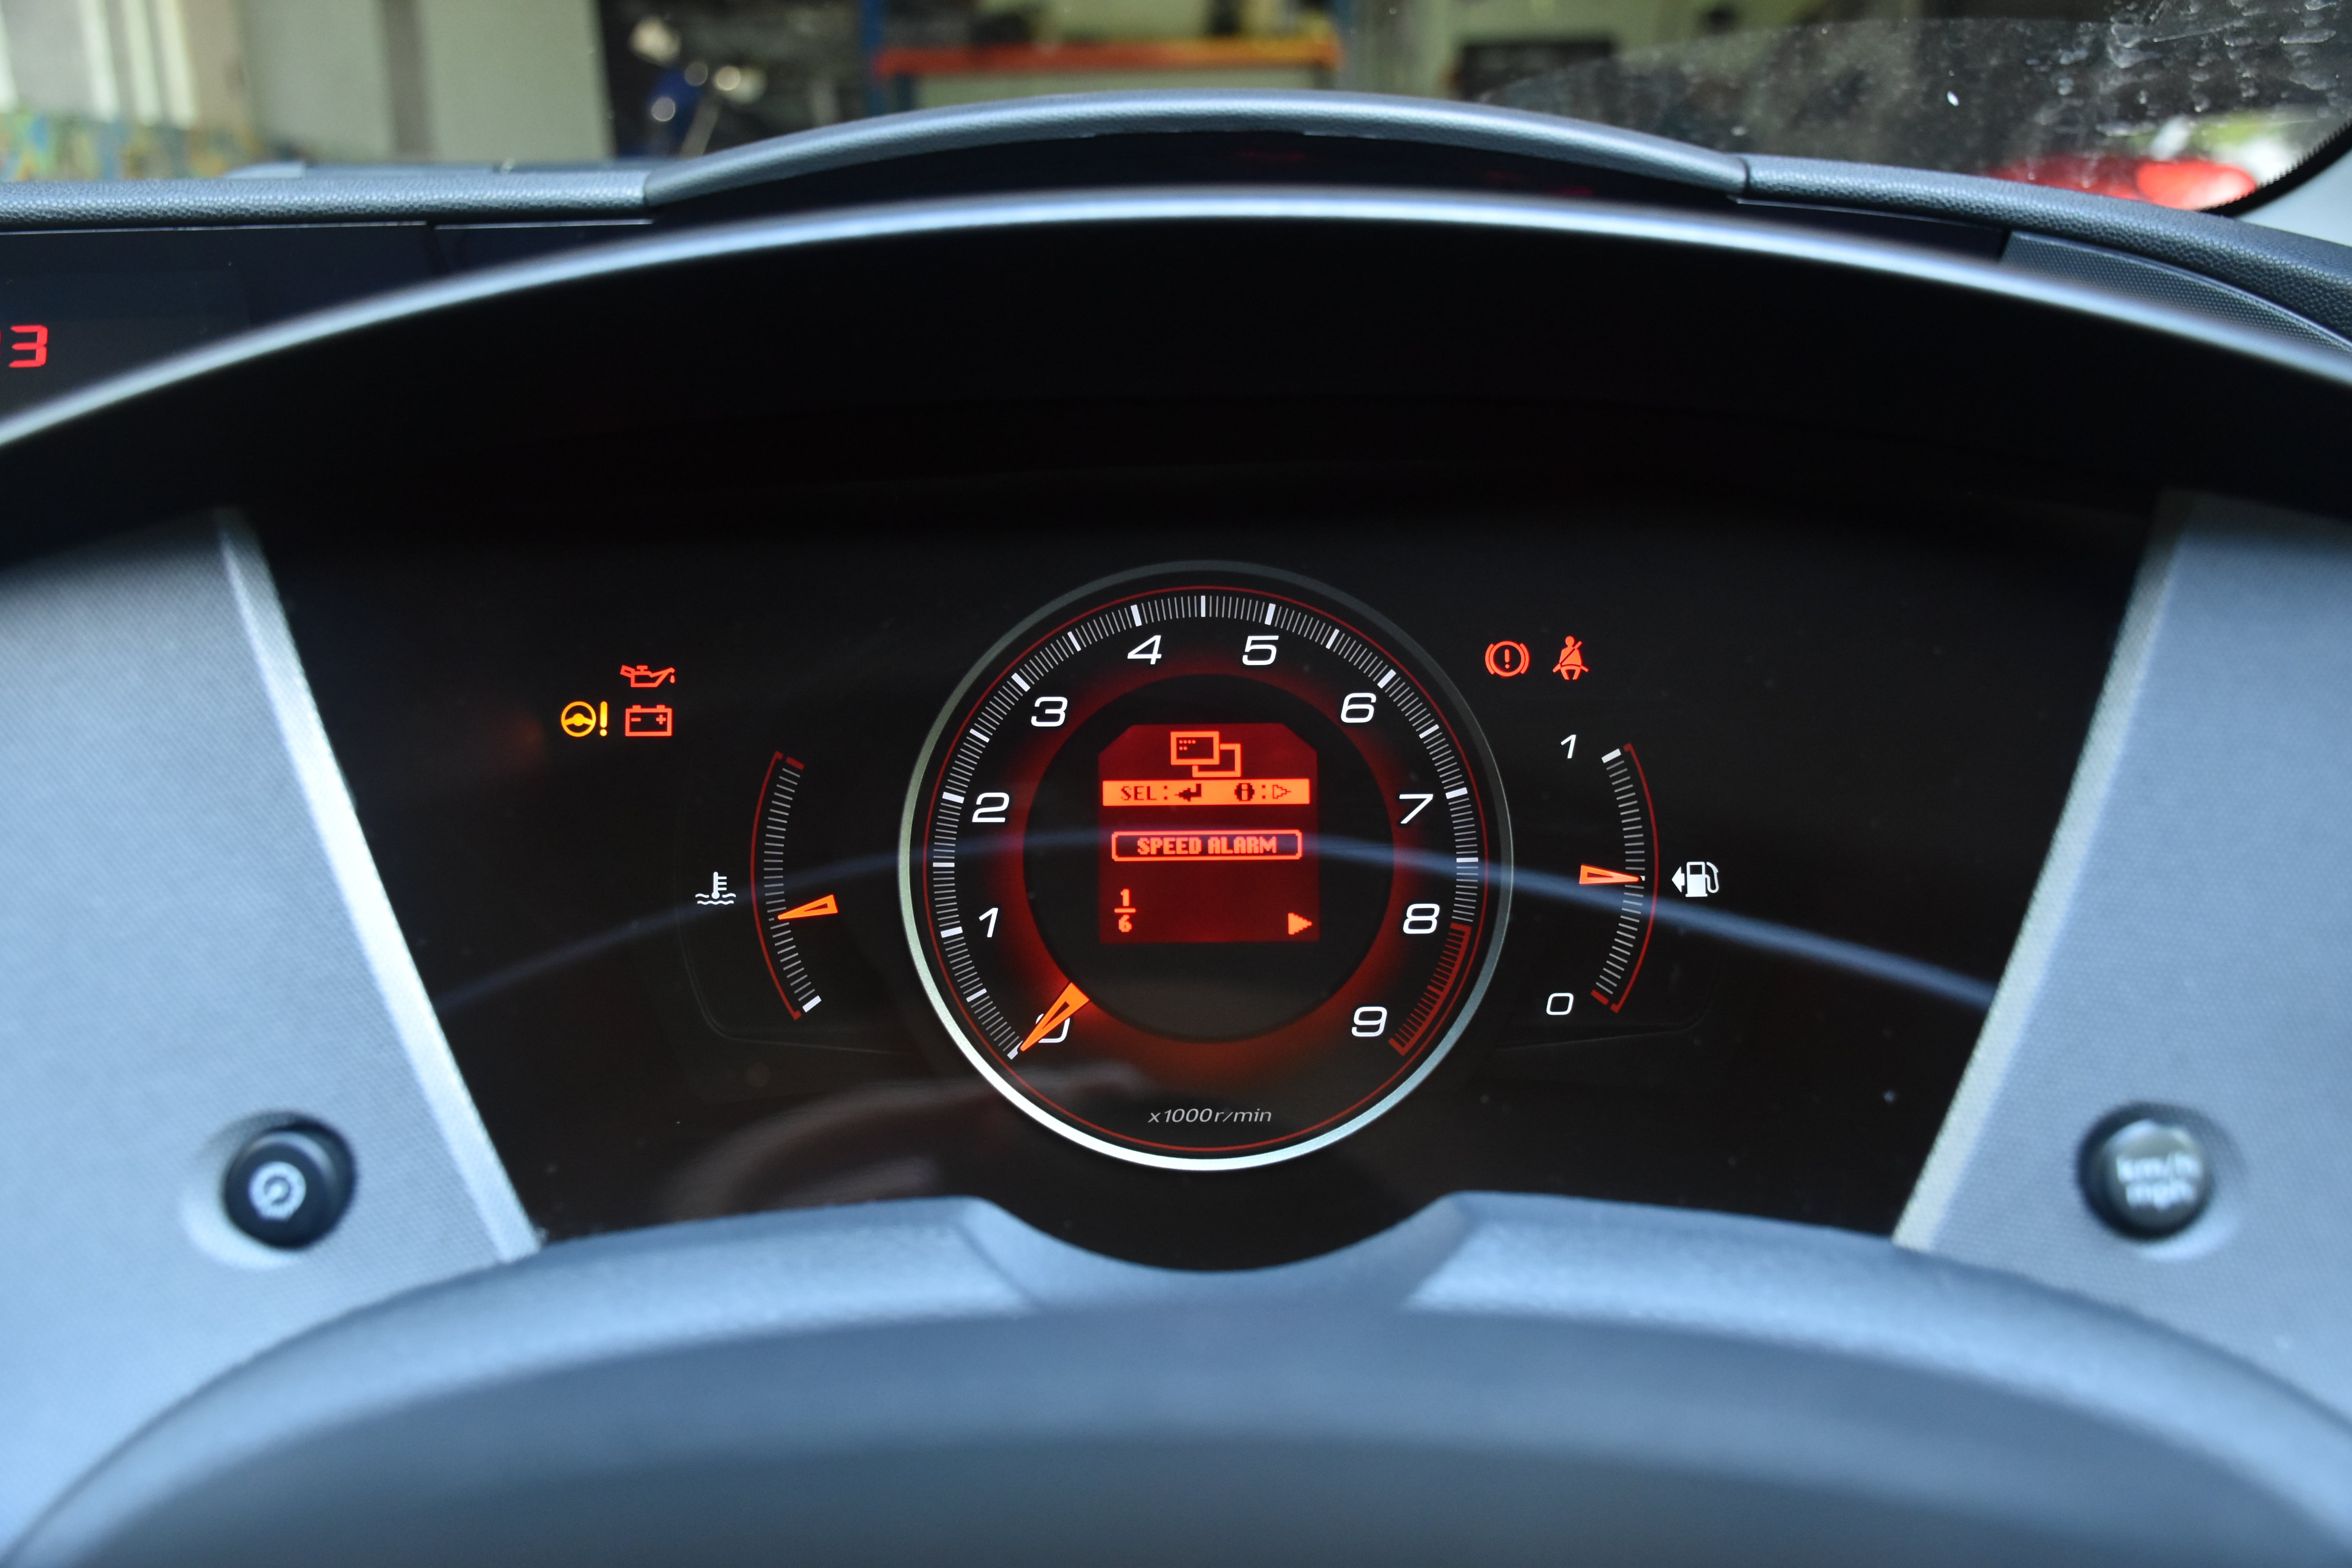
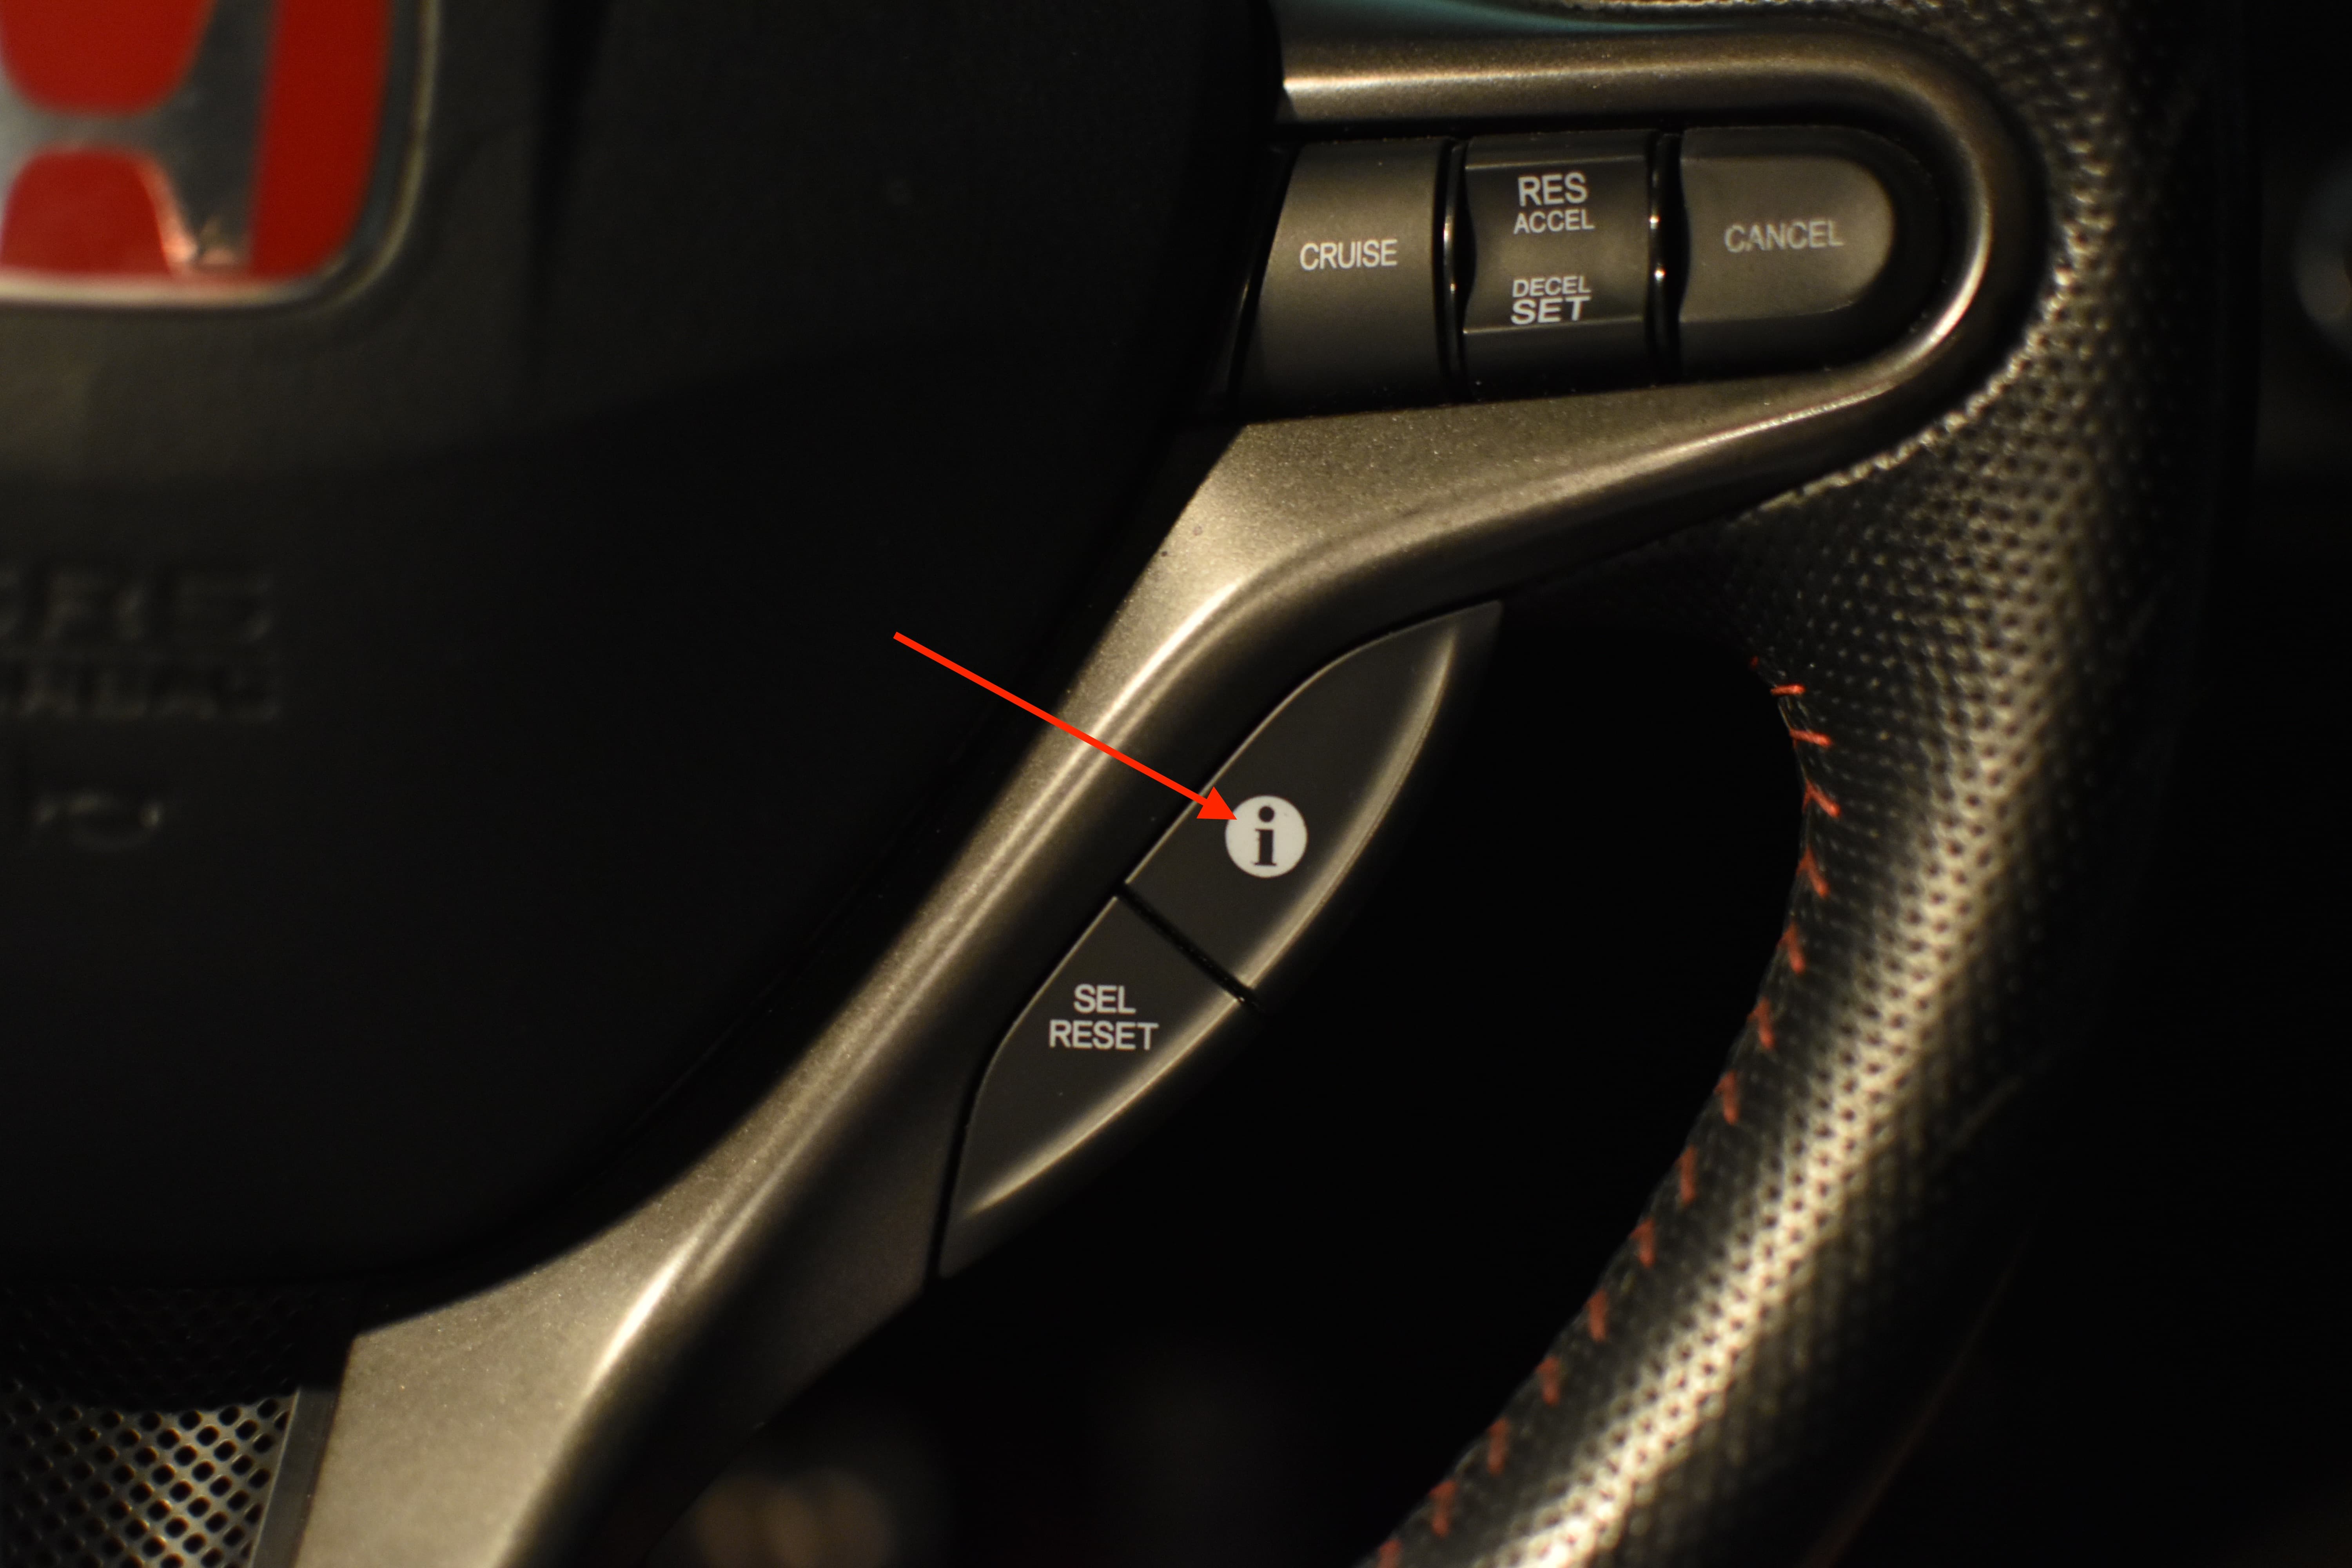
With the vehicle stationary and the handbrake on, hold down the ‘i’ button on the steering wheel for a few seconds. The Multi-Information Display will bring up a menu screen showing “Speed Alarm”, indicating you have entered the menu system.
Step 3
You are now in the main menu, pressing the ‘i’ button will scroll through the options and pressing the ‘Sel Reset’ button will select that option.The menu is structured as follows:
Speed Alarm
Tyre Pressure Monitor Reset
Change Settings
Warning Message
Adjust Outside Temperature Display
Trip A Reset with Refuel
Elapsed Time Reset
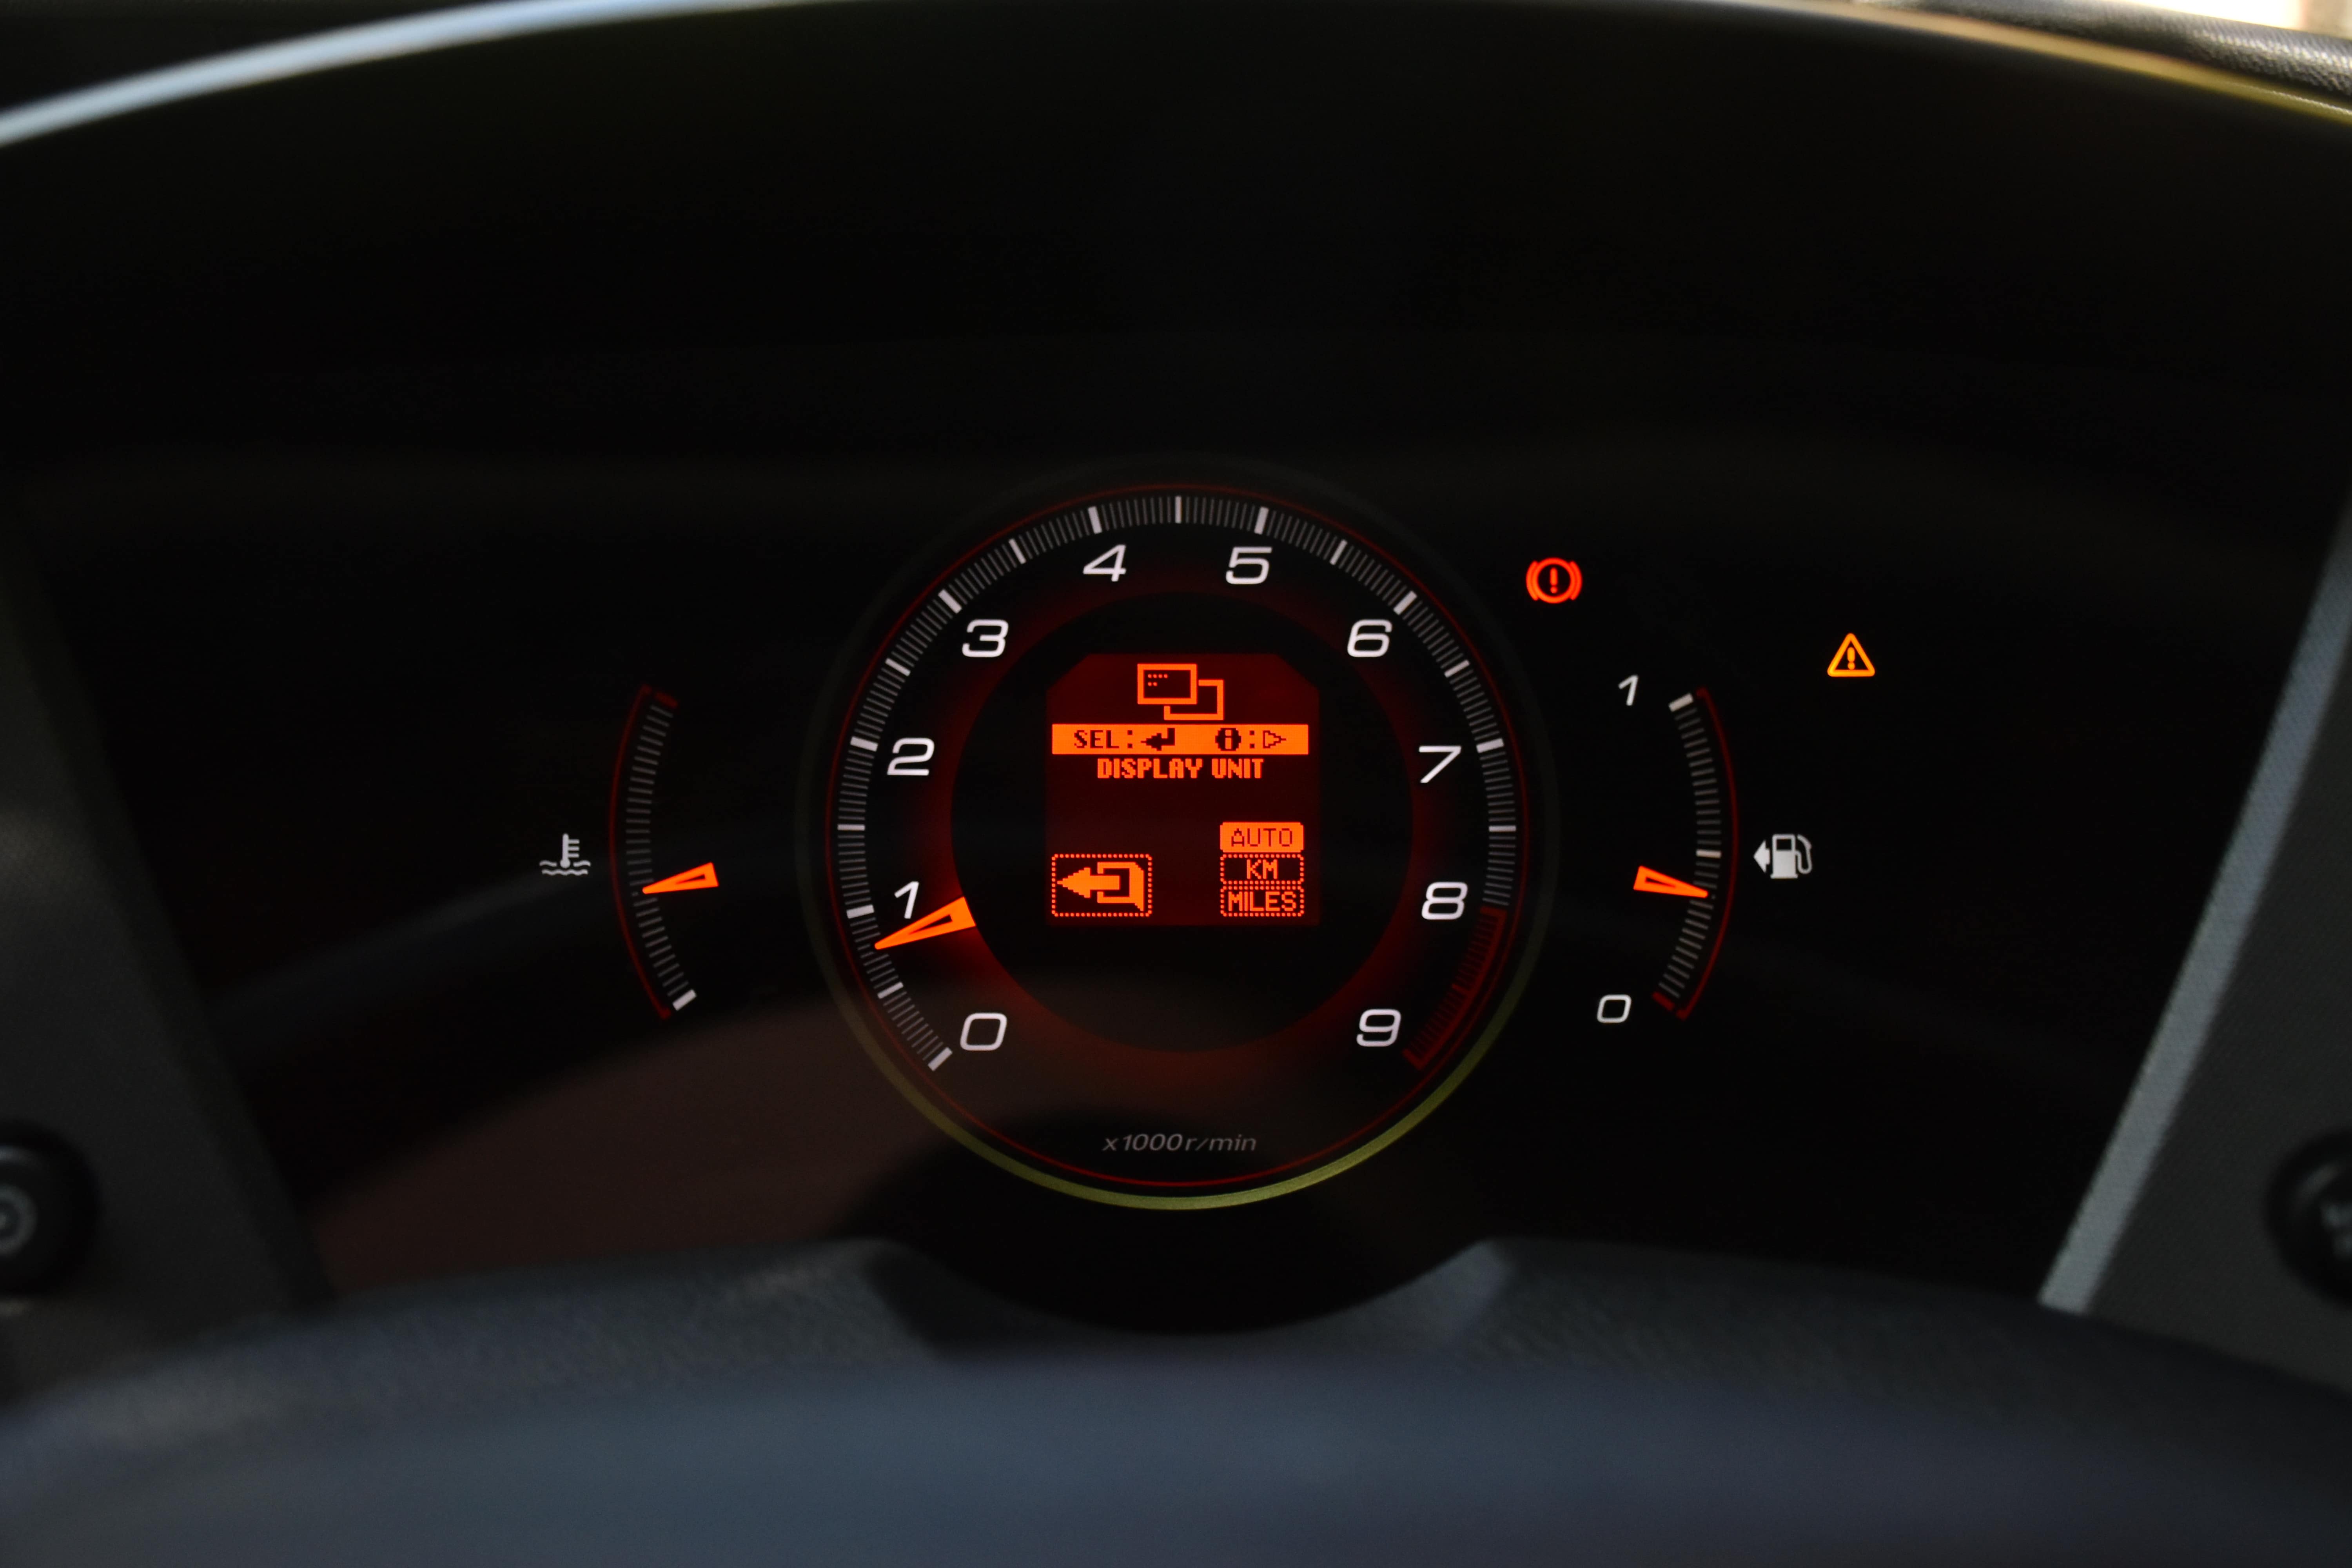
Display Unit
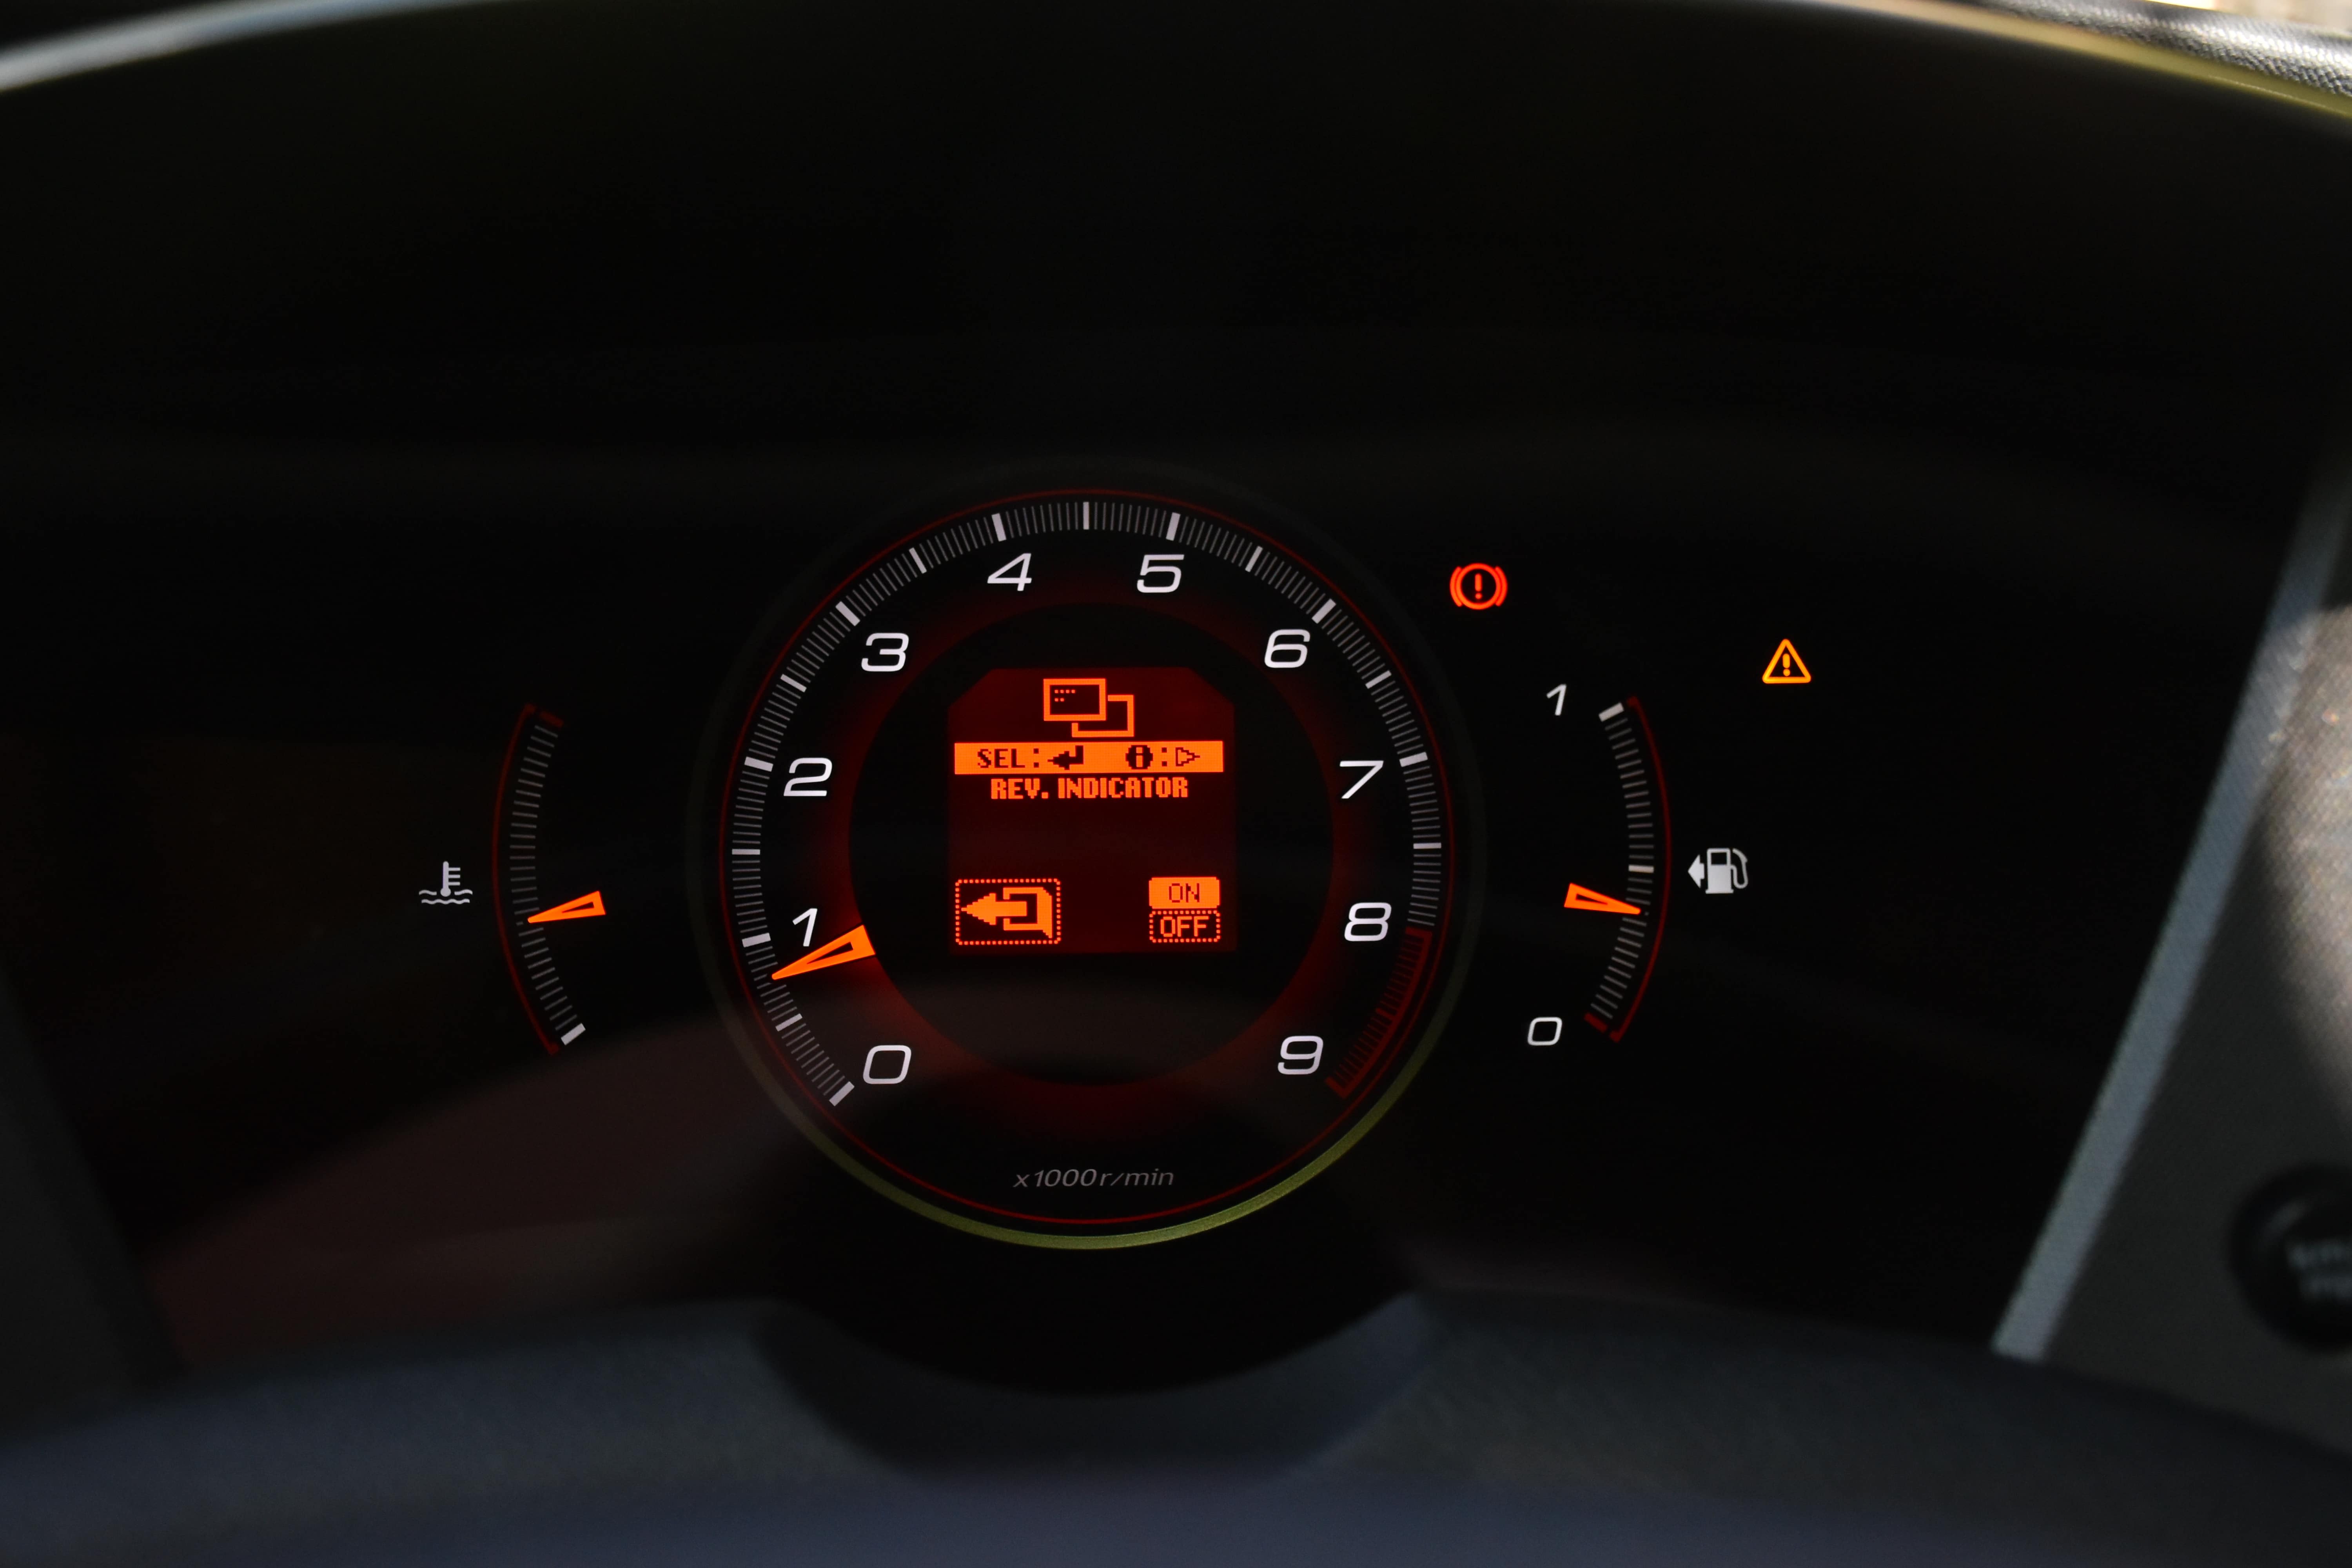
Rev Indicator
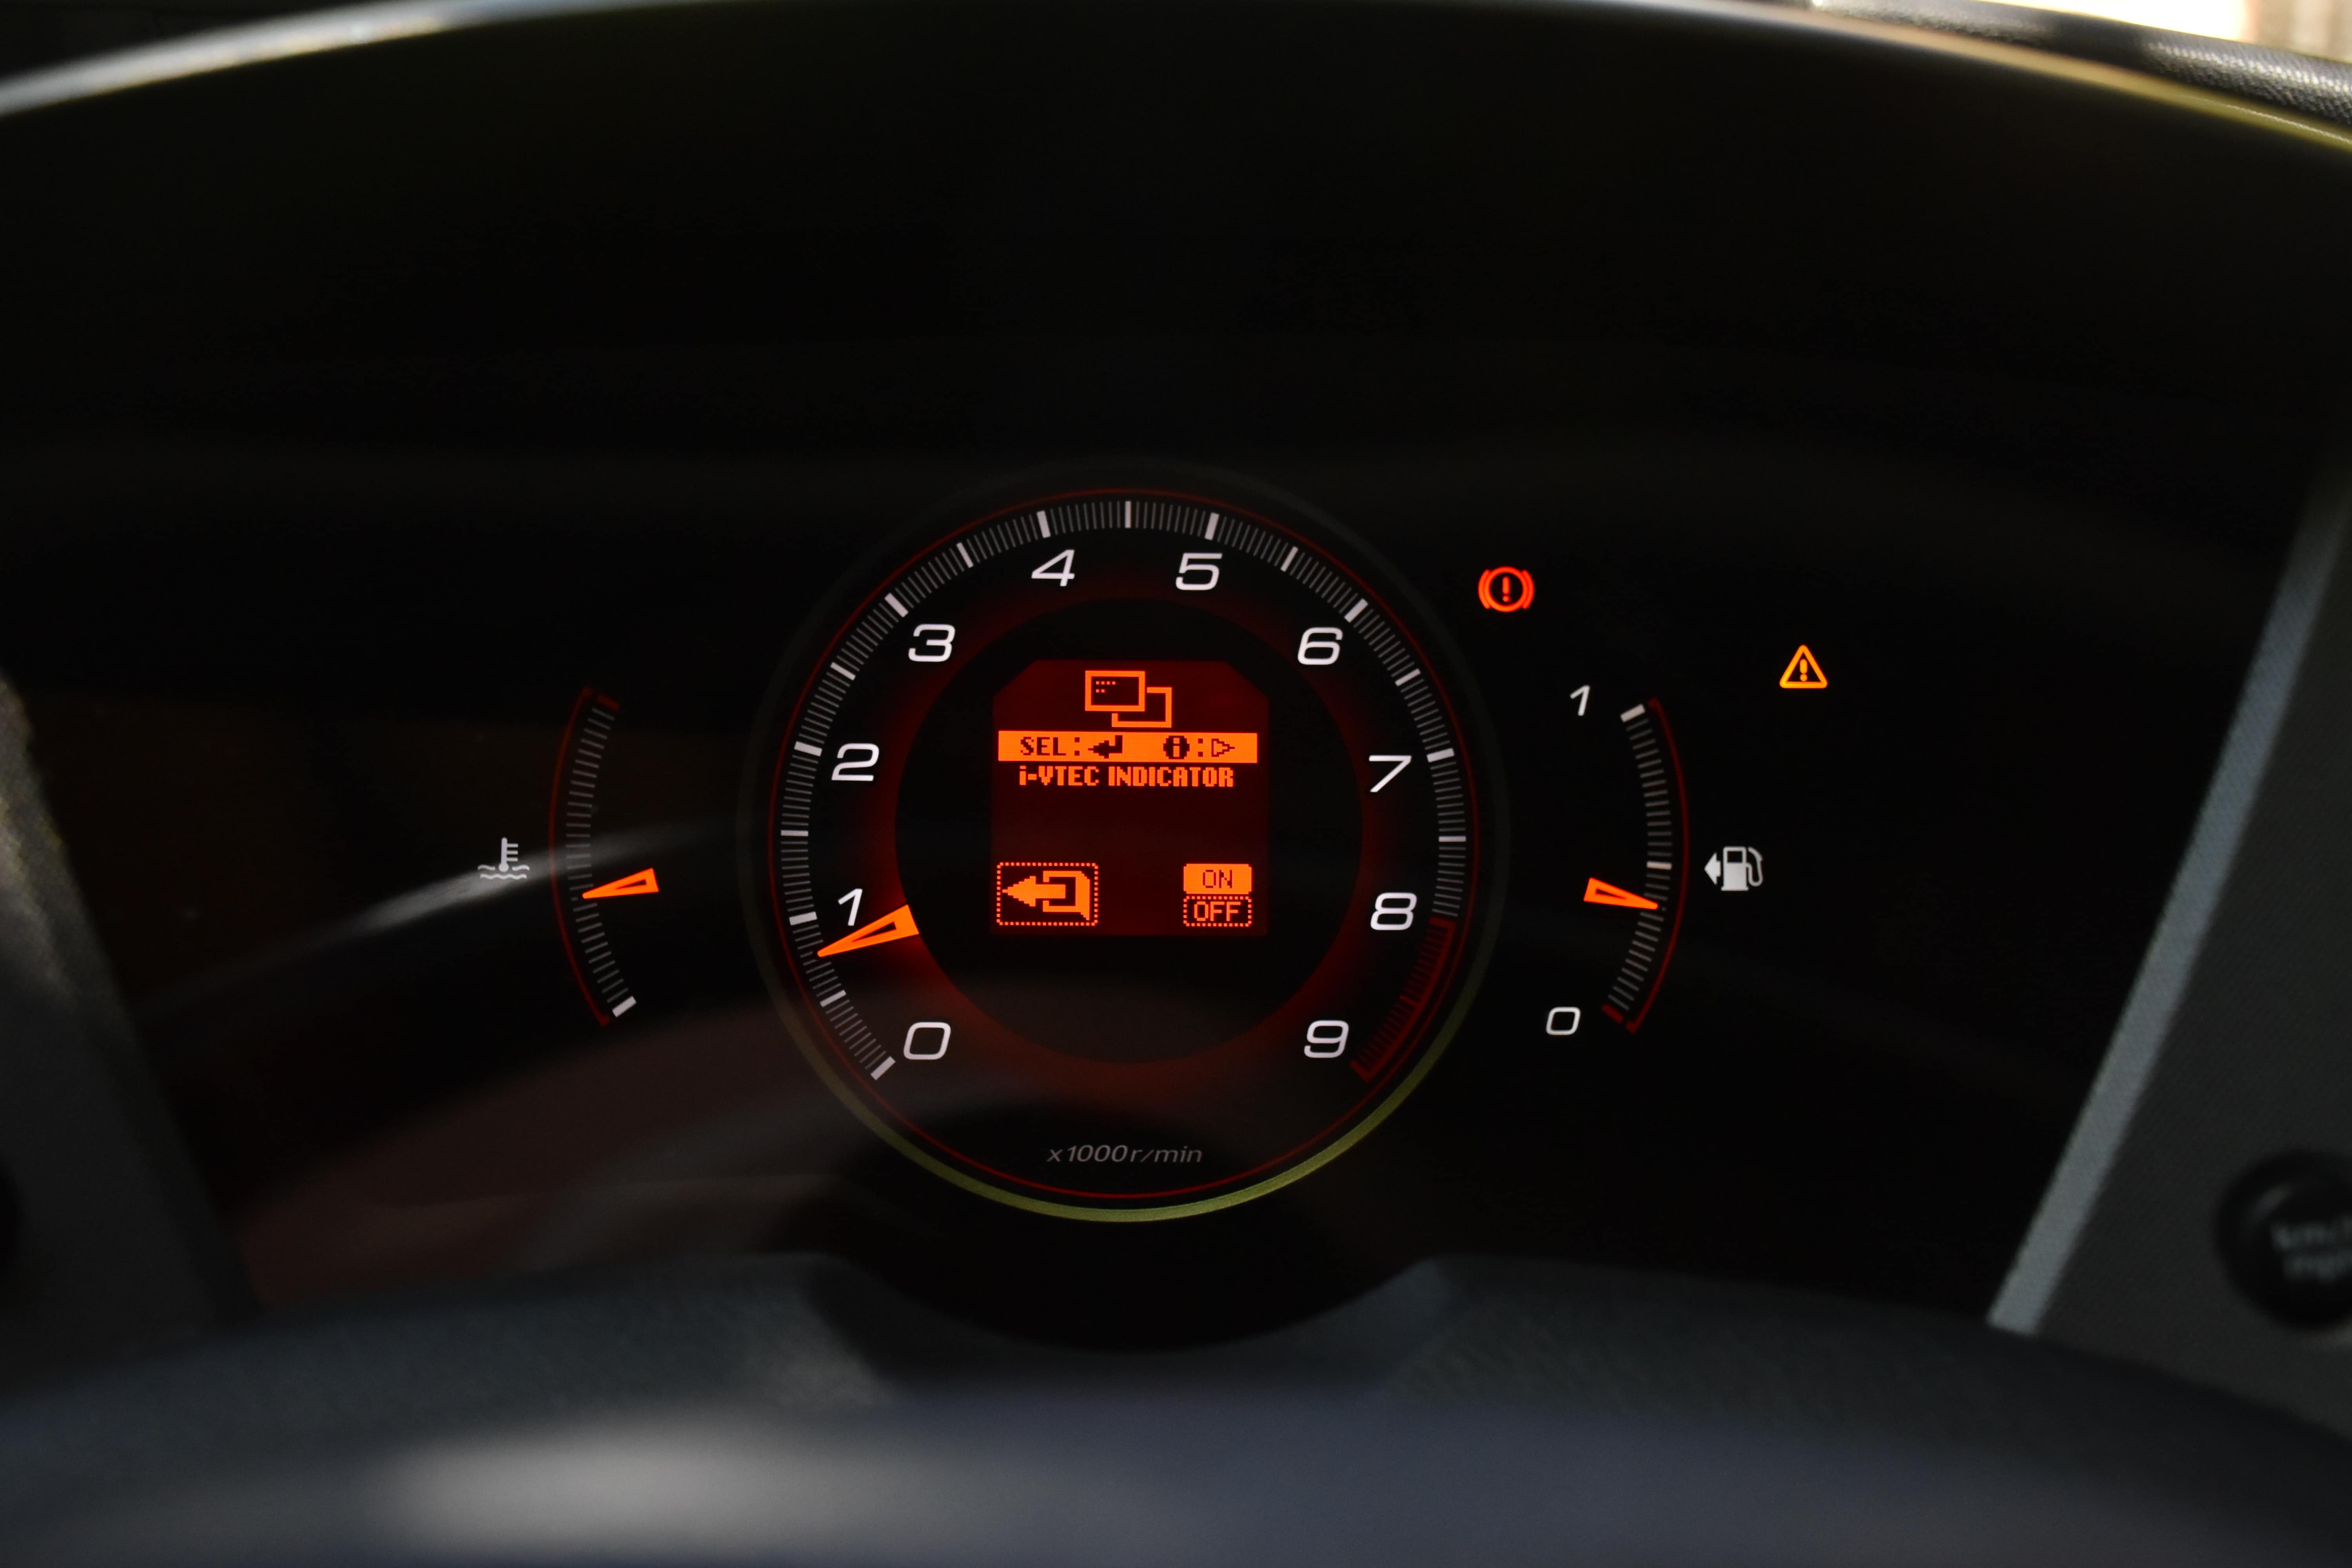
i-VTEC Indicator
Return
Default All
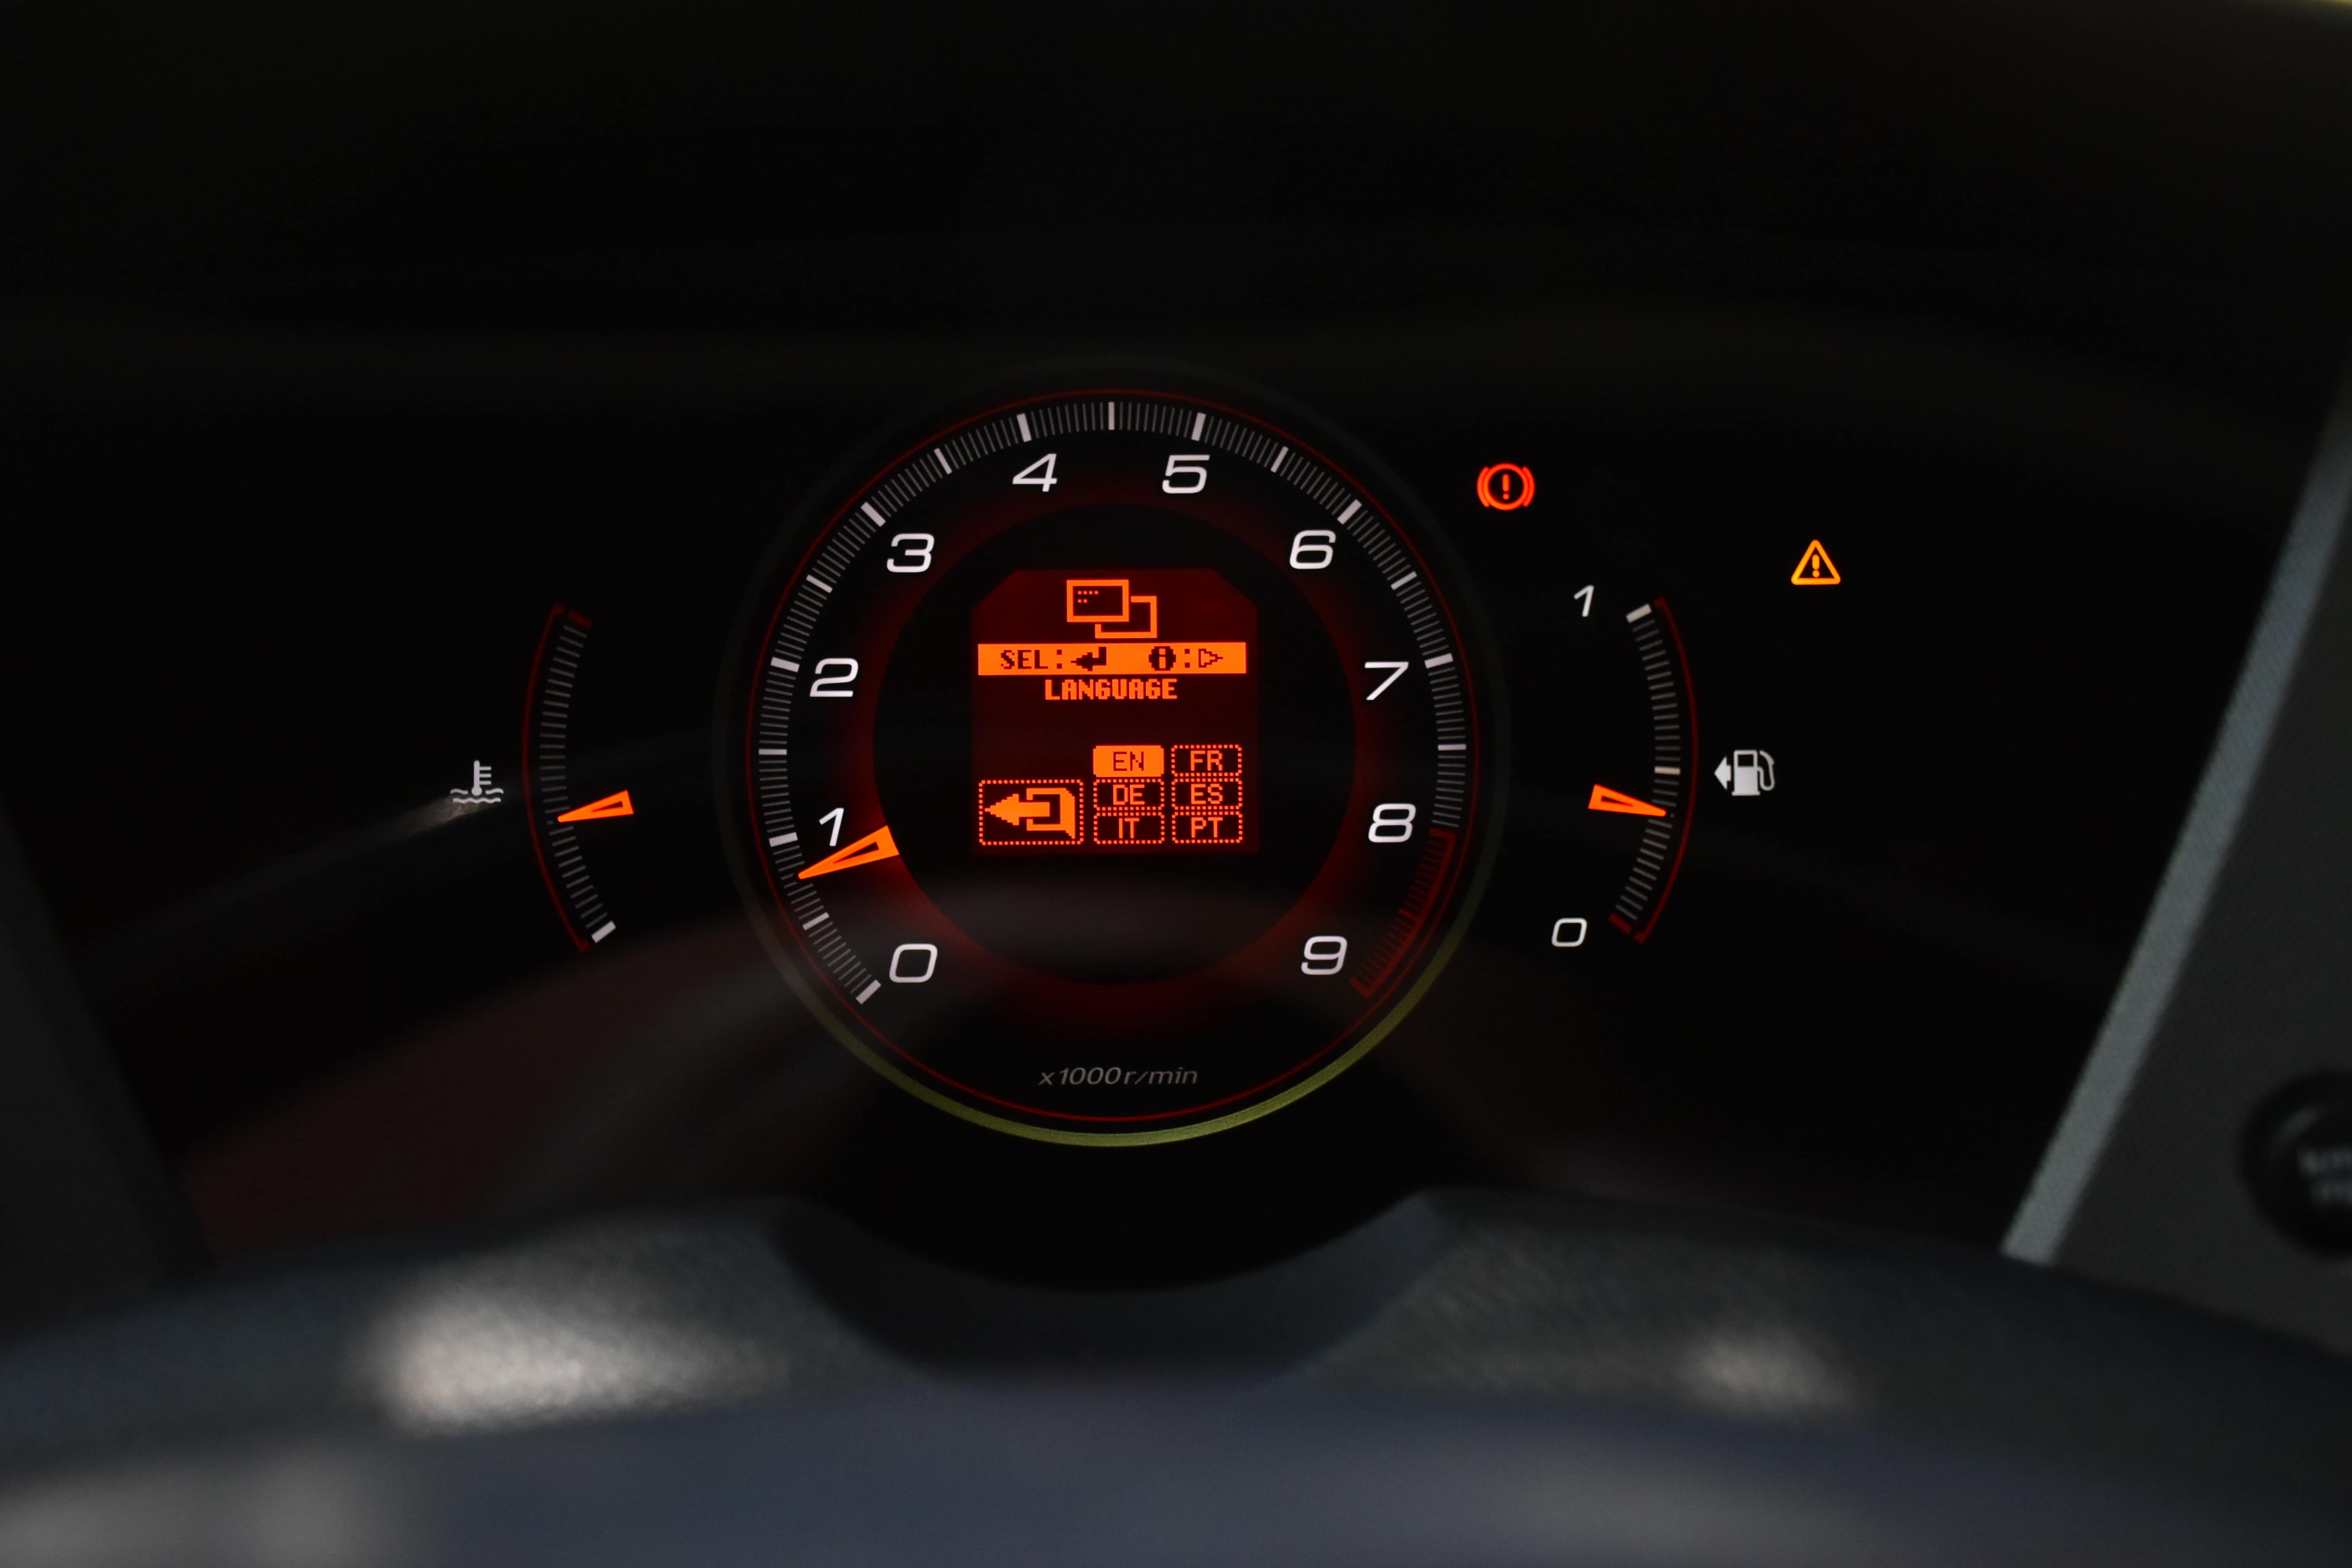
Language
Return
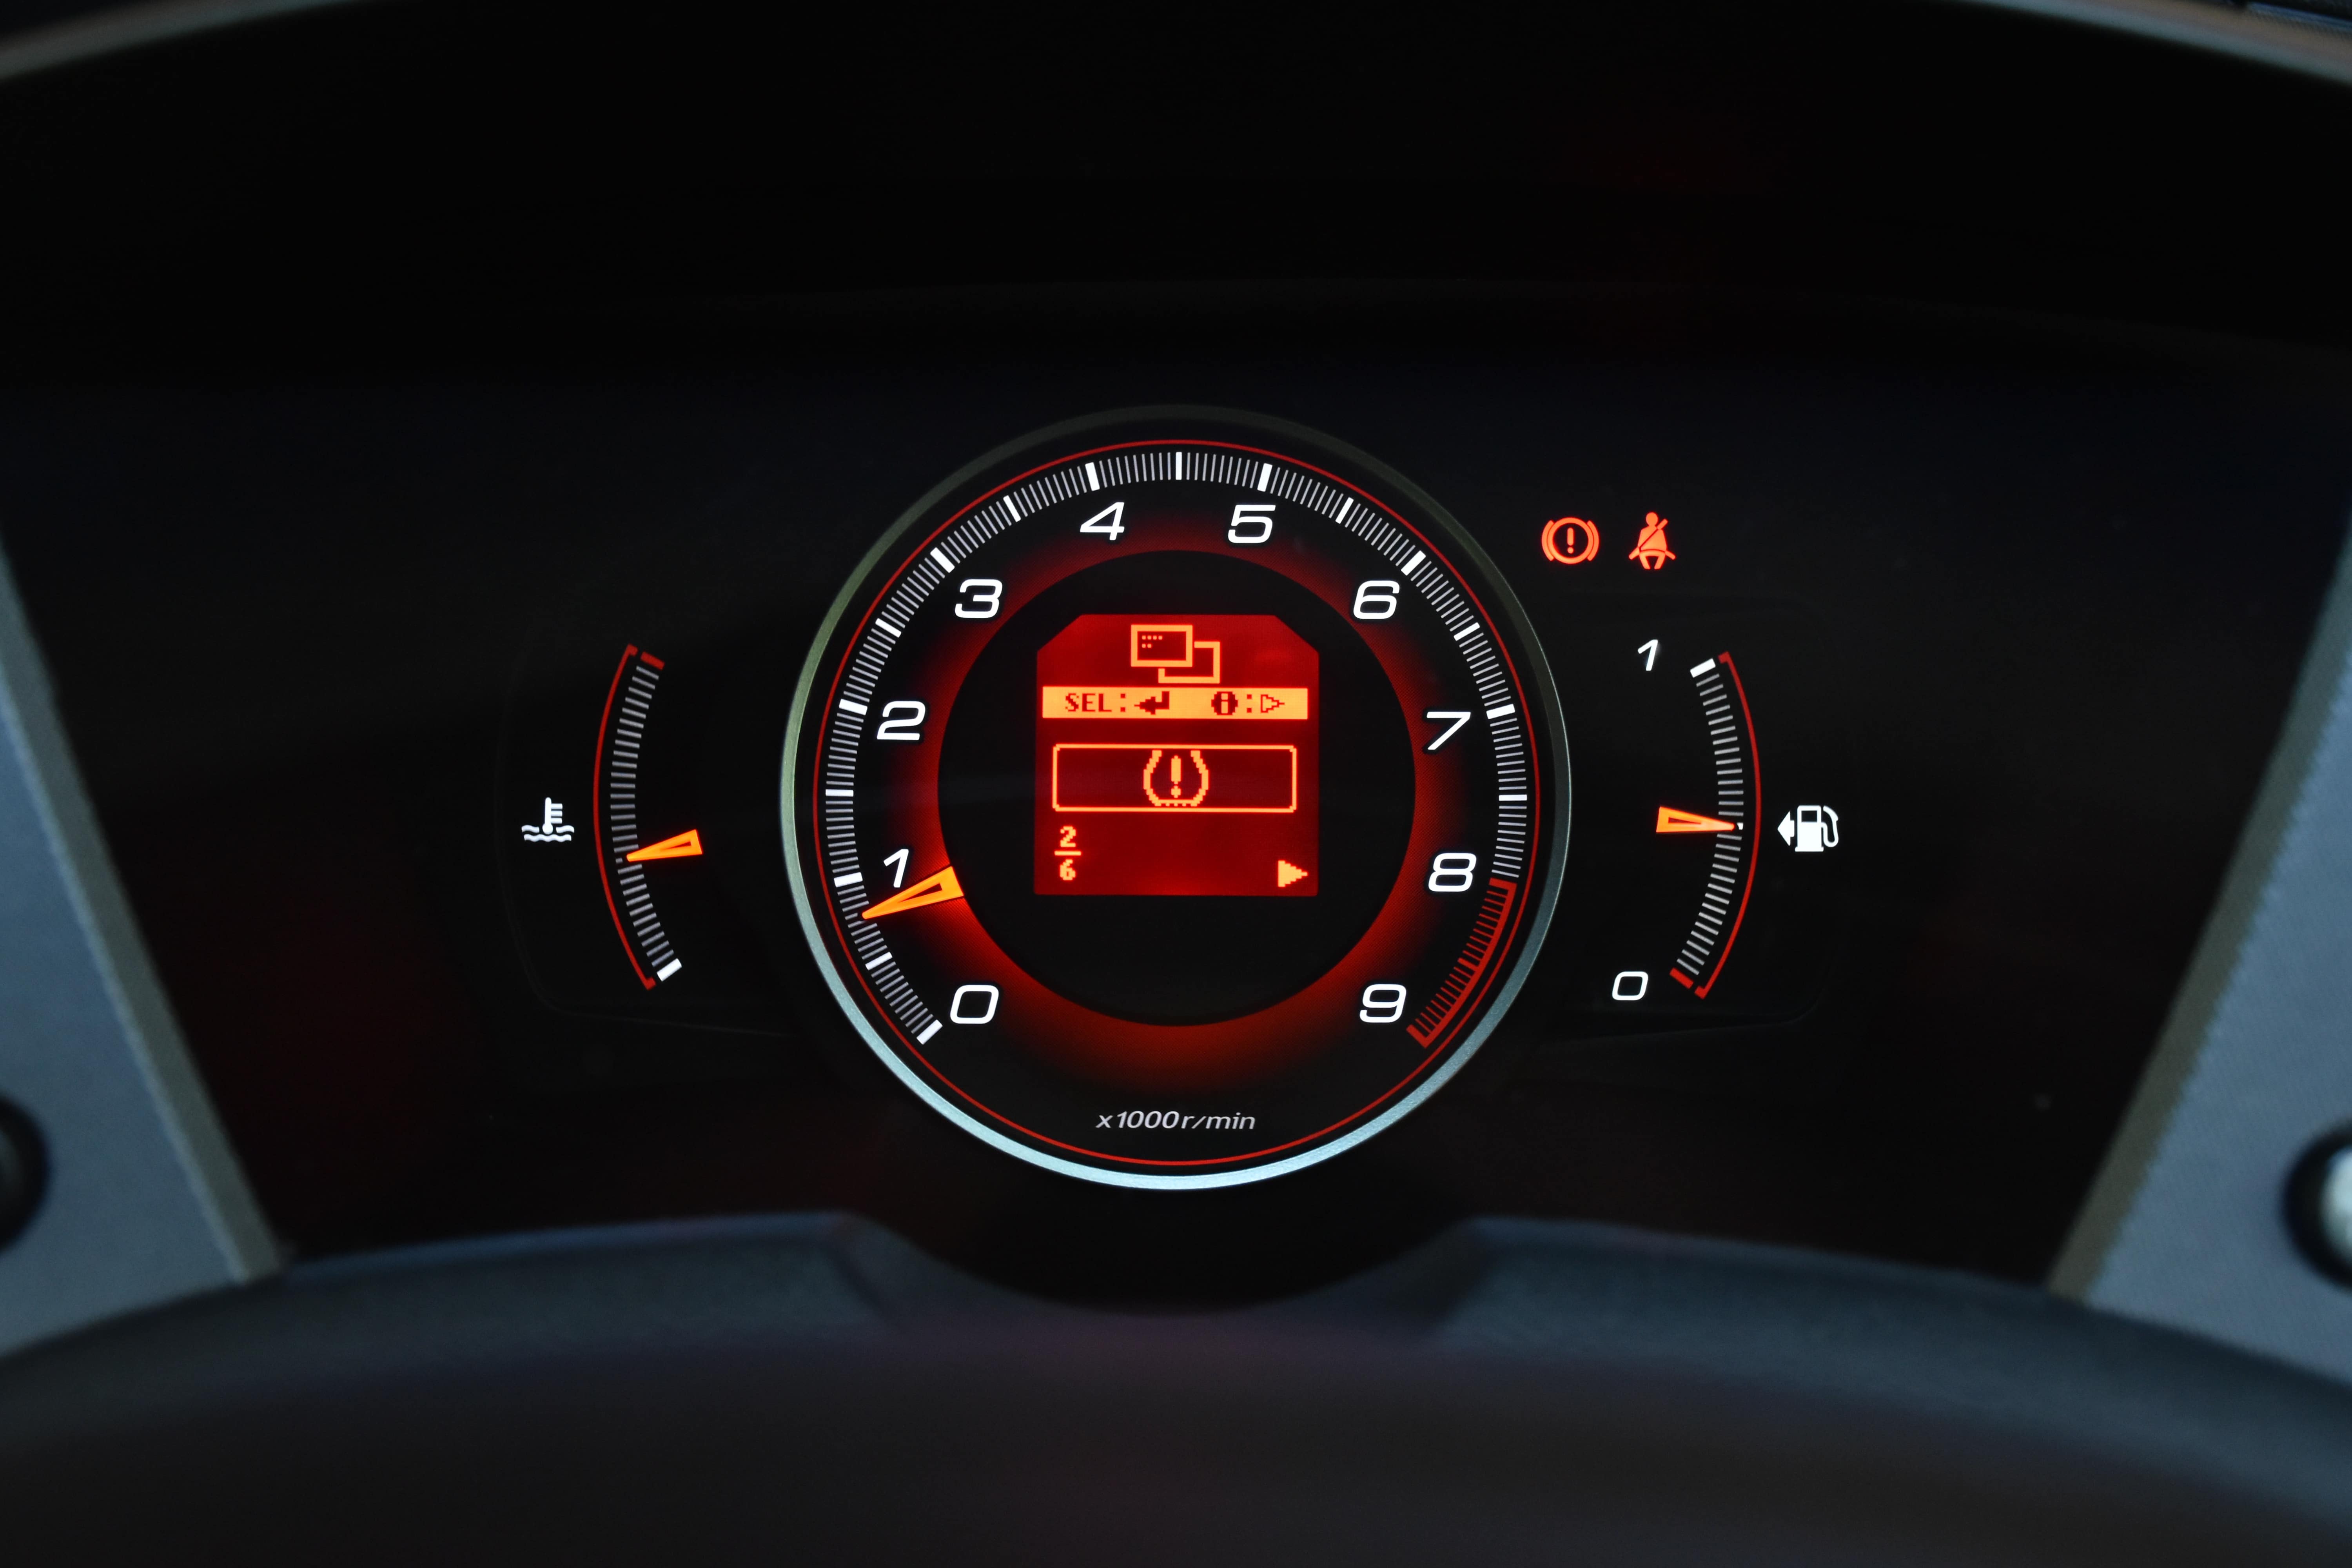
In the bottom left of the display it will show you which option you are viewing within the current menu system, for example, it will say “2/6” when viewing the “Tyre Pressure Monitor Reset” option.
Step 4
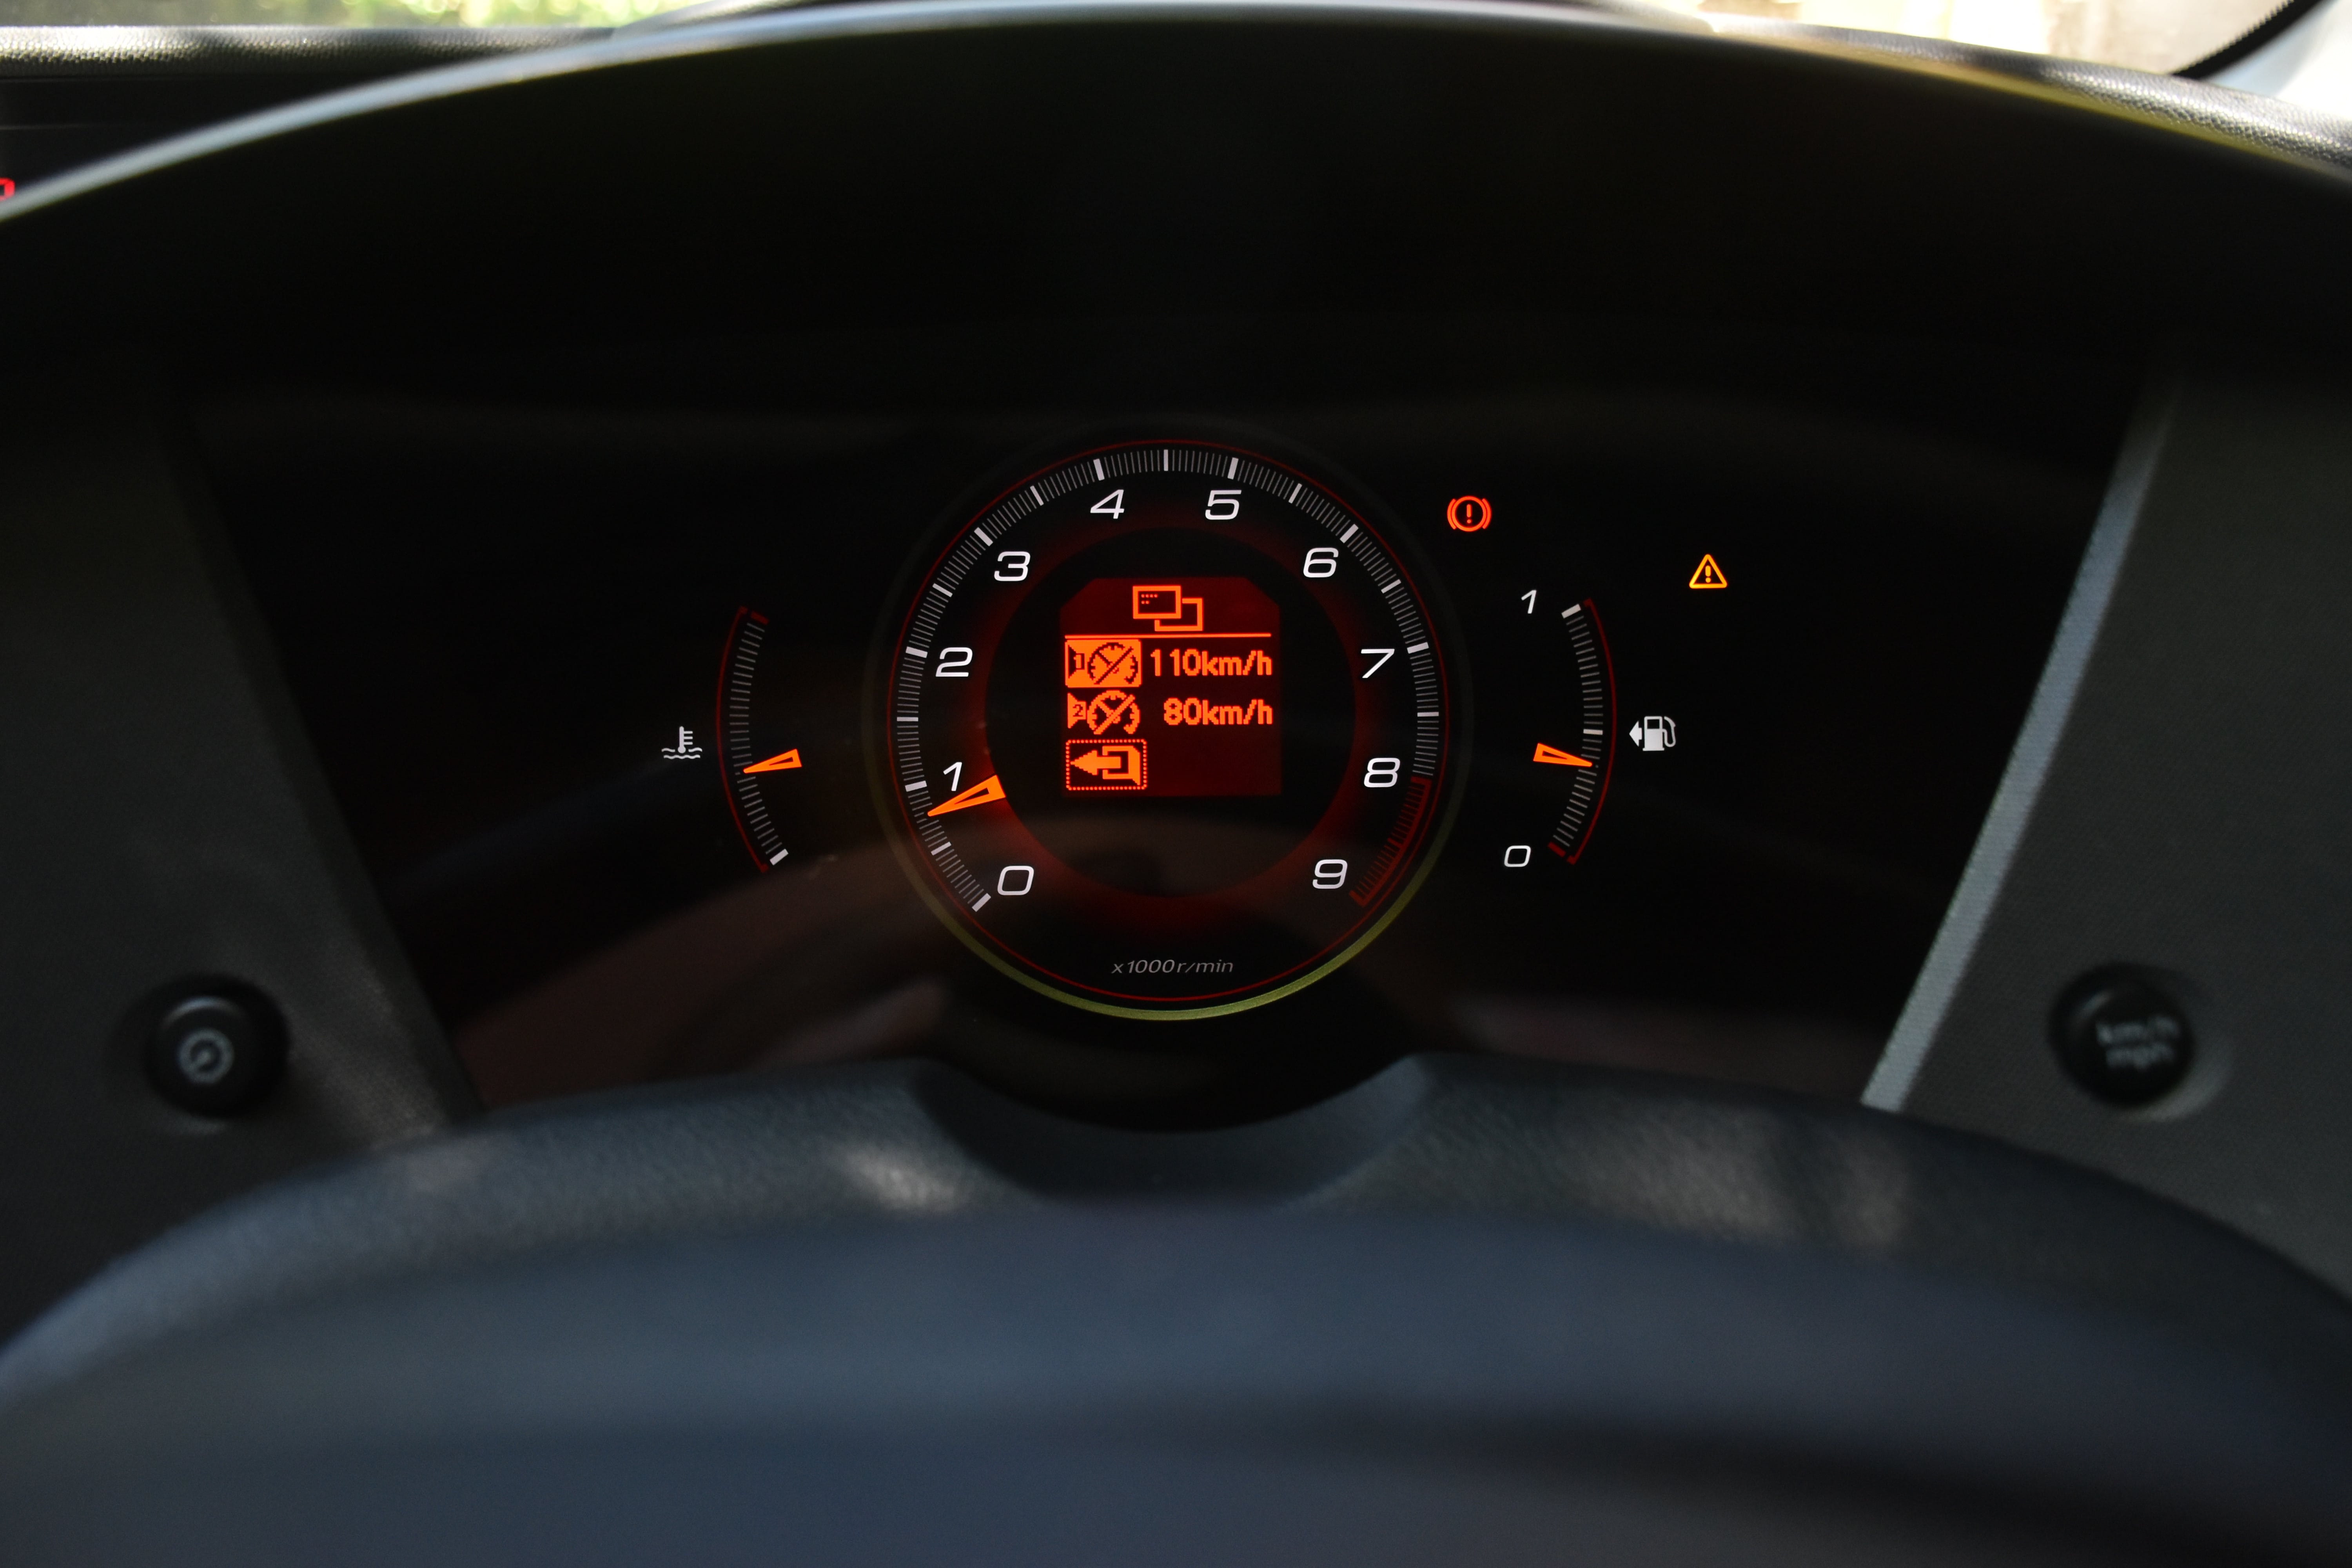
Speed Alarm
The Speed Alarm is turned off by default, once enabled the car will warn the user once a predefined speed is reached. The Speed Alarm settings allow you to set two different speeds. The alarm consists of a warning chime and an on-screen warning from the dashboard.
On the left you can set whether or not the alarm is on and on the right you set the corresponding speed at which the alarm goes off.
Step 5
Tyre Pressure Monitor Reset
The Tyre Pressure Monitors must be reset whenever you pump the tyres up to pressure. This menu screen will simply reset the sensors so that they know the current pressure is ‘full’, once the pressure in the tyres drops to a certain percentage below ‘full’ the car will warn you of a low tyre pressure.
This setting is a simple ‘initialisation’, pressing ok will reset the system.
Step 6
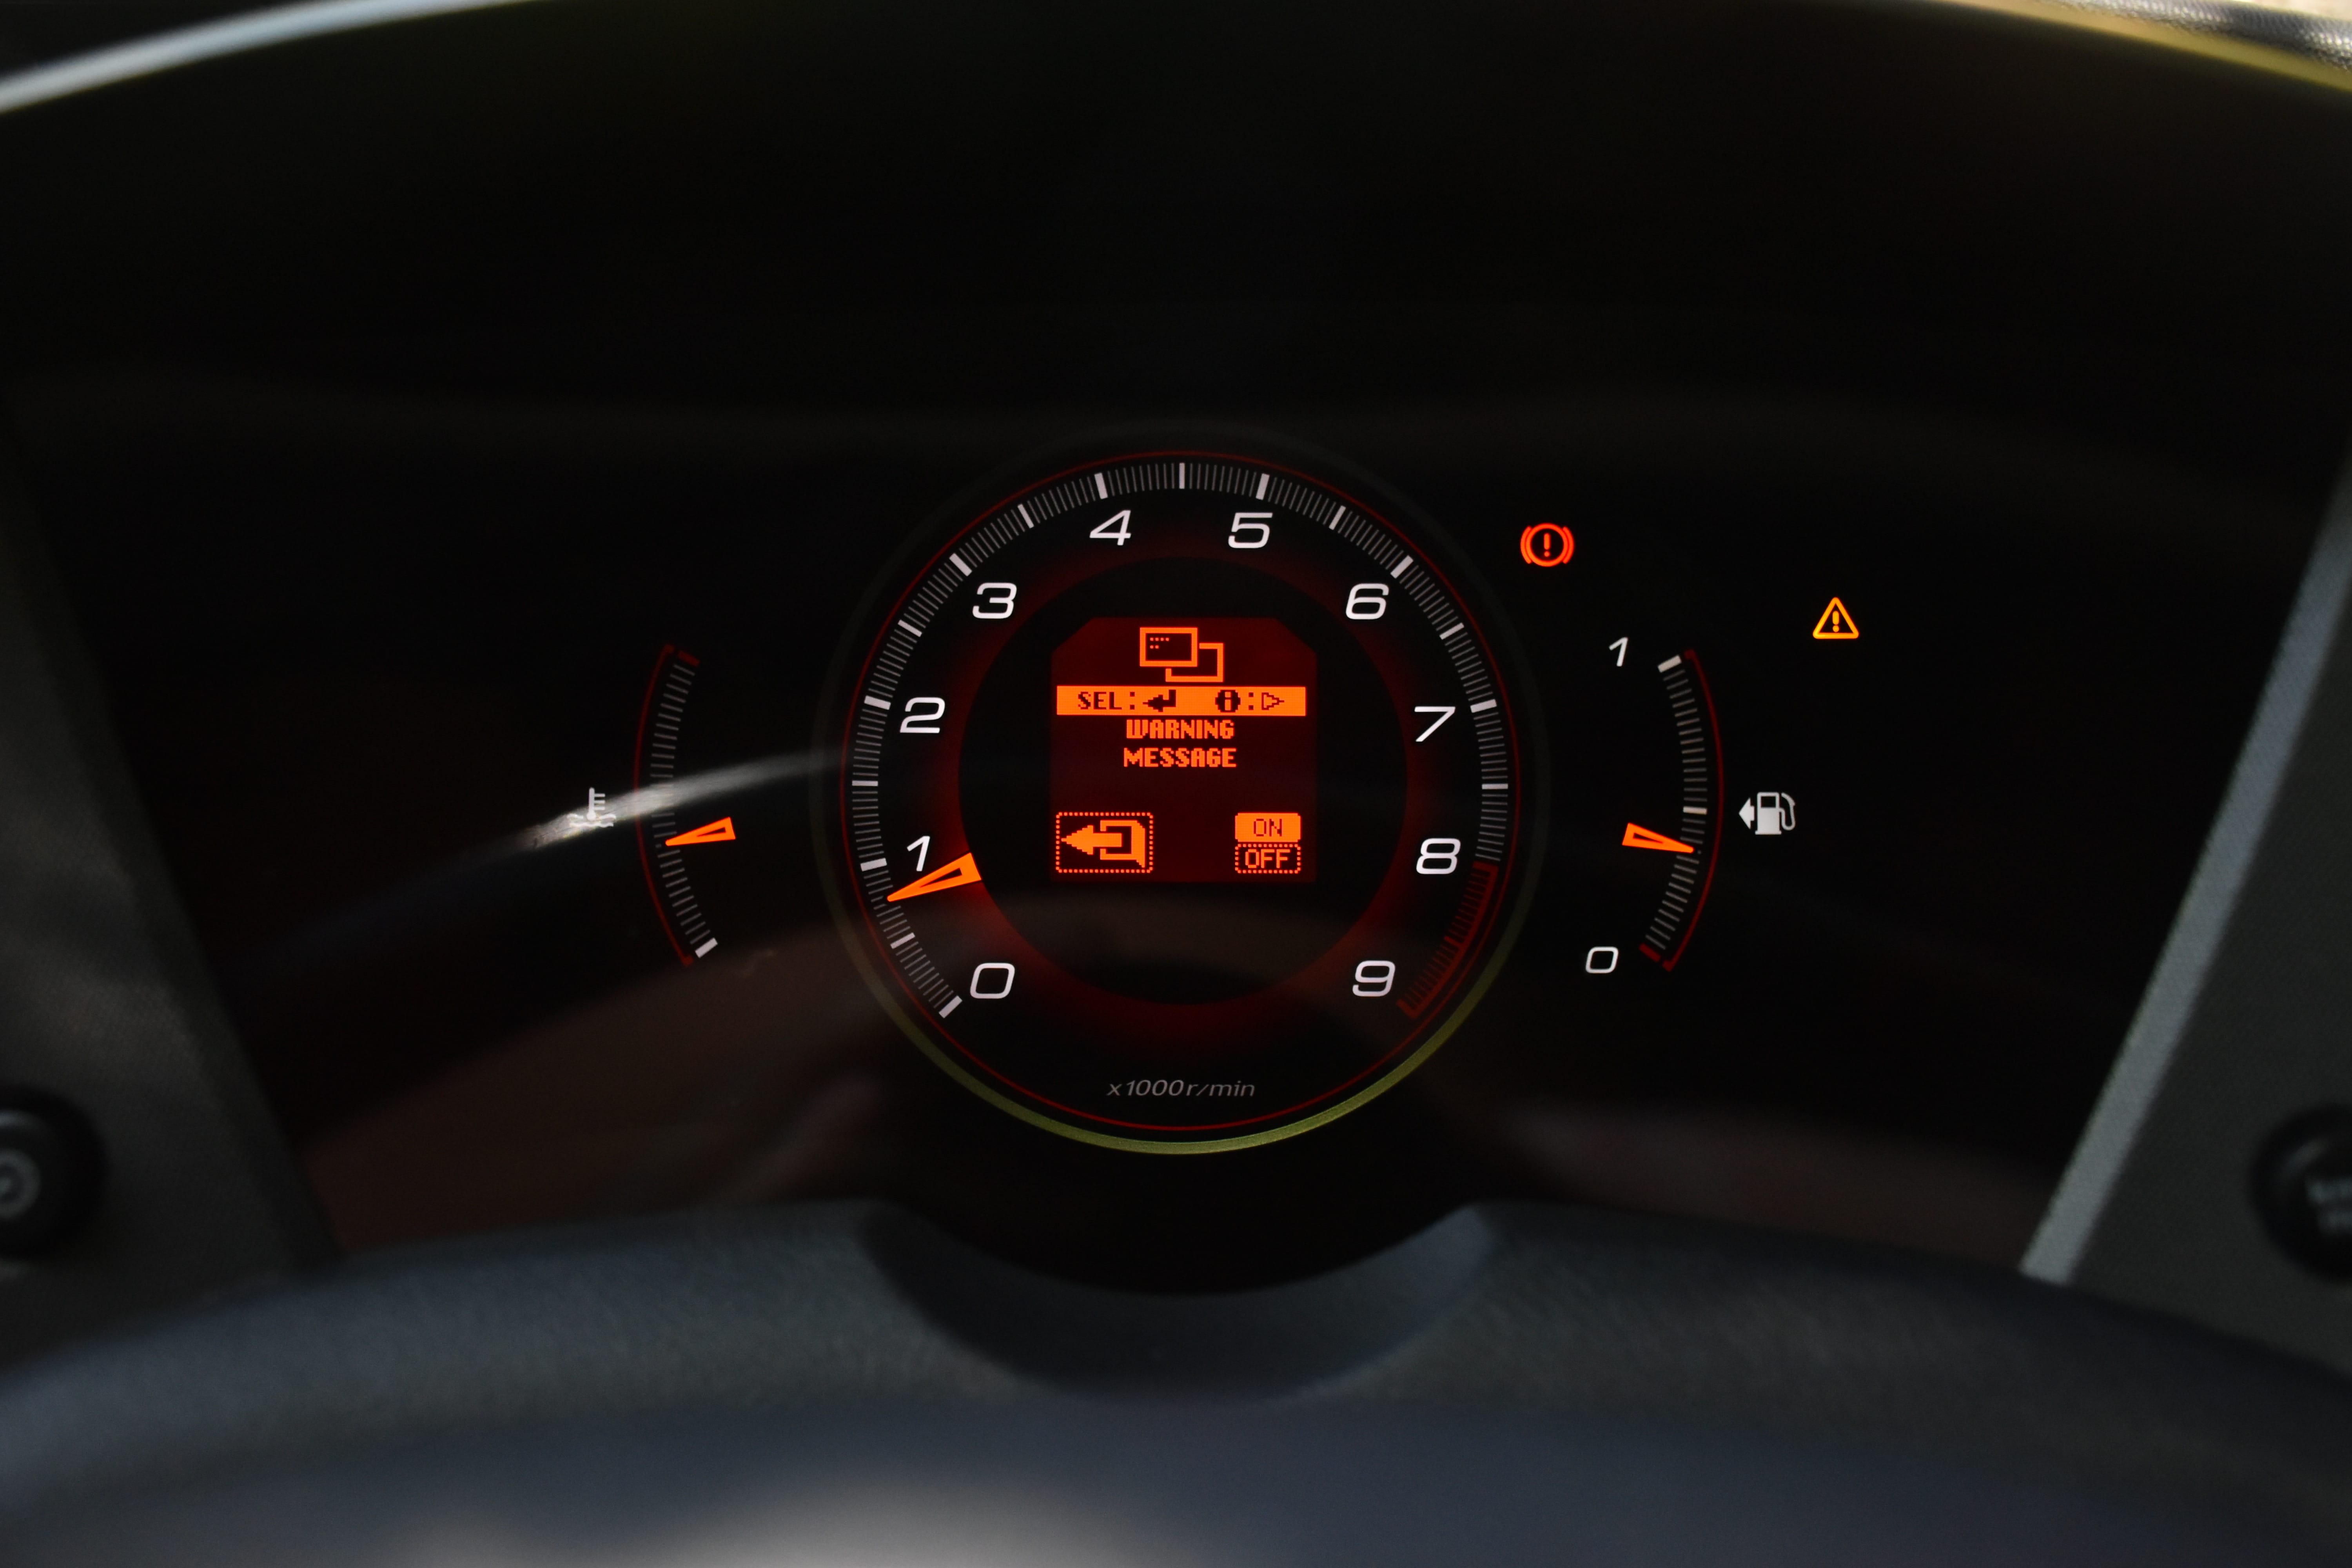
Warning Message
With ‘Warning Message’ enabled, your car’s multi-information display will warn you of an issue under certain circumstances such as low oil pressure or incorrect MAF sensor readings.
Step 7
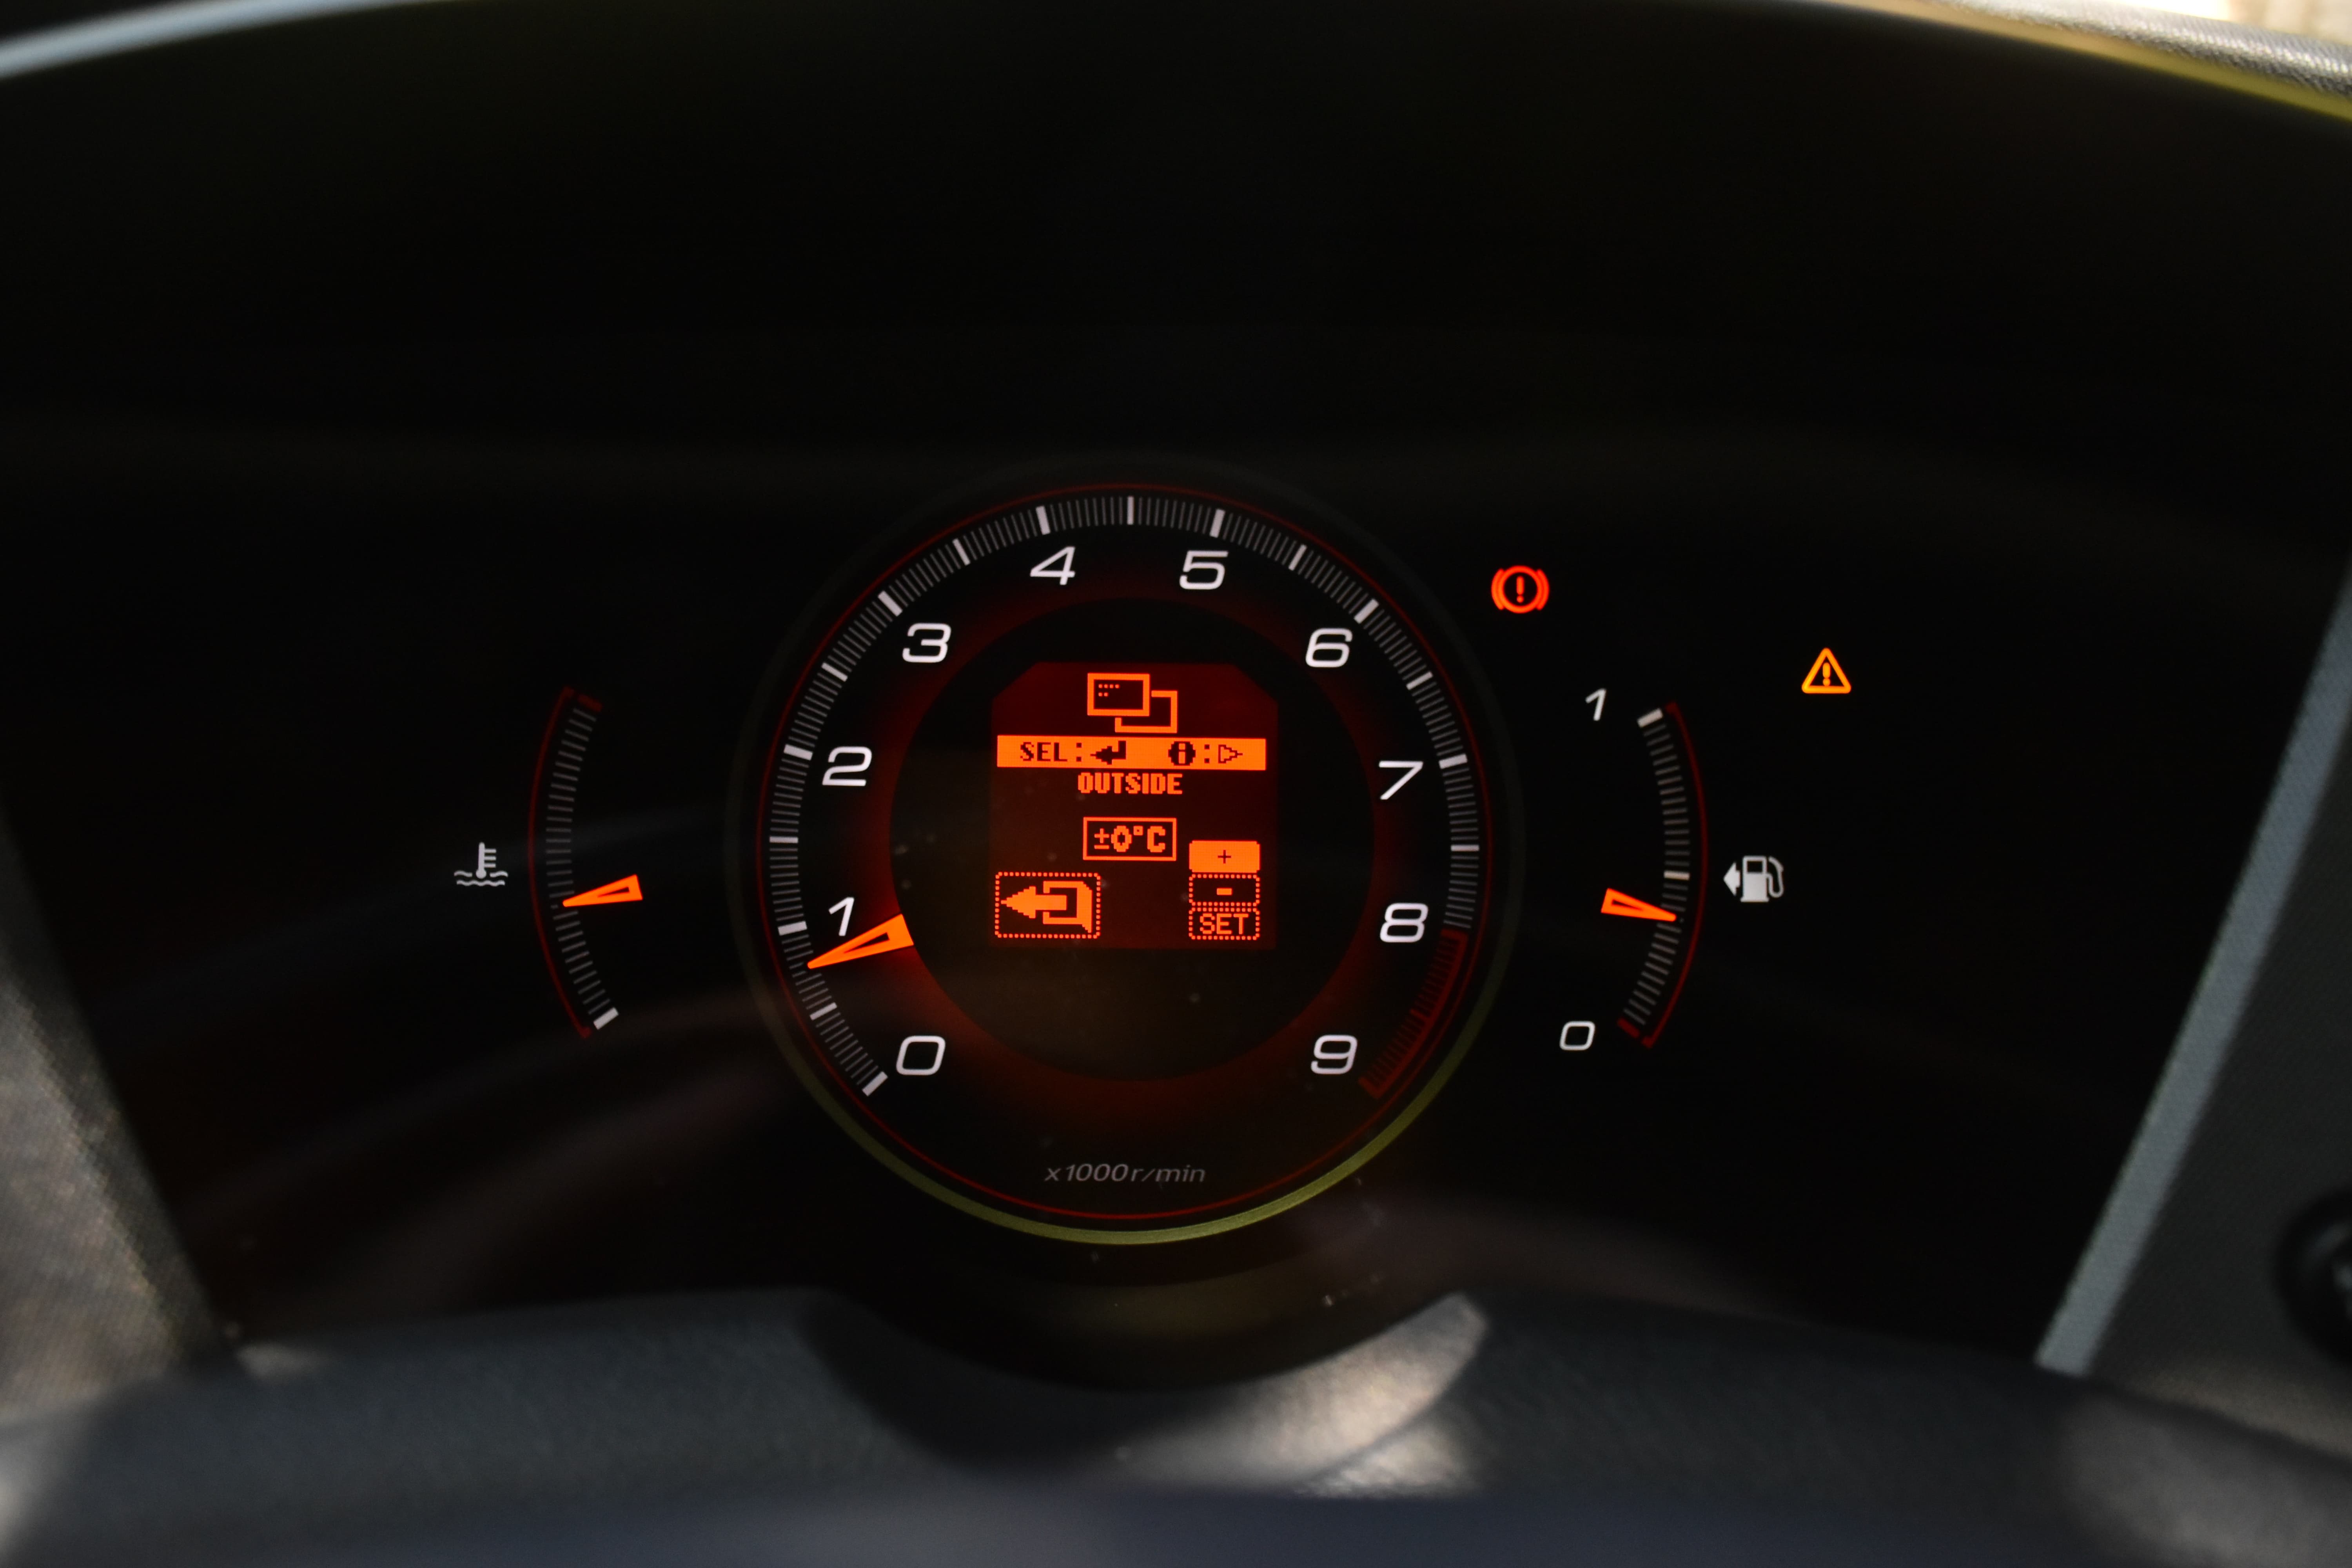
Adjust Outside Air Temperature Display
If you’re are having issues with your outside temperature sensor or the car is sitting in direct sunlight for most of the time, the ‘Adjust Outside Temperature Display’ will allow to you alter the temperature shown on the display to better match the actual ambient outside temperature.
Step 8
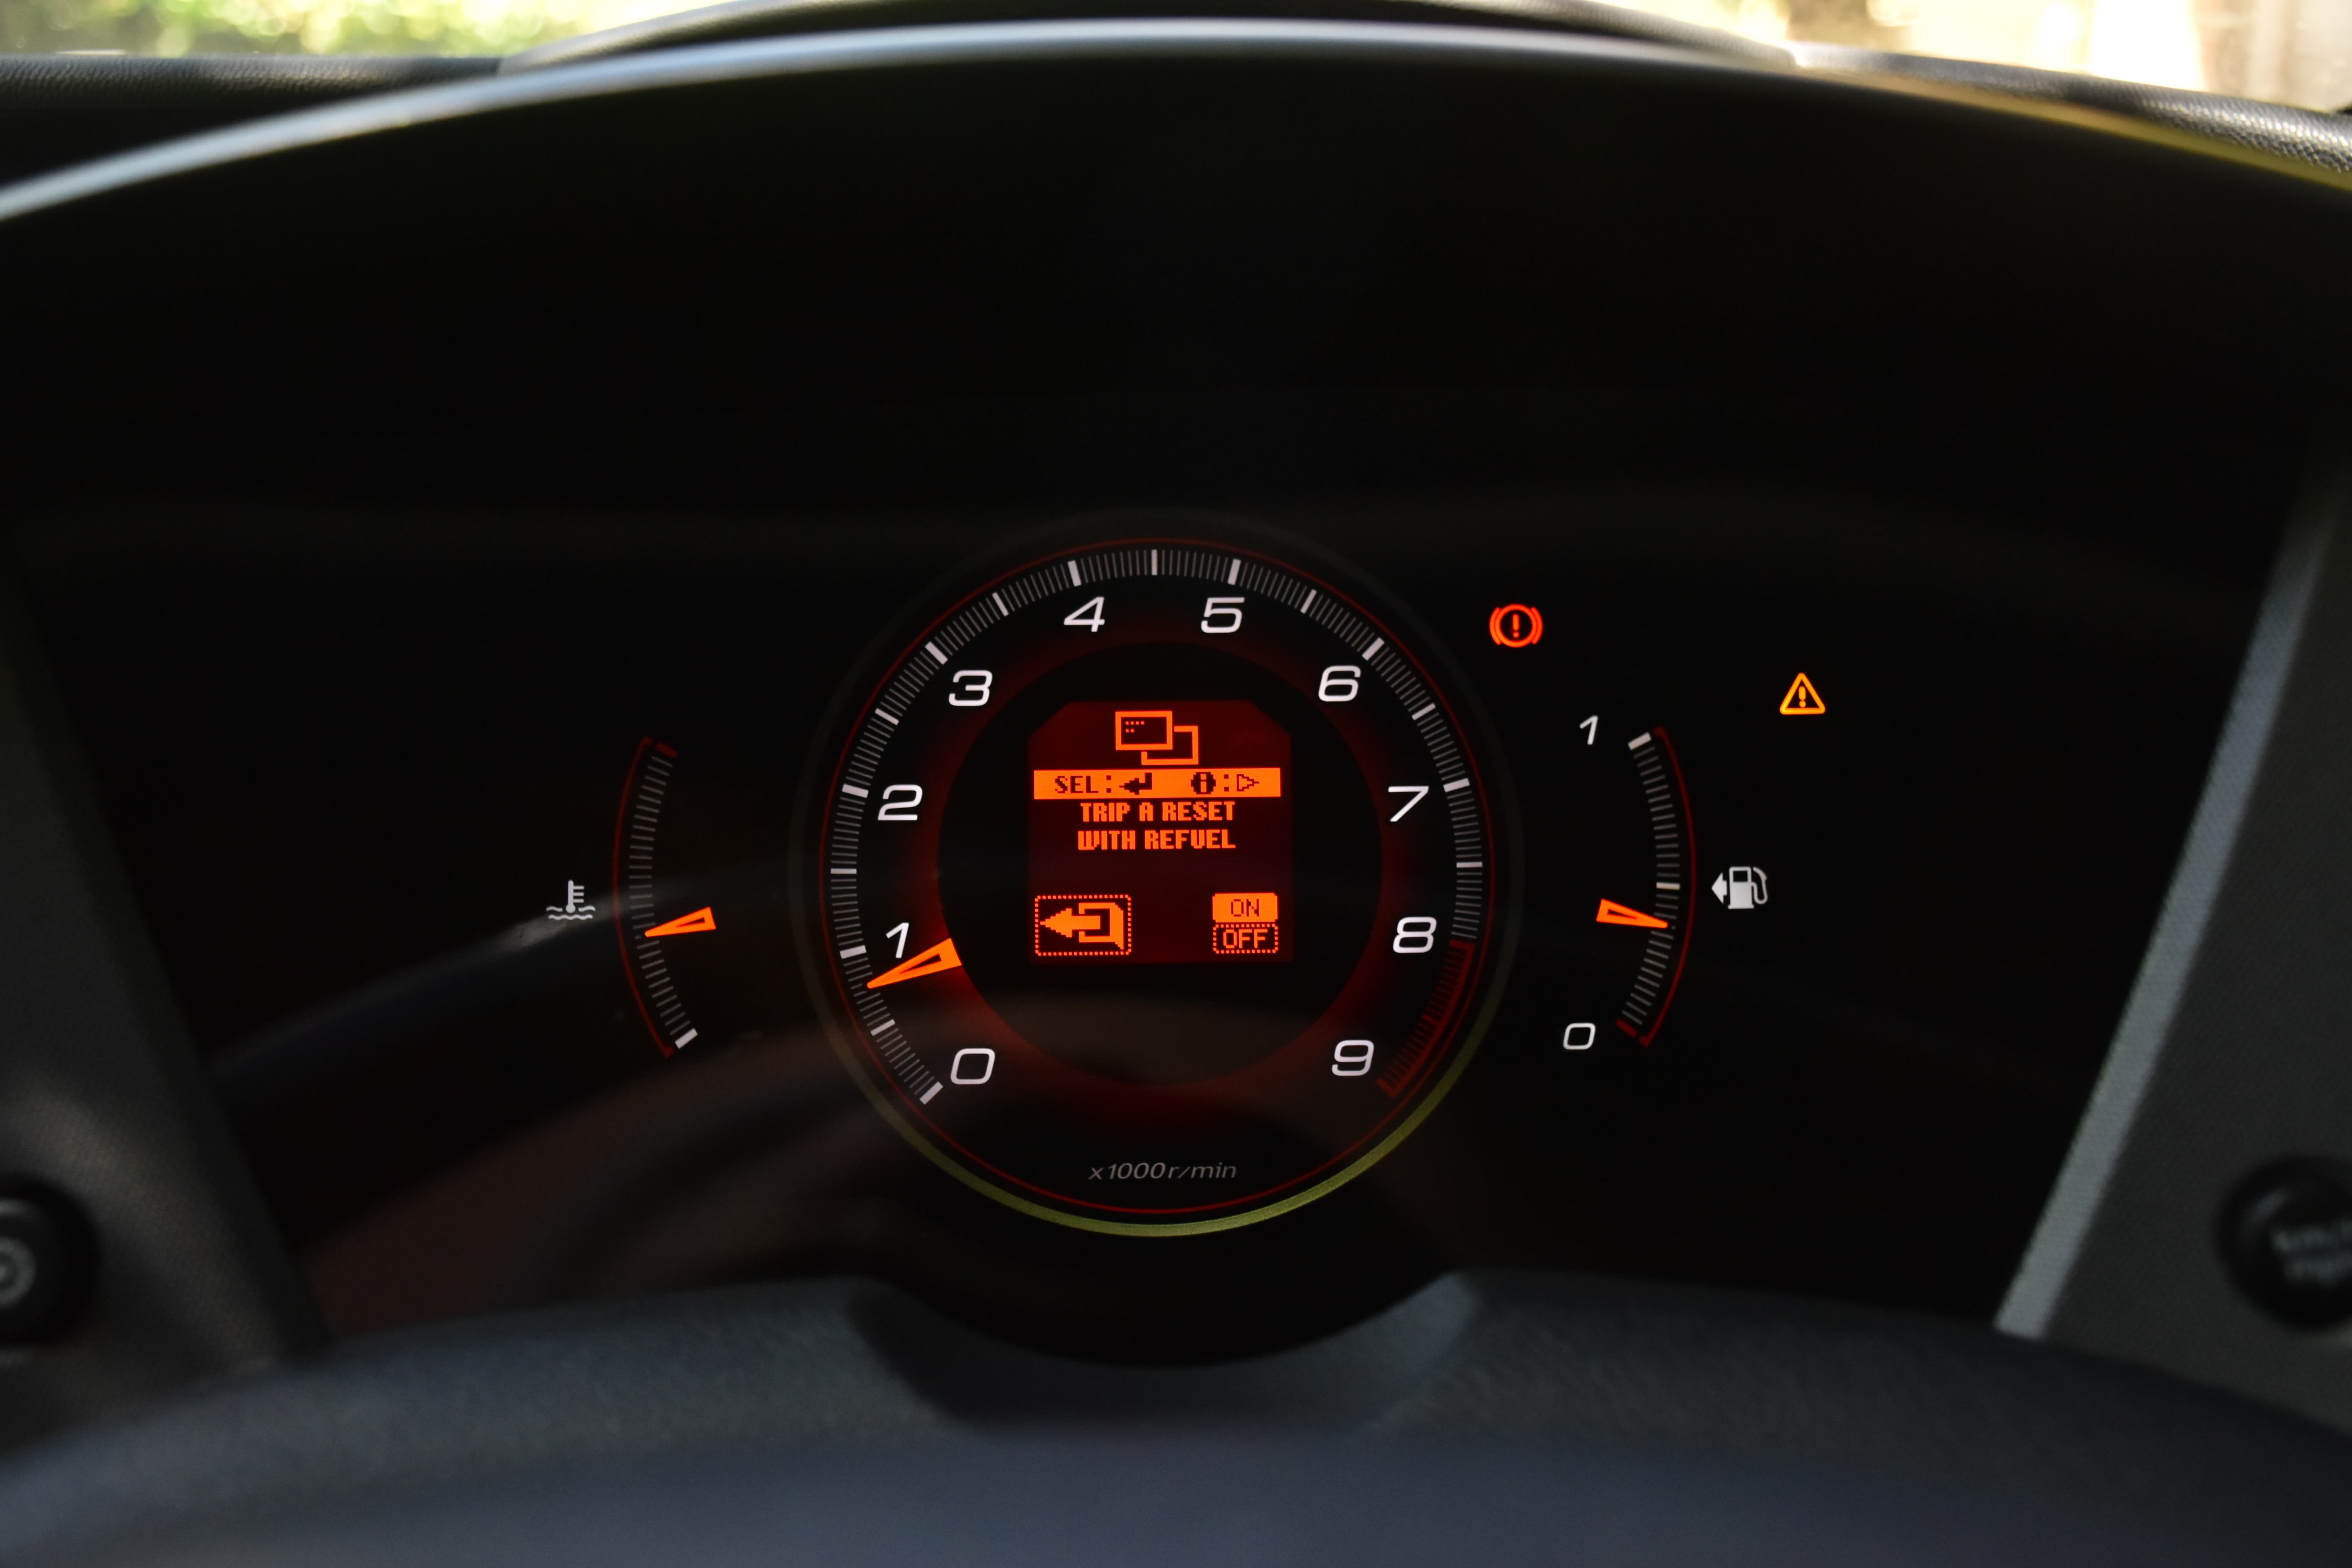
Trip A Reset with Refuel
This option will reset Trip A to 0km when the car detects that you have filled the petrol tank.
Step 9
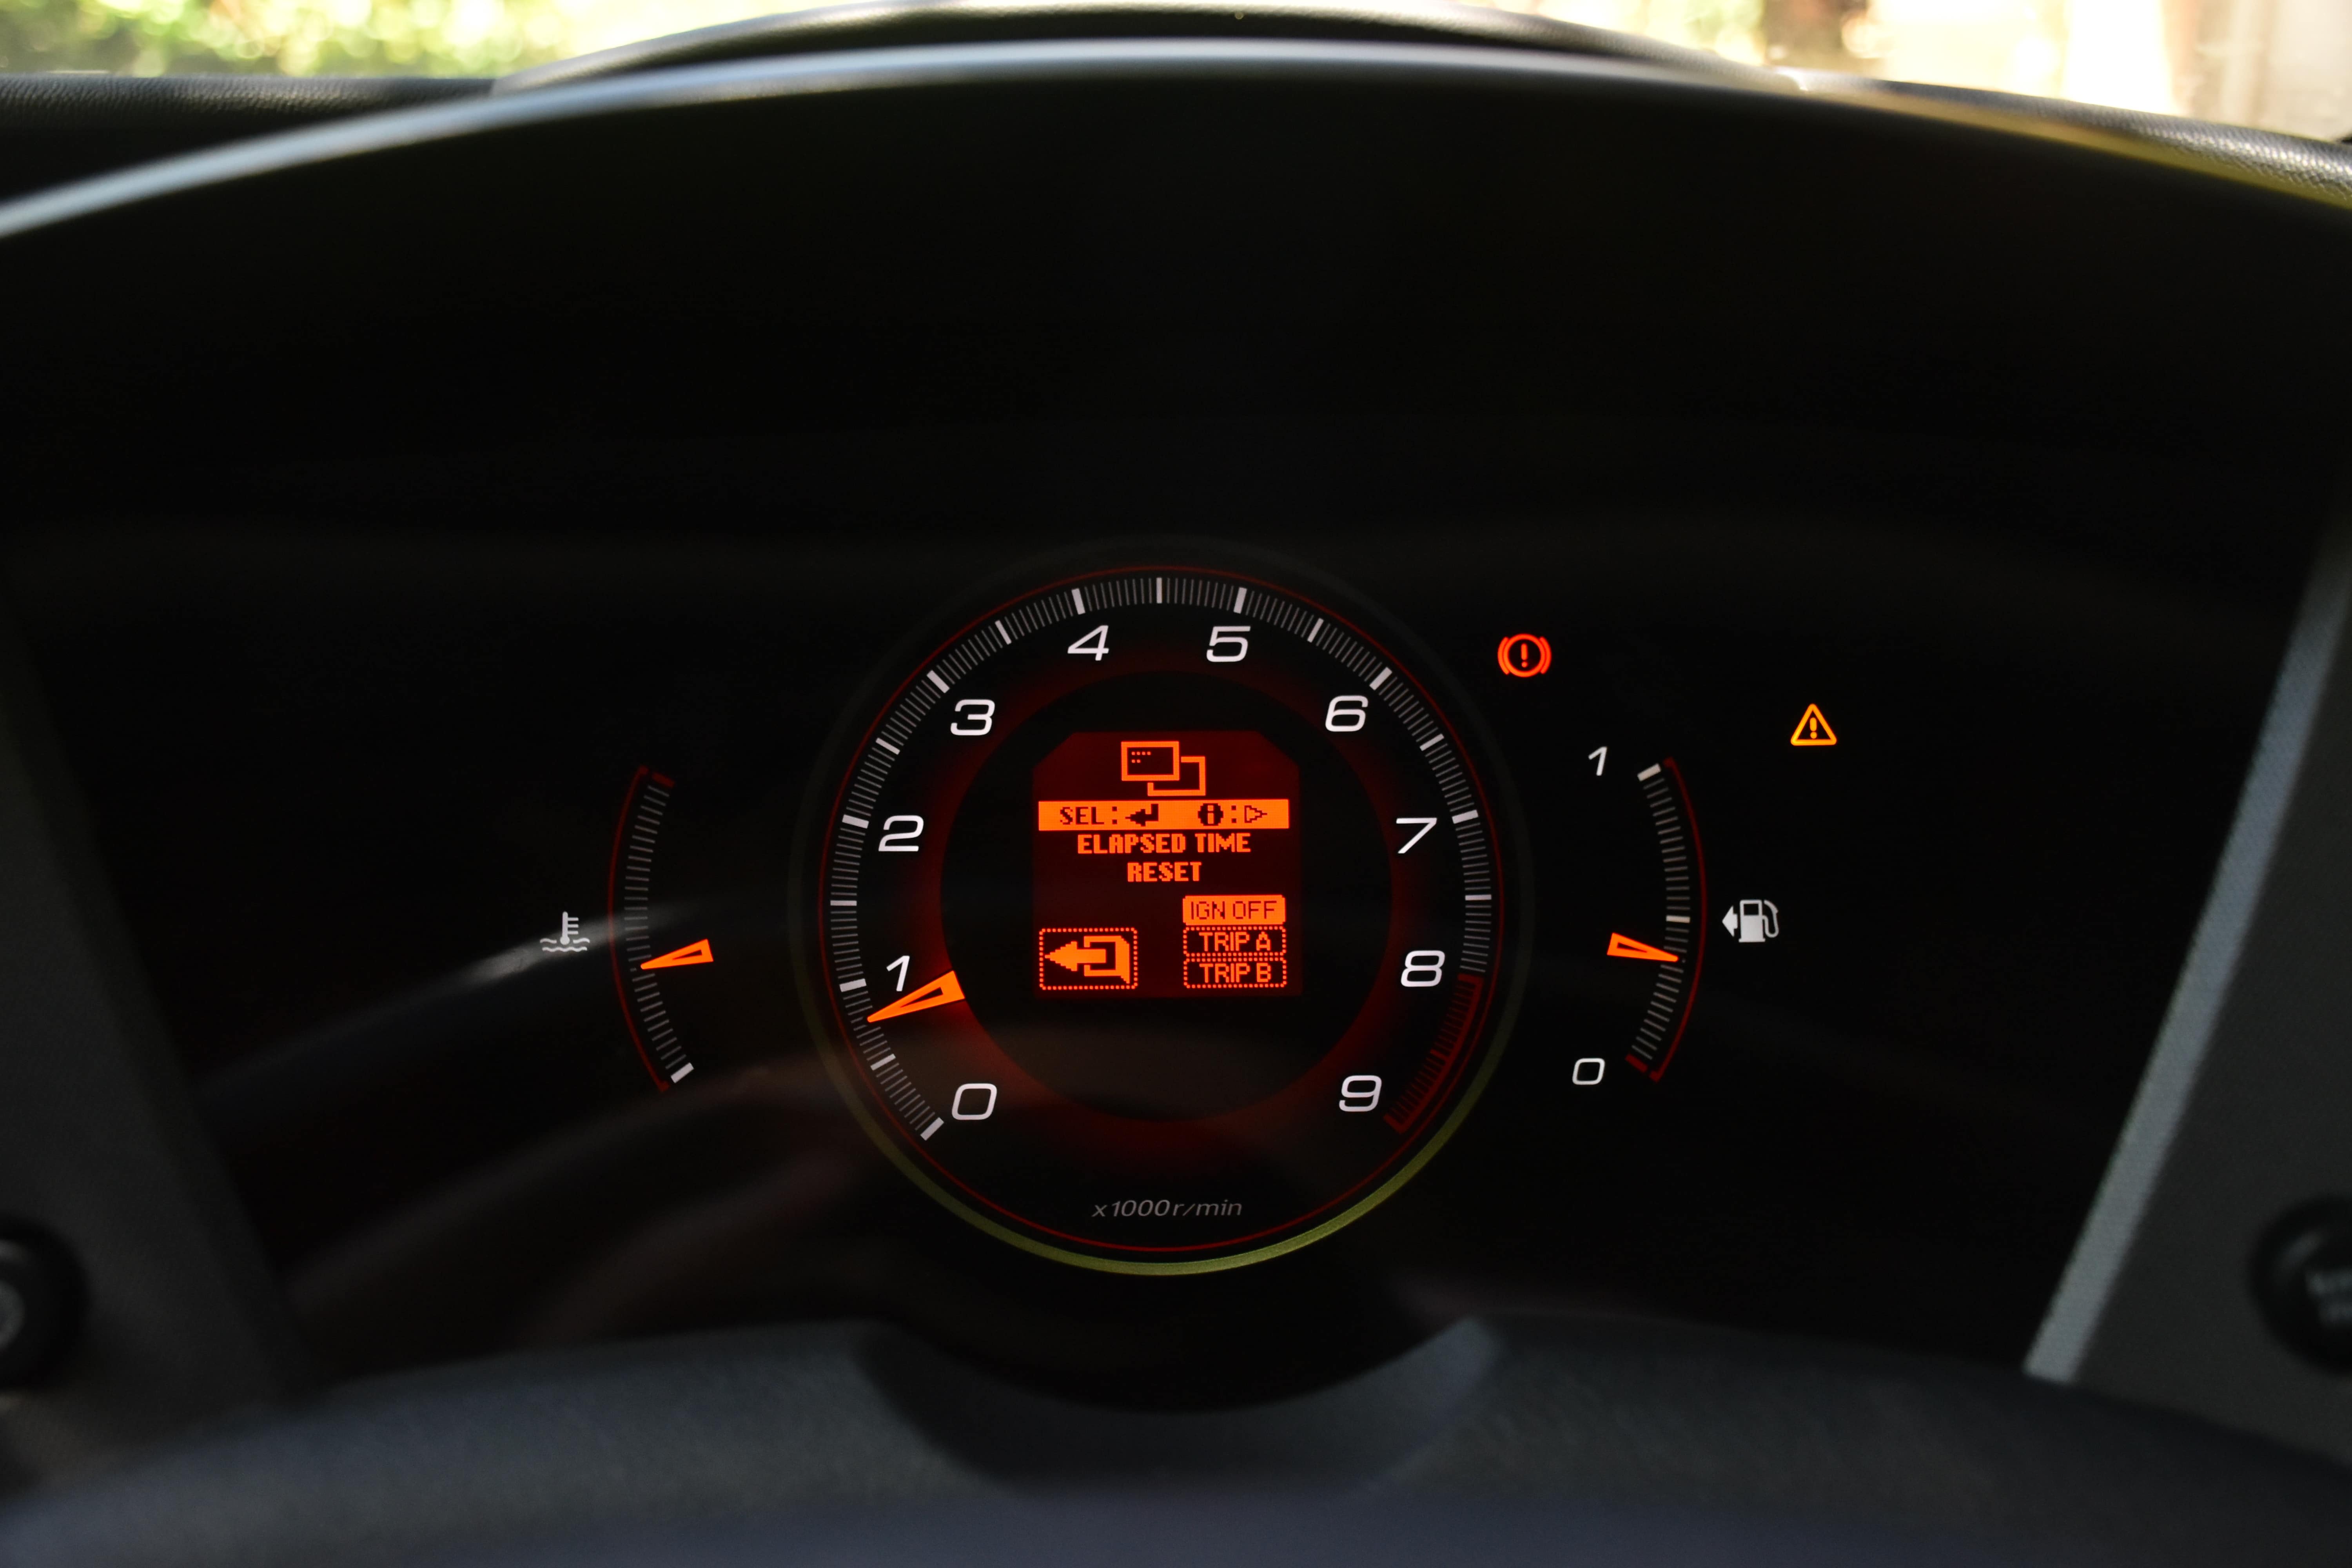
Elapsed Time Reset
This setting will allow you to change the condition under which the car resets its trip timer, the default setting is whenever the ignition is turned off. You can set the car to reset the trip timer under one of three conditions: when you turn off the ignition, when you reset Trip A or when you reset Trip B. By default the car will reset the timer when you turn off the ignition.
Step 10
Display Unit
Display Unit allows you to change the units between imperial (miles) and metric (kilometres). If this setting is set to ‘Auto’ then the trip computer will simply change units whenever the ‘km/h mph’ button is pressed, matching the speedometer unit.
Step 11
Rev Indicator
With the Rev Indicator activated, your car will notify you of the optimal rpm to shift up a gear. Whilst enabled a red bar with the word “REV” will be lit up to the left of the speedometer. A row of yellow LEDs to the left of the Speedometer will light up as you approach the cars RPM limiter and finally flash brightly just before the car reaches the limiter, roughly at the point of peak power.
Note that if you modify your RPM limiter through the use of a Hondata Flashpro or similar device, the car will automatically adjust the RPM at which the Rev Indicator flashes.
Step 12
i-VTEC Indicator
The i-VTEC indicator will turn on a red LED light to the right of the Speedometer when your car engages the high RPM cam profile. The word “i-VTEC” will also be lit up whenever the car is turned on whilst the i-VTEC indicator is enabled.
If the stock ECU is re-flashed using an aftermarket device and the i-VTEC RPM engagement point is altered, the i-VTEC indicator will adjust accordingly.
Step 13
Language
Language will simply change the language of the trip computer, in most cases this should already be set to the appropriate language for your car’s domestic market.
Did you find this guide helpful? Consider sharing it to help other car enthusiasts