This is a Combo Tutorial from AutoInstruct! Here we’ll be showing you a few different tutorials, all related to the MK6 Golf GTI Intake System!
Removing your Entire Air Intake System
Changing your OEM Air Filter
Replacing / Cleaning your MAF (Mass Air Flow) Sensor
Difficulty Rating
Moderate
Tools/Parts Required
Spring Clamp Tool + Remote Cable-Driven Clamp Tool
Torx Set
Security Torx Set
Step 1
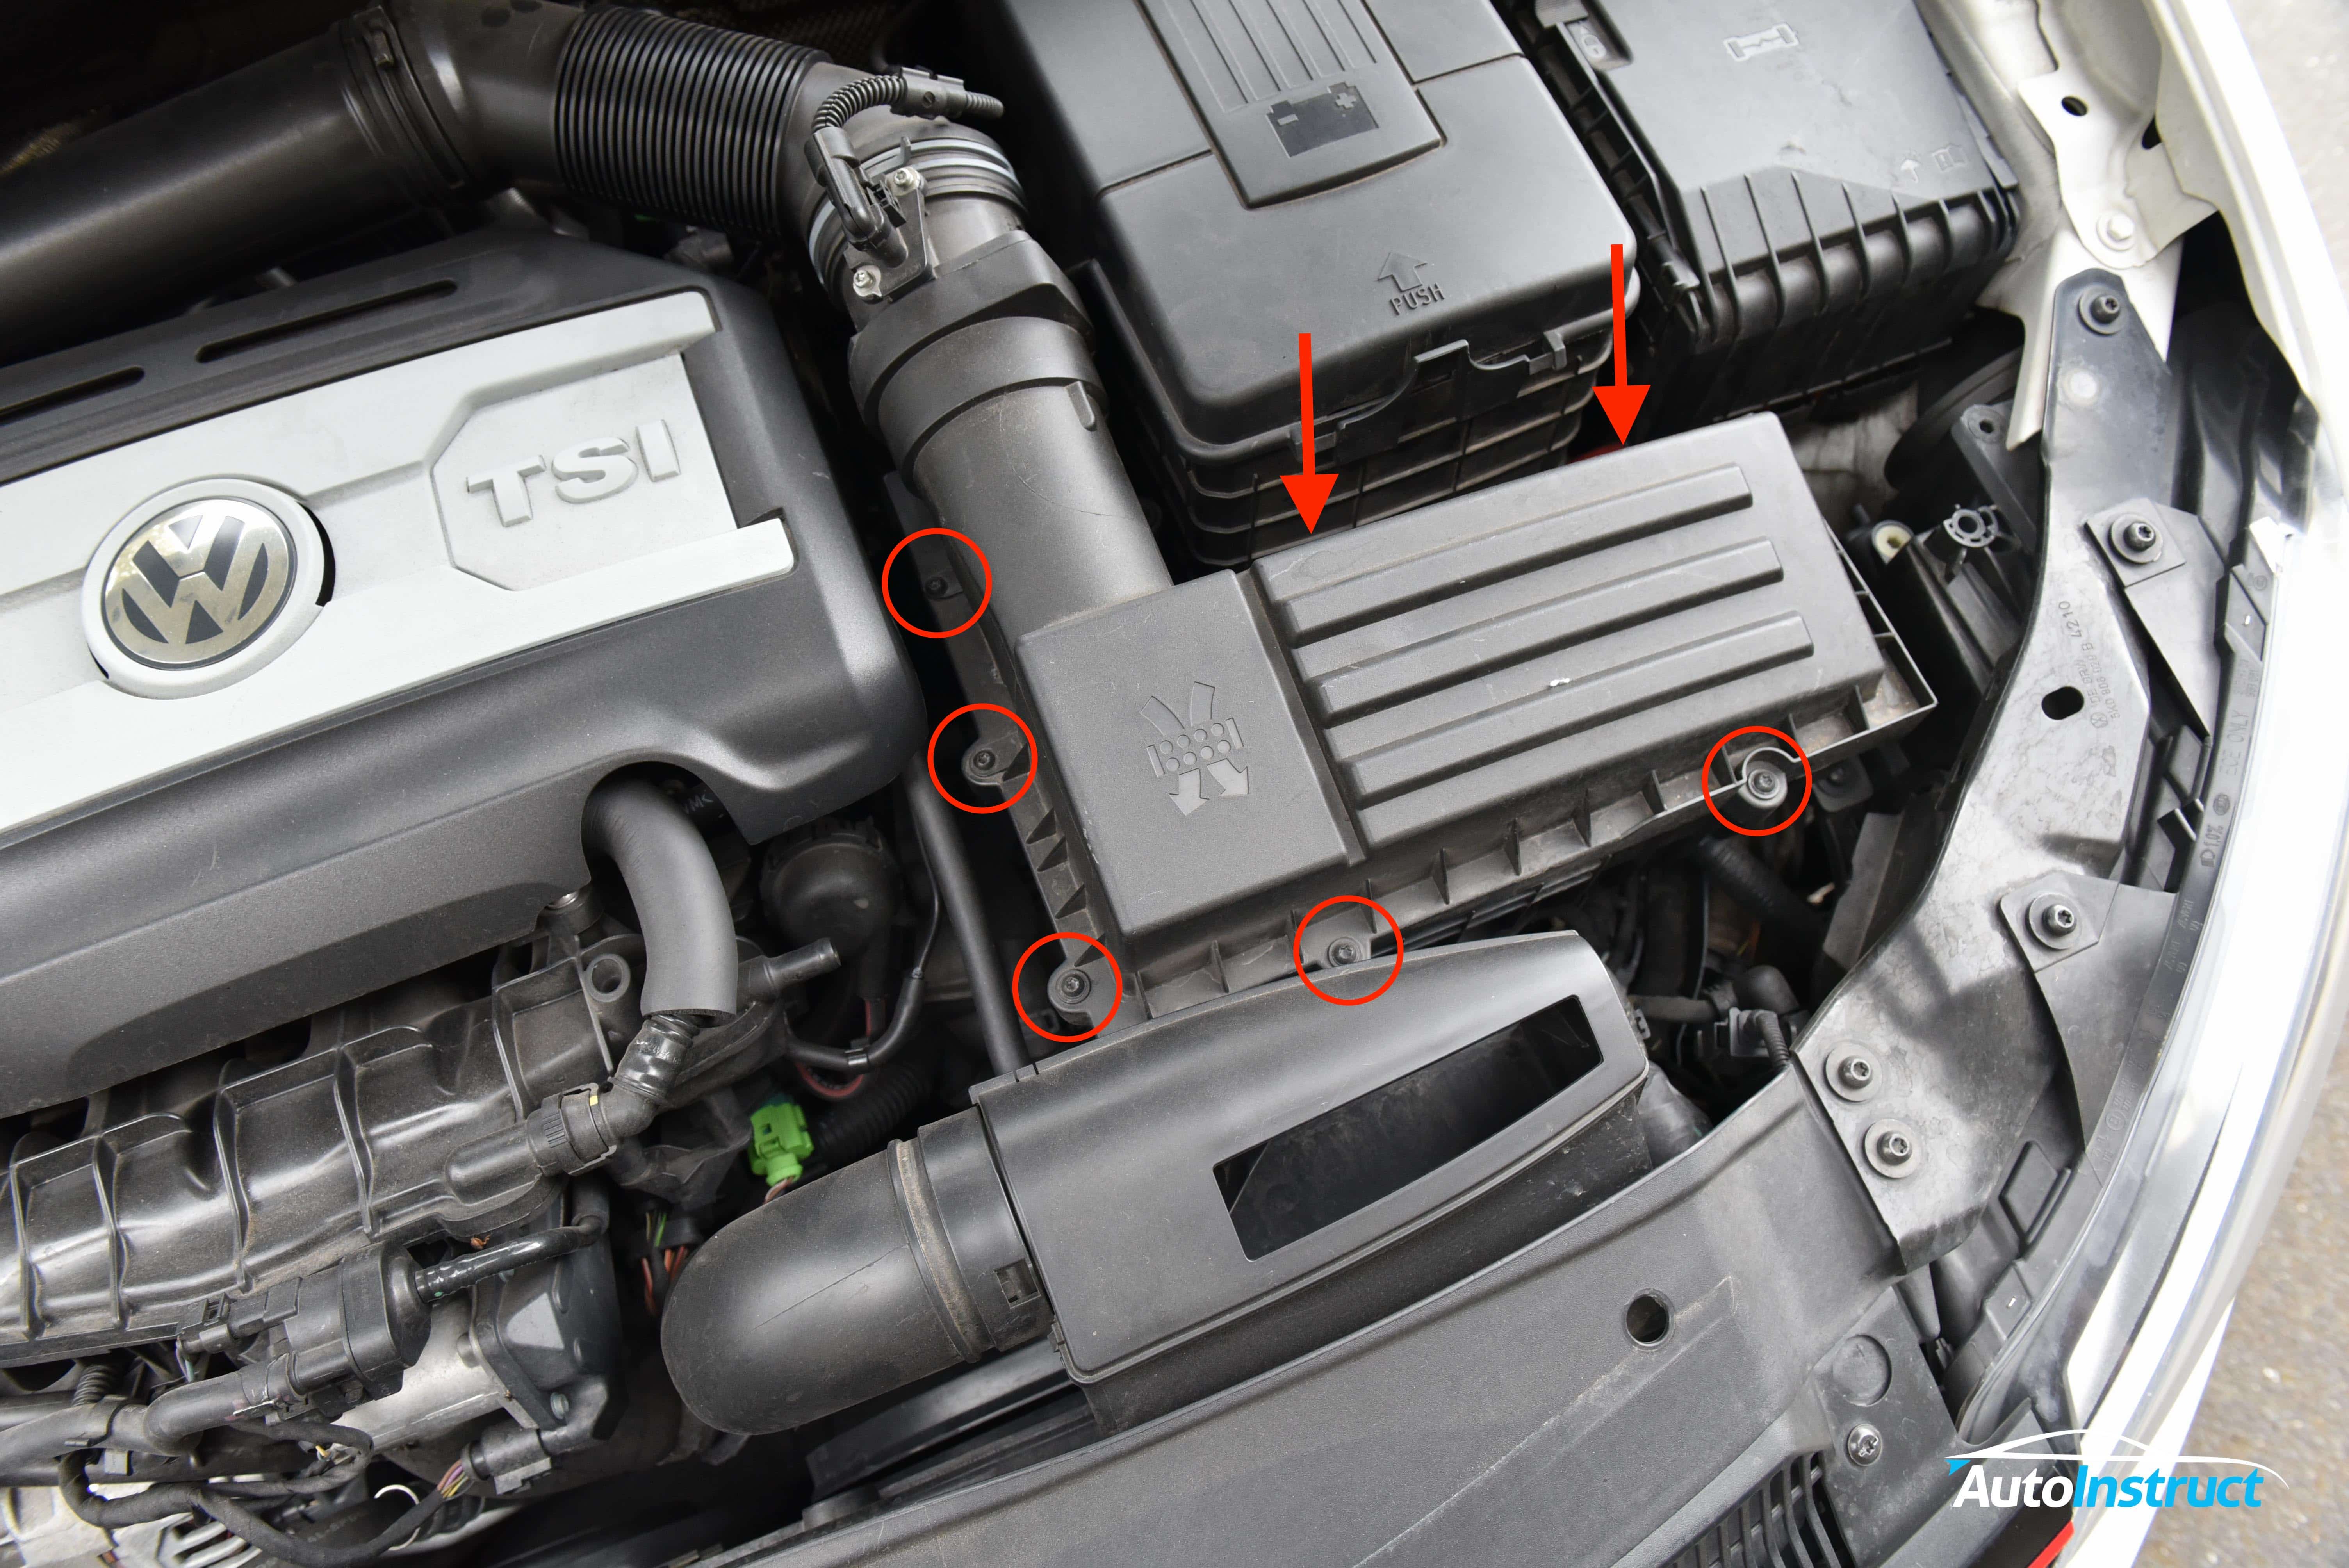
Air Filter Removal / Air Intake Box Removal
To change the OEM air filter, simply remove the screws as indicated and lift the lid up. You can then replace the filter and screw back into position.
If you’re removing the entire air intake, remove the screws and proceed to Step 2.
Step 2
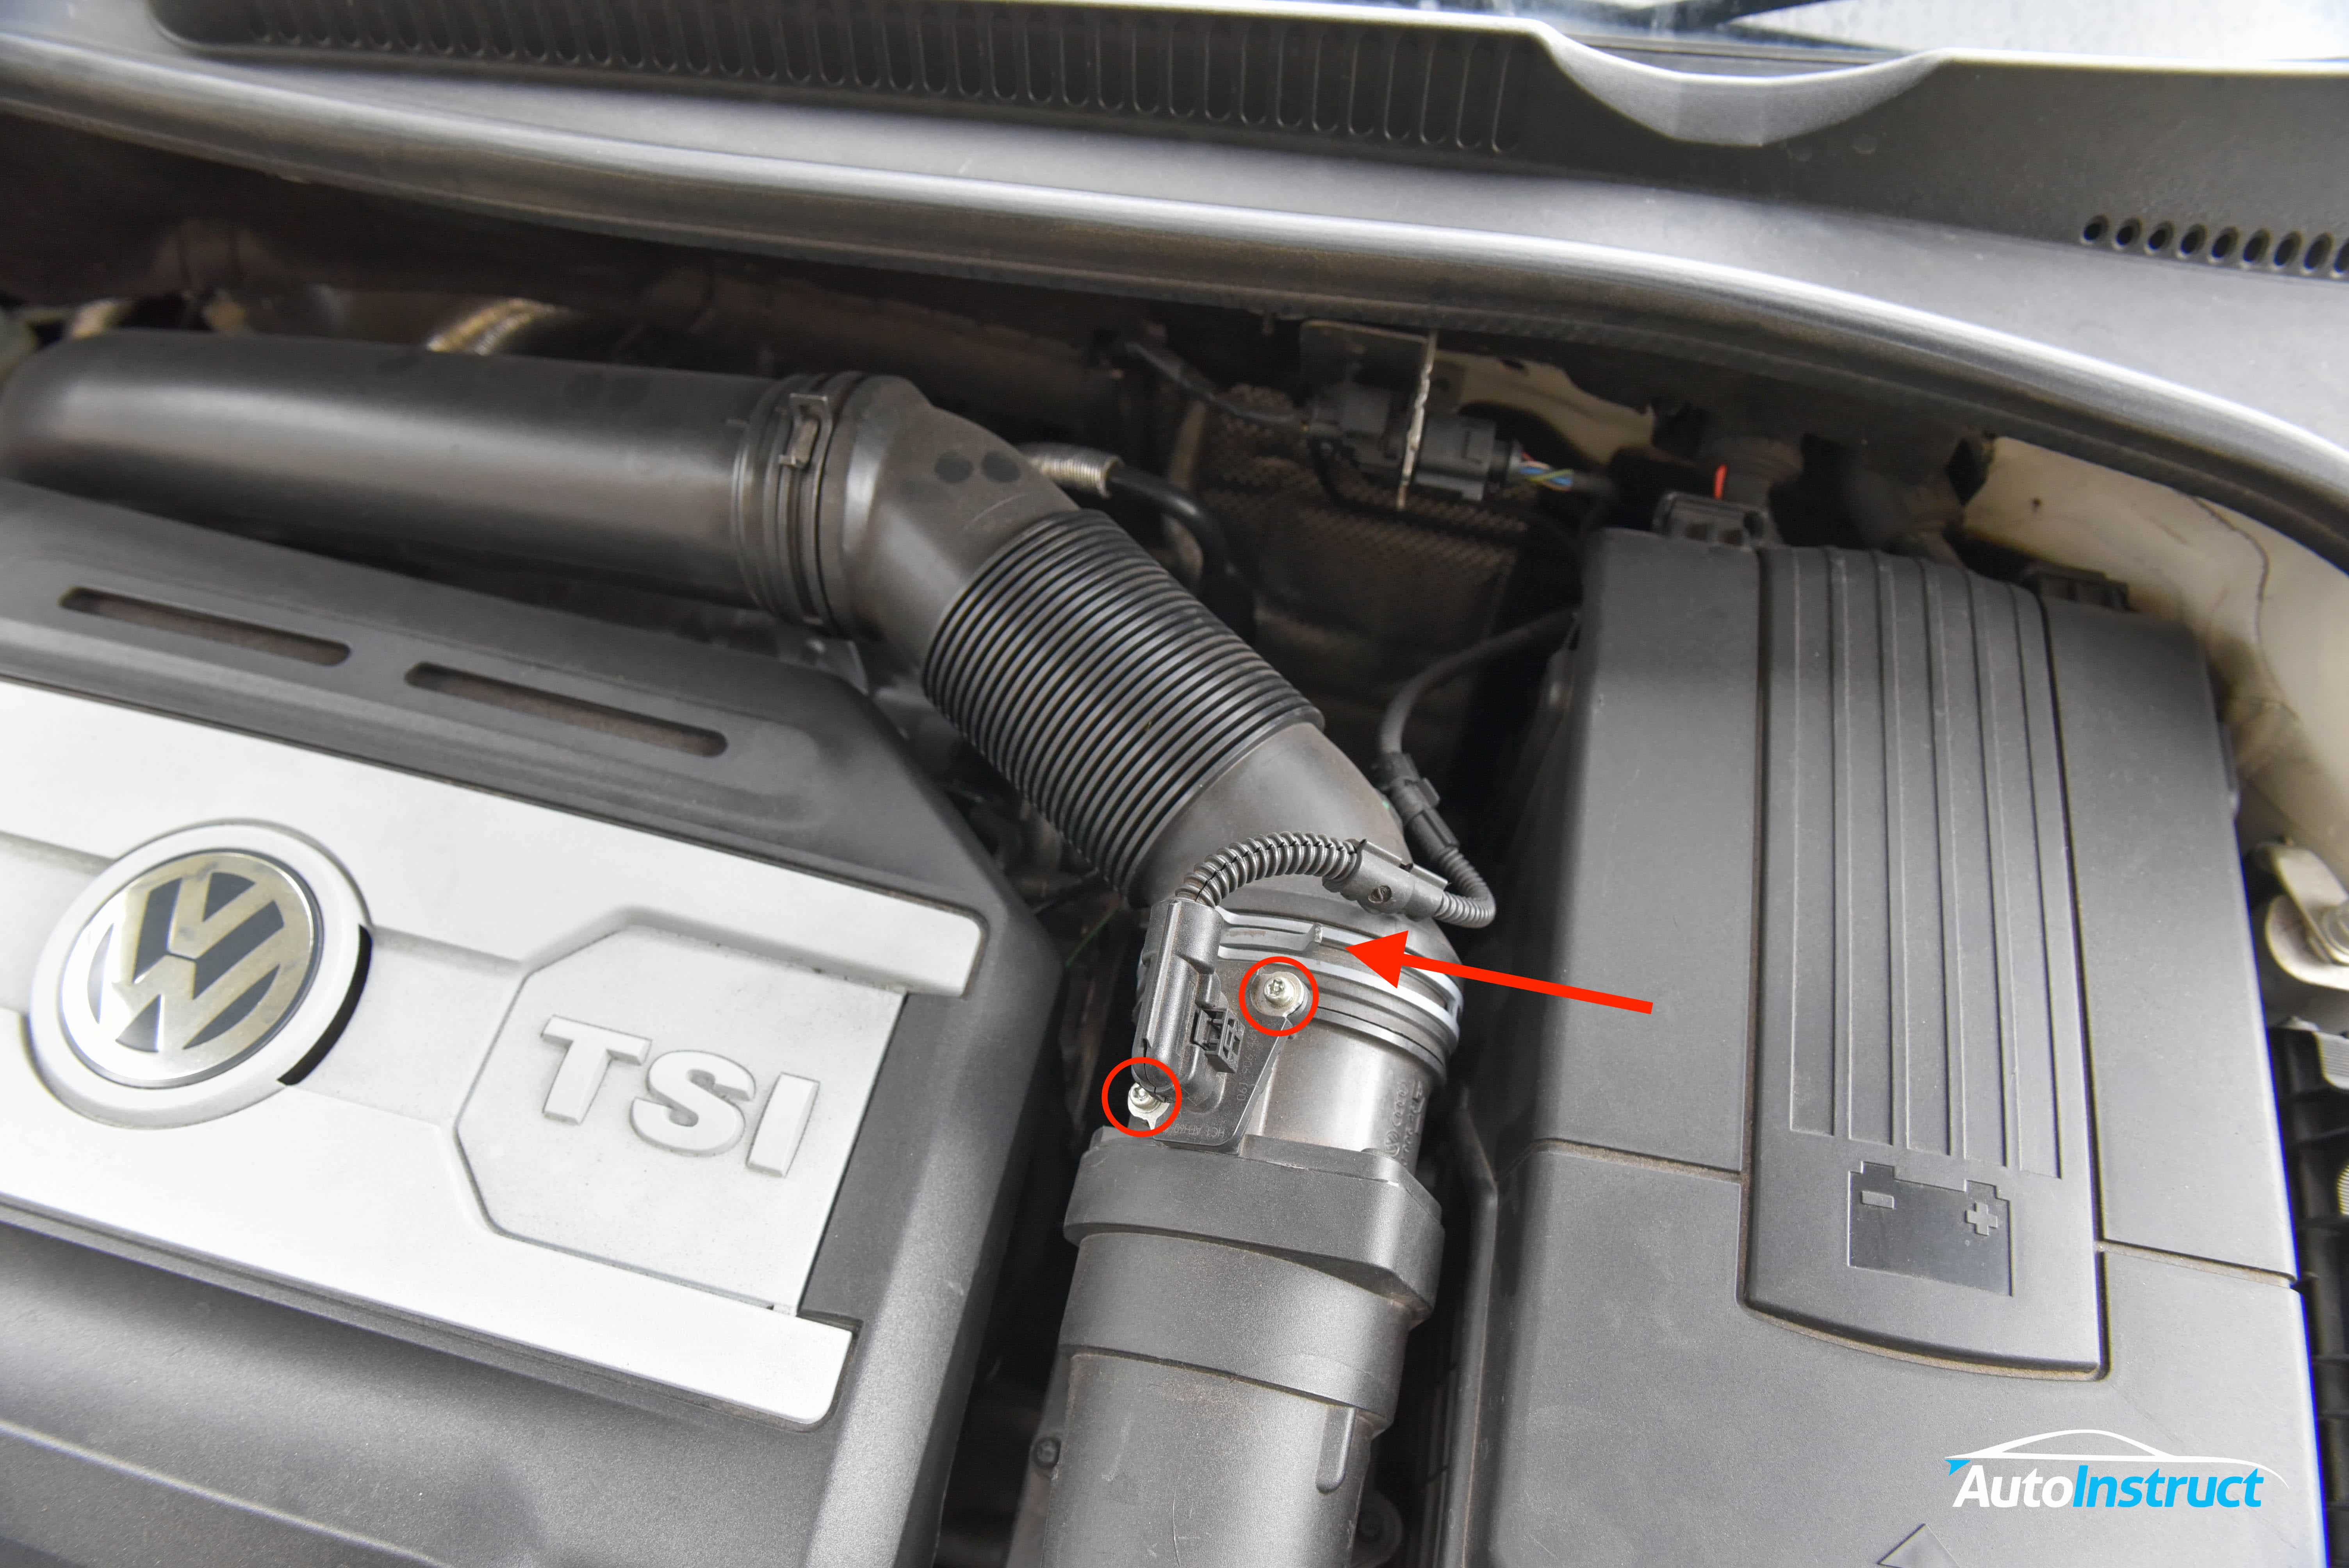
Replacing or Cleaning MAF Sensor / Removing MAF Sensor
To remove the MAF Sensor, simply unplug the sensor and loosen the two security-torx screws (Be careful not to drop them!) – The sensor will then lift out of position. Take note of the orientation, and clean / replace as required.
If removing the MAF Assembly as part of an air intake setup, simply remove and place aside. Loosen the spring clamp as indicated by the arrow, and disconnect the ducting. Continue to Step 3.
Step 3
Remove the rear intake duct by loosening the spring clamp on both ends. The turbo side has very limited access, and a remote cable-driven clamping tool may be required. You may also remove the rubber joiner onto the turbo, if required.
Step 4
Lastly remove the two screws that bolt the intake ducting onto the front grille.
You can now pull the entire system out from the vehicle. The main body will be held in place with rubber grommets, and a firm pull will release these.
Did you find this guide helpful? Consider sharing it to help other car enthusiasts