Next, simply hook the door card onto the window sill, it is generally a very firm fit and takes some attempts to seat correctly. Then firmly push down across the door card making sure every clip ‘clicks’ in correctly.
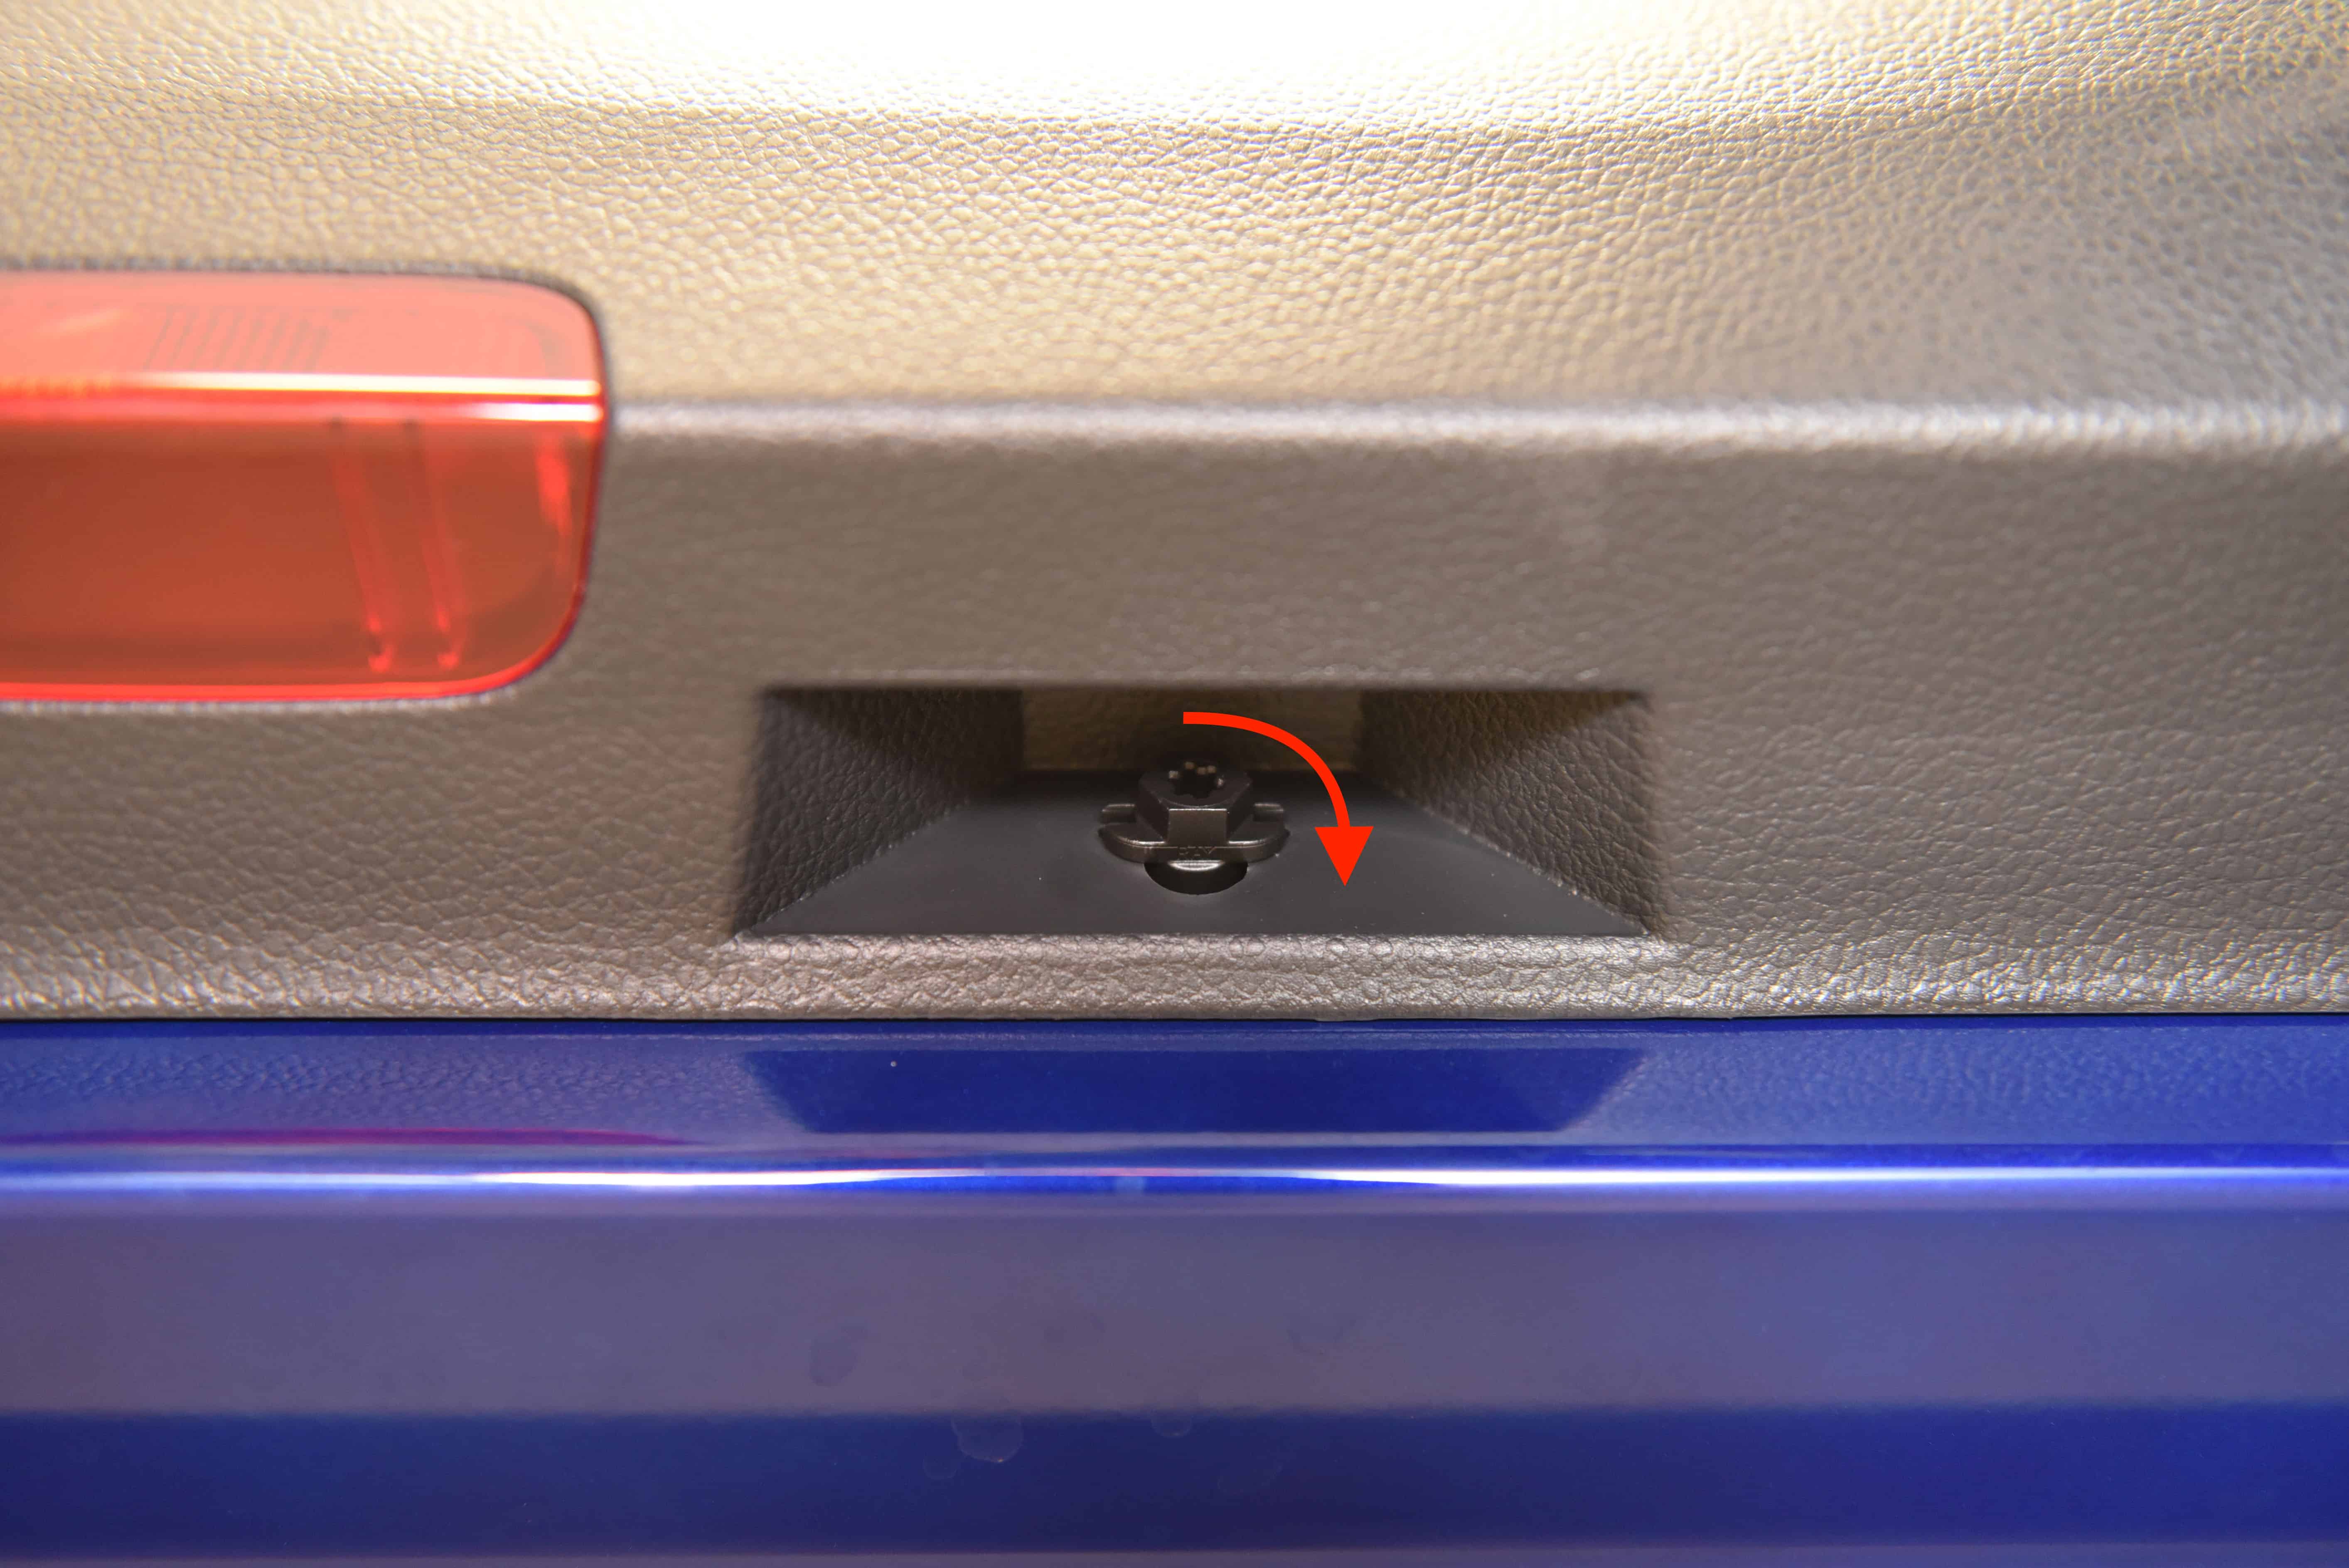
Lastly rotate the hexagonal clip another 90 degrees to secure the bottom of the door.
Difficulty Rating
Hard
Tools/Parts Required
Torx Driver Set
Trim Removal Tools
Step 1
Overview
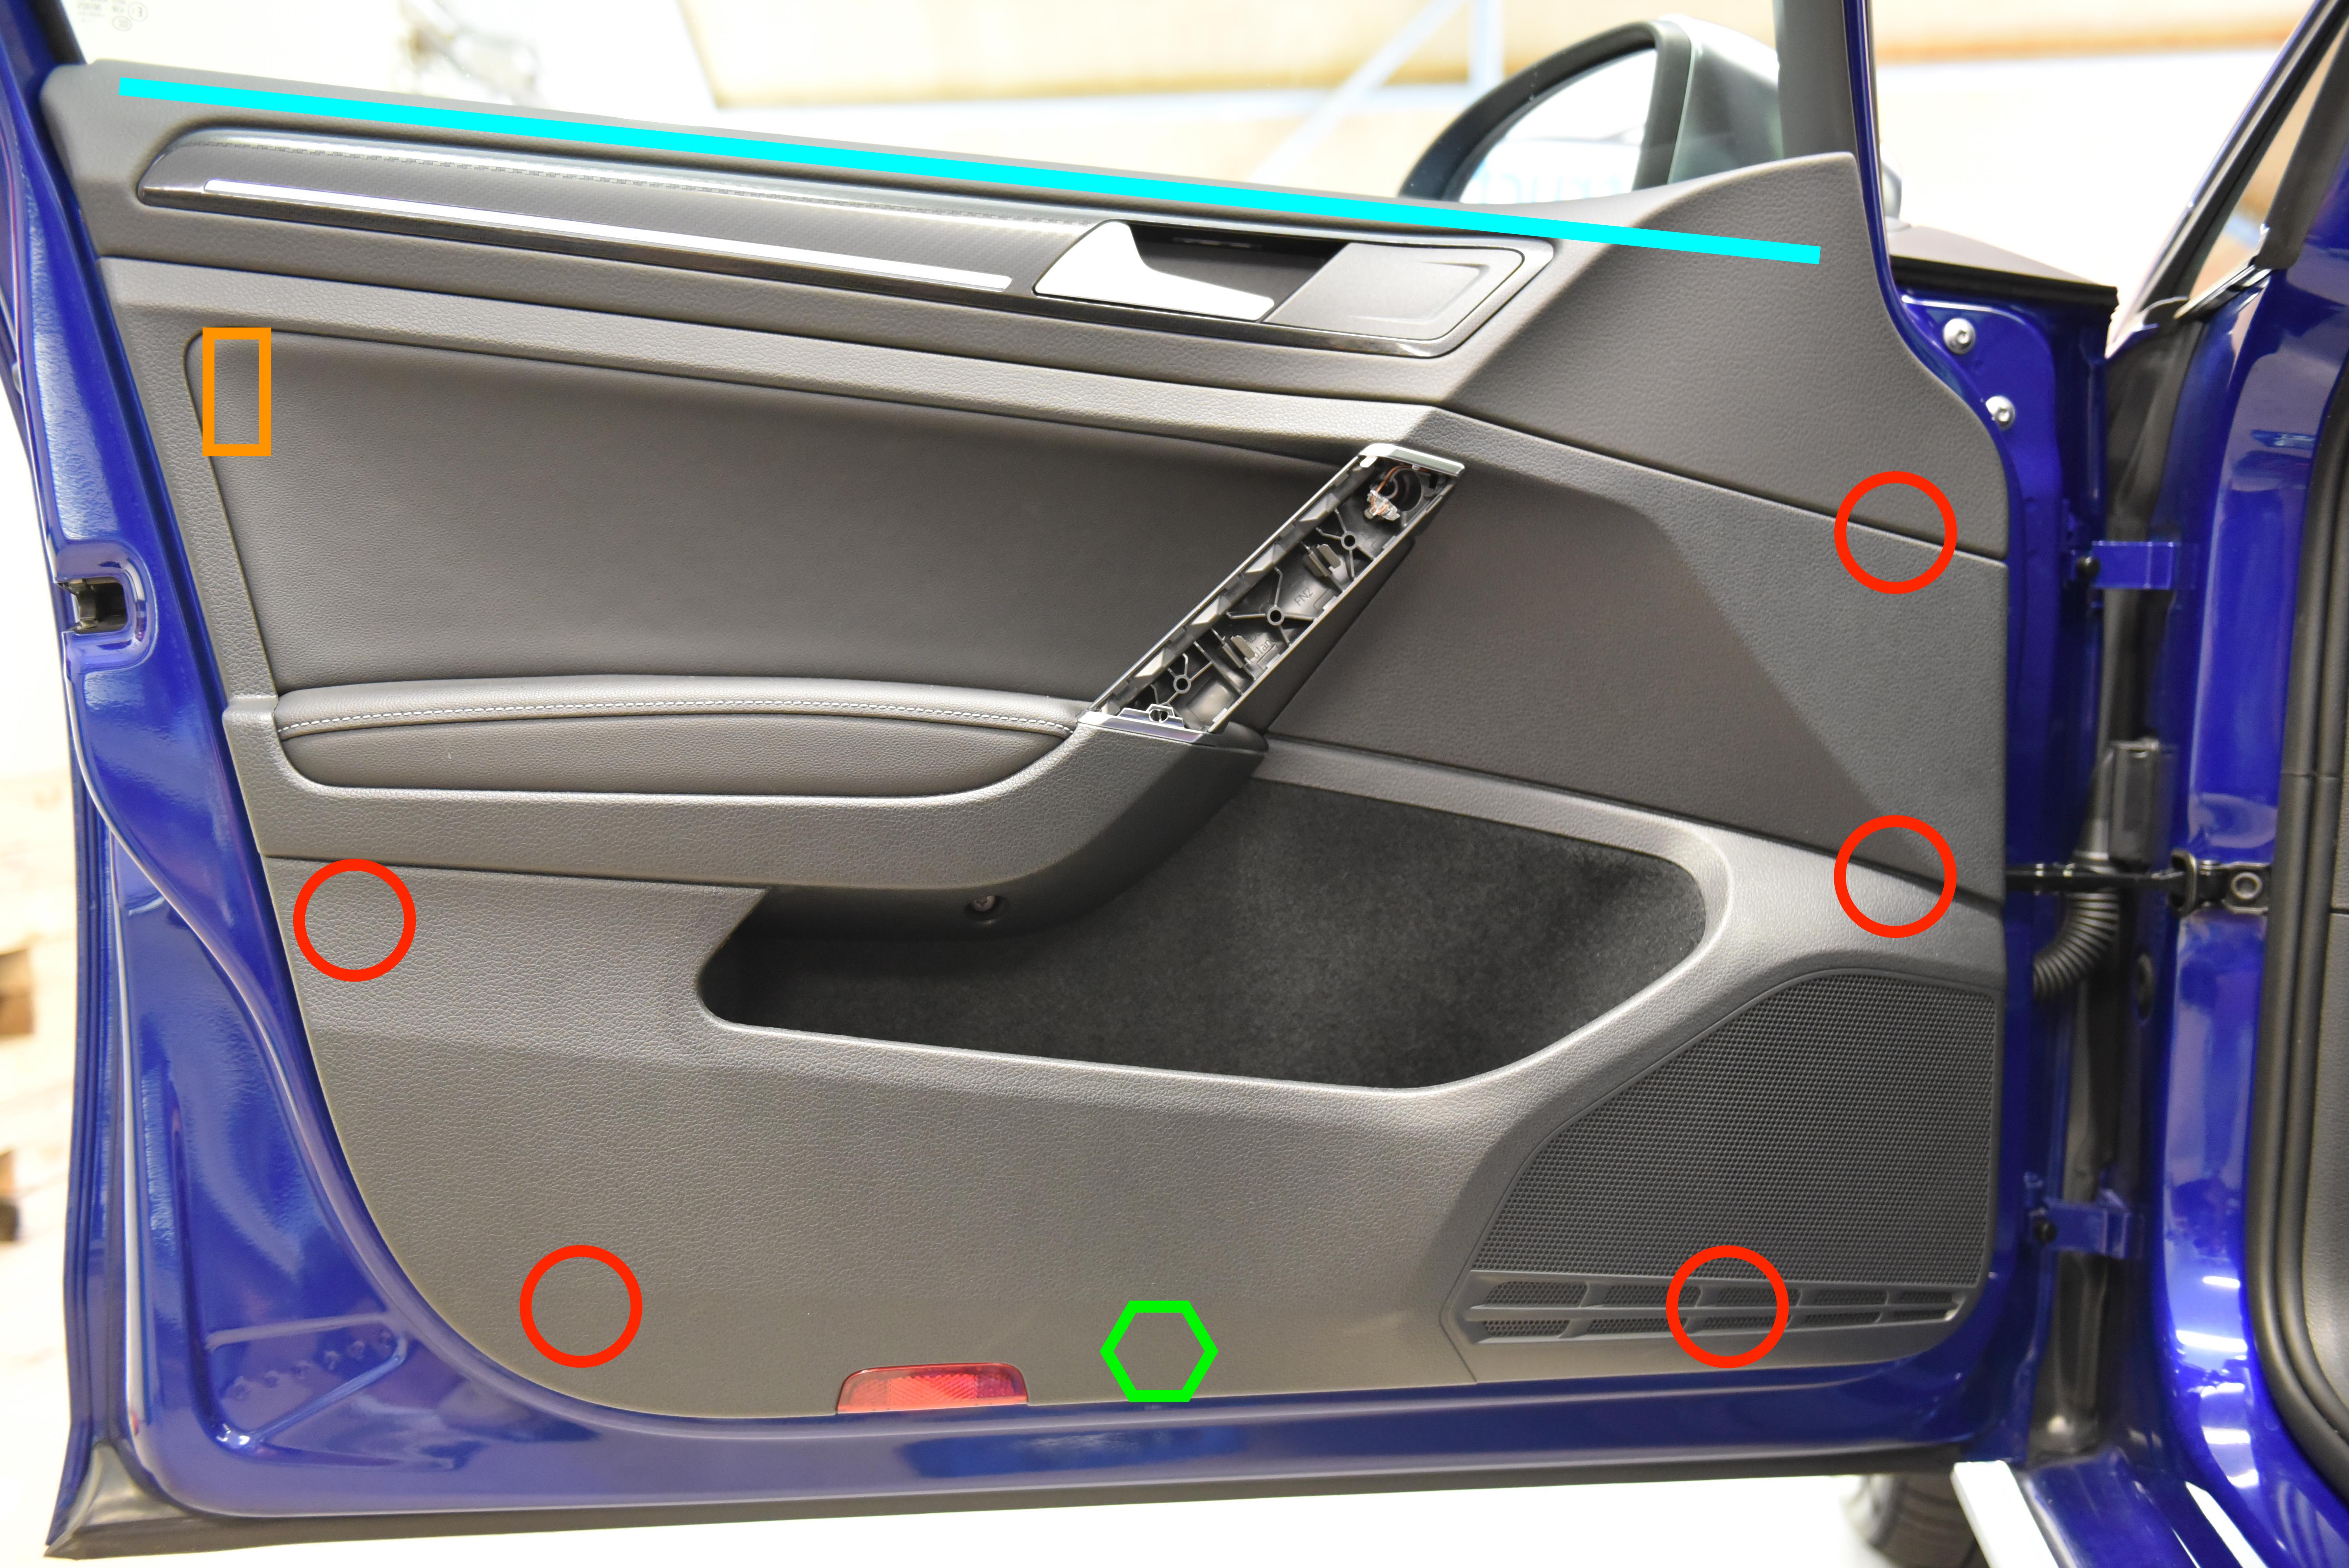
This image shows you an overview of all the clips we need to release to remove the door card. There are three different styles of clips:
Red Circles – Push-Pull Clips. These are simply ‘pulled’ on to release them.
Orange Square – Slide Clip. When removing the door card we need to slide it upwards to release.
Green Hexagon – Twist Clip. Simply rotated 90 degrees to release the door card.
Plus two bolts which are outlined in the following steps.
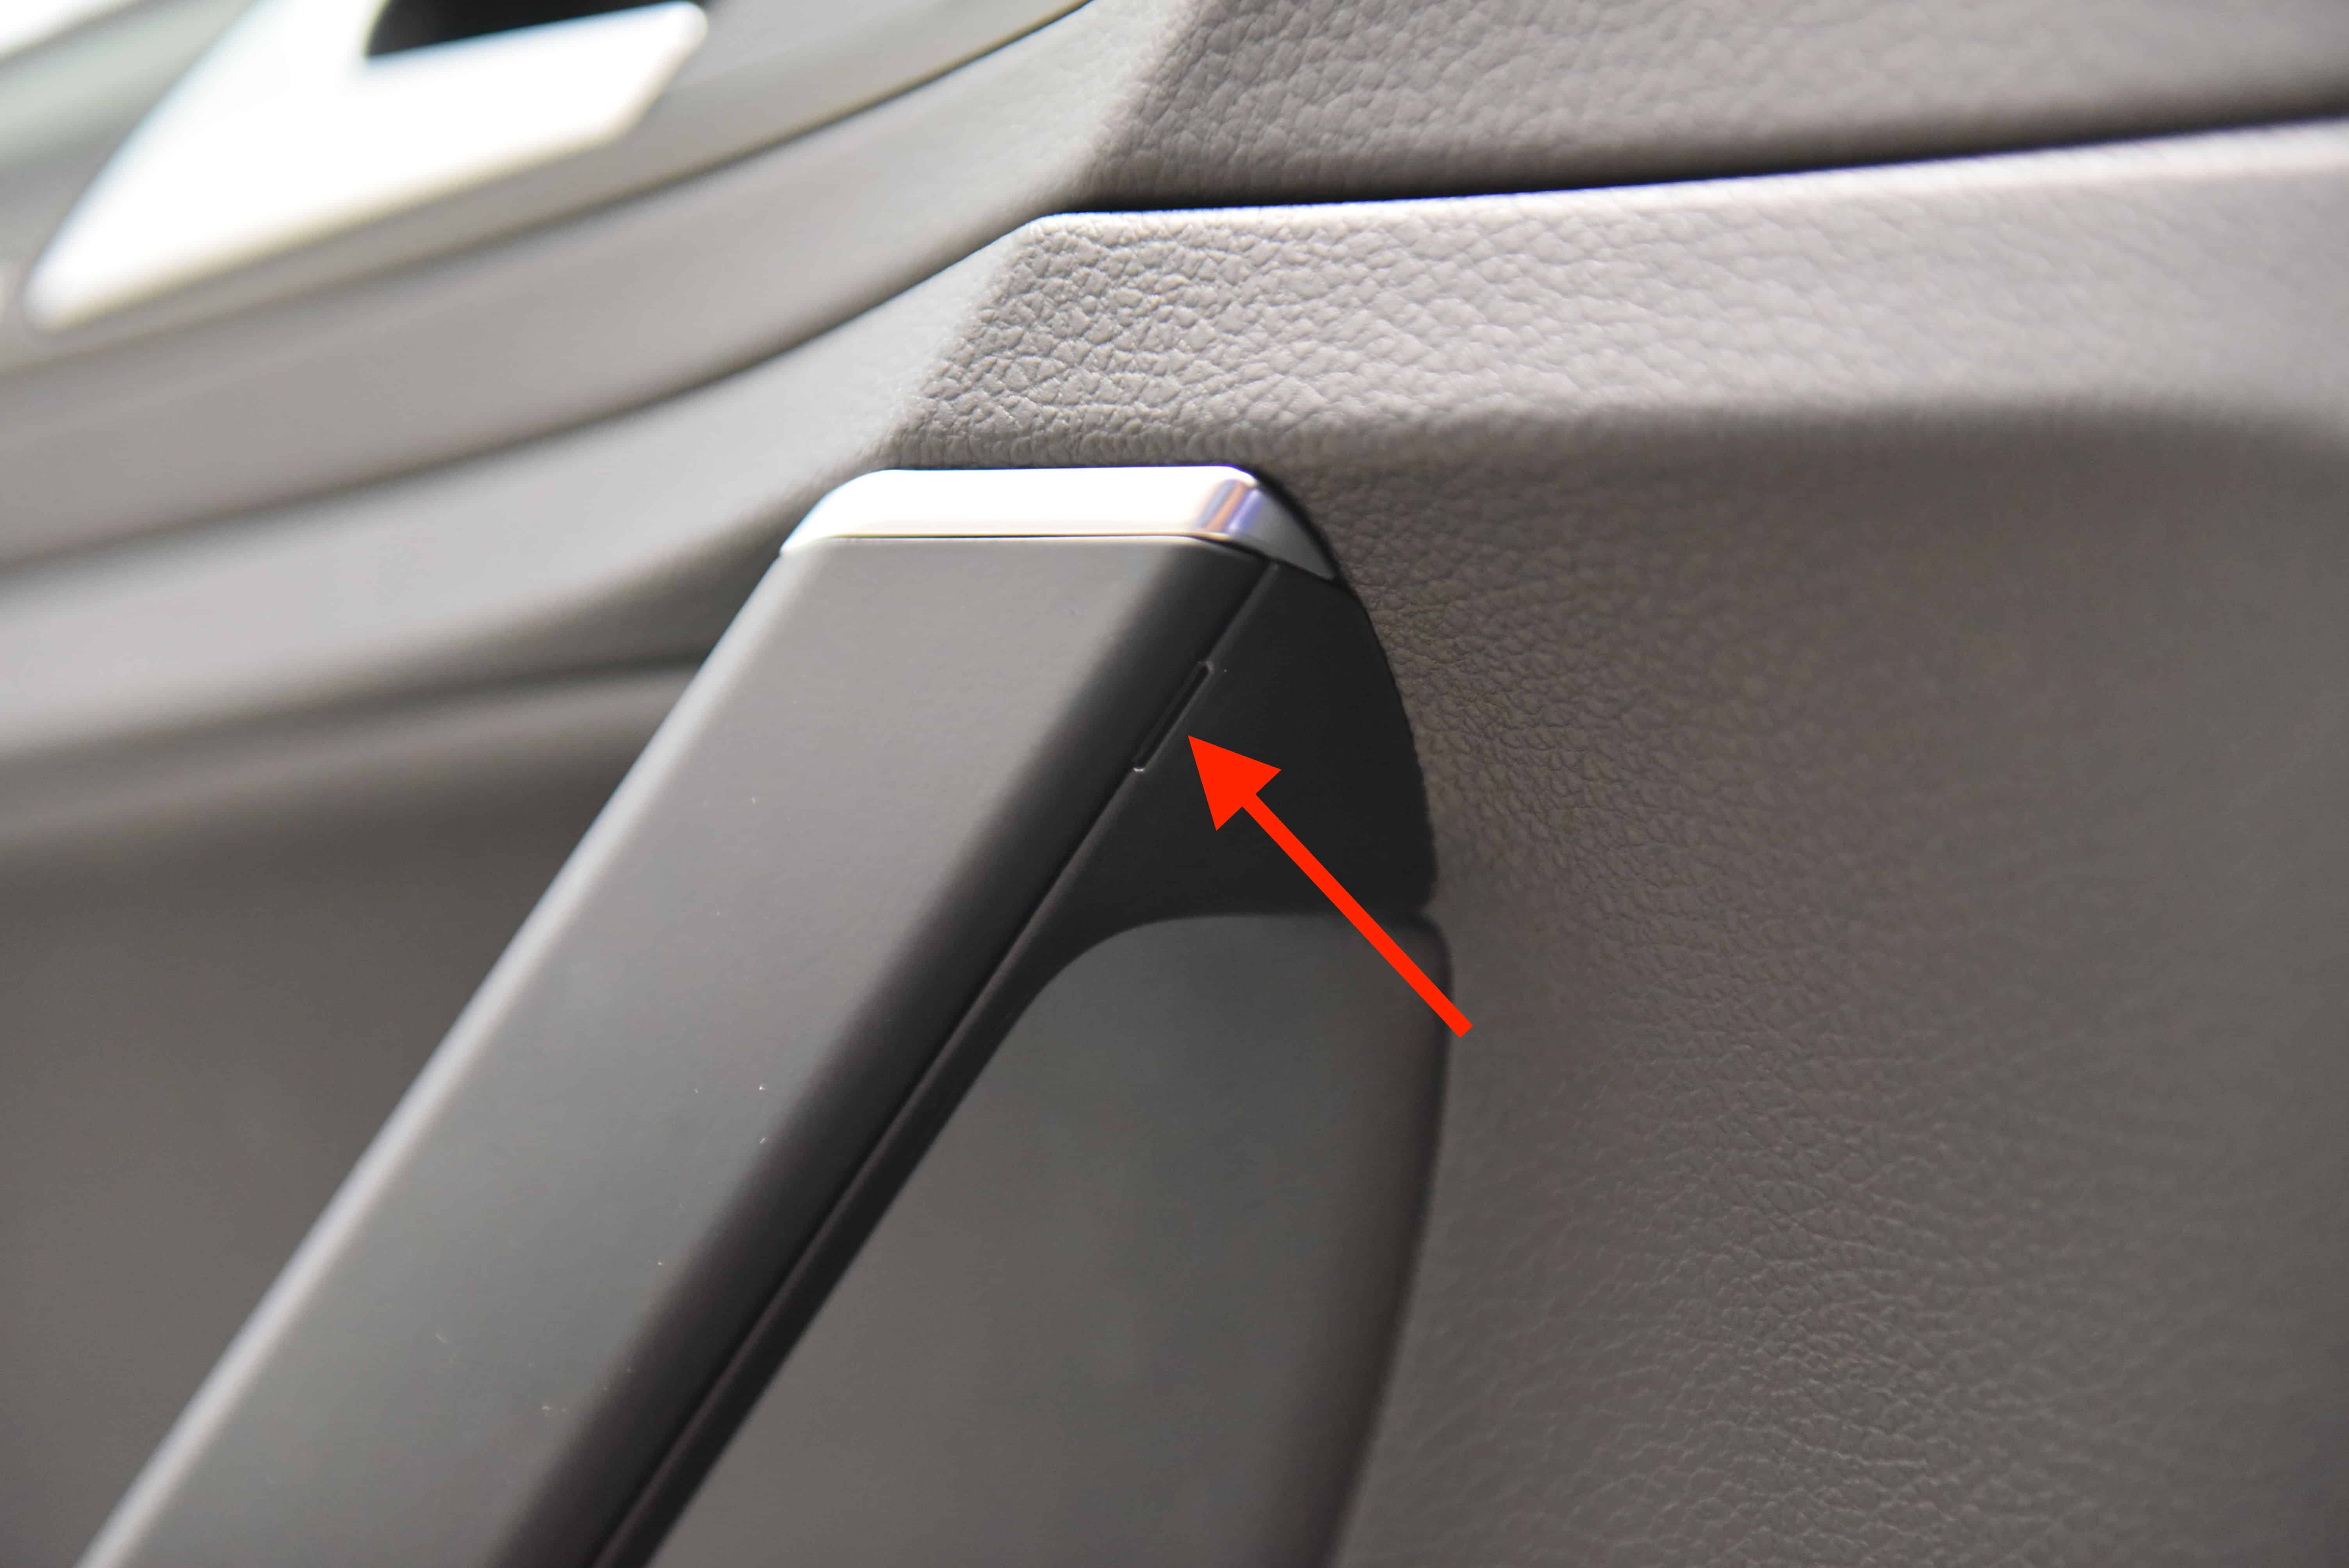
Step 2
Using a trim removal tool, release the plastic cover on the door handle.
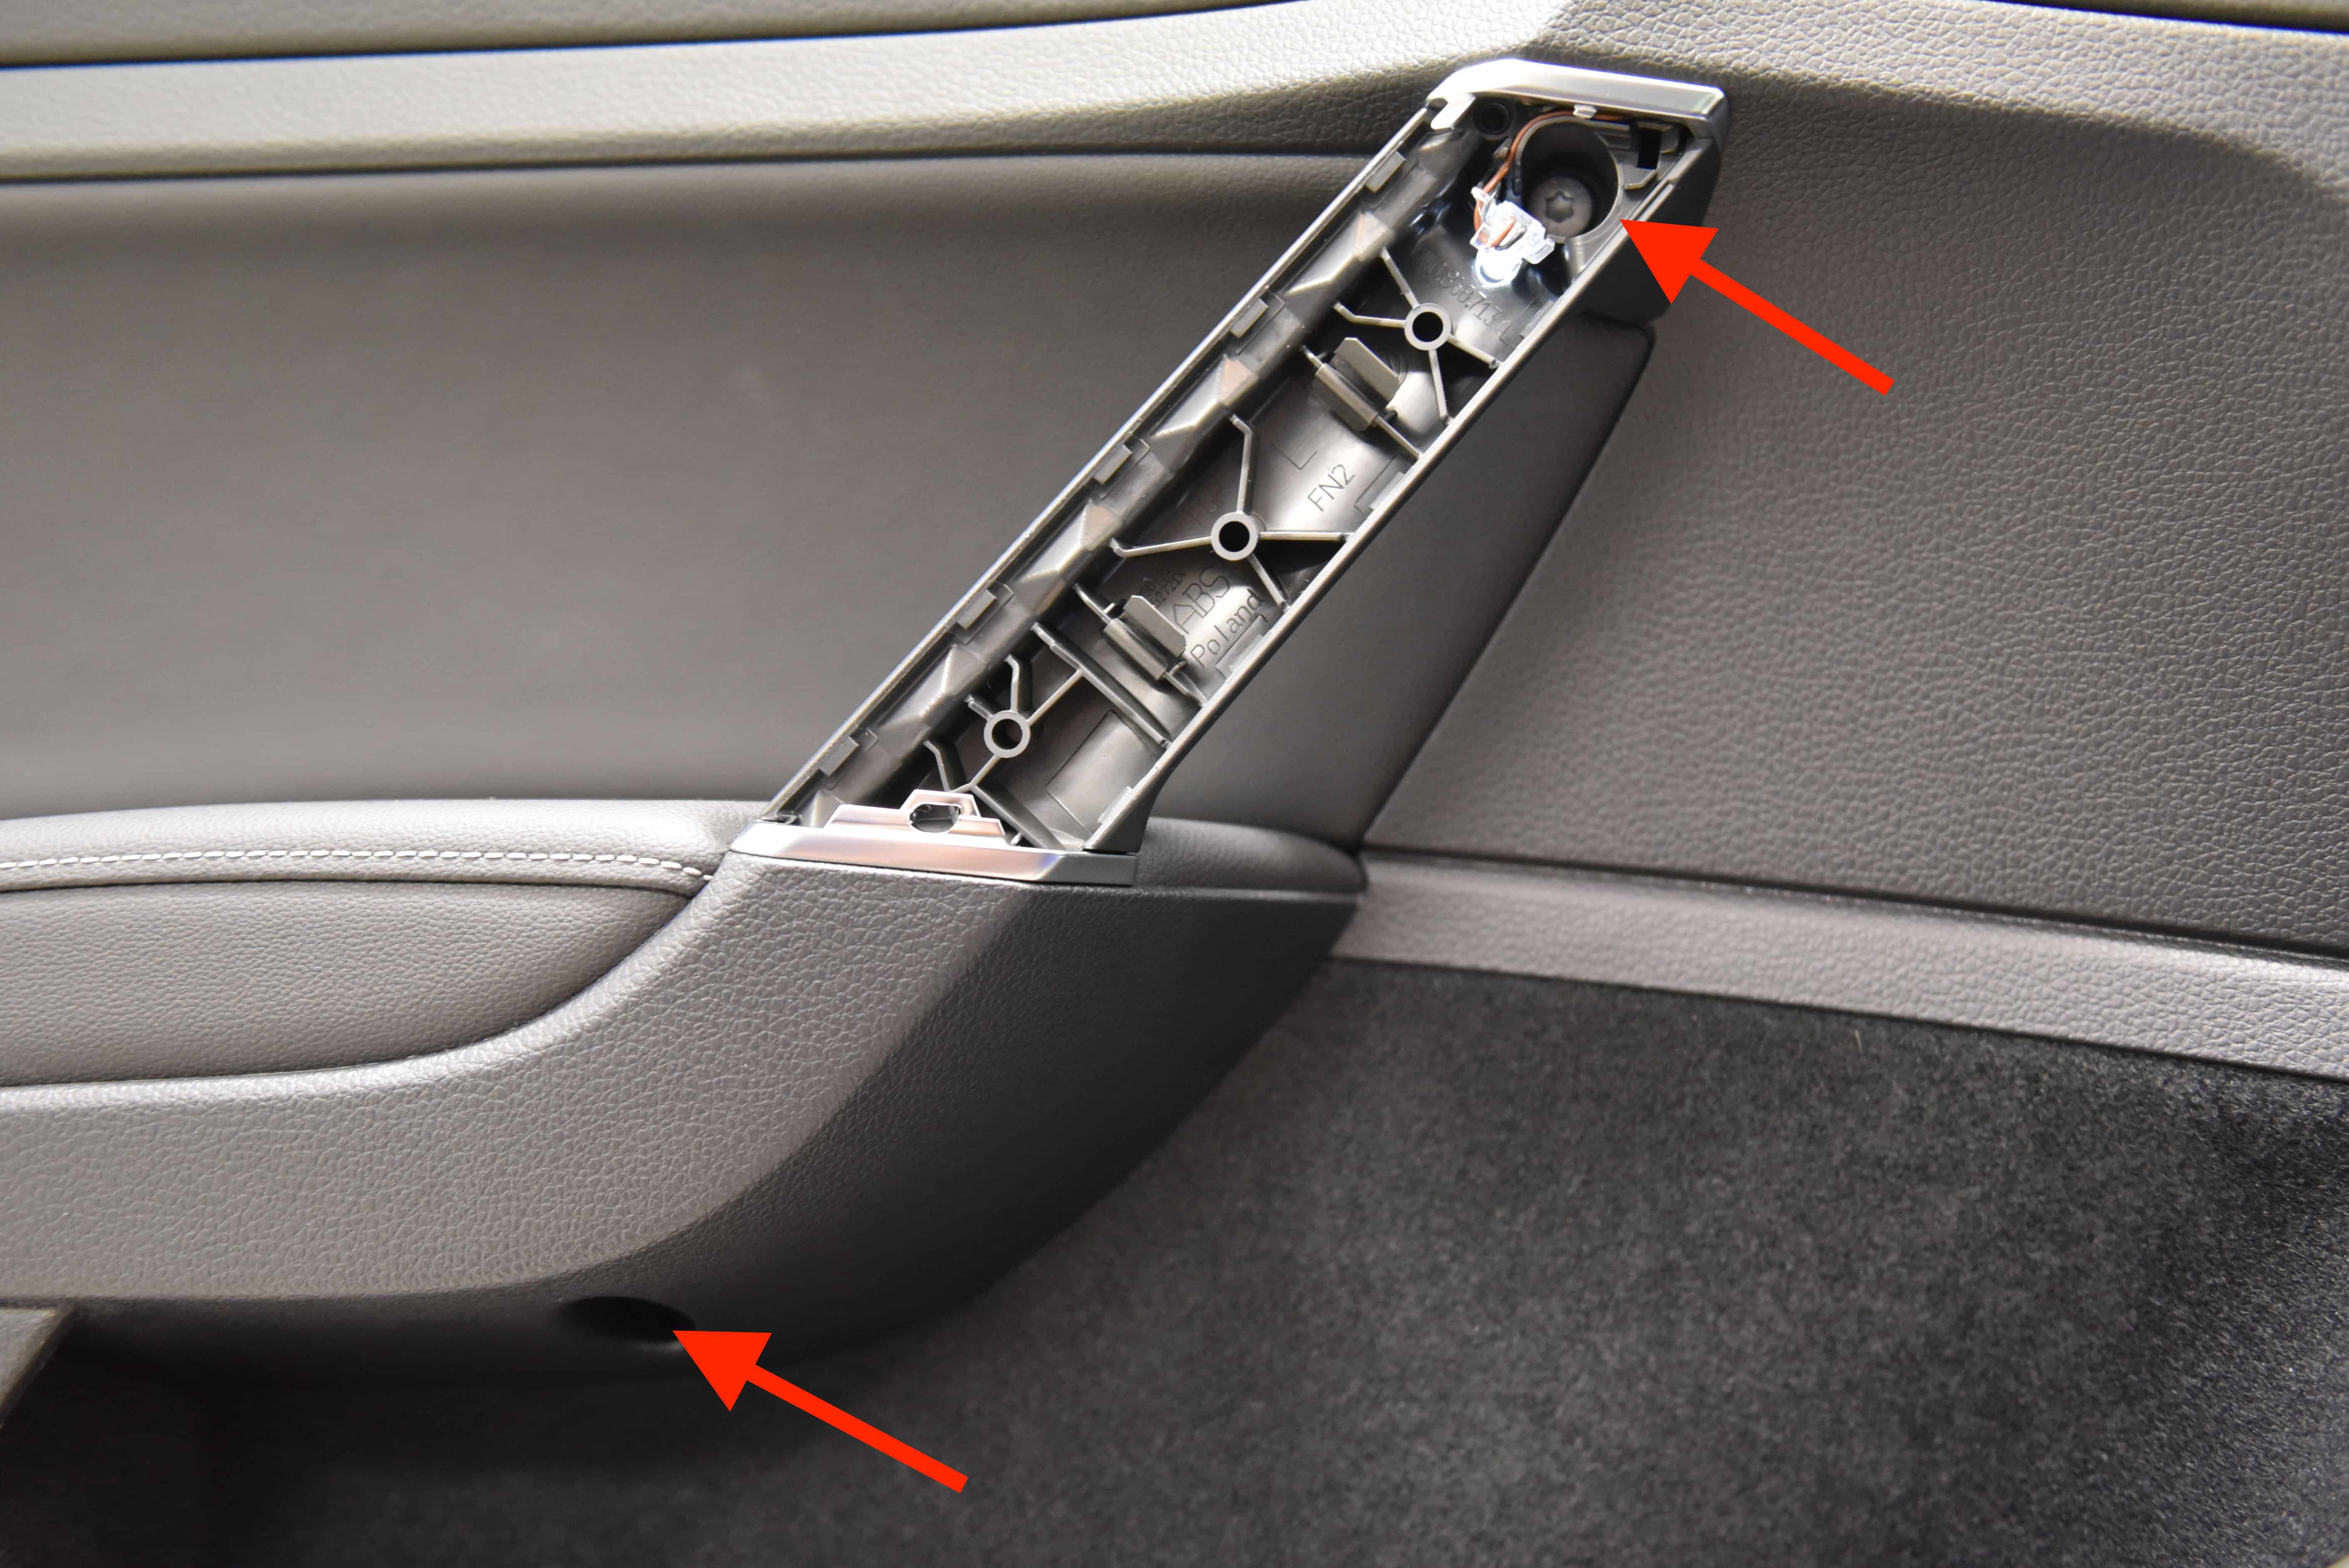
Step 3
Unbolt the following two bolts using a Torx driver.
Step 4
Looking at the underside of the door card, rotate this clip 90 degrees.
Step 5
Using your hands and trim removal tools, work from the bottom of the door and start to release the push-pull trims circled in Red. You need to pull very firmly to release the clips.
When you reach the last clip outlined in orange, begin to slide the trim upwards to slide it out of the clip.
Step 6
Lastly disengage the trim for the windowsill, which requires a firm lift upwards (light blue).
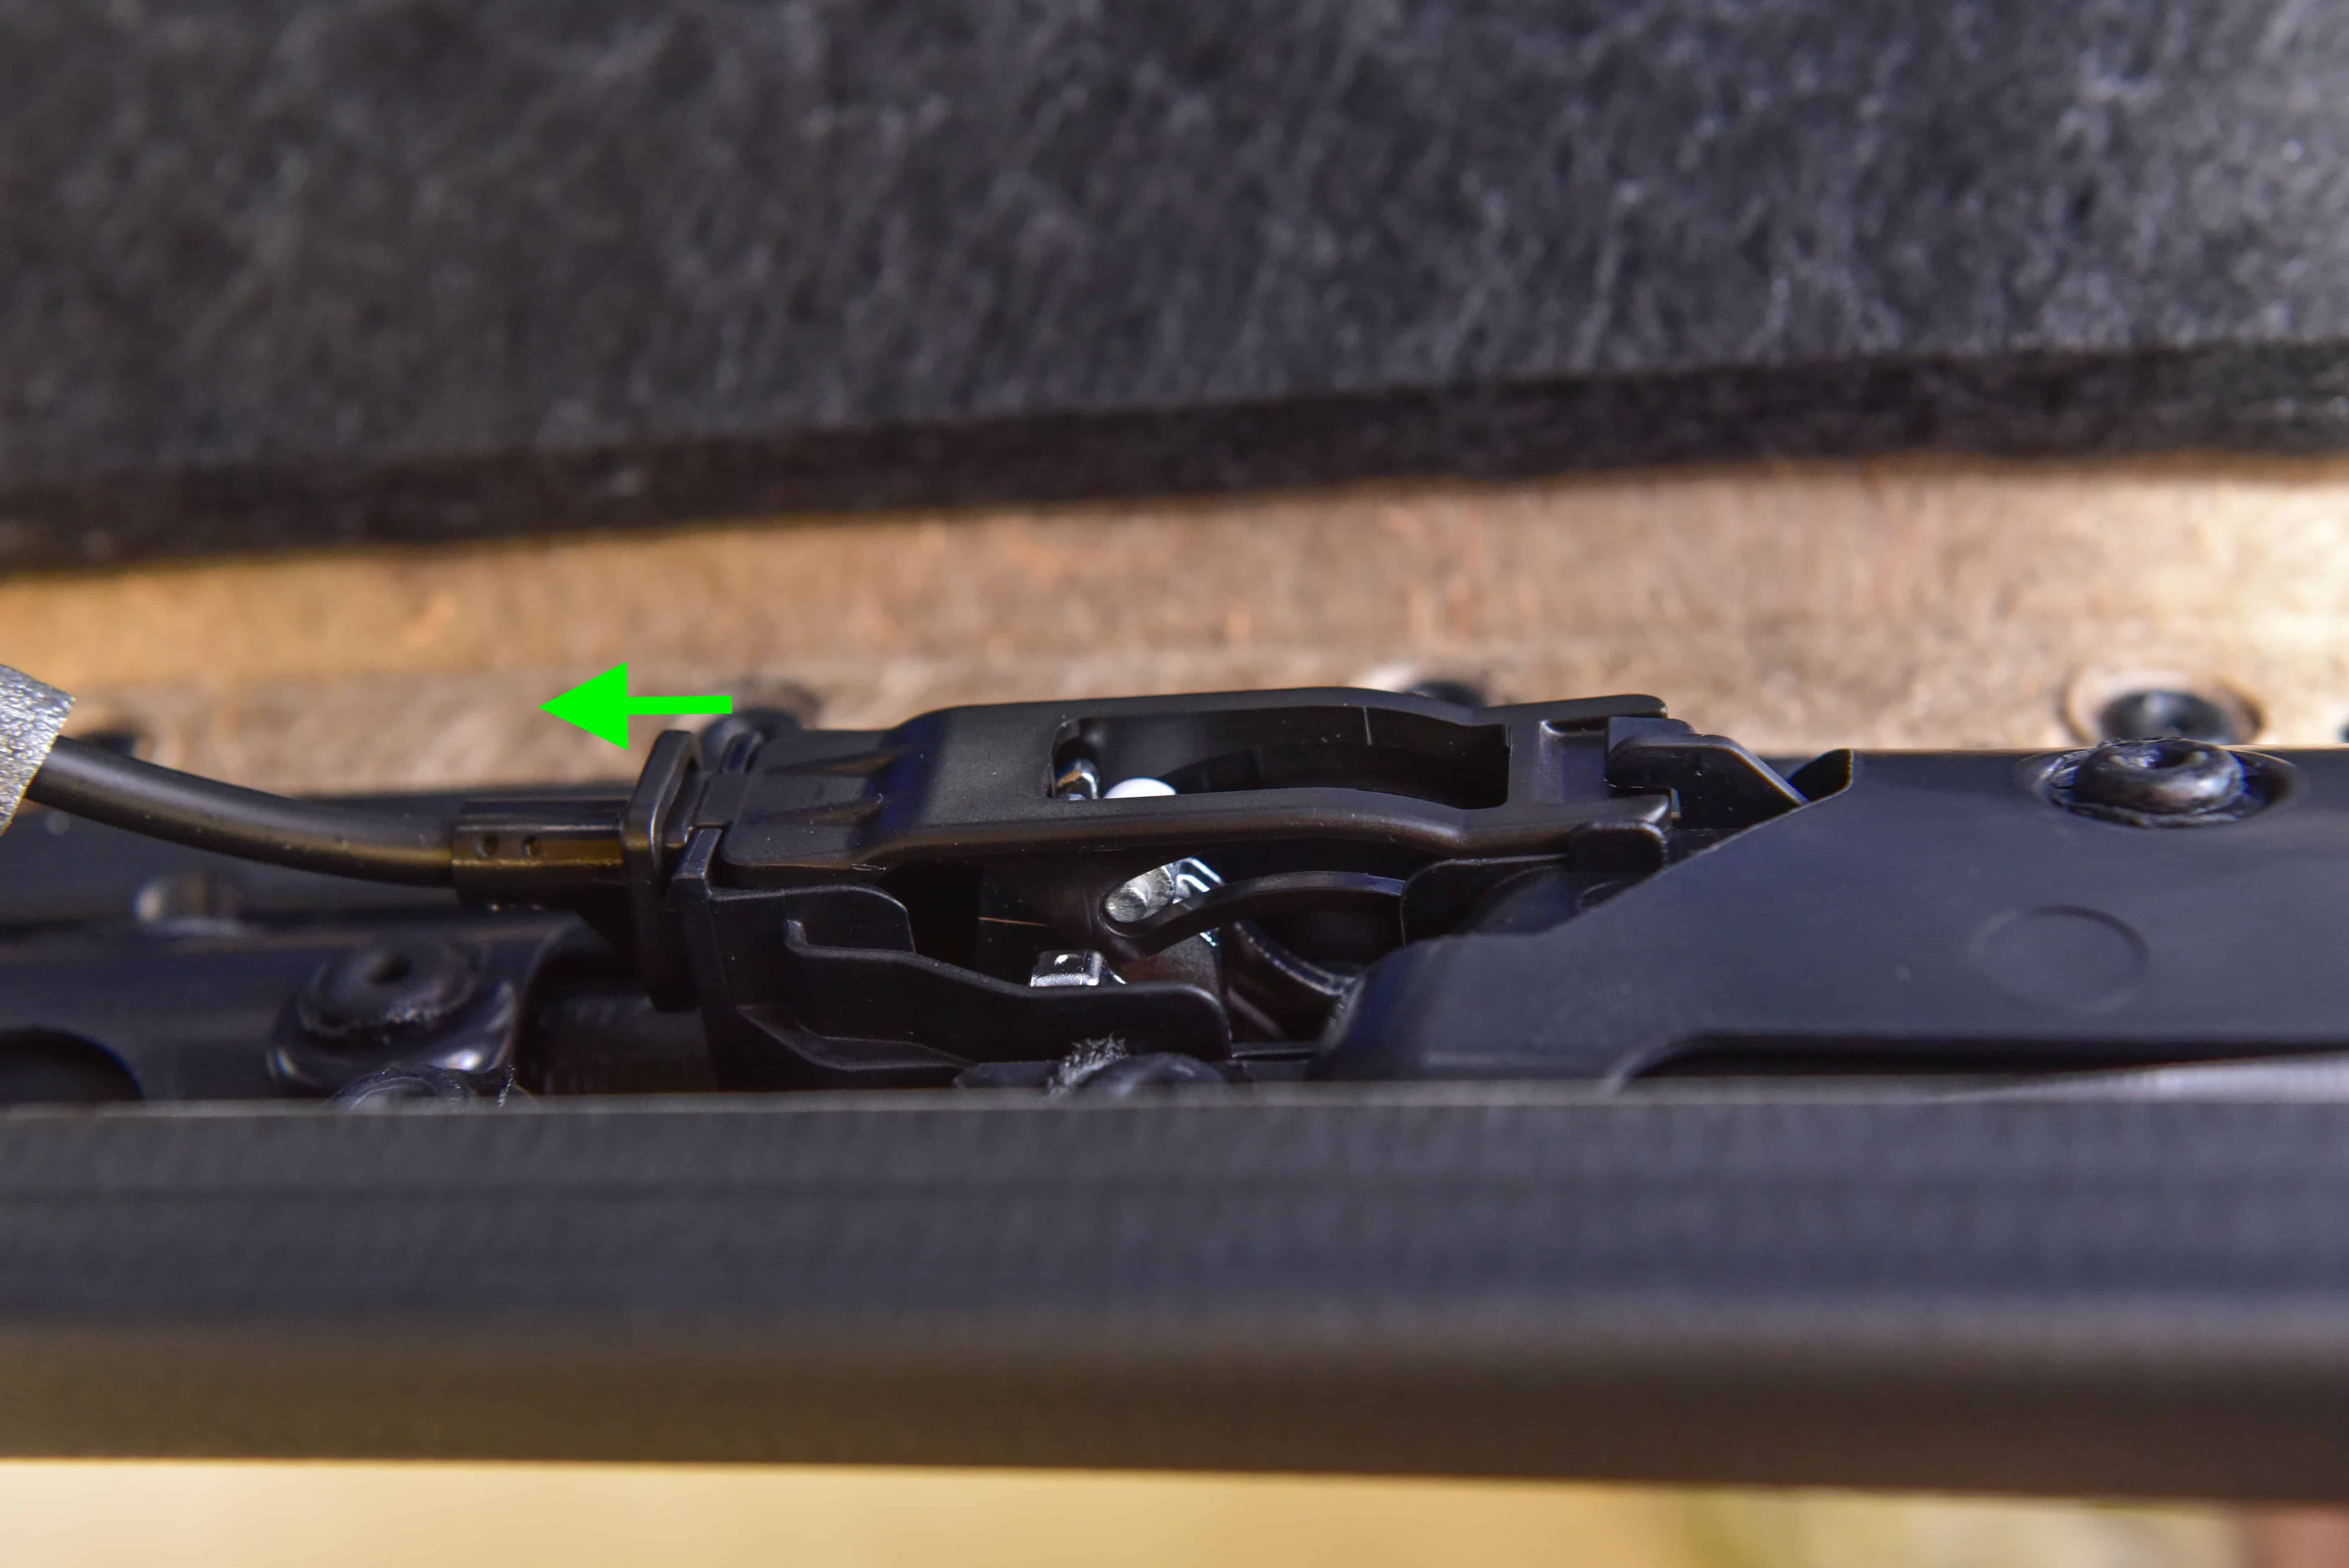
Step 7
With the door card loose, you need to unplug a series of wiring clips, which will vary between passenger and driver doors, as well as vehicle trim specification.
Next release the door lock cable by pushing the tab across and lifting outwards.
Did you find this guide helpful? Consider sharing it to help other car enthusiasts