We’ll be showing you how to remove the A Pillar trim, and associated trim around the triangular glass alongside the dashboard on your MK7 Golf. This tutorial will be helpful if you’re installing a dashcam / radar detector, upgrading your speakers, or tinting this small section of glass.
Difficulty Rating
Hard
Tools/Parts Required
Long Nose Pliers
Trim Removal Tools
Lots of Patience
Step 1
Overview
Before we begin, I’d like to mention that this is no easy task. This process in inherently difficult and fiddly due to the design and method of securing the base of the A Pillar to the dashboard.
We easily spent over 15 minutes on each side simply trying to pull the A Pillar out from the dashboard, and spent even more time trying to reinstall it. Unless you are lucky, this is not a simple process. The key is patience and plenty of time.
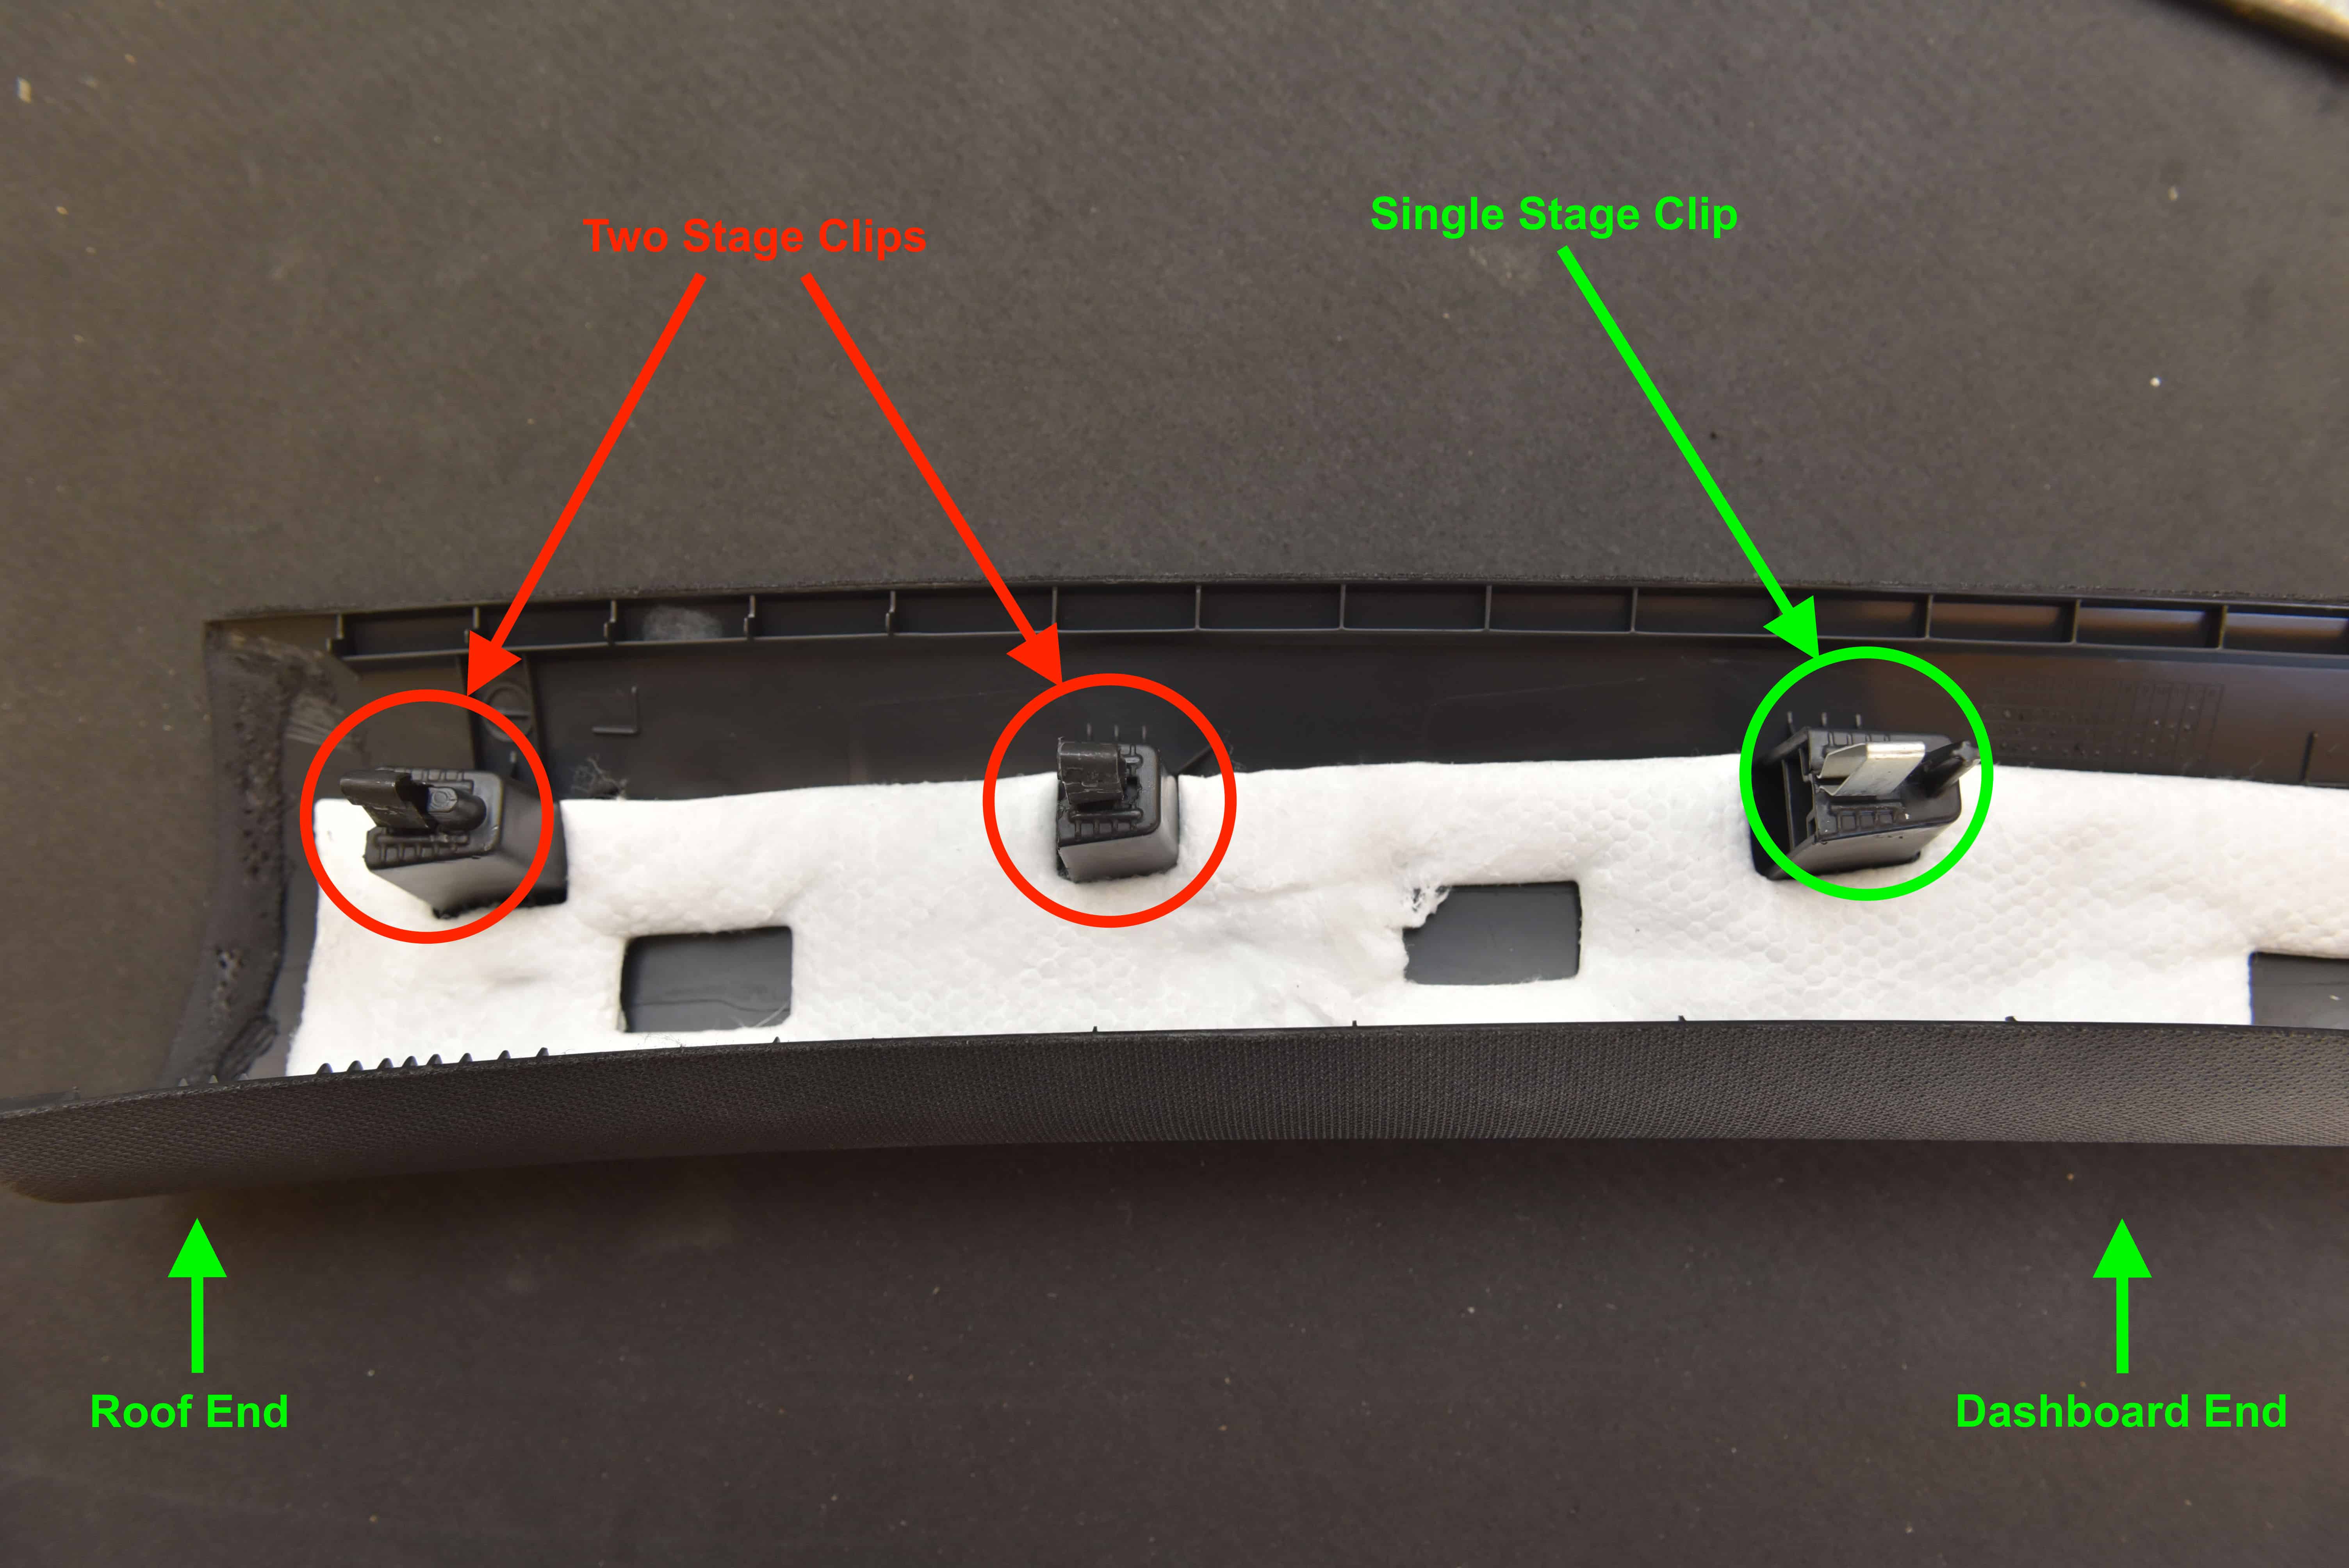
Clips
The A Pillar trim features a few different types of clips. The two upper clips, closest to the roof are two-staged. This means they require two different steps to correctly release the A-Pillar.
The third is a simple one-stage clip.
Step 2
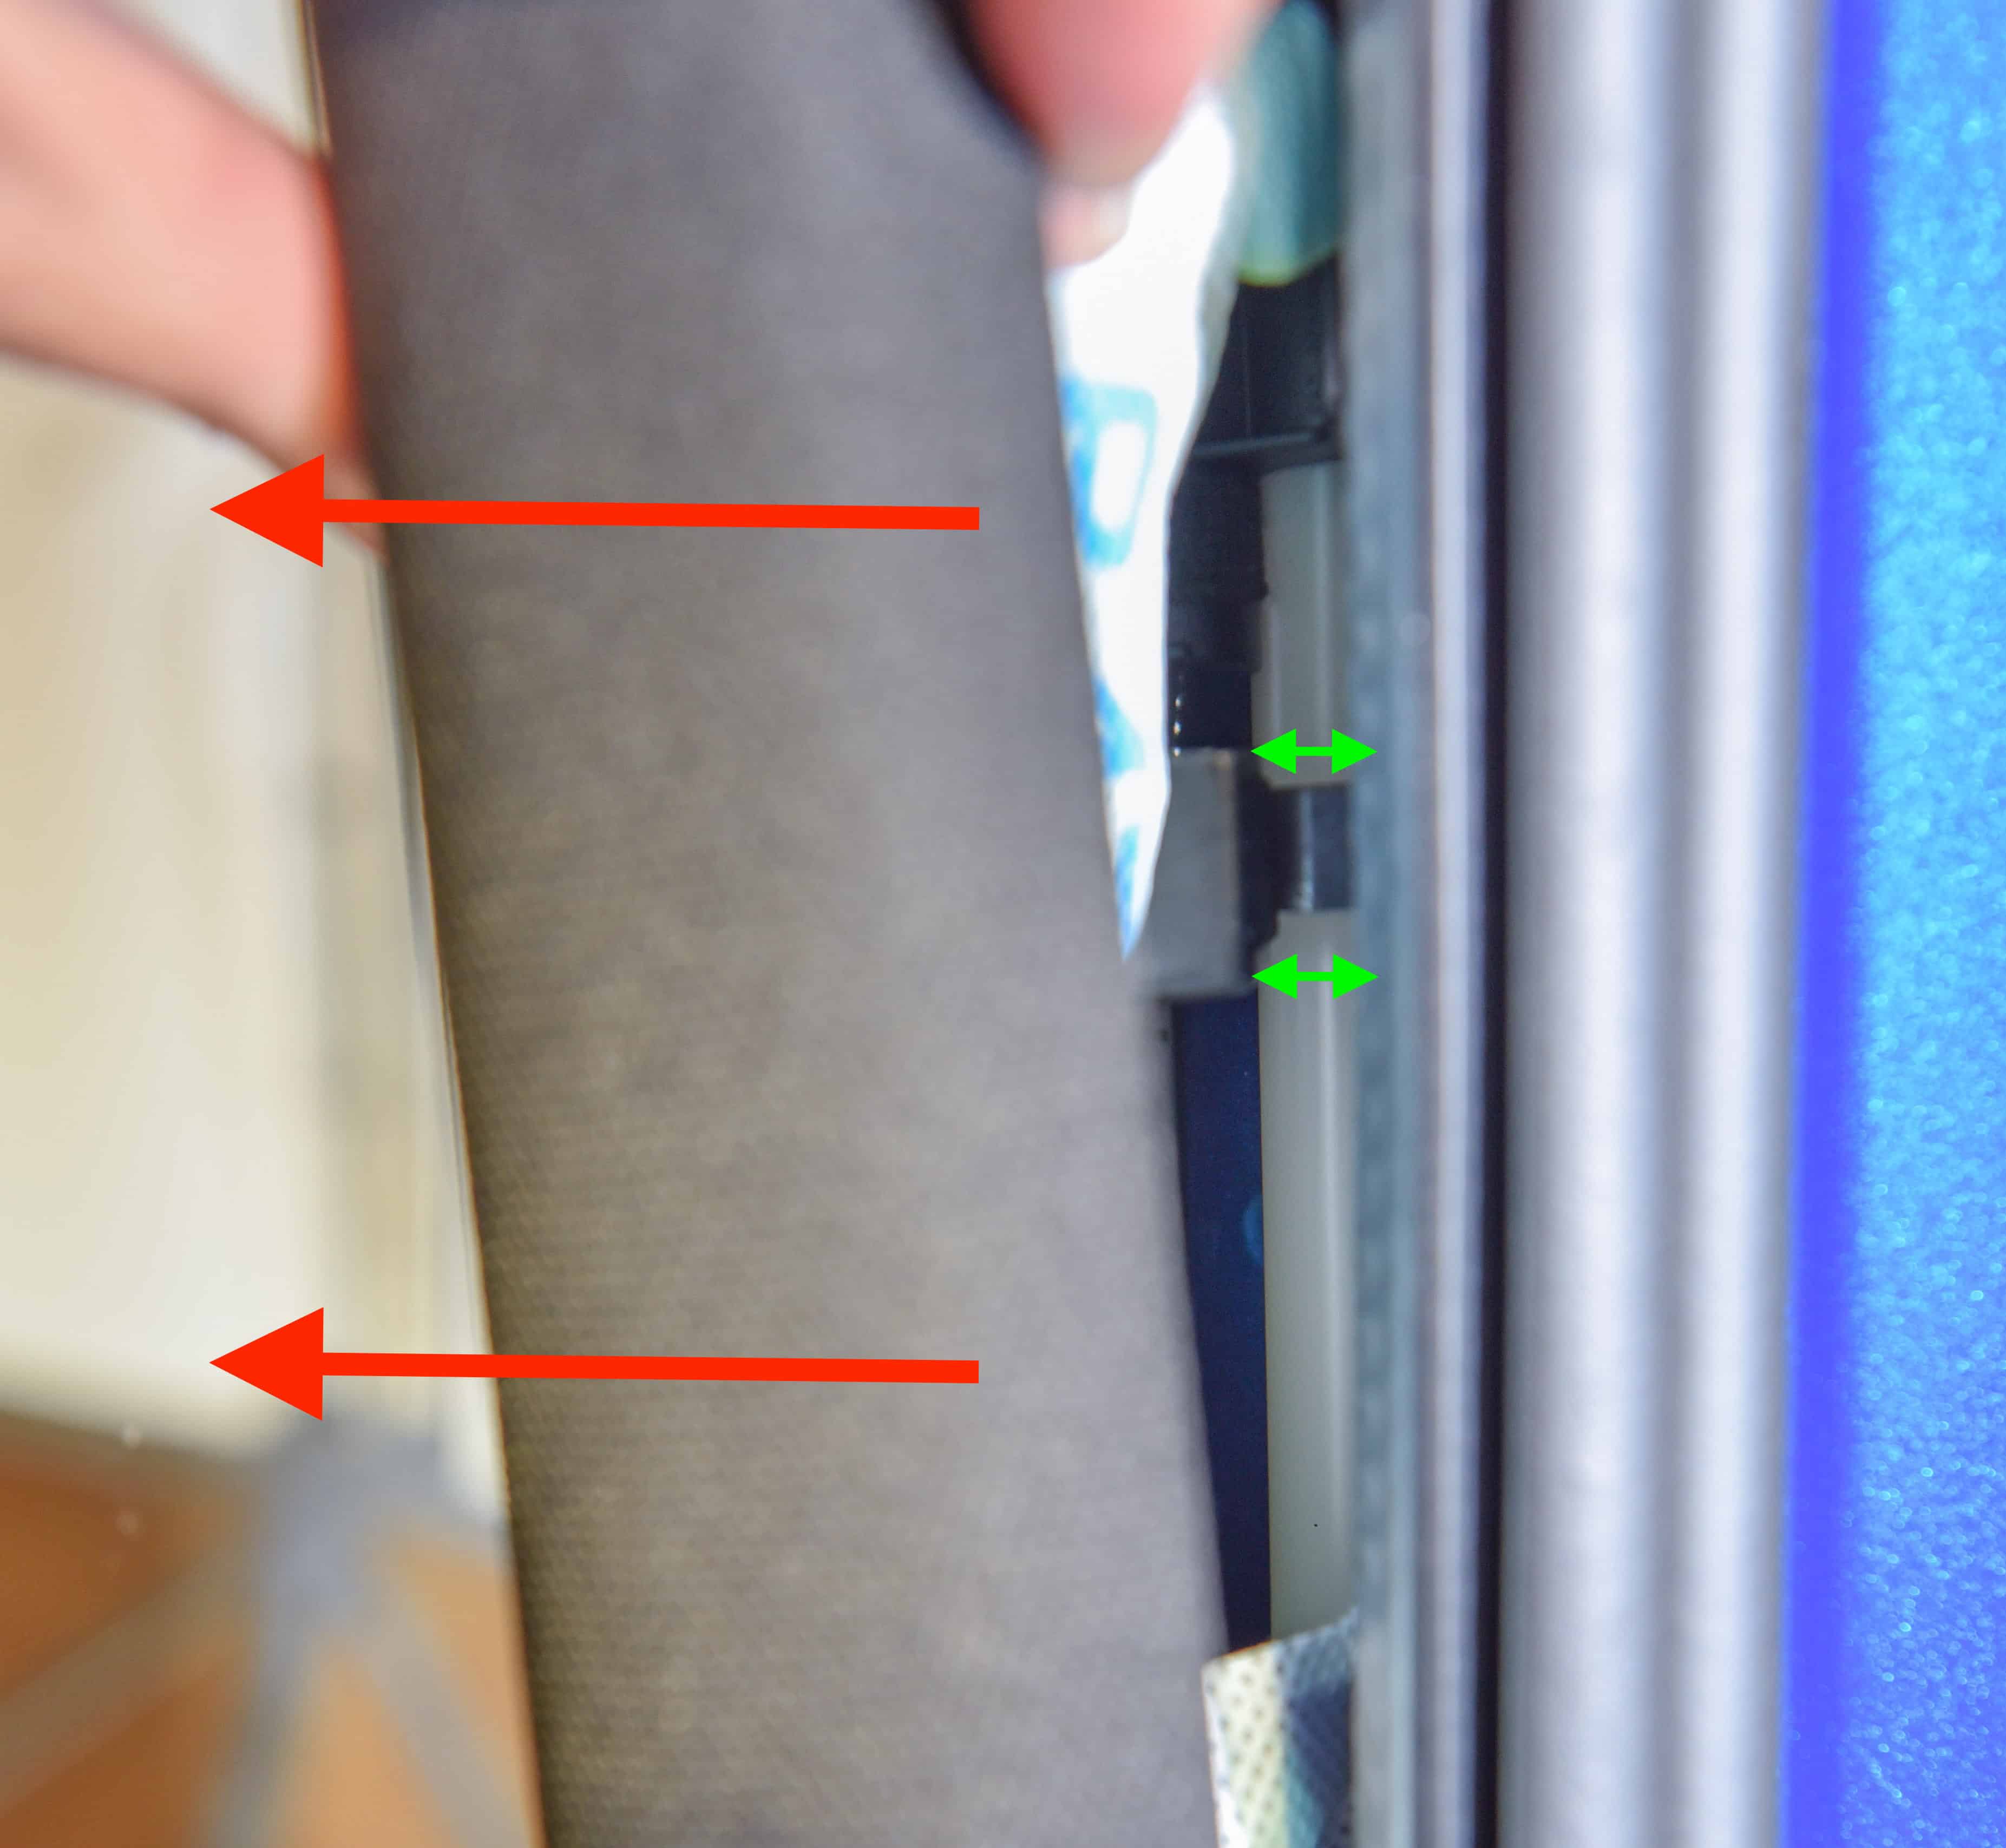
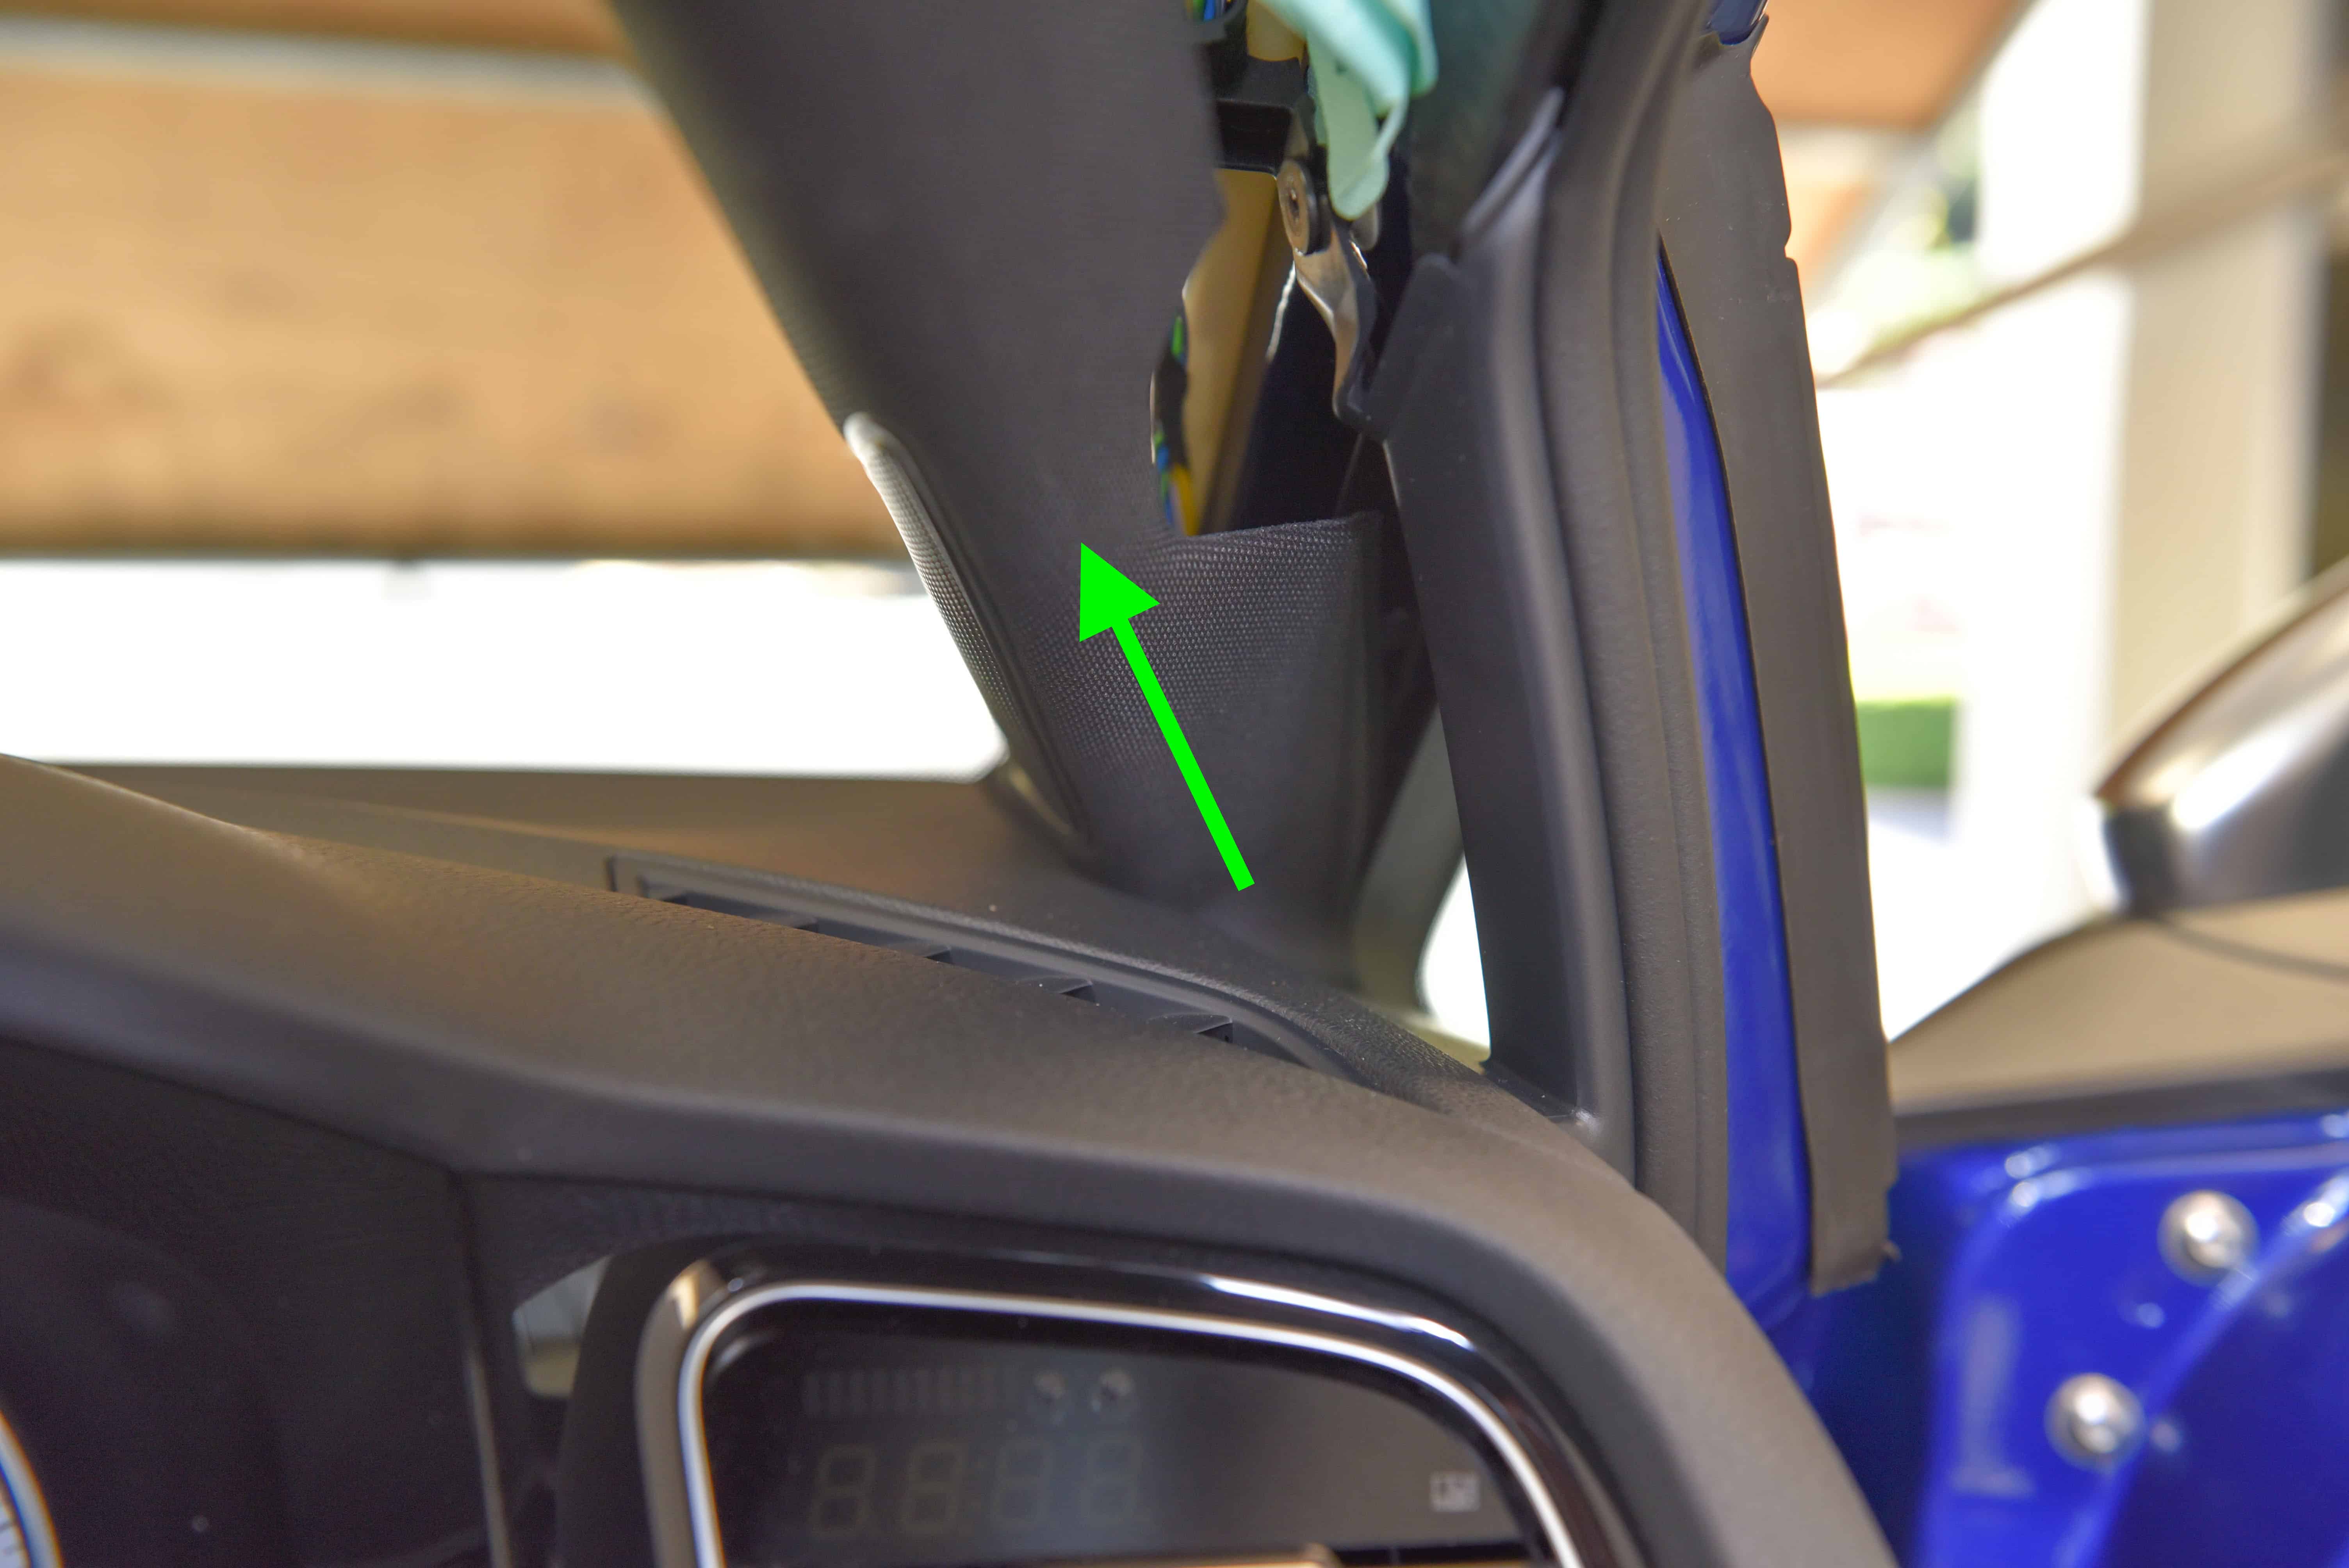
Using your hands, untuck the upper edge of the A pillar trim from the rubber door seal, and flex the trim away from the seal so you can see the first clip. It is located behind the airbag.
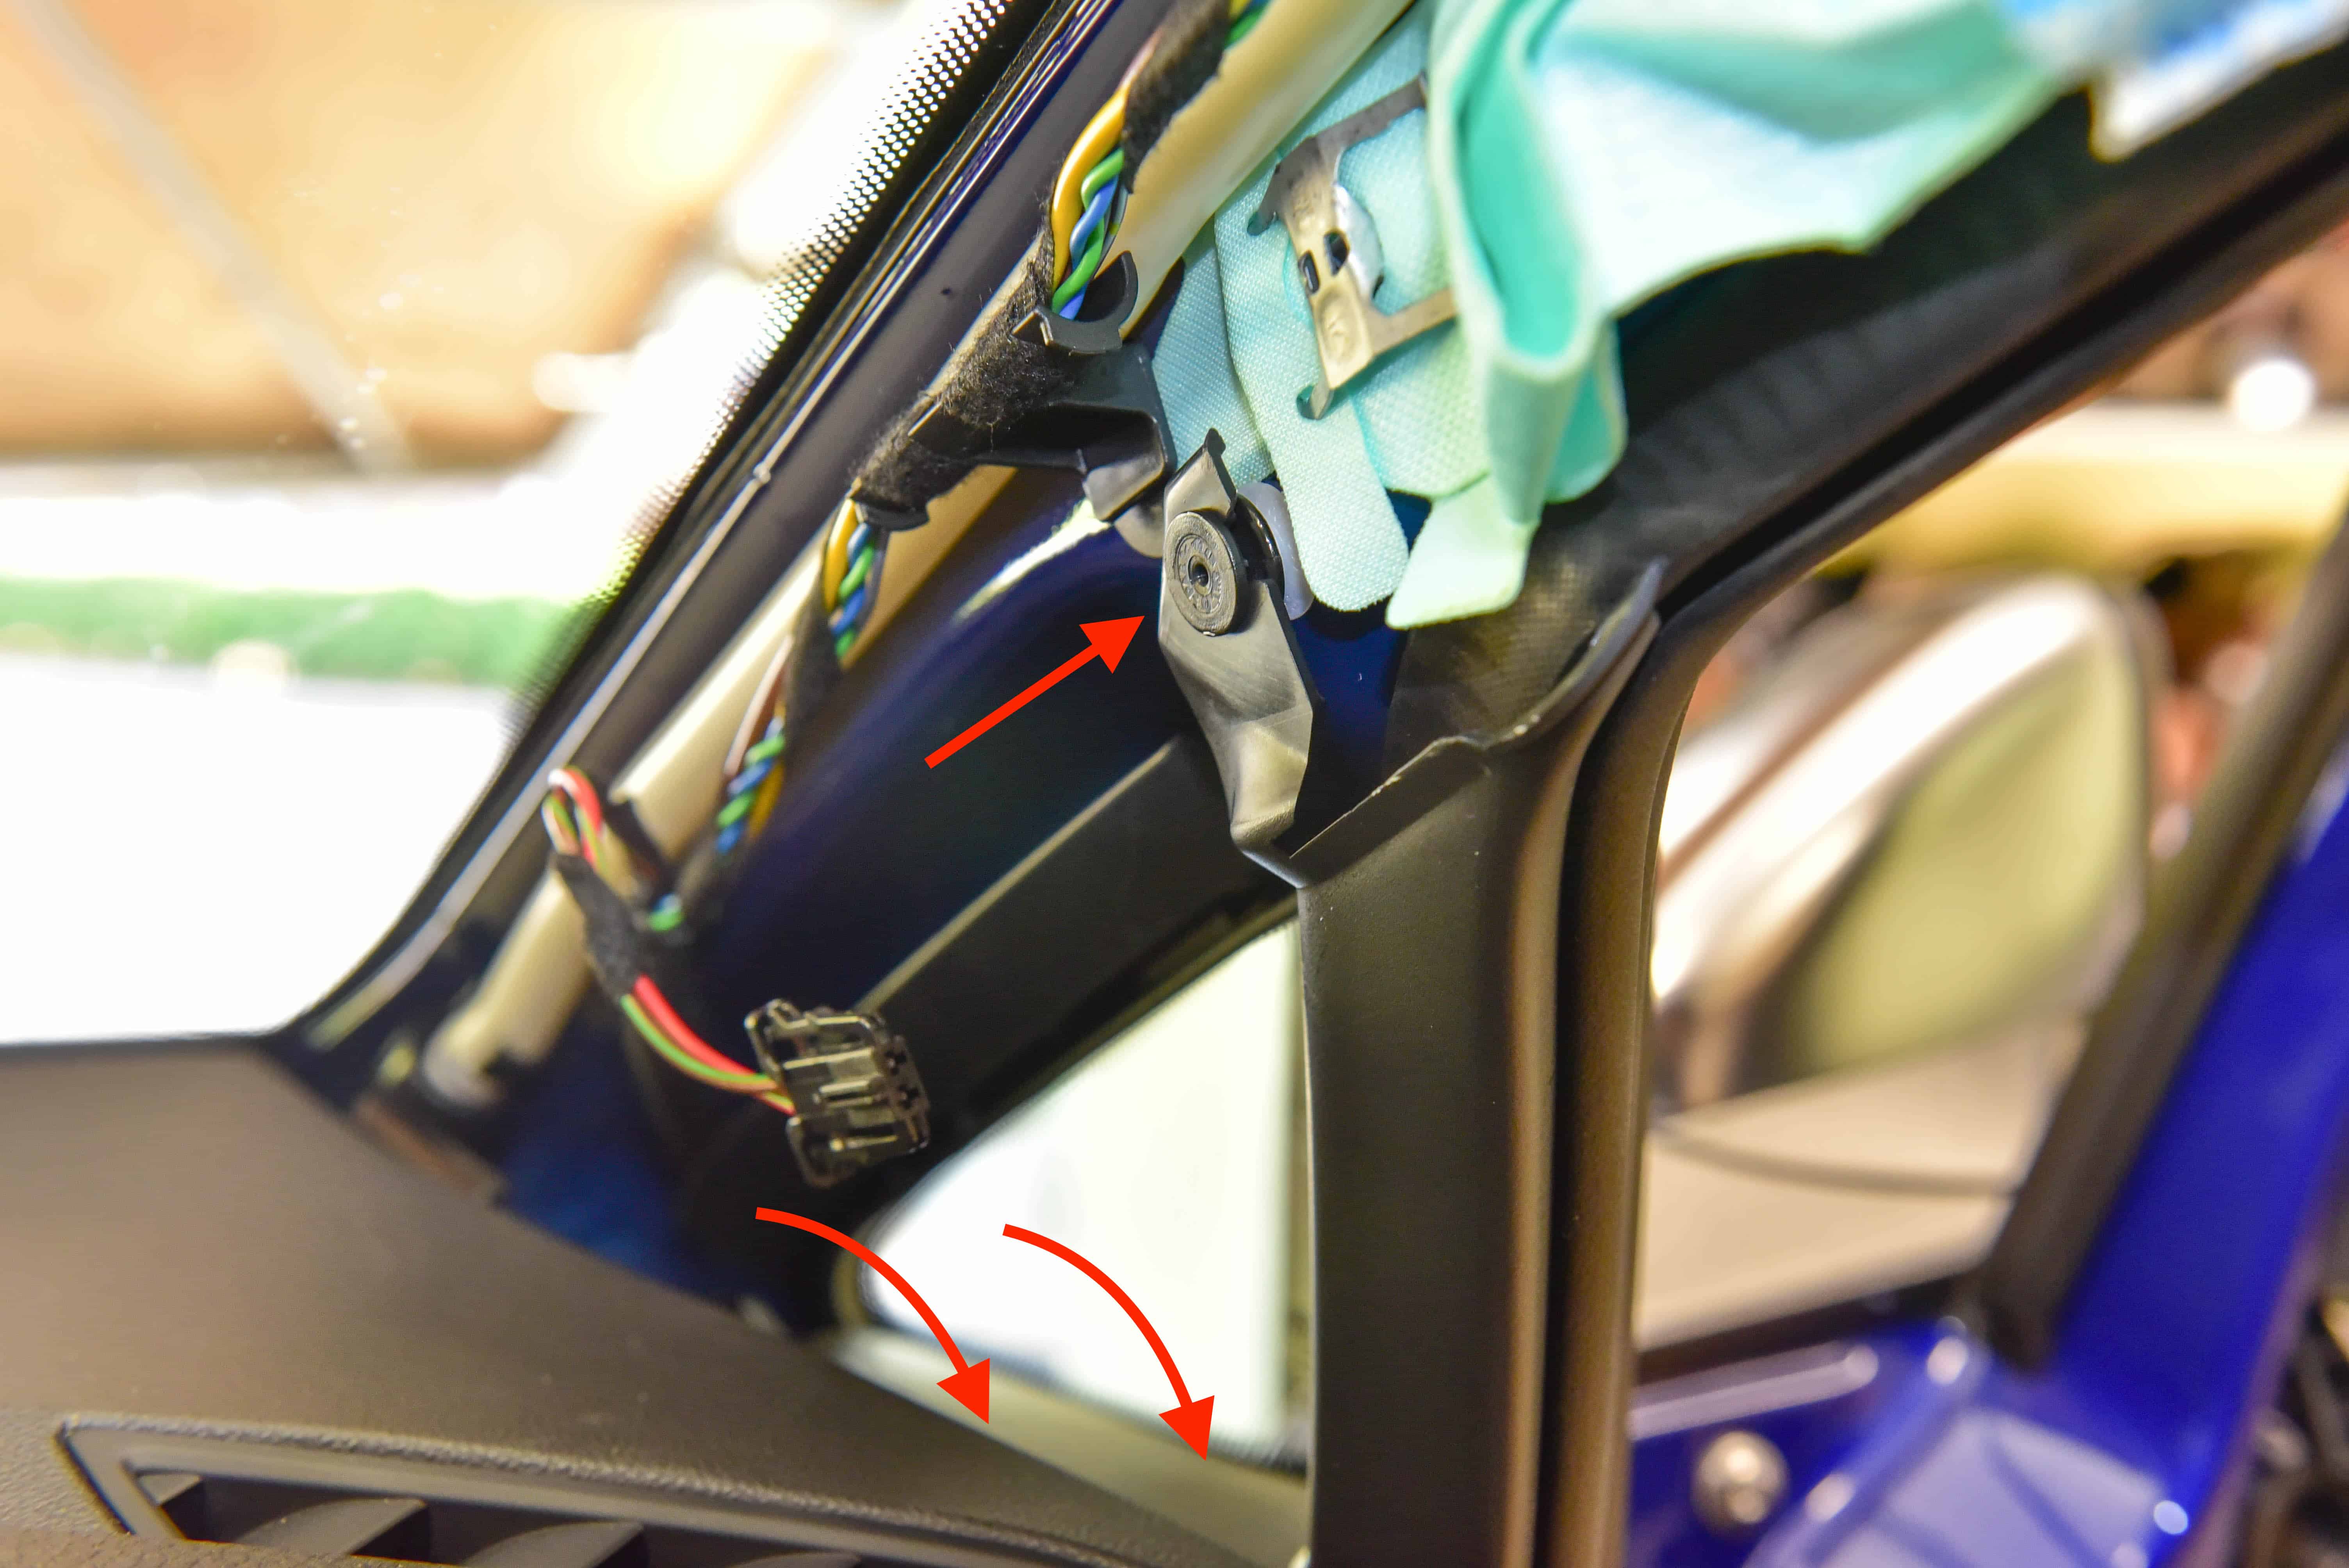
Gently pull on the trim to release the first stage of the clip. You will now notice a gap between the clip base and steel bodywork as indicated in Green.
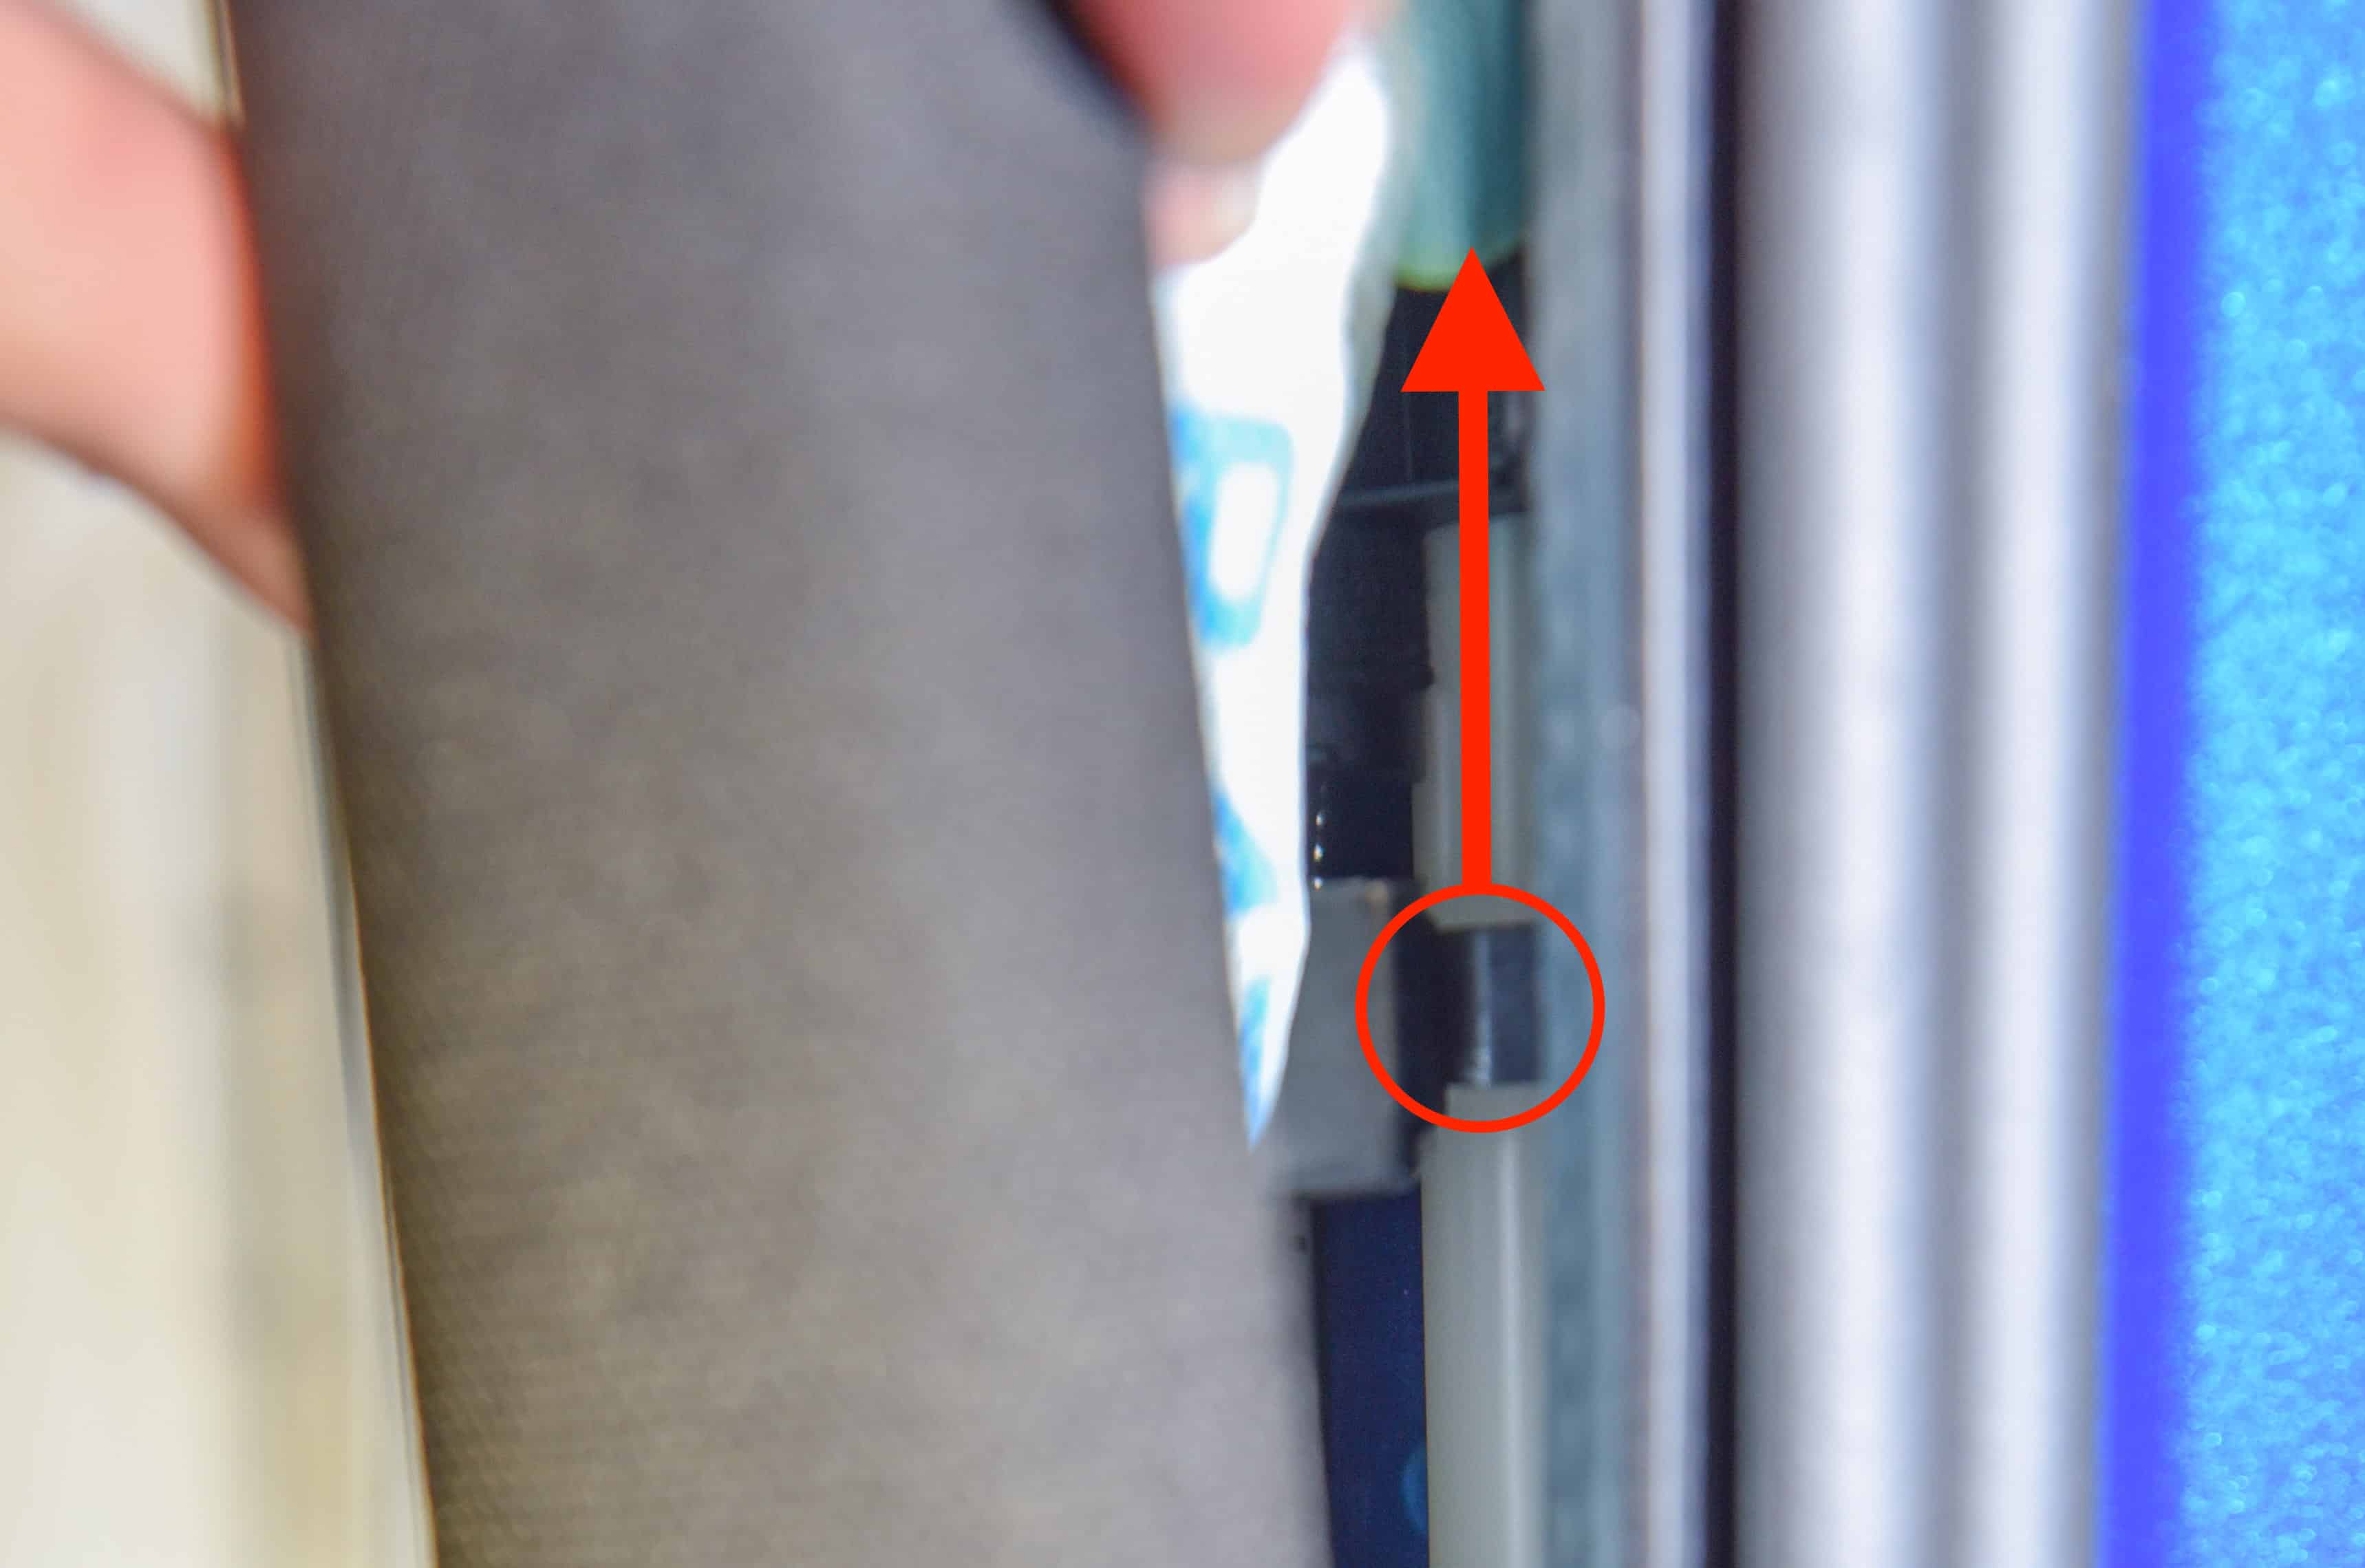
Step 3
With the gap now created, use a pair of long nose pliers to slide the clip out from the trim.
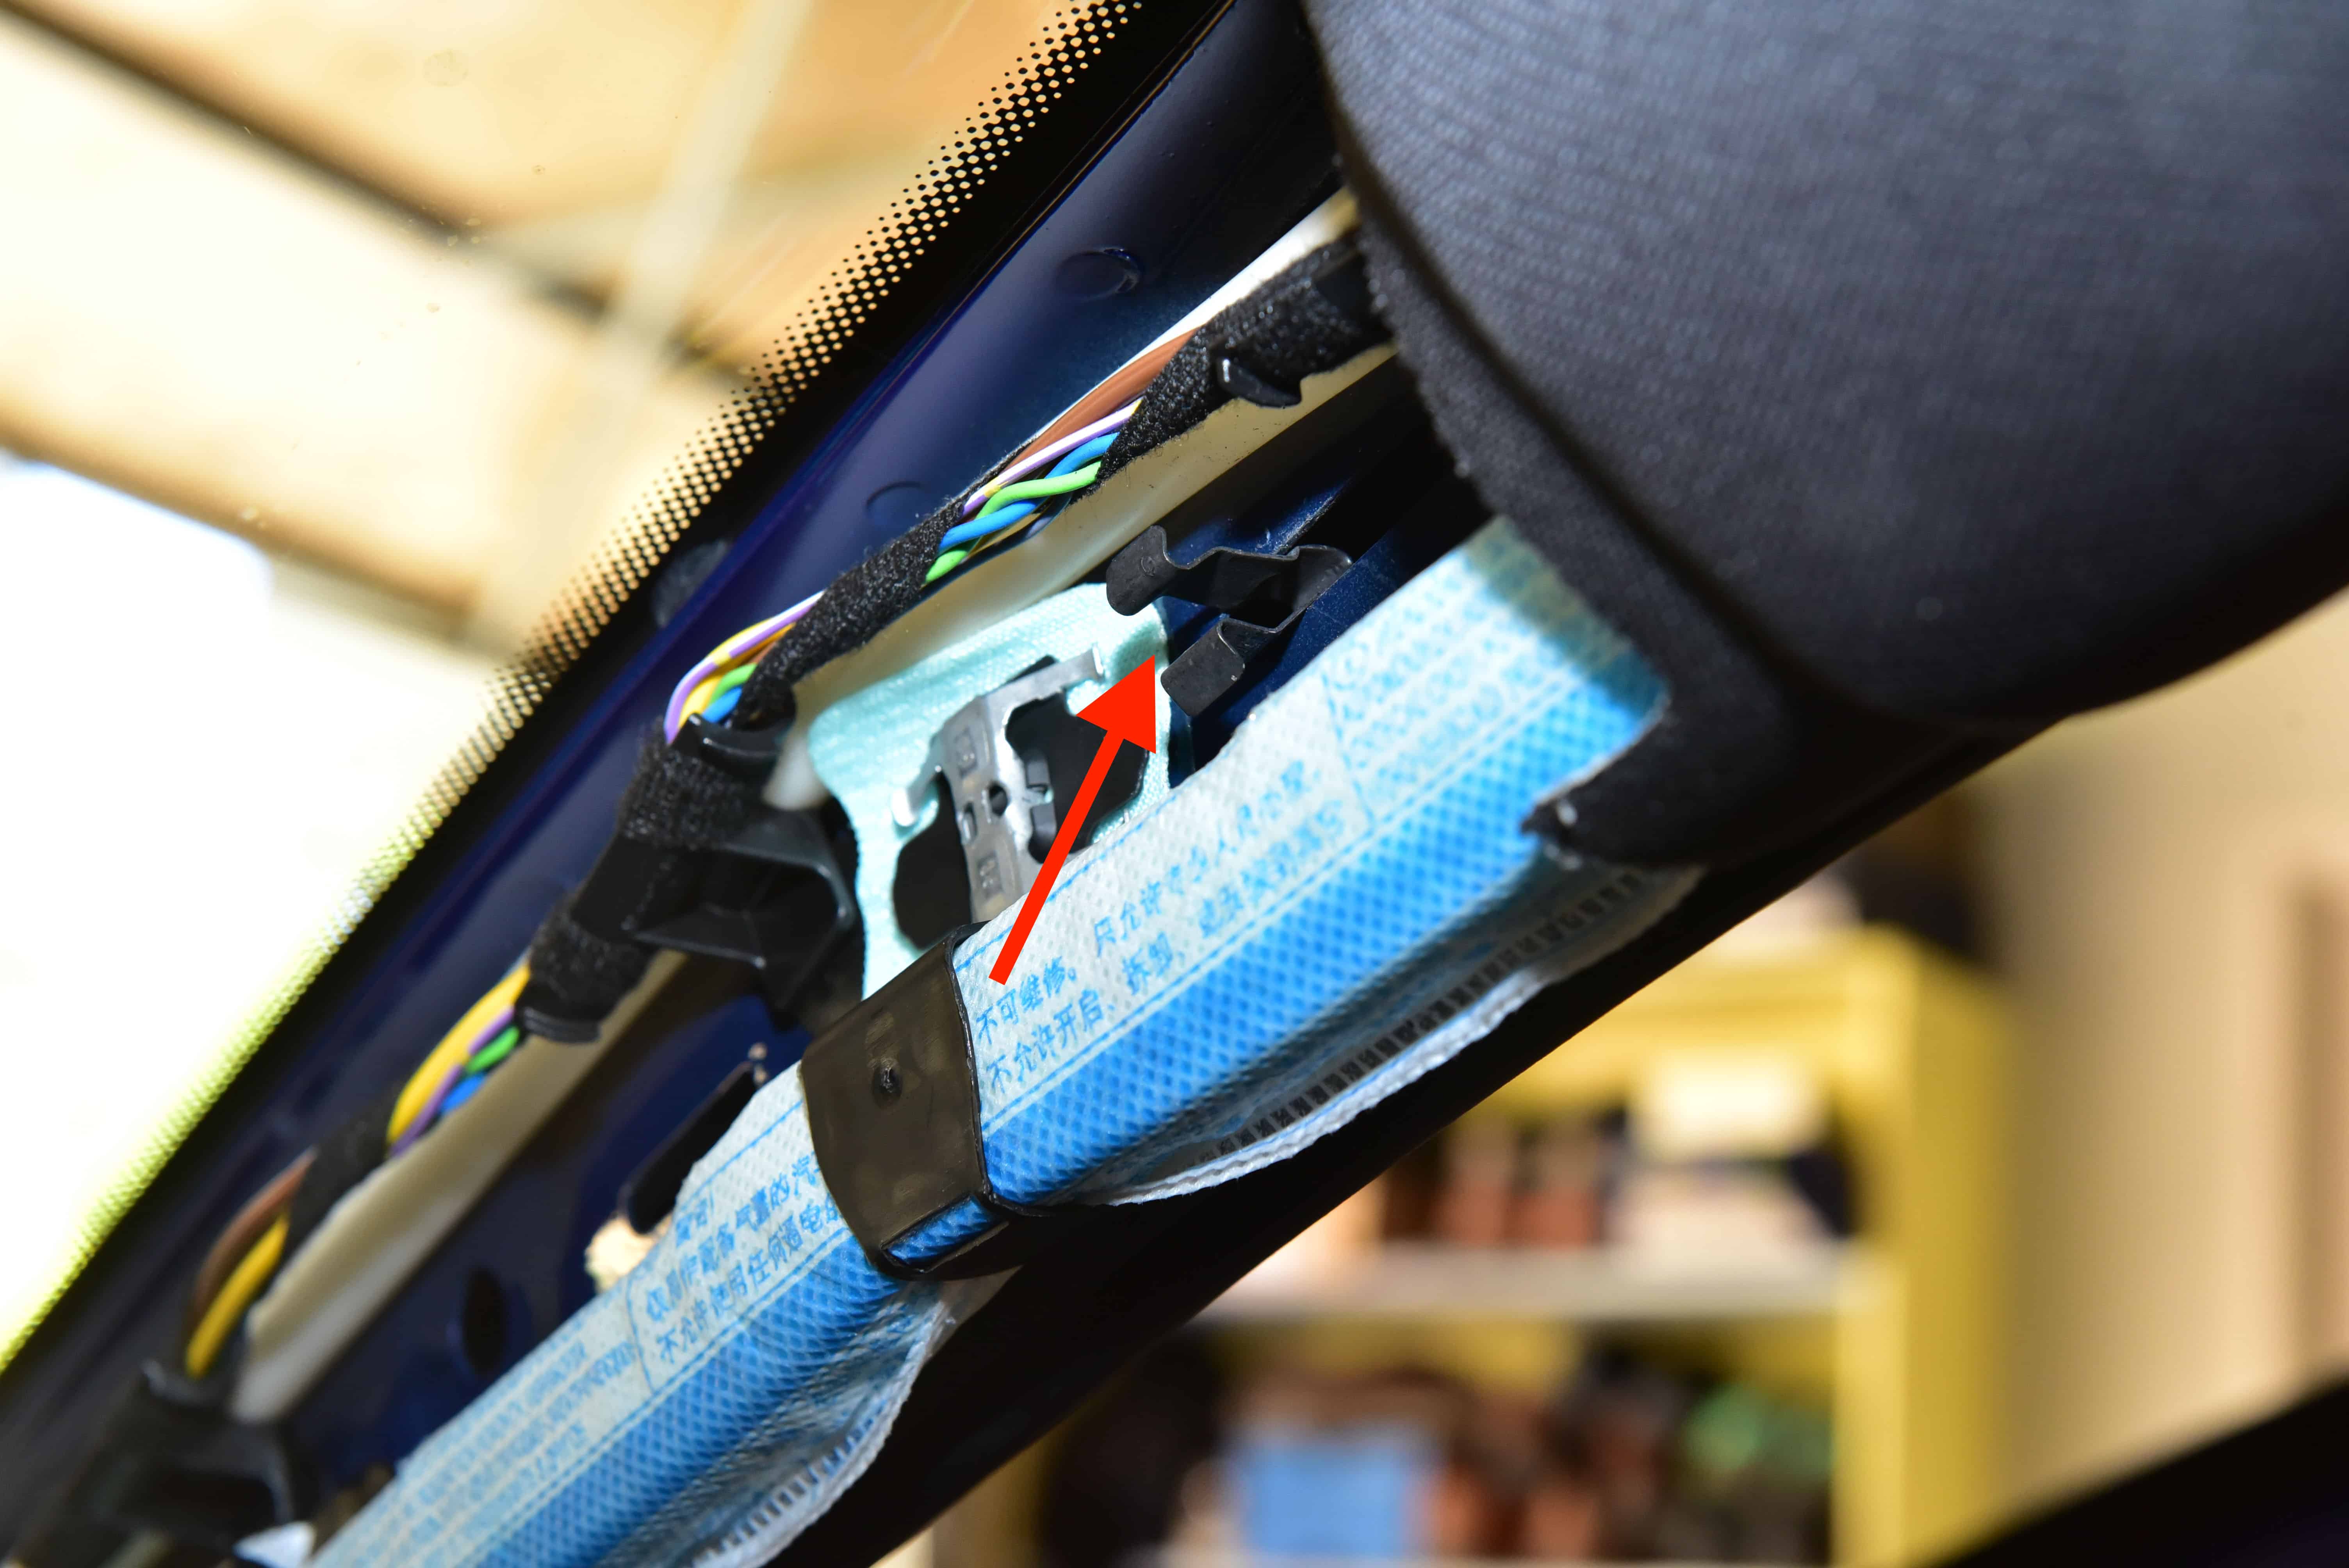
Step 4
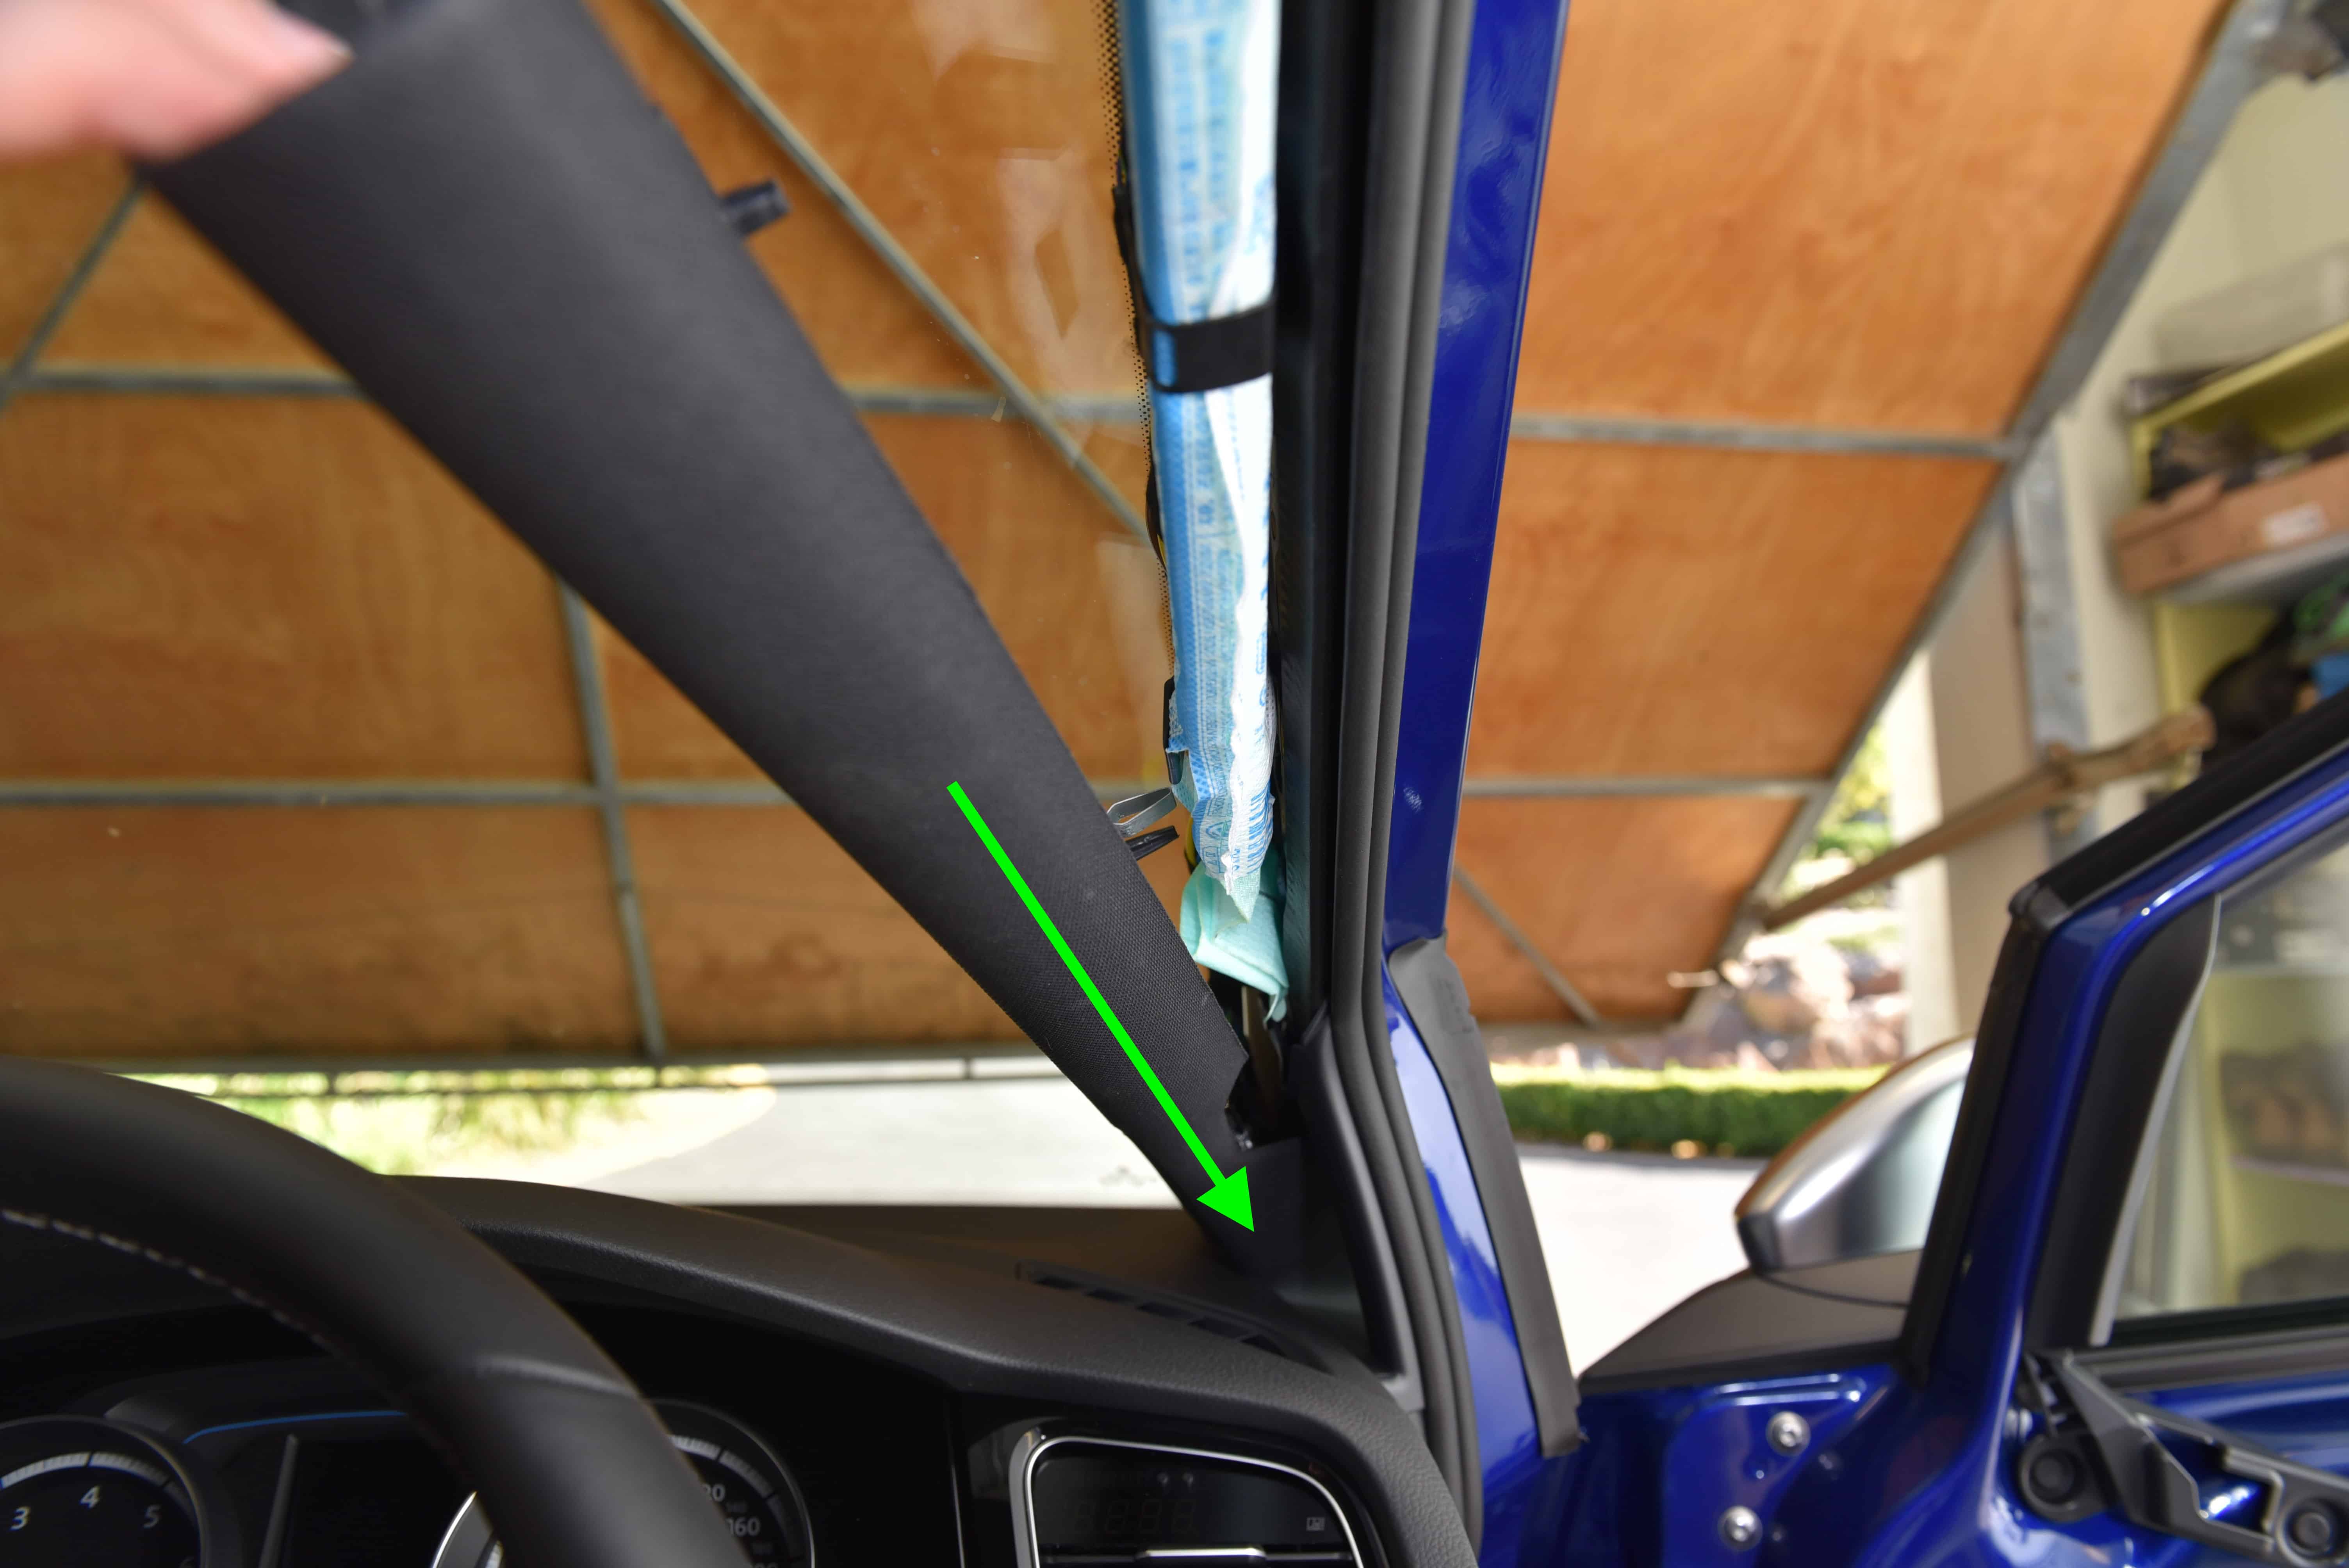
You will now expose the ‘slot’ which the clip slides in.
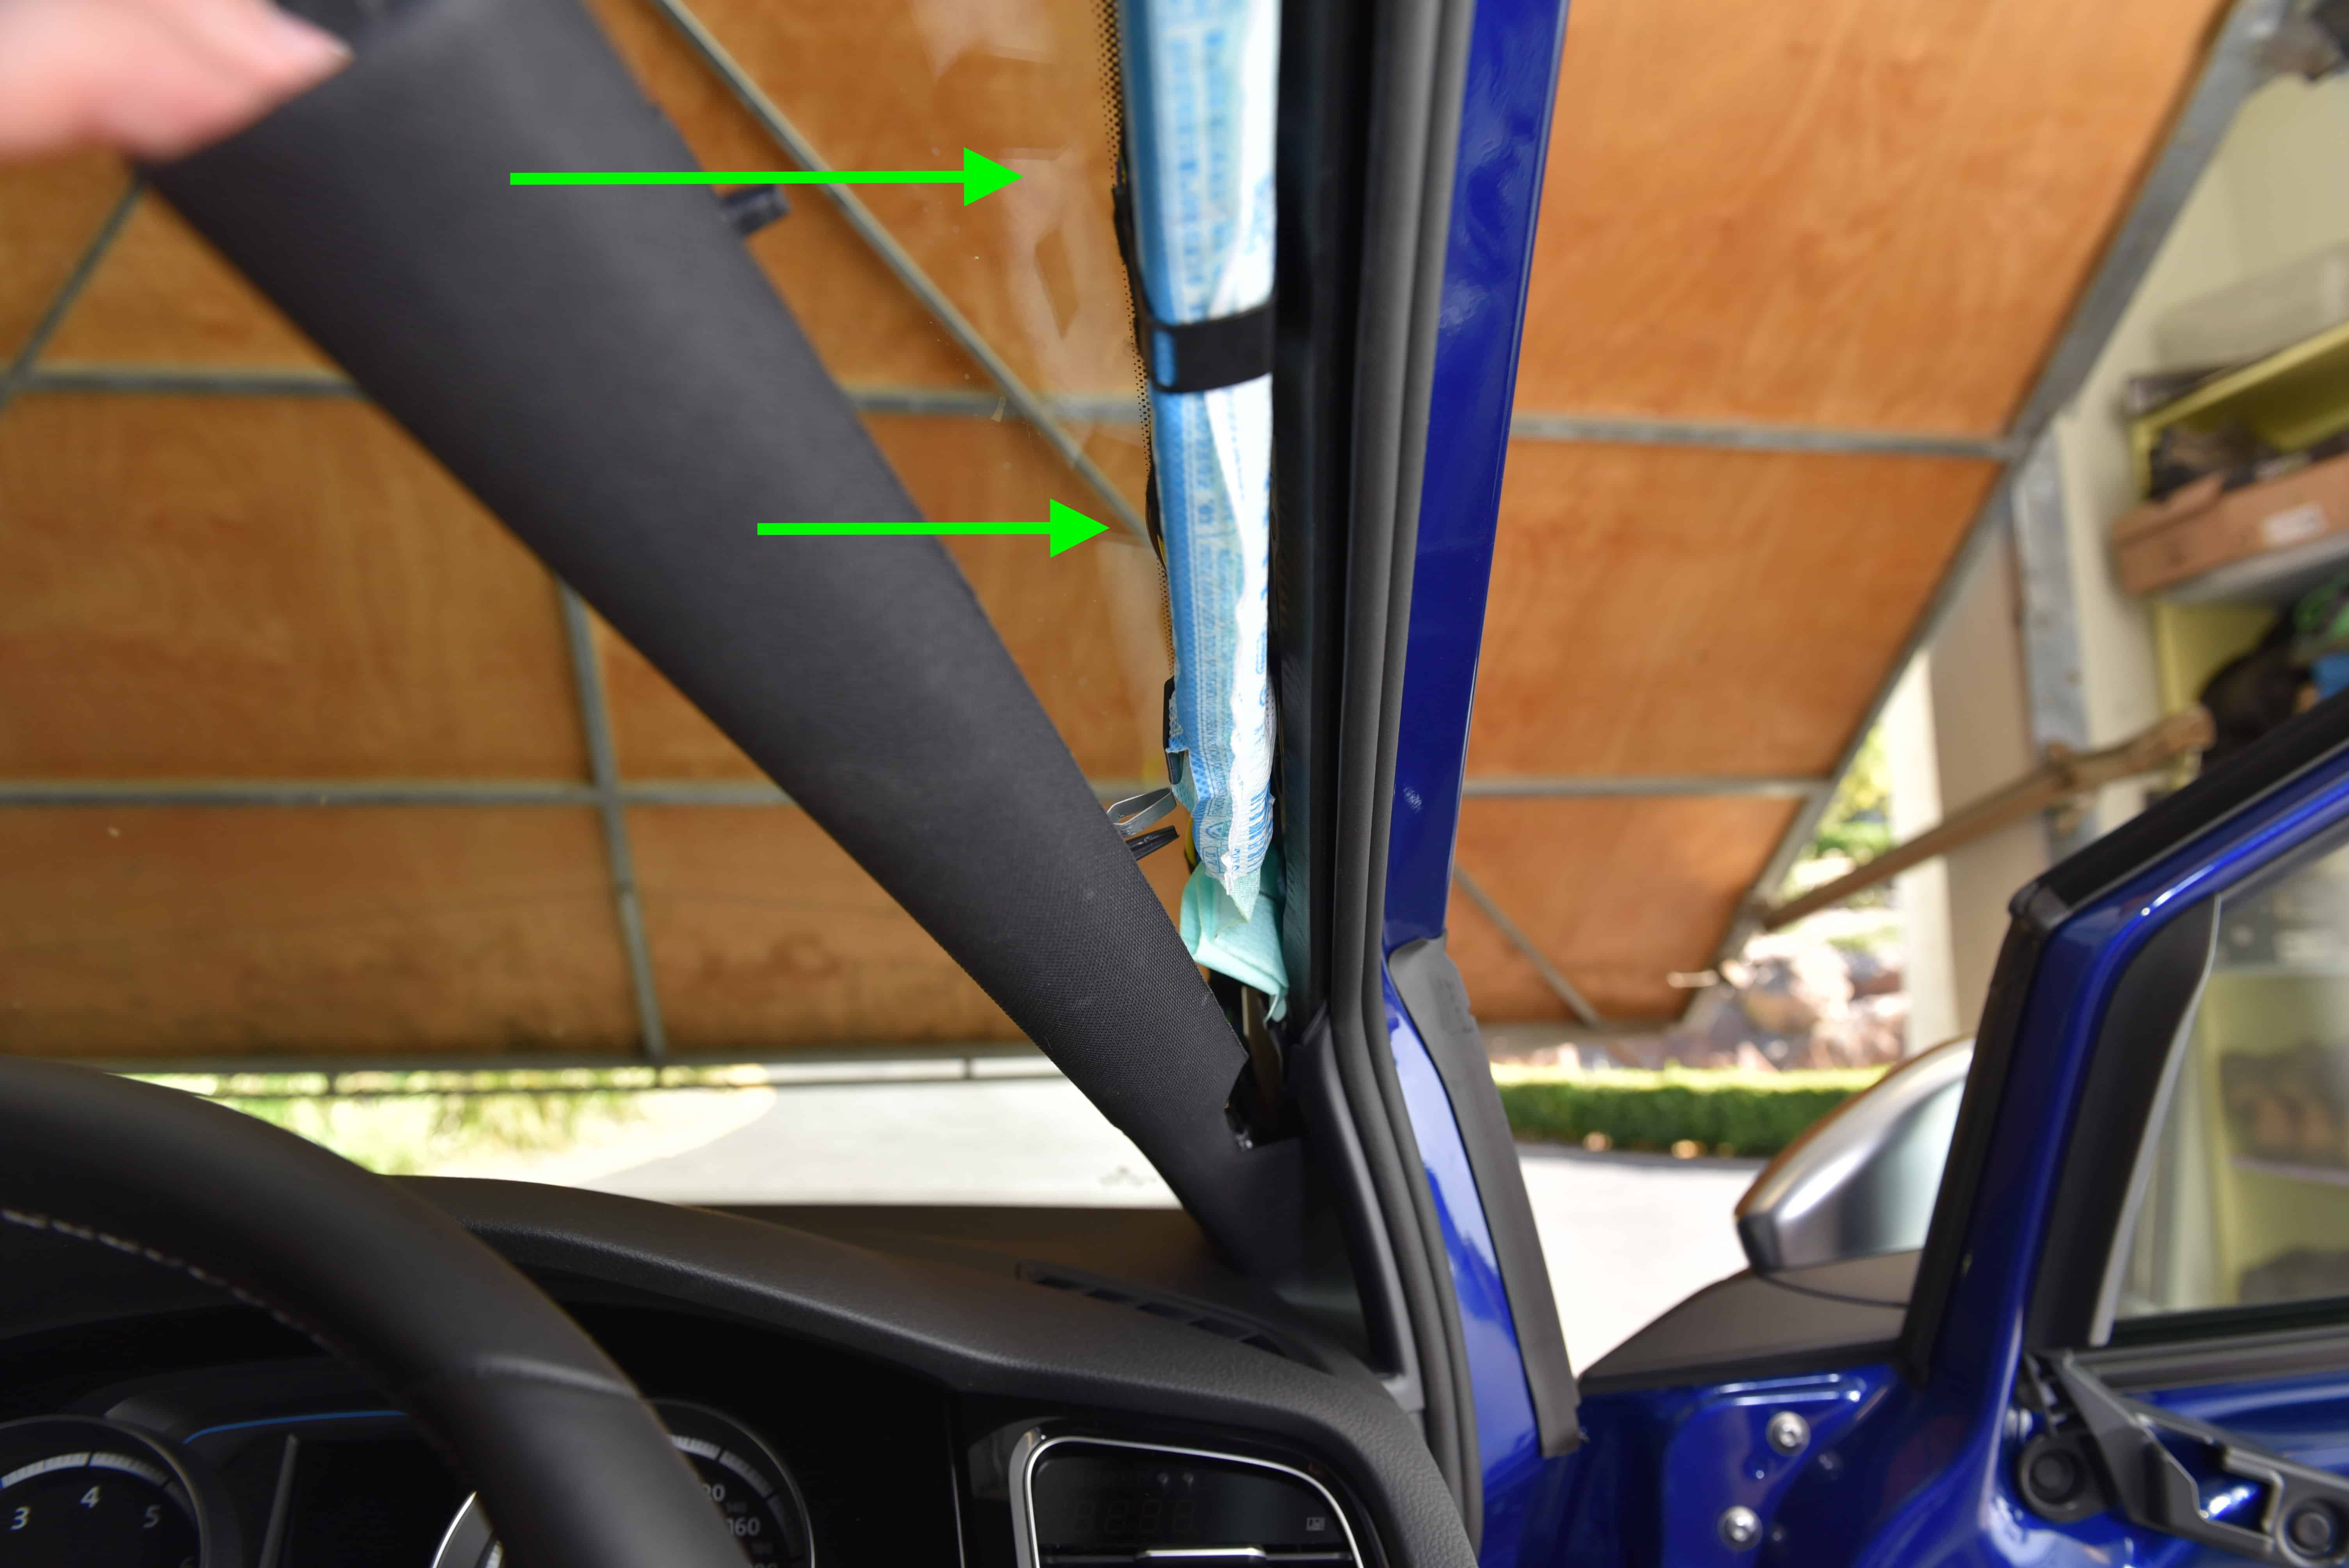
The clip will stay attached to the vehicle. Work your way towards the dashboard, releasing the second clip in the same way. The third clip is only single-stage and will simply pull free.
Step 5
Continue to seperate the A Pillar Trim from the vehicle. You will then be able to unplug the tweeter by squeezing the connector.
Step 6
The trim is now ready to be released from the dashboard. This step is quite difficult, and takes some twisting and firm pulling to release the trim.
Step 7
The trim surrounding the triangular glass can now be released. Use a trim removal tool to release the clip, and push upwards from the bottom. It will twist out of the dashboard.
Step 8
Reinstallation
Using a pair of pliers, squeeze and remove the two-stage clips which would have remained in the bodywork during removal.
Step 9
Reinstall these clips back into the trim piece. You may need to reform them if they’ve been bent.
Step 10
Reinstall the glass trim and push the clip into place. Be careful not to damage the dashboard.
Step 11
Next, insert the A Pillar trim into the dashboard. This is the most difficult part, and requires a range of twisting and pushing to insert the trim correctly. It need to lock in behind the glass trim, and alongside the dashboard.
Connect the tweeter.
Step 12
Lastly clip the trim back into position and tuck it behind the rubber door seal.
Did you find this guide helpful? Consider sharing it to help other car enthusiasts


This Post Has 3 Comments
Thanks!
Perhaps they broke the retaining clips in the dashboard? Unsure sorry.
Yes I do mean that one, or it’s not sitting in it correctly. I believe the foam is there from factory.