Some would call the removal of your clutch delay valve as the ‘Ultimate’ modification for any manual vehicle. It restores the direct feel many manual owners would be used to, and allows you to change gears with maximum accuracy.
What is a Clutch Delay Valve?
A delay valve is an inline restrictor which blocks you from hard launches and rapid gear changes. It delays and slows the pressure being applied to the clutch plate, thereby protecting the gearbox but increasing wear on the clutch. Unfortunately this also creates a poor driver experience and unpredictable clutch movements.
Difficulty Rating
Hard
Tools/Parts Required
Flathead Screwdriver
Torx Set
DOT4 Brake Fluid
Brake Bleeder Kit
Warning
Work at your own risk. This work is inherently dangerous and must only be carried out by a qualified mechanic. AutoInstruct will not be held responsible for damage to your vehicle or personal injury / death as a result of the information we provide.
Step 1
For this task the air intake need to be removed. To remove the intake, unscrew as shown and release the clamp connected to the piping.
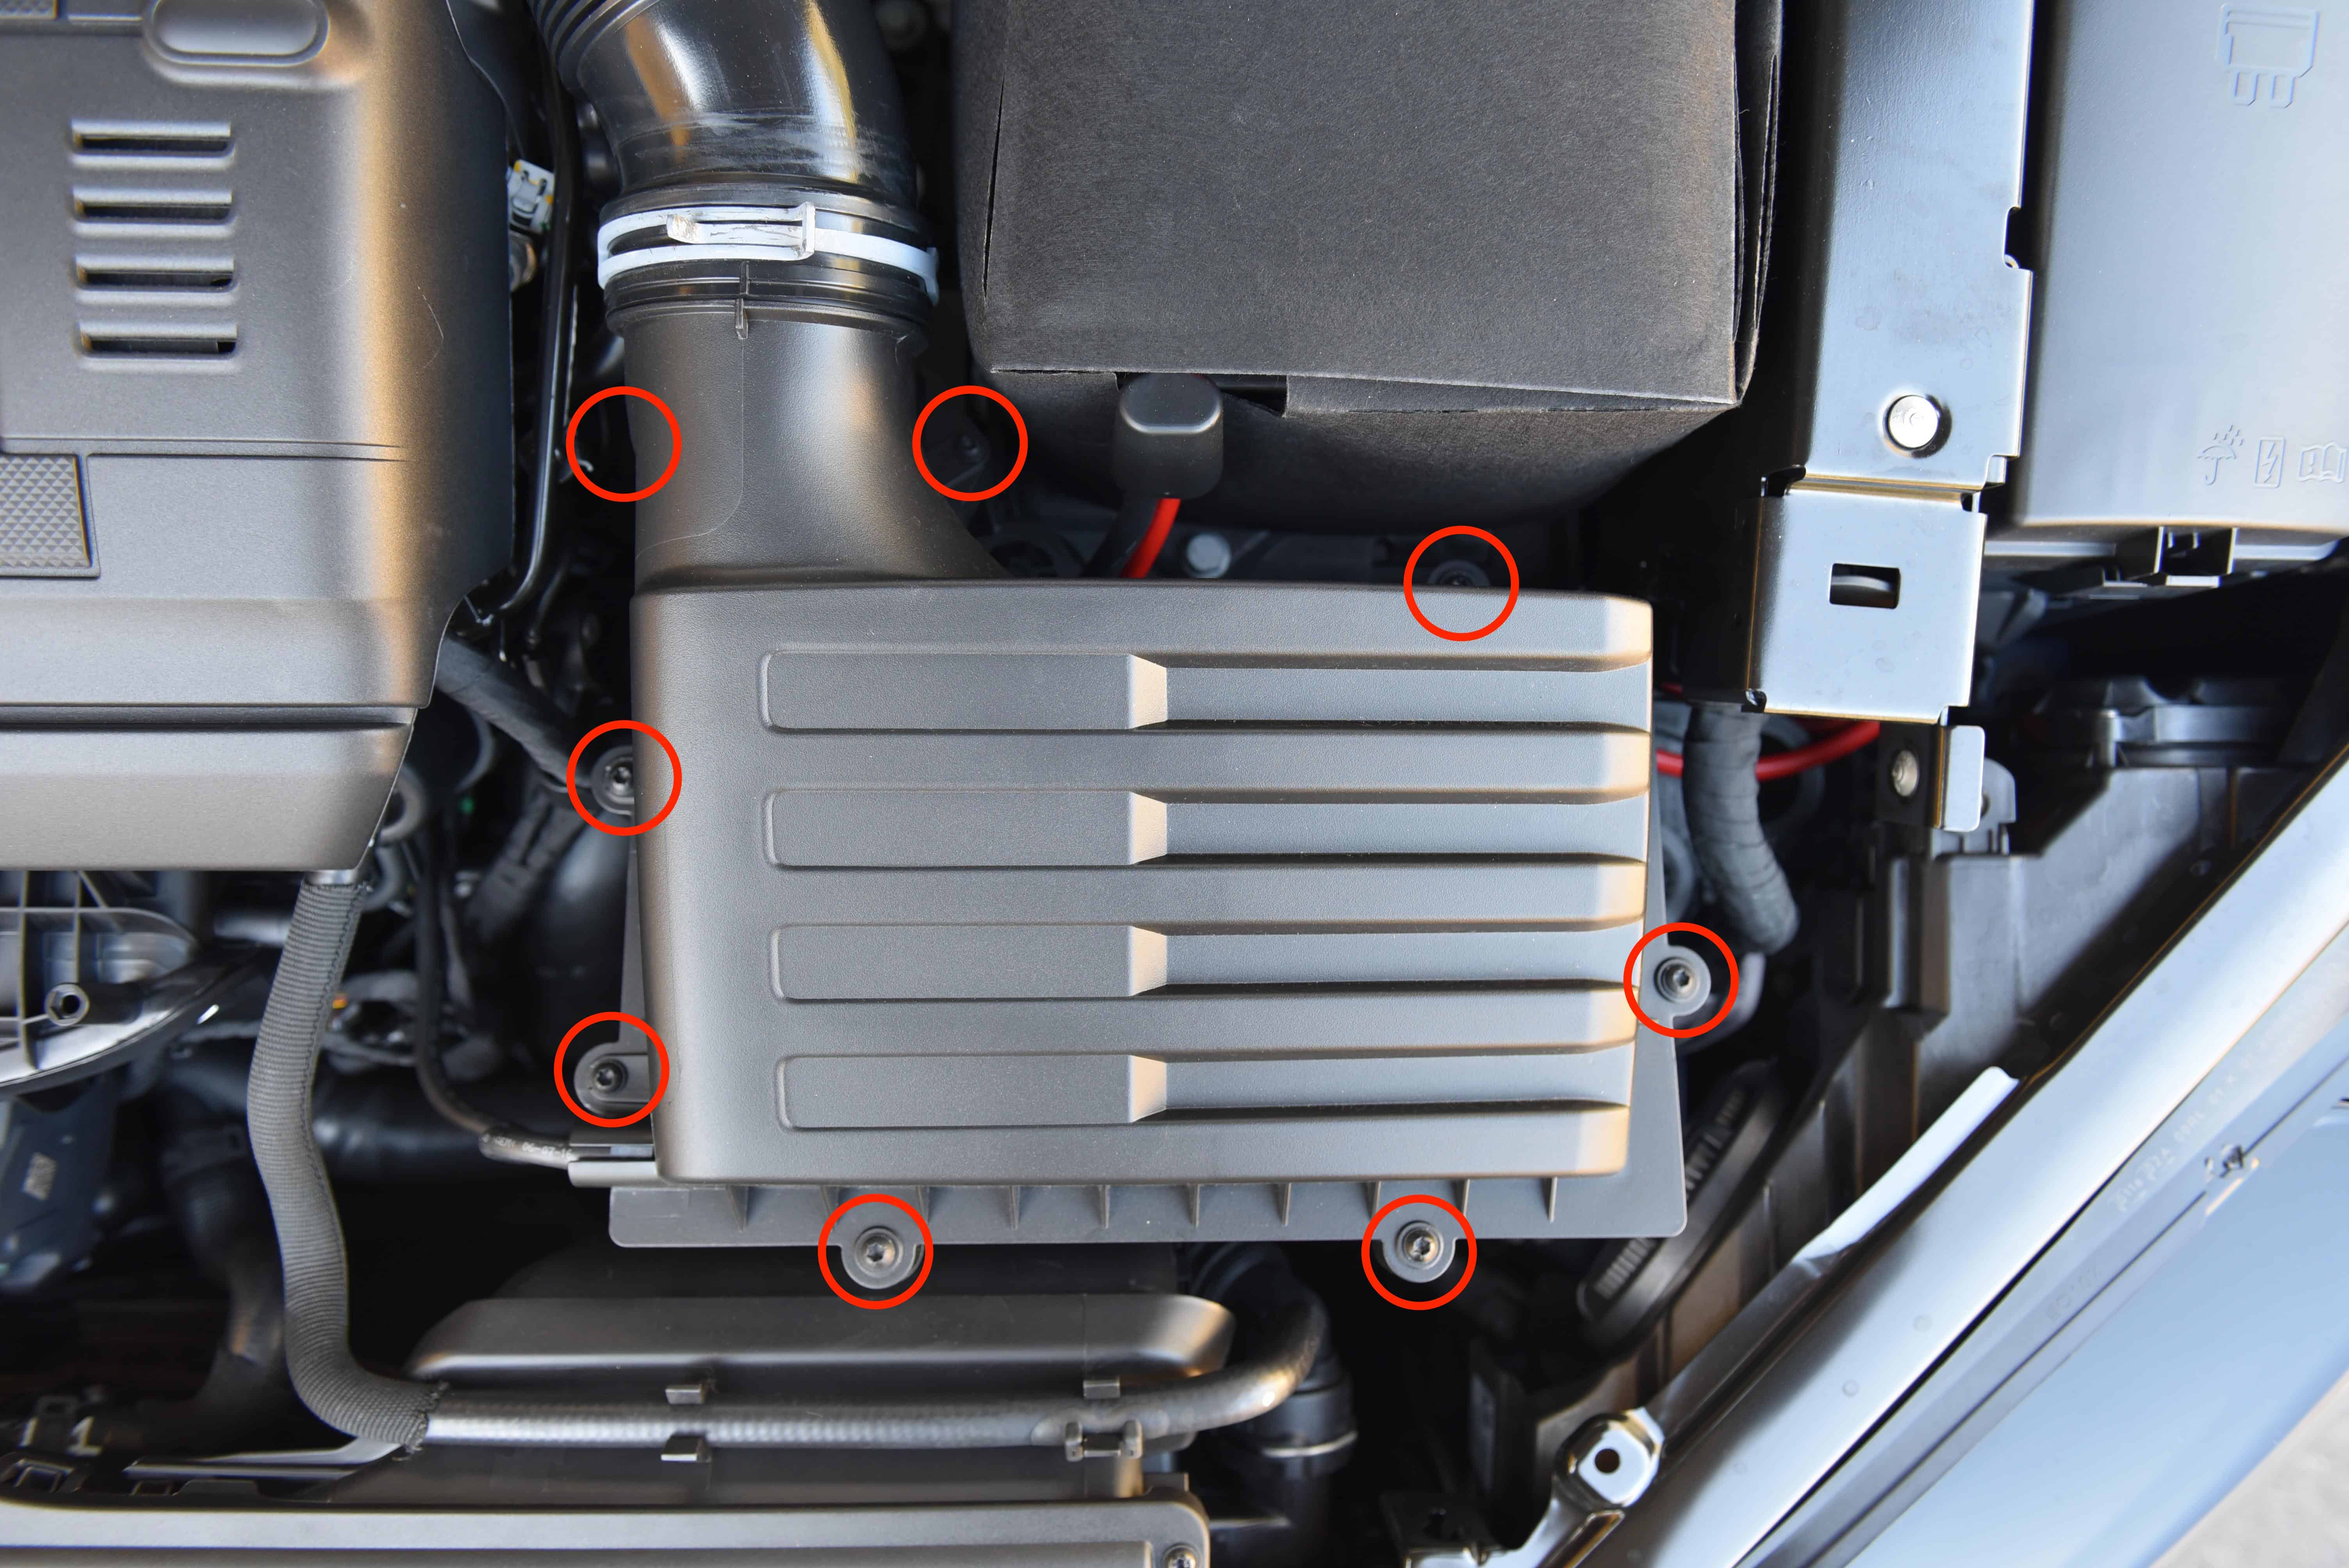
Step 2
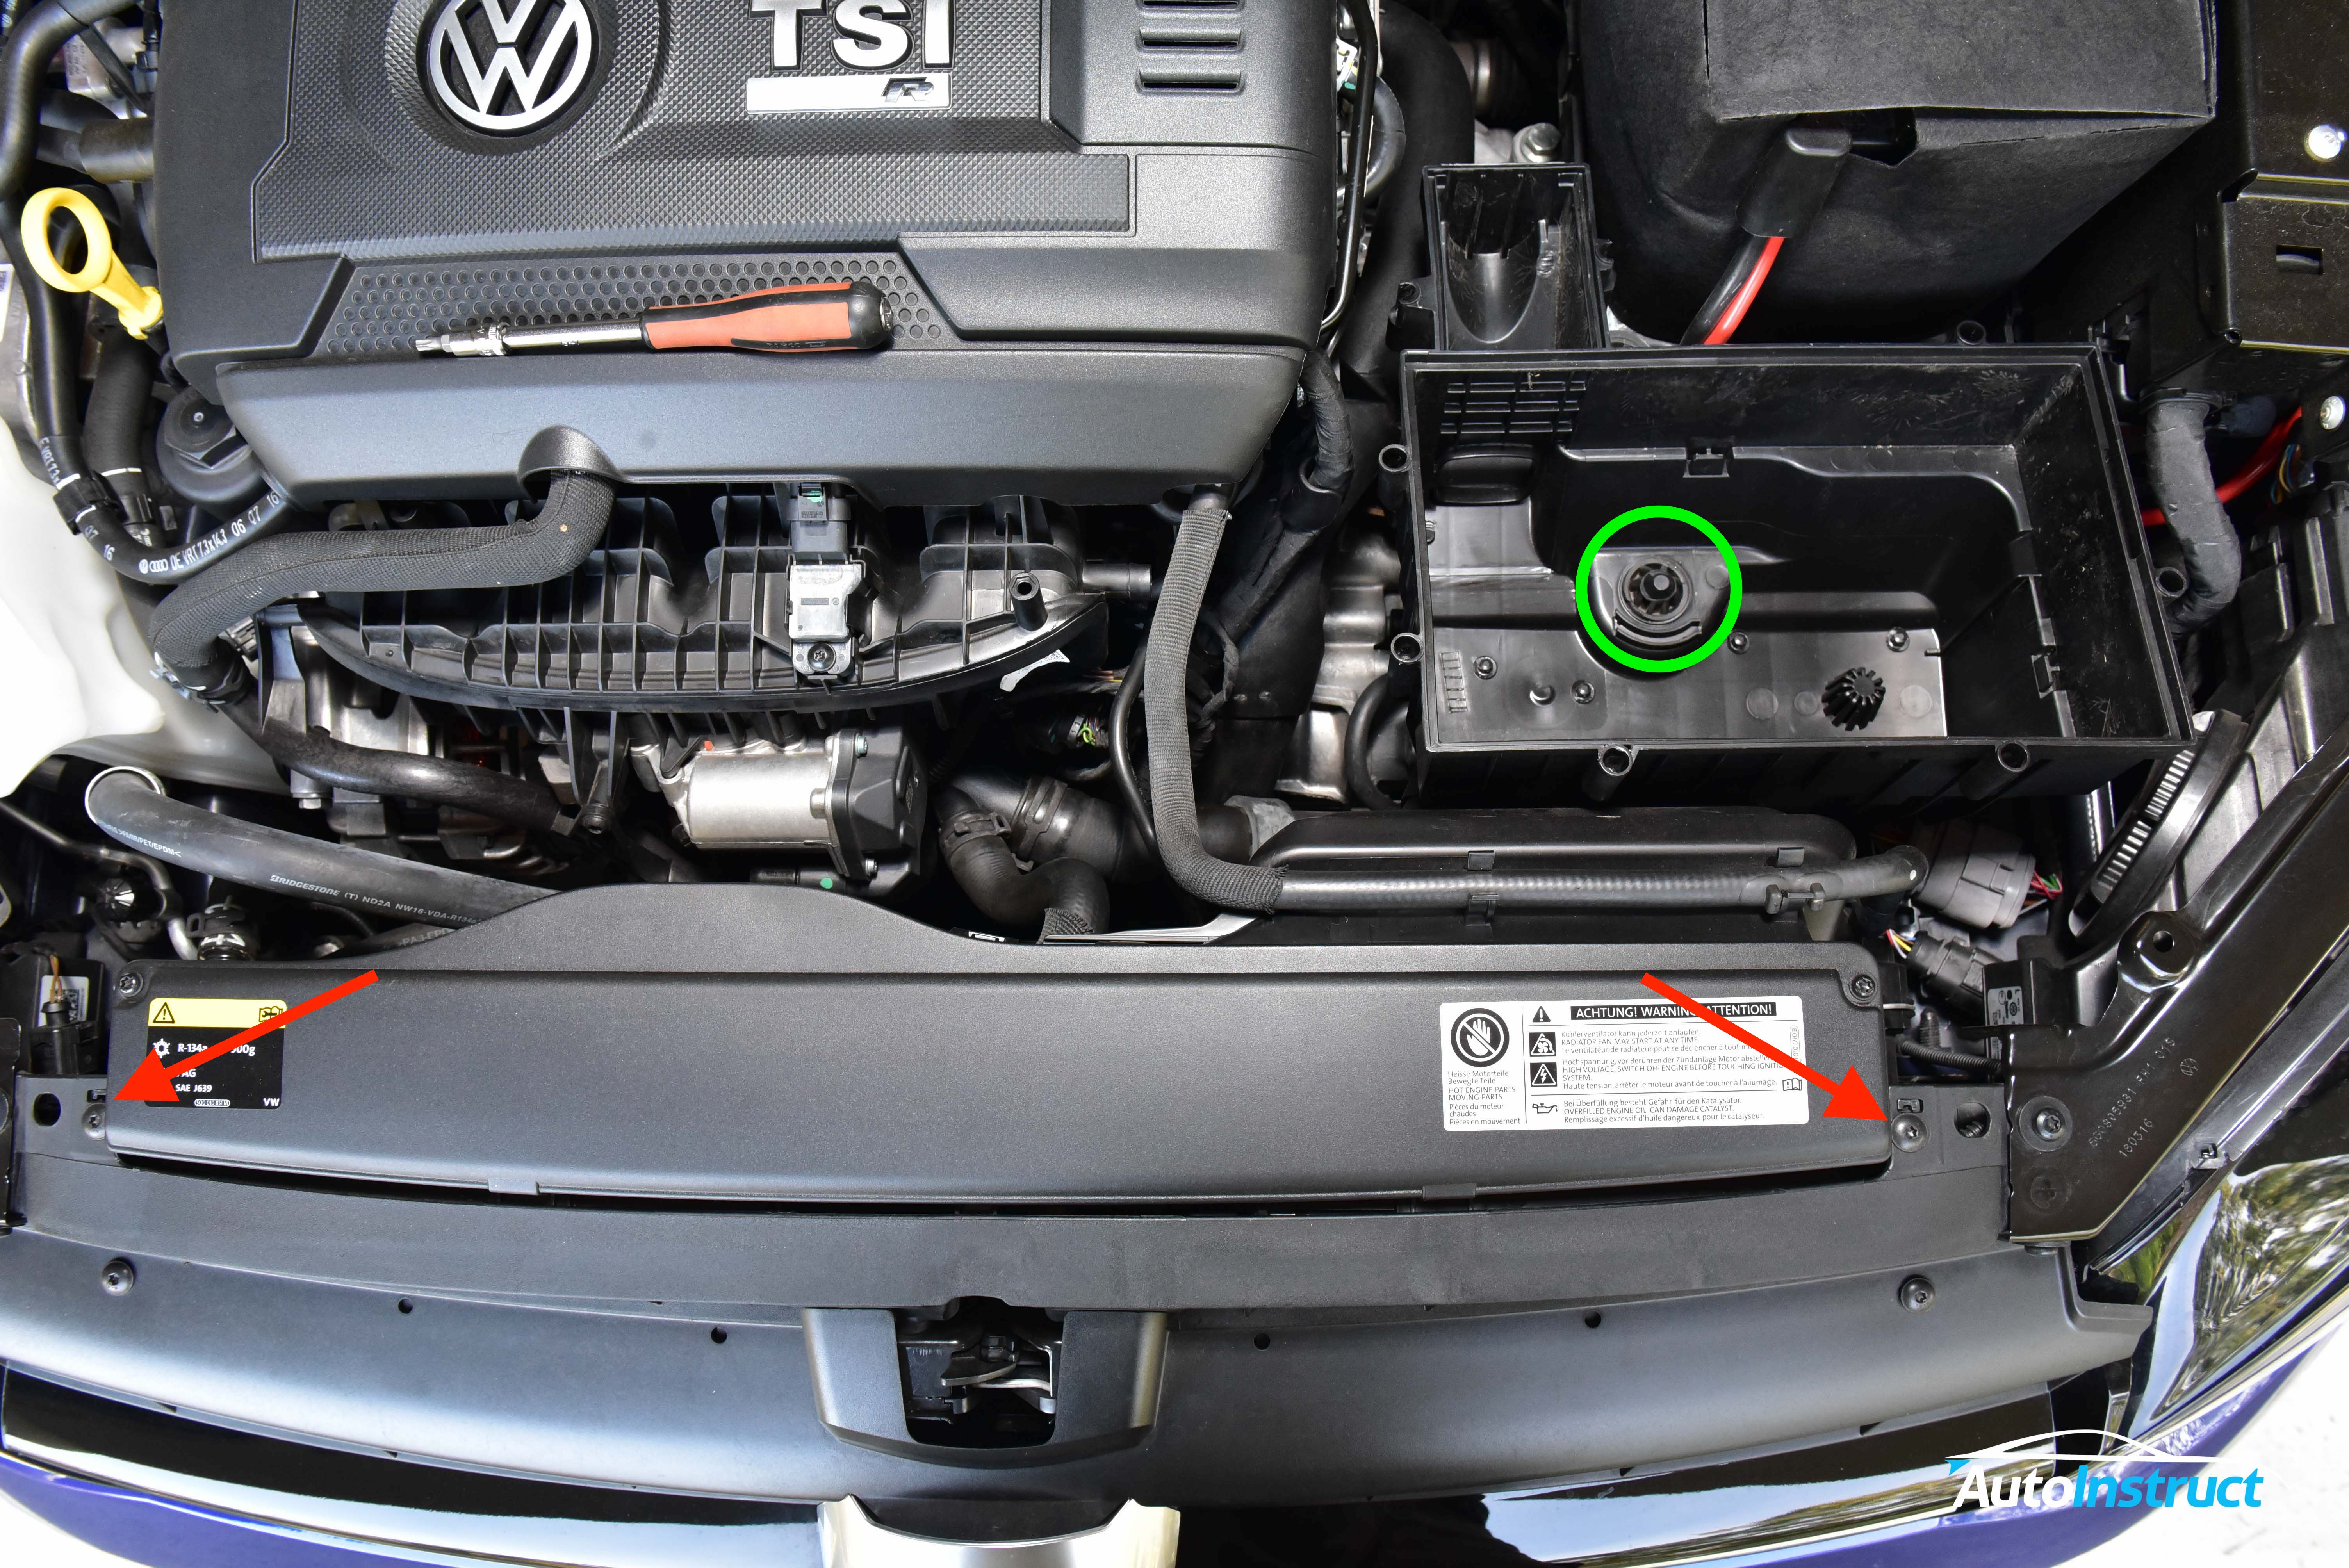
Next, remove the screws shown by the red arrows. The air intake can then be removed.
Pull firmly upwards on the filter housing, which will release the rubber grommets. One is circled in green for reference. Once disengaged, wriggle the whole unit out of the vehicle.
Step 3
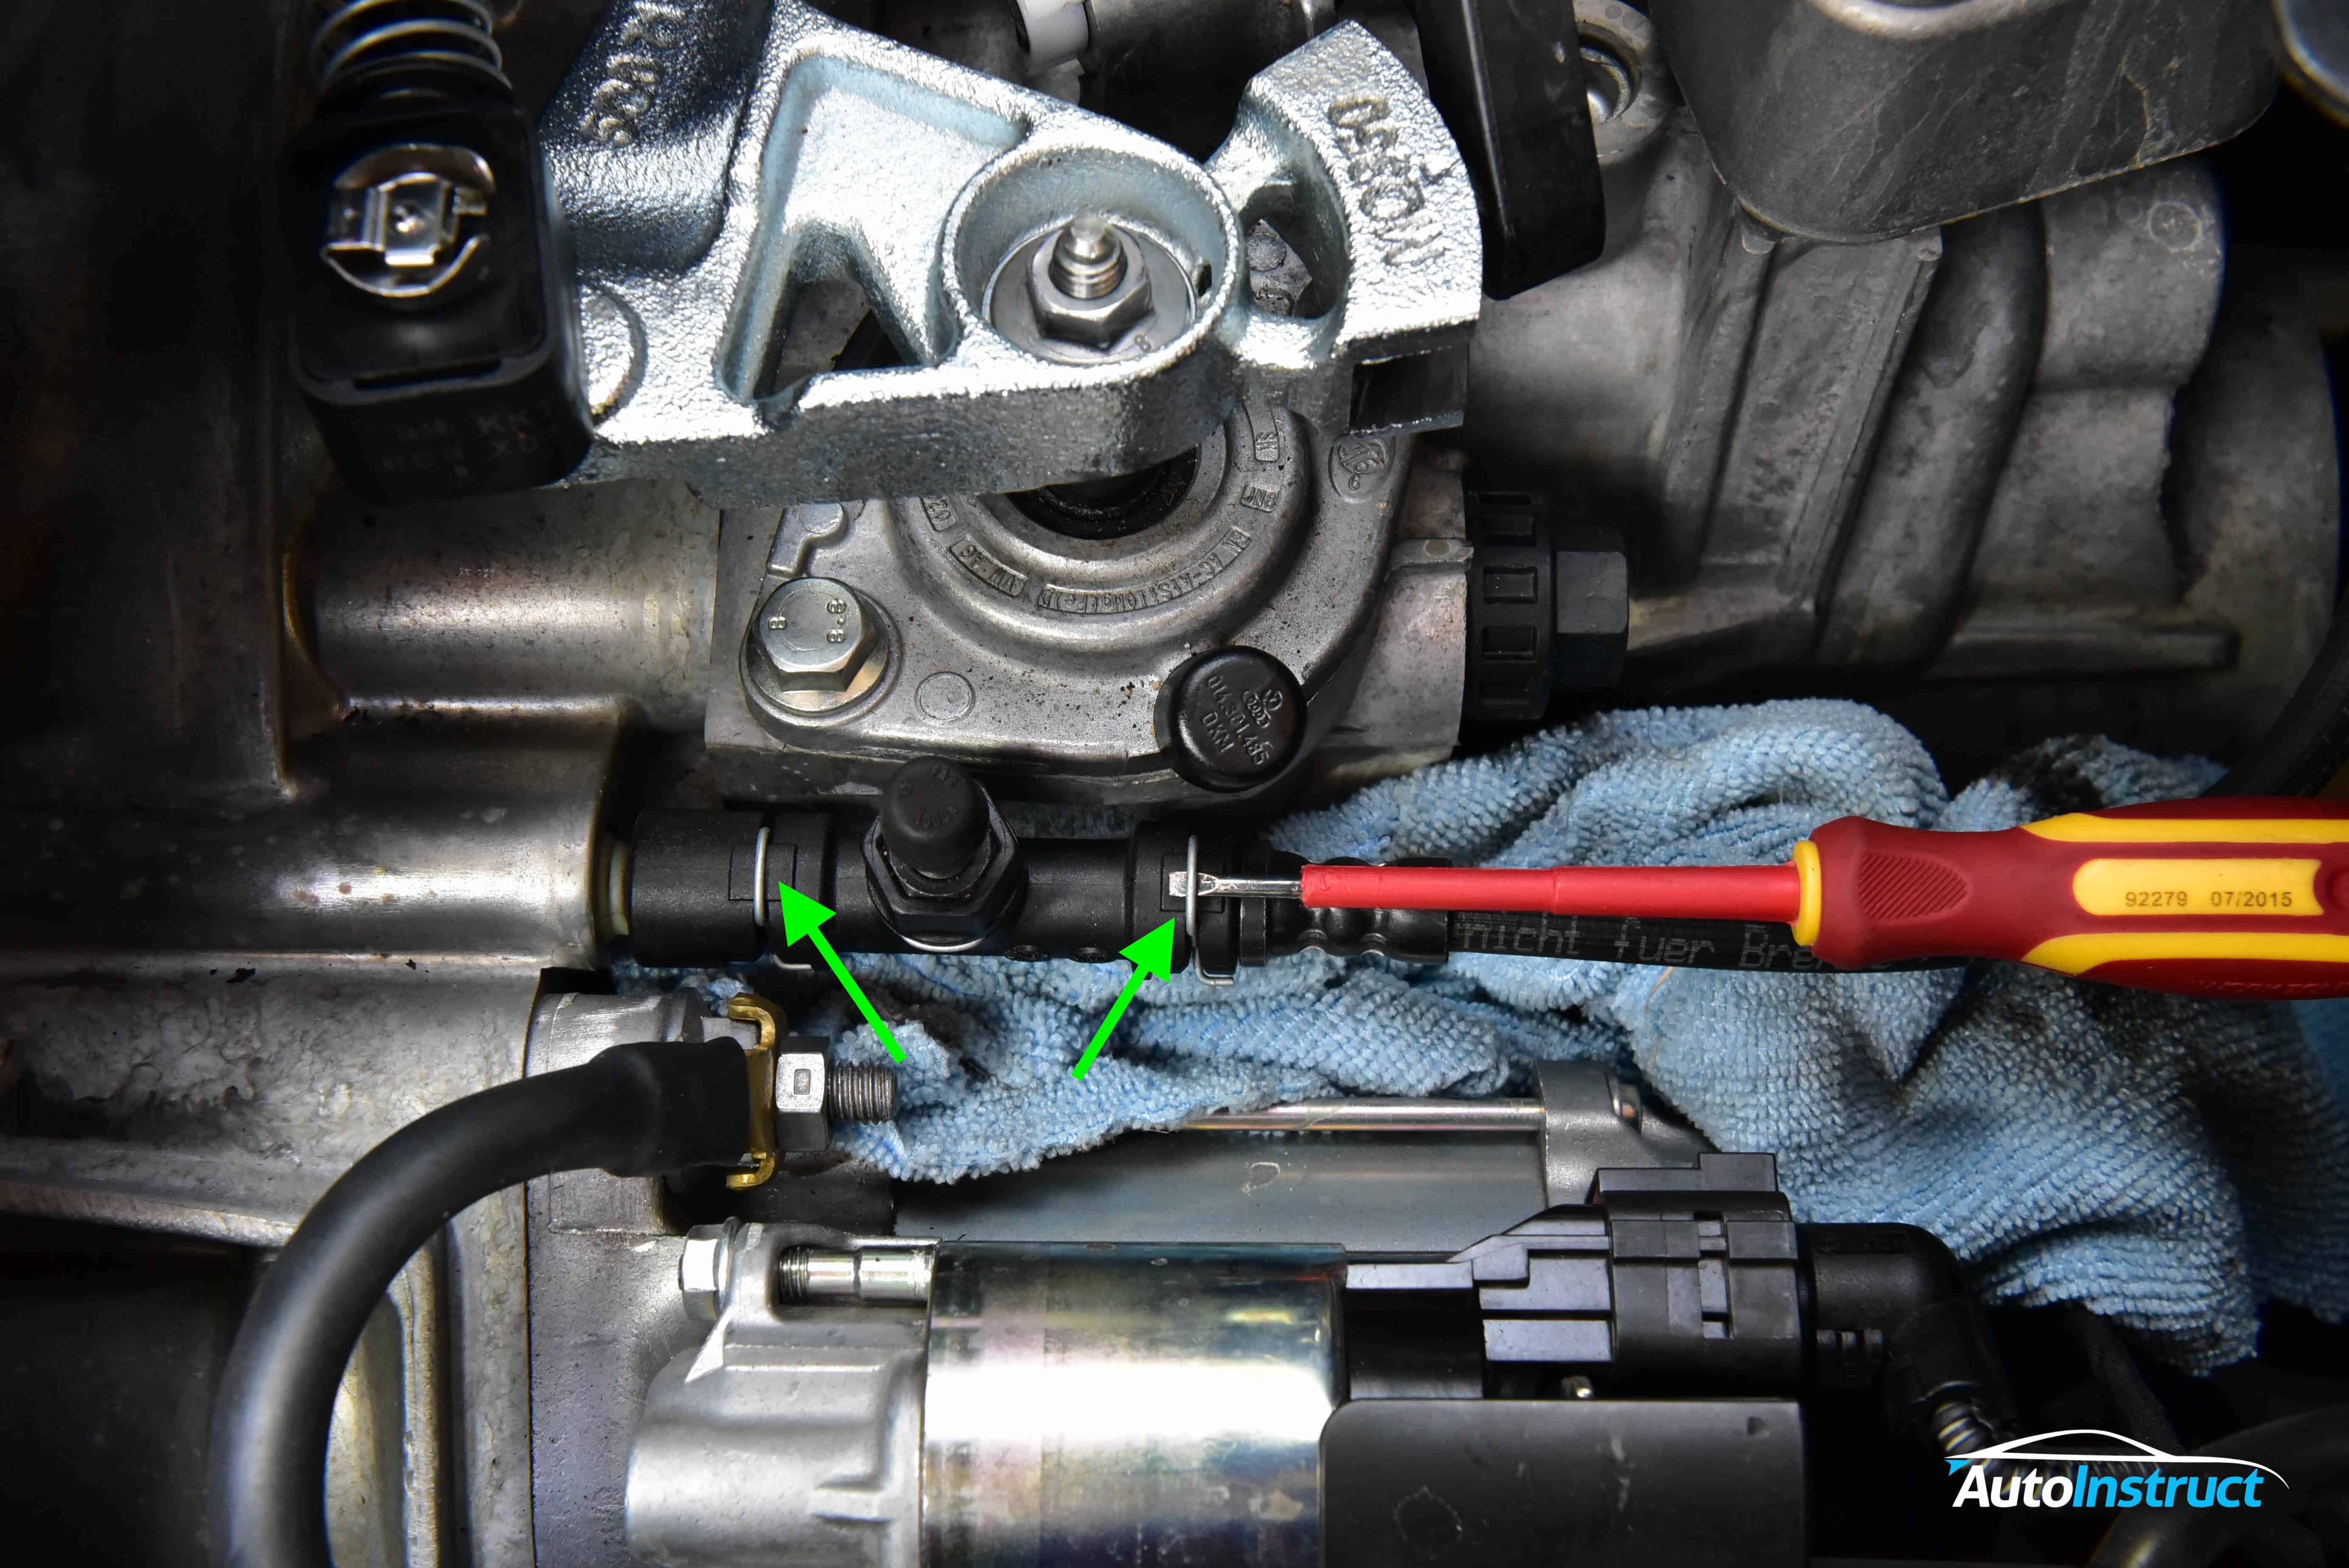
We’ll now remove the bleeder block, which also houses the delay valve. Place a cloth under the clutch line and release both clips attached to the bleeder.
Once the clutch line is disconnect it will start to rapidly drip. You can connect your brake bleeder kit to the clutch line to ‘block’ the line and prevent dripping.
Step 4
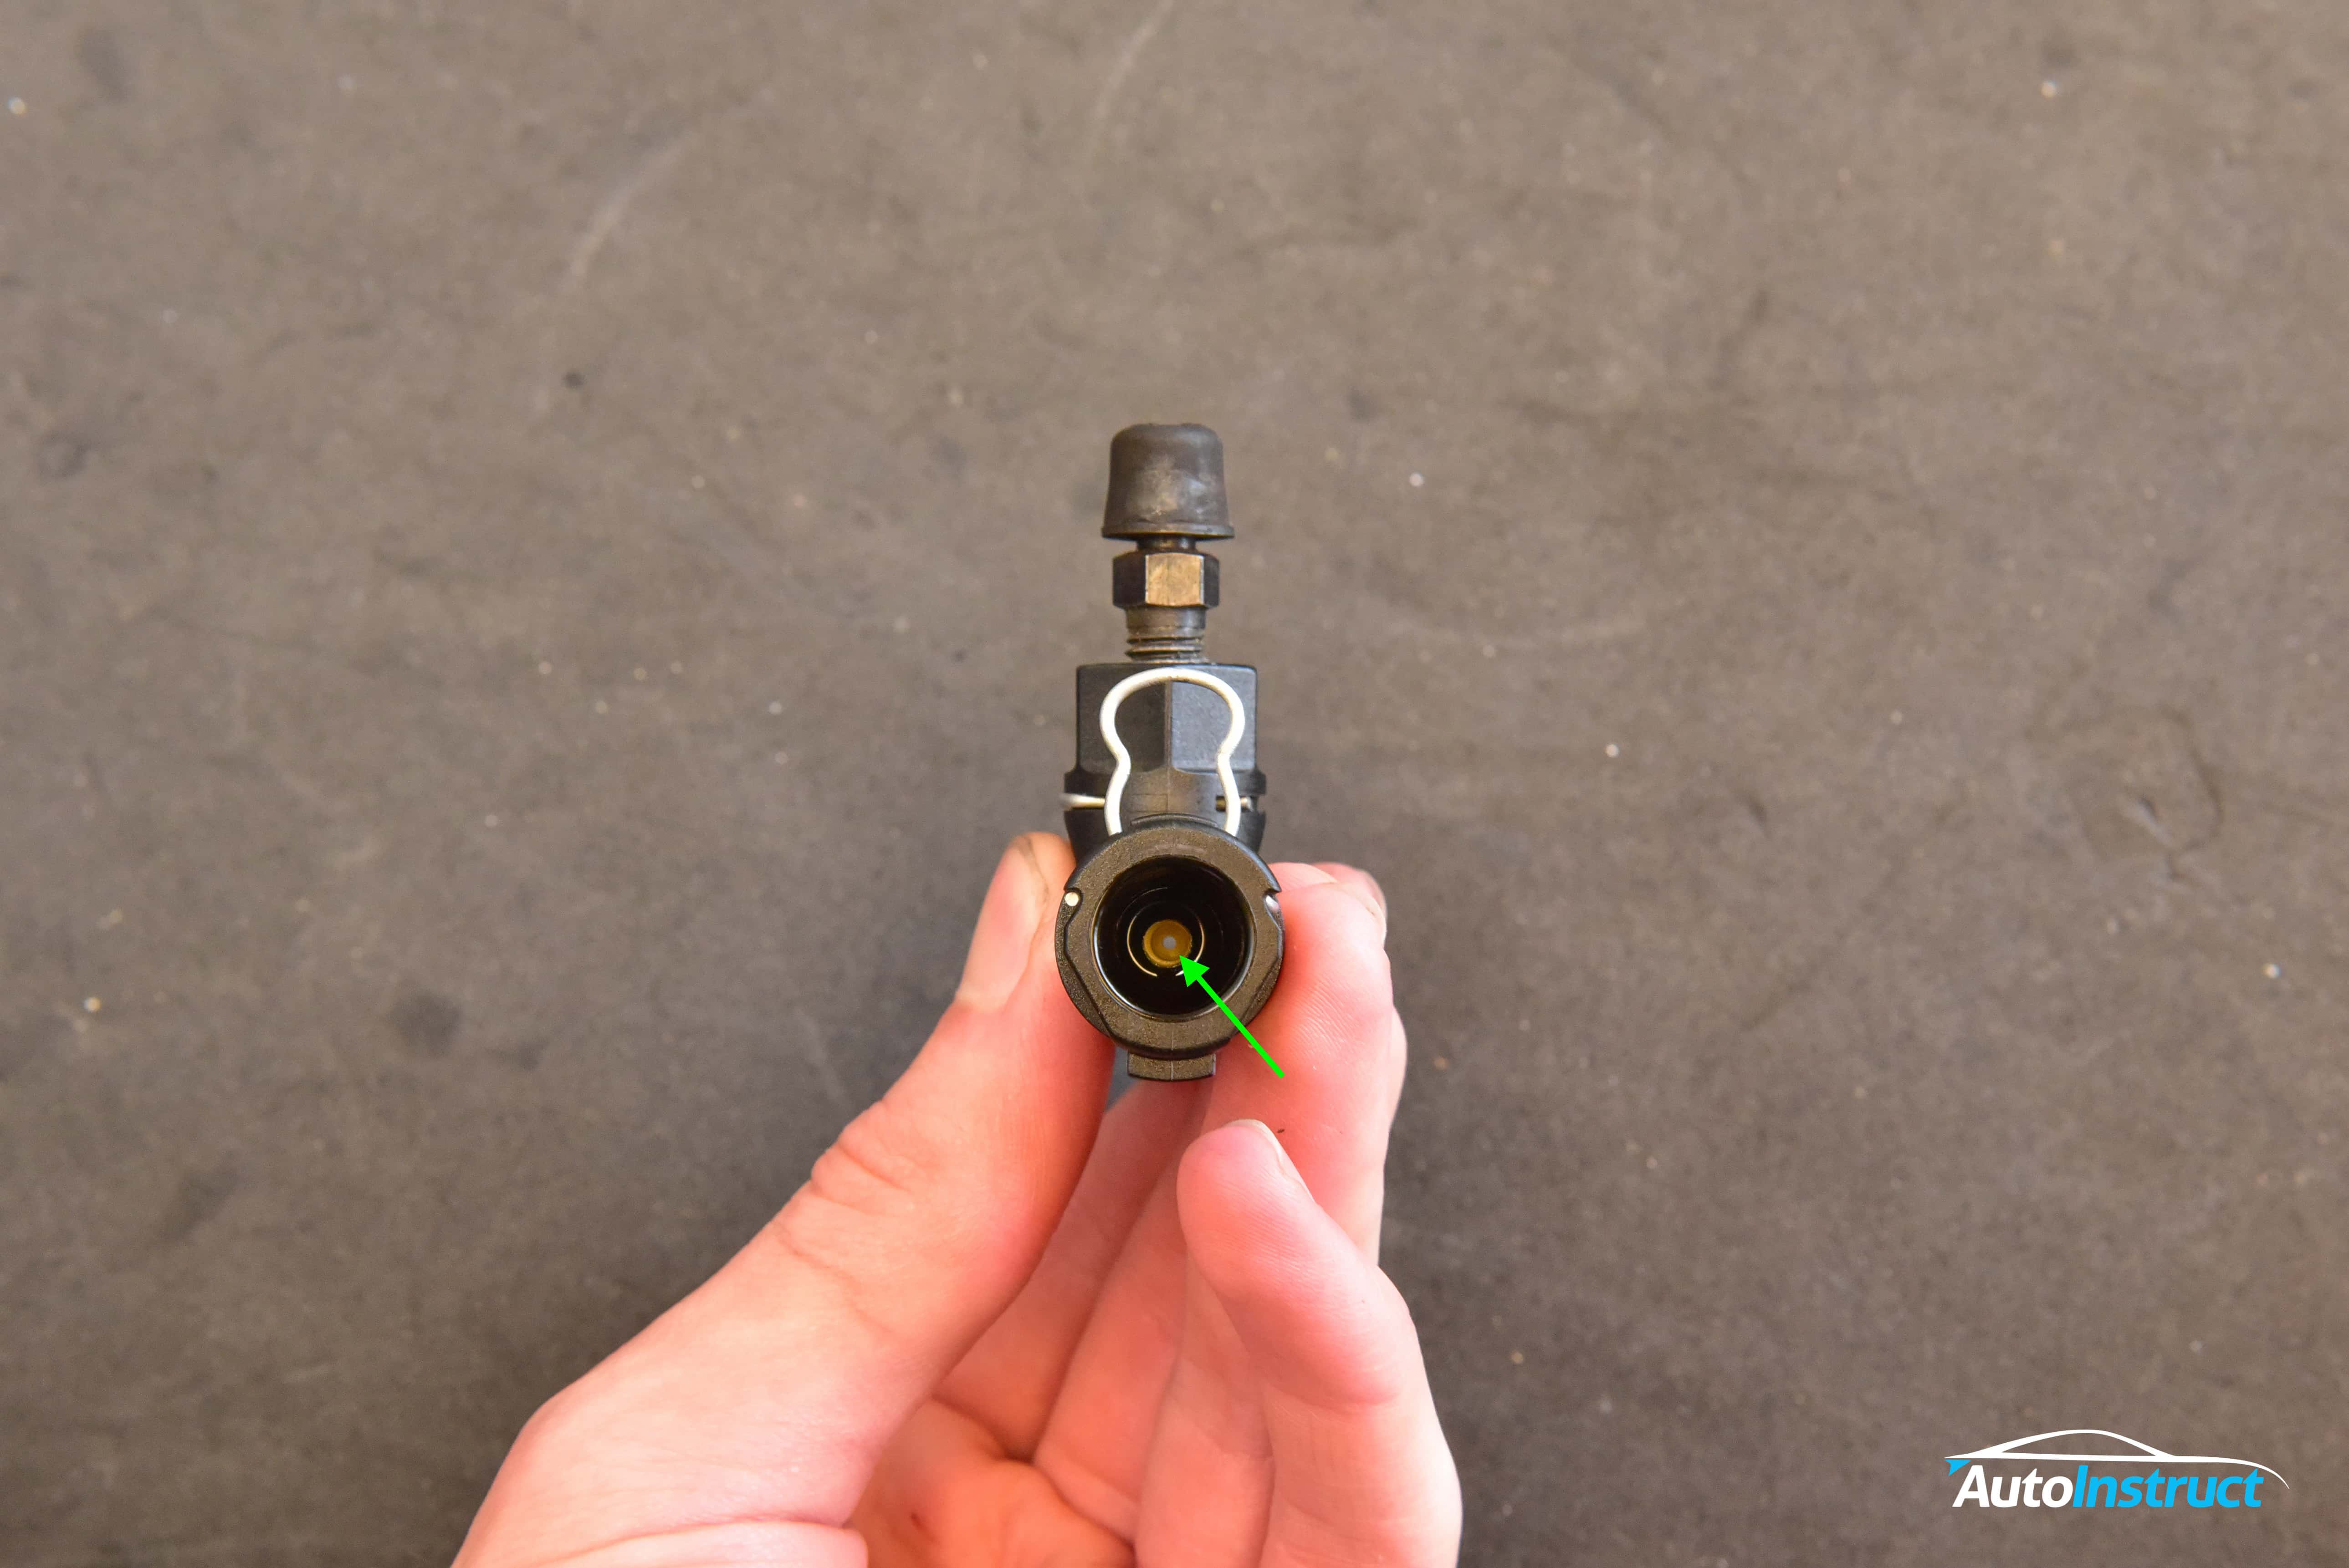
With the T-Piece removed from the vehicle you can see the clutch delay valve down the middle. This yellow piece is what we will remove.
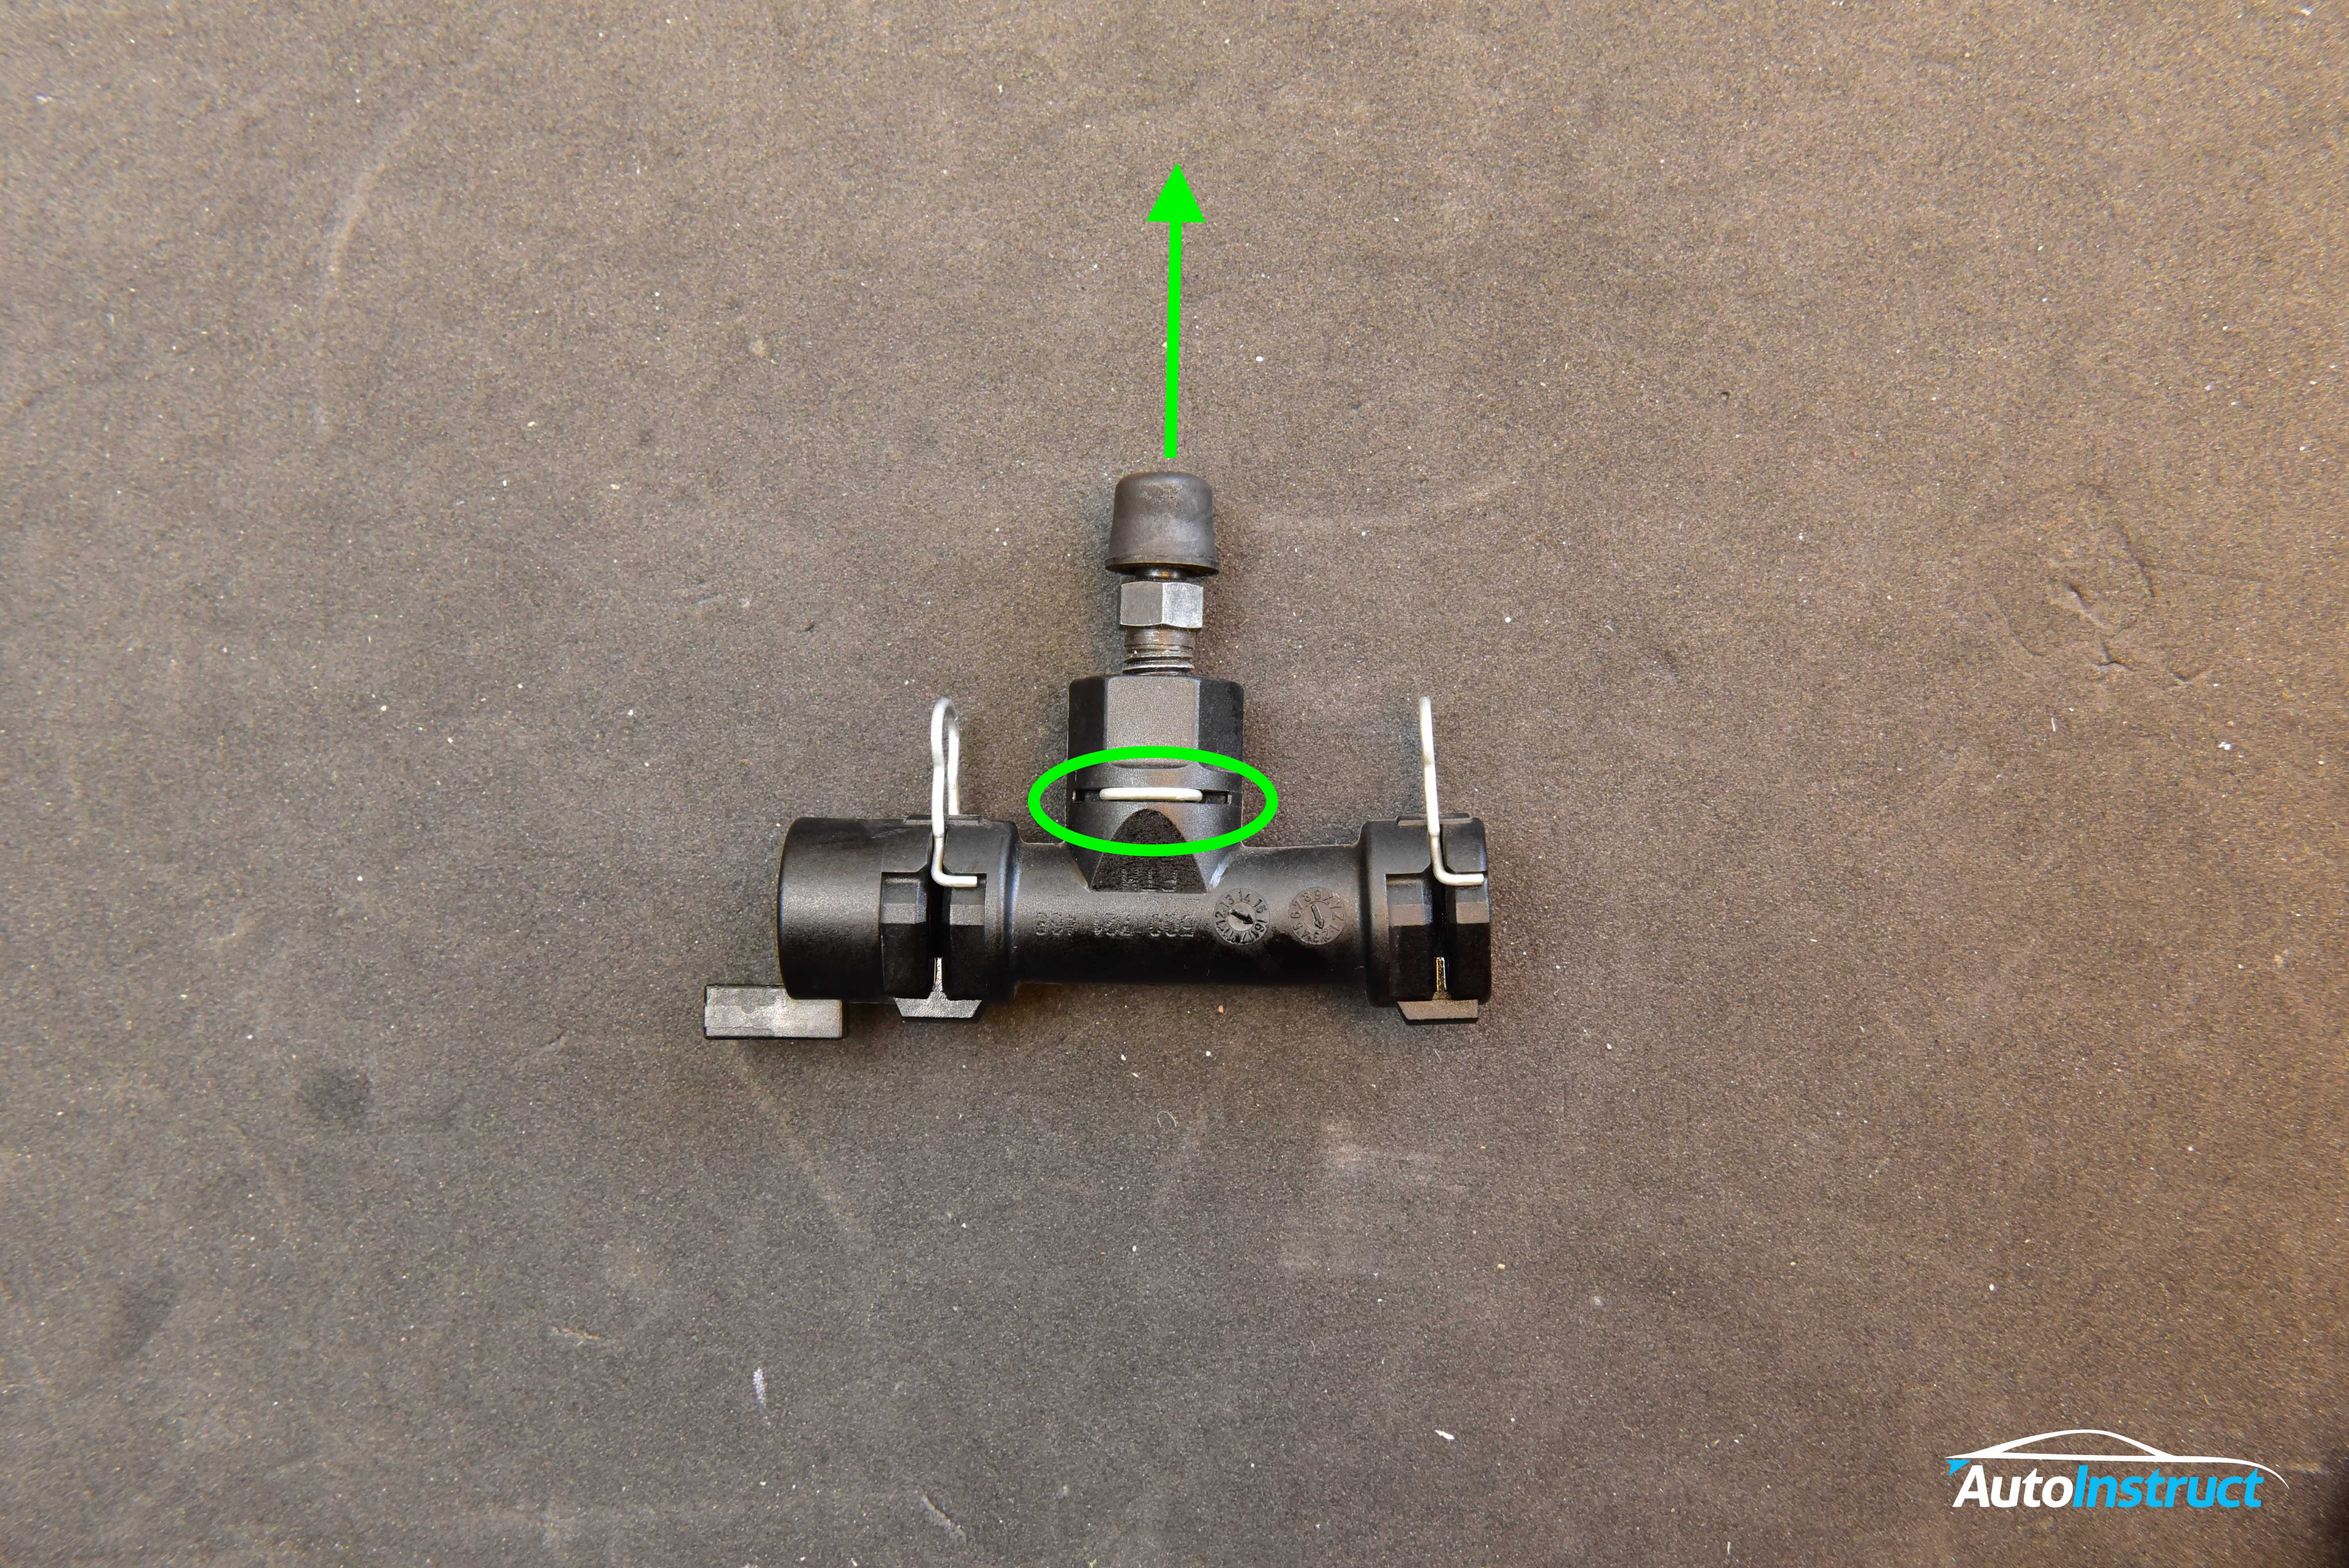
Step 5
To remove the delay valve, release the centre clip and pull the bleeder valve out. You can then poke the clutch delay piece from the side, and it will fall out through the centre hole.
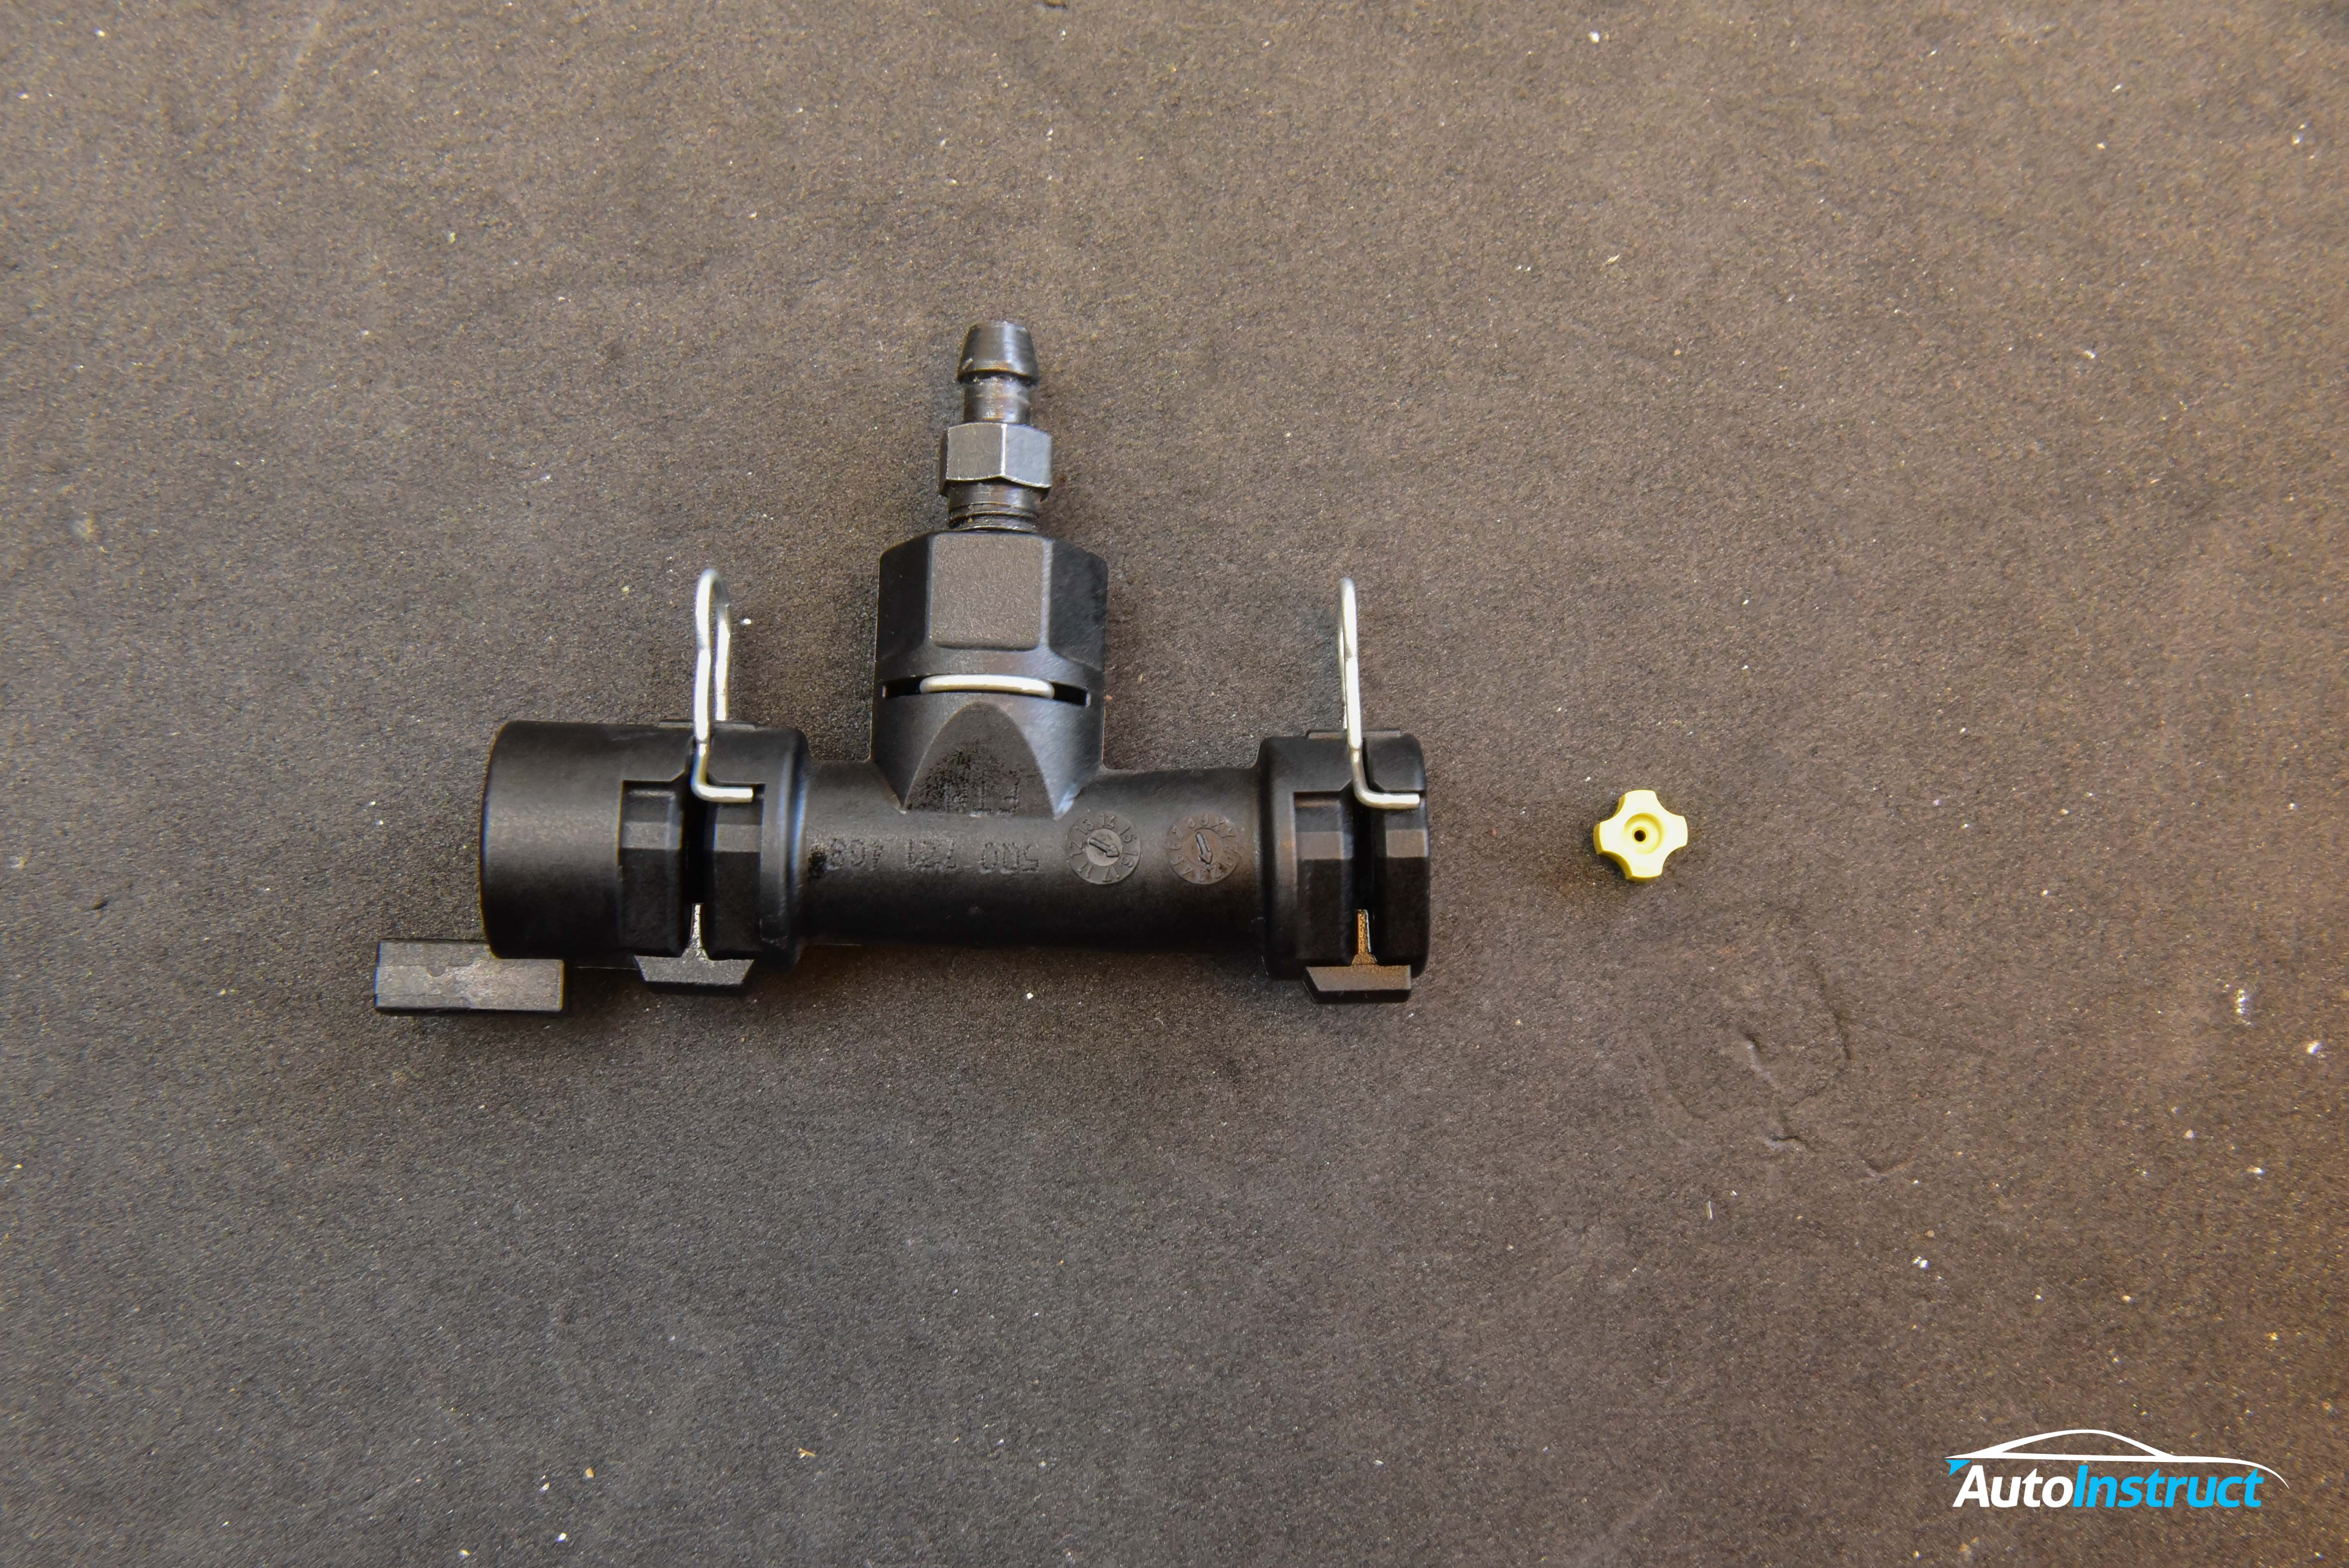
Step 6
We’ve now reassembled the clutch bleeder unit, ready for installation. You can also see the removed valve in this picture.
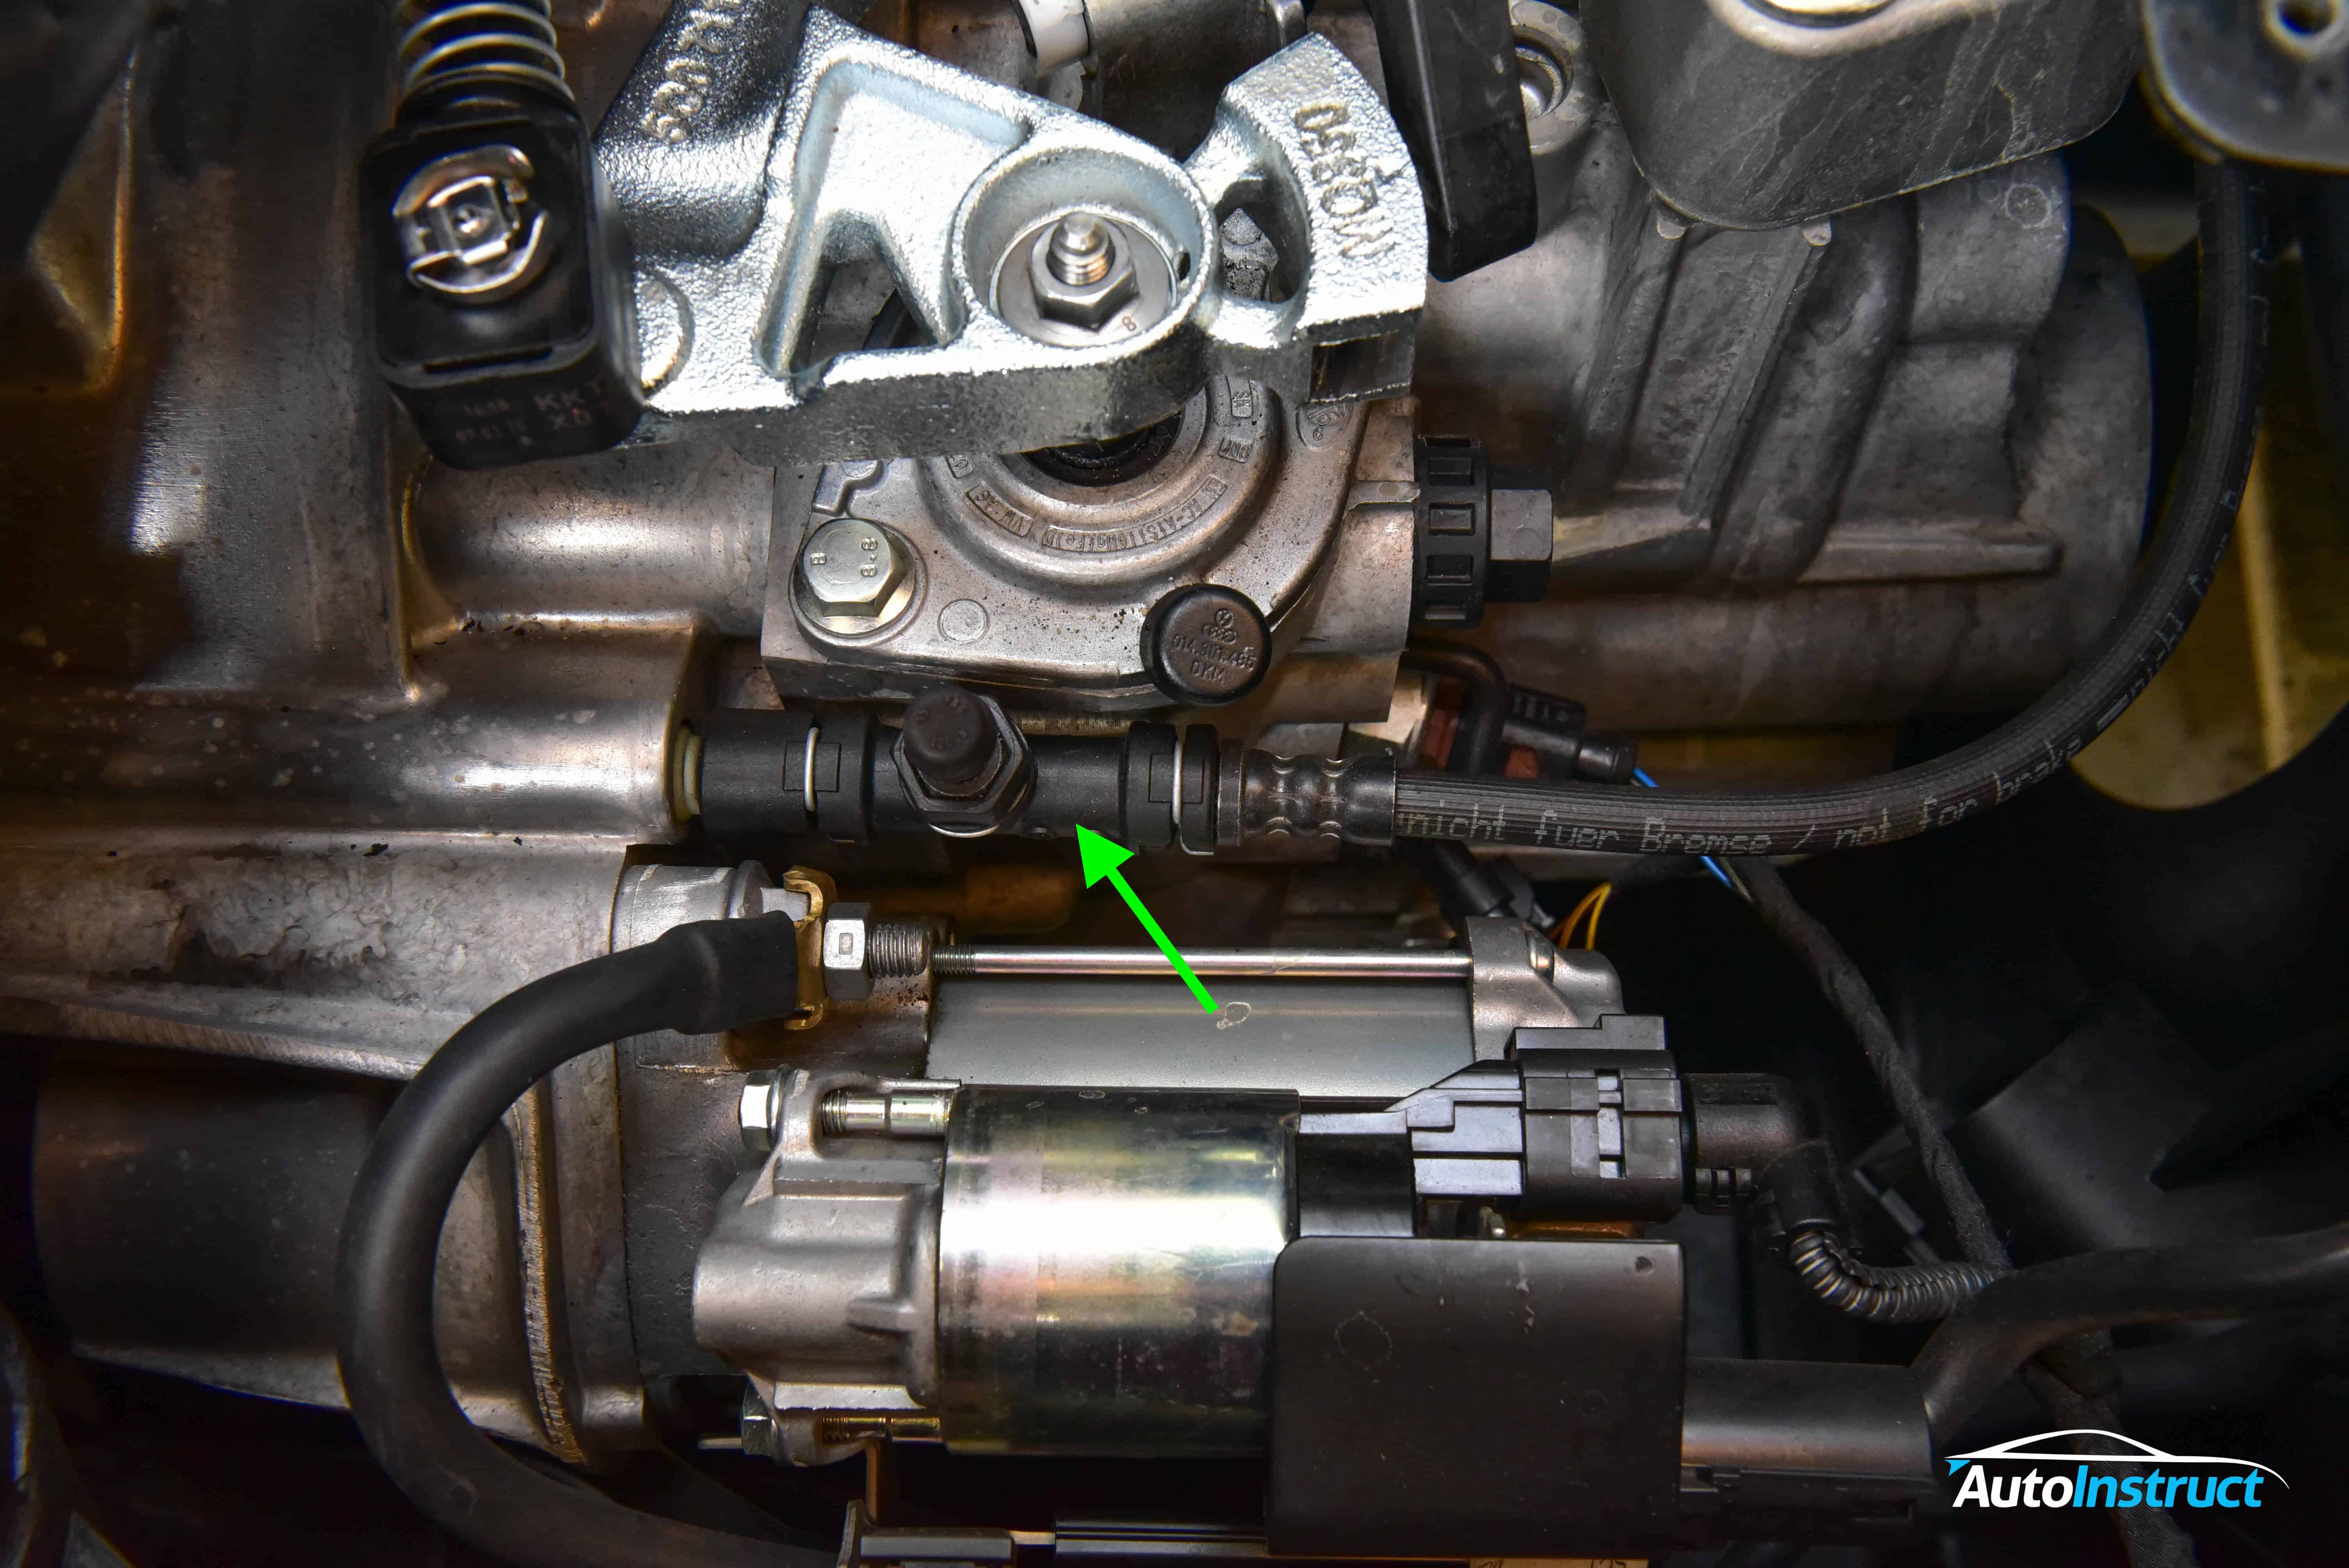
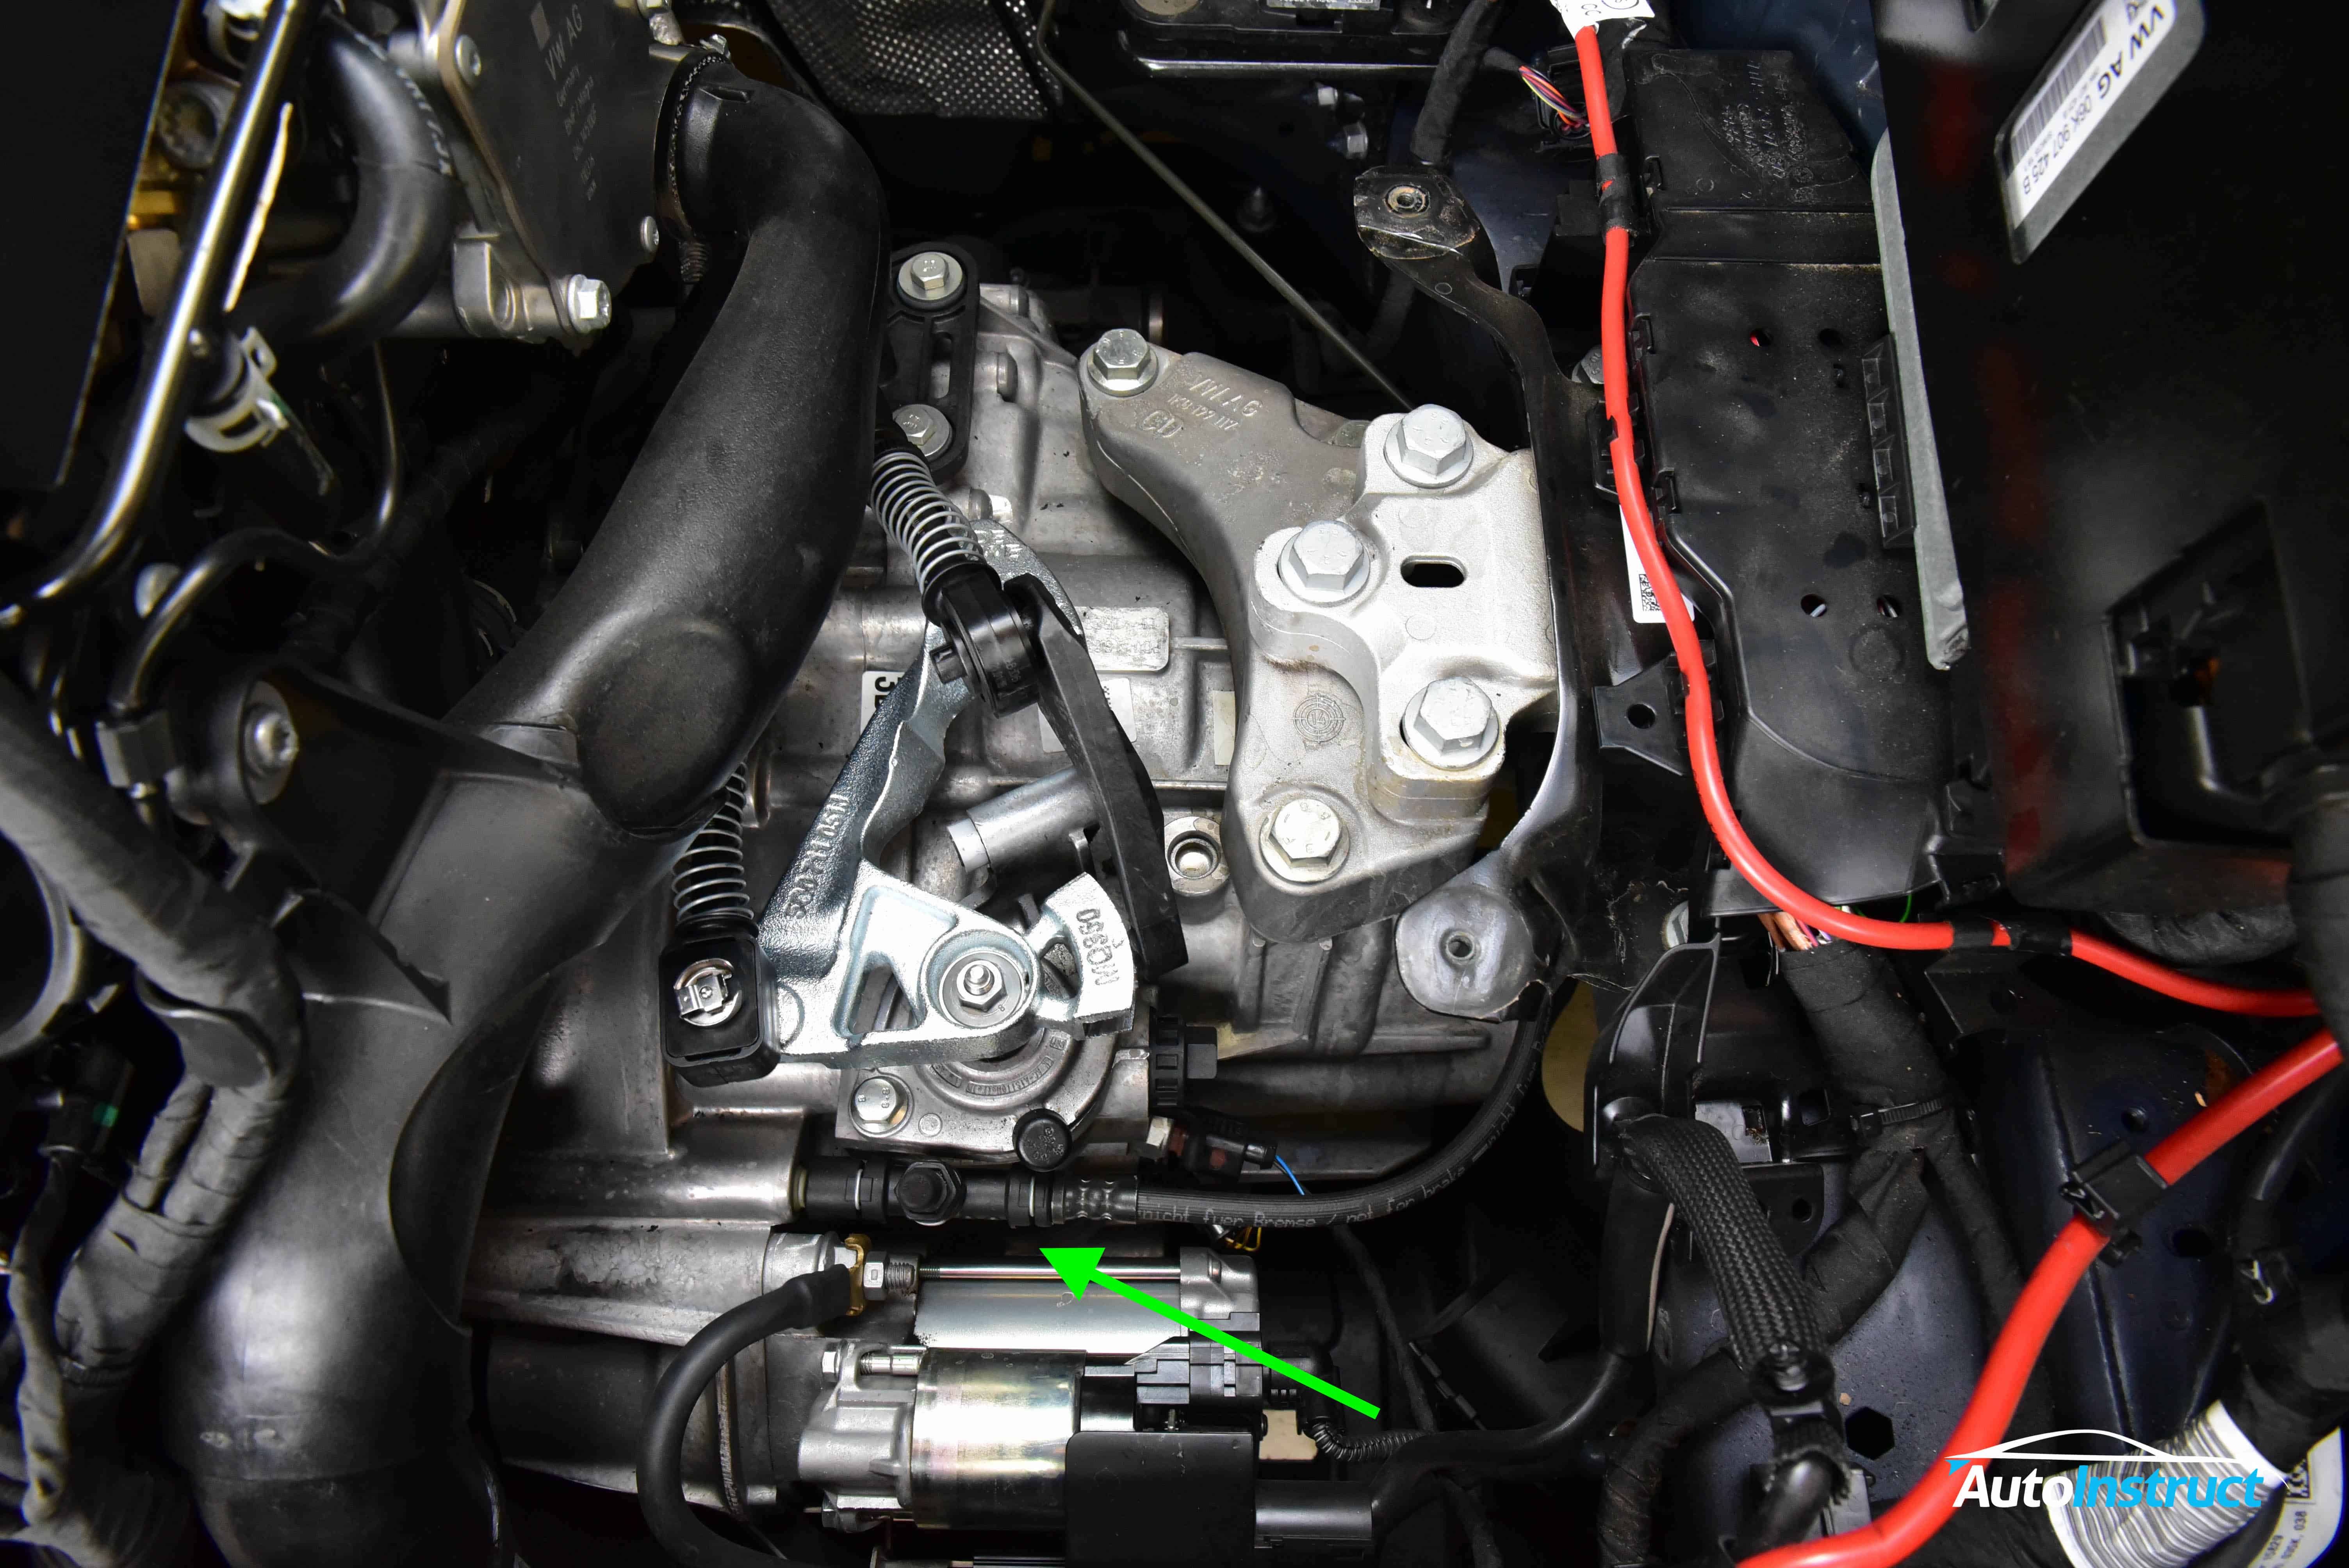
Step 7
Reinstall the bleeder block back into the vehicle. We now need to bleed the clutch line.
Step 8
Connect a brake bleeder kit and commence the bleeding process. This is done as follows:
Open the brake fluid reservoir and ensure the fluid is at the MAX line.
Crack open the bleeder valve 1/8th of a turn.
With the assistance of a friend, depress the clutch pedal whilst watching the fluid flow into the bleeder kit. You will bubbles in the fluid.
Close the bleeder valve.
With your hand, pull up the clutch pedal which would have become ‘stuck’ on the firewall.
Top up the fluid reservoir, back to the MAX line.
Repeat these steps until no more bubbles are flowing out of the bleeder valve.
Step 9
The installation is now complete. If at any stage your clutch feels odd, or becomes stuck, bleed the fluid again as there is likely bubbles in the system.
Did you find this guide helpful? Consider sharing it to help other car enthusiasts