Want to improve the gear shift on your MK7 Golf? Look no further then a short shifter! This tutorial will show you how to install a short shifter and solid bushings, greatly improving the side to side and front to back throw of your gear lever.
Difficulty Rating
Hard
Tools/Parts Required
Hammer
Flat Screwdriver
Grease
Socket Set
Spanner Set
Torx Set
Warning
Work at your own risk. This work is inherently dangerous and must only be carried out by a qualified mechanic. AutoInstruct will not be held responsible for damage to your vehicle or personal injury / death as a result of the information we provide.
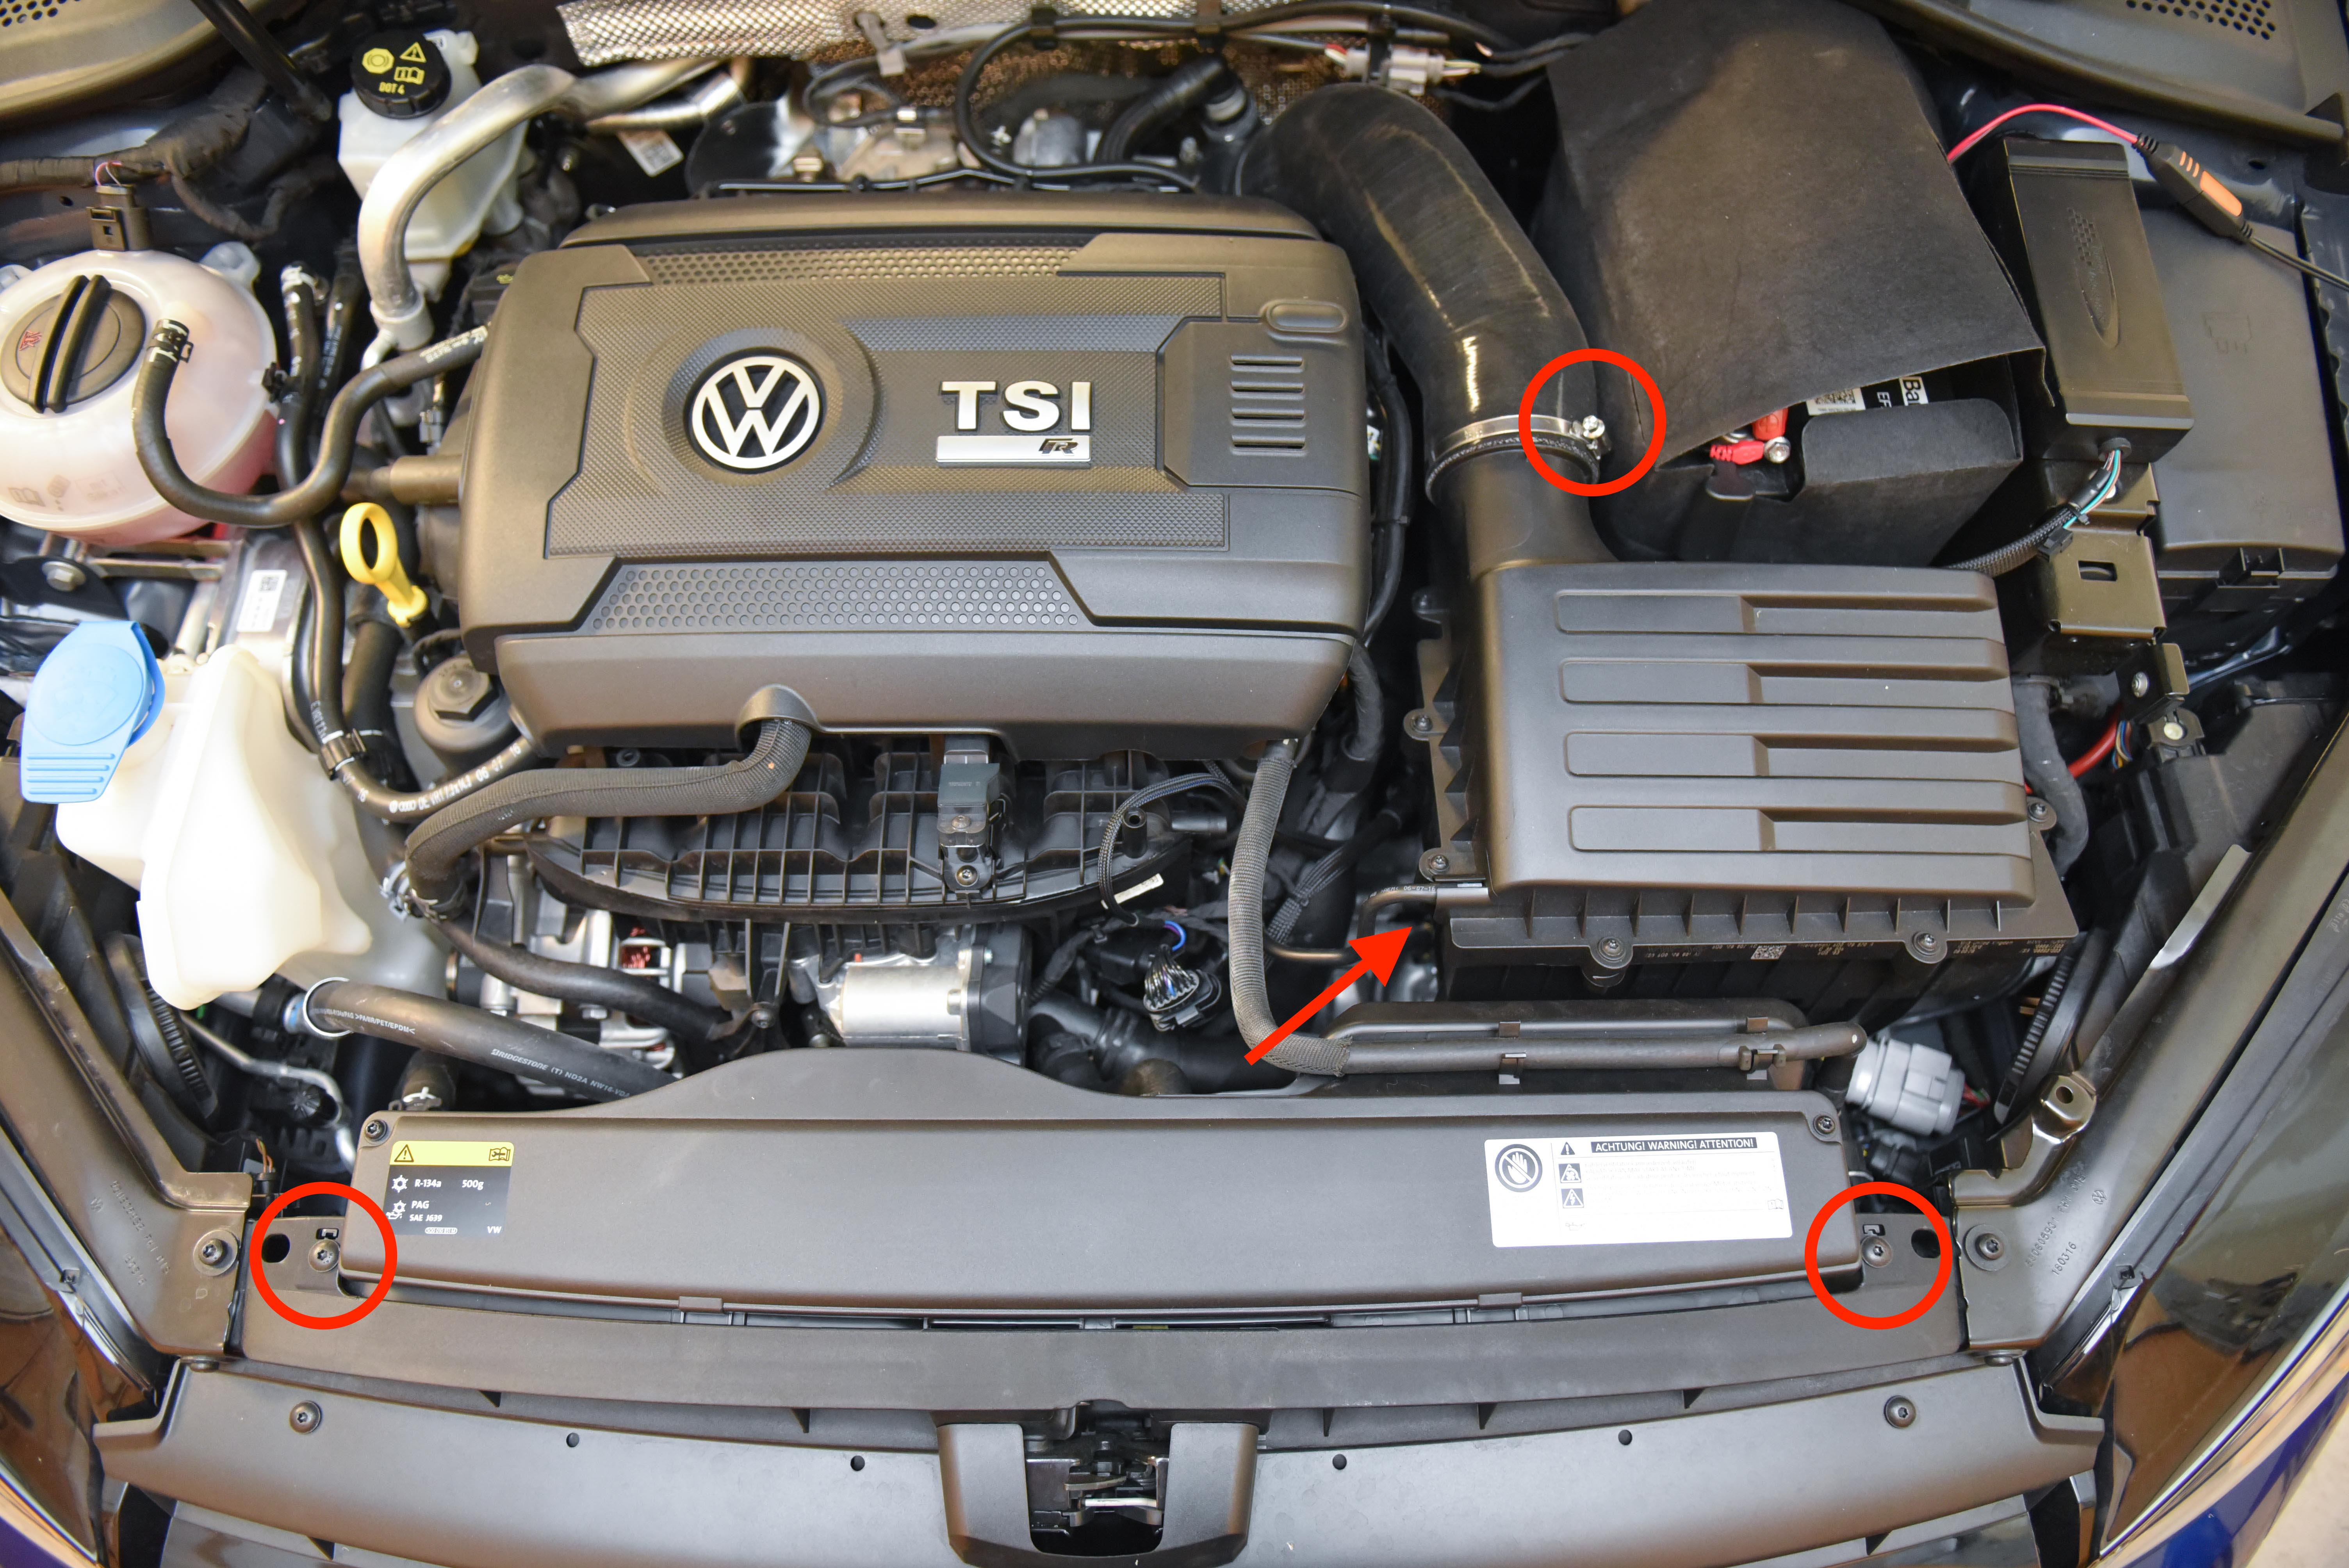
Step 1
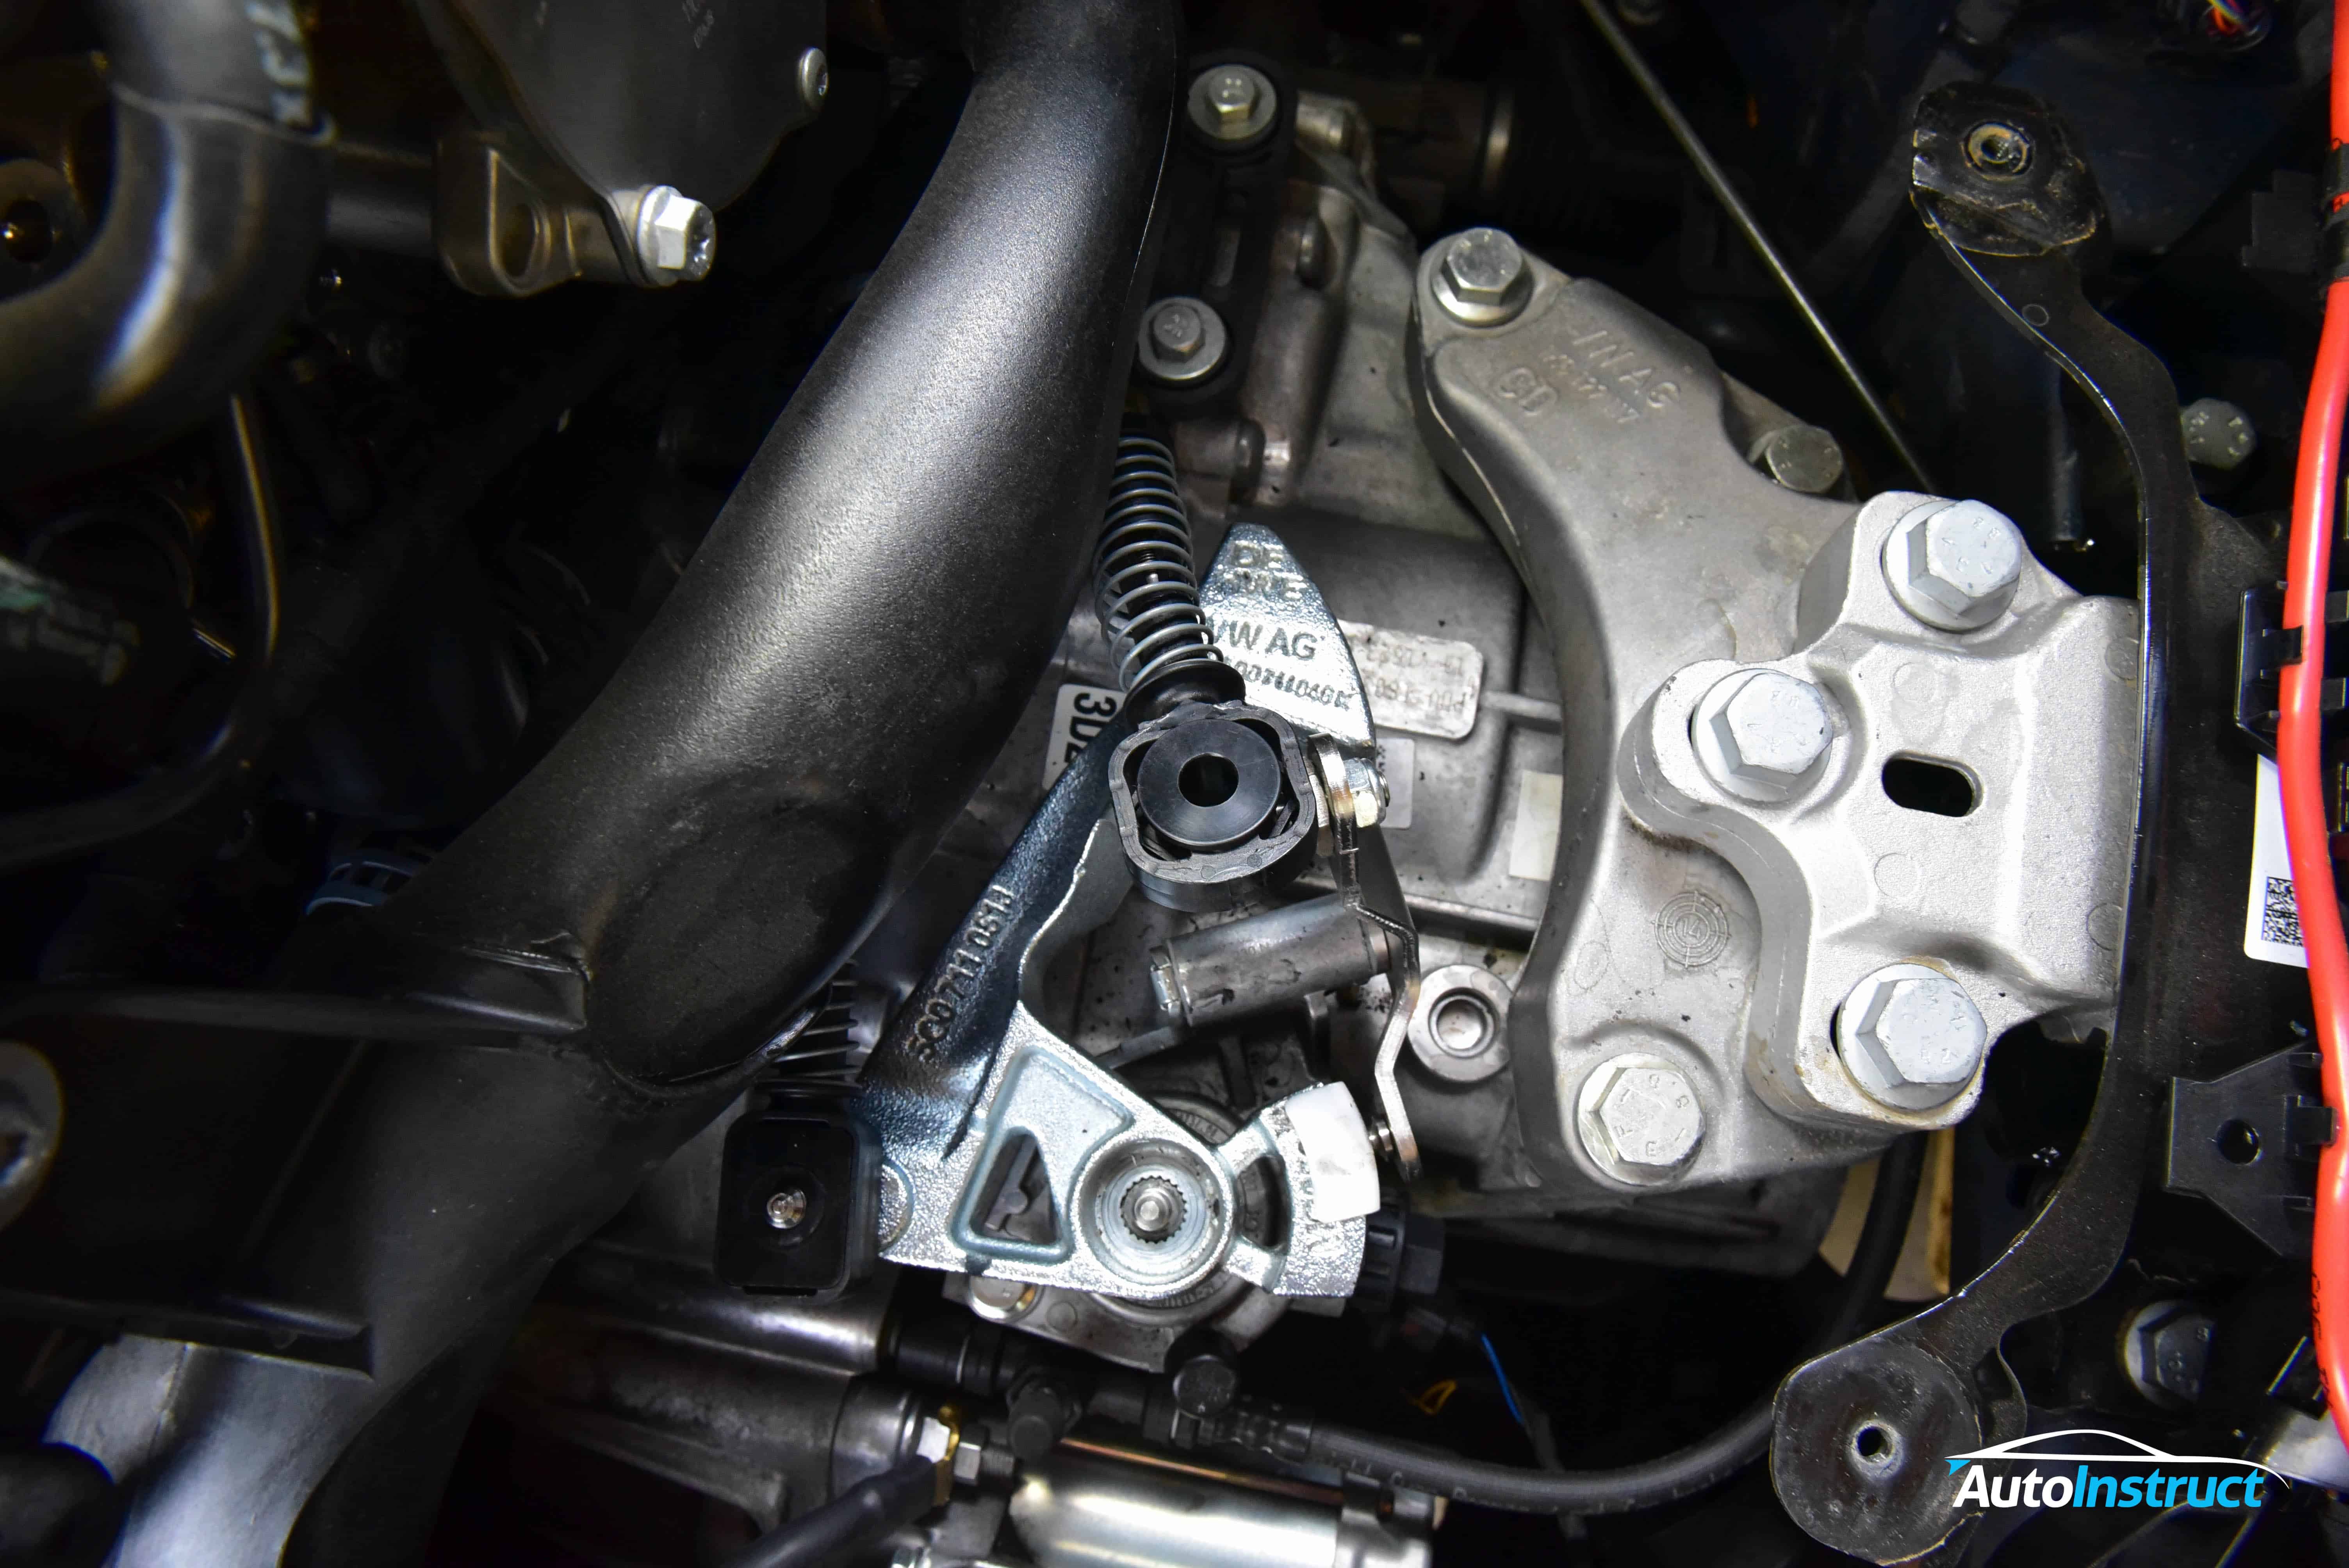
Our first step is to remove the intake assembly to gain access to the shifter lever. Remove the screws as indicated, and release the hose clamp on the intake pipe. Pull firmly upwards on the filter box to release it from the rubber grommets.
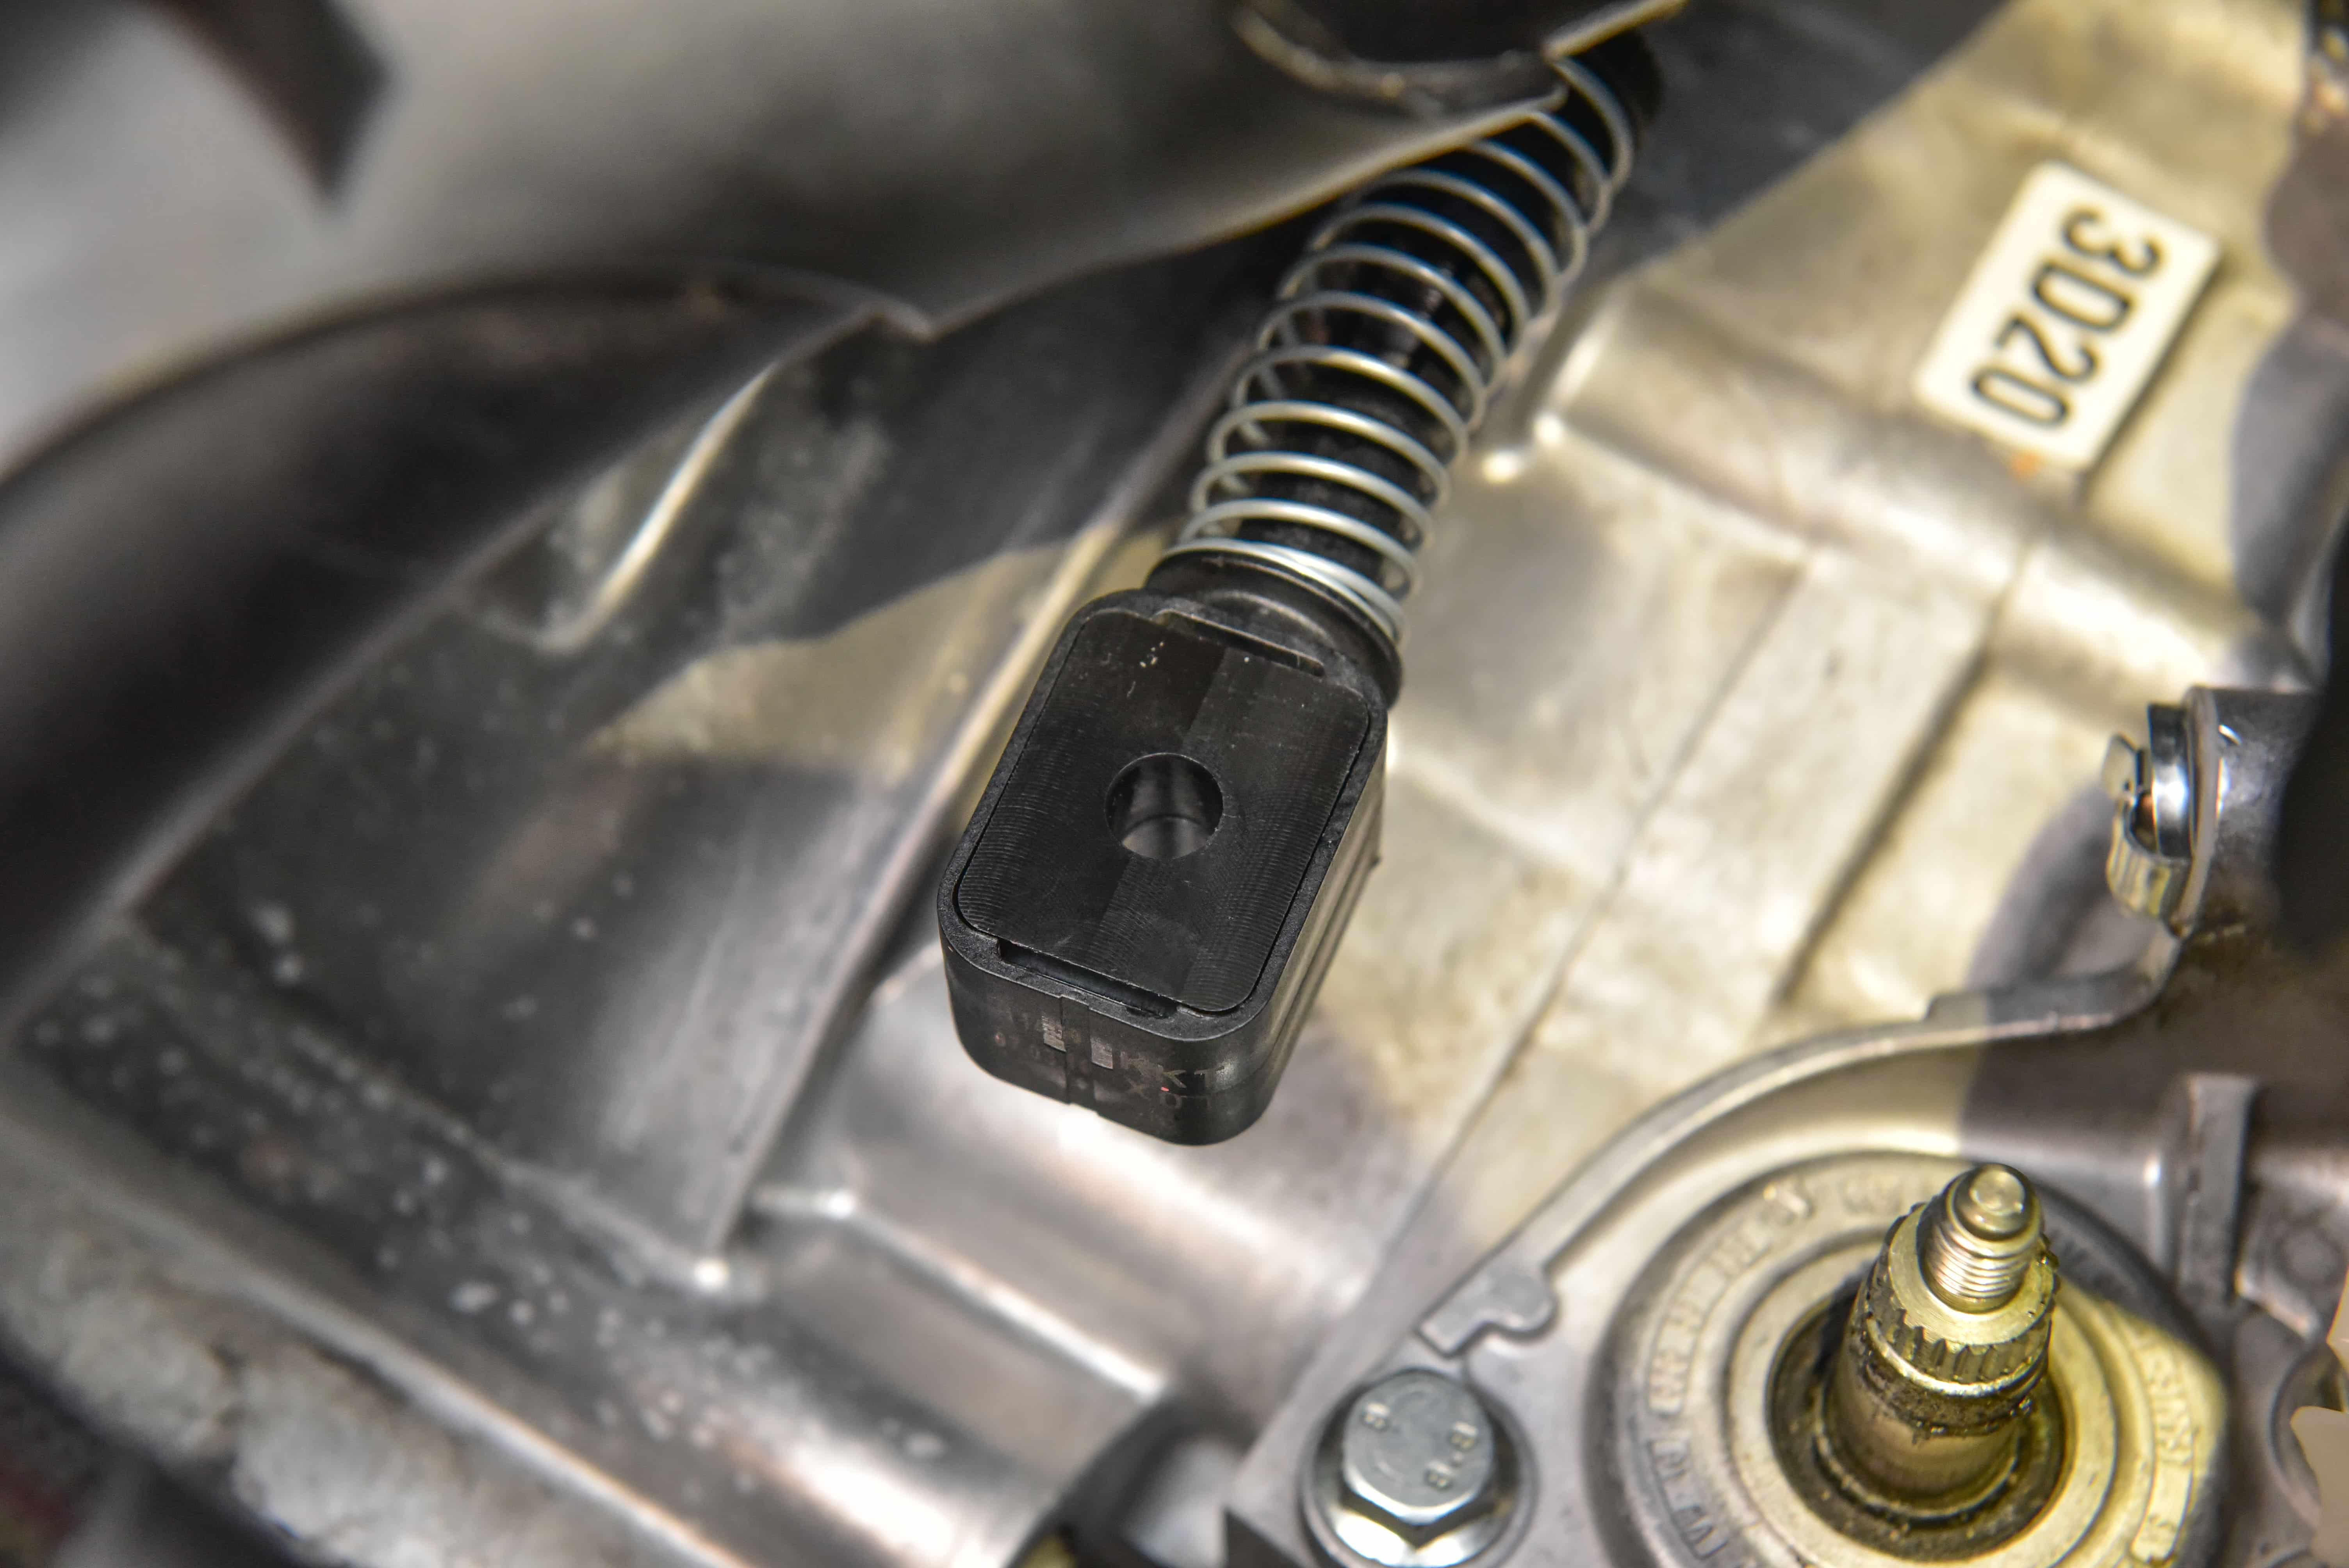
This will reveal the shifter and shift linkages.
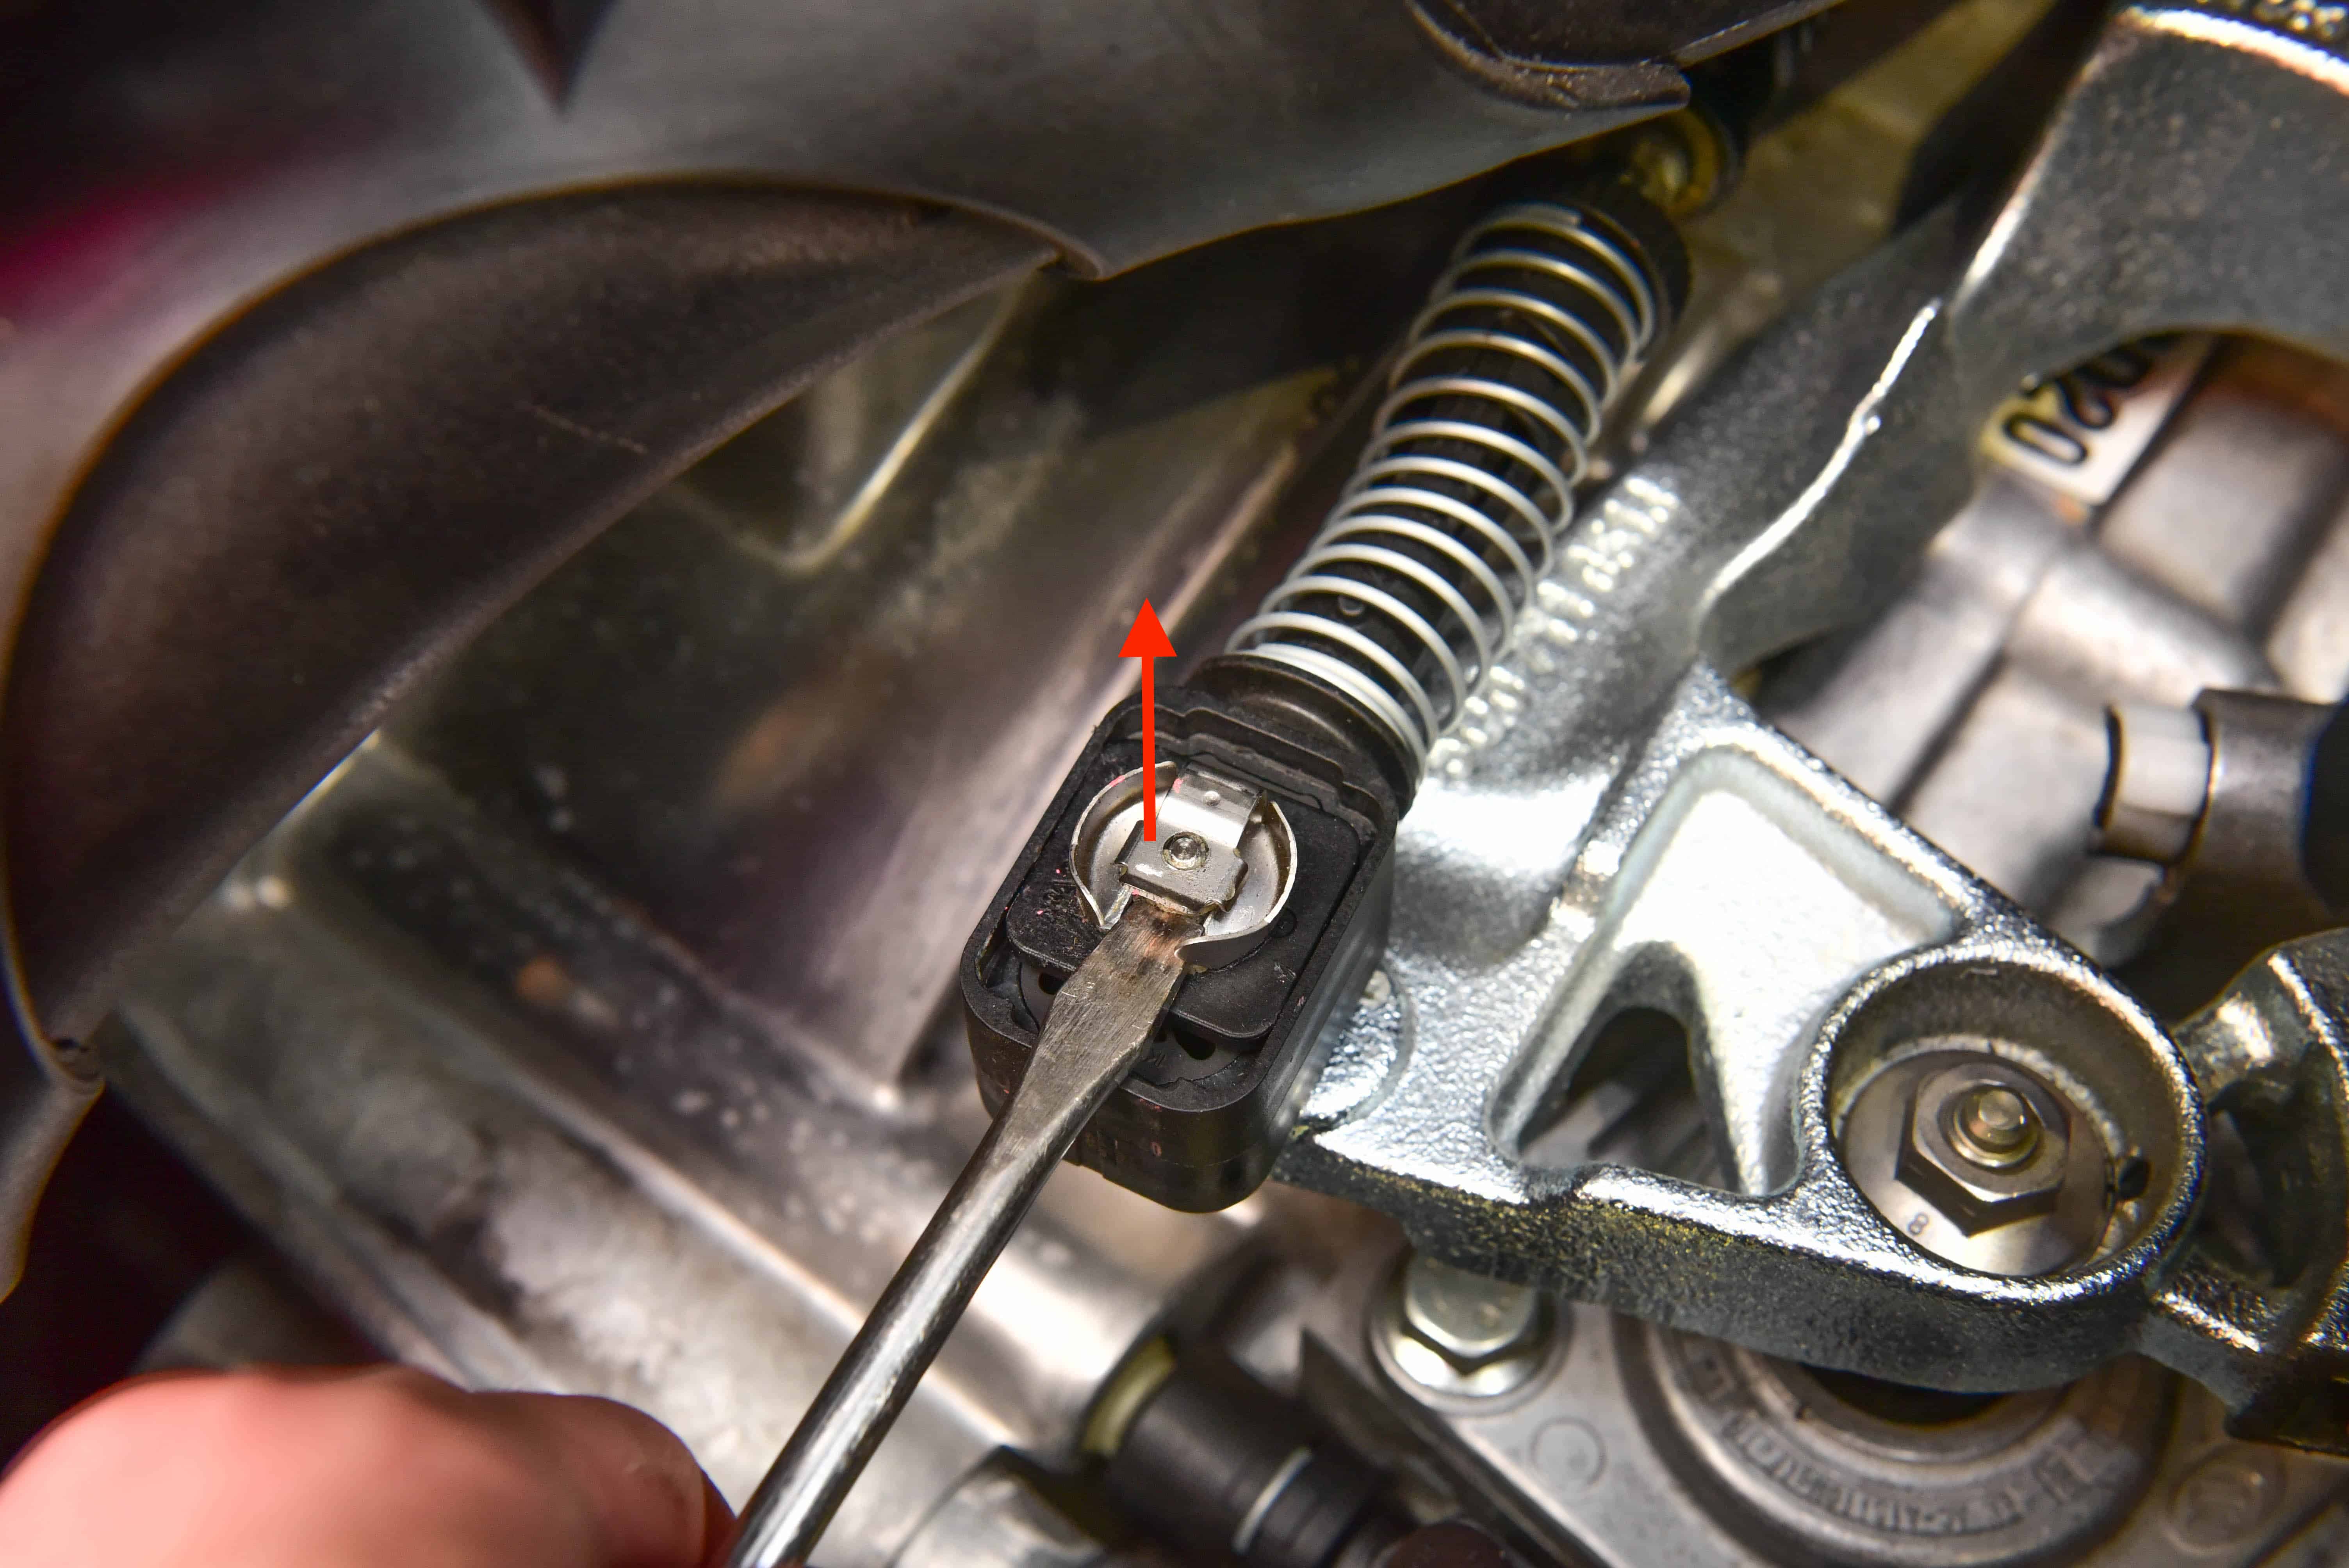
Step 2
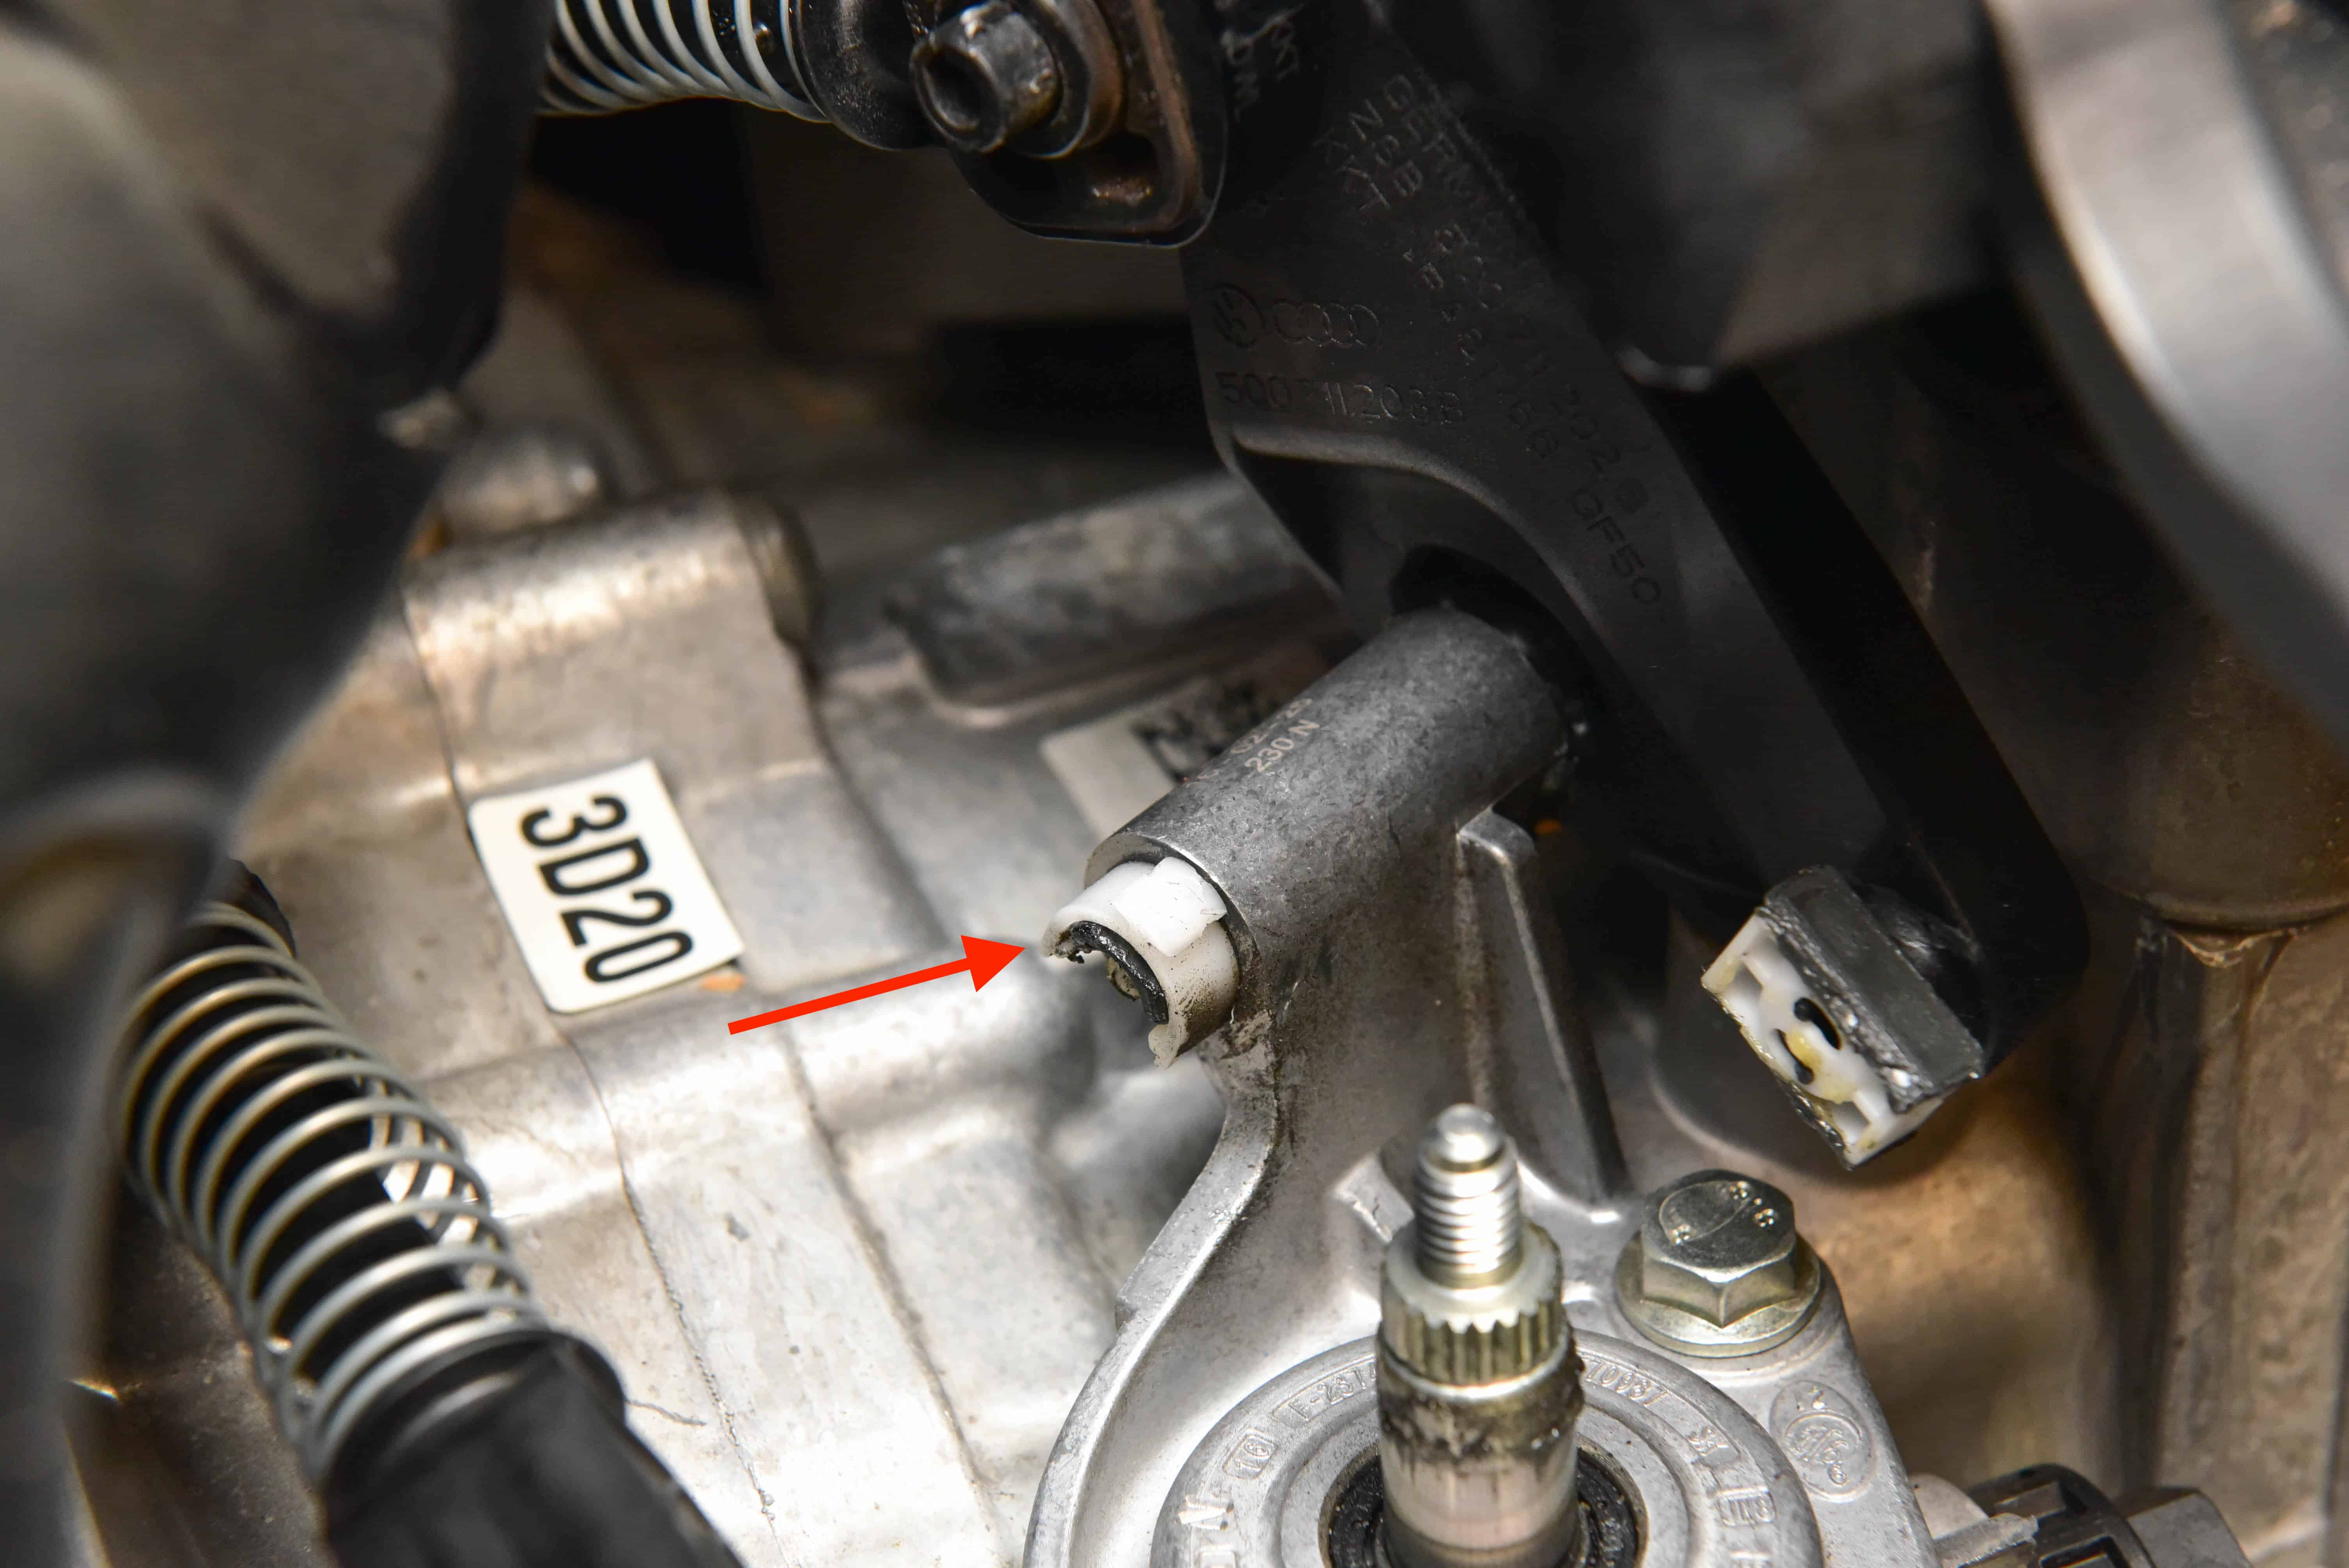
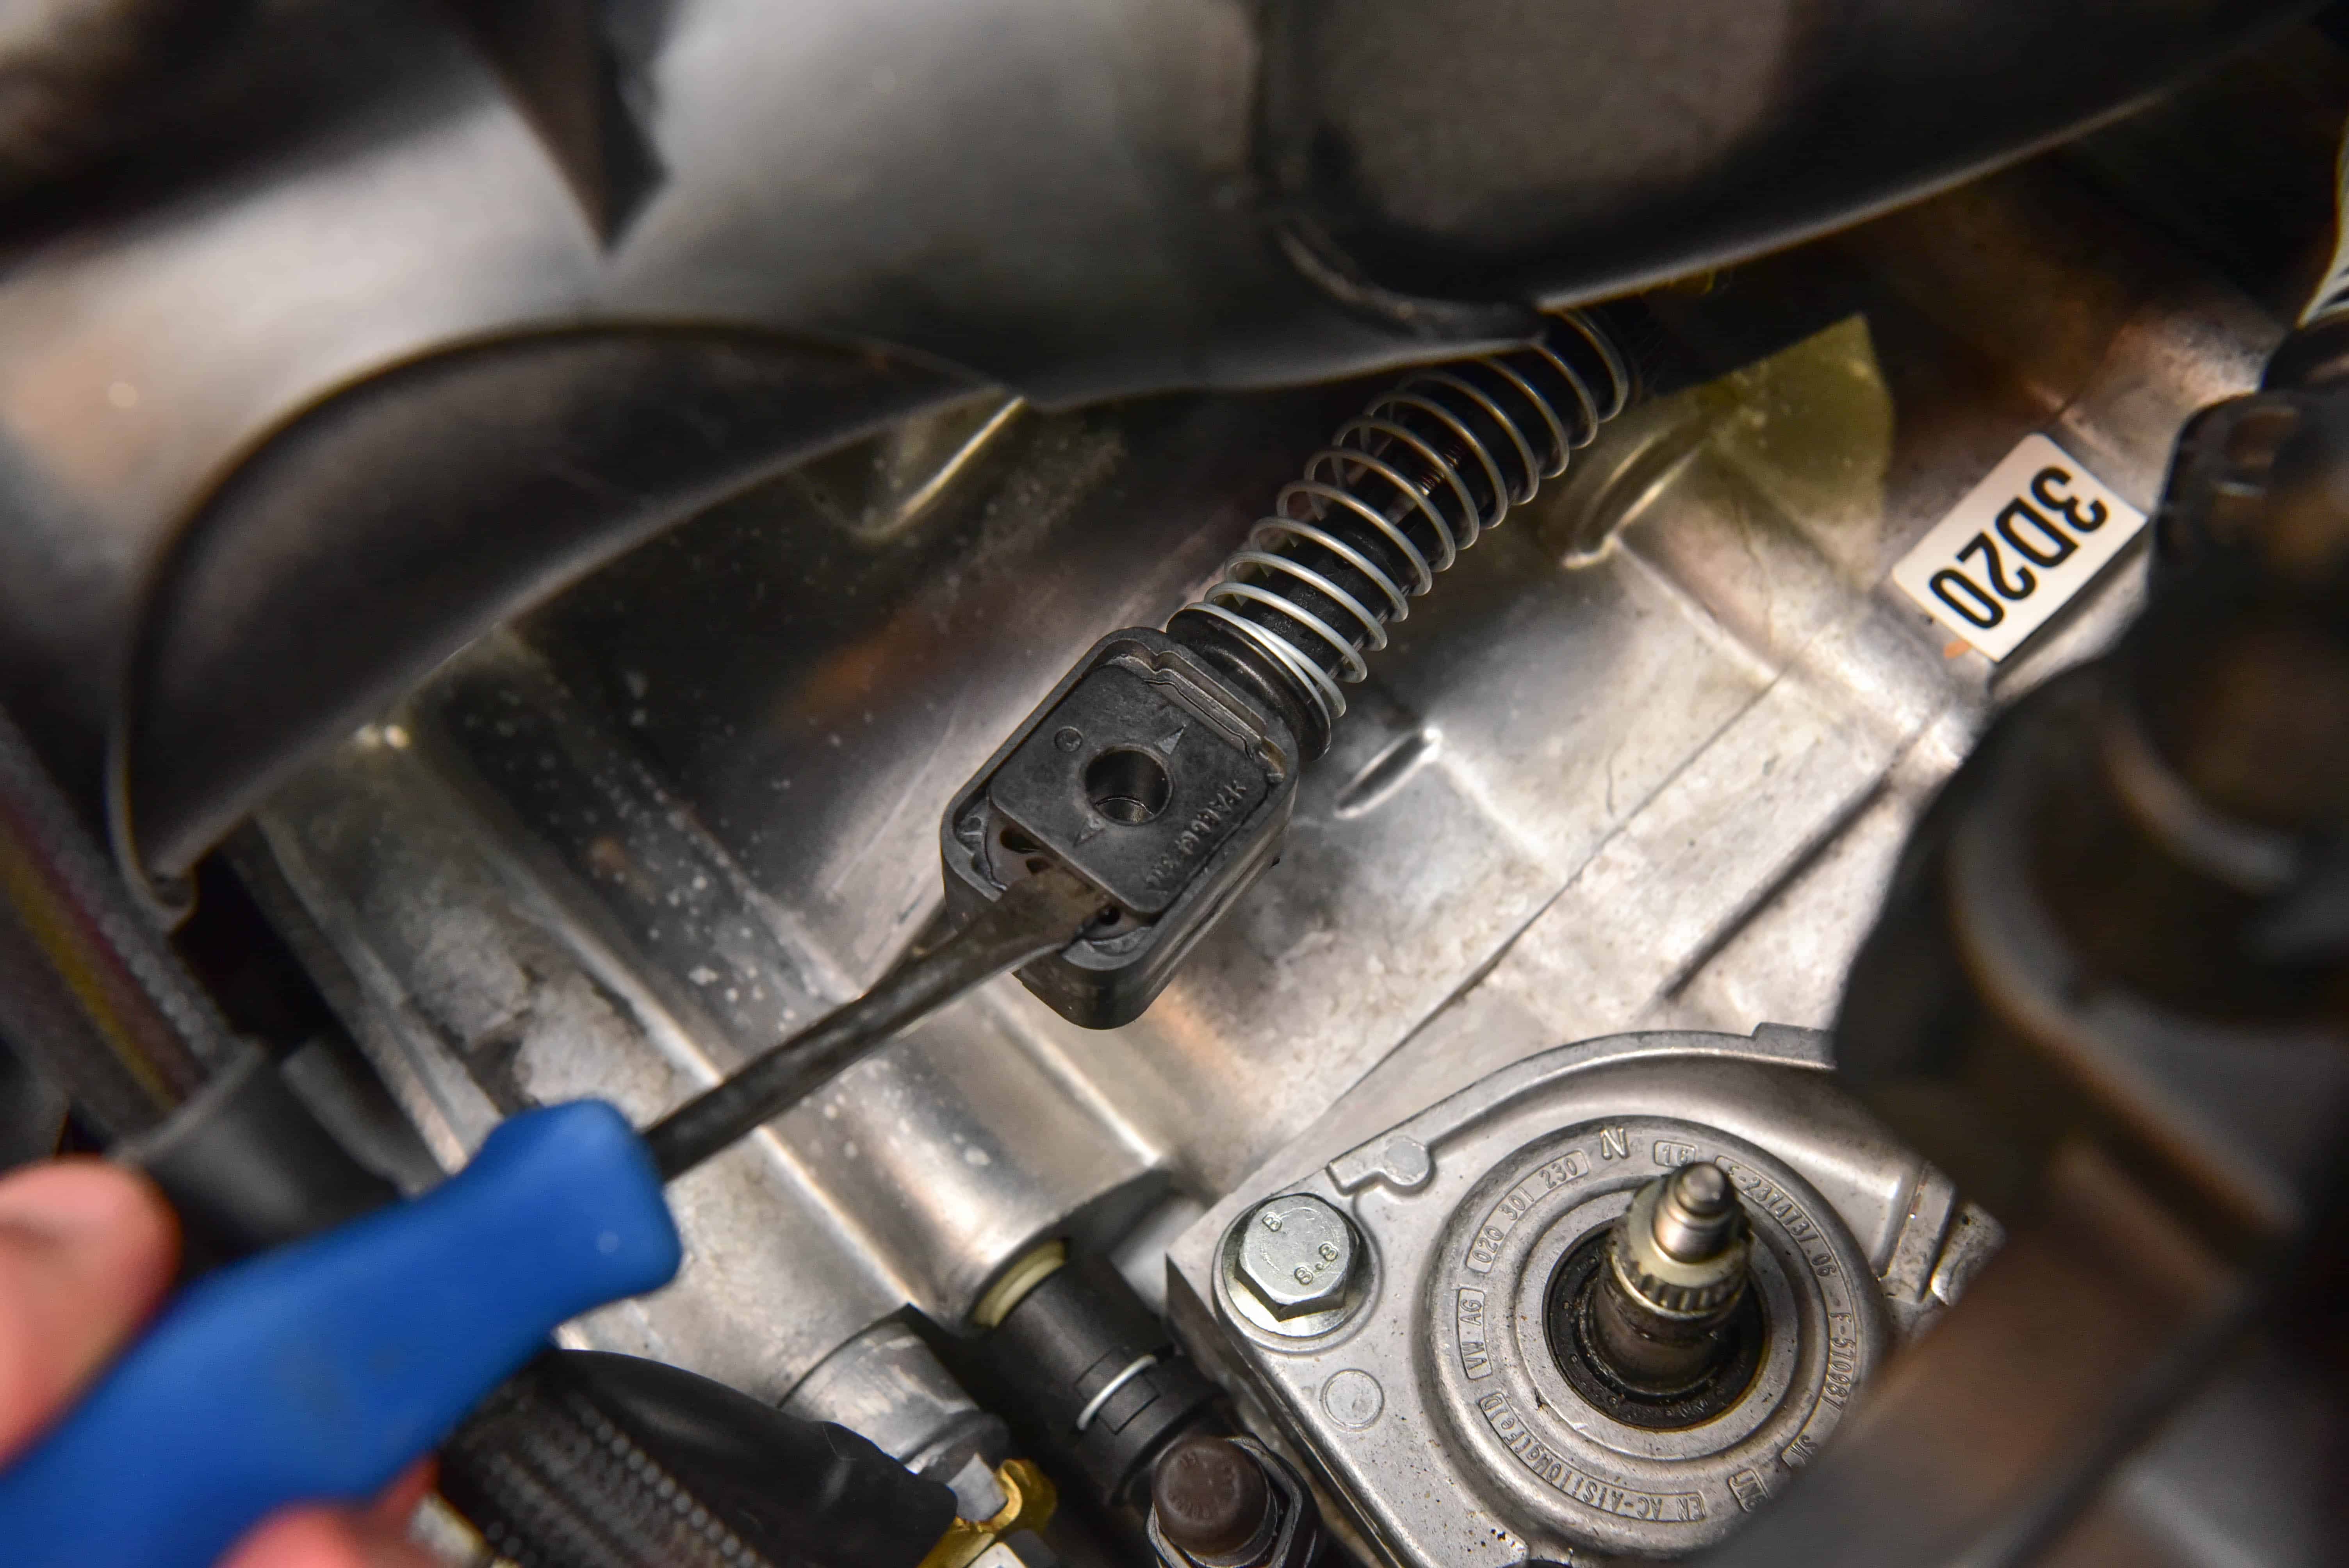
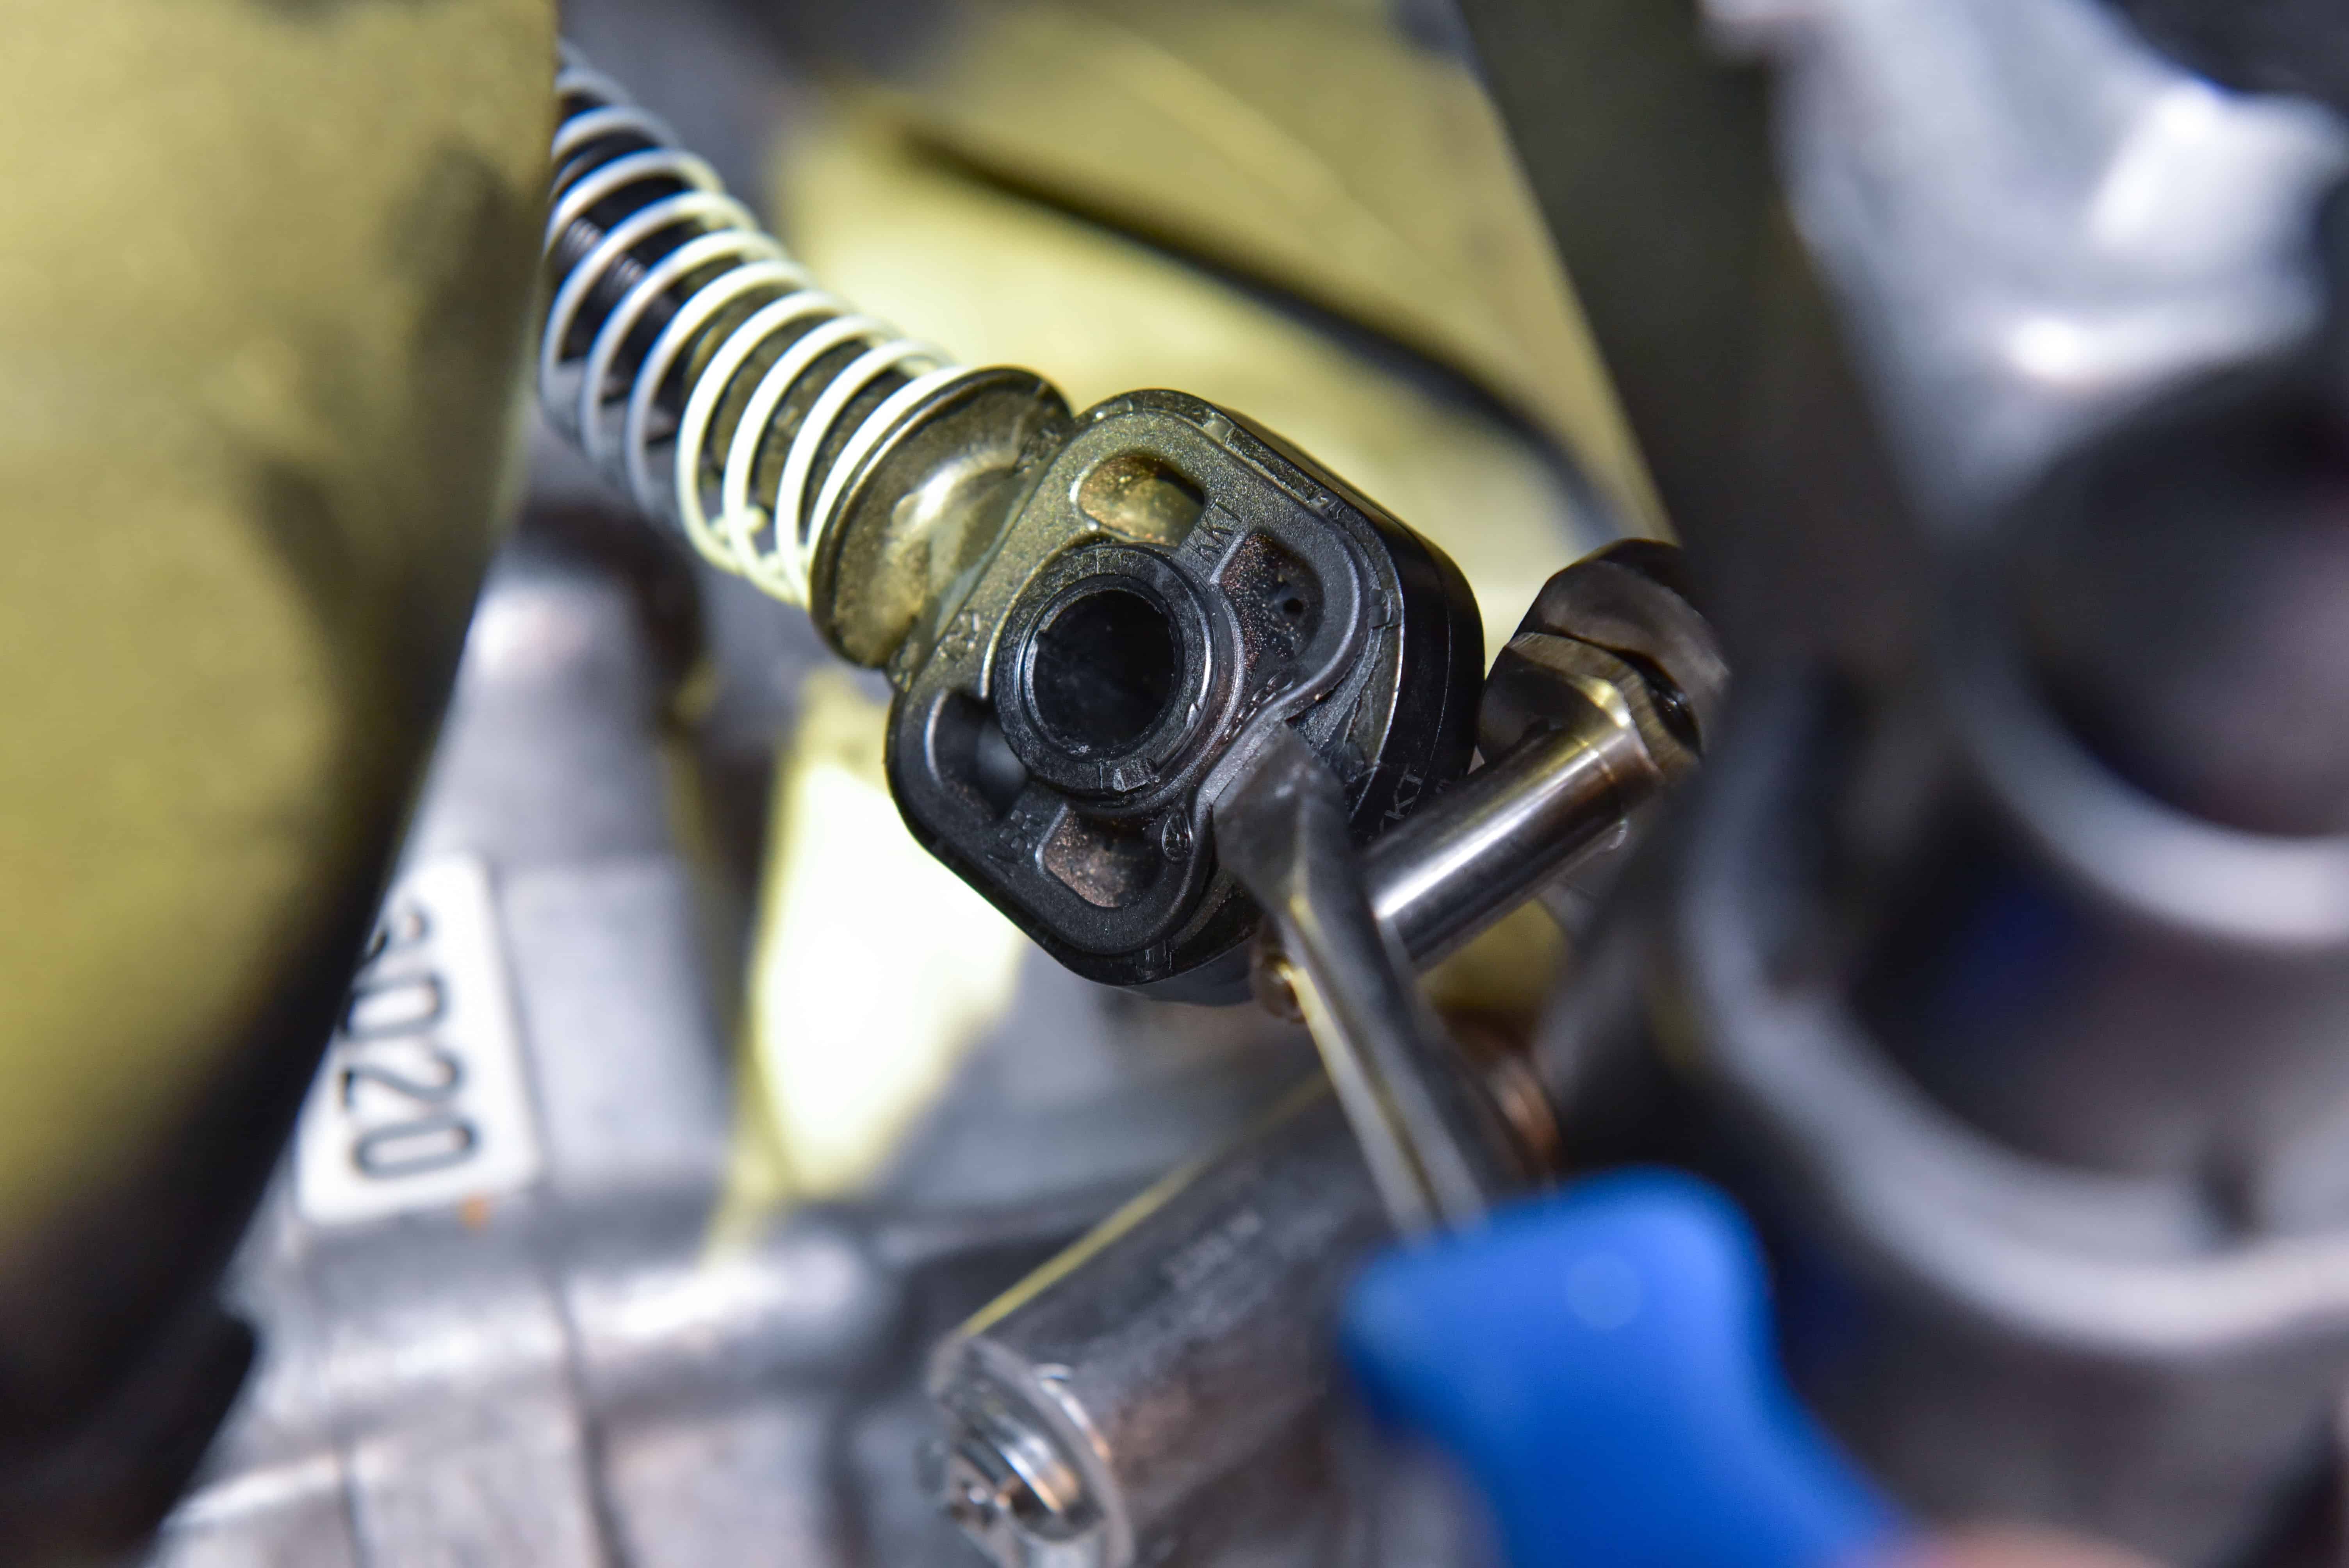
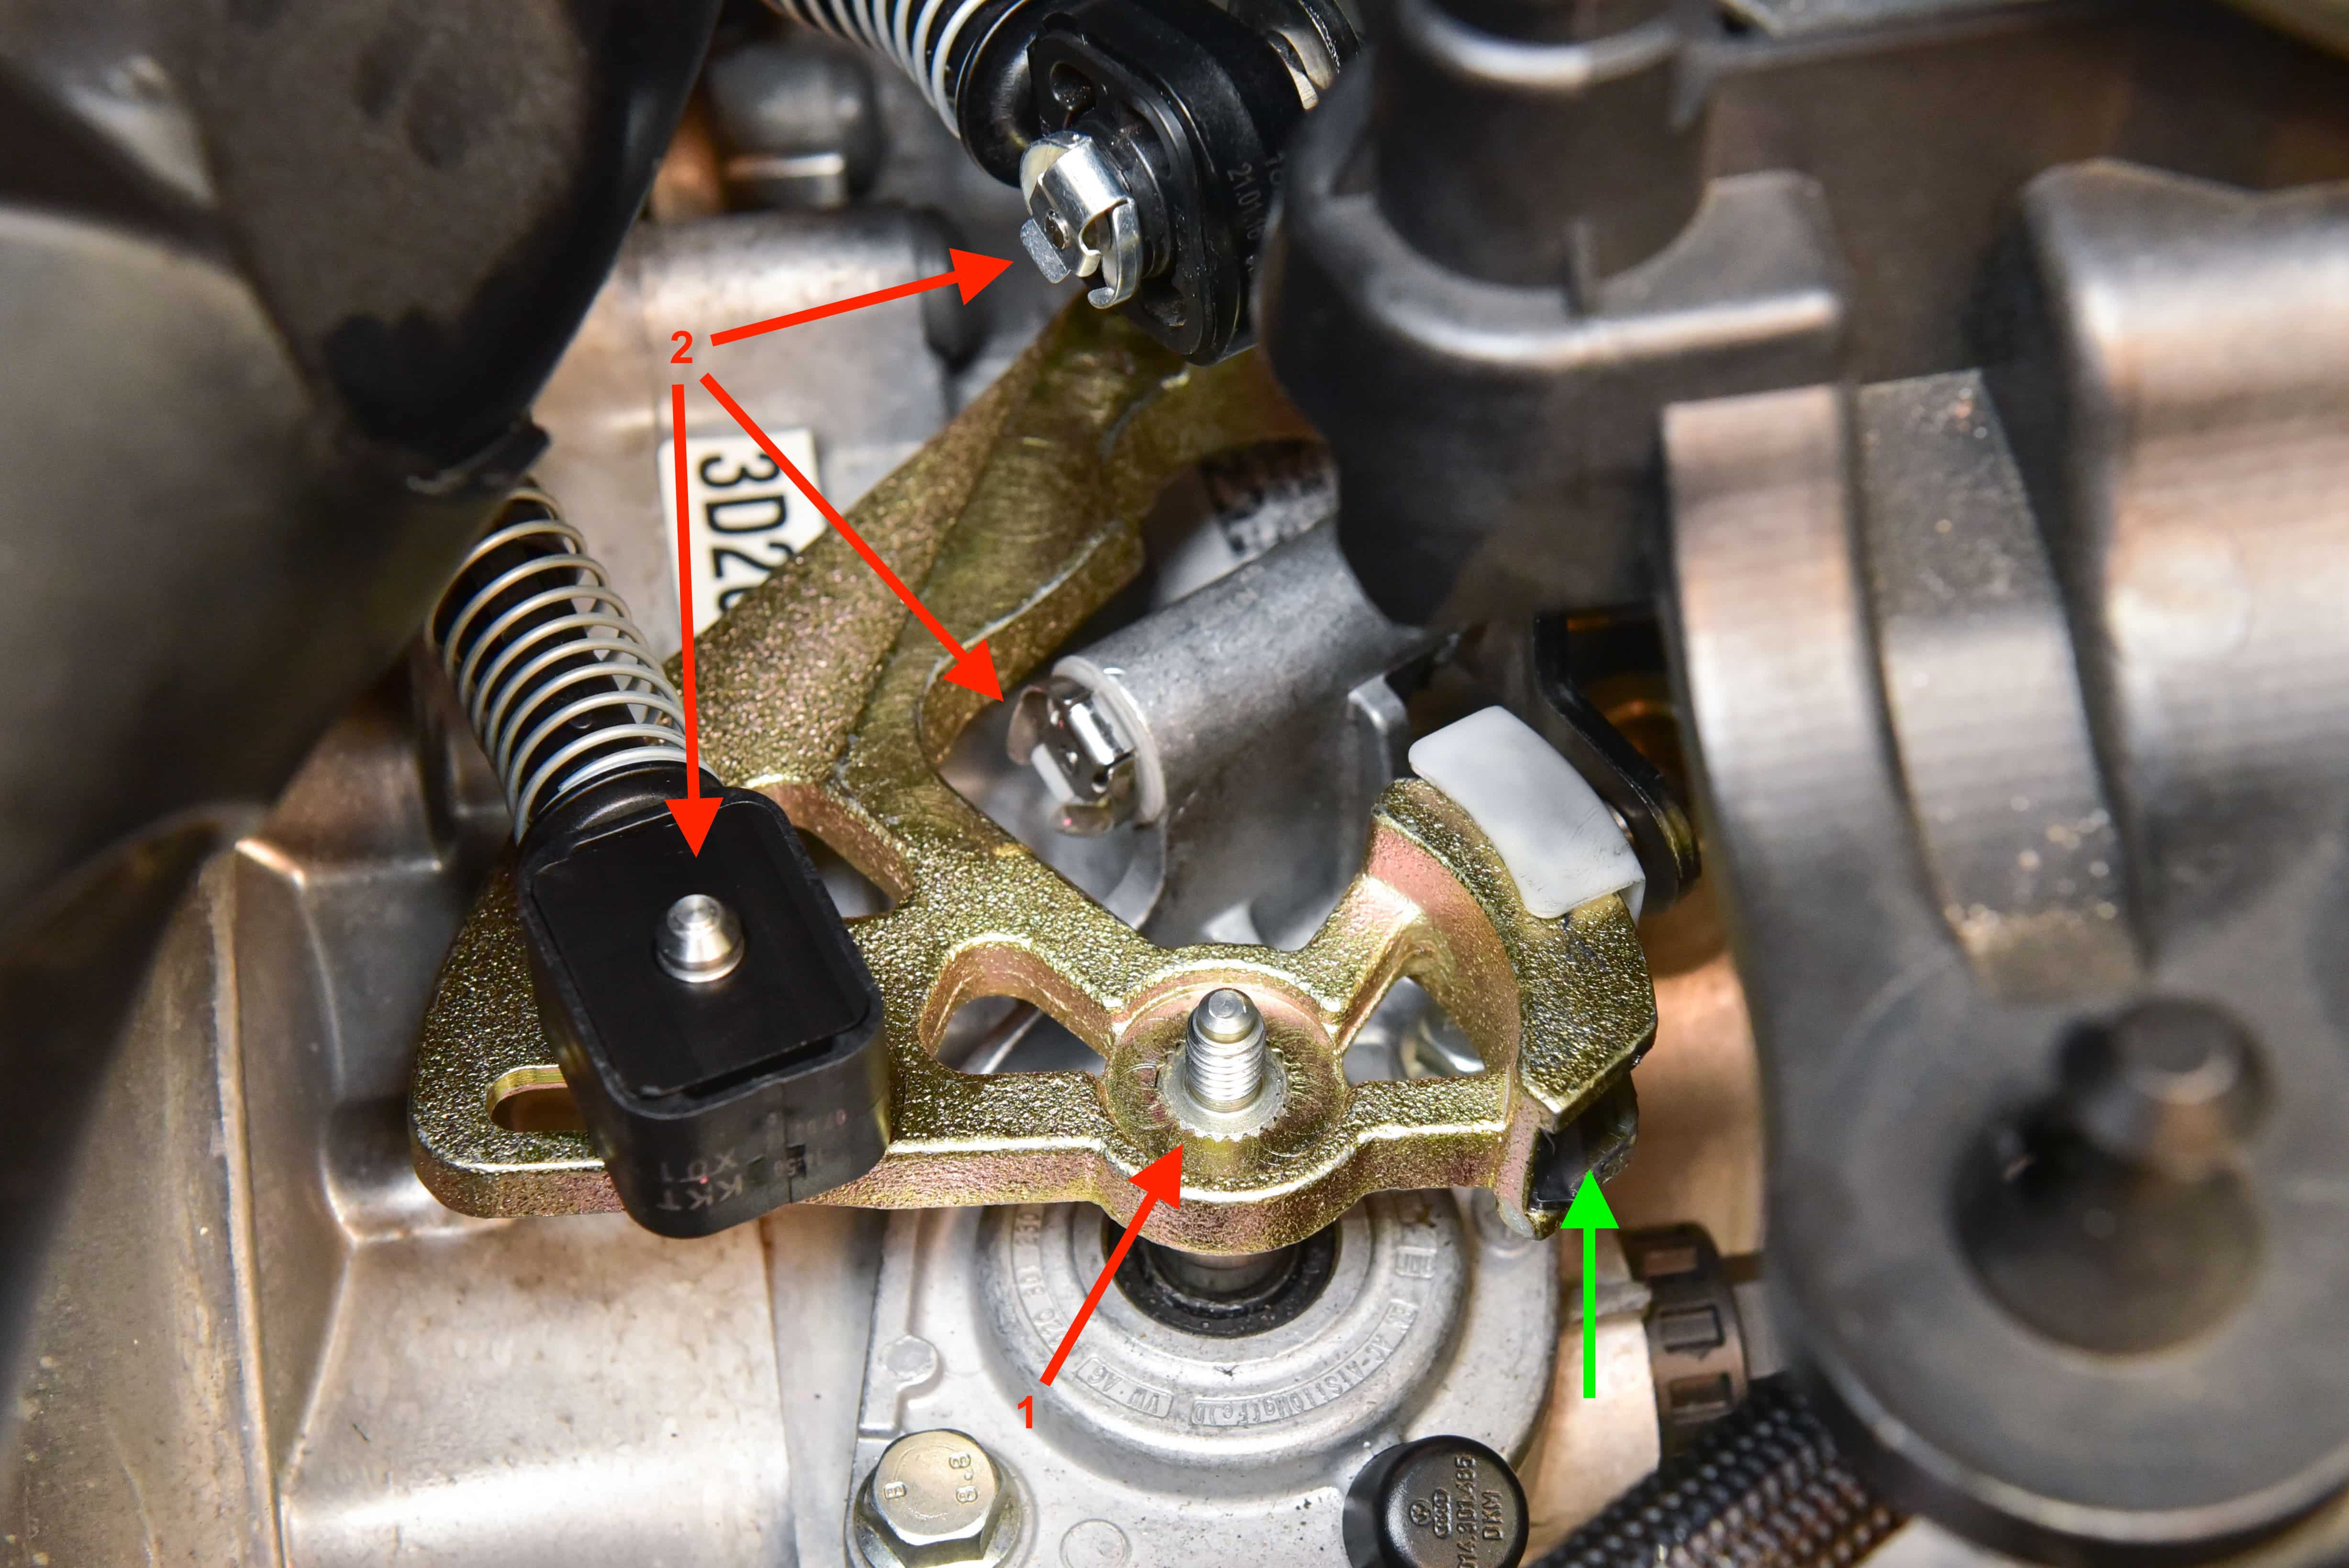
This is the front to back shift linkage. Use a screwdriver to raise the retaining clip, and slide it off.
Step 3
The entire linkage can now be disconnected from the shifter lever.
Step 4
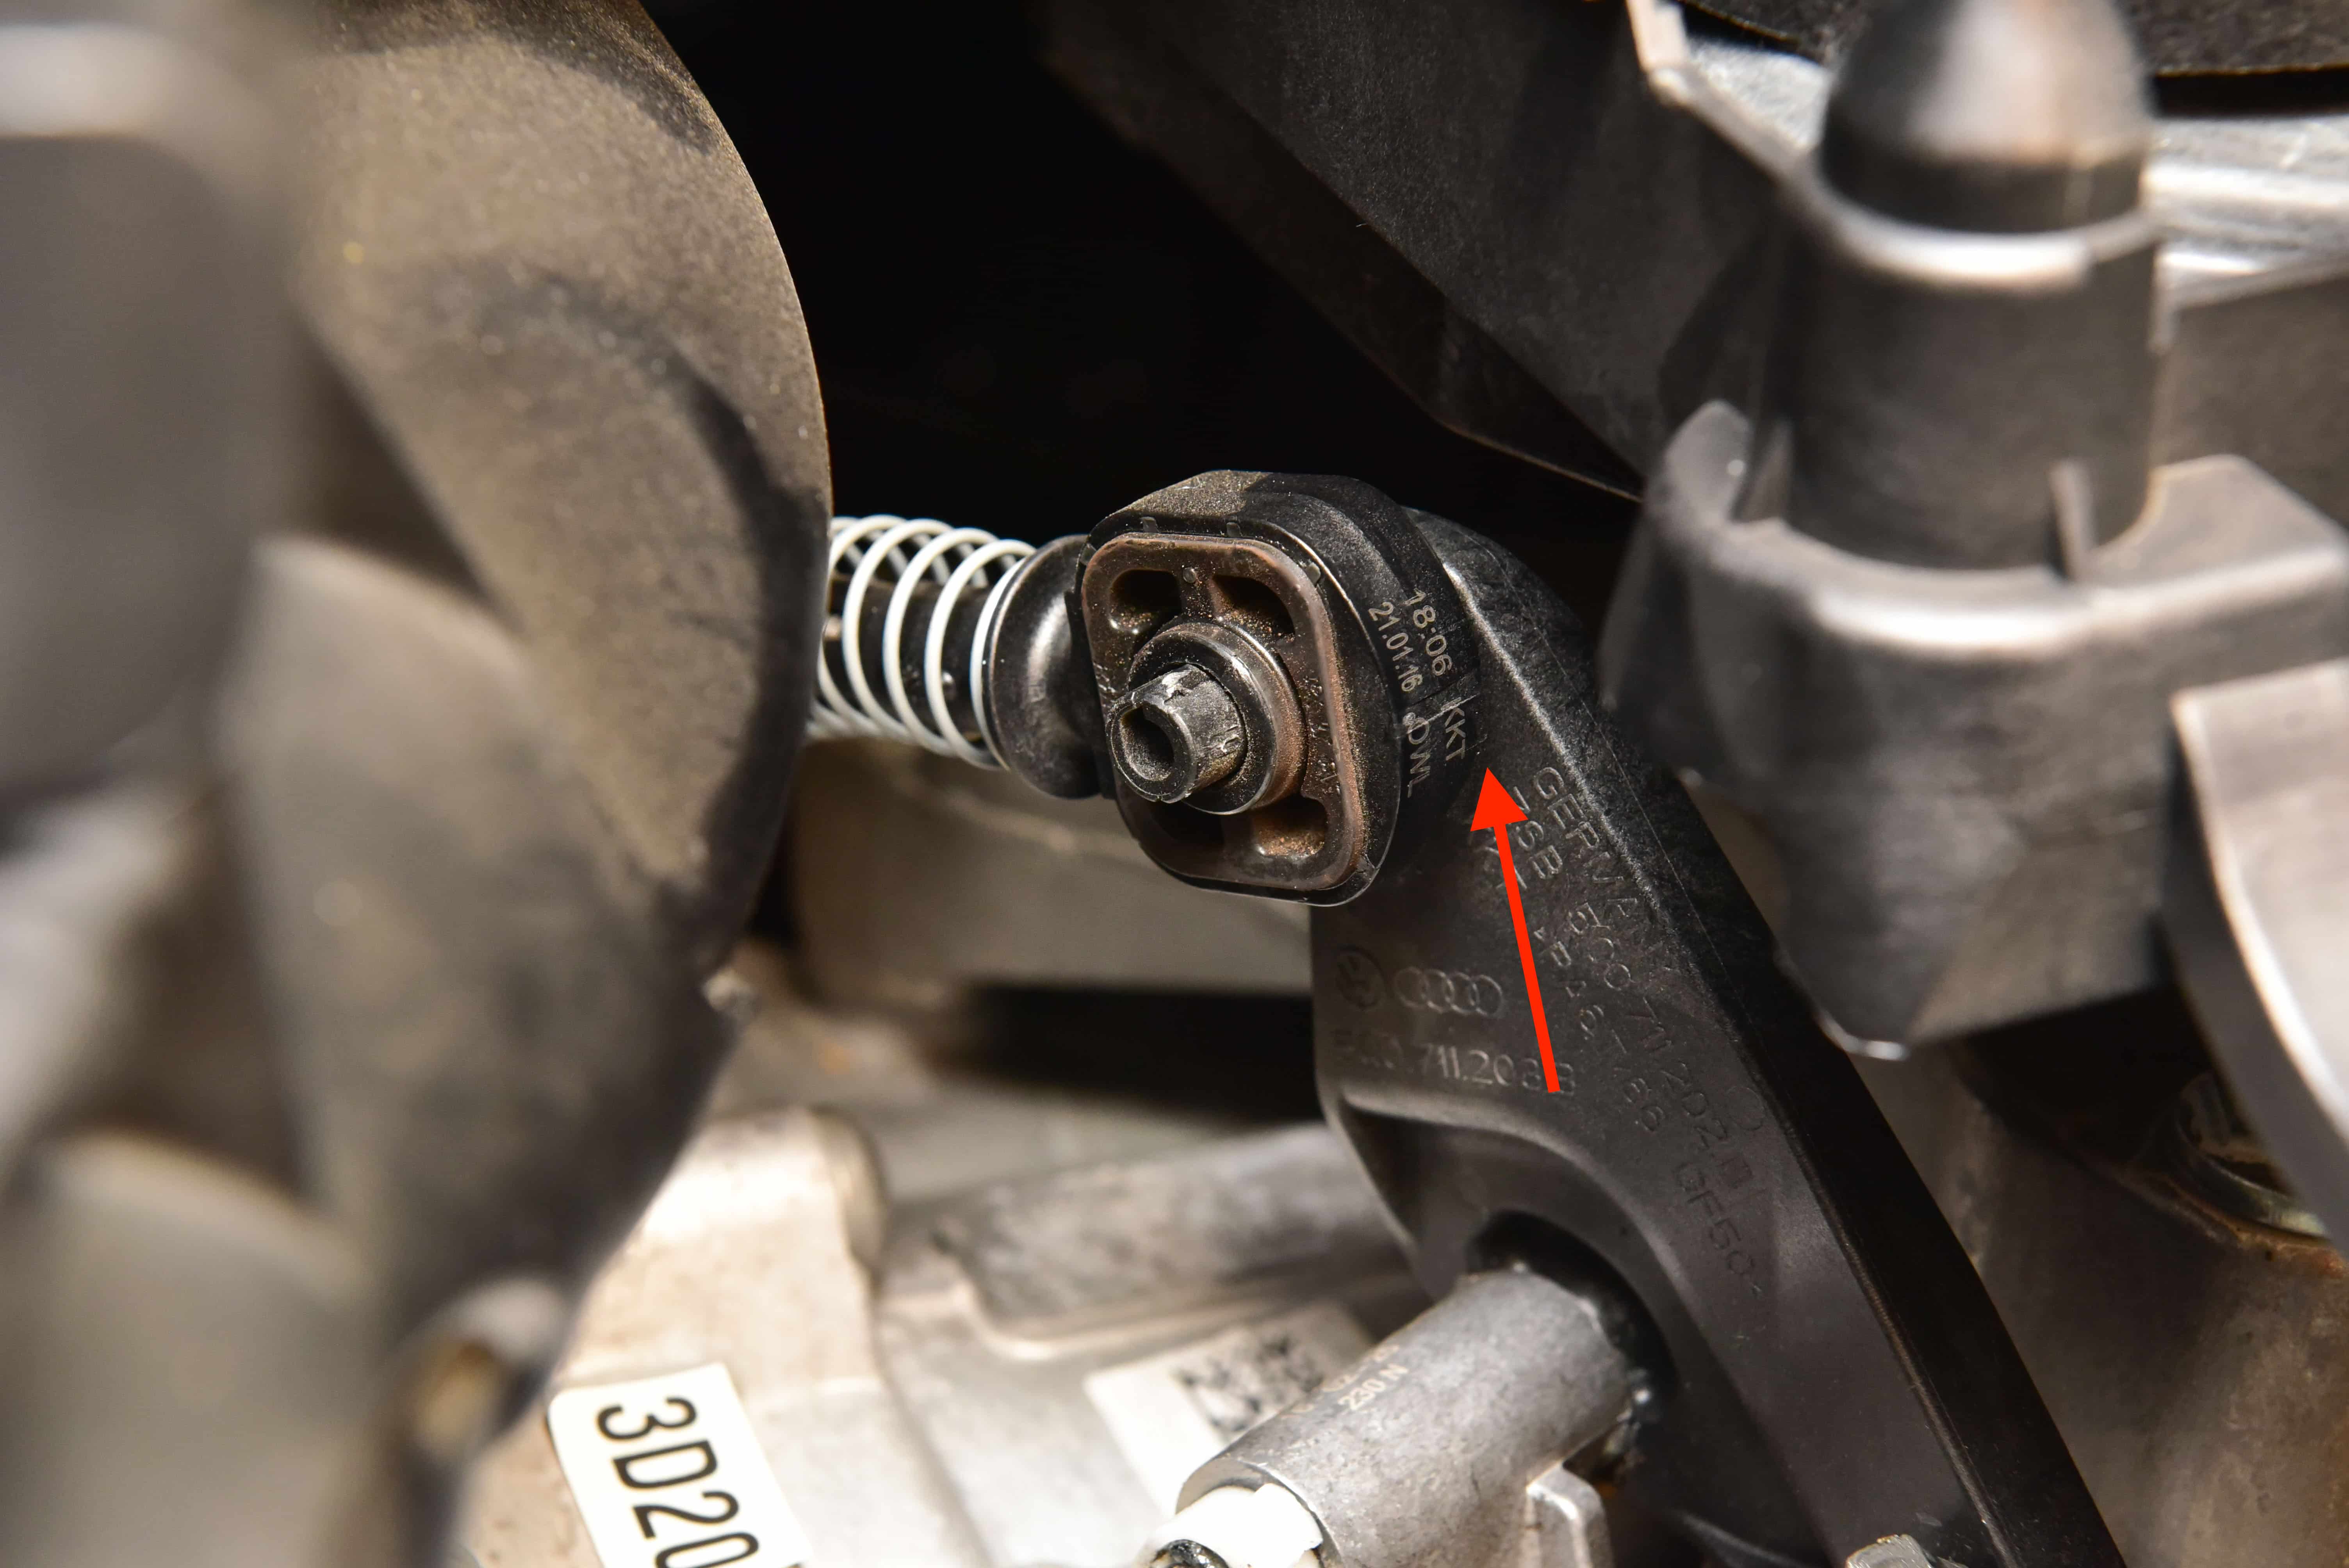
We will now remove the shifter leaver. Using a socket extension, loosen the large retaining nut. It is normal for the lever to ‘shift’ into a gear whilst attempting to undo this bolt.
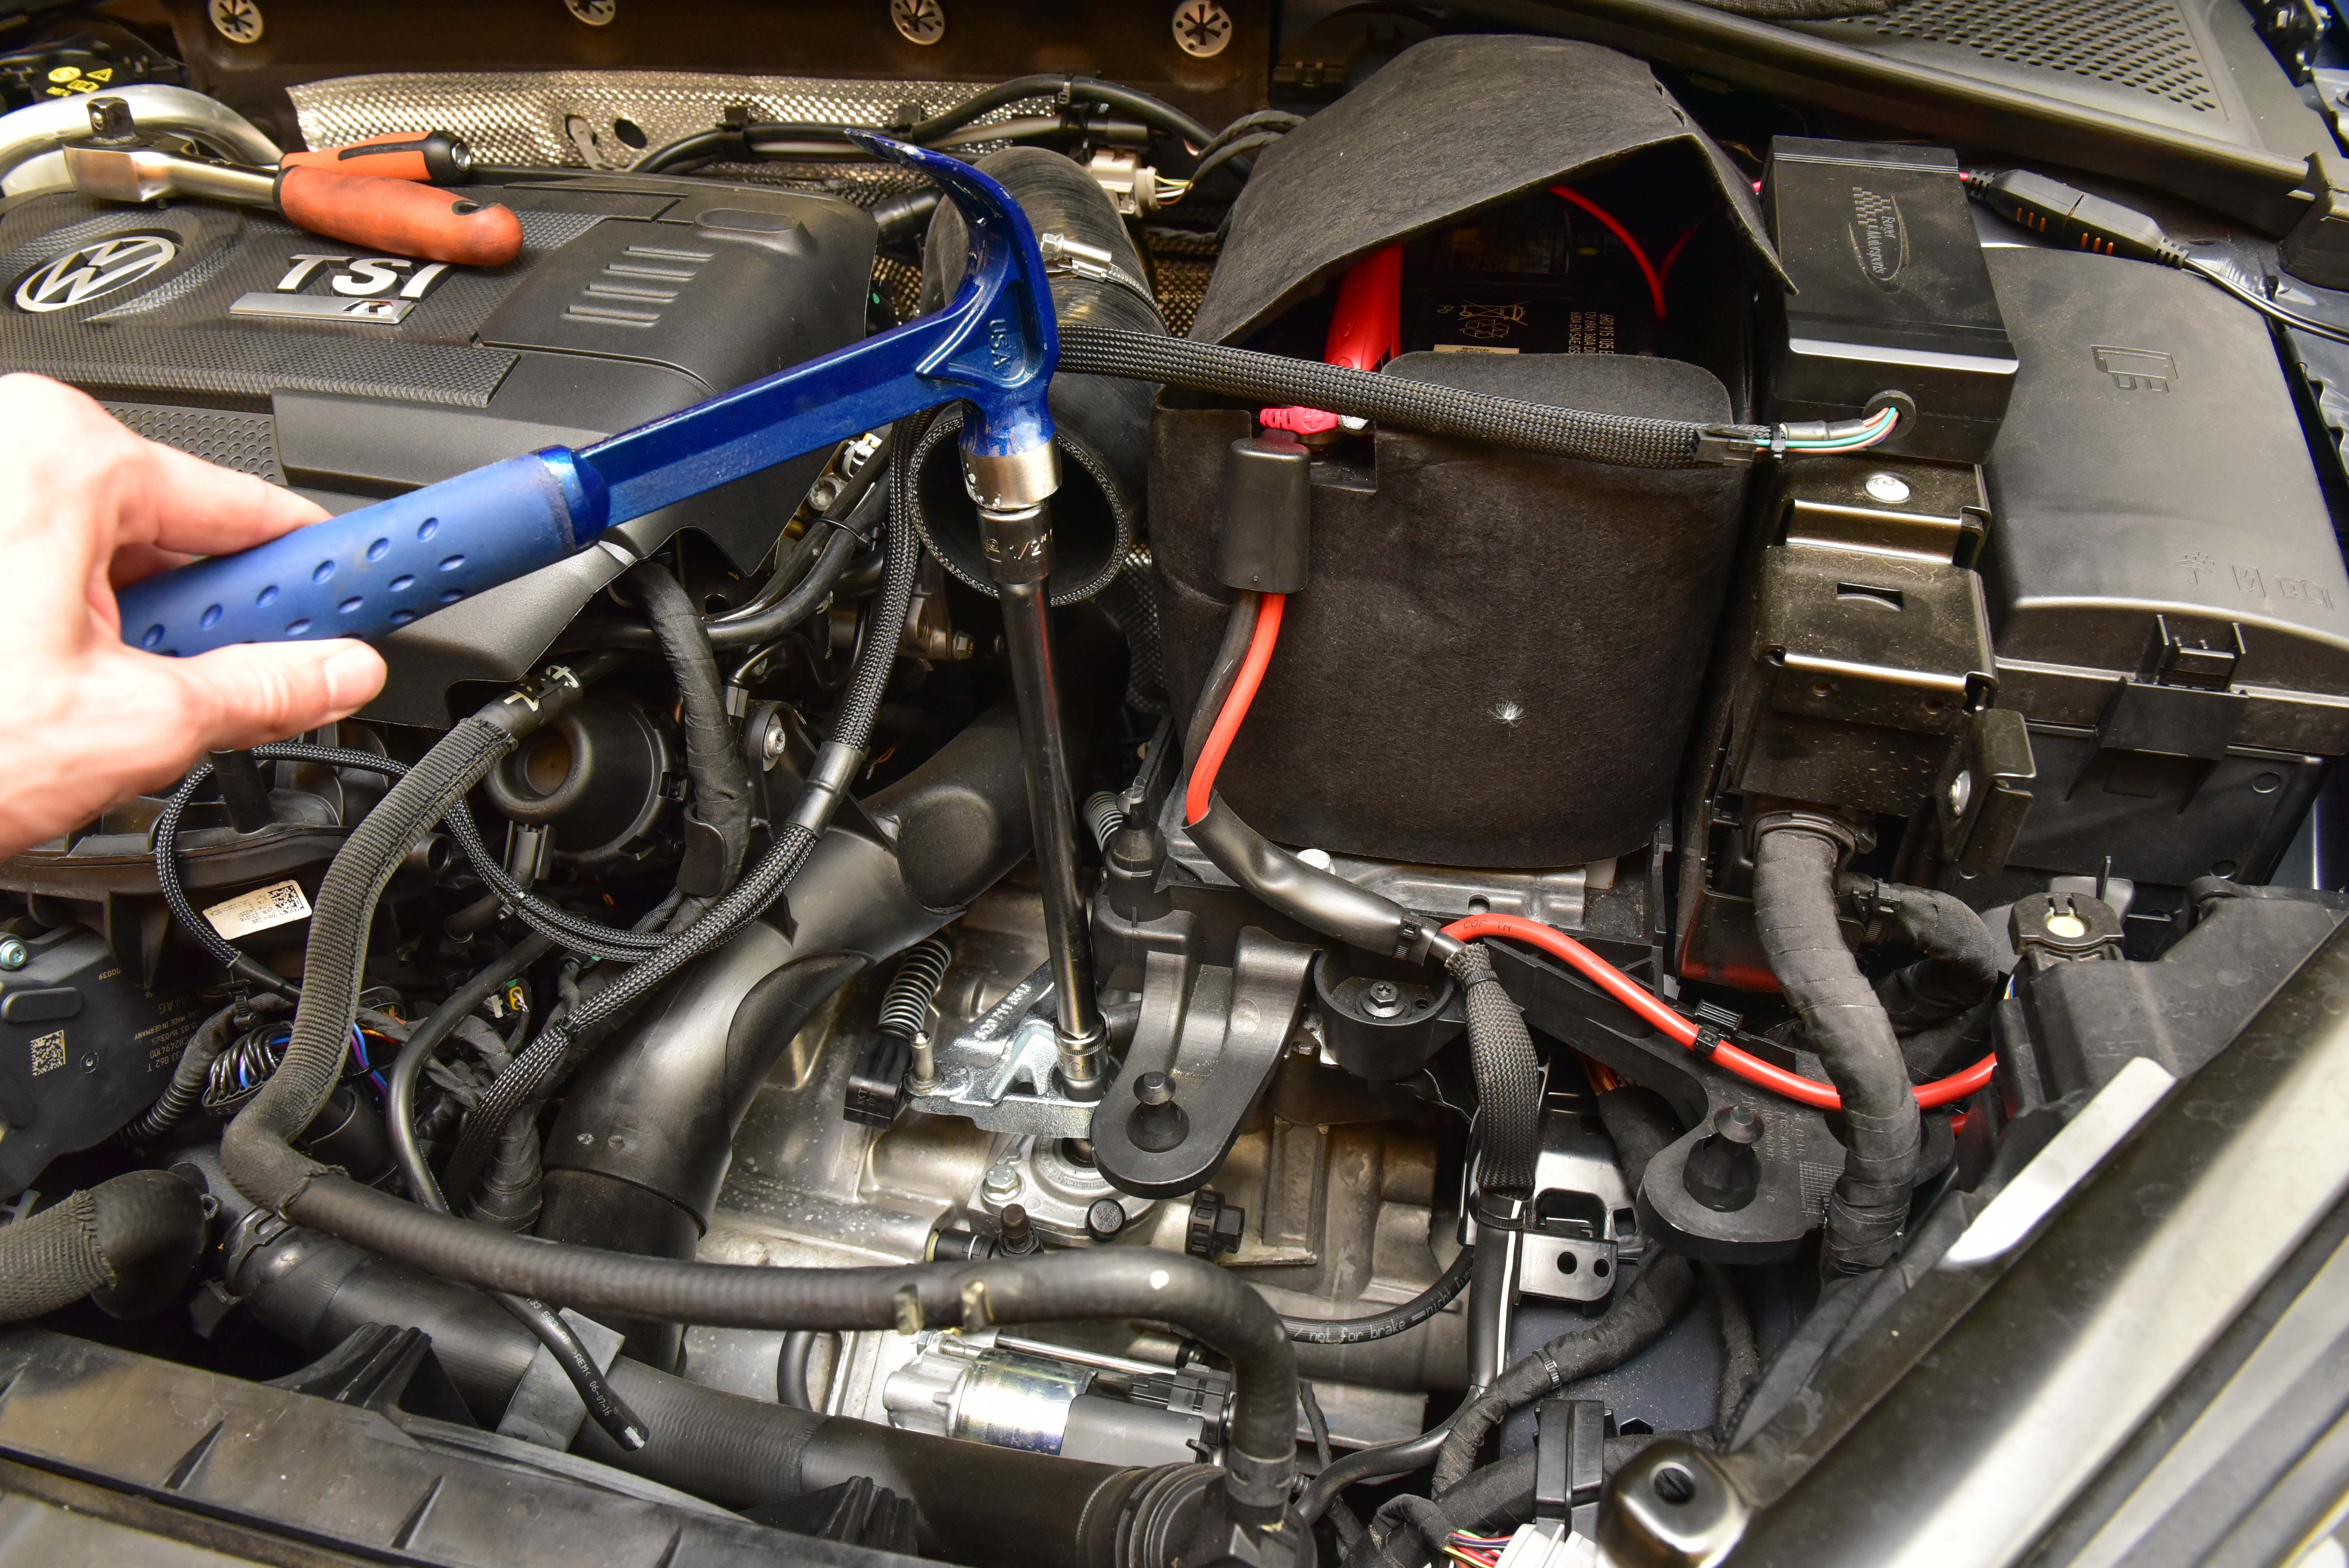
Step 5
The next step will aid in removal of the shifter lever from the gearbox. First shift the lever into neutral, which is where the lever will move vertically up and down on the gearbox.
Screw the nut back down by one rotation, and connect the socket an extension. Using a hammer and some force, hit the nut to shake the lever loose from the gearbox spindle. Once the lever has slid off the majority of the spindle, remove the nut and pull the lever off the gearbox.
Step 6
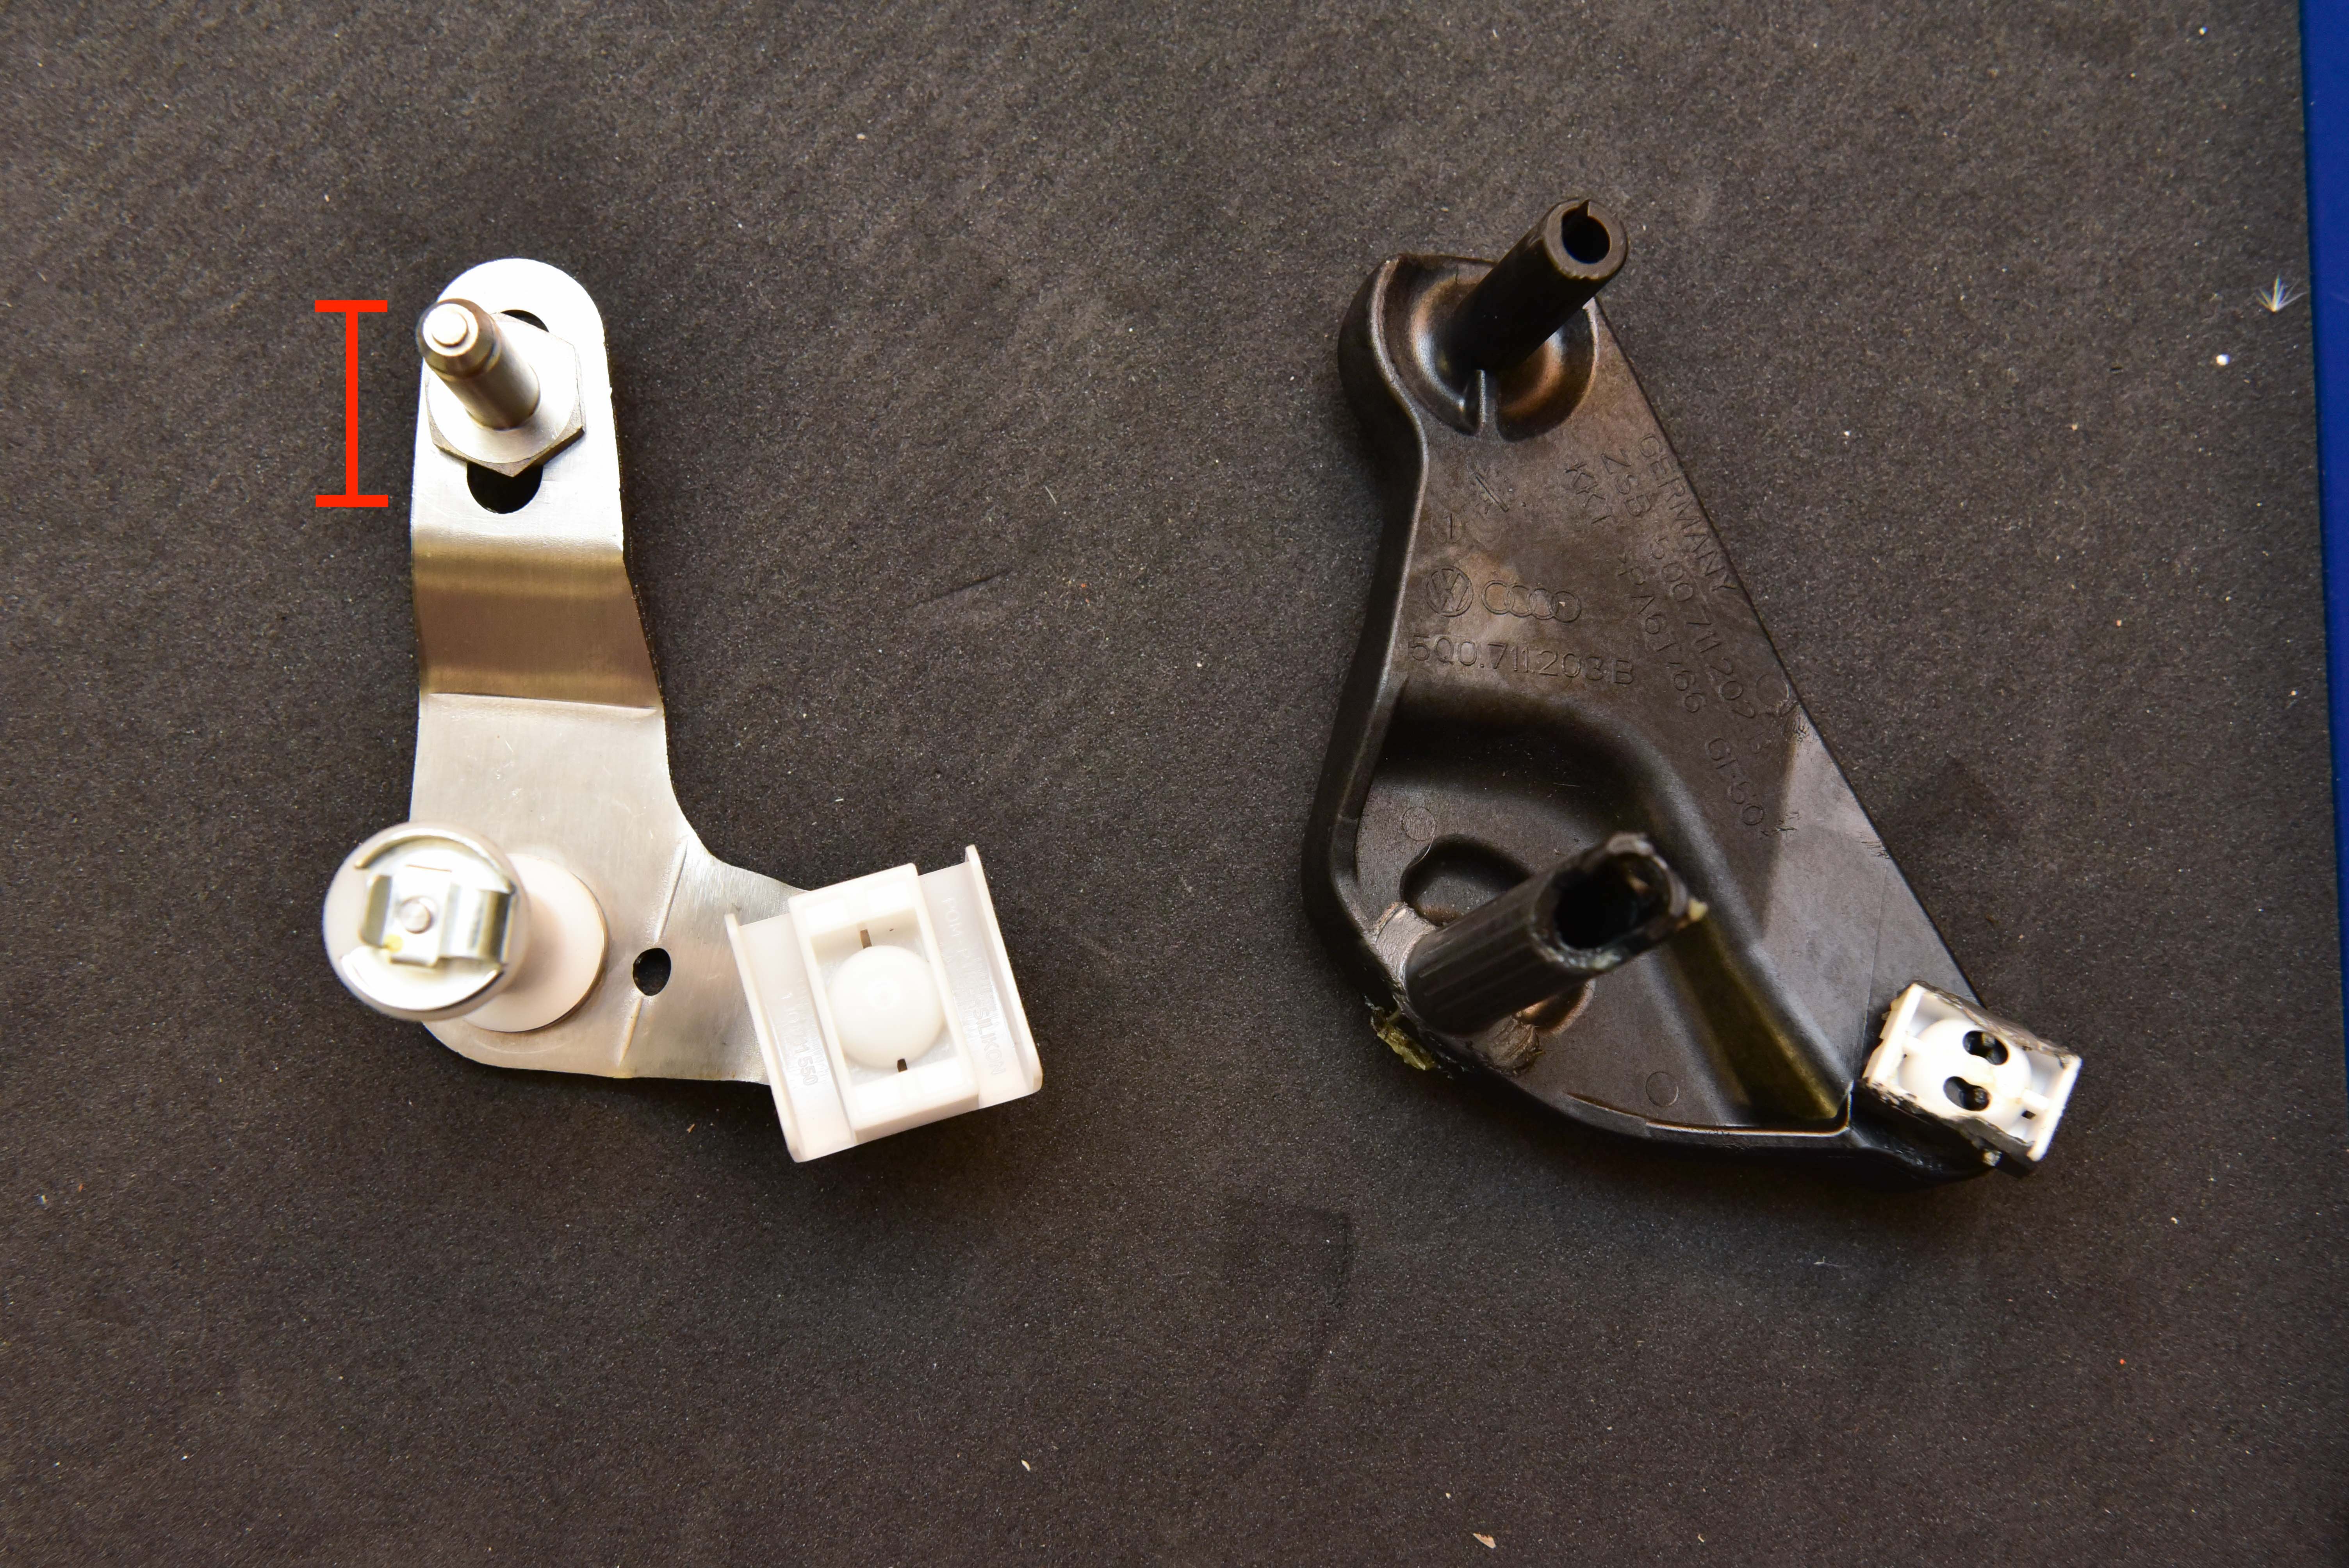
Here we have the stock shifter lever (Right) compared to an aftermarket lever (Left). Note the adjustable front to back throw.
The closer to the geared pivot, the shorter the shift.
Step 7
Next we will remove the side to side linkage. First remove the white retaining clip.
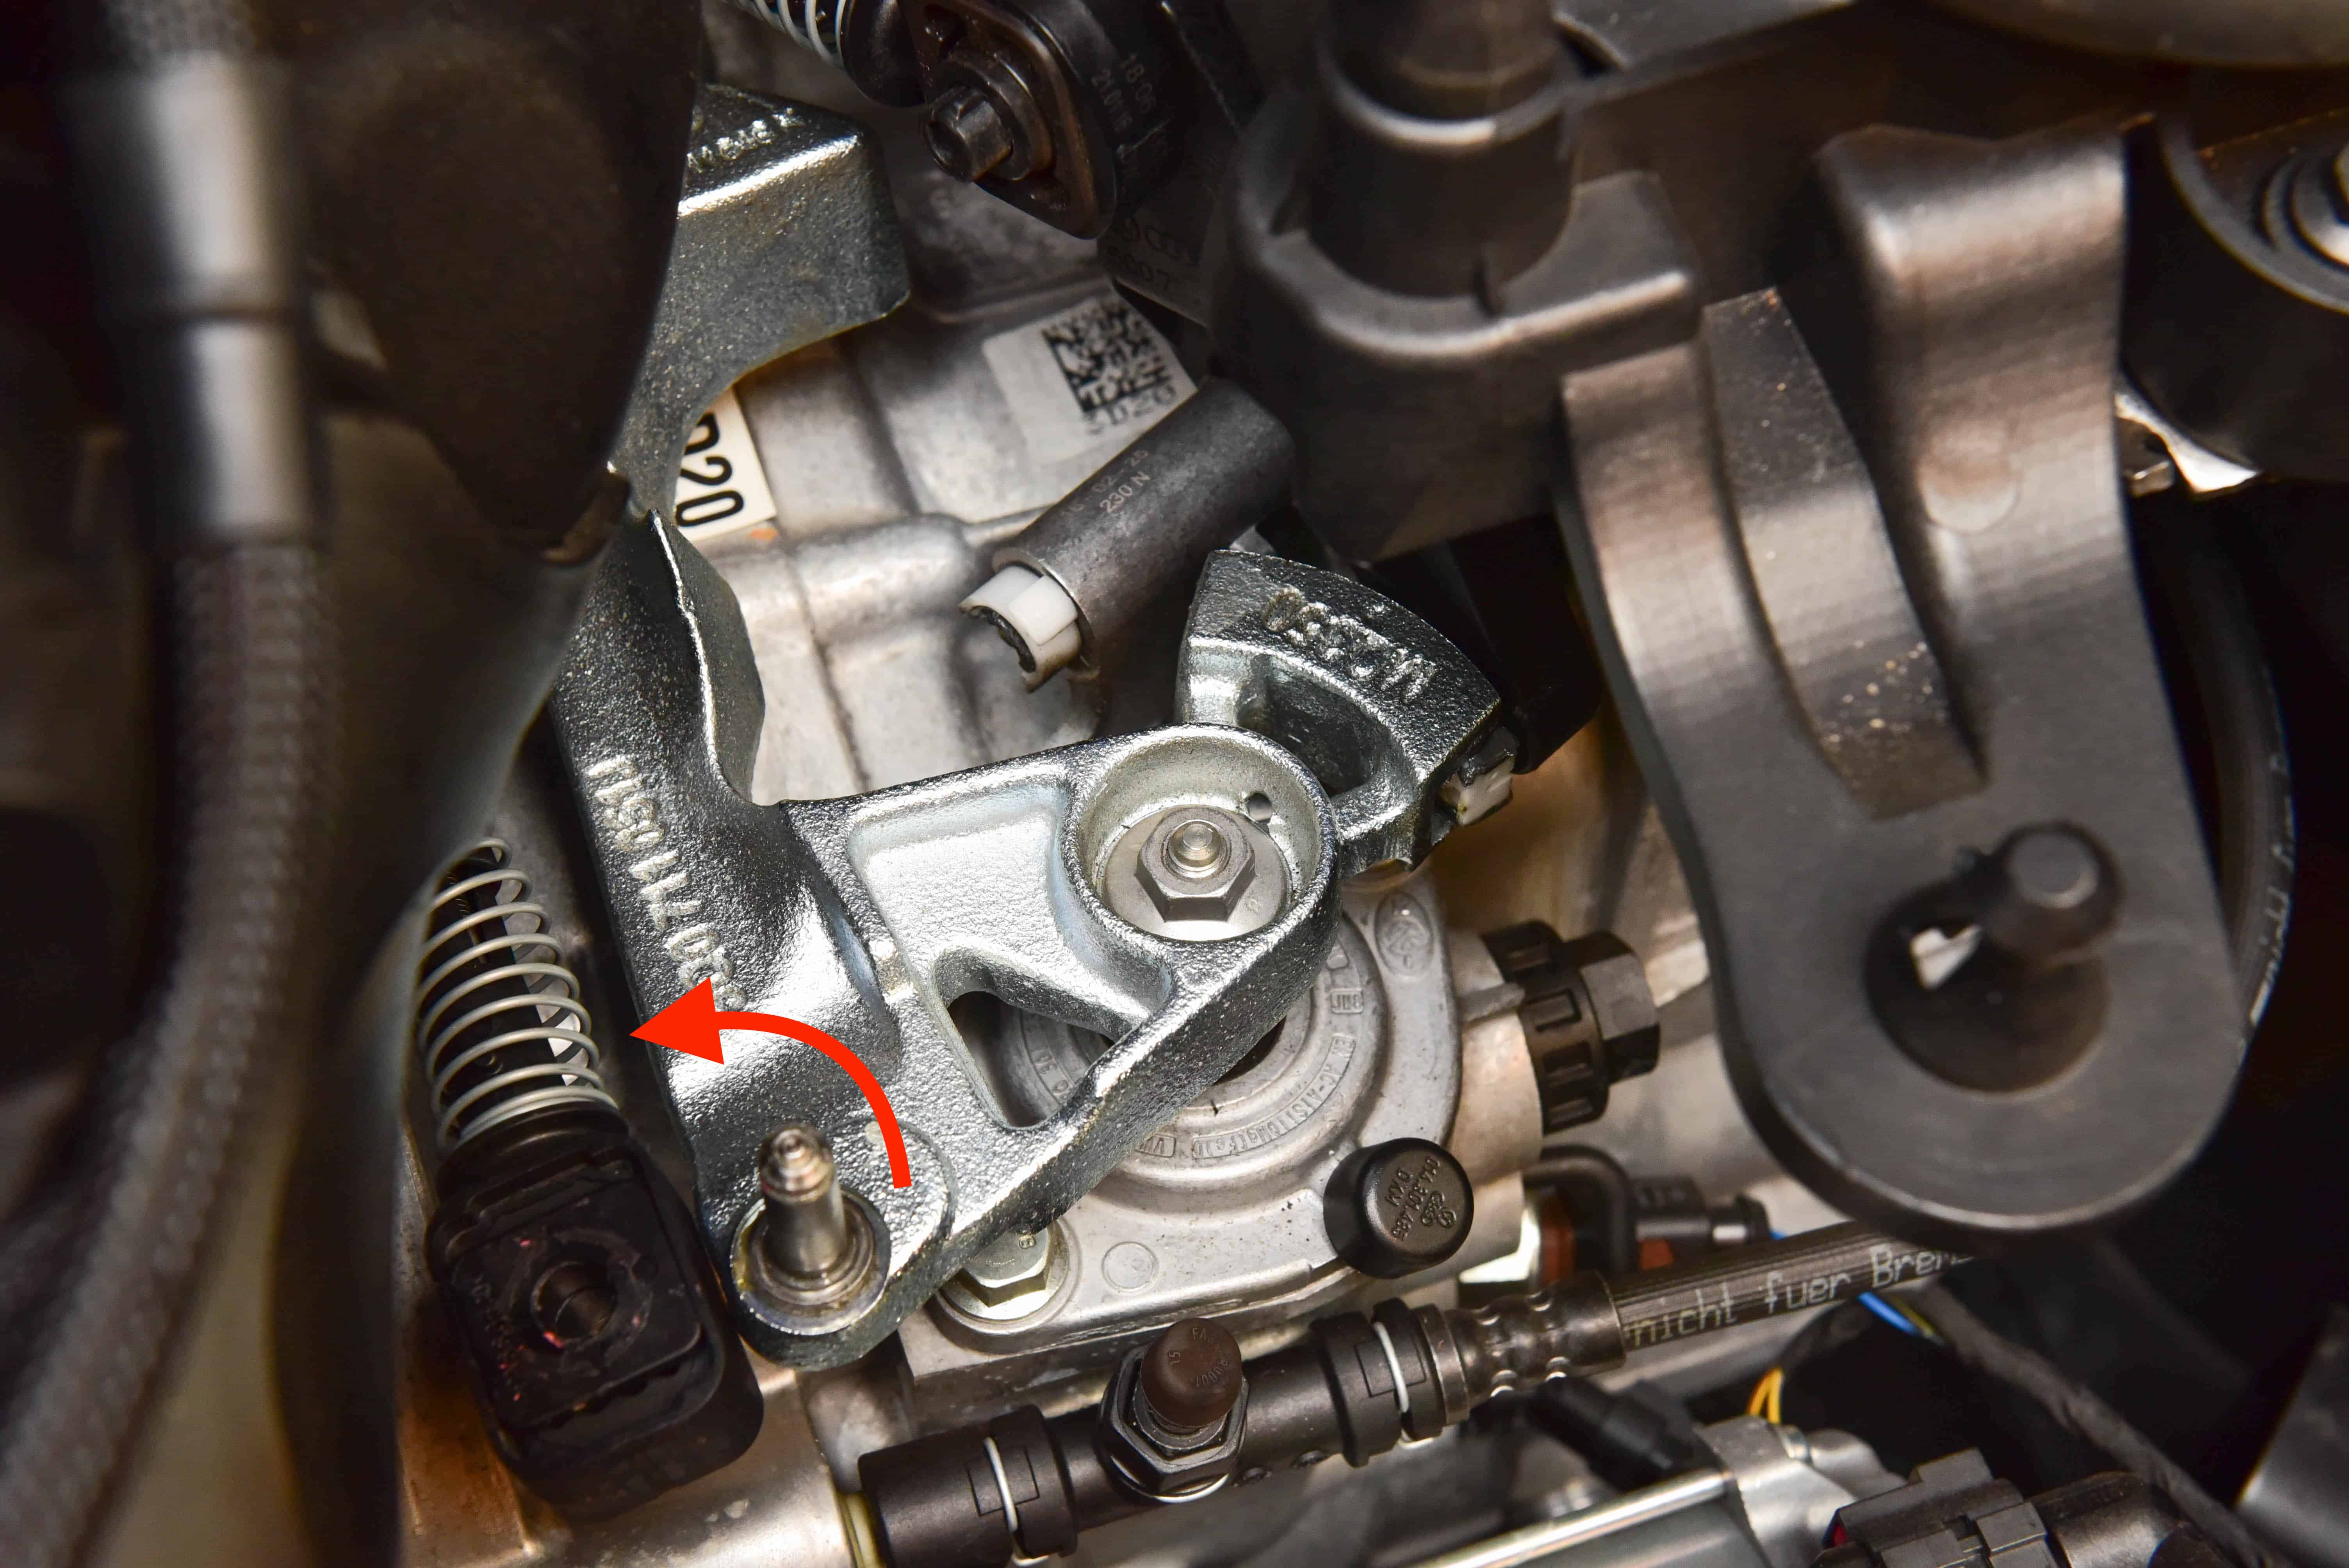
Step 8
Using a flathead screwdriver, pry behind the linkage mechanism to slip it forward, over the retaining notch.
Once removed, rotate the leaver anti-clockwise and slide it free from the metal transmission sleeve.
Step 9
Here is the aftermarket shifter leaver (Left) and stock shifter leaver (Right). Again noting the adjustability of the aftermarket leaver.
Step 10
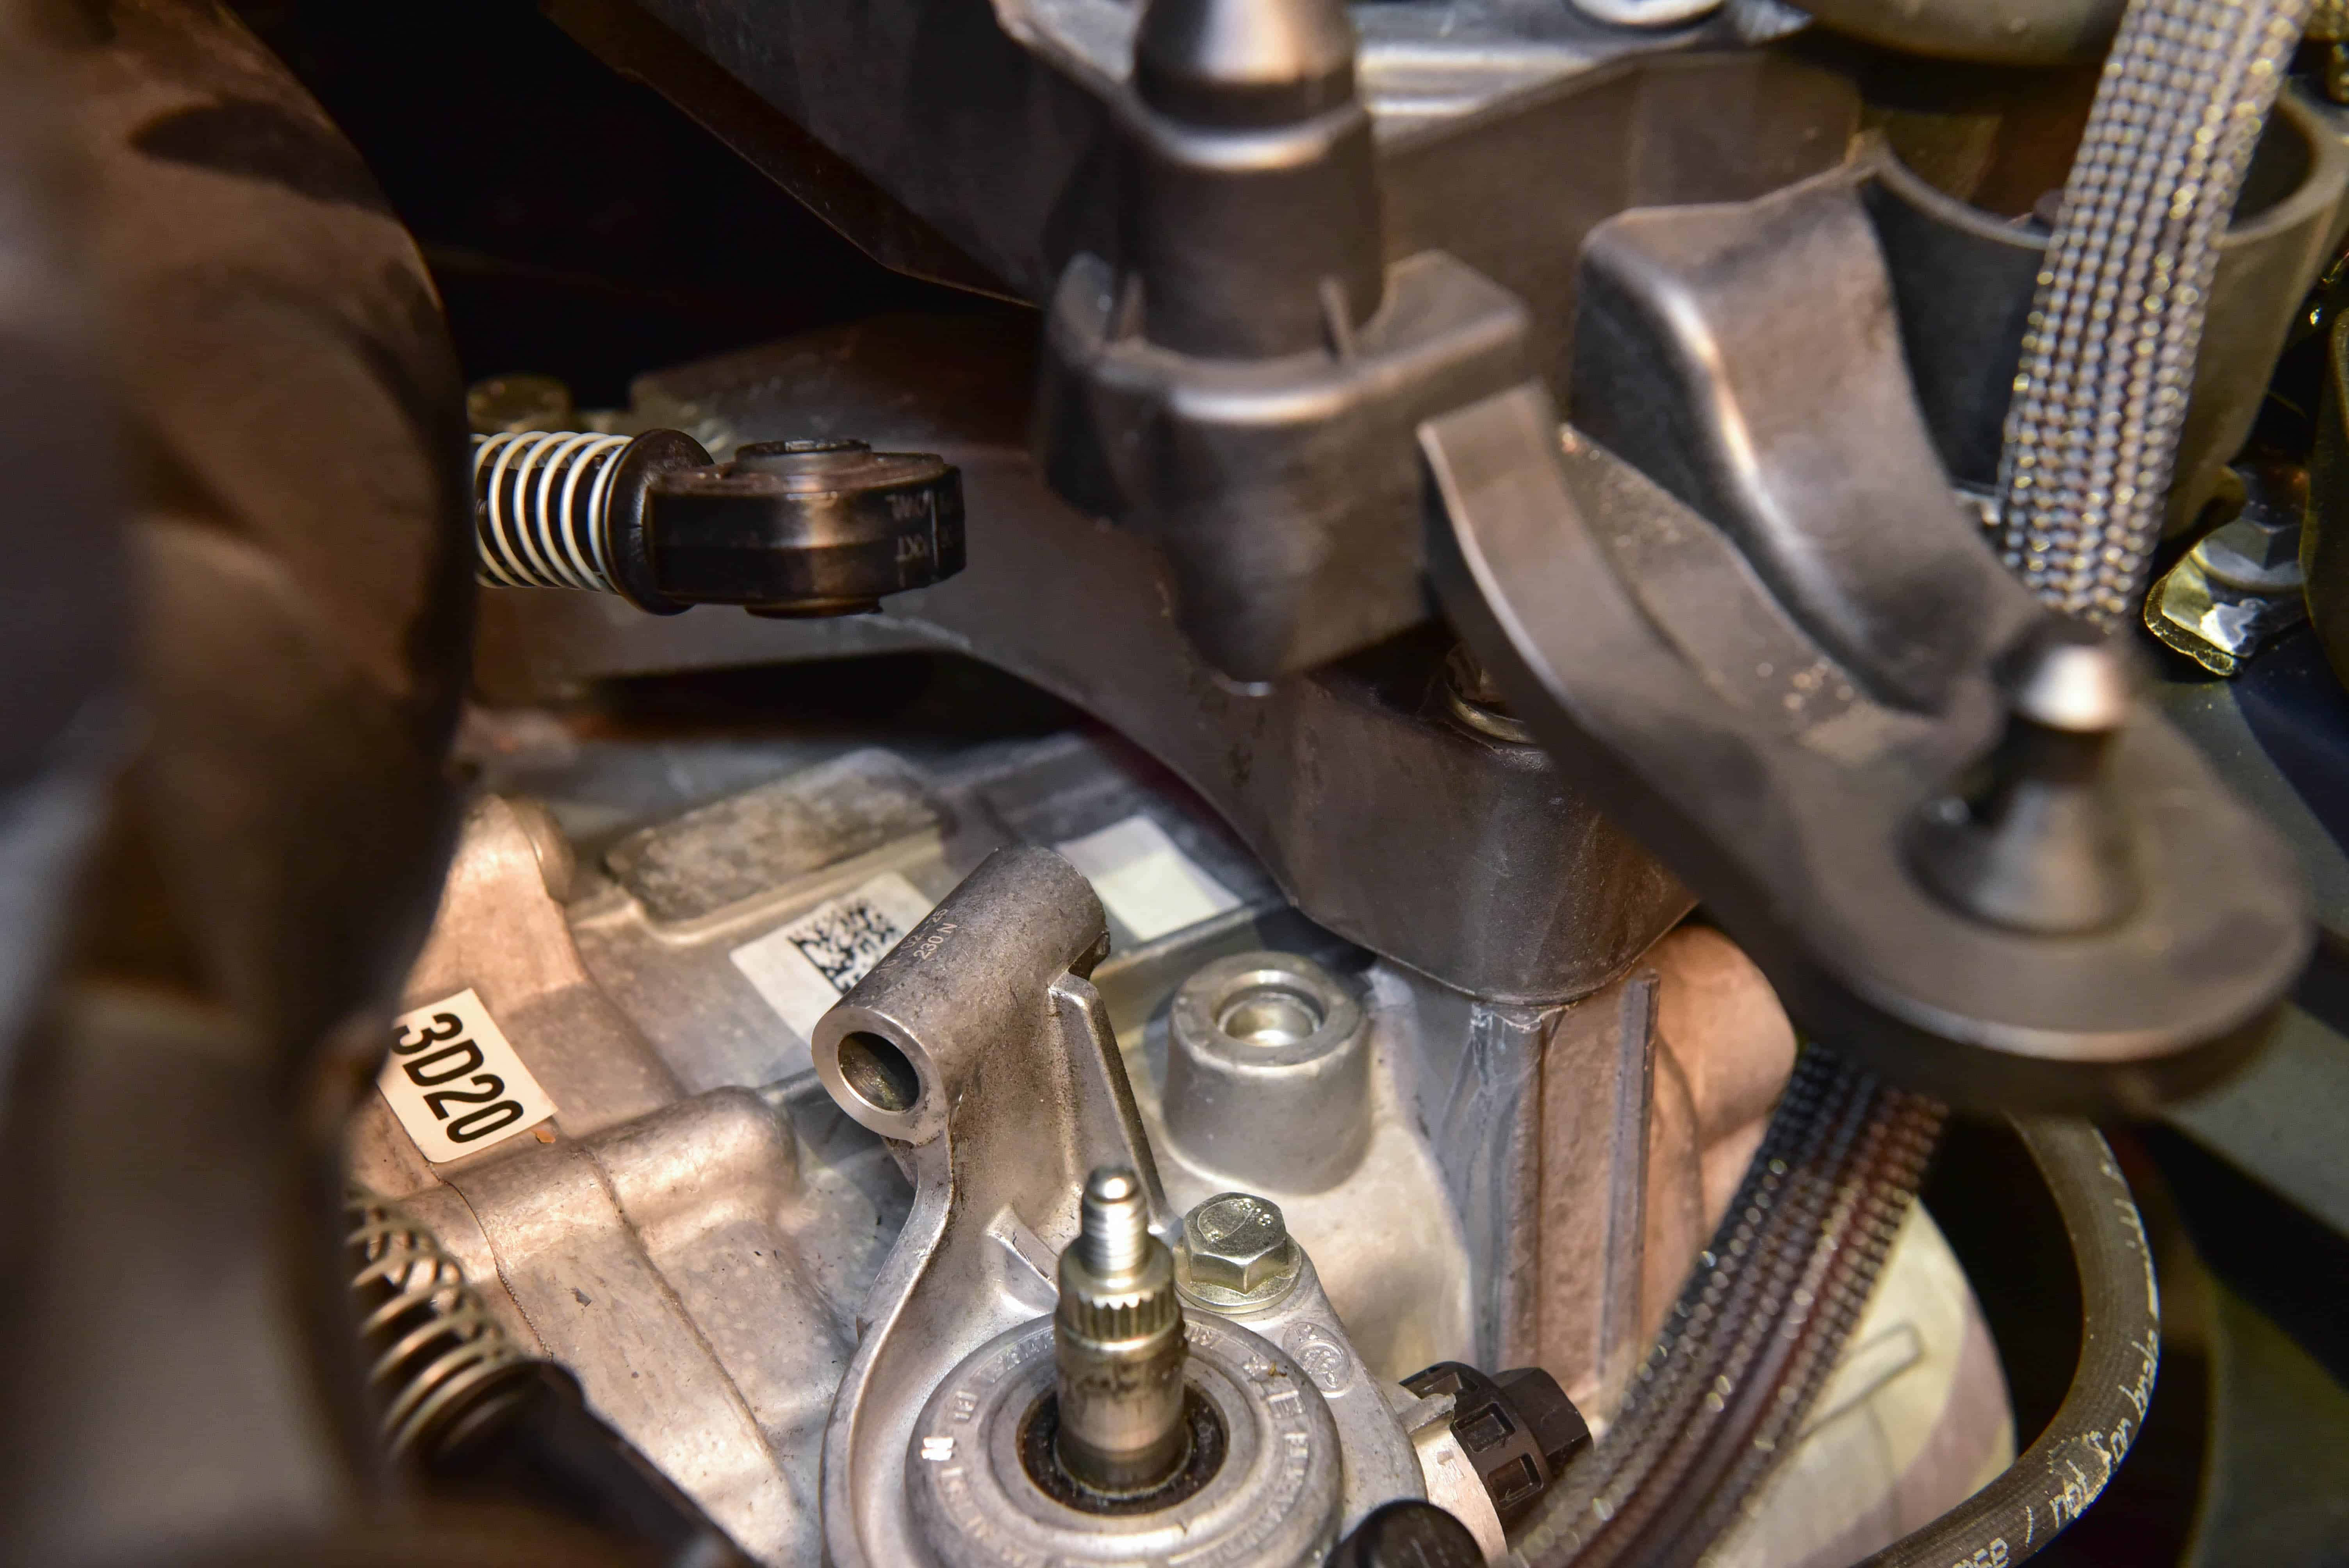
Here is the bare gearbox with both shifter levers removed.
Step 11
Upgrading Bushings
Using a flathead screwdriver, pry out both sides of the OEM front to back bushing. There is no need to remove the rubber portion of the bushing.
Step 12
Press in your aftermarket bushings.
Step 13
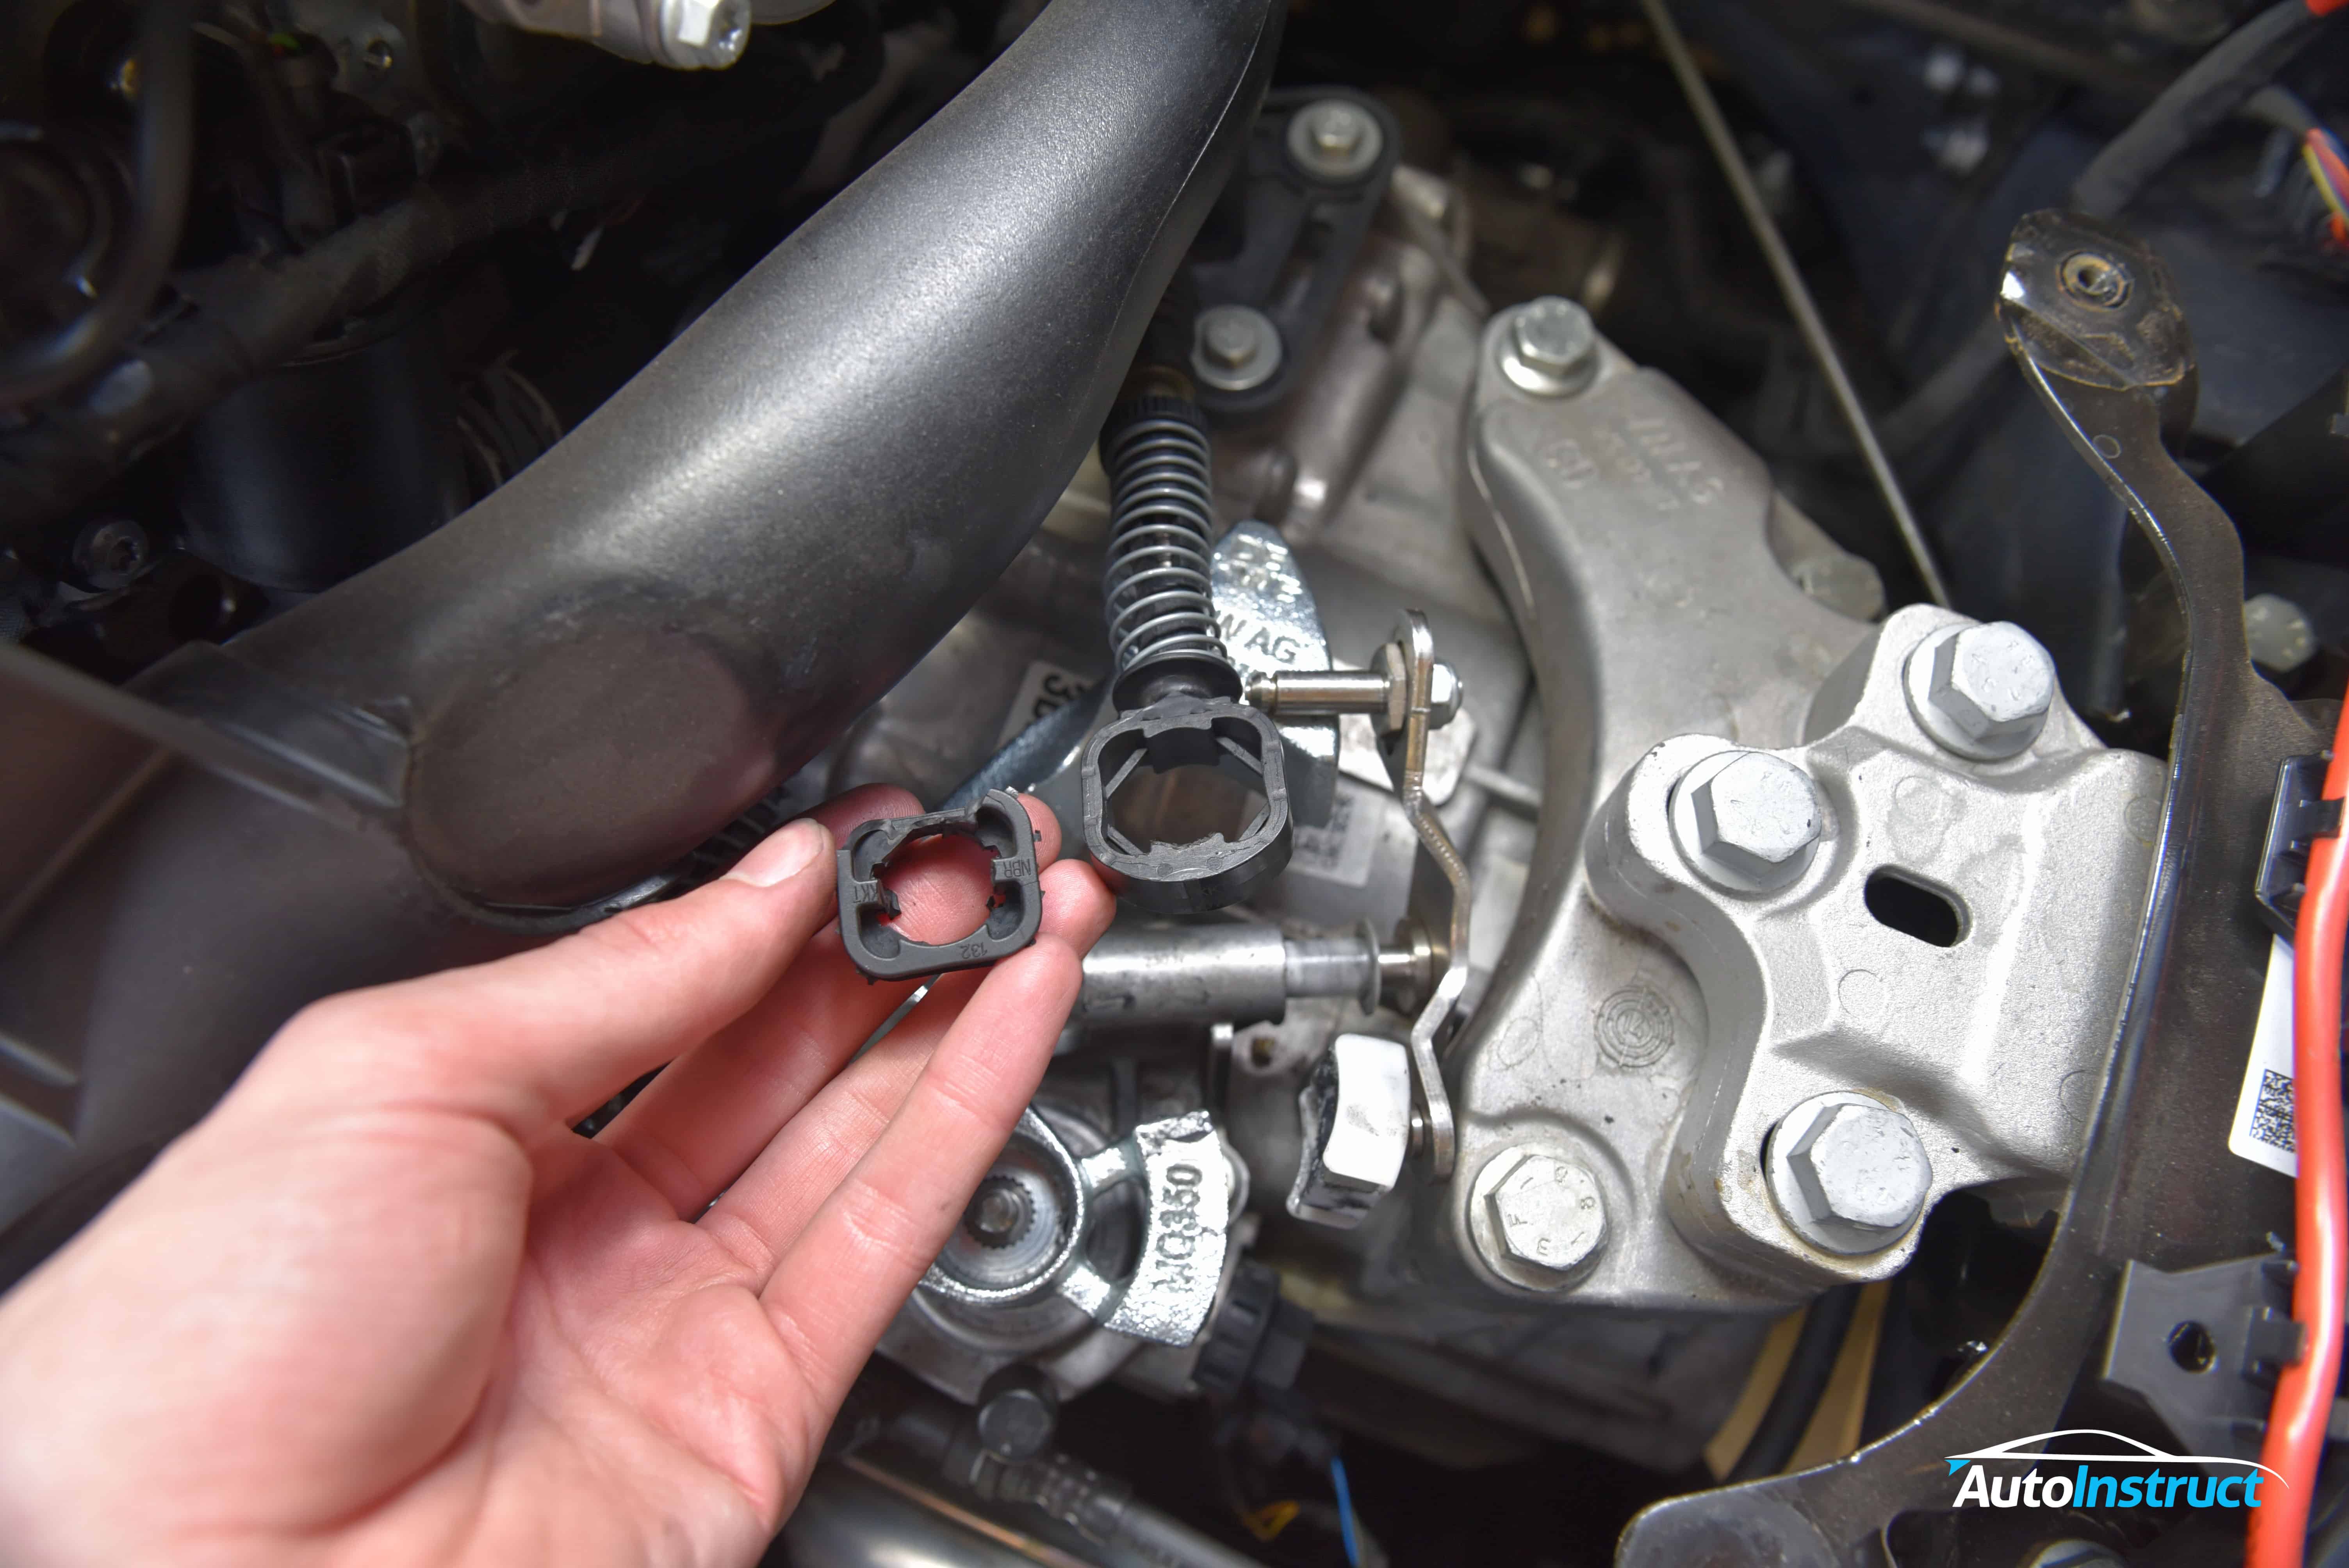
Carry out the same procedure for the side to side linkage. This bushing is harder to remove as the entire rubber section needs to be pushed out.
Step 14
Here you can see the whole rubber section cut out from the linkage. A sharp blade helps with this process.
Step 15
Insert the new bushing into the linkage, and secure with supplied C-Clip or similar.
Step 16
Reinstallation
To reinstall, simply reverse the removal process. In summary:
Reinstall the side to side lever
Reinstall the front to back lever, noting the careful alignment onto the geared spindle. There is a missing tooth which must be aligned. Be careful not to over tighten this nut. The stud is VERY weak.
Ensure all clips are in place.
Ensure the slide is well greased (Green Arrow)
Step 17
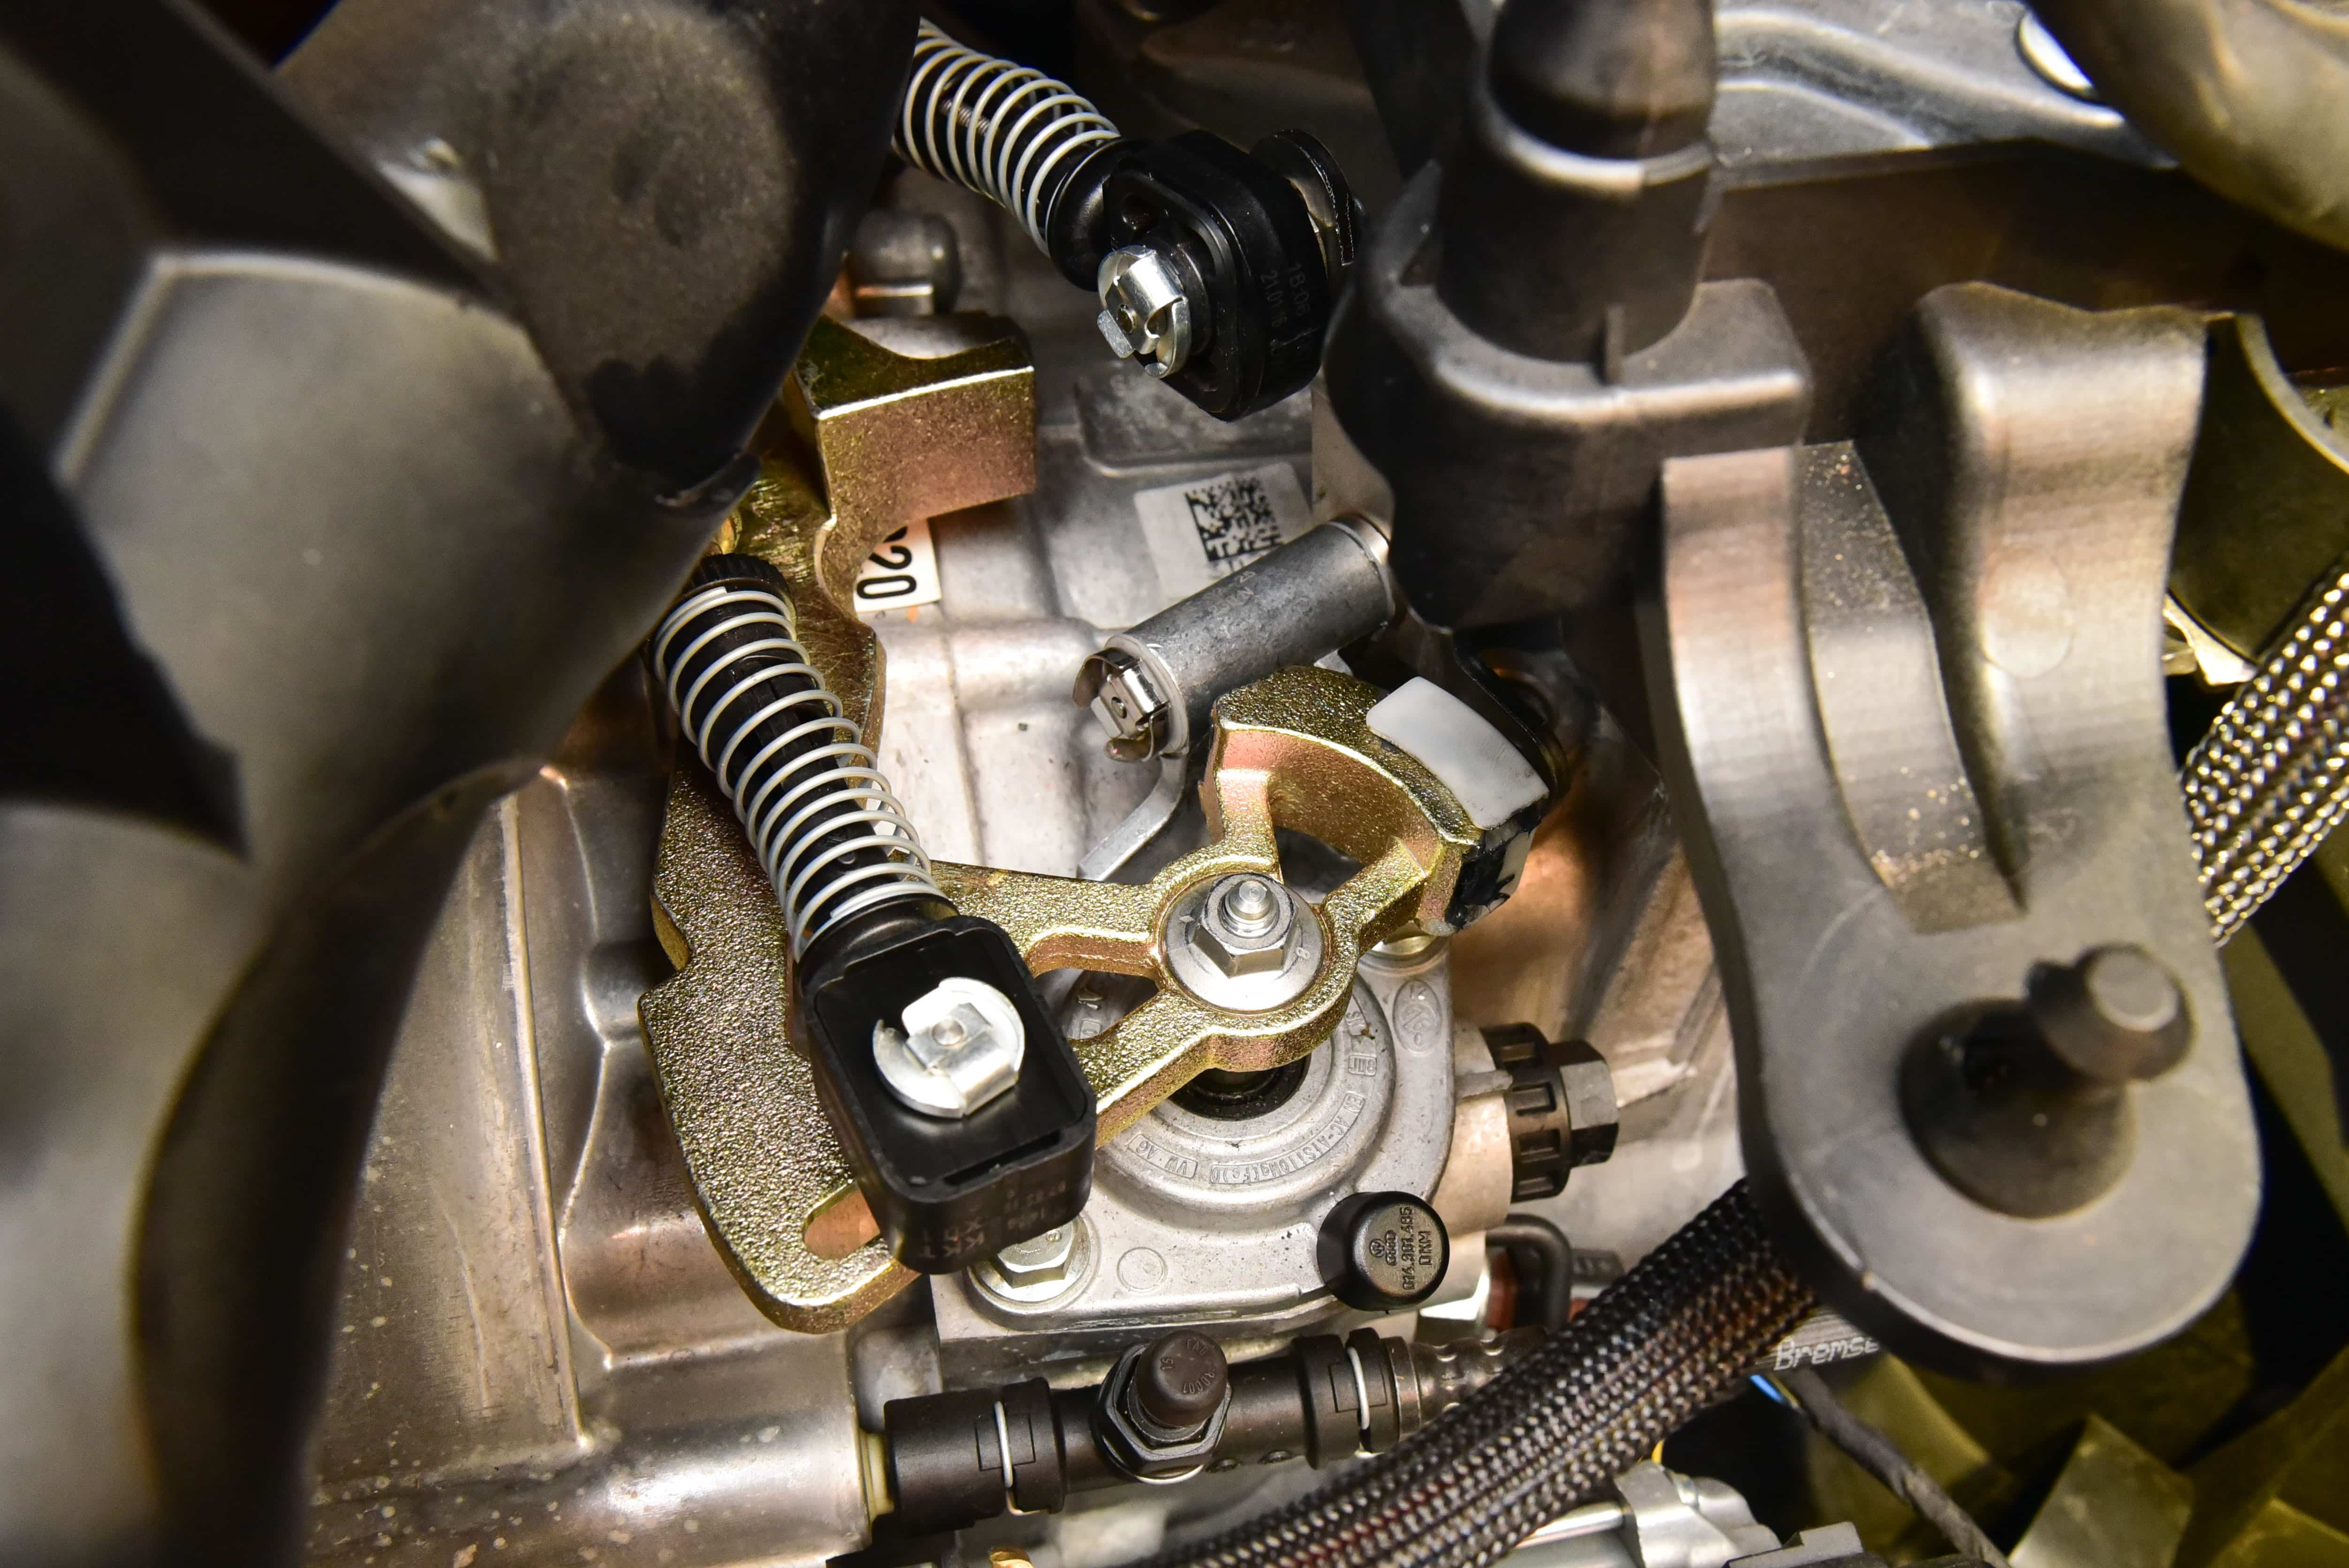
Here is the end result with everything reinstalled.
Install the air intake and you’re now finished. Go for a test drive and enjoy your new short shifter. Don’t forget it can be adjusted to suit your personal preference!
Did you find this guide helpful? Consider sharing it to help other car enthusiasts