Work at your own risk. This work is inherently dangerous and must only be carried out by a qualified mechanic. AutoInstruct will not be held responsible for damage to your vehicle or personal injury / death as a result of the information we provide.
Step 1
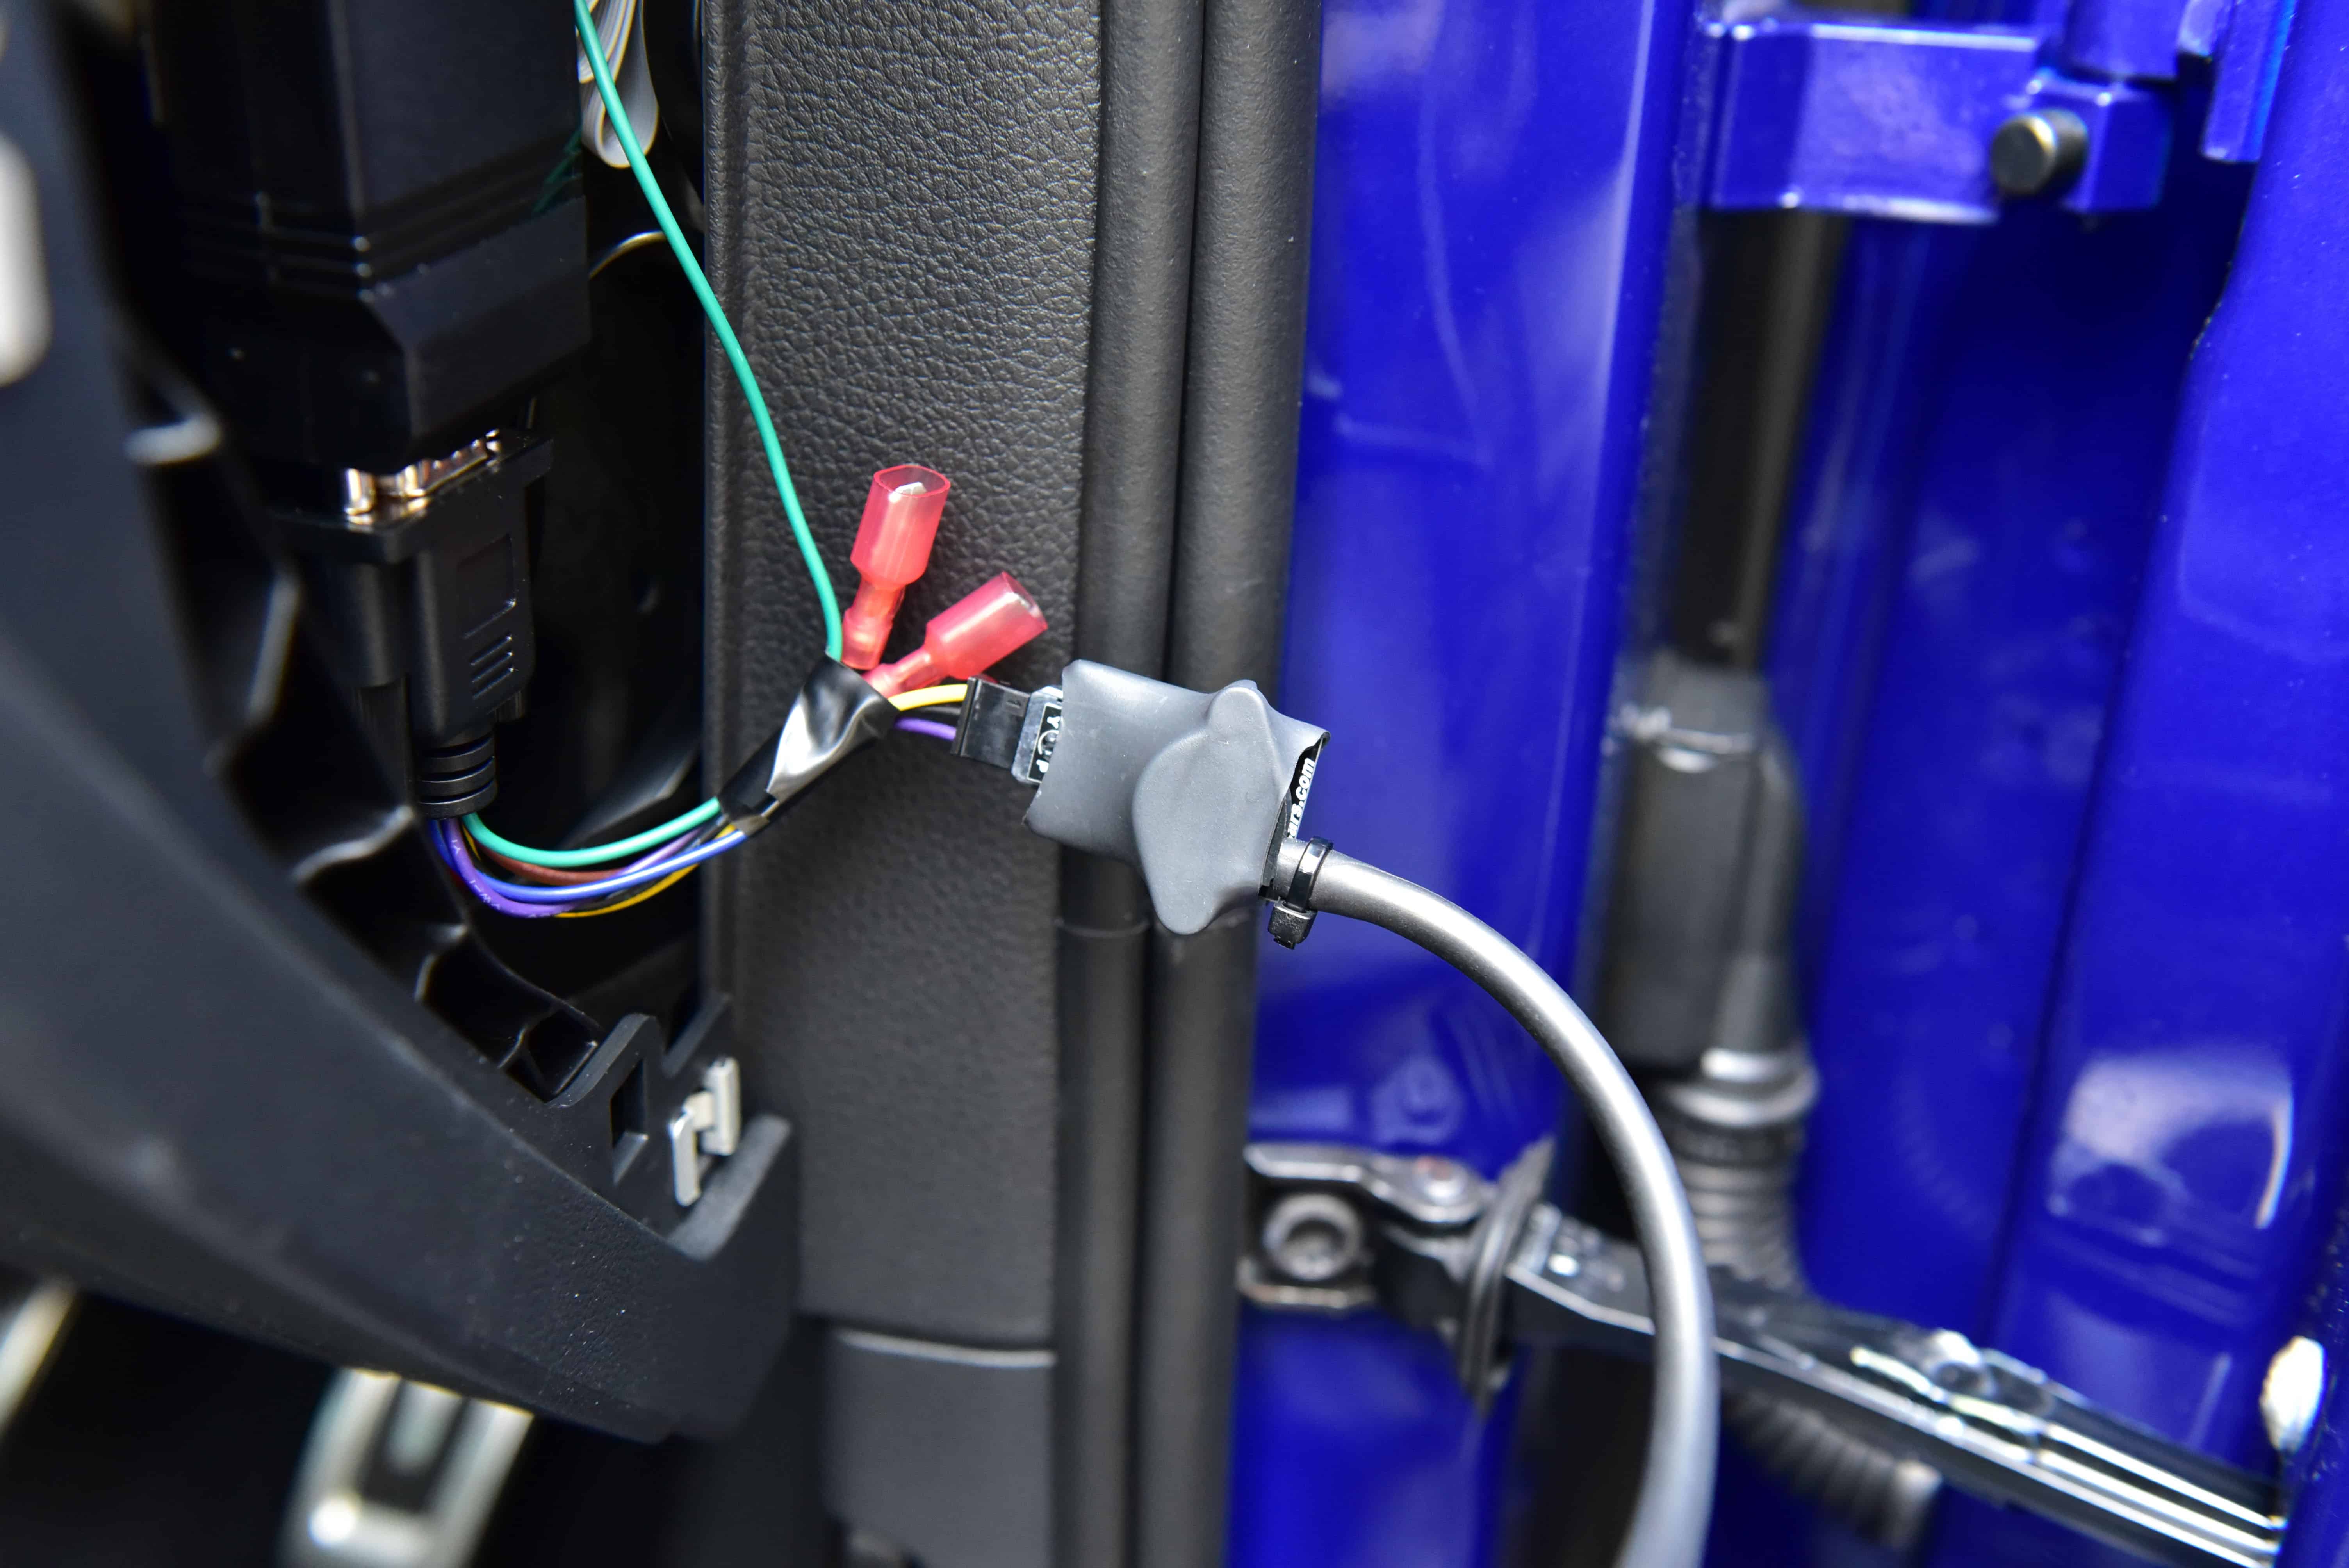
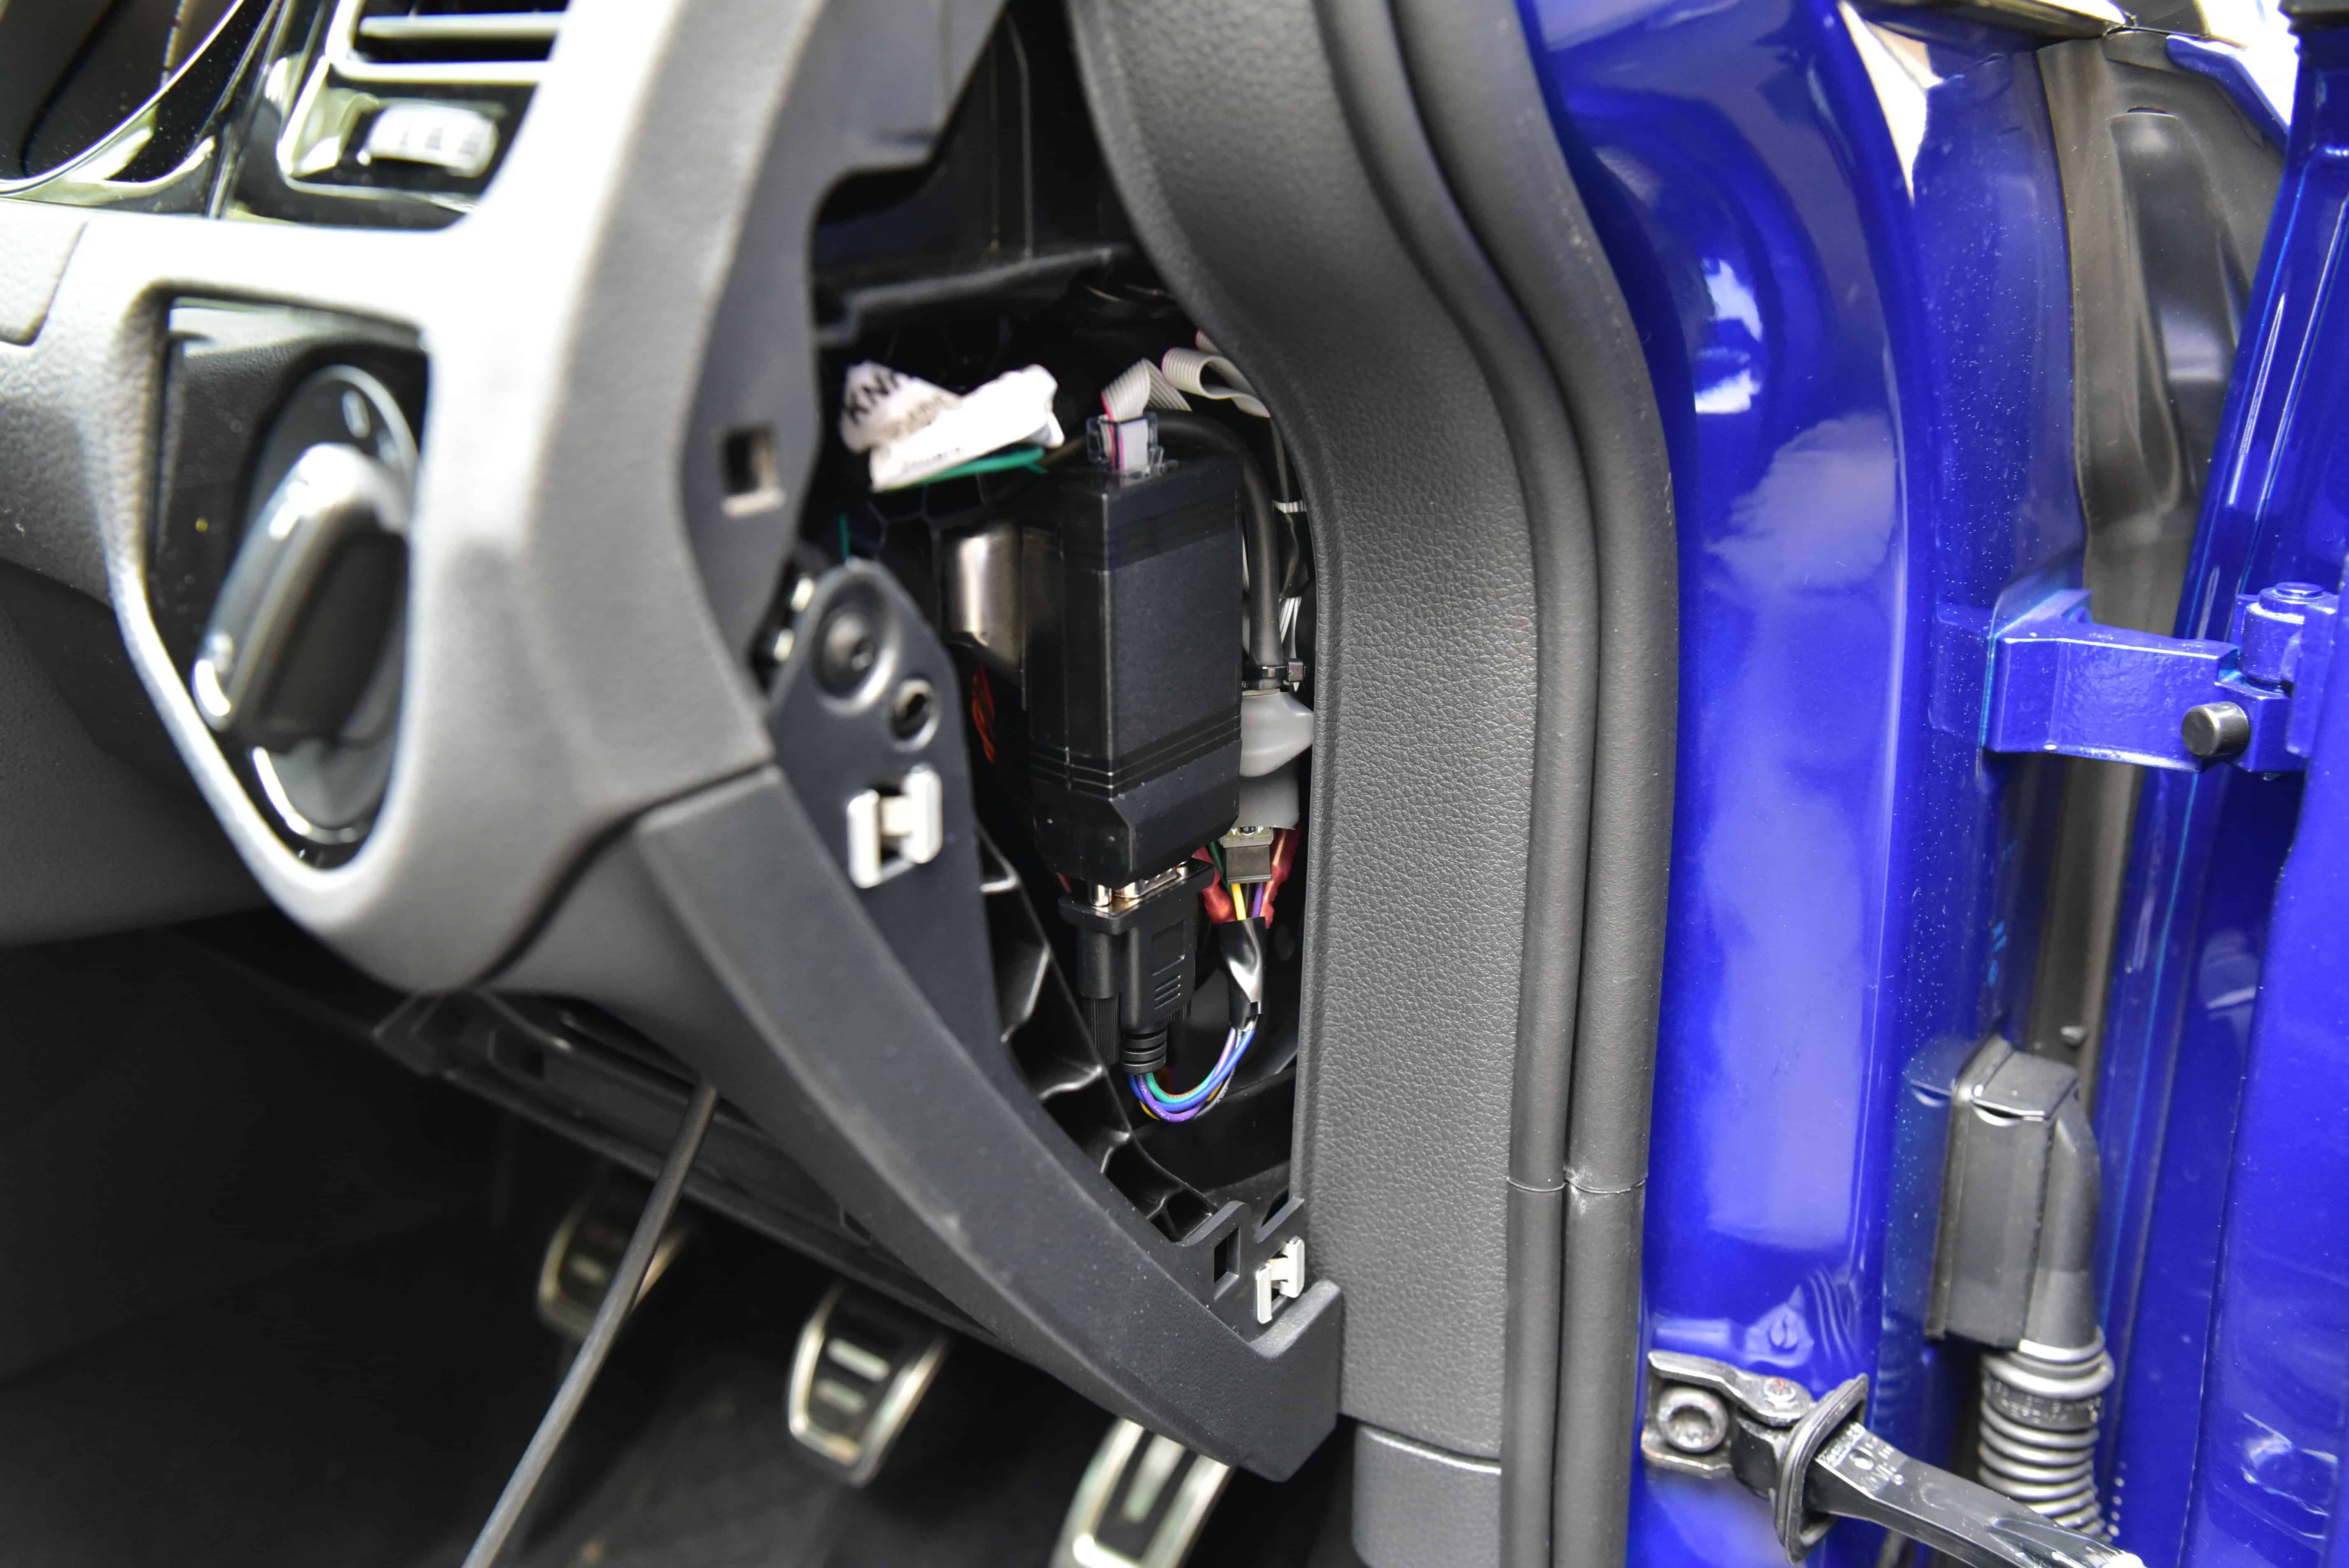
Remove the side panel where your P3 Cars Control Box is located. Plug in the Analog Boost Sensor and connect your vacuum hose. A cable tie can be used to secure the hose.
There’s two options when it comes to accessing manifold pressure for the boost sensor.
Connect the vacuum hose to a ‘Boost Tap’. These taps come in a variety of forms, from throttle body spacers, to MAP sensor adapters.
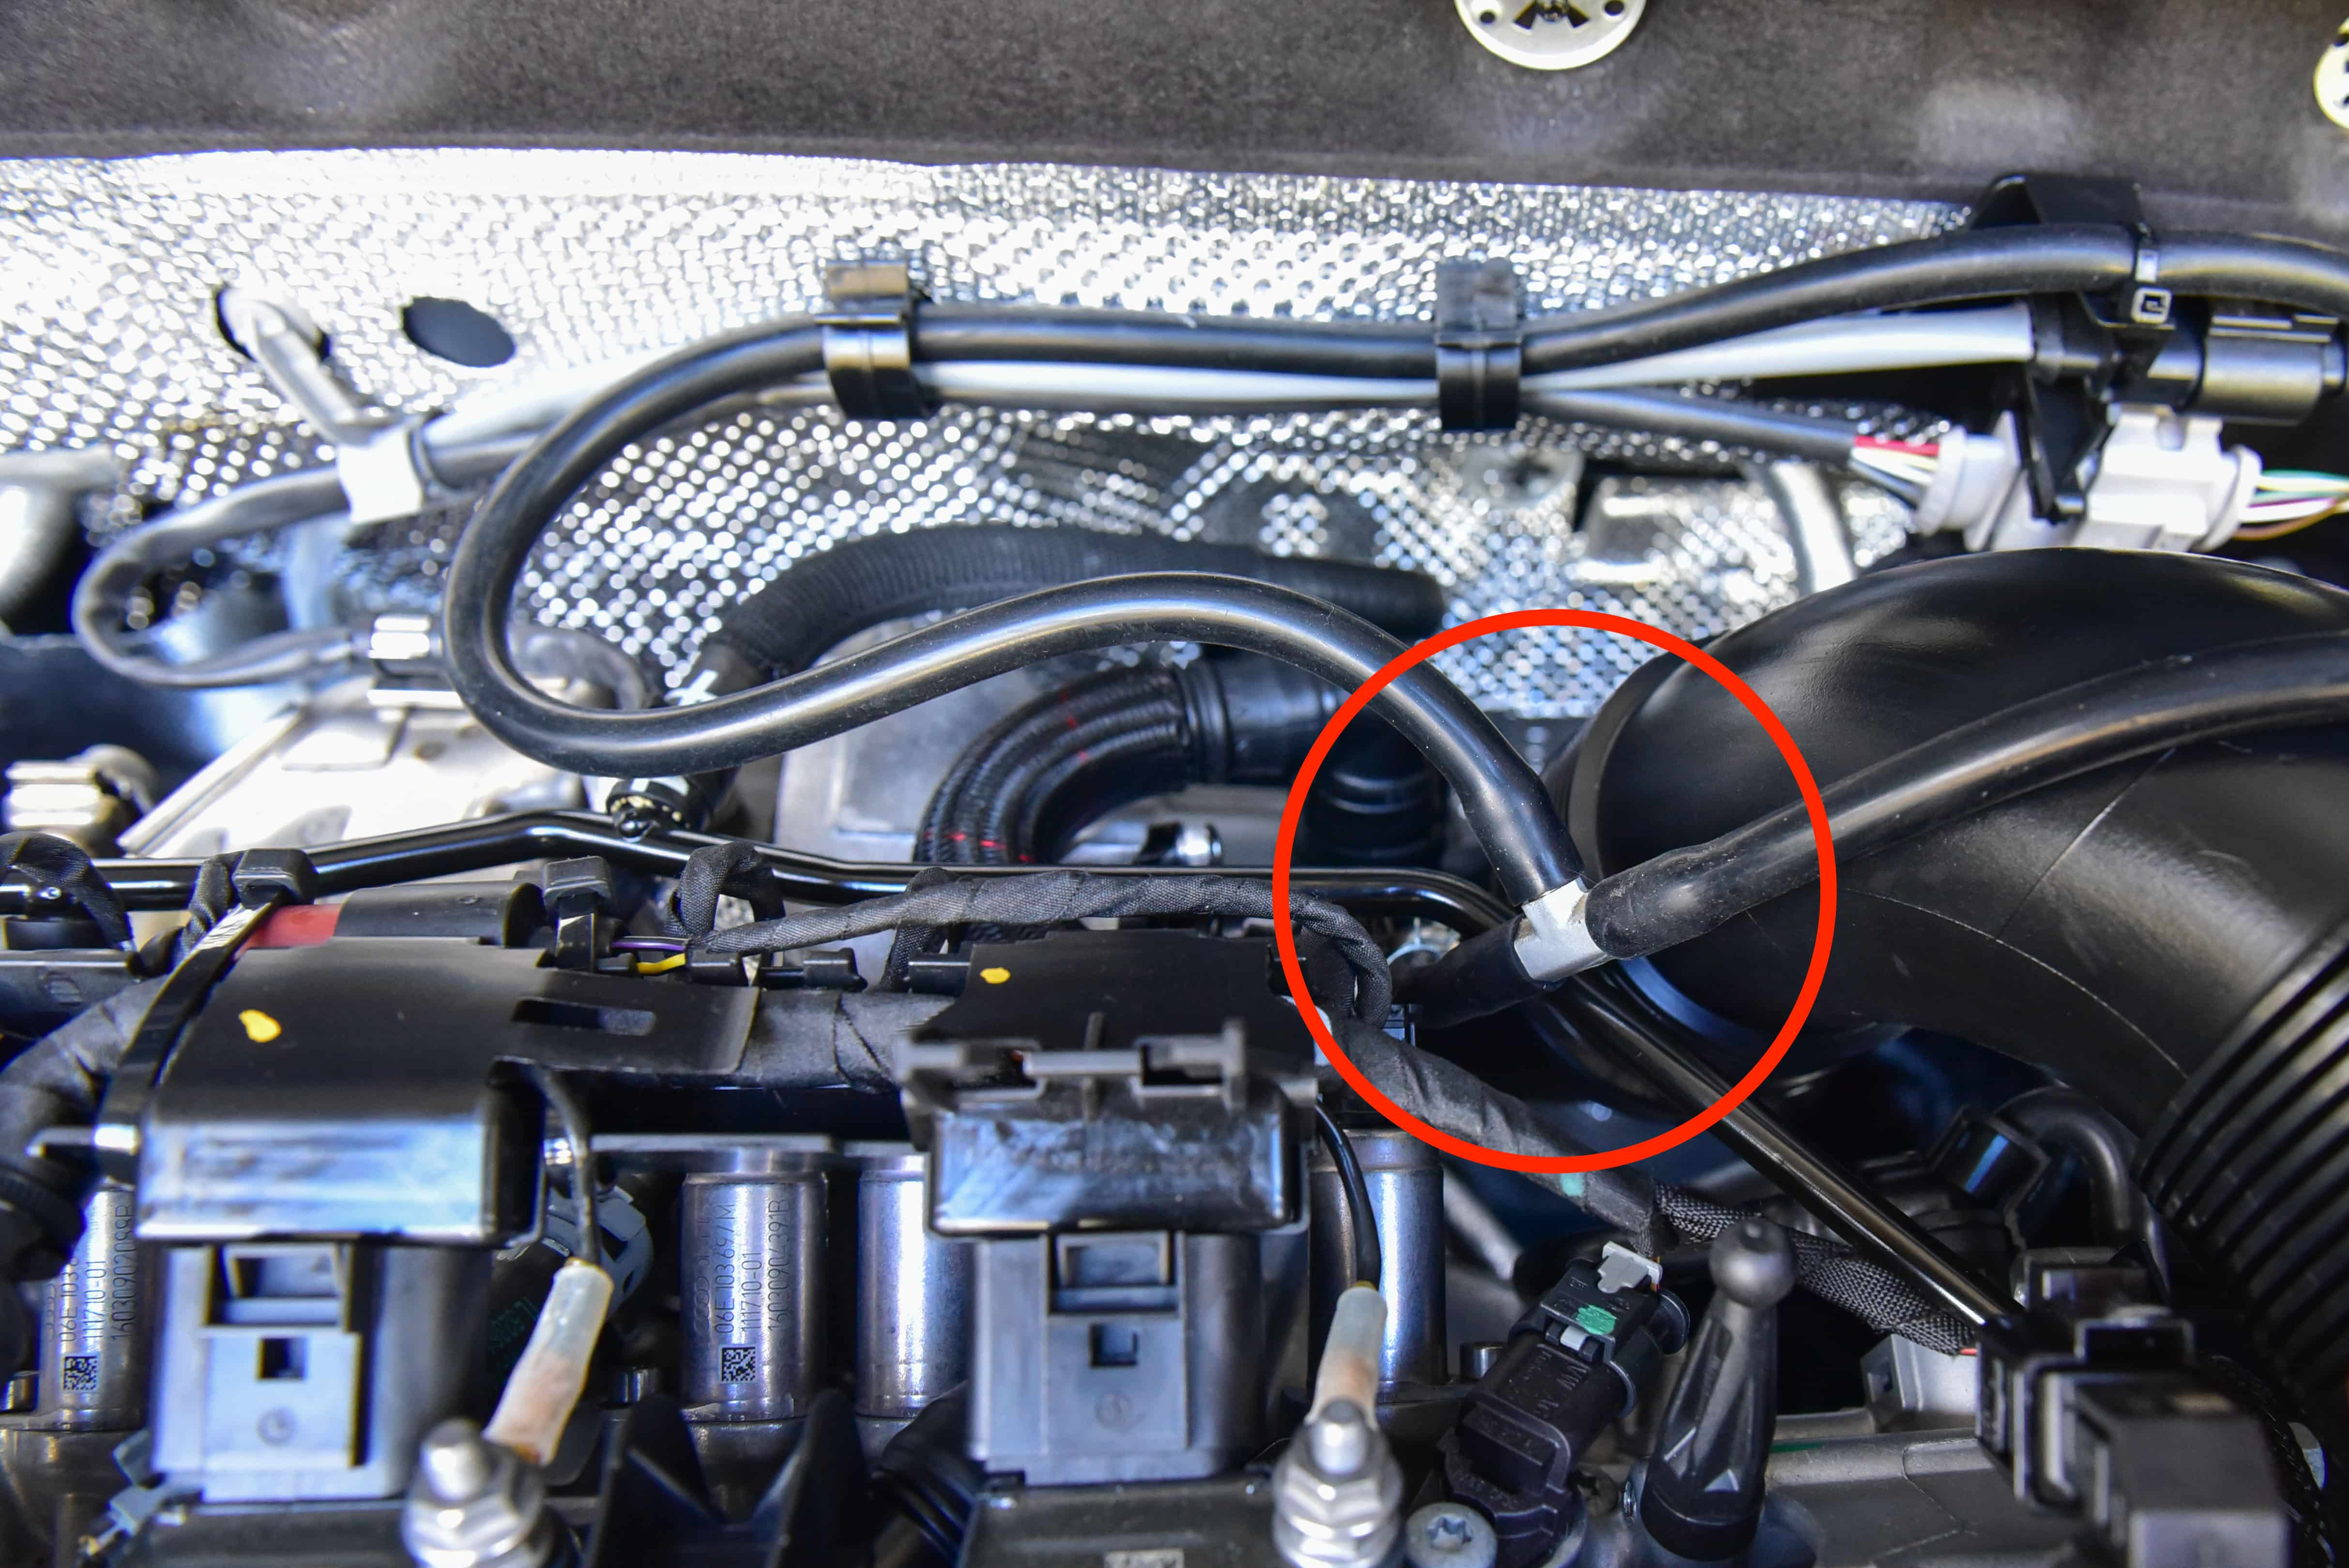
If you already have a blow-off valve installed you can use this existing vacuum line. We used a T-Piece to tap our blow-off valve vacuum hose.
Step 4
If required use a universal reducer to adapt from the larger blow-off valve hose to the smaller boost sensor hose.
Step 5
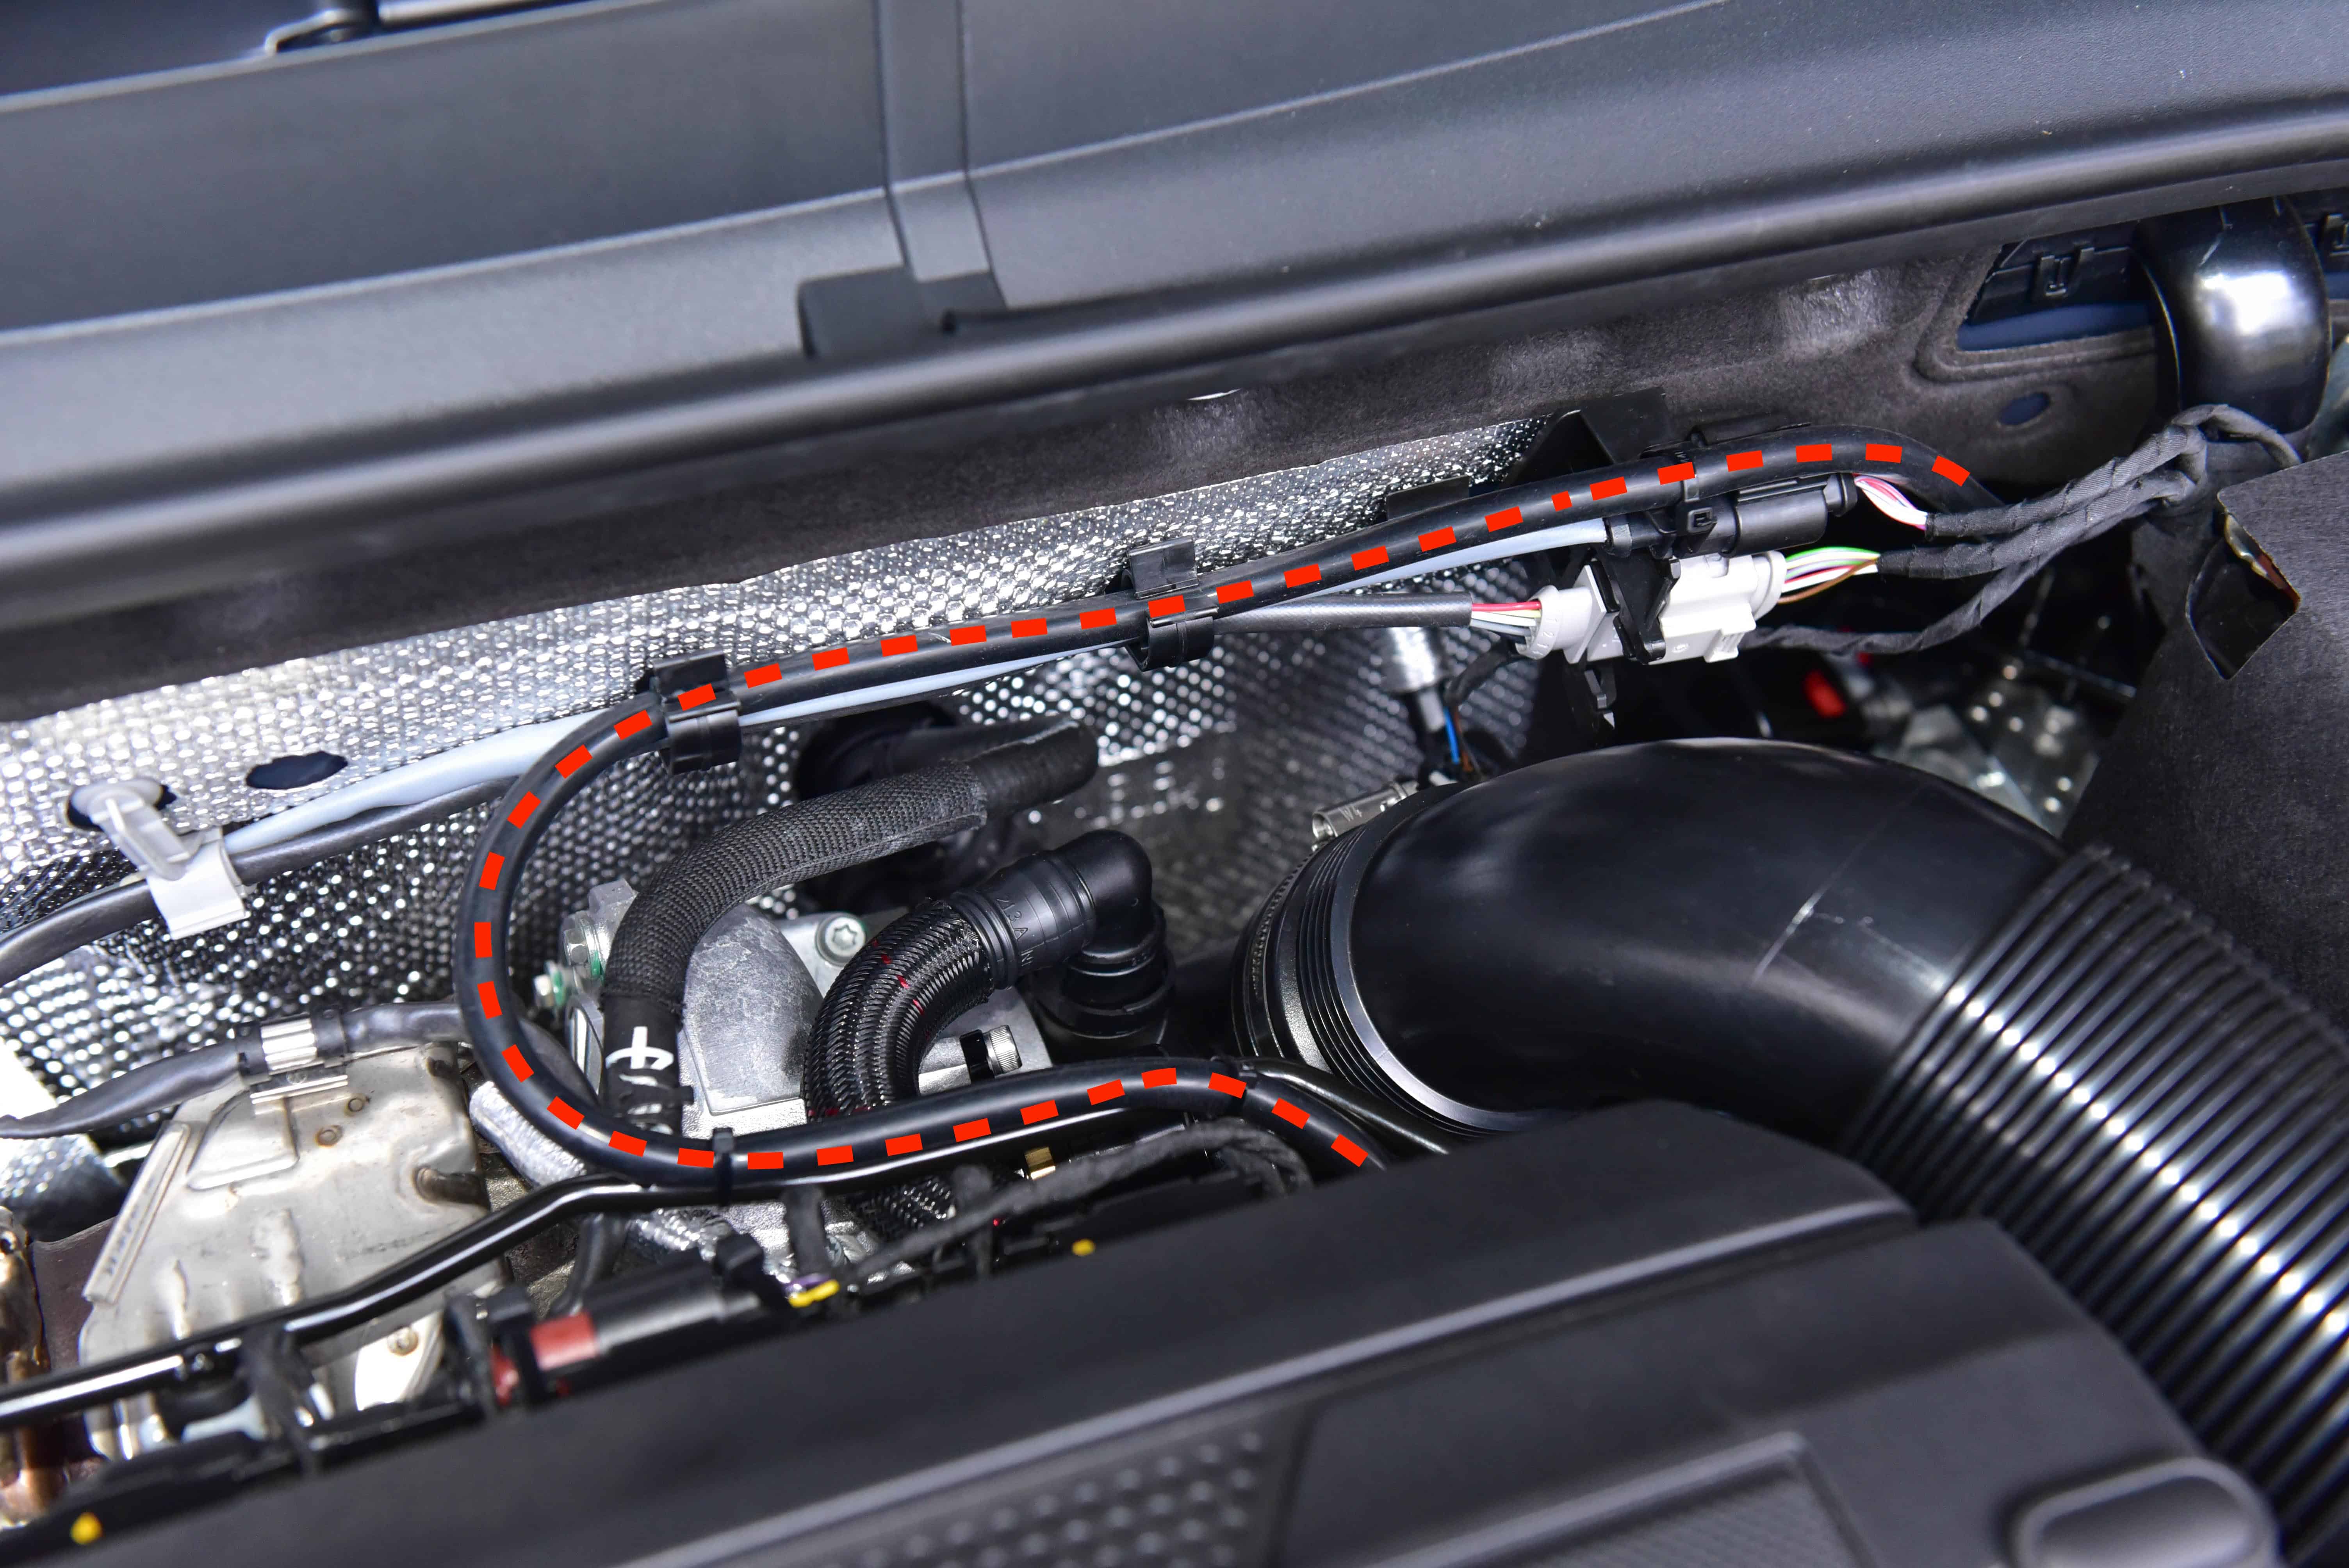
Neatly route the vacuum hose around the engine as required, depending on your make and model. We chose to use the existing cable clips and a few cable ties. Ensure you only lightly fasten the cable ties and leave adequate slack to account for engine movement.
Step 6
Enter the P3 Gauge settings menu by holding both buttons. Scroll to the ‘Boost Reading Selection’ displayed as bSt.dor A or n – Digital or Analog or None. Set the setting to ‘A’ for Analog.
Once set to Analog and the gauge has rebooted, enter the ‘Analog Boost Sensor Calibration’ displayed as Cal.B. This calibrates the boost sensor to your current altitude. Enter the calibration, turn the engine off and then tap the left button. Calibrate your analog sensor any time your altitude changes significantly to ensure the highest accuracy.