This guide will show you how to remove the front and rear door sill trims on a VE Commodore. If you’re installing any form of aftermarket wiring or installing speakers, this is the guide you will need!
Difficulty Rating
Moderate
Tools/Parts Required
TORX Screwdriver
Trim Removal Tools
Step 1
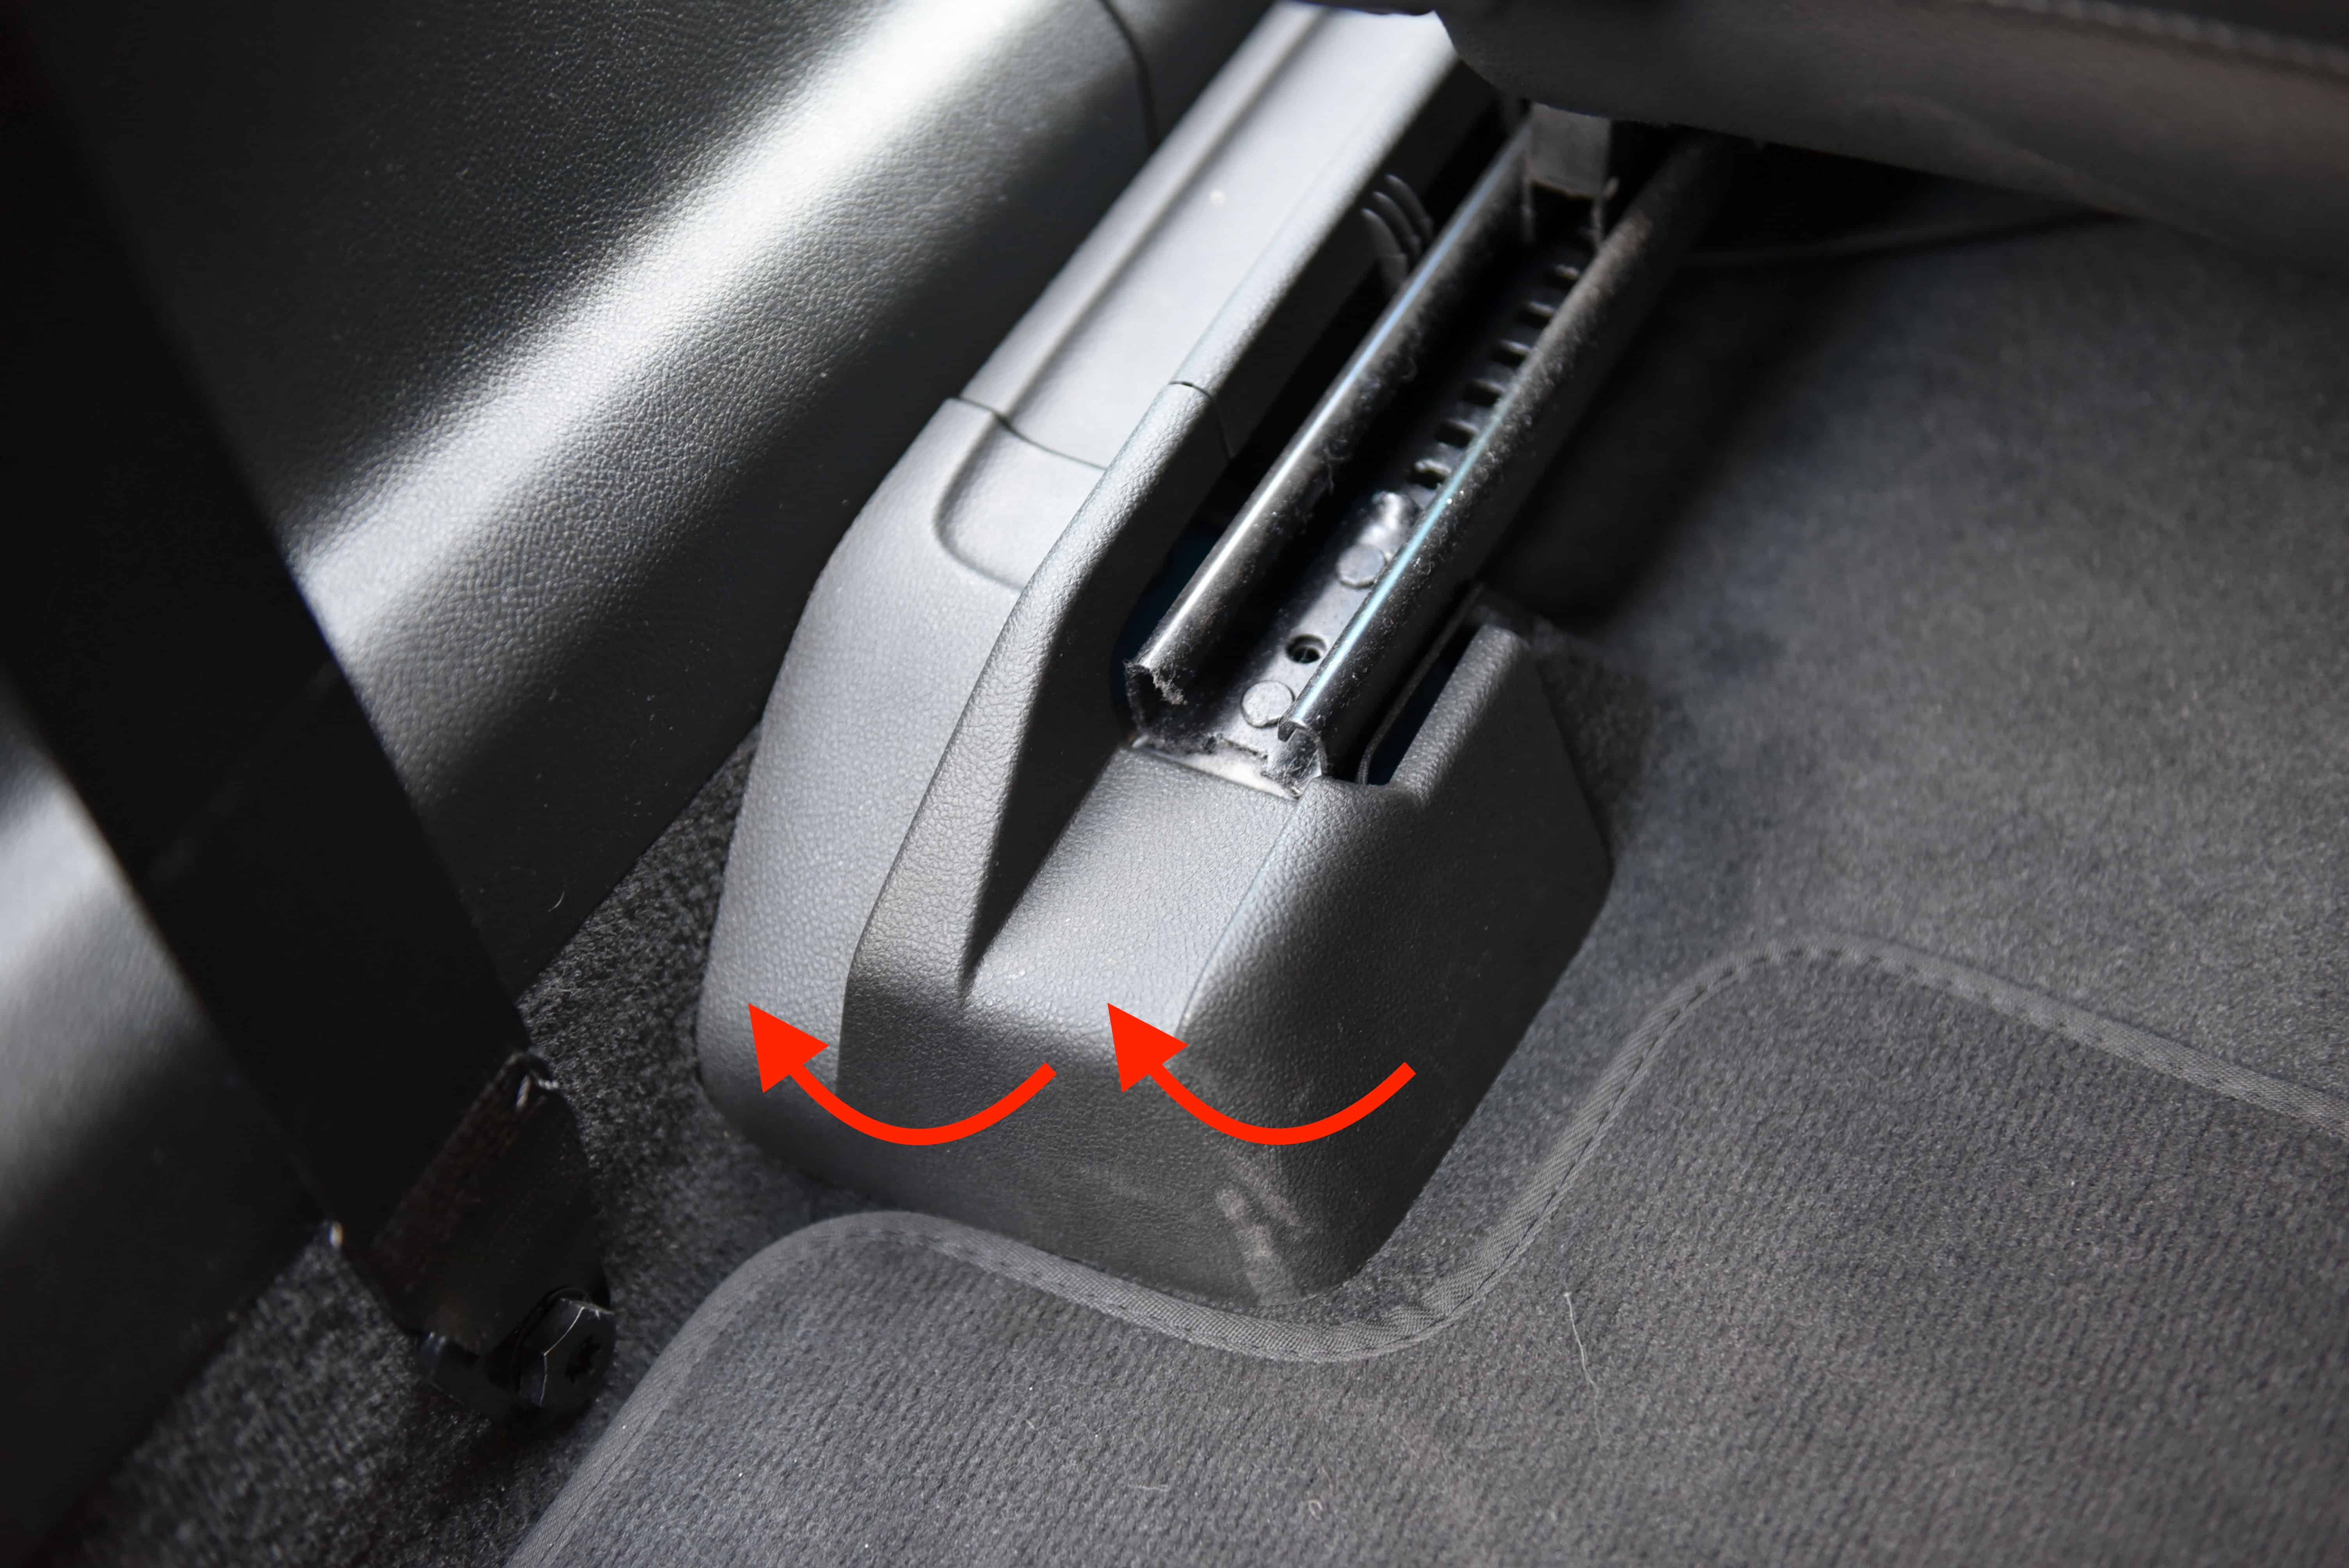
Front Door Sill
Pry your fingers underneath the capping trim and pull upwards to release. You need to swing the piece upwards to remove it.
Step 2
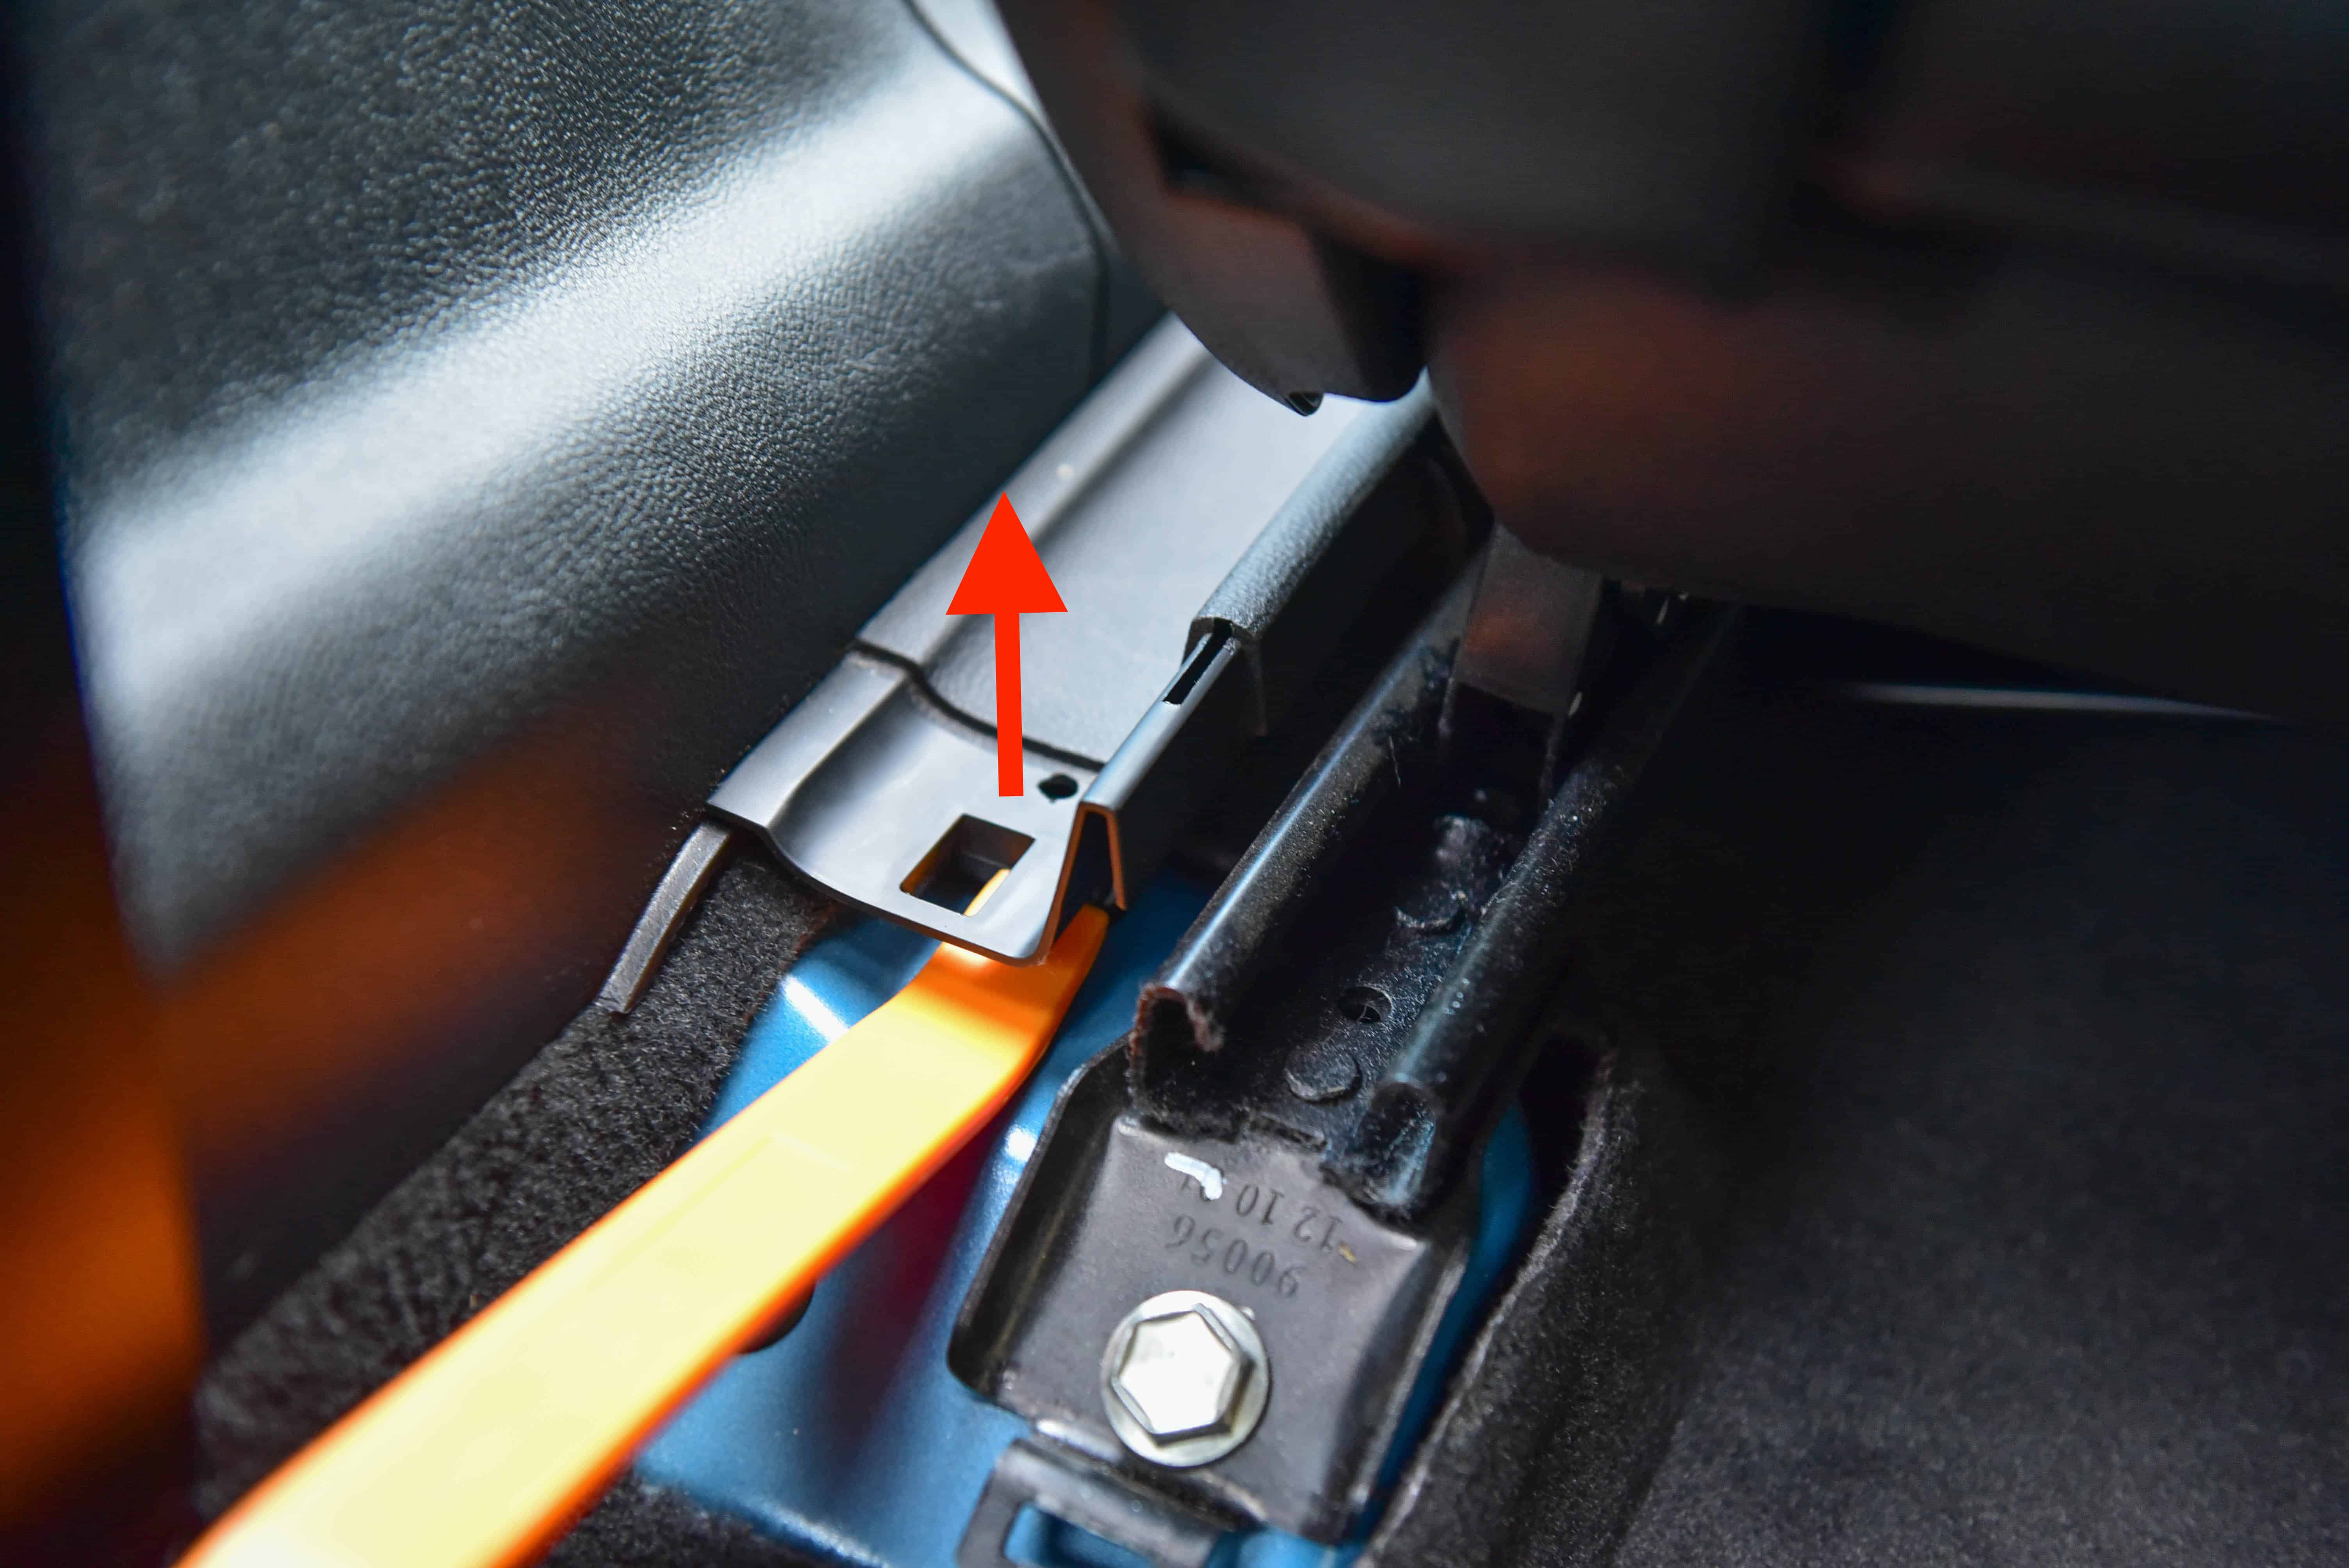
Using a trim removal tool, release the clip as shown.
Step 3
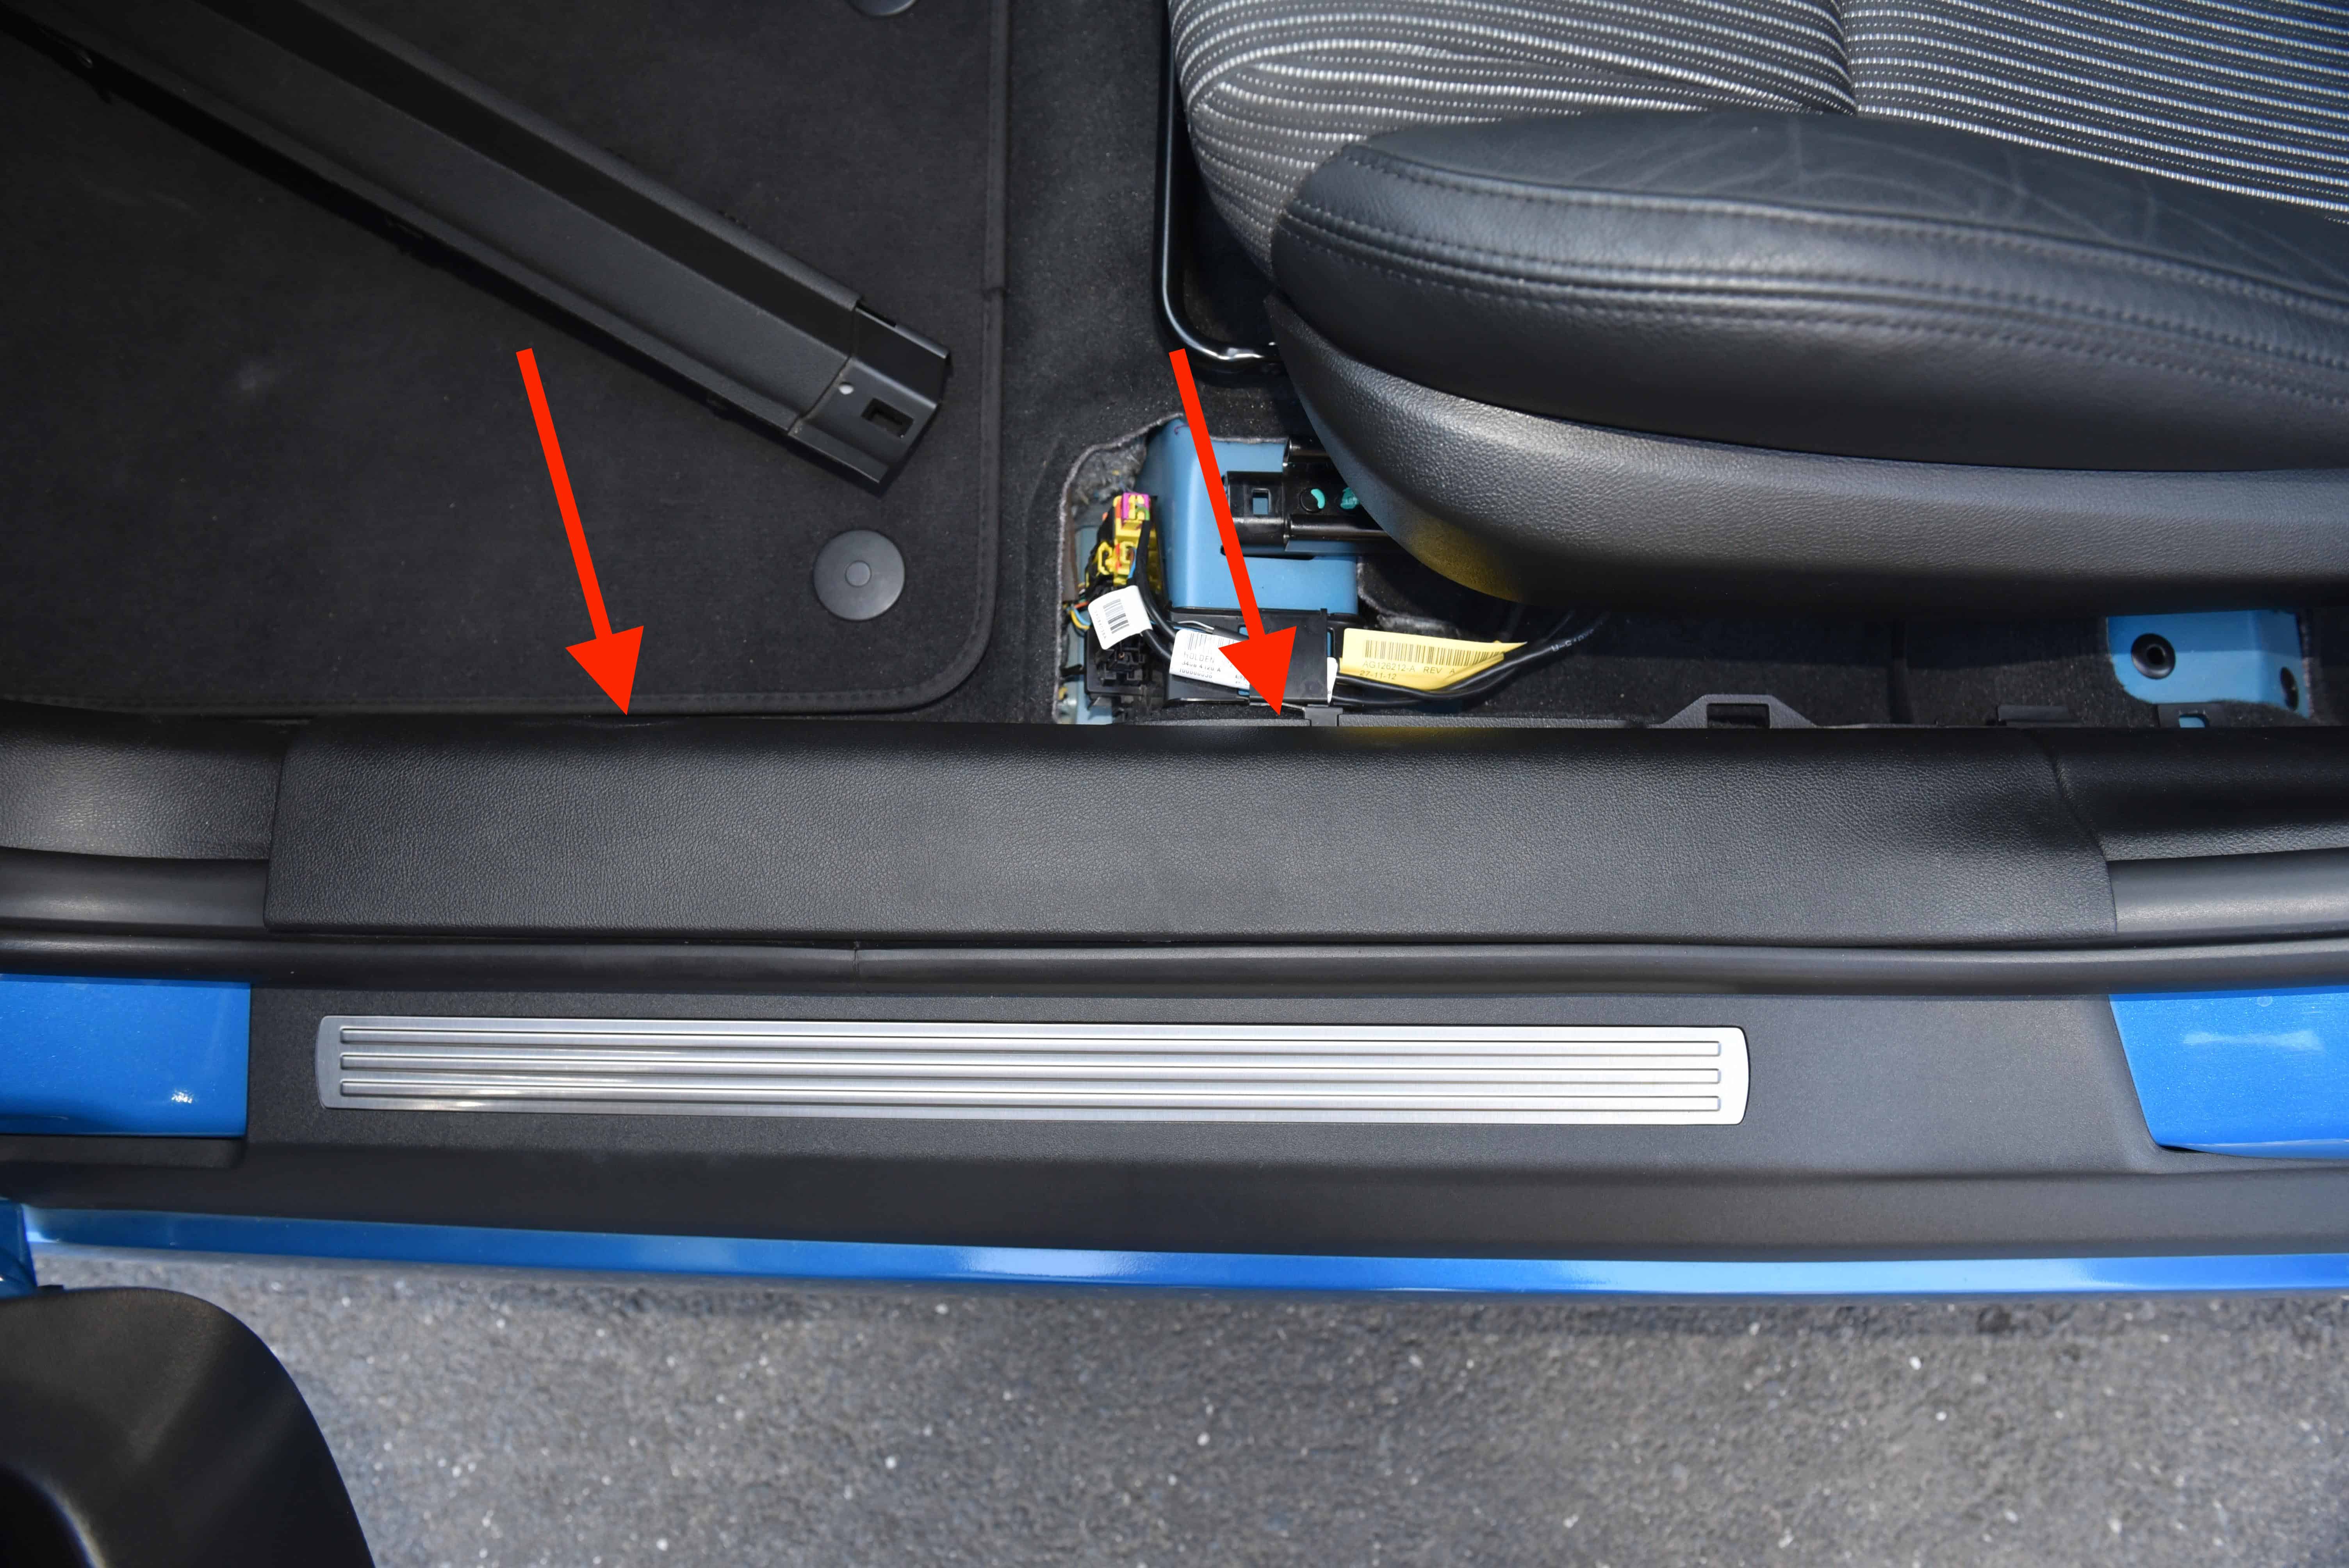
The seat rail trim can now be removed by pulling towards the front of the car.
Step 4
With the seat rail trim removed, the front door sill can also be removed. Using your fingers, pull firmly upwards on the door sill trim to release the clips.
Step 5
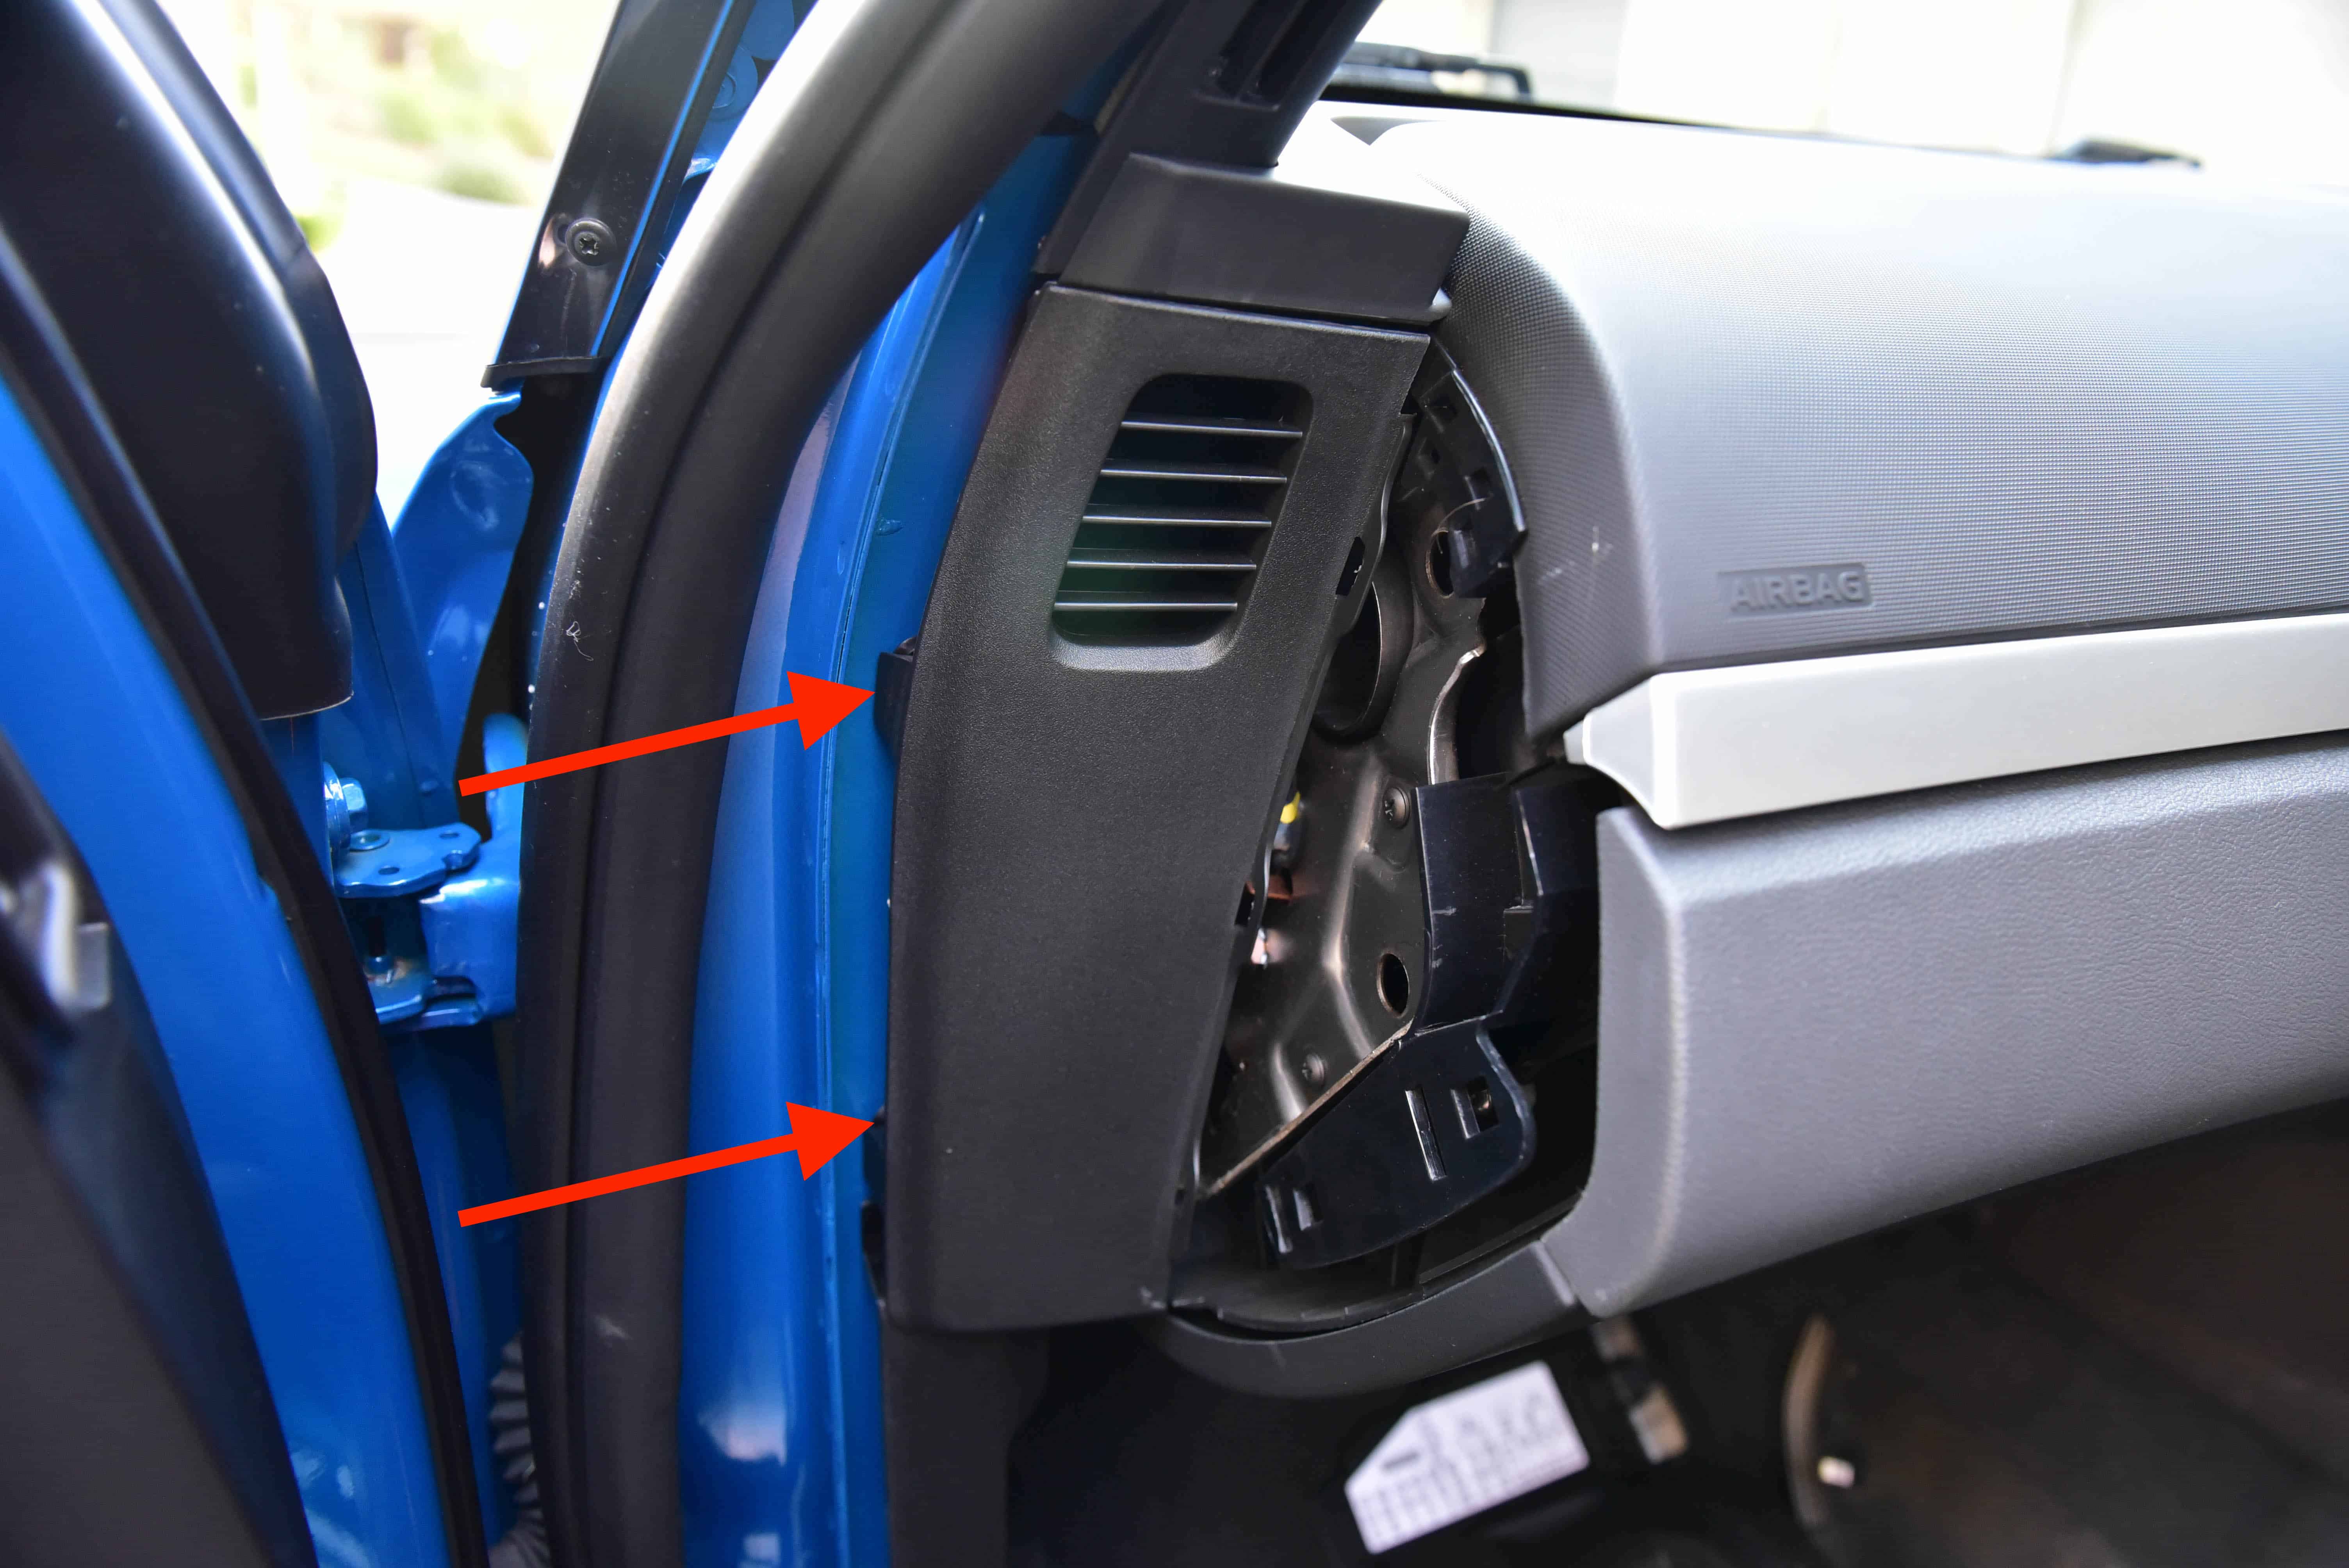
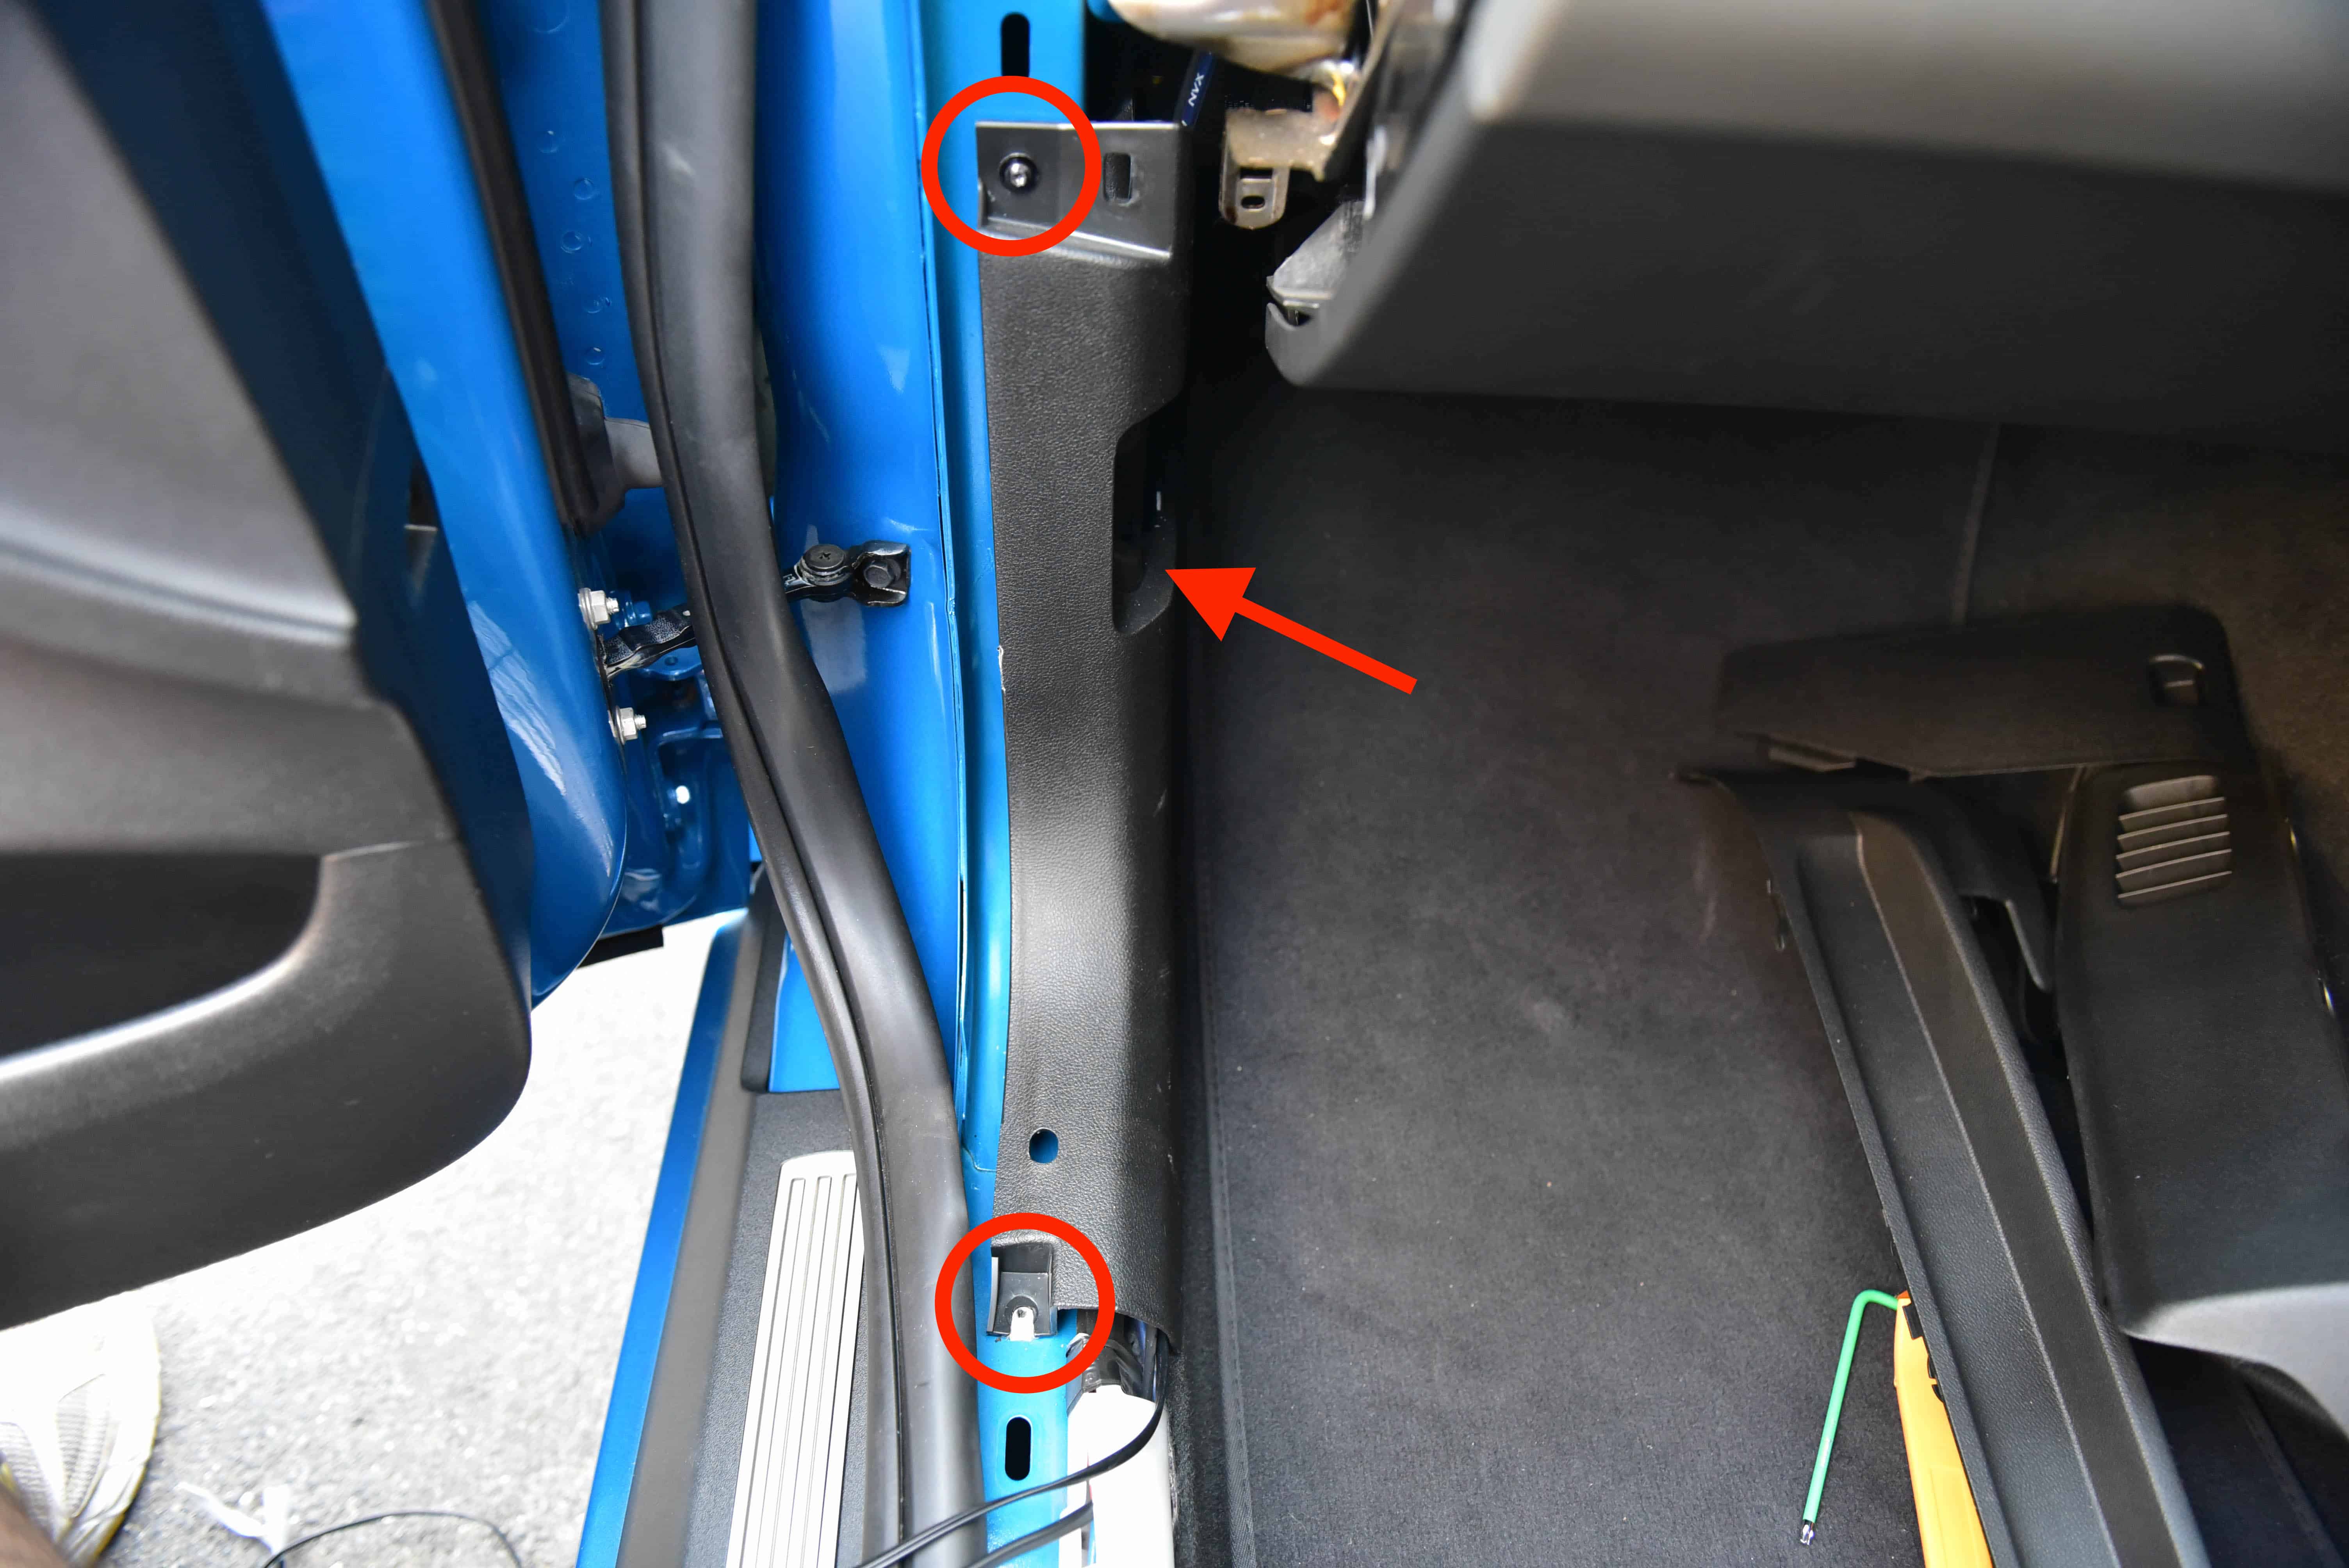
Kick & Side Panel Trim Removal
Remove the glove box side trim using a trim removal tool. Next, pull on the rubber door seal to separate the seal from the bodywork.
You can then remove the pictured trim by releasing the two metal clips.
Step 6
Remove the kick panel by unscrewing the two TORX screws and removing the fuse box cover. The clips can now be released using a trim removal tool.
Step 7
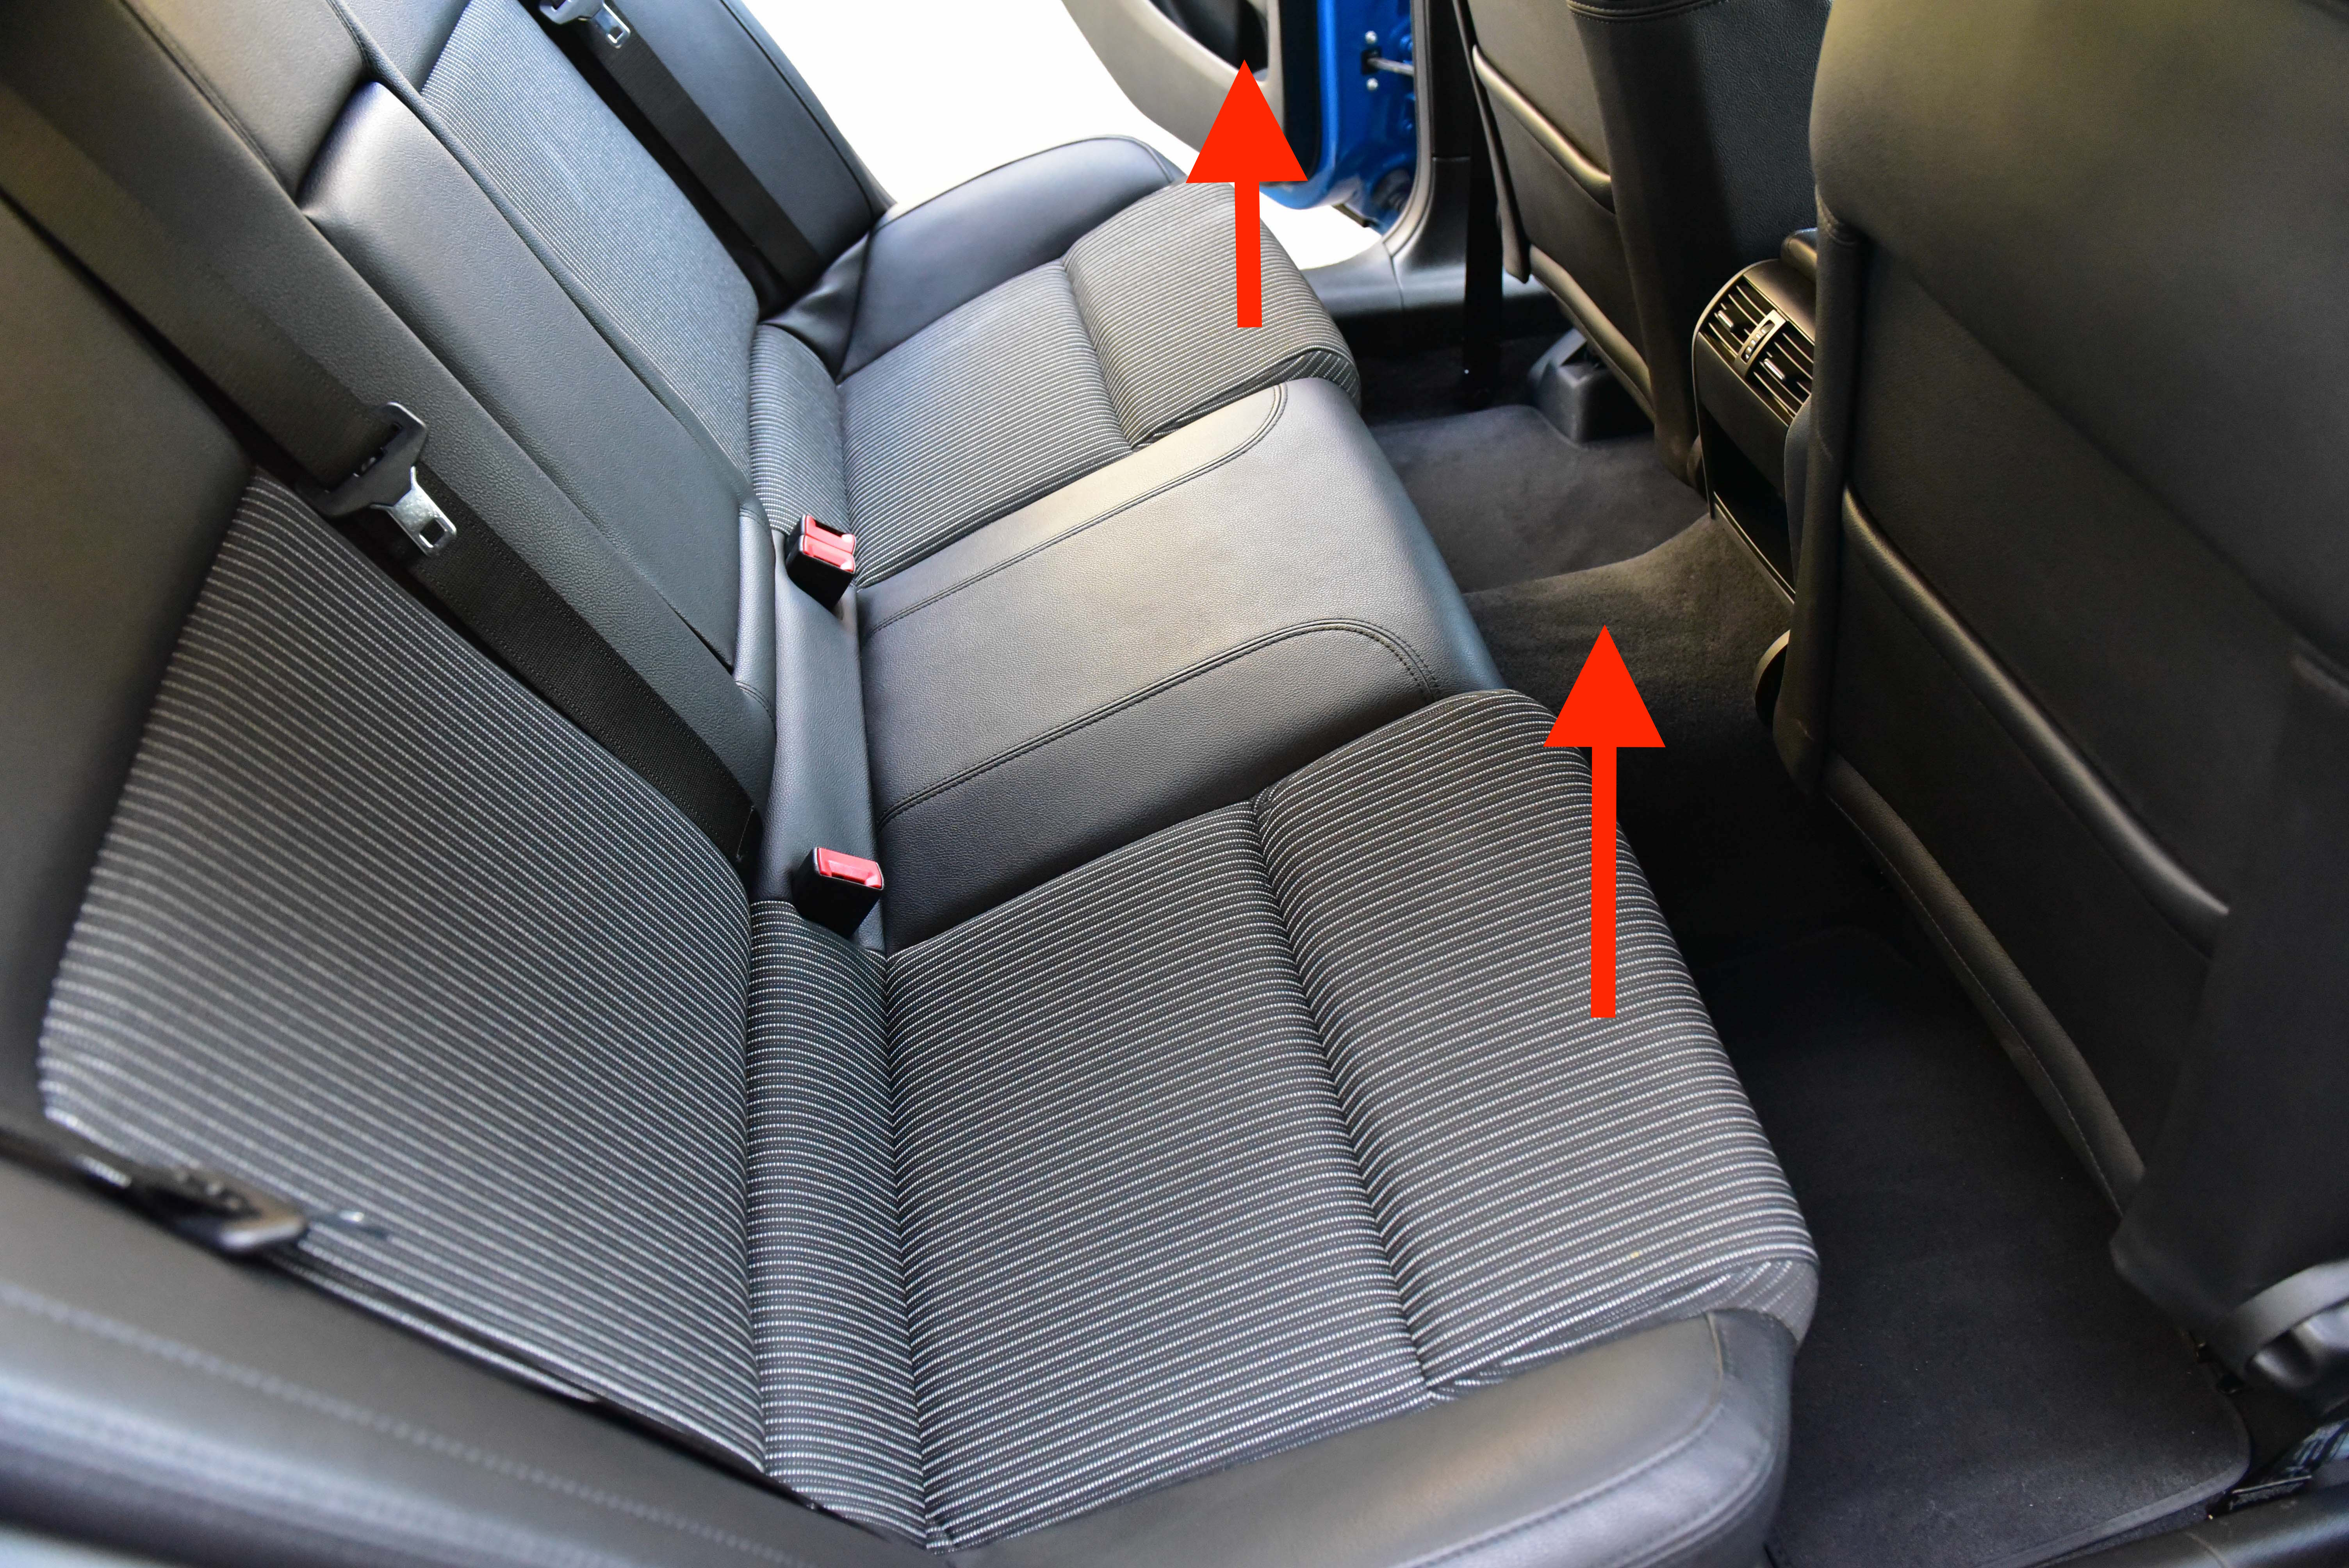
Rear Door Sill Trim
Remove the rear seat base using our guide, which can be found here.
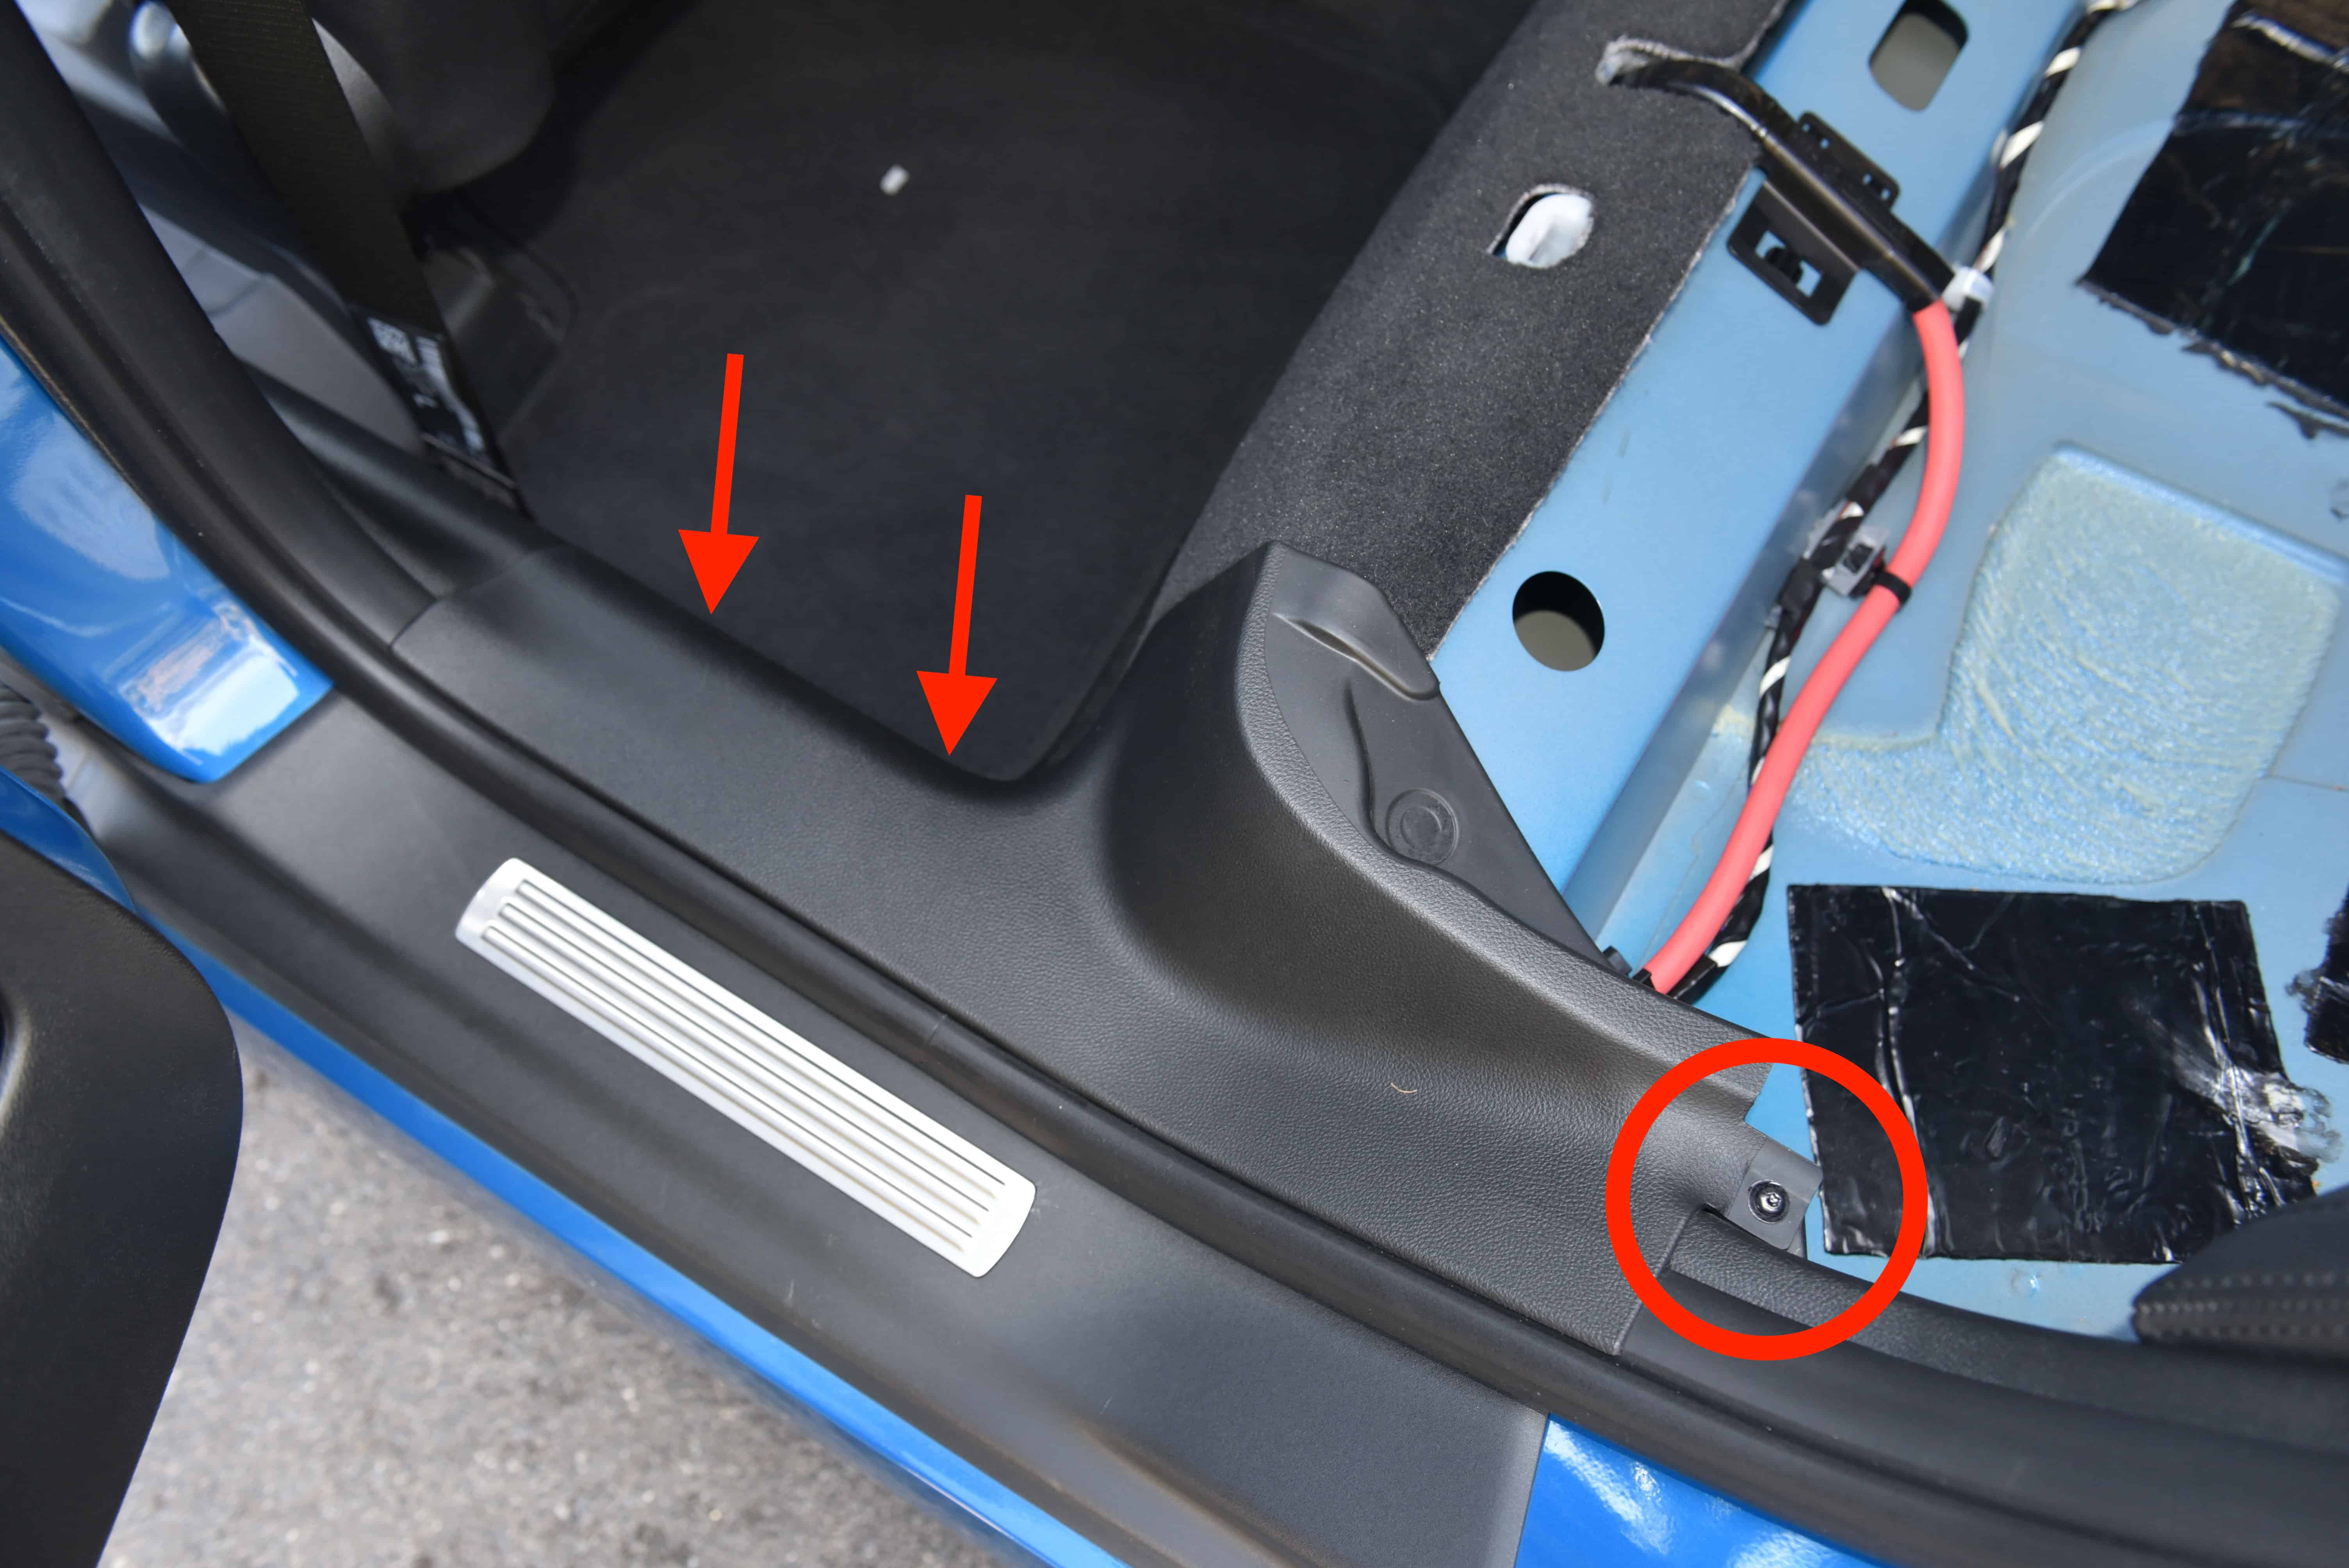
Step 8
Remove the TORX screw as pictured, then gently pull upwards on the trim to release the clips.
Step 9
Re-Installation
All trim pieces can be reinstalled by lining up the pieces and pushing down firmly to engage the clips. TORX screws in can then be reinstalled where applicable.
Did you find this guide helpful? Consider sharing it to help other car enthusiasts
Hi Andrew, I assume you’re referring to the triangular piece we didn’t show in the guide. There’s three clips behind it that will come off with some force. I suggest getting a trim removal tool behind it from the bottom, then pry it off. Once you can fit your fingers under there it should come off easily.
Hi, this is a handy starting point for me to try and dry out my passenger side carpet, after of course identifying the source of the leak, I’ve read the plenum above the windscreen can leak in through the firewall, any other pointers ?
That’s correct. It can also be related to the bottom door seal (Where the Door sill trim sits) and sometimes blocked A/C drains – I would definitely take a look at this. On a hot day run your A/C on cool and look for water dripping into the footwell.
I recently removed the door sill plate as per Step 4 but the metal tip on the end of the plastic clip came off and fell down inside the sill panel. I can’t see the clip end (it definitely went down there) but was wondering if there is an access point to see within the space of the sill panel? On my old VH there were end caps that could be prised off to see down the length of the panel and retrieve any thing that fell through, although the VE appears to have ‘bulkheads’ along the sill. Any other suggestions on retrieving a broken clip from within that space would be much appreciated!
Hi Paul, We’ve had the same issue occur. Poor design! Best way is to use a magnetic pickup tool, insert it down the hole and fish around for the clip. Make sure the tool is thin enough to fit.
I have a VE Series 2 Calais V sedan. I’m wanting to install a 2CH dashcam Blackvue DR750S with CELLINK B Battery pack. I’ll need to remove some trim to feed the cables and access the fuse box on the passenger side as I’m wanting to hard wire it with a battery pack. I’m wanting to hide all the cables and don’t want to see any especially along the top windscreen. Any advice if anyone has installed dashcams?
Hi Phil, That’s correct, and you can install the battery back under the seats too. You can run the cable up the A-Pillar and tuck it into the headliner pretty easily. We’re a reseller of BlackVue and Cellink, feel free to get in touch with prices! https://www.autoinstruct.com.au/brand/blackvue/
Hi
How do you remove and replace the door sills? Im referring to the front and rear sections with the aluminium strip on them in a VE Sportswagon. I have a replacement 4 door set. I hear you first bend/tear off the aluminium strip to access the clips?? I assume you also first need to remove all the interior seat rail covers and scuff trim panels first??
Thanks


This Post Has 11 Comments
How does the glove box side trim come off? I have tried multiple ways and it is not budging.
Hi Andrew, I assume you’re referring to the triangular piece we didn’t show in the guide. There’s three clips behind it that will come off with some force. I suggest getting a trim removal tool behind it from the bottom, then pry it off. Once you can fit your fingers under there it should come off easily.
Hi, this is a handy starting point for me to try and dry out my passenger side carpet, after of course identifying the source of the leak, I’ve read the plenum above the windscreen can leak in through the firewall, any other pointers ?
That’s correct. It can also be related to the bottom door seal (Where the Door sill trim sits) and sometimes blocked A/C drains – I would definitely take a look at this. On a hot day run your A/C on cool and look for water dripping into the footwell.
Thanks for the swift reply……
Hot day ? I’m in Scotland and its late November, forgotten already what the sun looks like !
Hello AutoInstruct,
I recently removed the door sill plate as per Step 4 but the metal tip on the end of the plastic clip came off and fell down inside the sill panel. I can’t see the clip end (it definitely went down there) but was wondering if there is an access point to see within the space of the sill panel? On my old VH there were end caps that could be prised off to see down the length of the panel and retrieve any thing that fell through, although the VE appears to have ‘bulkheads’ along the sill. Any other suggestions on retrieving a broken clip from within that space would be much appreciated!
Hi Paul, We’ve had the same issue occur. Poor design! Best way is to use a magnetic pickup tool, insert it down the hole and fish around for the clip. Make sure the tool is thin enough to fit.
I have a VE Series 2 Calais V sedan. I’m wanting to install a 2CH dashcam Blackvue DR750S with CELLINK B Battery pack. I’ll need to remove some trim to feed the cables and access the fuse box on the passenger side as I’m wanting to hard wire it with a battery pack. I’m wanting to hide all the cables and don’t want to see any especially along the top windscreen. Any advice if anyone has installed dashcams?
Hi Phil, That’s correct, and you can install the battery back under the seats too. You can run the cable up the A-Pillar and tuck it into the headliner pretty easily. We’re a reseller of BlackVue and Cellink, feel free to get in touch with prices! https://www.autoinstruct.com.au/brand/blackvue/
Hi
How do you remove and replace the door sills? Im referring to the front and rear sections with the aluminium strip on them in a VE Sportswagon. I have a replacement 4 door set. I hear you first bend/tear off the aluminium strip to access the clips?? I assume you also first need to remove all the interior seat rail covers and scuff trim panels first??
Thanks
Hello, We’re not sure about this unfortunately! I’ve heard something similar however.