Introduction
AutoInstruct presents a tutorial on how to remove the front door trims on a VE Commodore.
For removal of the rear door trims, see our tutorial here.
Difficulty Rating
Moderate
Tools/Parts Required
- TORX Driver Set
- Phillips Screwdriver
- Small Flathead Screwdriver
Step 5
This step is the most difficult of the removal process.
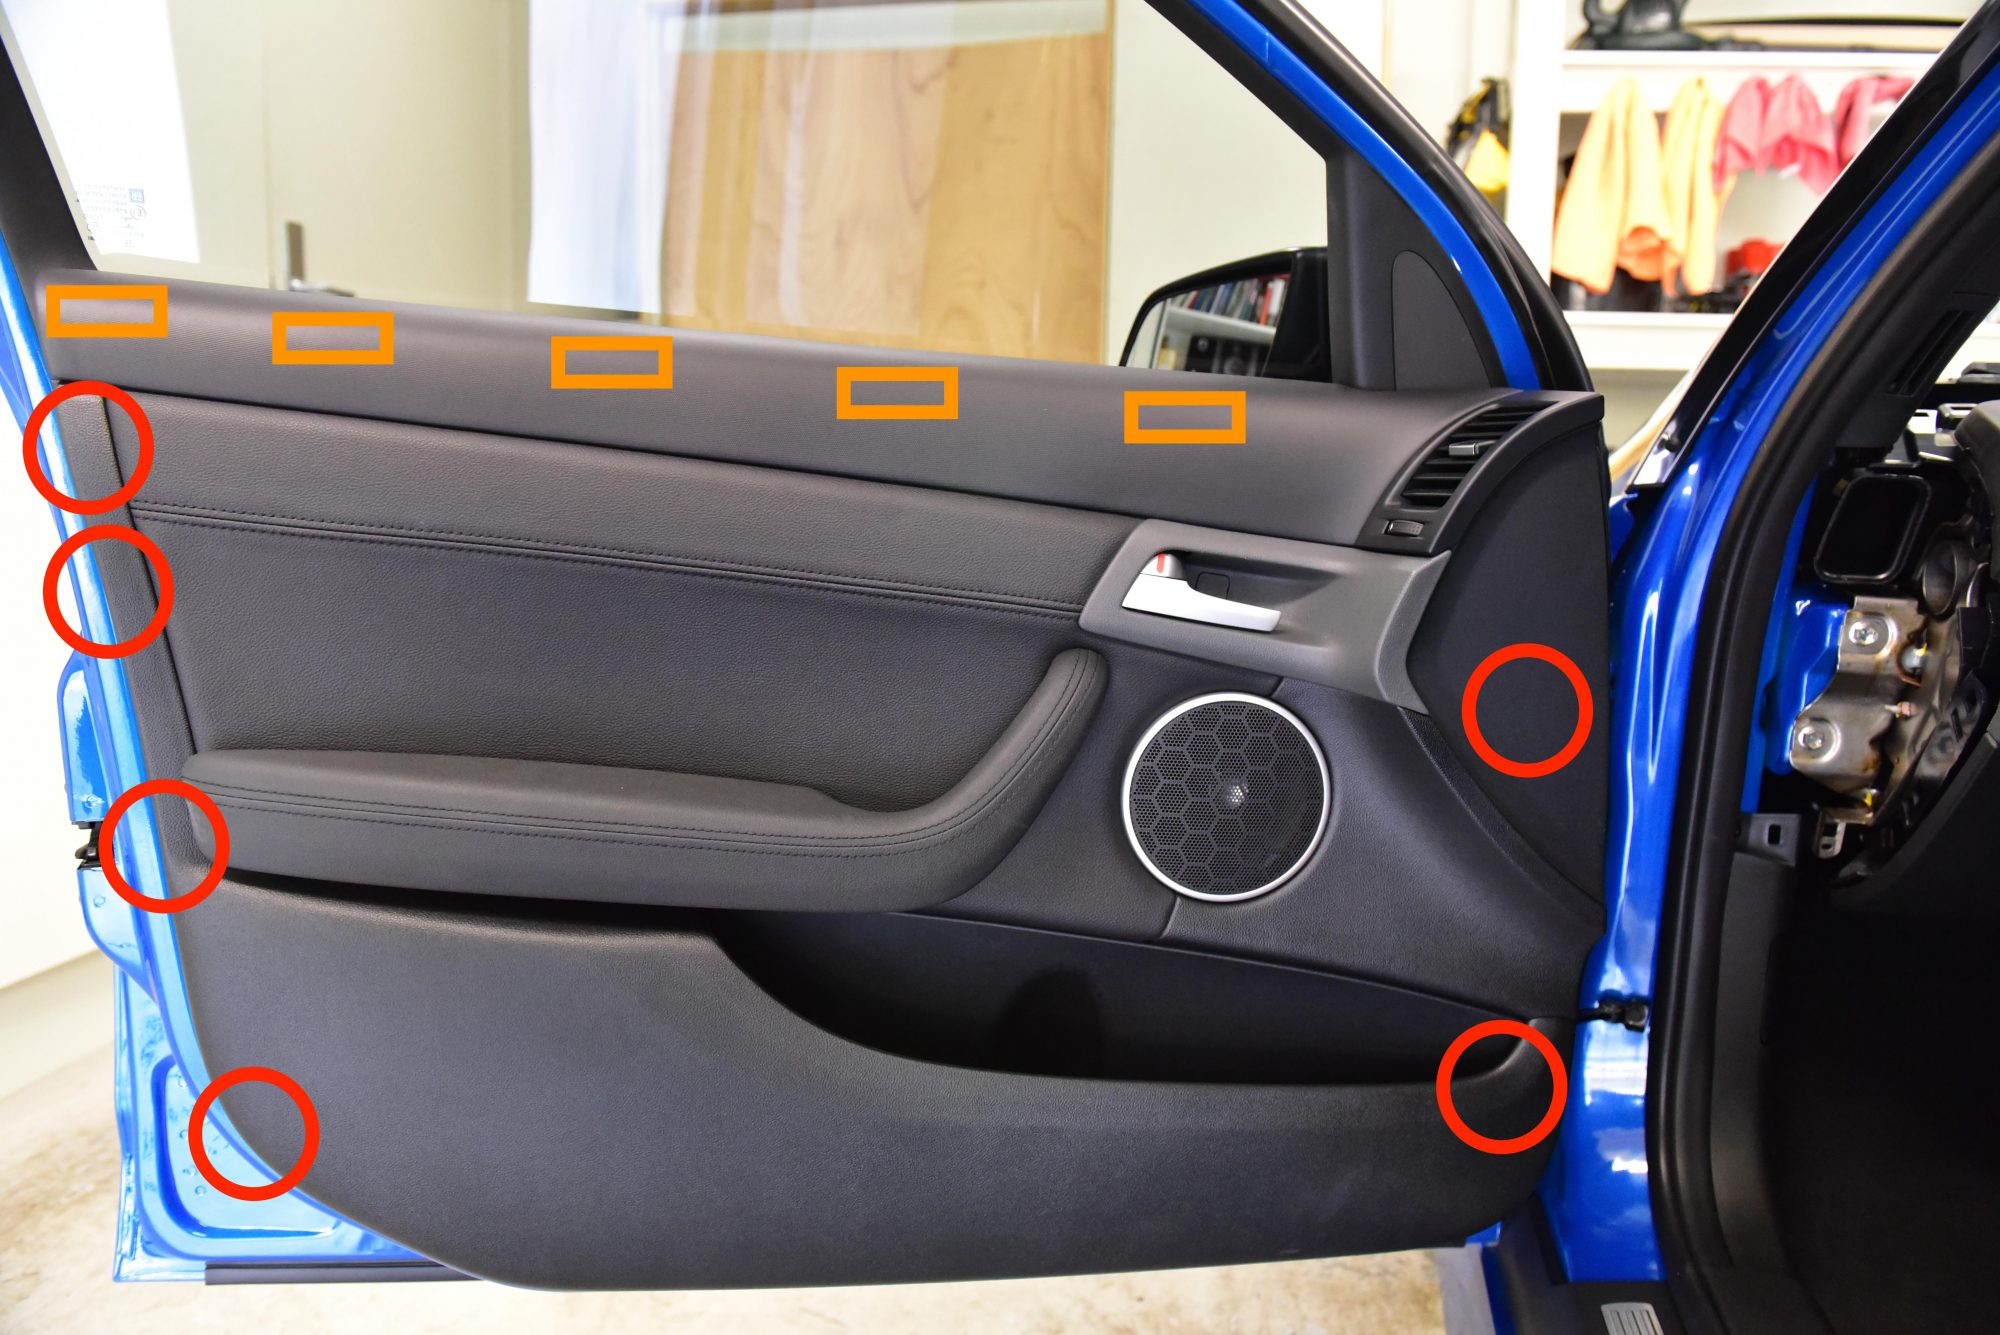
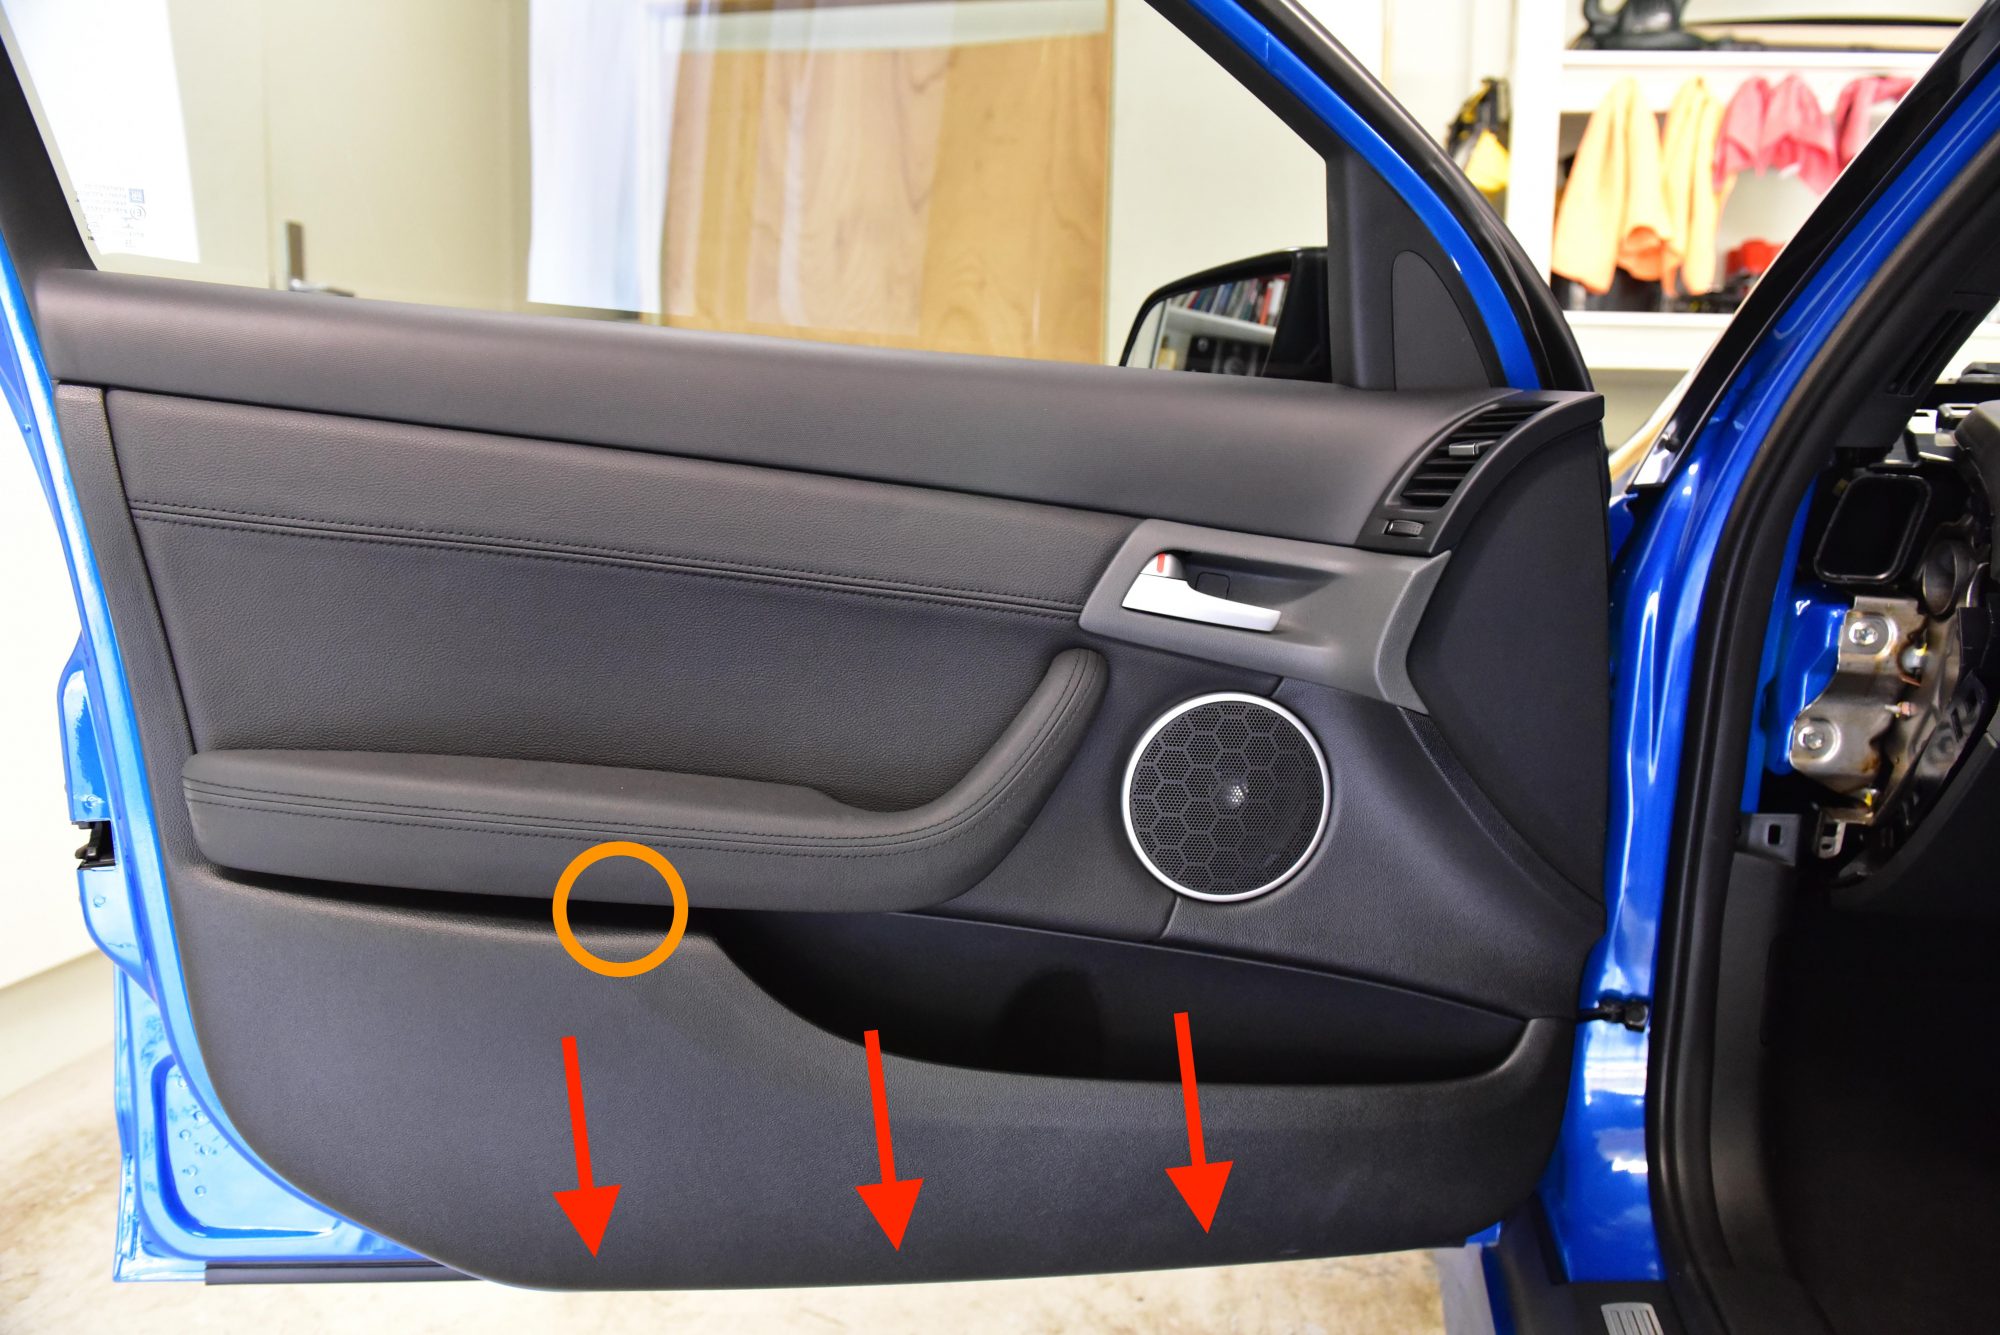
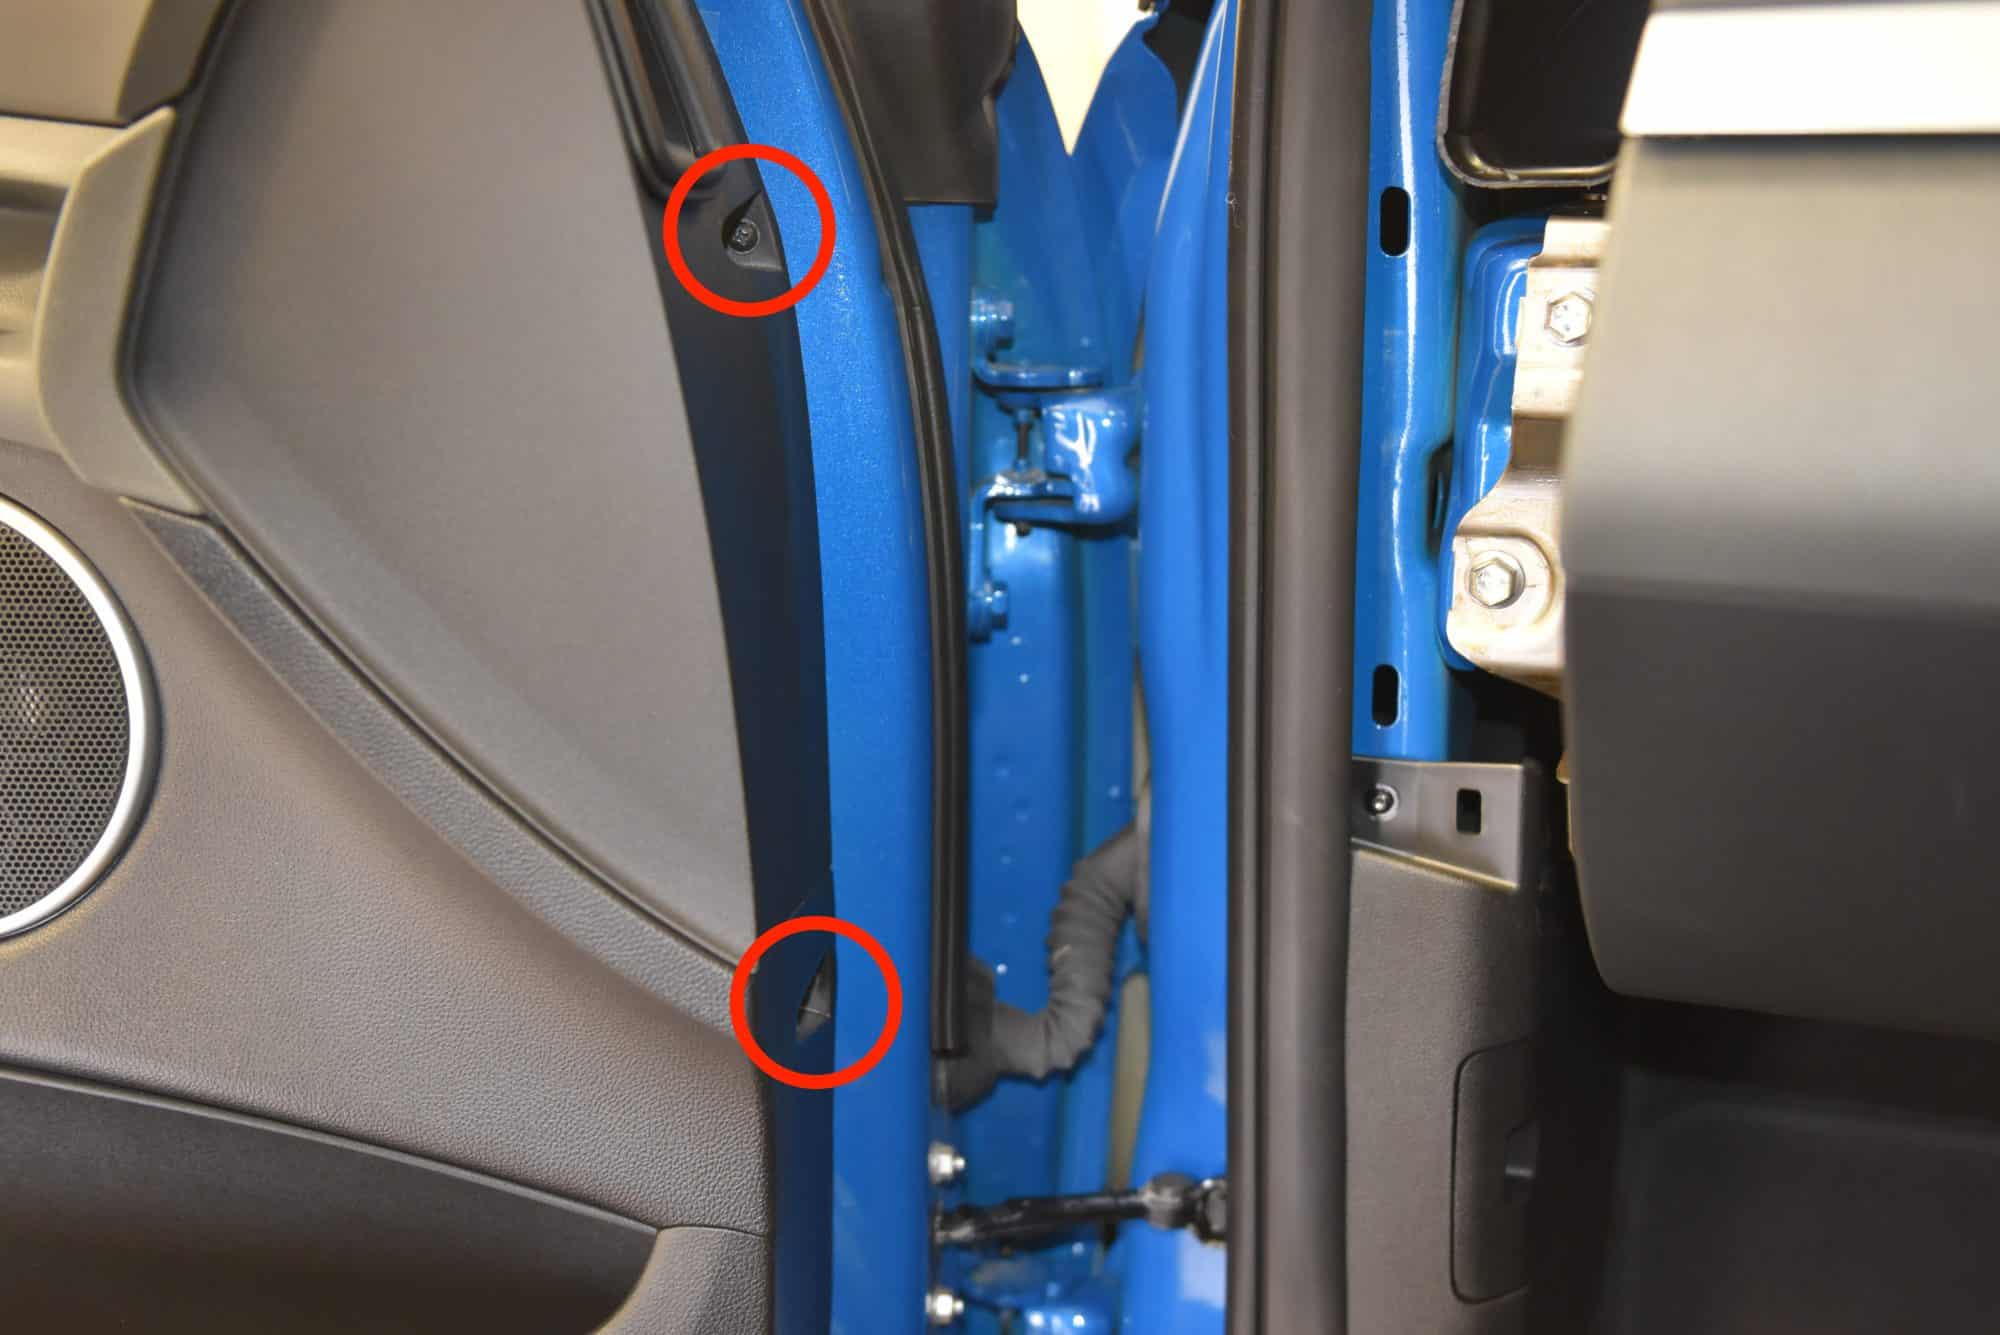
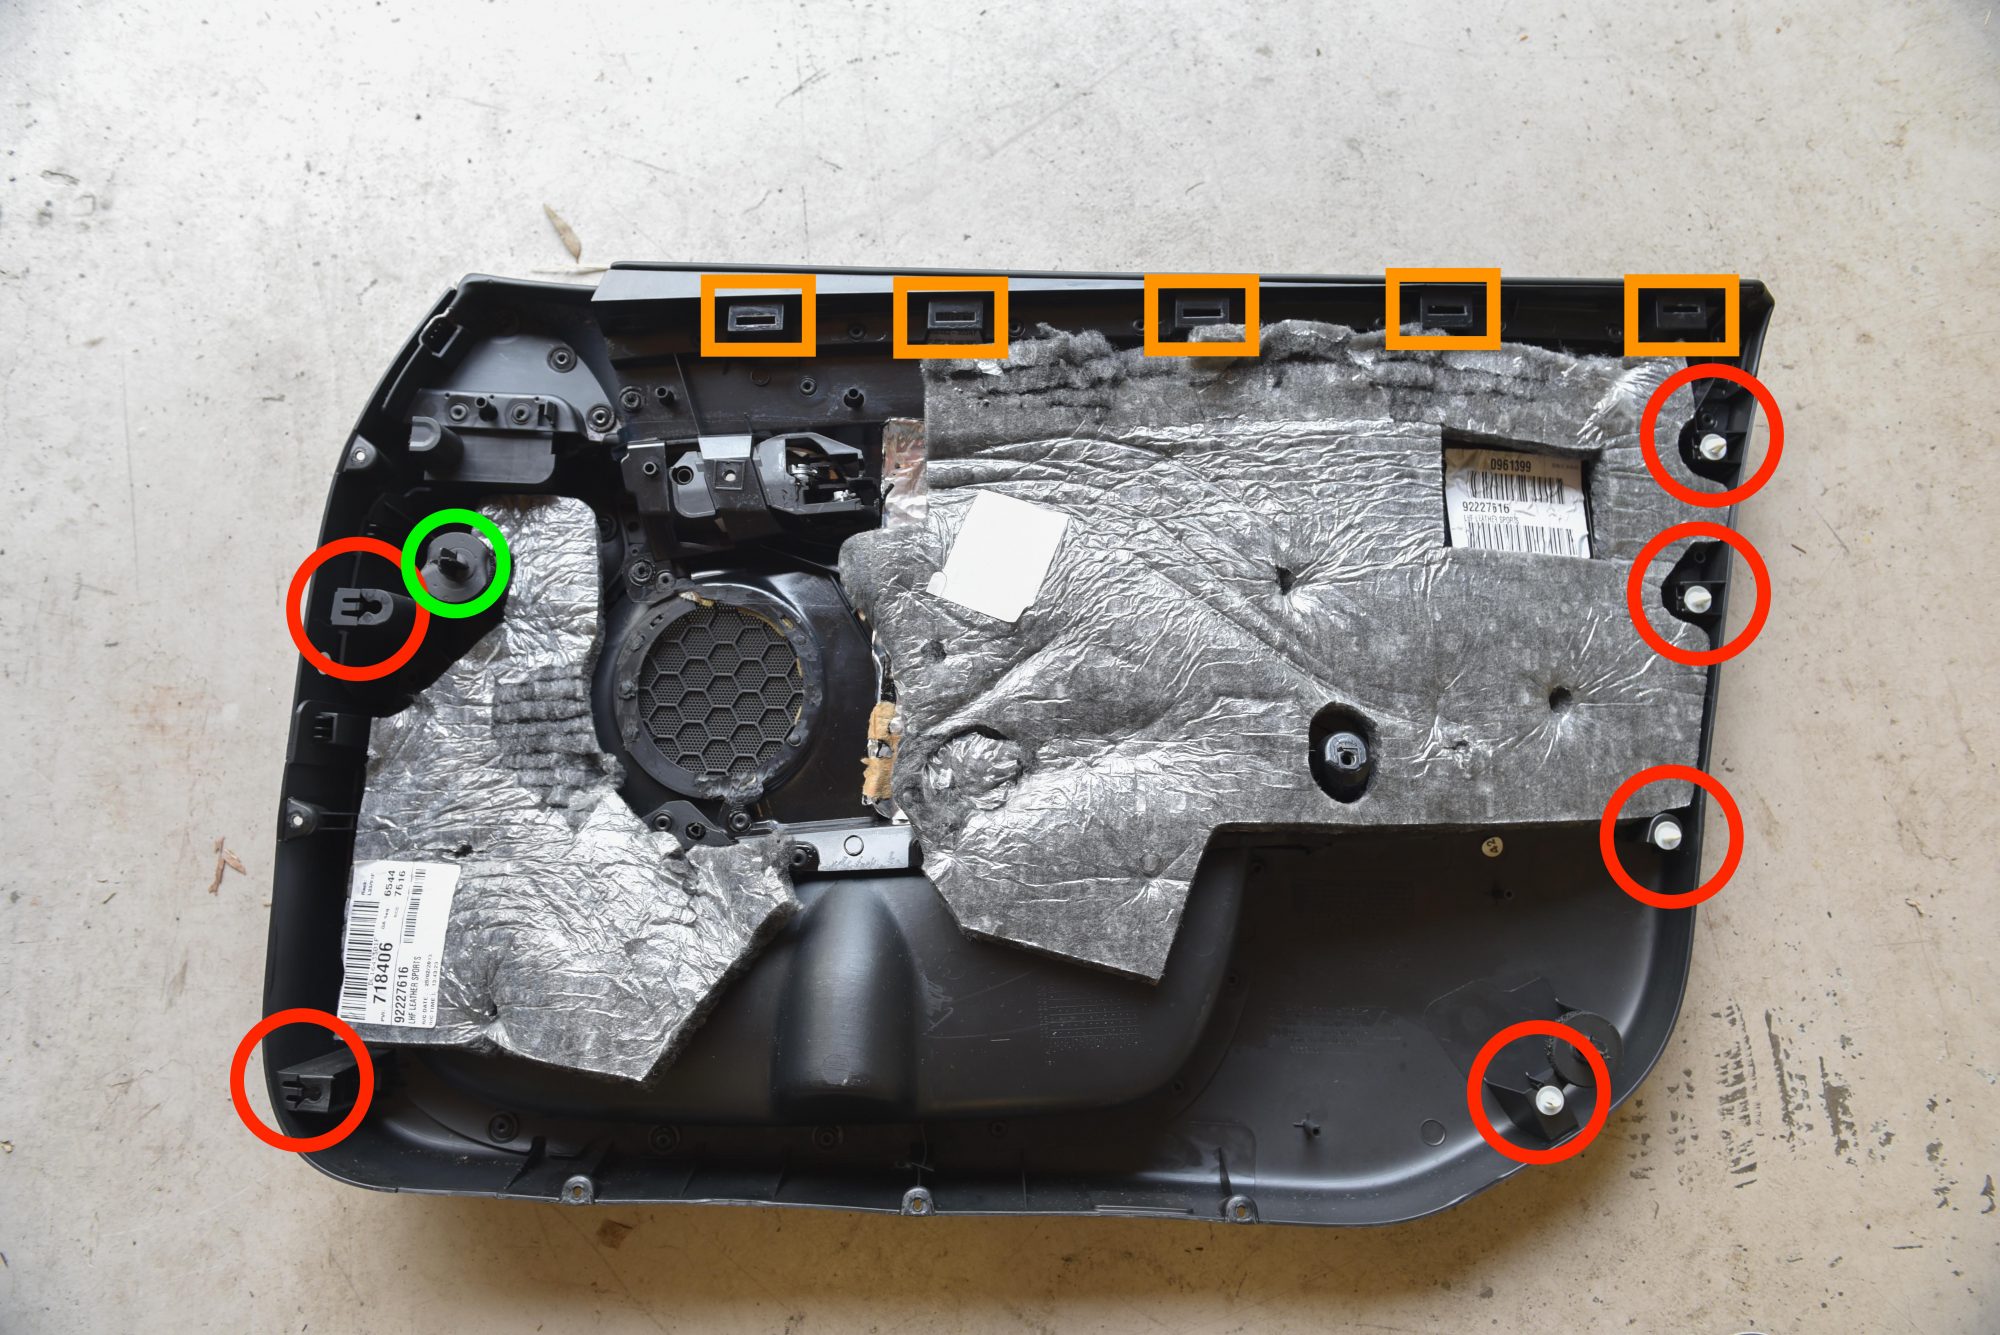
- Pull firmly on the handle and base of the door trim to release all the RED clips.
- The door will now act as a hinge on the remaining ORANGE clips. Working from the outermost edge of the door, pry each clip off with a screwdriver or a firm pull. It is easy to access each clip by looking underneath the door trim.
Did you find this guide helpful? Consider sharing it to help other car enthusiasts
Facebook
Twitter
This Post Has 10 Comments
Brilliant! Simple to follow.
Thank you, very easy to follow. Operation with 2010 VE Calais V, is exactly same except you have the added Underdoor Light (Blue Wire goes in front , Black in back) of globe attachments.
Thank you Darren! Its good to know the guide covers all VEs.
Thanks mate , wife bought a 2010 Calais V , Someone must have grabbed the interior handles with a ring on and split the silver coating, the silver coating had started to peel off, Only door handle I could source was from a standard VE. the outer plastics are a completely different shape. So I needed to replace handles only. The unit that actually holds the silver handles is exactly the same and with a touch of manipulation was able to be swapped directly over. I took pics if you would like them to show.
Hi Darren, We would love to see the photos. I will send you an email.
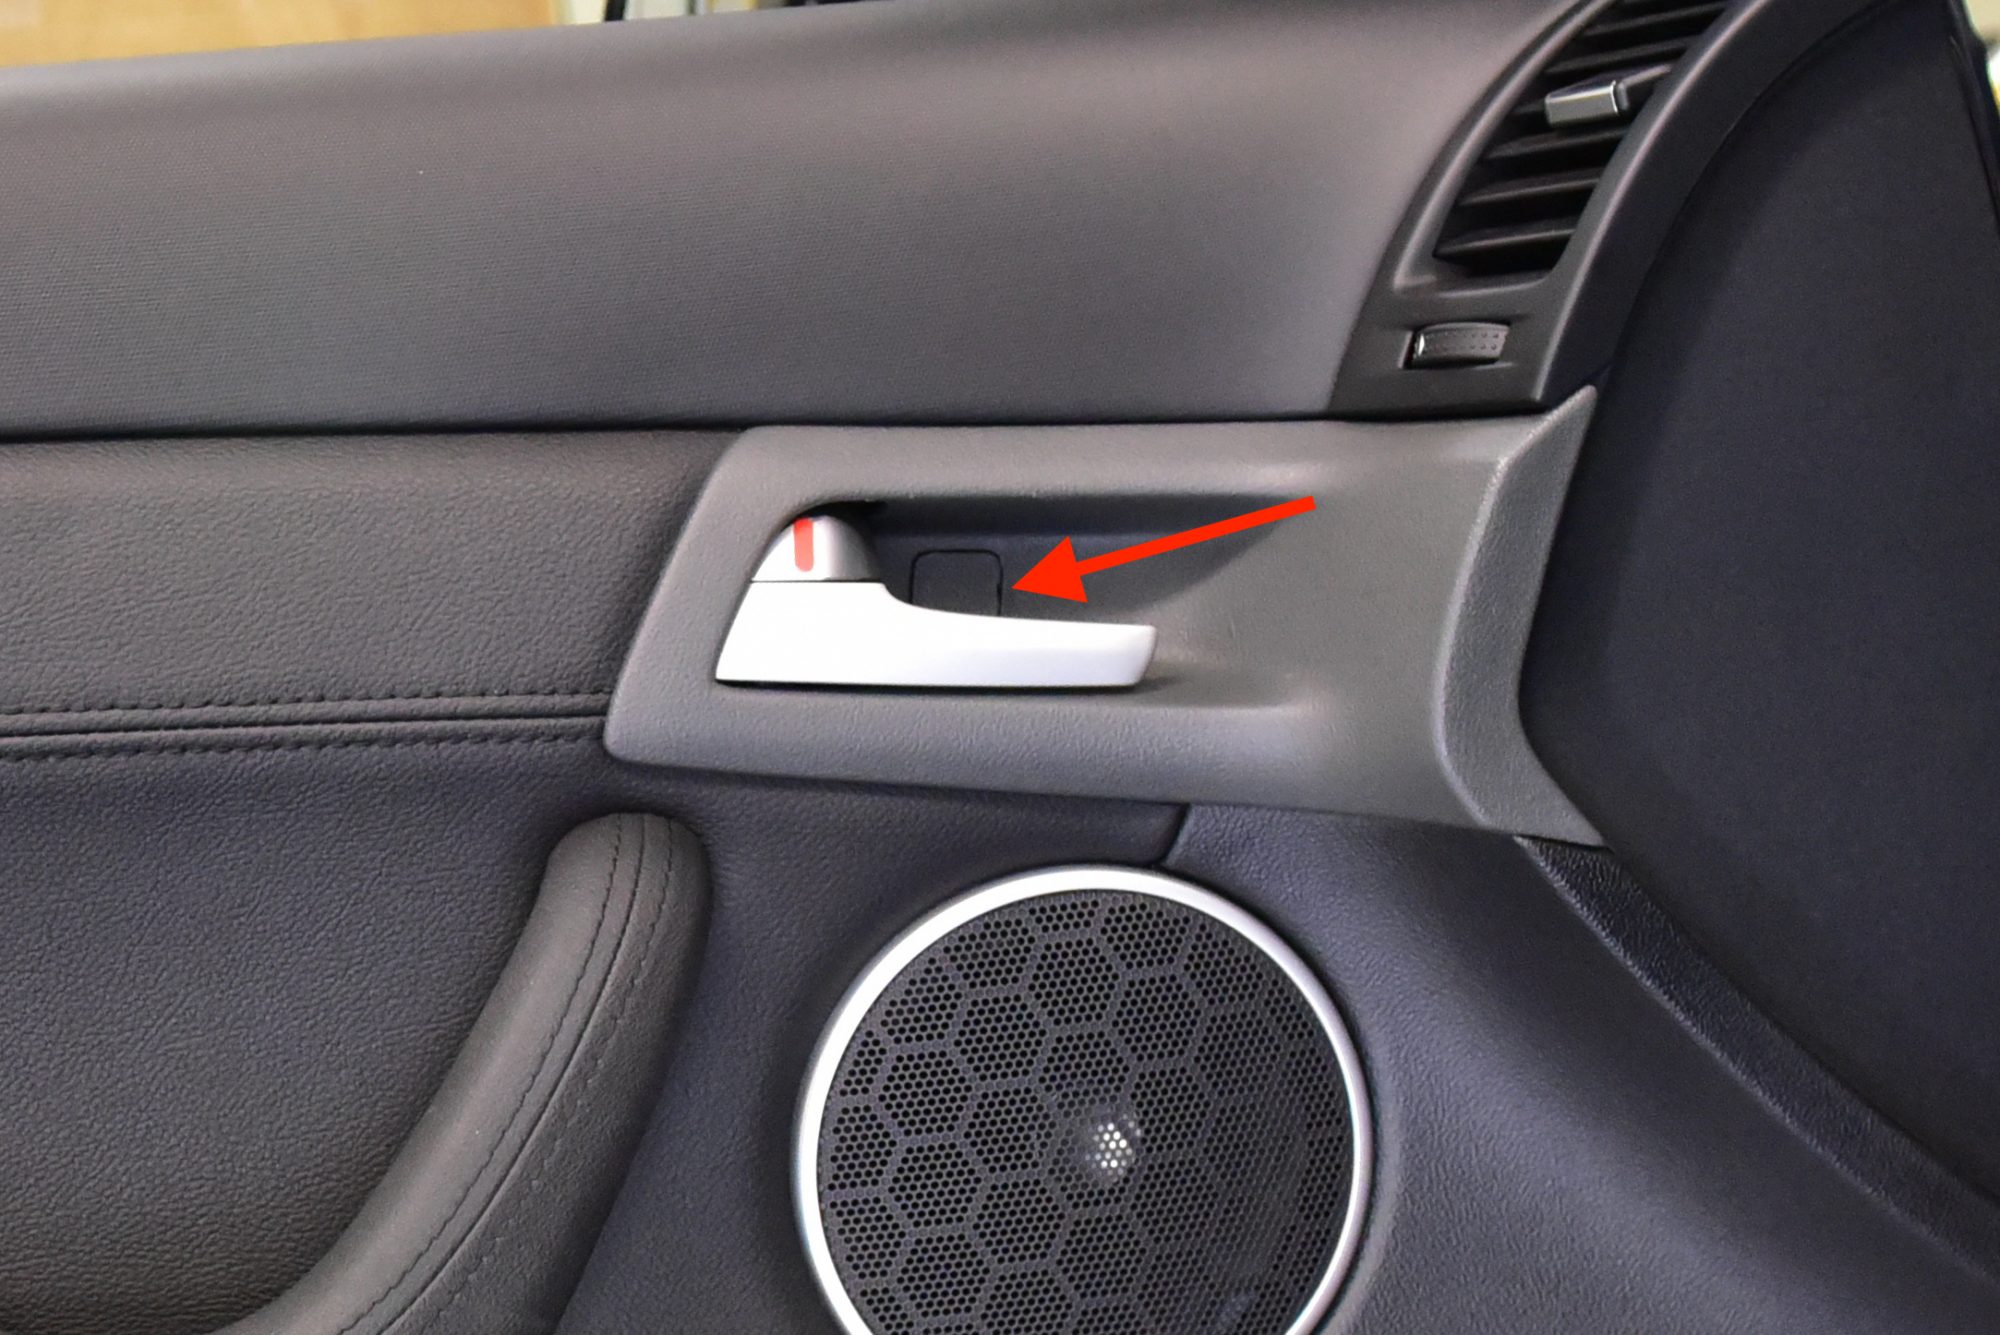
Further note… Nick, I found out last night while changing interior door handles that on the 2010 the screw that comes out from under the arm of the trim ( while looking very similar) is slightly different in thread size than the 2 inner edge and 3 under door screws. It will not screw in anywhere else when putting back together so should not be forced.
Good Tip, thank you!
Excellent instructions. Needed to replace the window regulator and having a heads up on where the clips are and how to unclip them is a real help. Too many other cars the clips break and then they are hard to source. This was simple. I had two screws in the handle of my VE Berlina not just the one which locked the trim on the door so if it doesn’t start to come off don’t force it look for any additional screws before just yanking it off.
I had 2 screws in my 08 Omega as well. Wondered why it wasn’t coming away lol.
Great instructions. One question, how do you get the inner handle and surround out of the door card? I can’t see any screws anywhere holding it in but I don’t want to just yank it out. Cheers