AutoInstruct presents a tutorial on how to remove the rear door trims on a VE Commodore.
For removal of the front door trims, see our tutorial here.
Difficulty Rating
Moderate
Tools/Parts Required
TORX Driver Set
Phillips Screwdriver
Small Flathead Screwdriver
Step 1
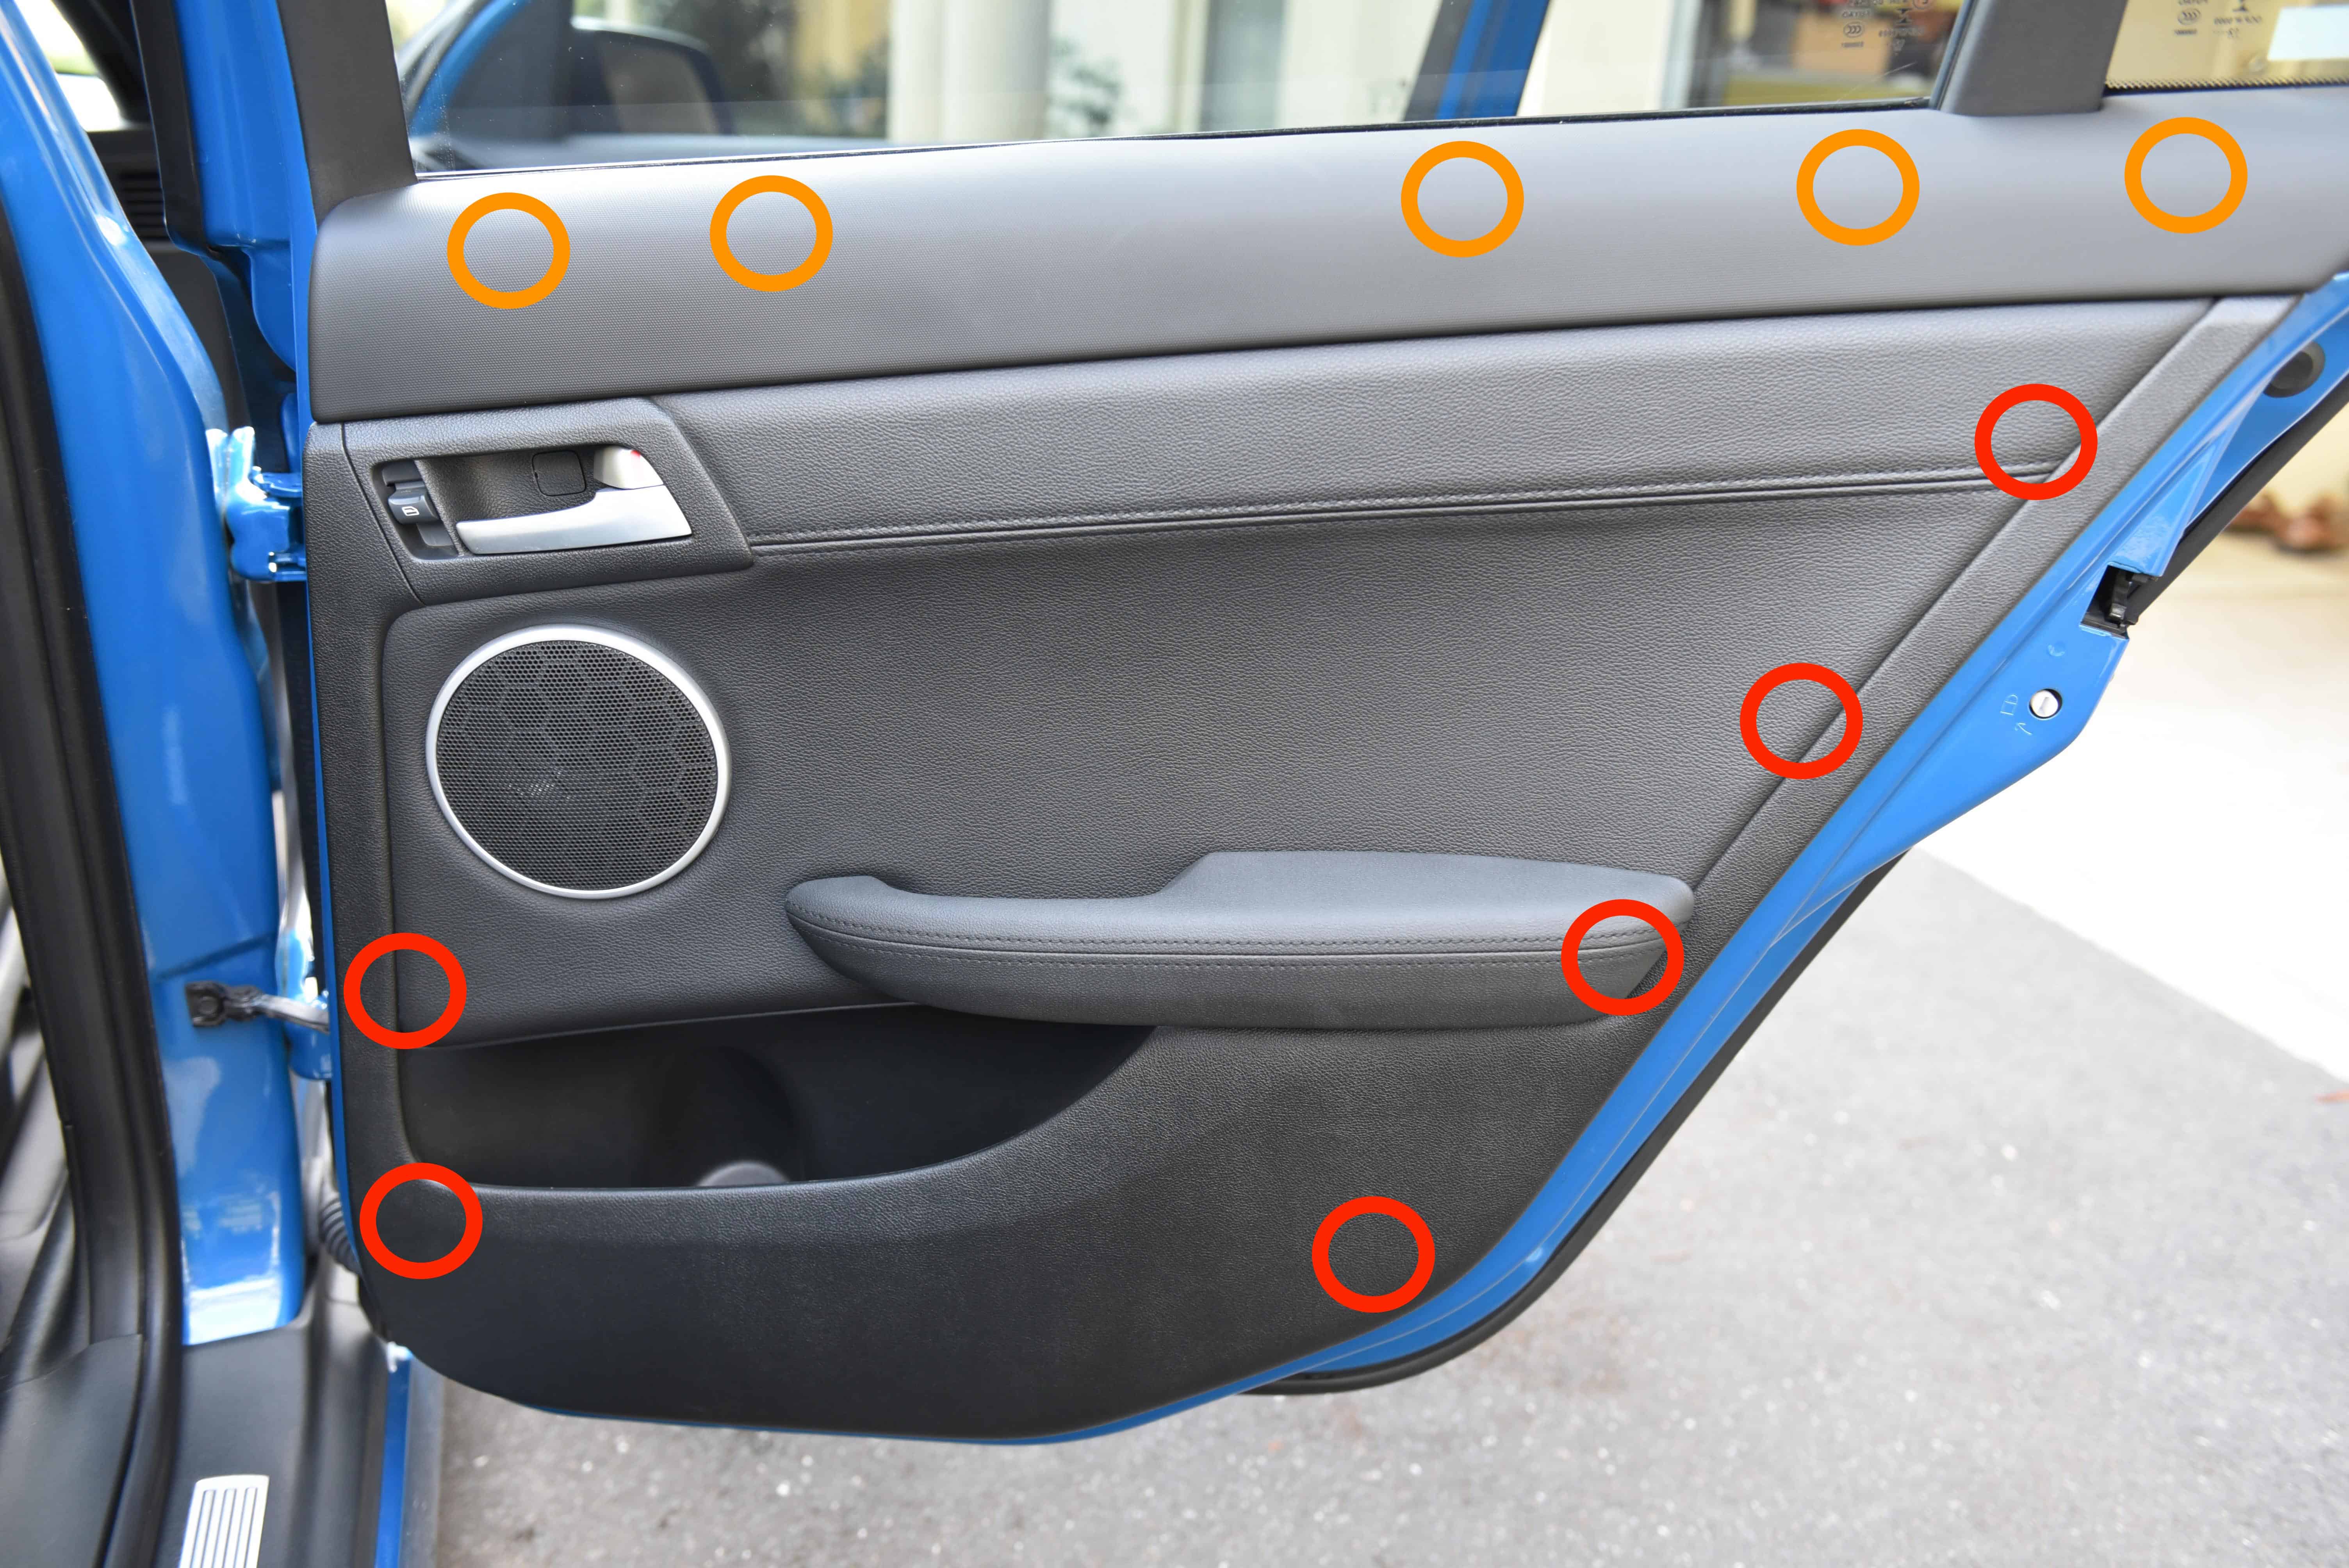
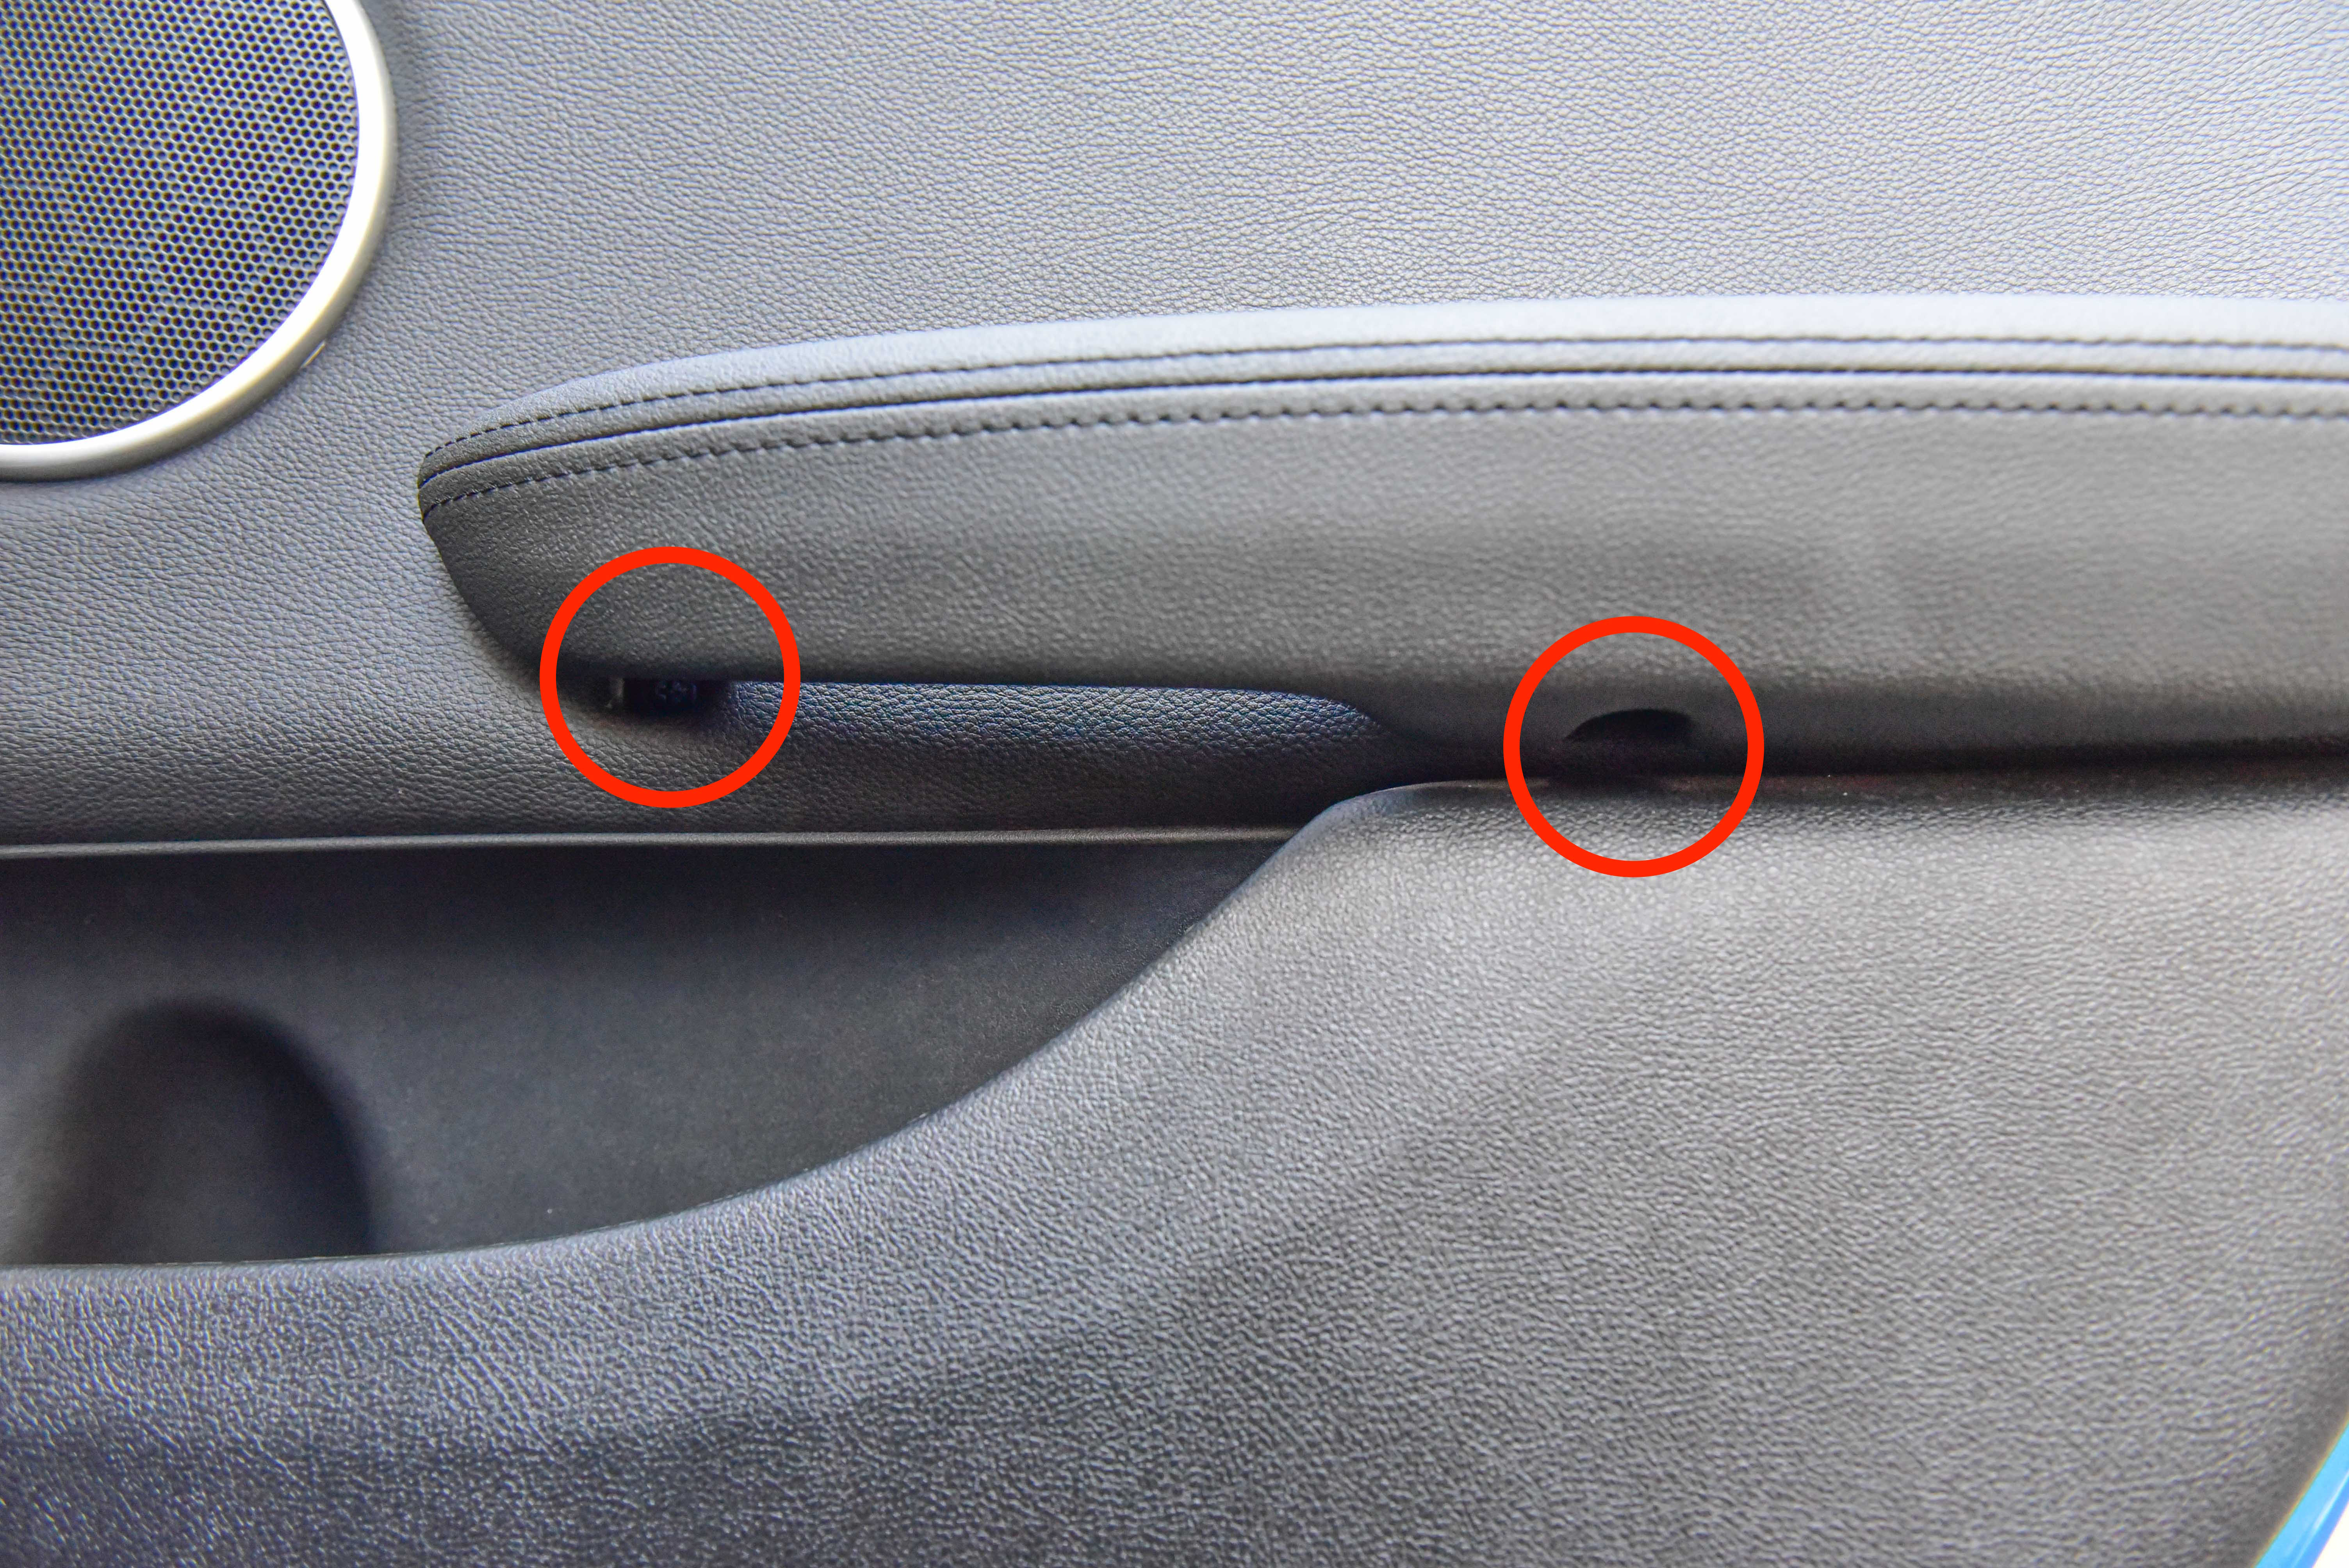
Before we start, the following image will show you what to expect.
The red circles signify basic clips which will be released when you pull on the door trim in Step 5.
The orange circles are flat clips which are somewhat difficult to remove. These will be released after the red clips.
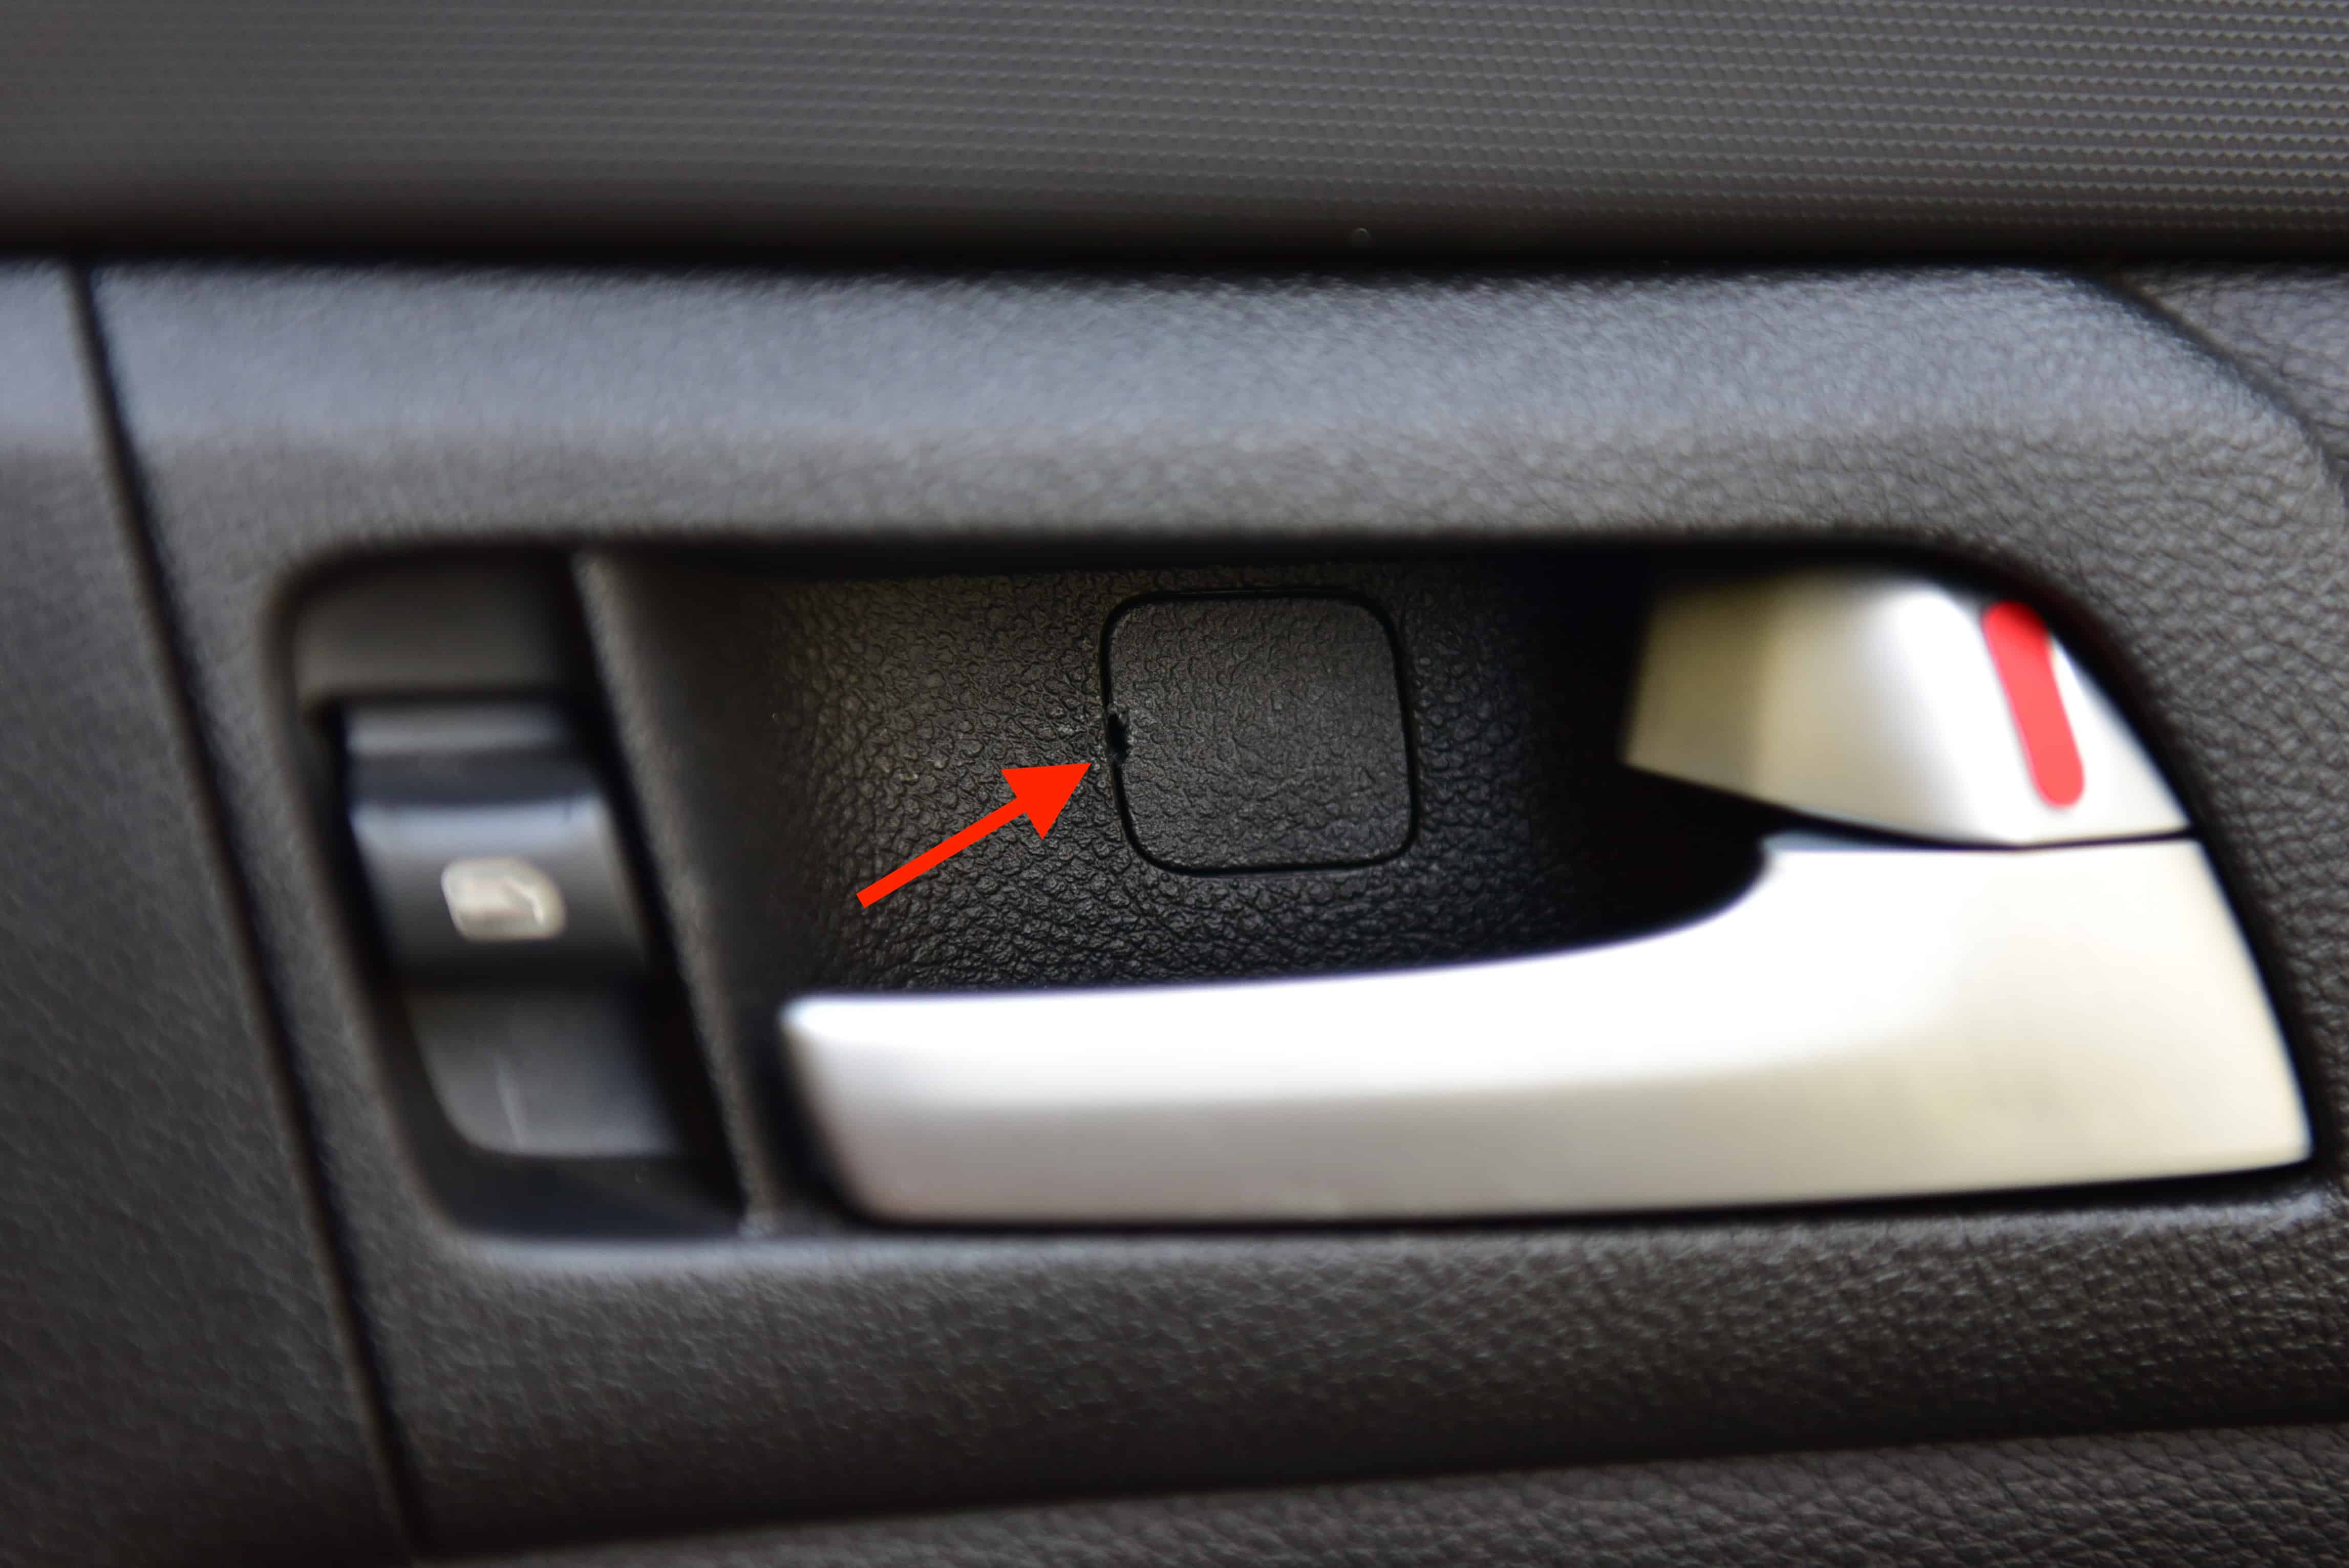
Step 2
Using a small flathead screwdriver, gently pop off this cover.
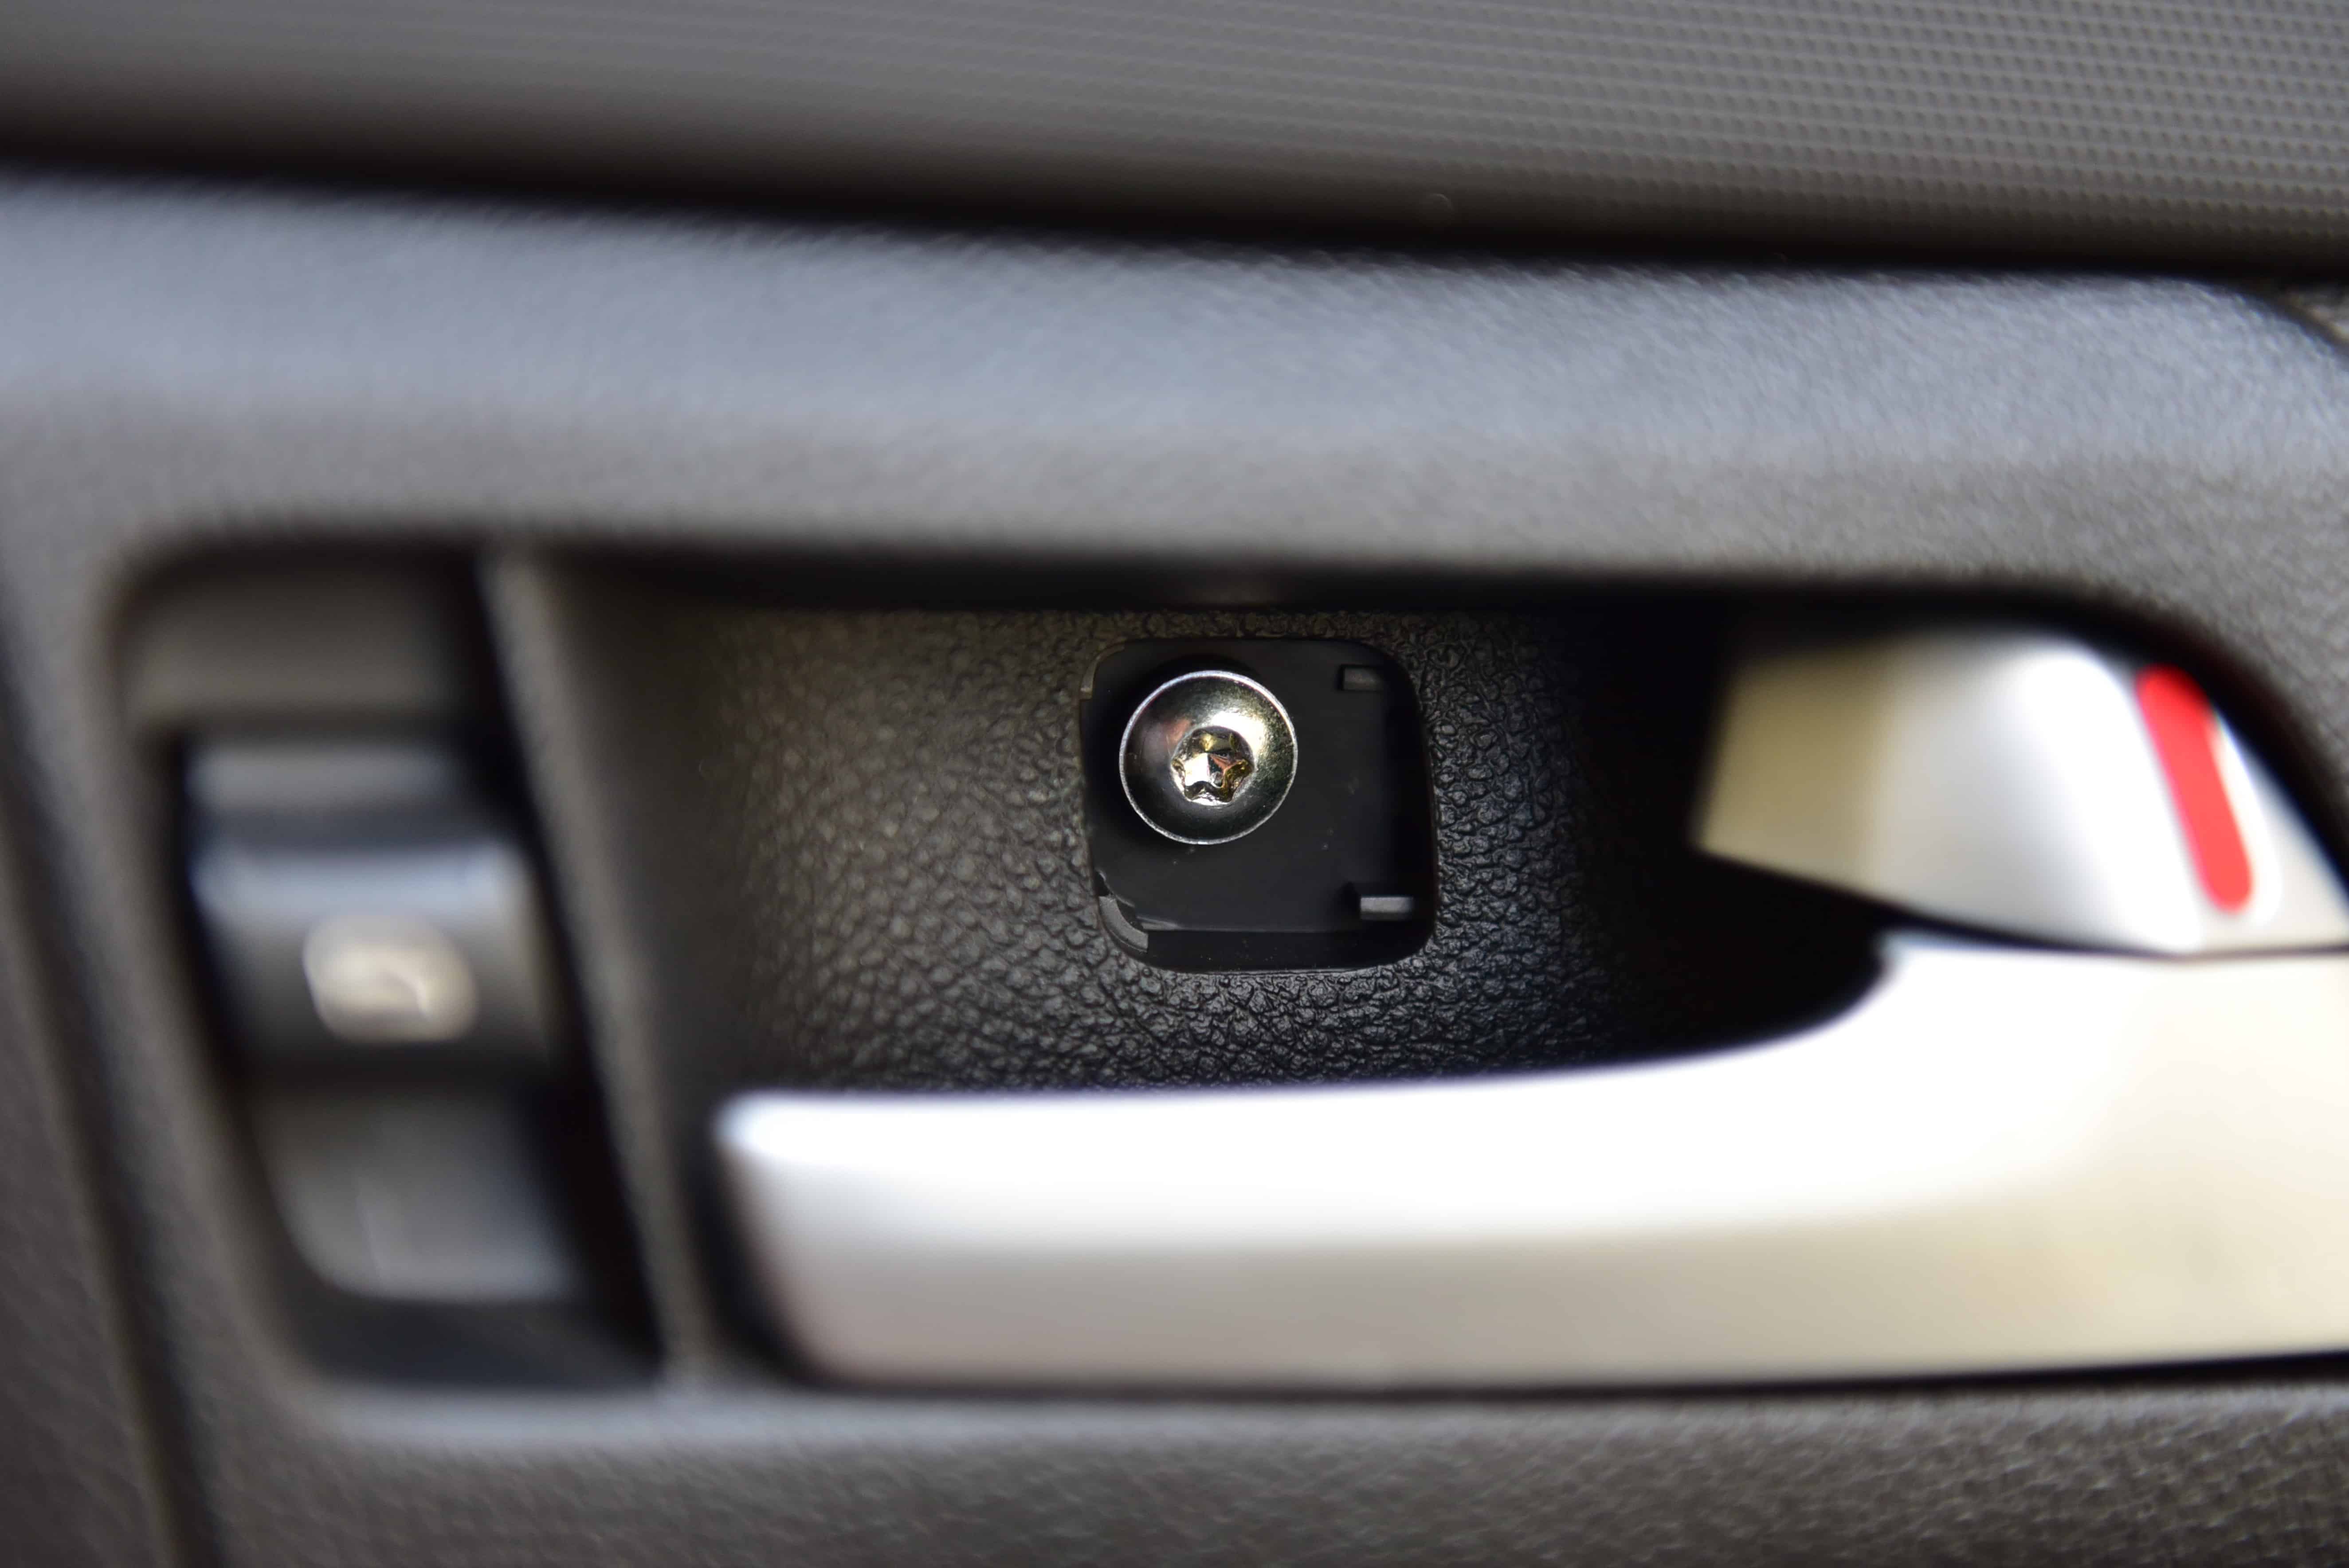
Step 3
Remove this screw using a suitable TORX Driver.
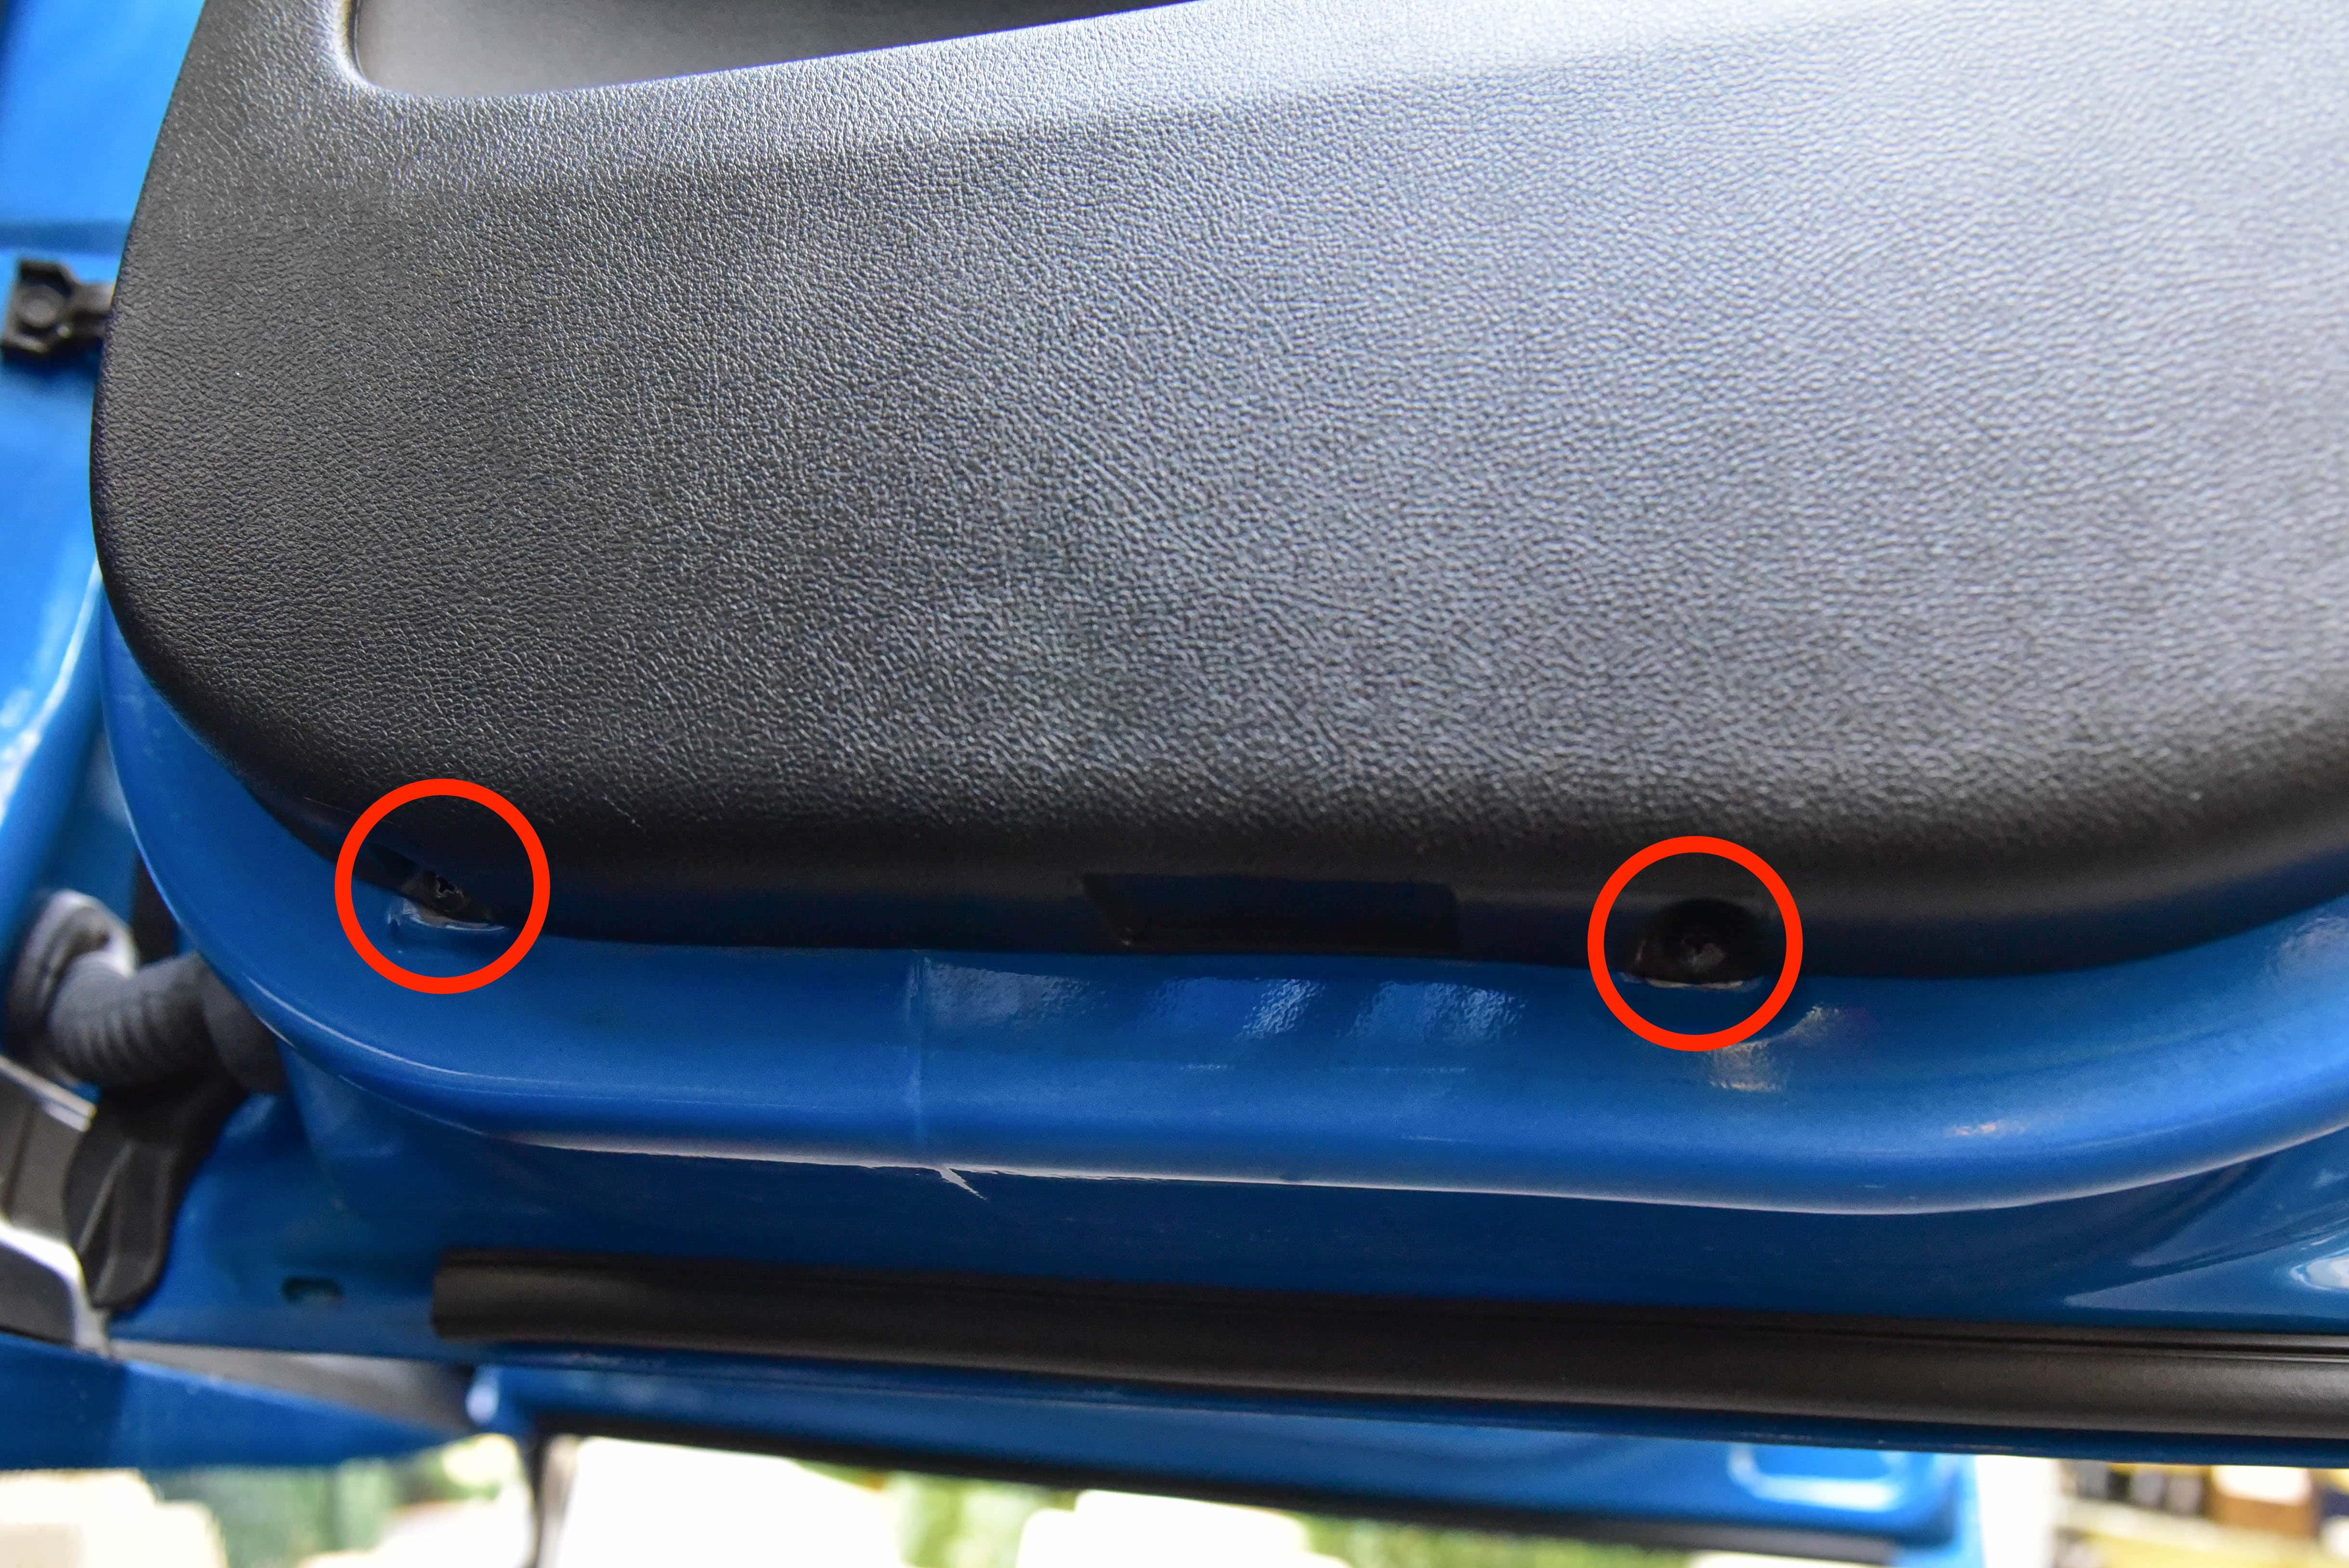
Step 4
Remove the two screws located on the bottom of the door trim.
Step 5
Remove the two screws located under the handle.
Step 6
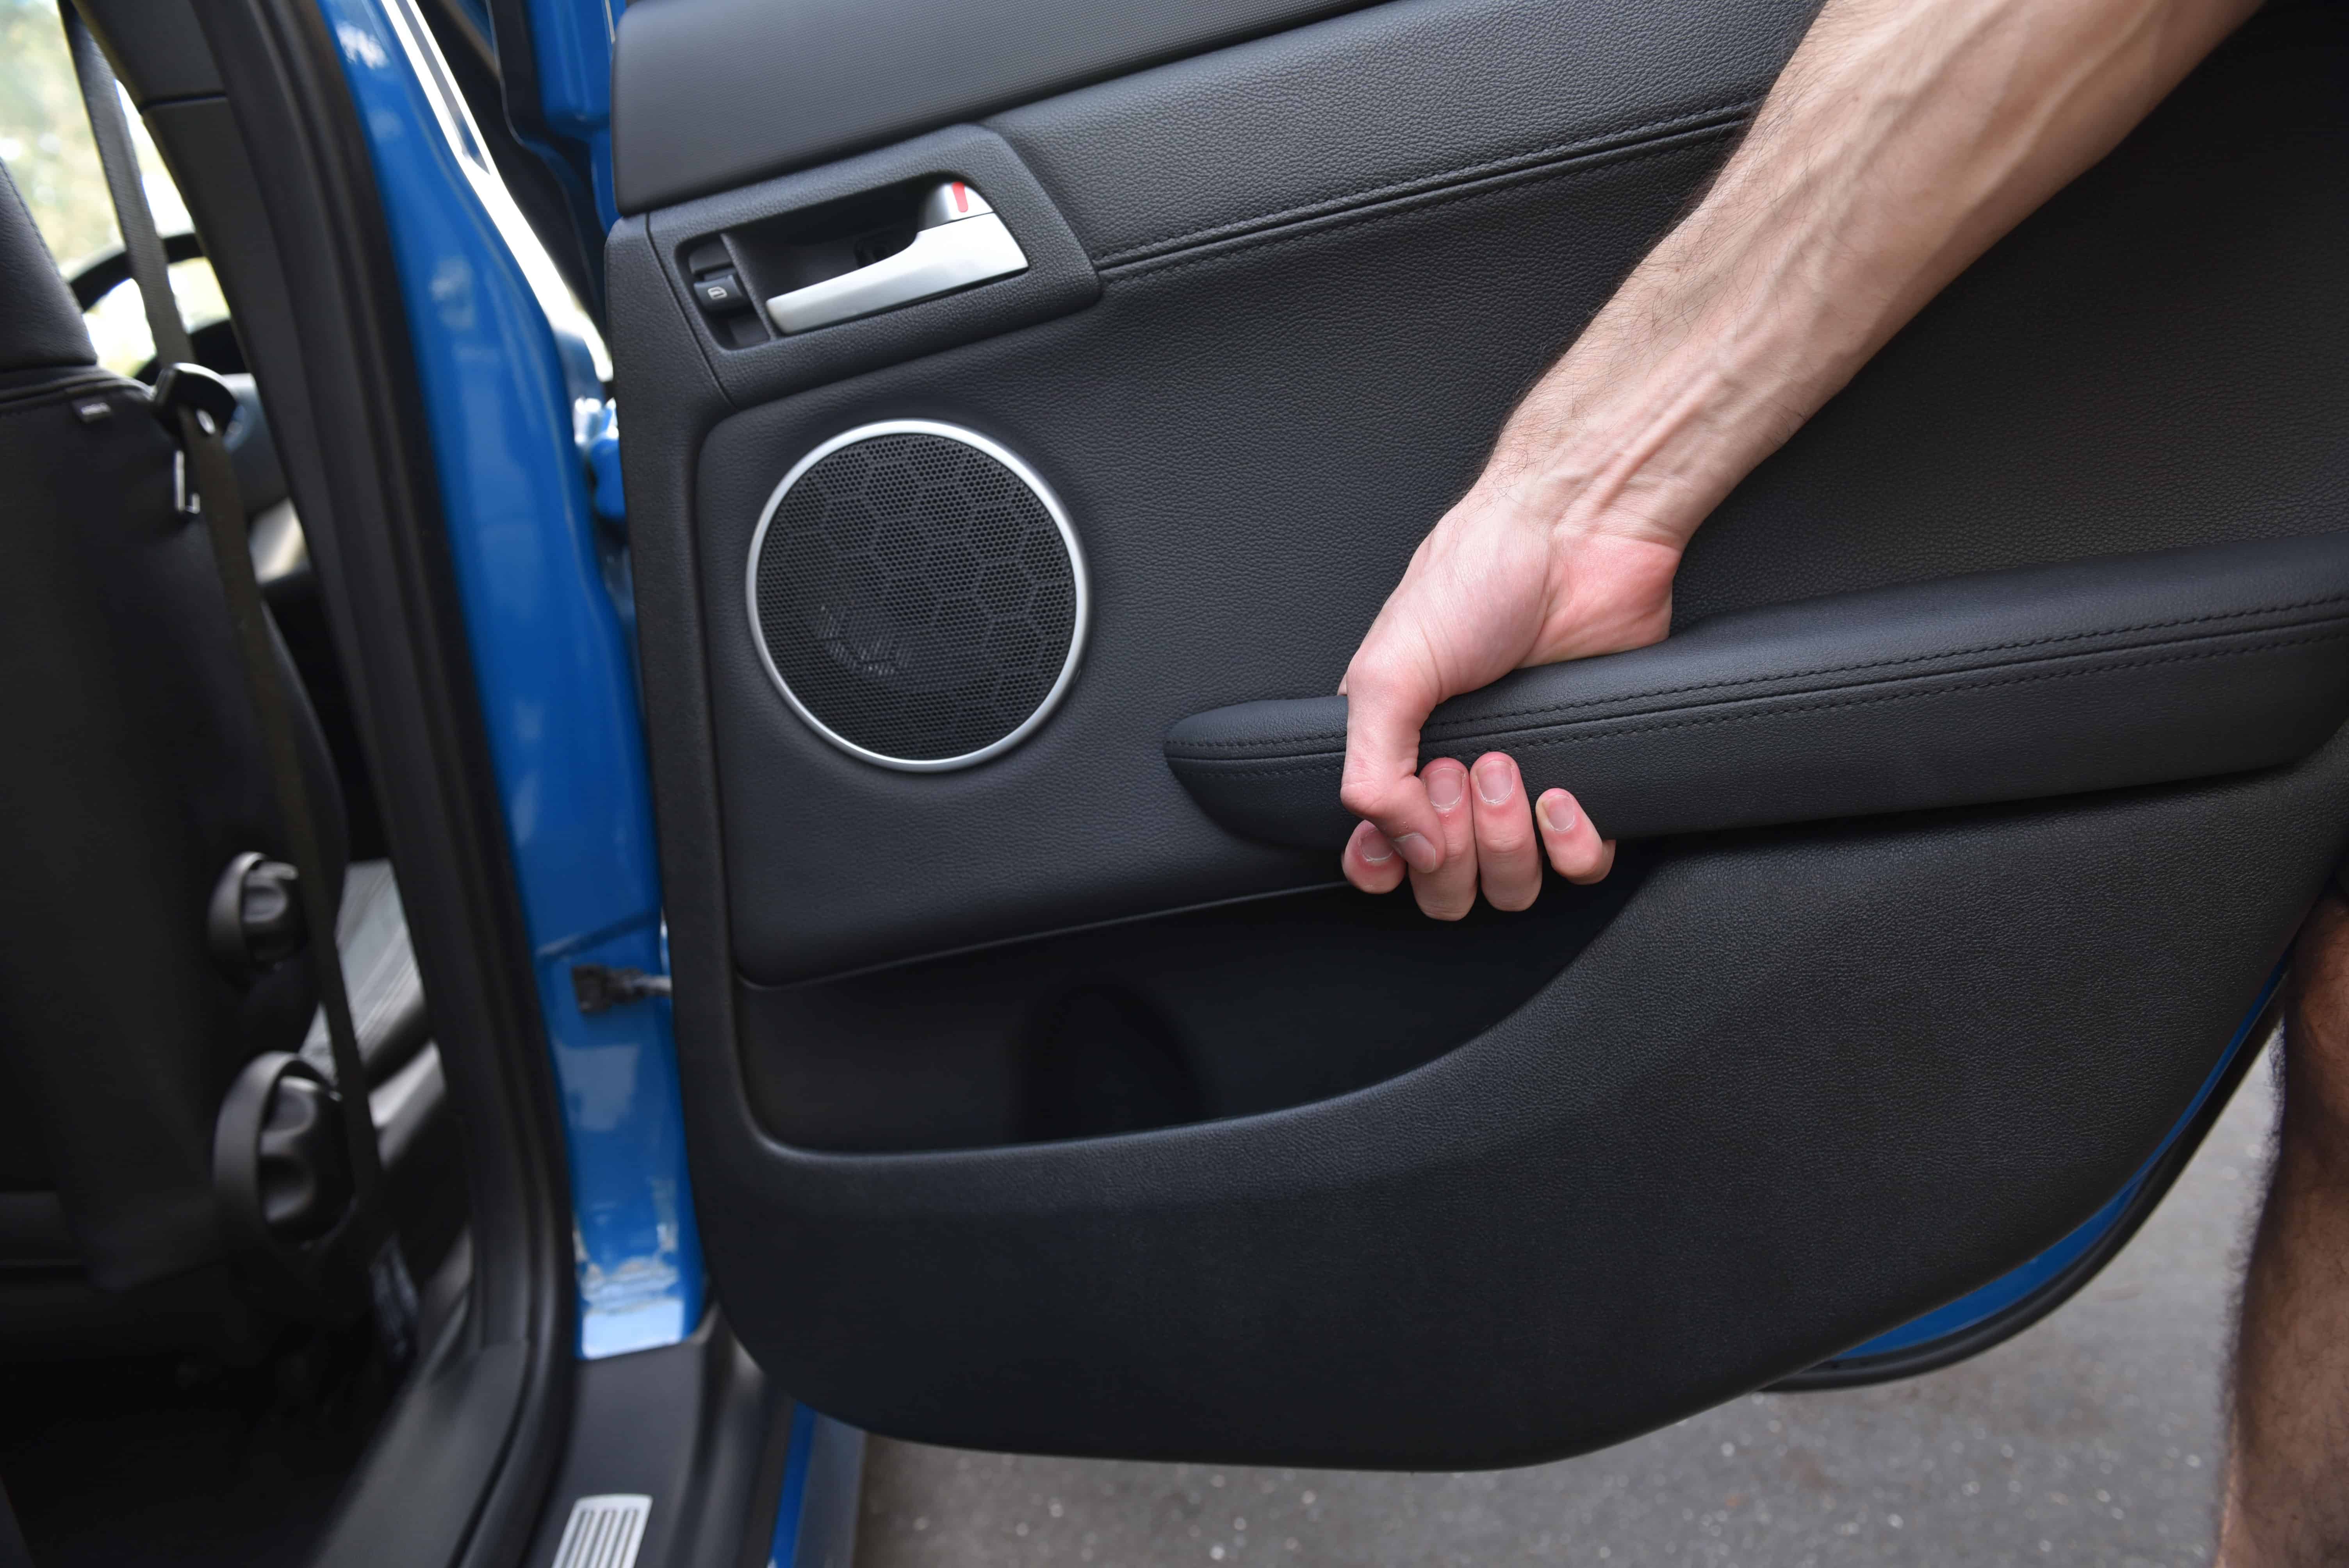
This step is the most difficult of the removal process.
Pull firmly on the handle and base of the door trim to release all the RED clips.
The door will now act as a hinge on the remaining ORANGE clips. Working from the outermost edge of the door, pry each clip off with a screwdriver or a firm pull. It is easy to access each clip by looking underneath the door trim.
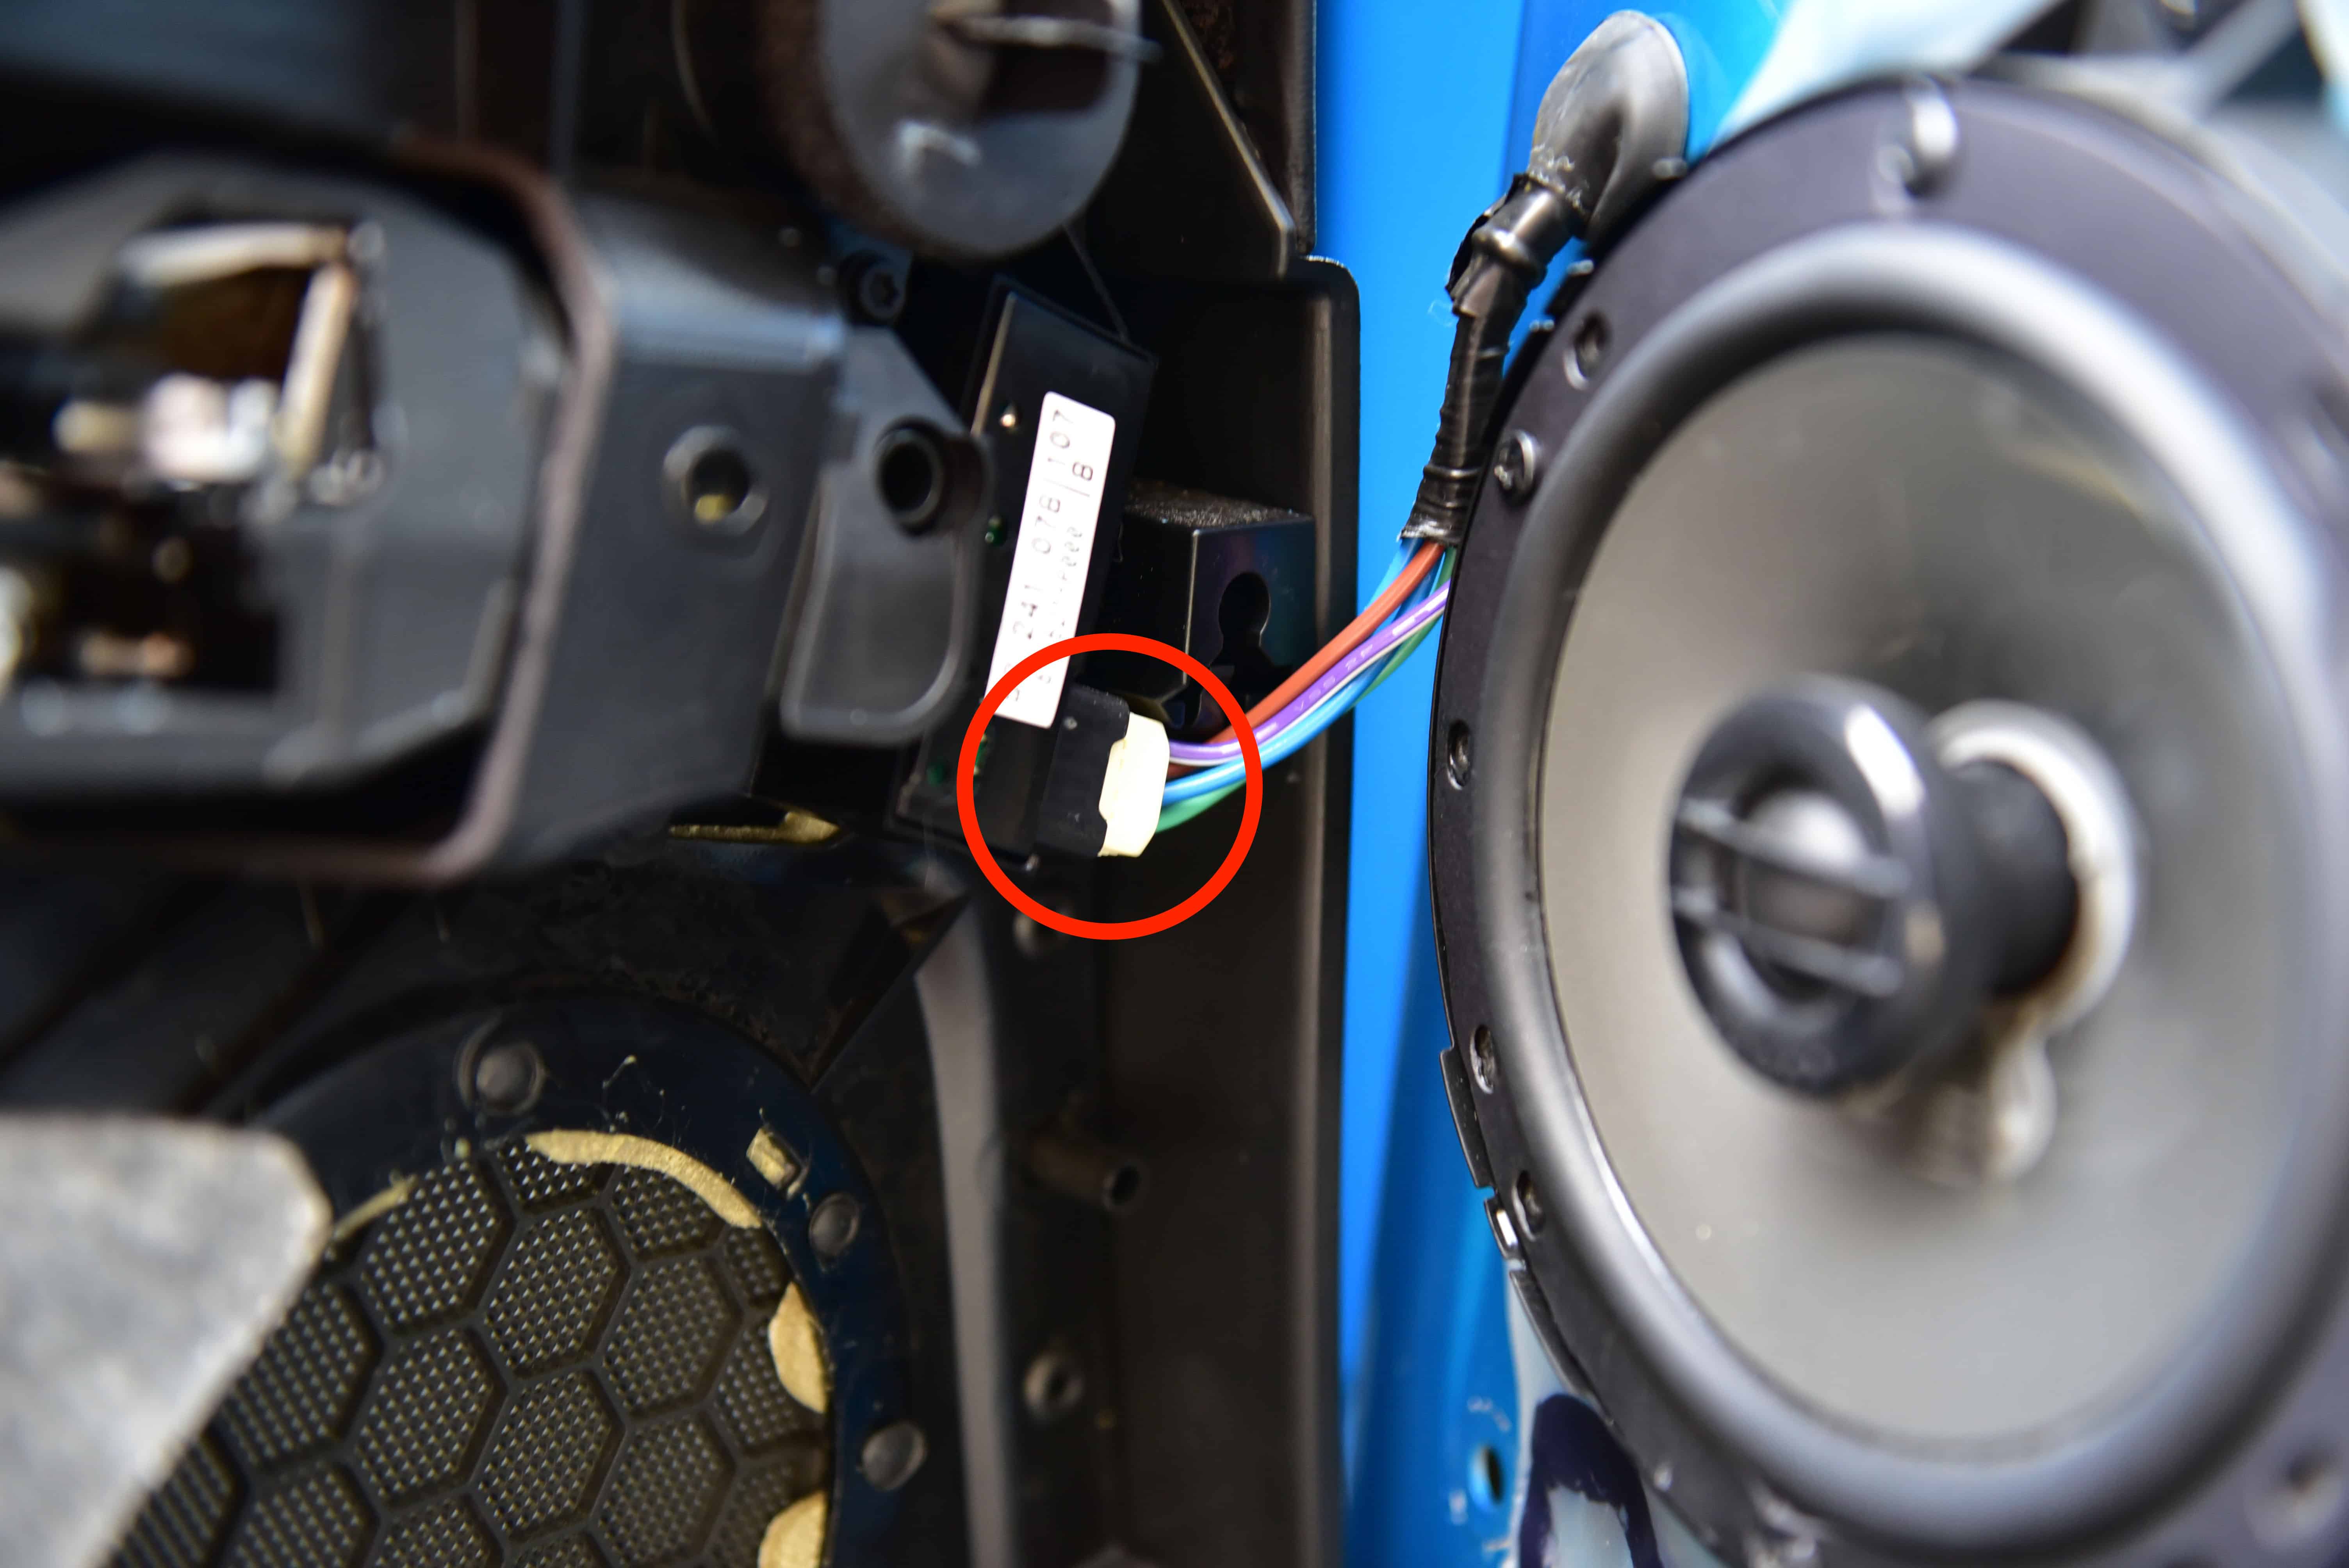
Step 7
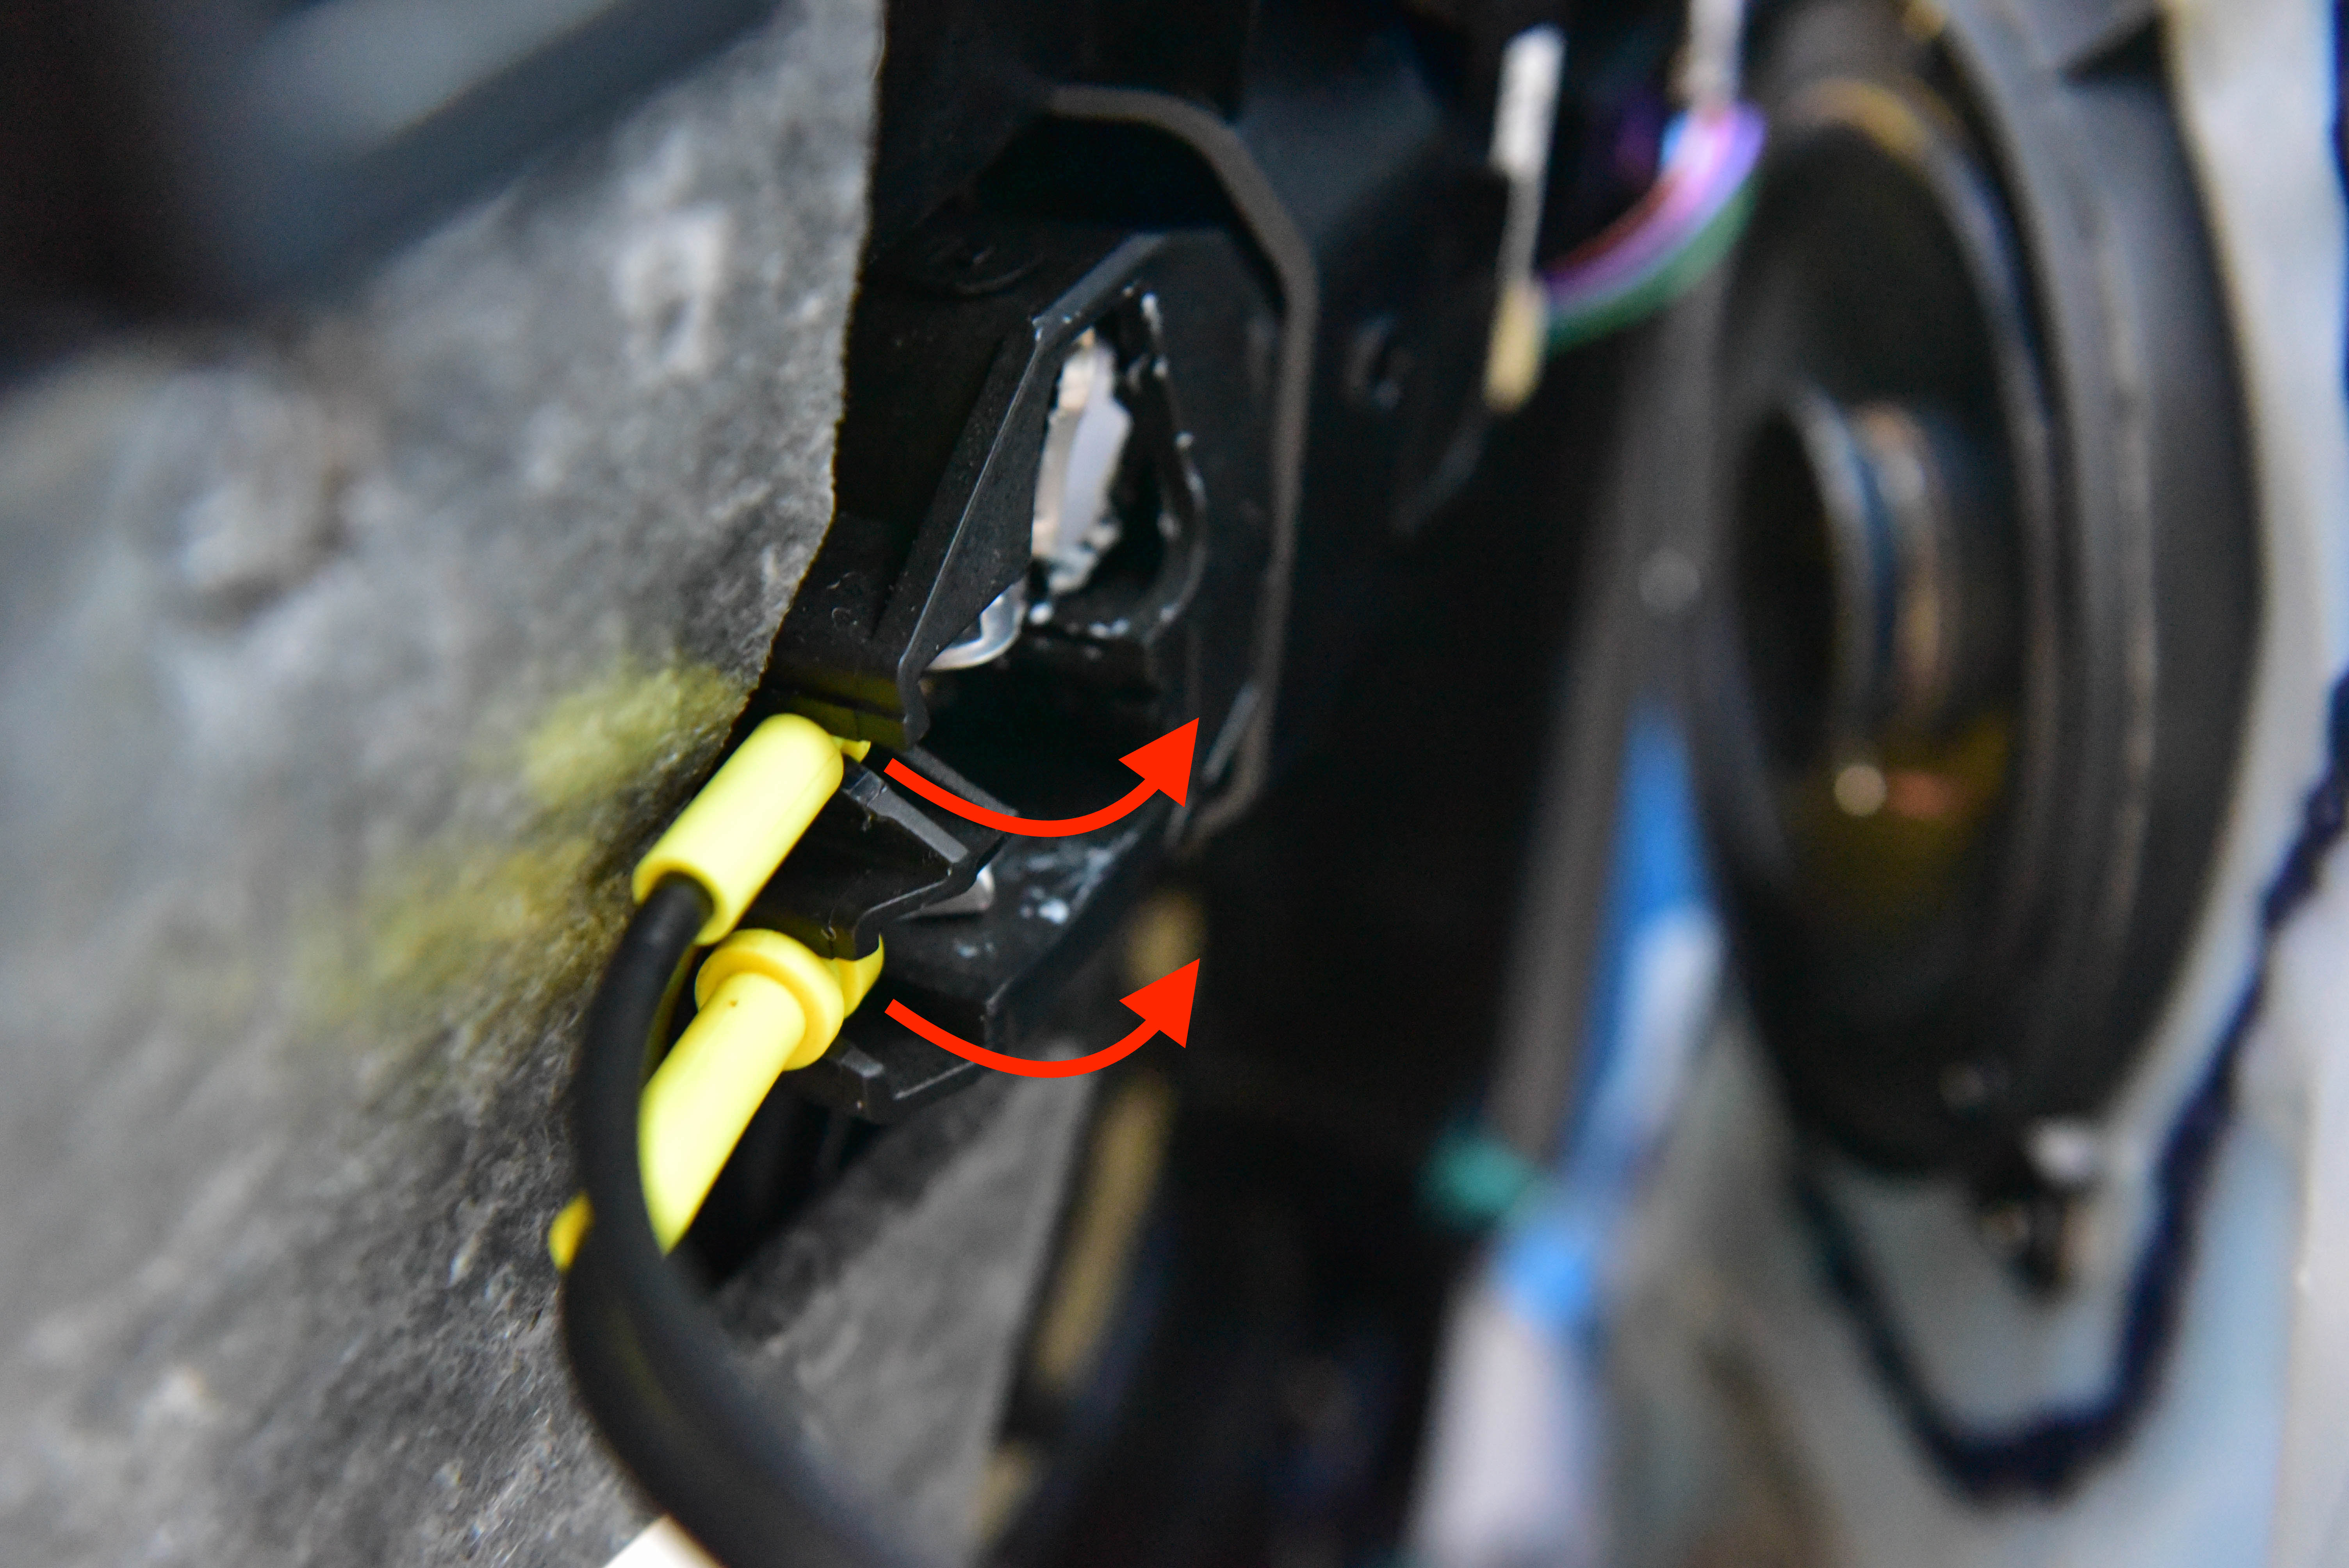
Release the lock mechanism by unclipping both yellow connectors.
Step 8
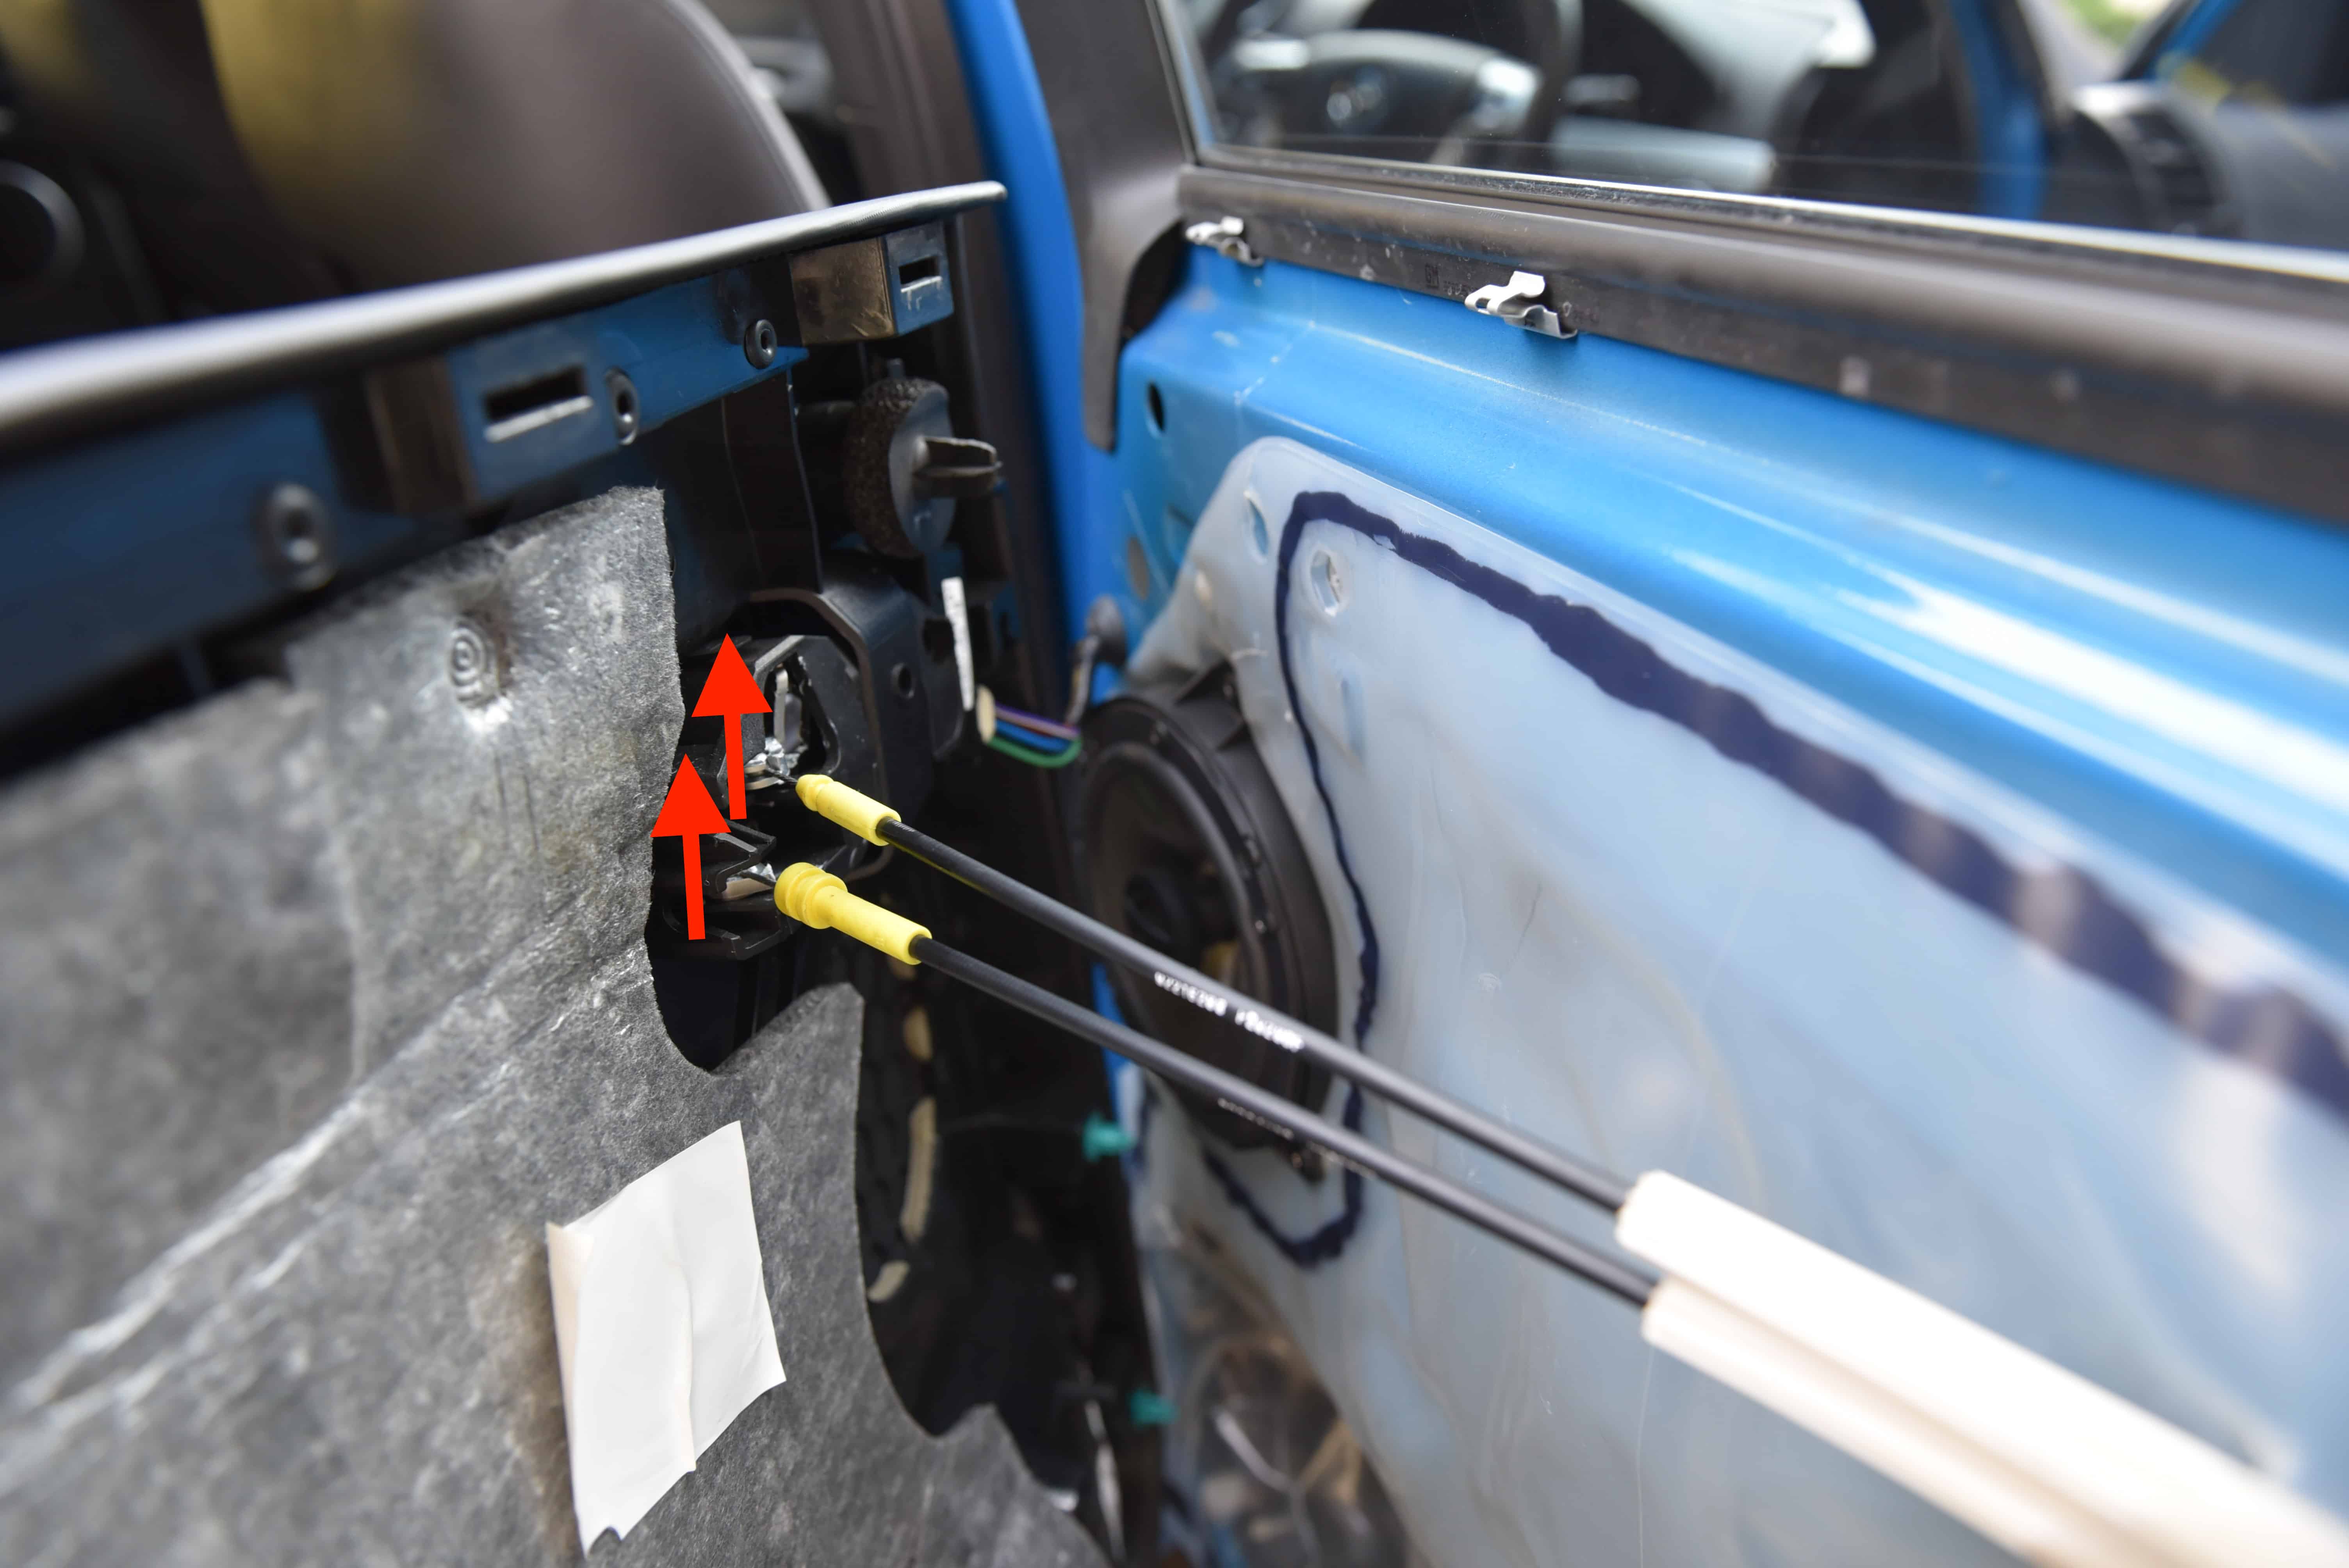
Each wire can now be pulled out of the lock mechanism.
Step 9
Unplug the wiring loom. The trim is now free from the door.
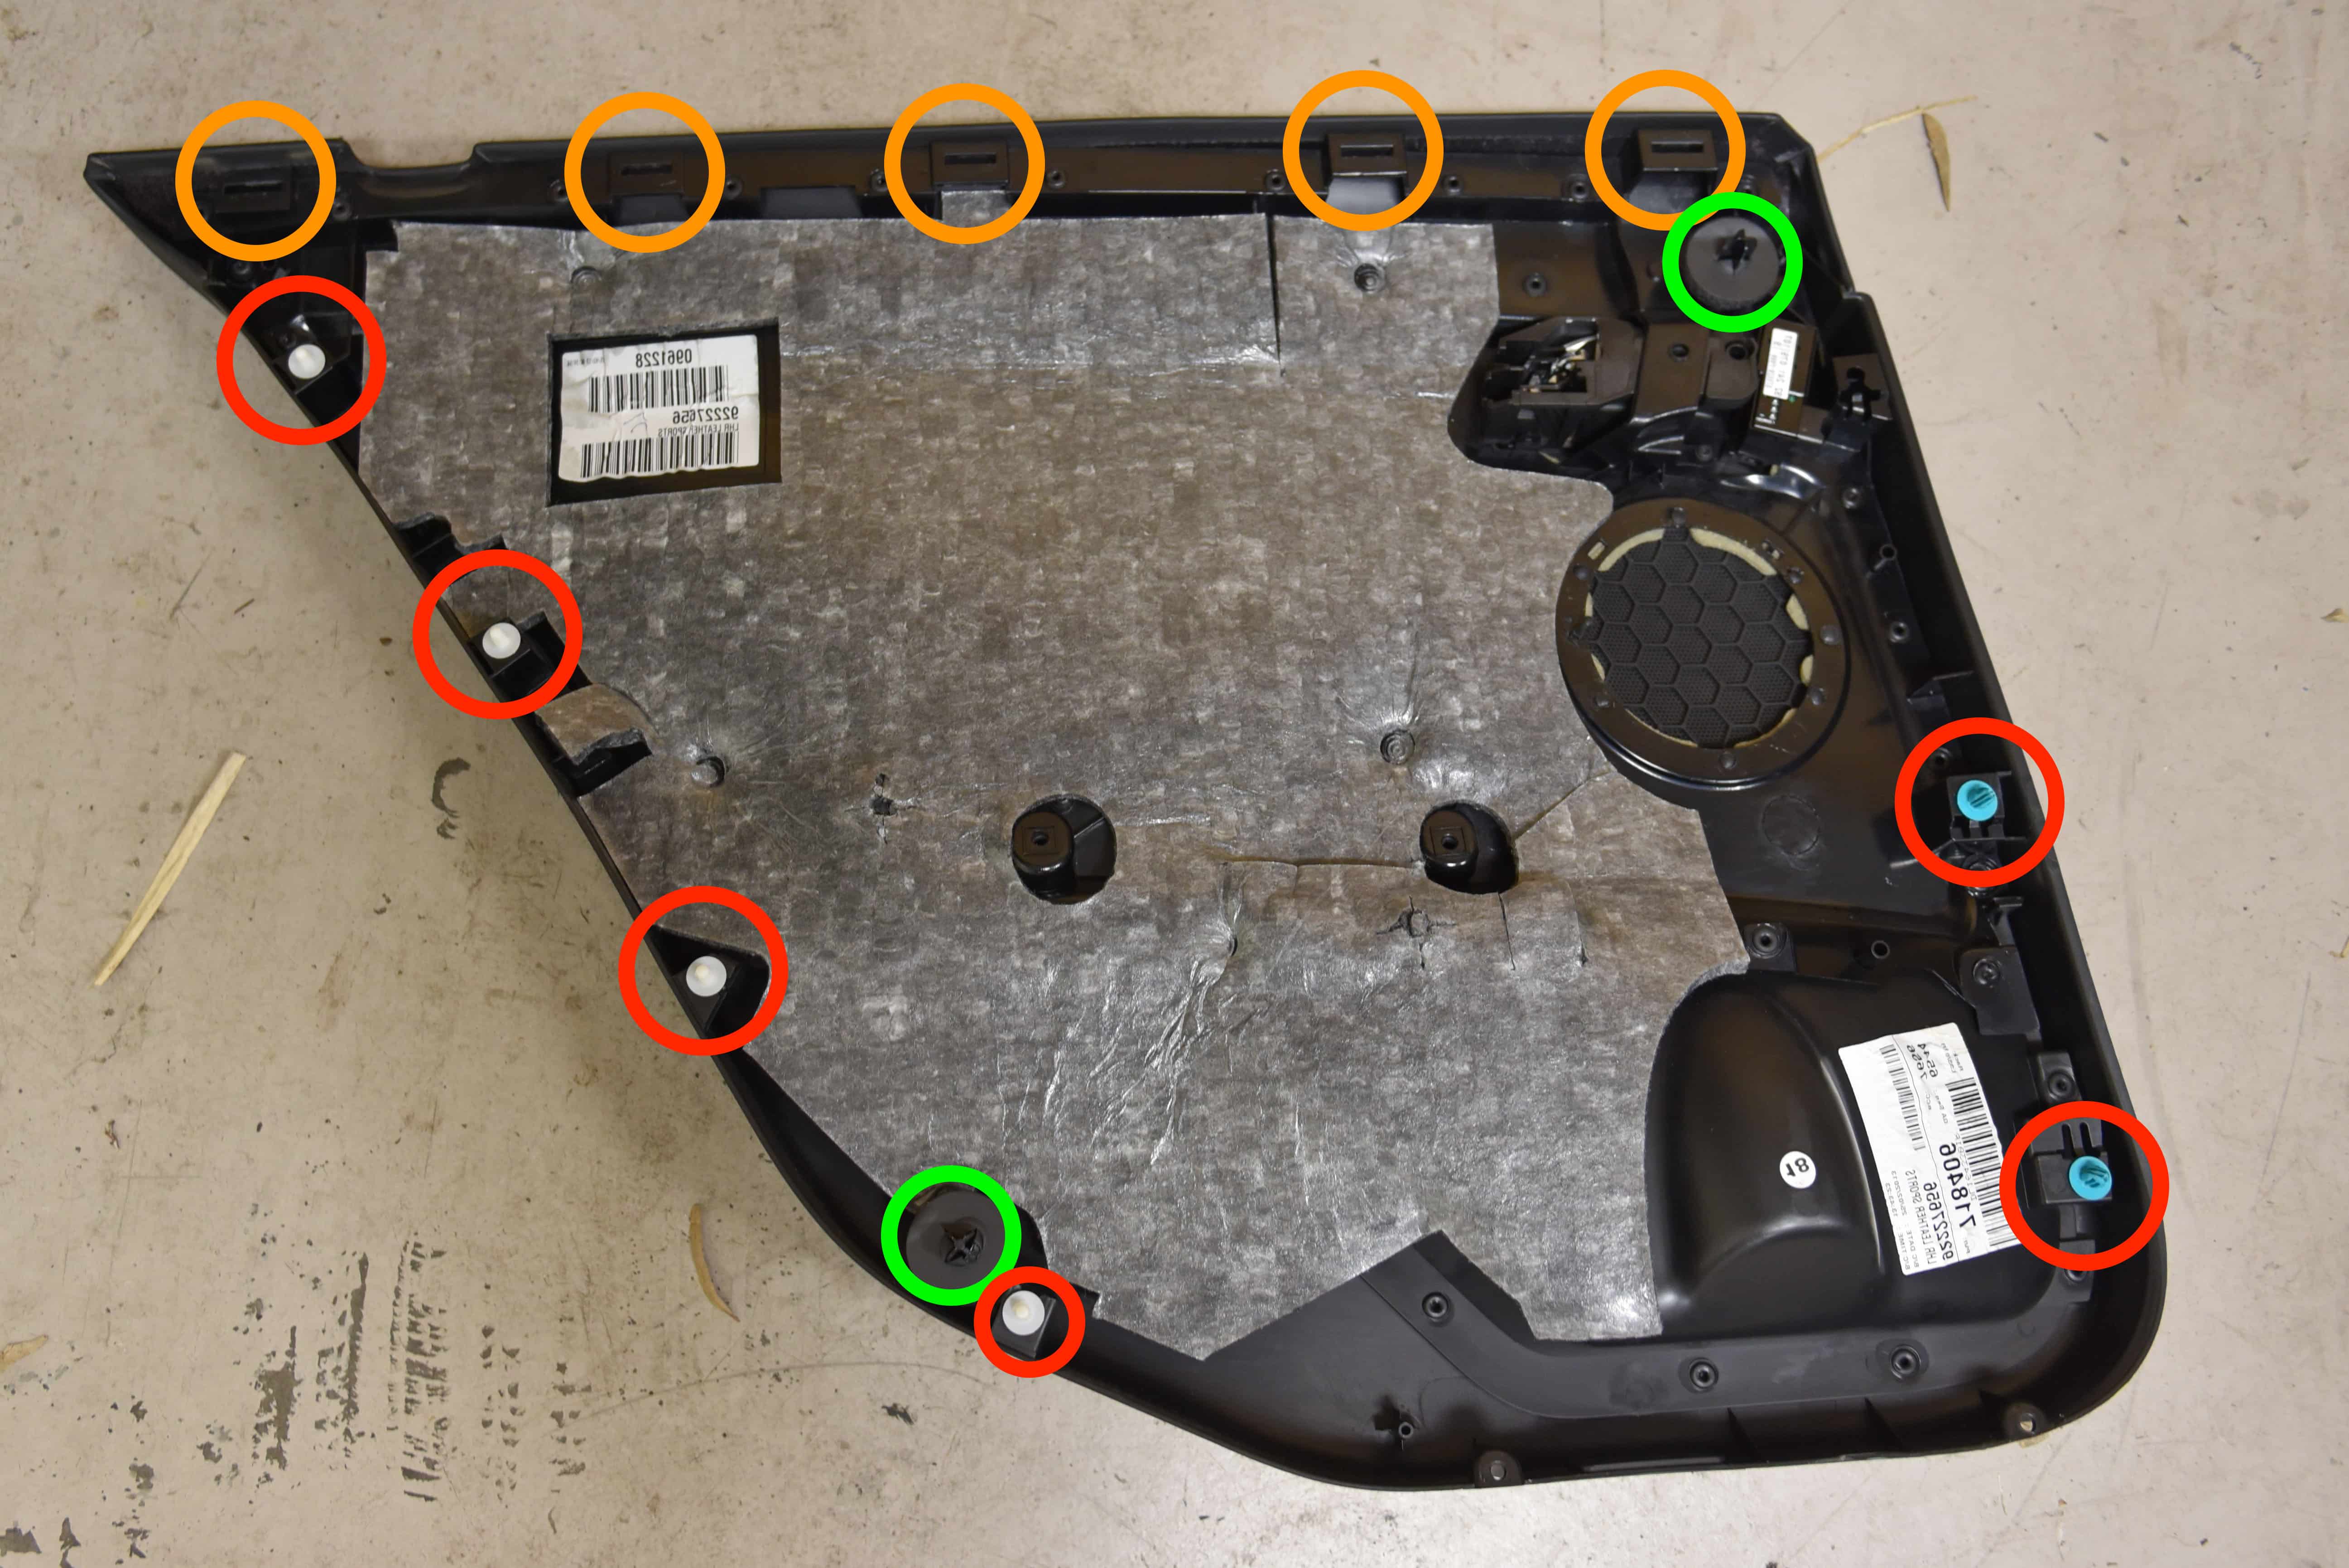
Step 10
With the trim removed from the door we can see:
Standard clips (Red)
Flat clips (Orange)
Alignment pins (Green)
To reinstall simply reverse the process. If any clips remained attached to the door, be sure to remove them and re-attach to the trim piece before reinstallation.
Did you find this guide helpful? Consider sharing it to help other car enthusiasts
Excellent step-by-step, but I also wanted to remove the grab handles on the door cards of my SV6 (as per picture in Step 5) as two are damaged. However, they appear to be thermally welded with plastic rivets to the back of the door card. Is there a correct way to remove the handle from the door card, or is it possible to replace the plastic rivets with screws later (e.g. T20 tech screws as are in place at various points on the handle)?
Hi Paul, Thanks for the feedback! You’re correct, they’re plastic welded in position with no real ‘correct’ way to remove them. If you carefully remove them (cutting or un-welding with heat) you might be able to screw them back into position. Alternatively seek an automotive trimmer to re-trim the handles without the need to remove them. Plastic welding companies may also assist.
Hi there I followed your instructions but when I refitted the door trim the door will not open using the inside handle. I checked everything again and it all seems correct so I’m kind of stumped. Have you got any advice?
Just curious. I had to pull my door panel off as the power window regulator had broken.
However the door had blown shut in wind after I’d put the panel back on.
Think the door lock cables have come out of the handle when it slammed shut As I can’t open the door from inside or outside now.
Thats an interesting issue to have! Try pull on the cables. One will activate the lock/unlock and the other will operate the mechanism to open the door.
Brilliant thank you! Clear, precise, easy to follow instructions and pictures.
I managed to get it all off apart from the wiring loom (but that didn’t cause any problems, I just hooked the trim inside the door to work on it).
Didn’t lose any screws or break any clips or have anything left over (a common problem when I try DIY). Even managed to lever a couple of clips out the door to put them in the trim as you recommended.
Also remembered to test lock and window before putting it all back together!
Pity I didn’t find the cause of the rattle that has been driving me mad, but I haven’t had a good test drive yet so maybe just taking the trim off and putting it back will have fixed it.


This Post Has 10 Comments
Hello AutoInstruct,
Excellent step-by-step, but I also wanted to remove the grab handles on the door cards of my SV6 (as per picture in Step 5) as two are damaged. However, they appear to be thermally welded with plastic rivets to the back of the door card. Is there a correct way to remove the handle from the door card, or is it possible to replace the plastic rivets with screws later (e.g. T20 tech screws as are in place at various points on the handle)?
Cheers!
Paul
Hi Paul, Thanks for the feedback! You’re correct, they’re plastic welded in position with no real ‘correct’ way to remove them. If you carefully remove them (cutting or un-welding with heat) you might be able to screw them back into position. Alternatively seek an automotive trimmer to re-trim the handles without the need to remove them. Plastic welding companies may also assist.
Just wondering what size torx screw will i need to remove this door?
Hi James, From memory it was a T25.
Thanks for the swift reply
Hi there I followed your instructions but when I refitted the door trim the door will not open using the inside handle. I checked everything again and it all seems correct so I’m kind of stumped. Have you got any advice?
Hi – Check and reverse Steps 6 and 7 as as it sounds like these have not been reattached to the door trim correctly.
Just curious. I had to pull my door panel off as the power window regulator had broken.
However the door had blown shut in wind after I’d put the panel back on.
Think the door lock cables have come out of the handle when it slammed shut As I can’t open the door from inside or outside now.
Any ideas???
Thats an interesting issue to have! Try pull on the cables. One will activate the lock/unlock and the other will operate the mechanism to open the door.
Brilliant thank you! Clear, precise, easy to follow instructions and pictures.
I managed to get it all off apart from the wiring loom (but that didn’t cause any problems, I just hooked the trim inside the door to work on it).
Didn’t lose any screws or break any clips or have anything left over (a common problem when I try DIY). Even managed to lever a couple of clips out the door to put them in the trim as you recommended.
Also remembered to test lock and window before putting it all back together!
Pity I didn’t find the cause of the rattle that has been driving me mad, but I haven’t had a good test drive yet so maybe just taking the trim off and putting it back will have fixed it.