This guide will show you how to change the Cabin Filter on your Toyota 120 Series LandCruiser Prado.
Difficulty Rating
Moderate
Tools/Parts Required
Cabin Filter
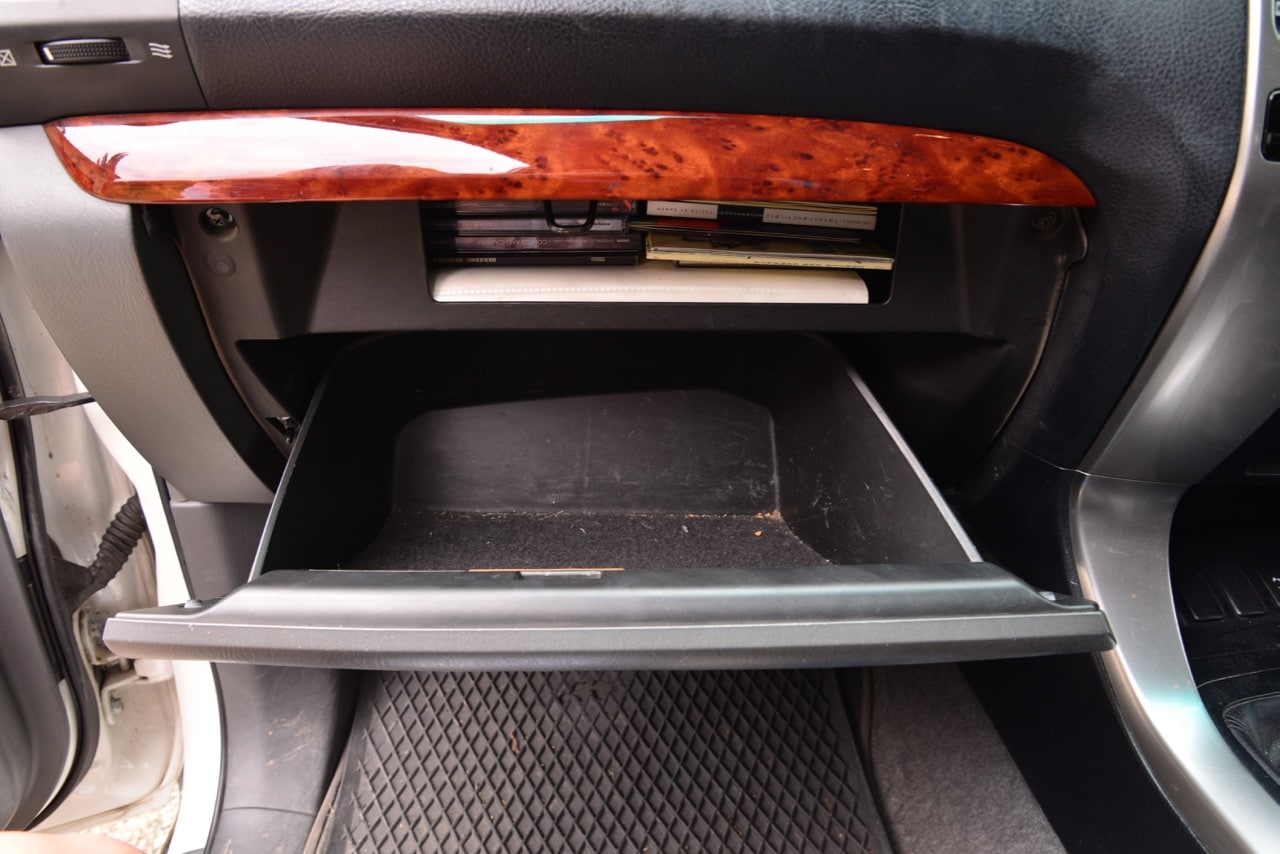
Step 1
The cabin filter is located behind the glovebox, start by opening up the glovebox.
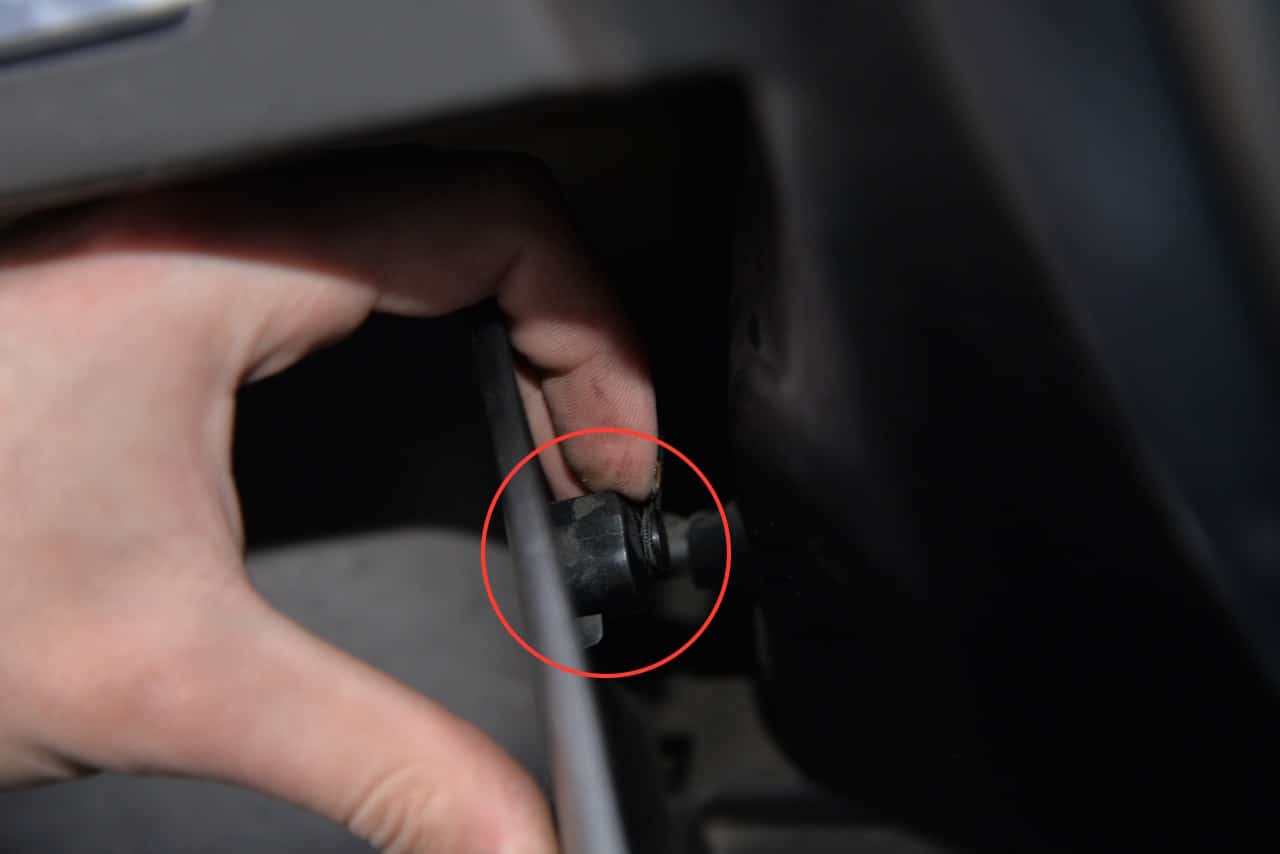
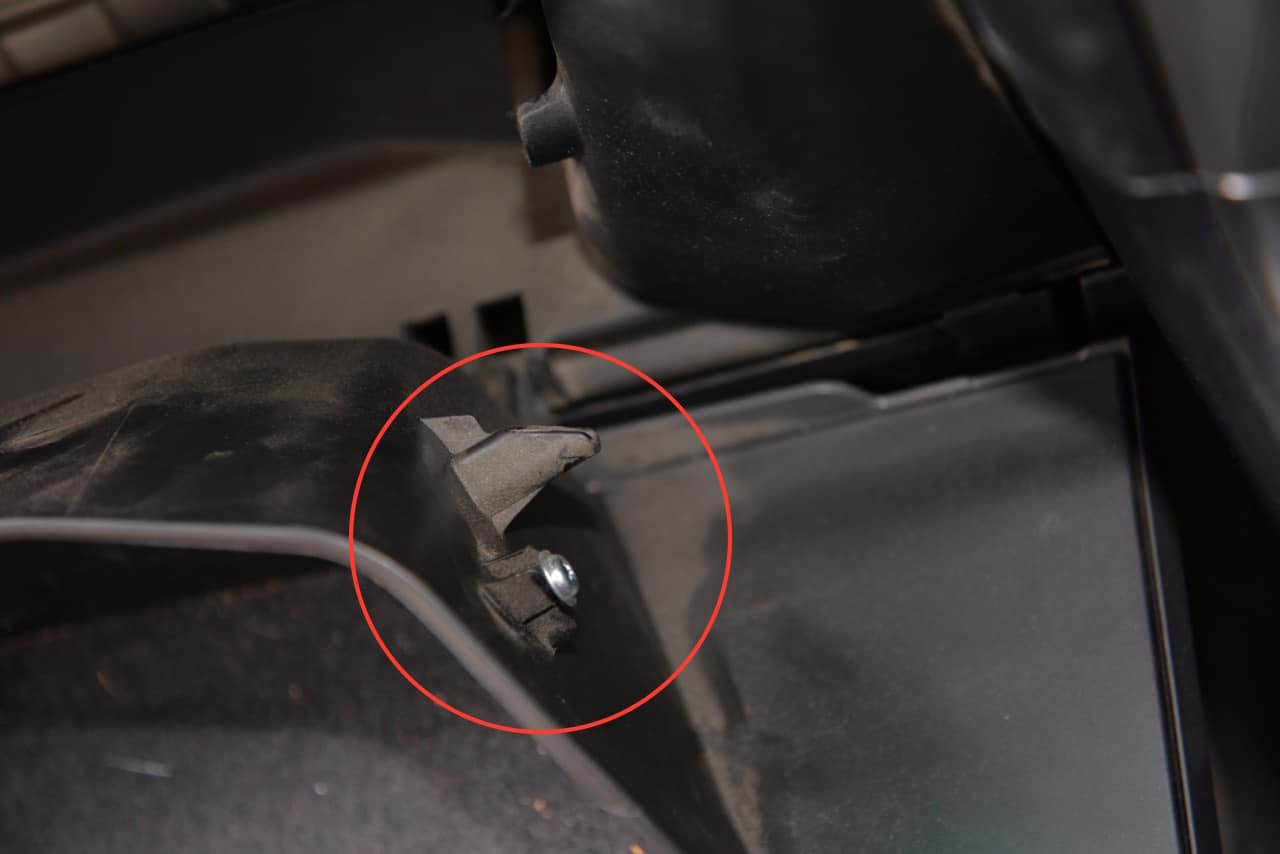
Step 2
The glovebox has a tether on the righthand side which hooks over a screw. To remove this simply slide it towards the front of the glovebox.
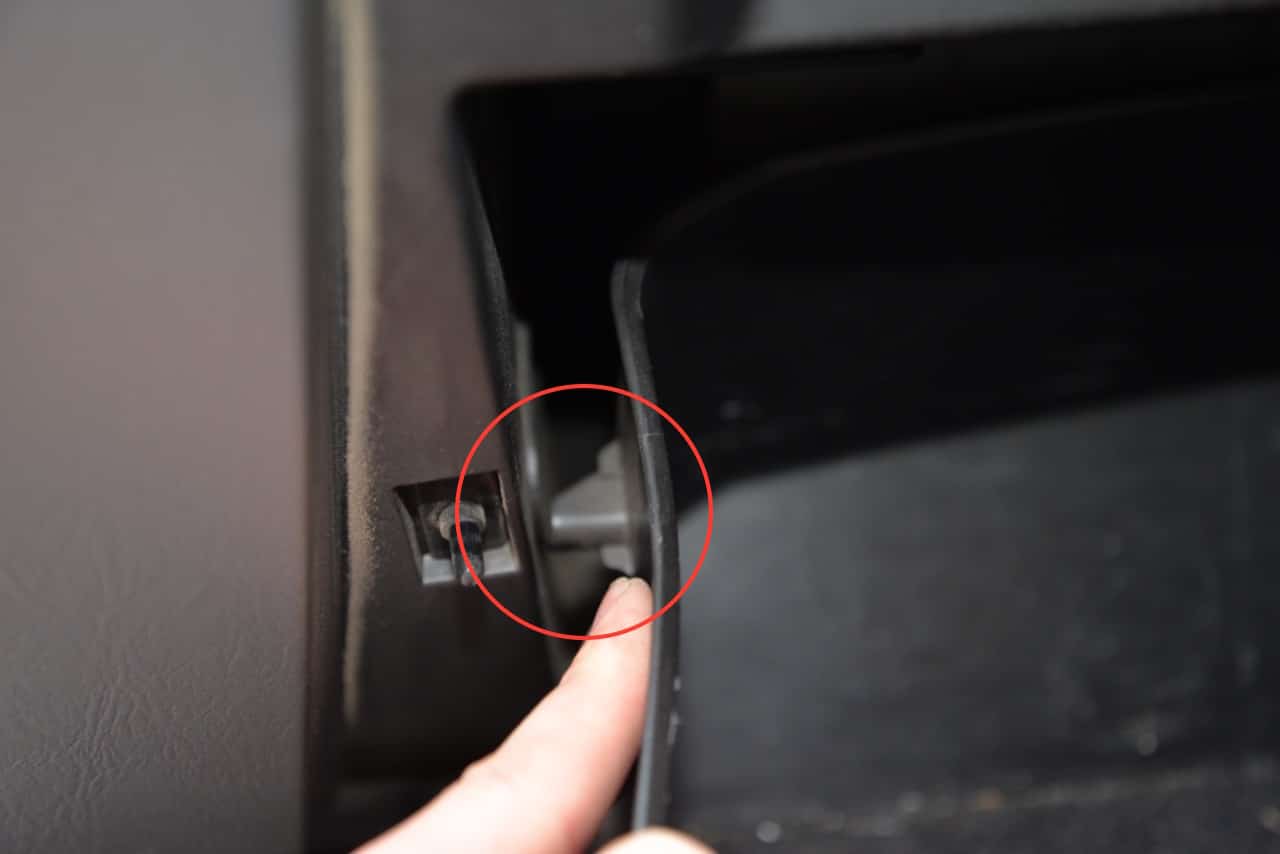
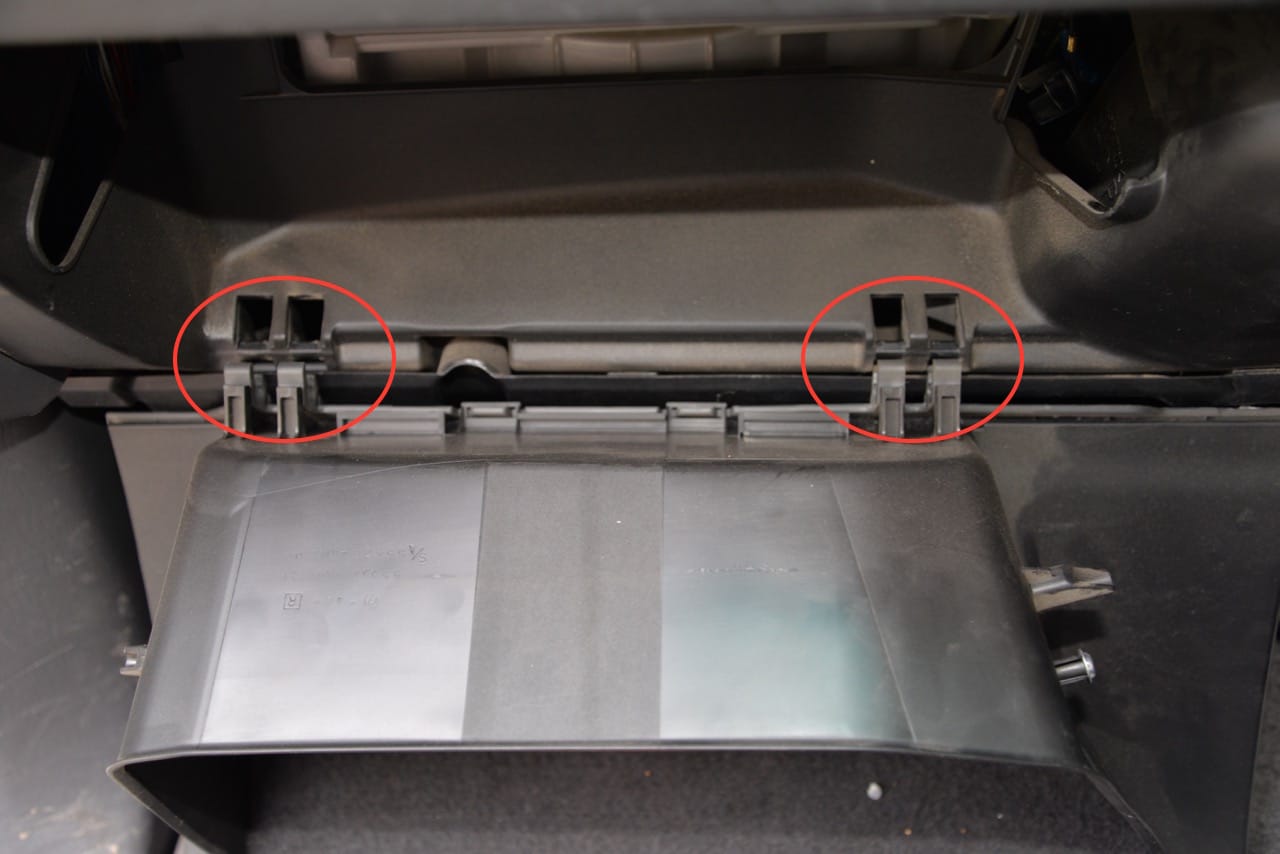
Step 3
There are two tabs (one on the left and right) holding the glovebox from falling out. Simply push the side of the glovebox inwards so the tab squeezes past the stopper on both sides.
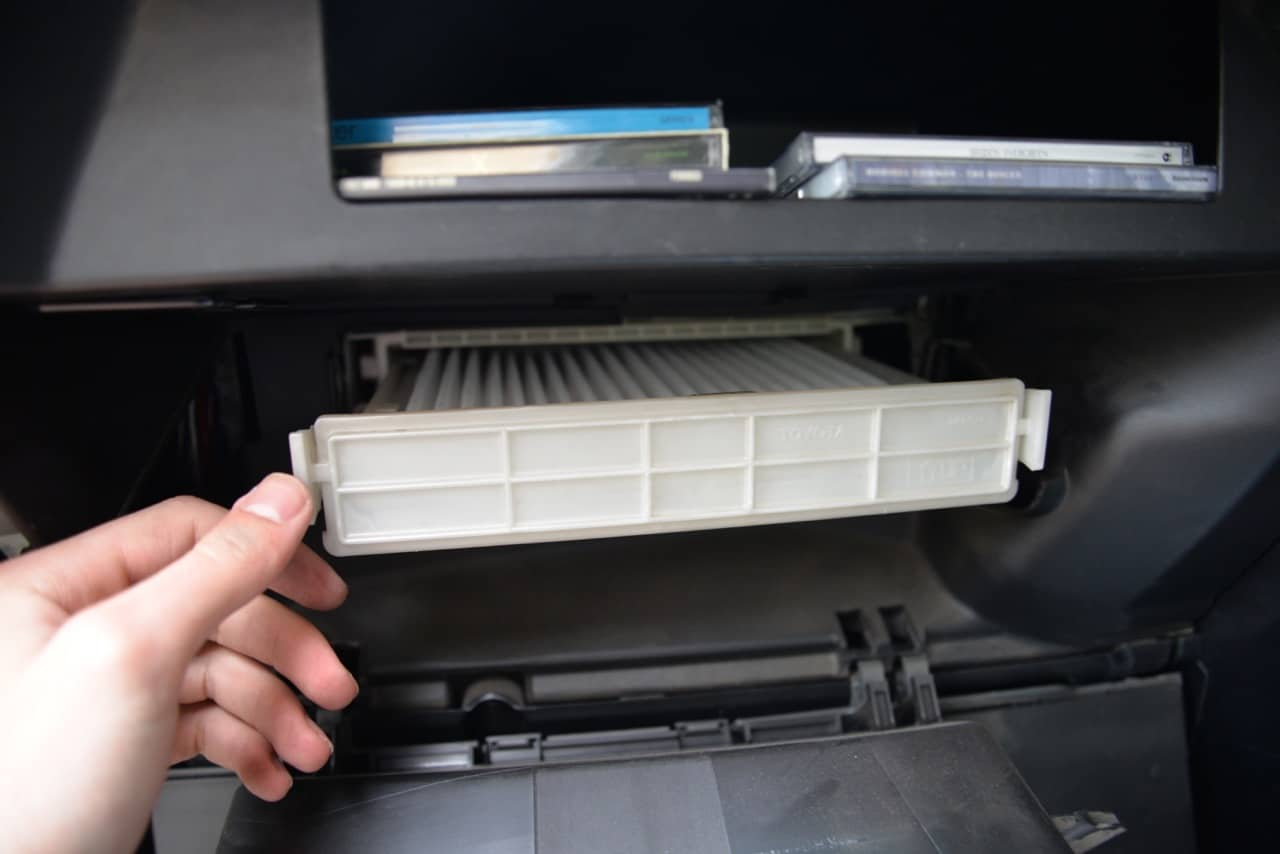
Step 4
The glovebox will now be free and you will have a clear view of the cabin filter housing. Squeeze the two tabs and pull the tray towards you.
Step 5
Remove the old filter from the tray and insert the new one. Note correct orientation.
Step 6
Insert the tray with the new filer back into the housing. Ensure the tray locks in.
Step 7
To reinstall the glovebox make sure the base sits and clips into the hinge. If the glovebox is misaligned when closing it has not correctly clicked into place.
Step 8
Squeeze the tabs on each side back onto the other side of the stopper and reconnect the tether.
Did you find this guide helpful? Consider sharing it to help other car enthusiasts