We’re going to show you how to install an aftermarket intercooler on a MK7 Golf R. This tutorial is almost identical to the MK7 Golf GTI, and very similar for the Audi 8V S3 as it shares the same MQB platform, and EA888 engine.
Whilst this is one of our longest tutorials ever, the process actually not too difficult. There is simply a large number of steps to follow.
Difficulty Rating
Savage
Tools/Parts Required
Torx Set (T25, T30)
Socket Set (16mm)
Flathead Screwdrivers
Warning
Work at your own risk. This work is inherently dangerous and must only be carried out by a qualified mechanic. AutoInstruct will not be held responsible for damage to your vehicle or personal injury / death as a result of the information we provide.
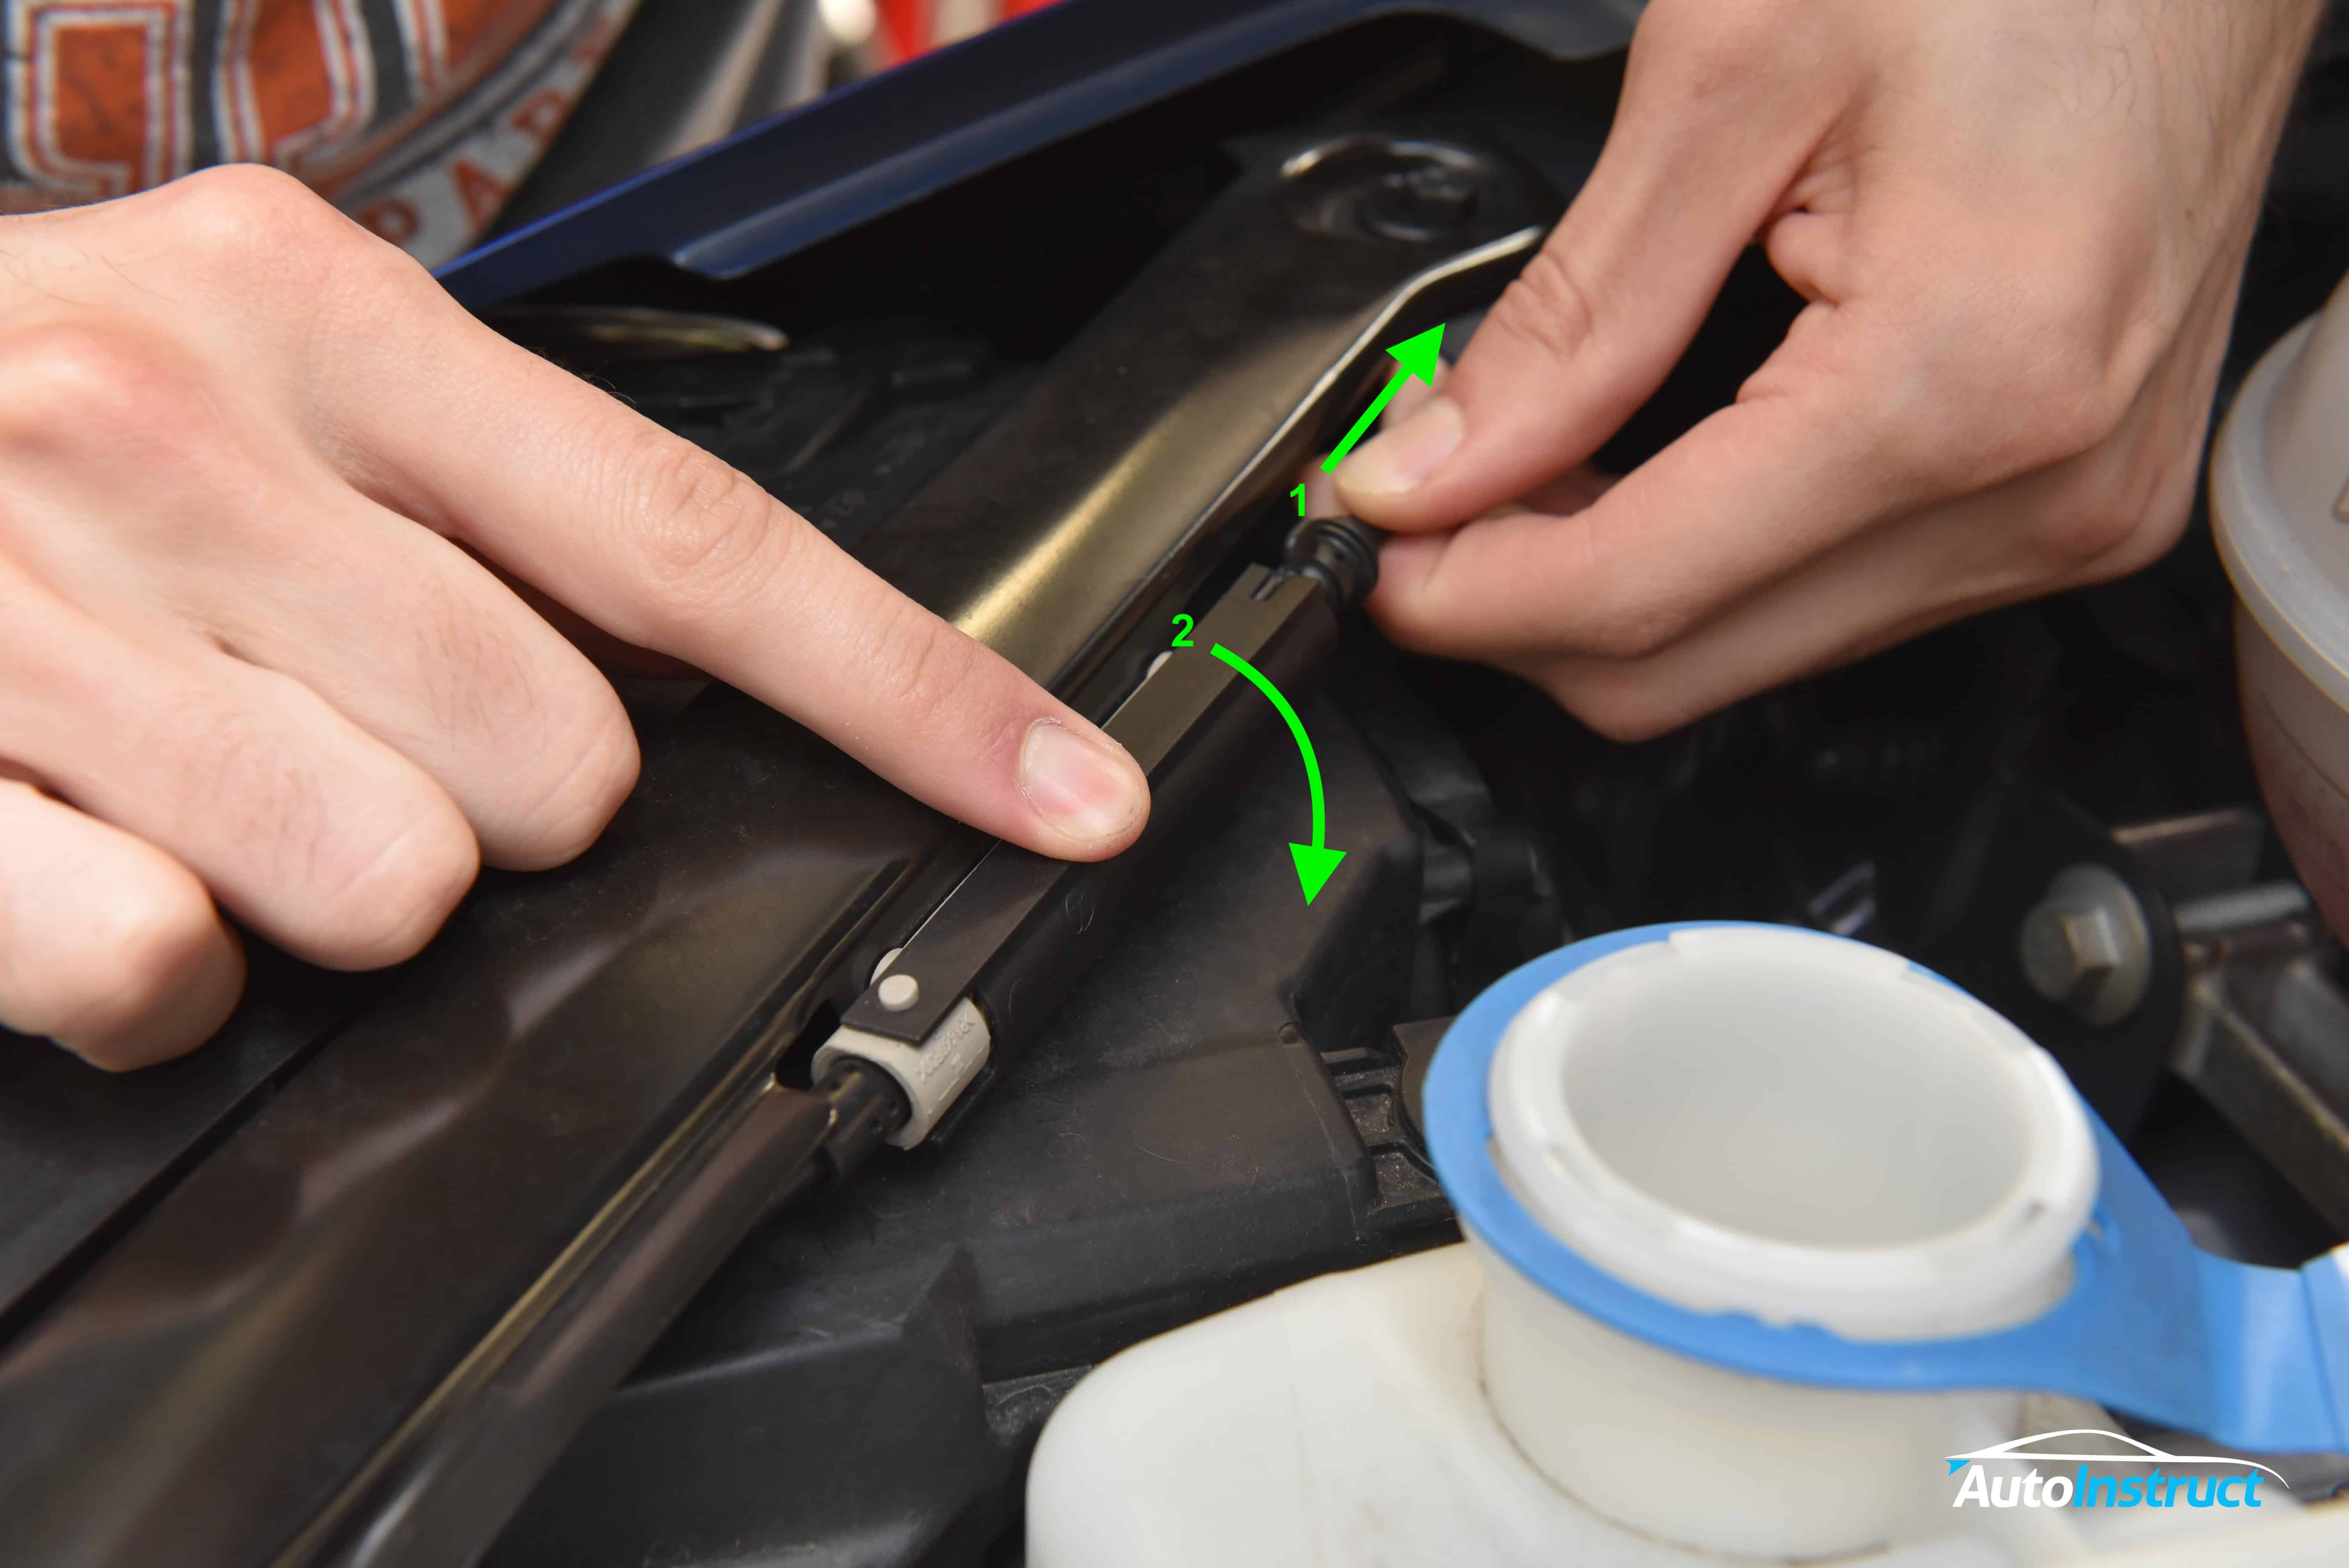
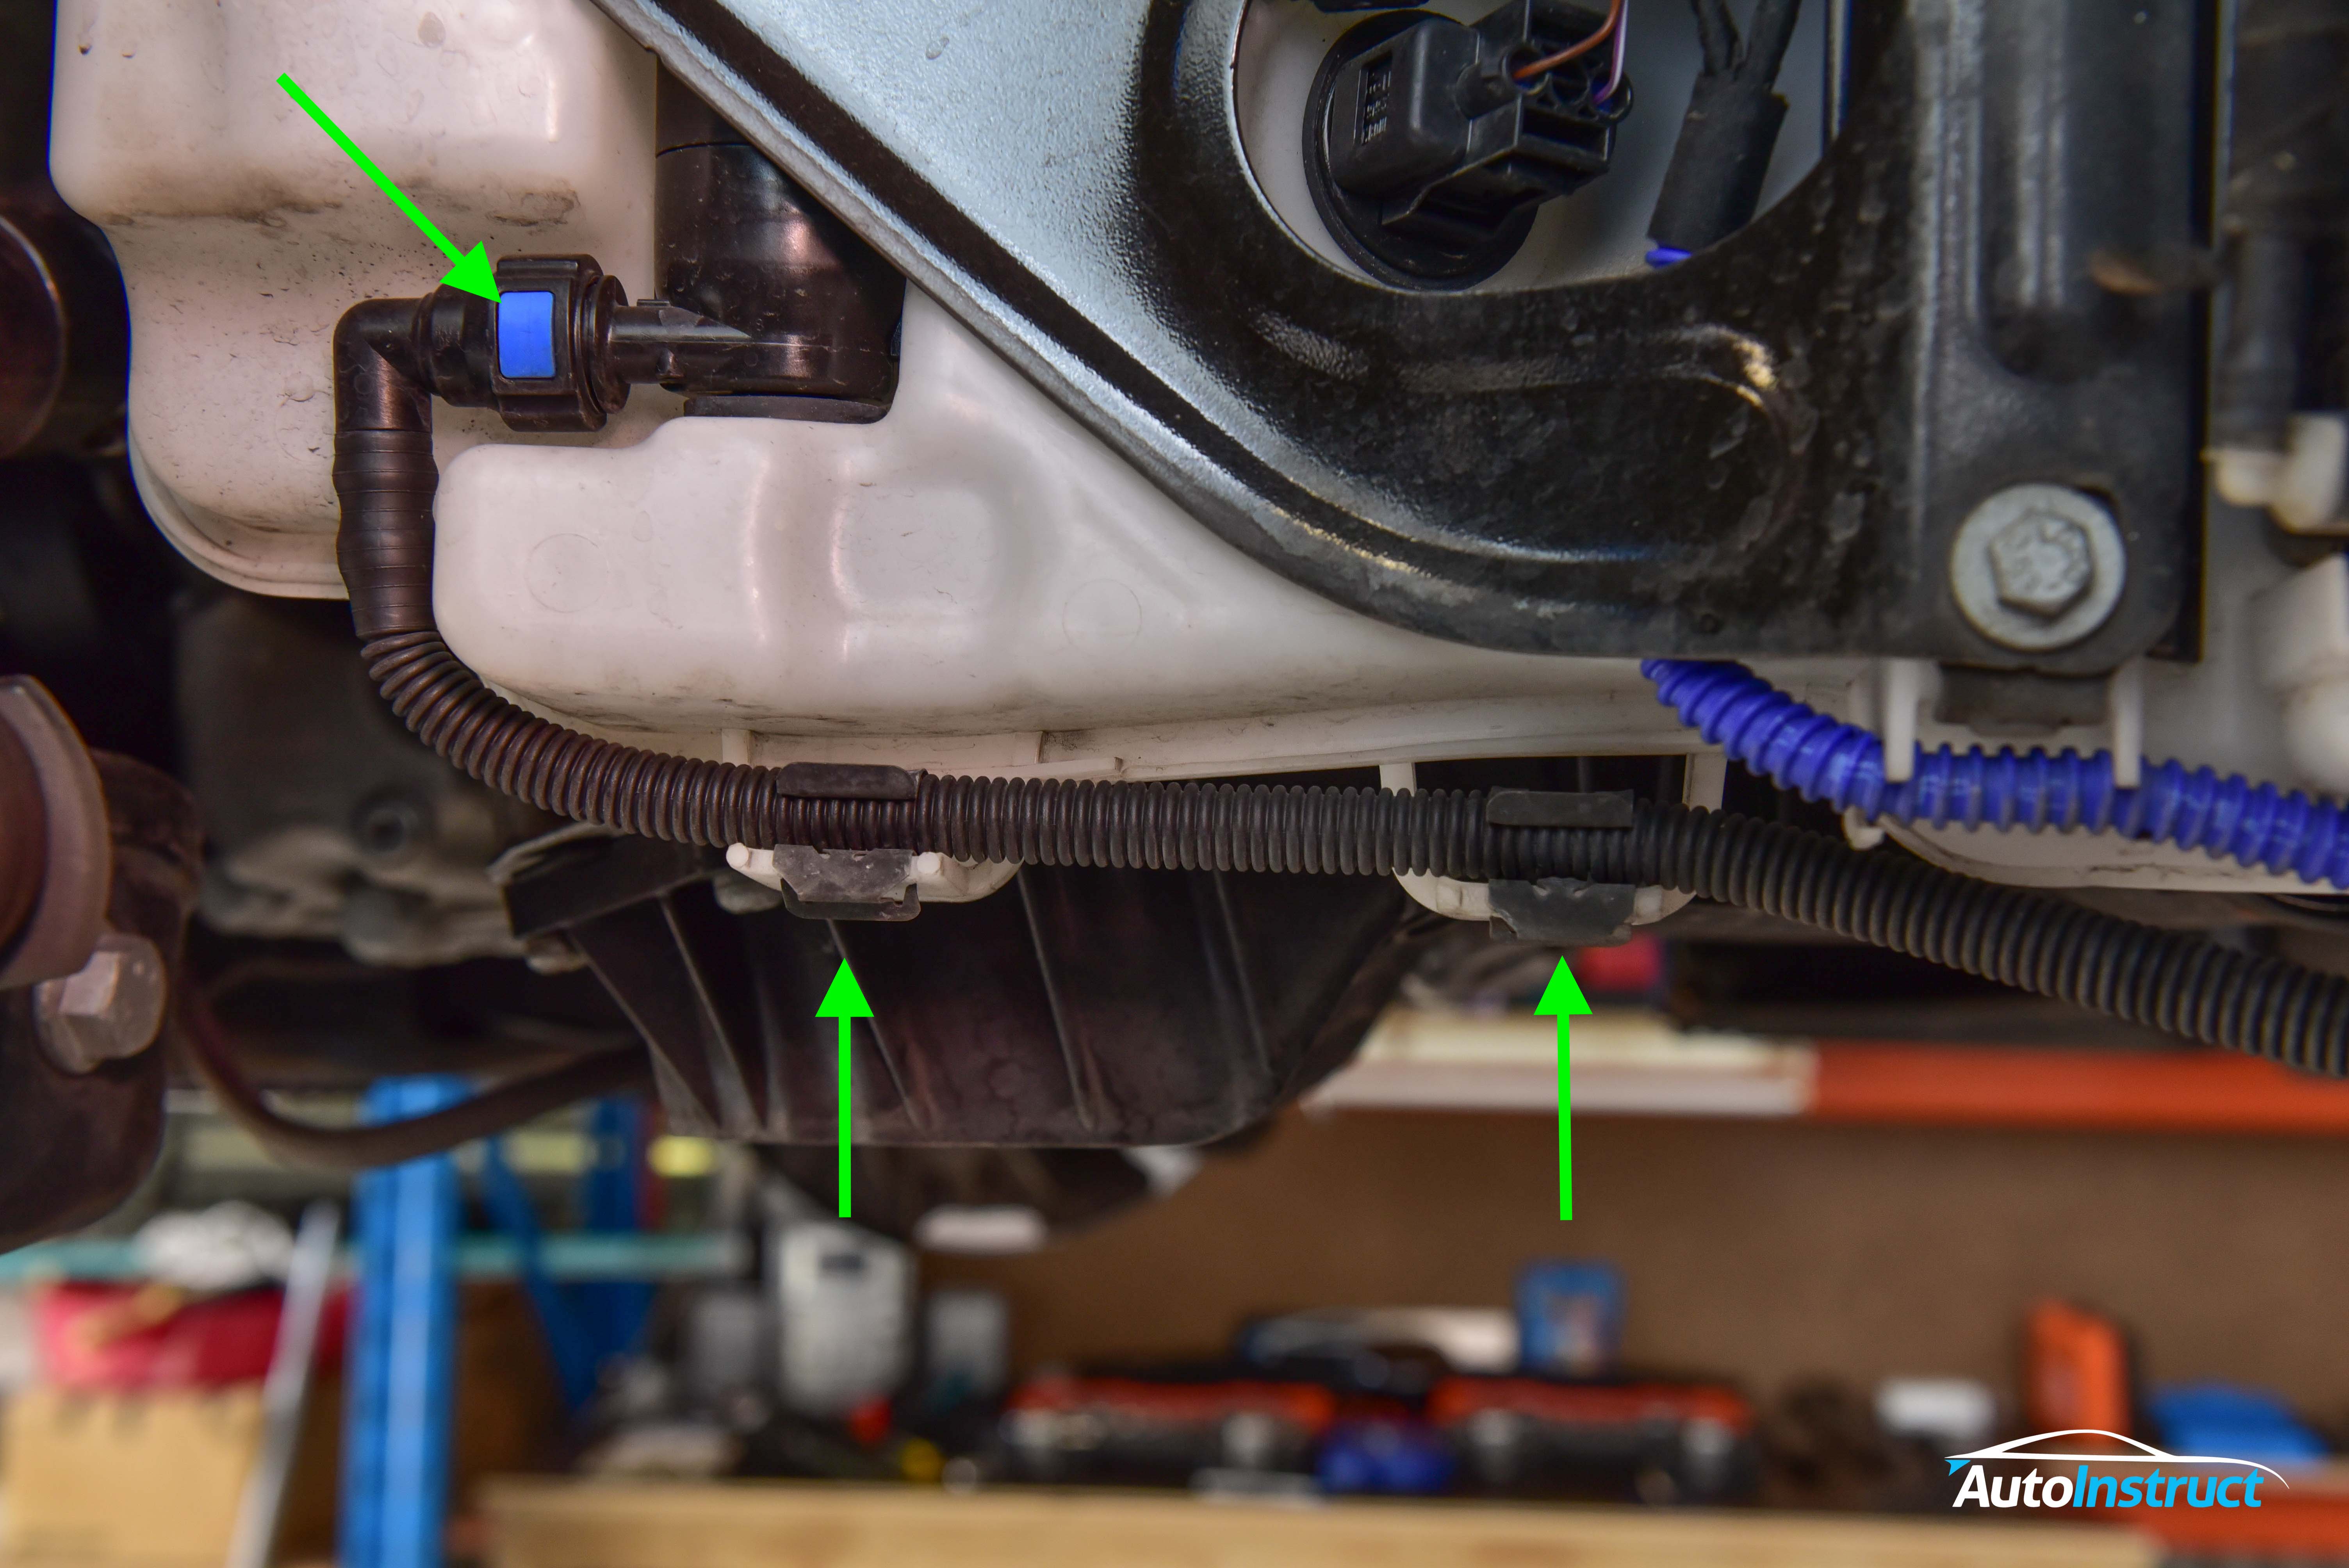
Do not close the hood until this is reconnected at the end!
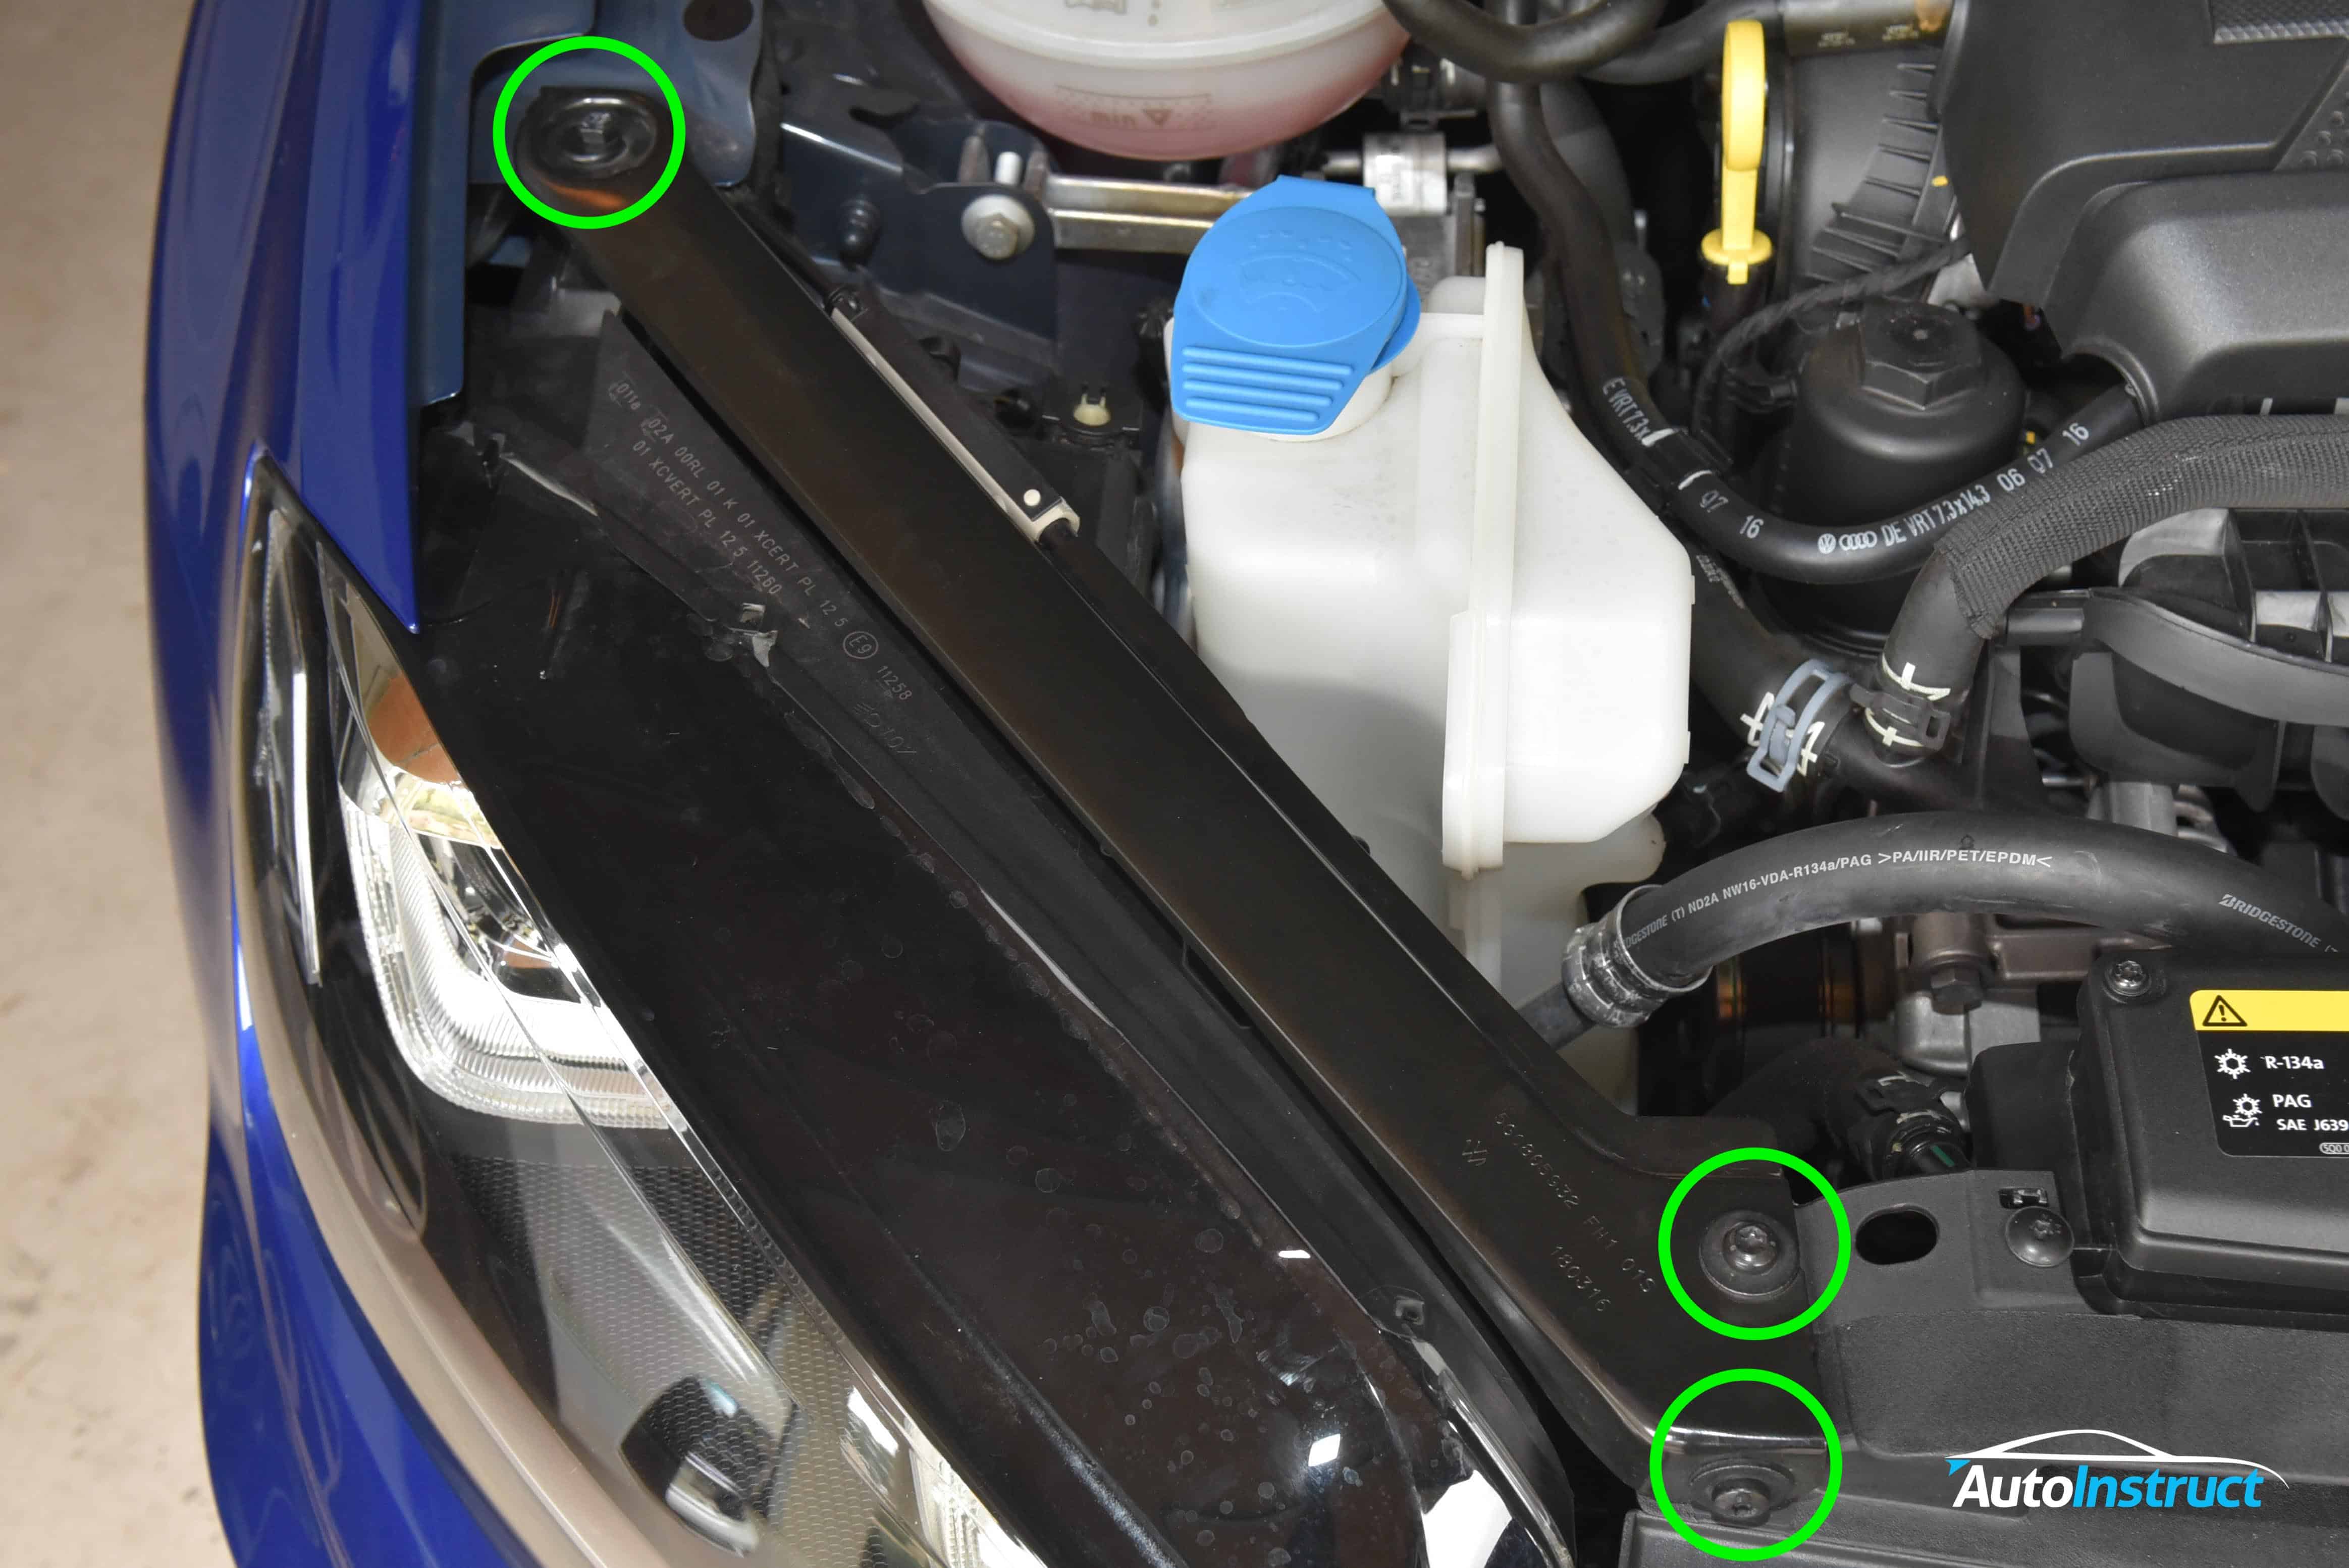
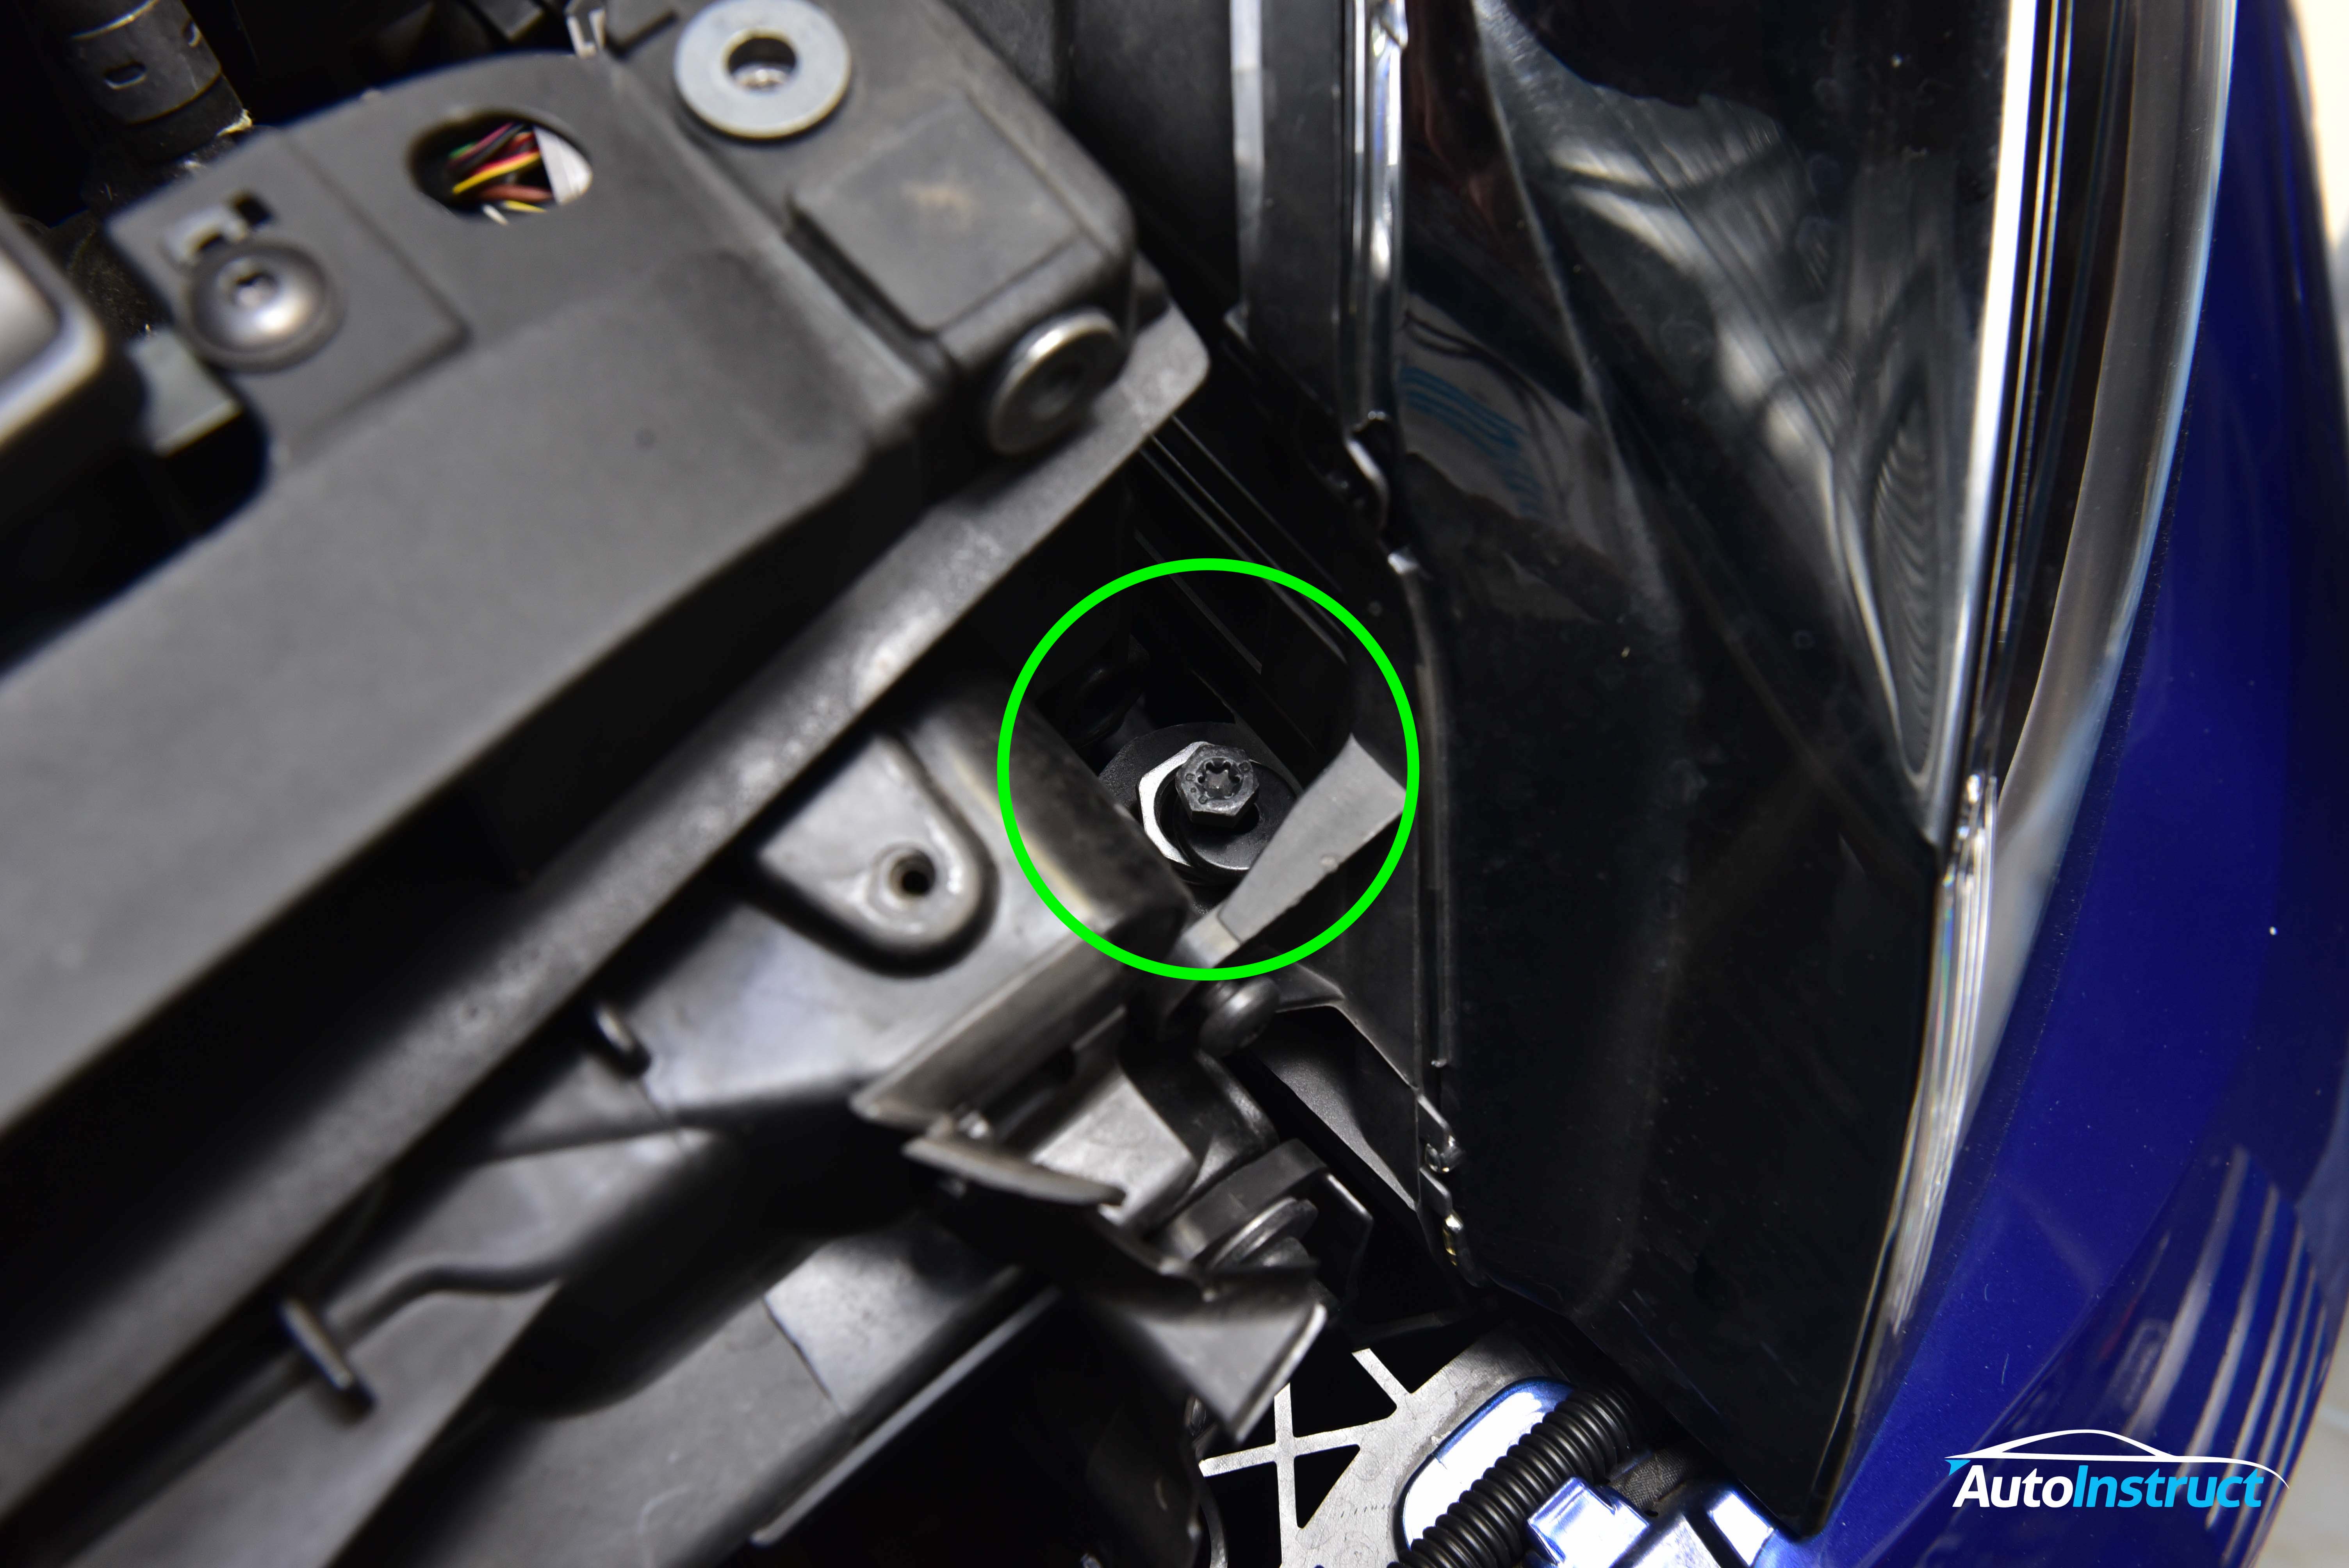
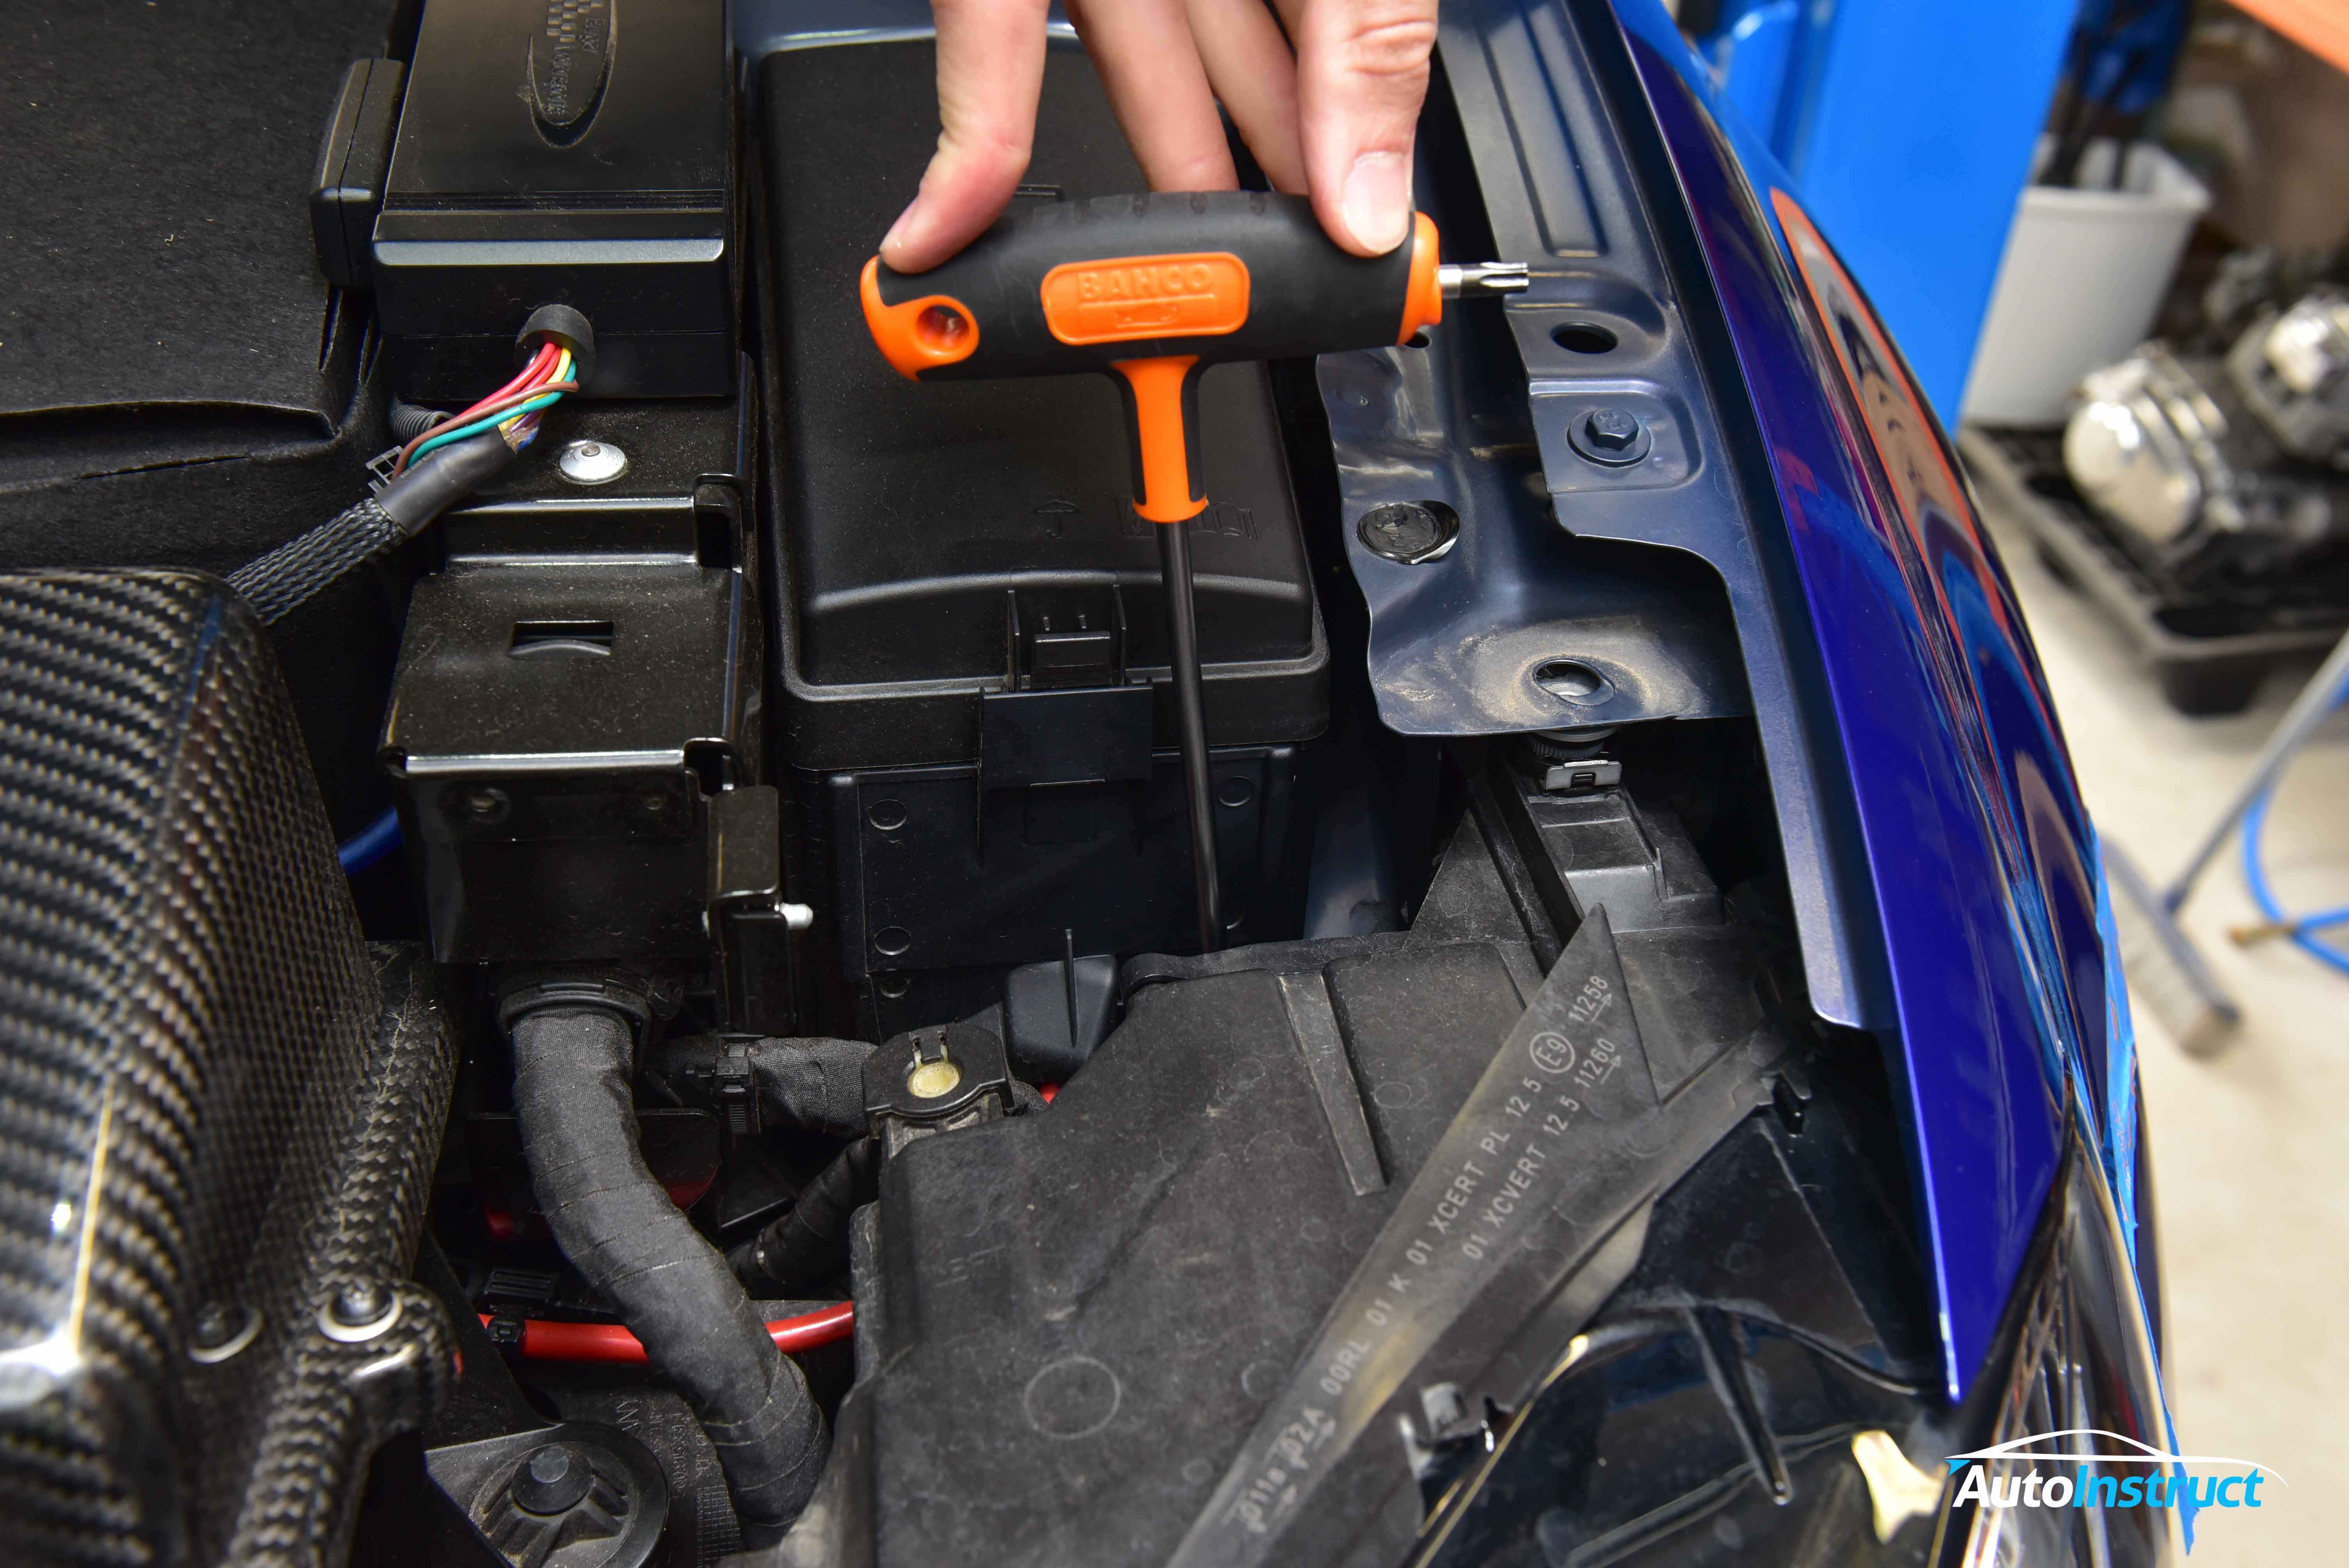
Step 3
Unscrew both upper support brackets, they’re held in place by three screws each. Once loose, unclip the hood release cable from behind and remove both brackets from the vehicle.
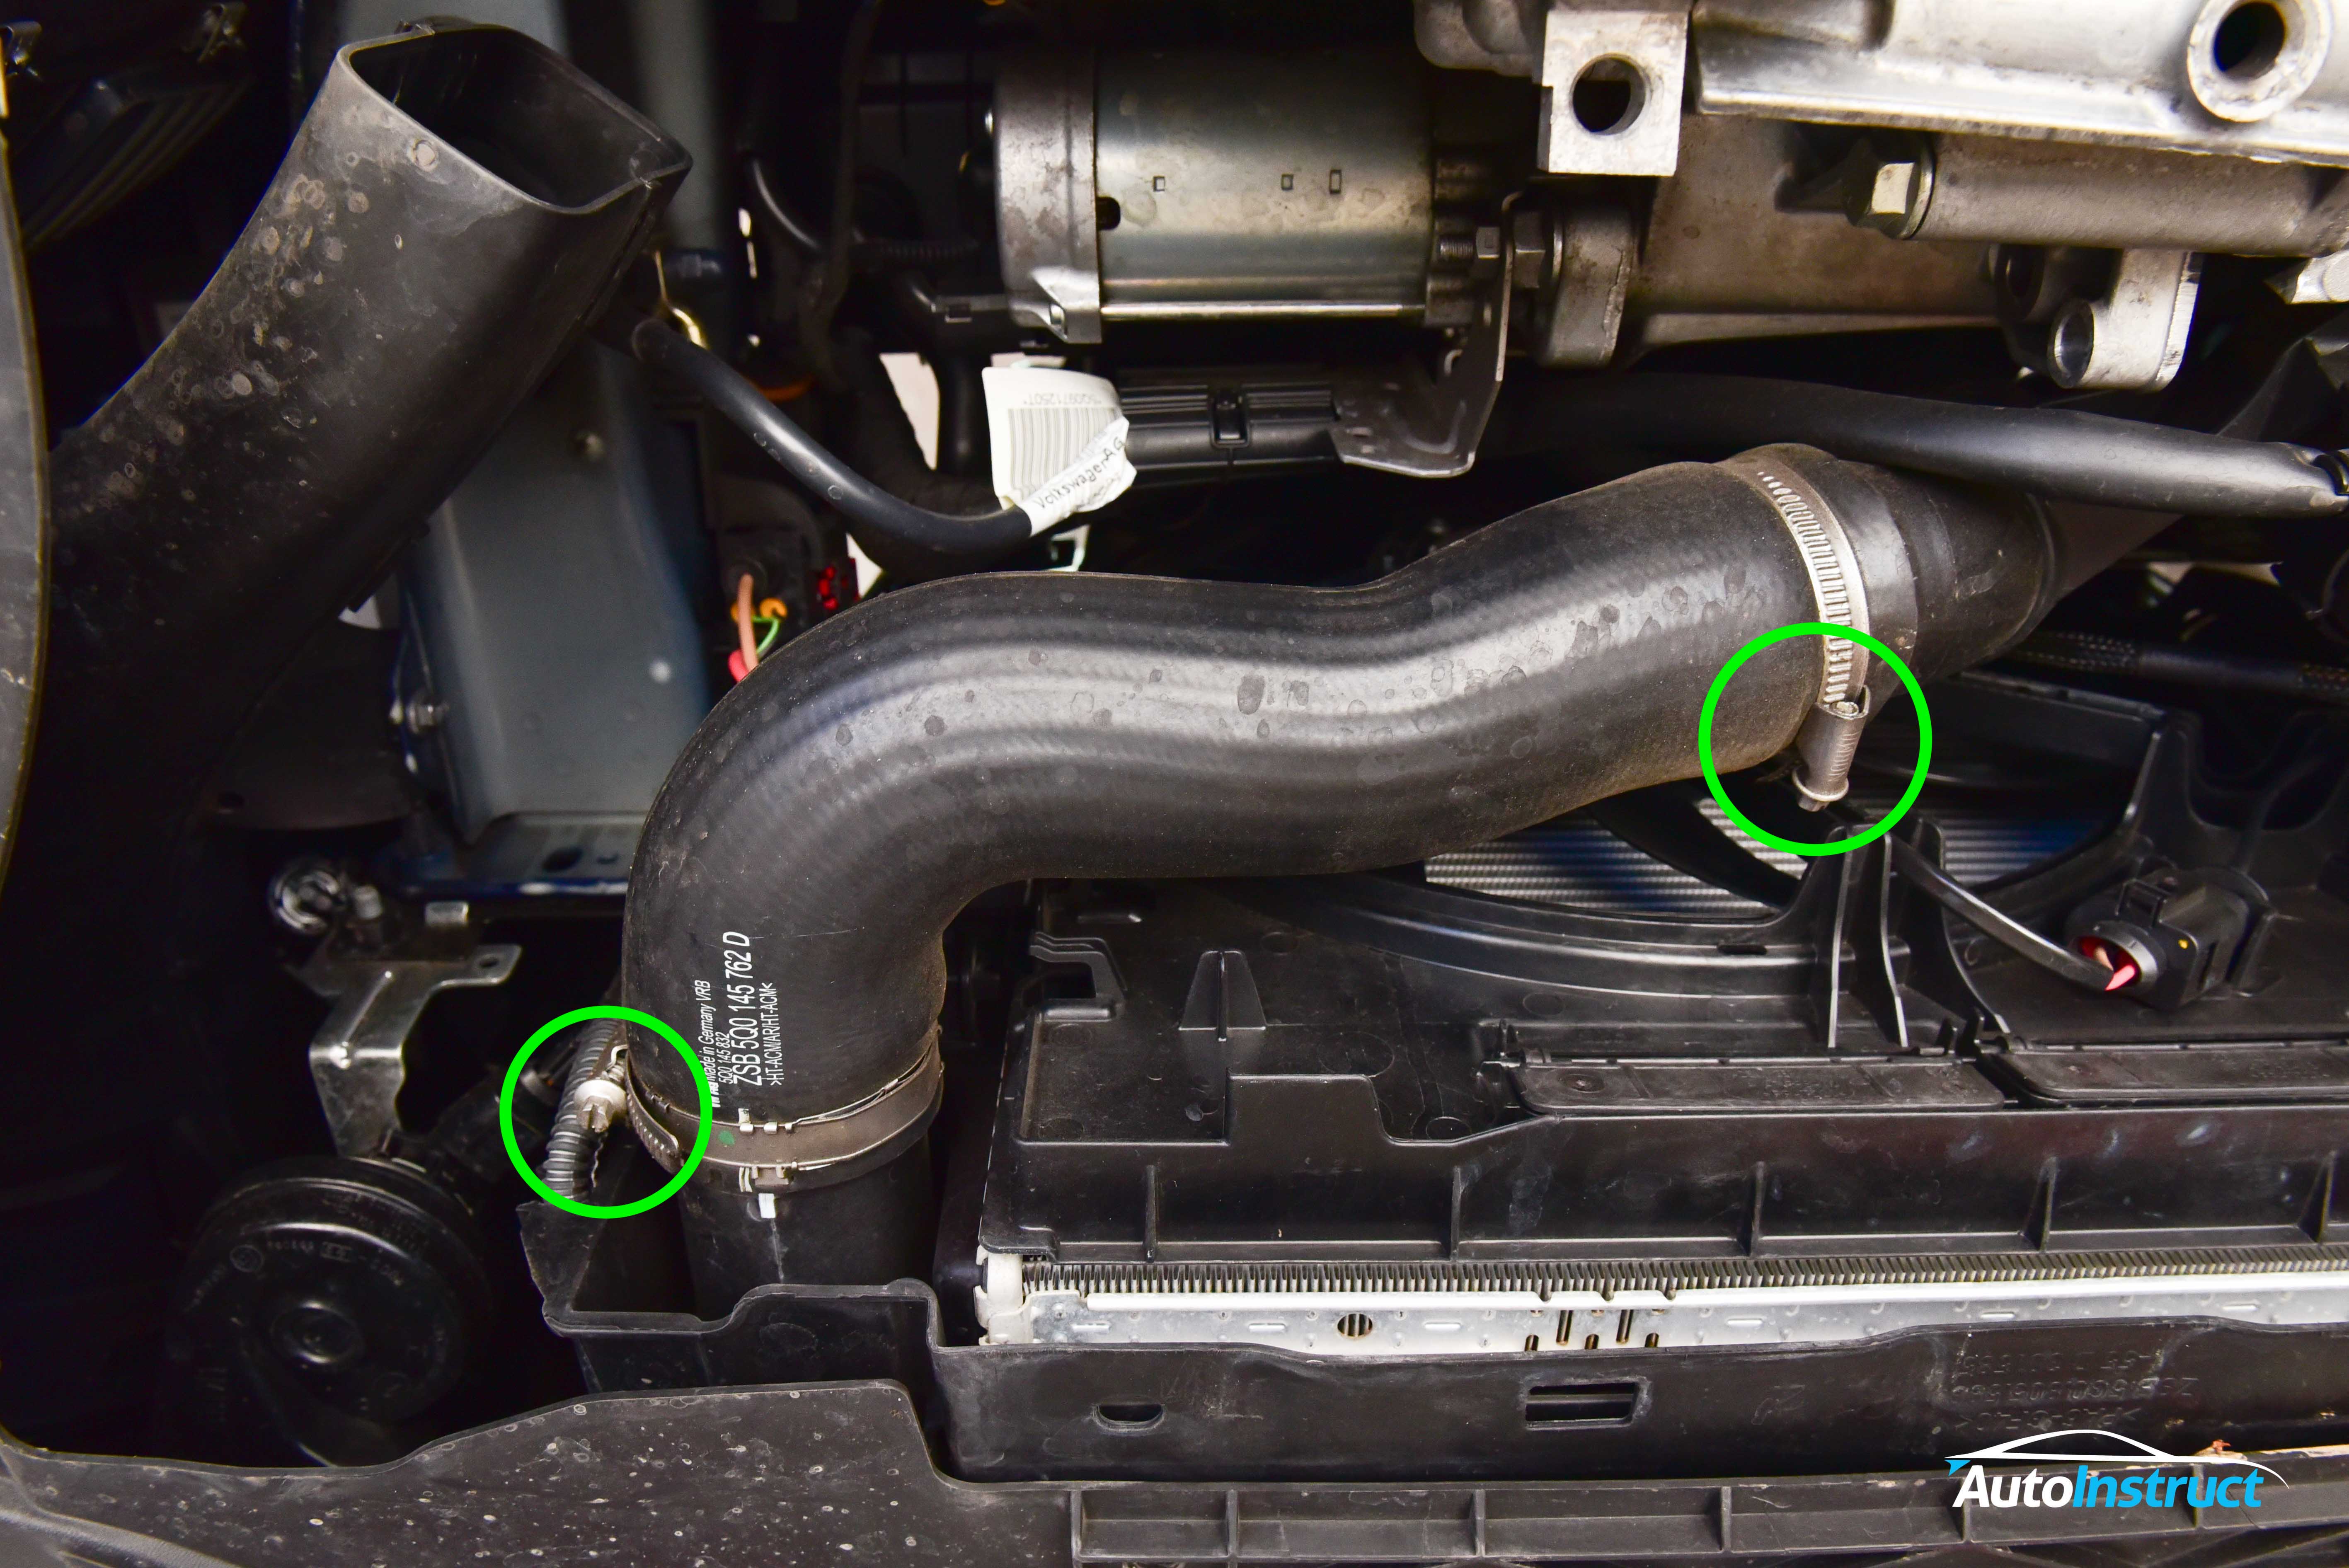
Step 4
Undo both hose clamps and remove the intercooler inlet pipe.
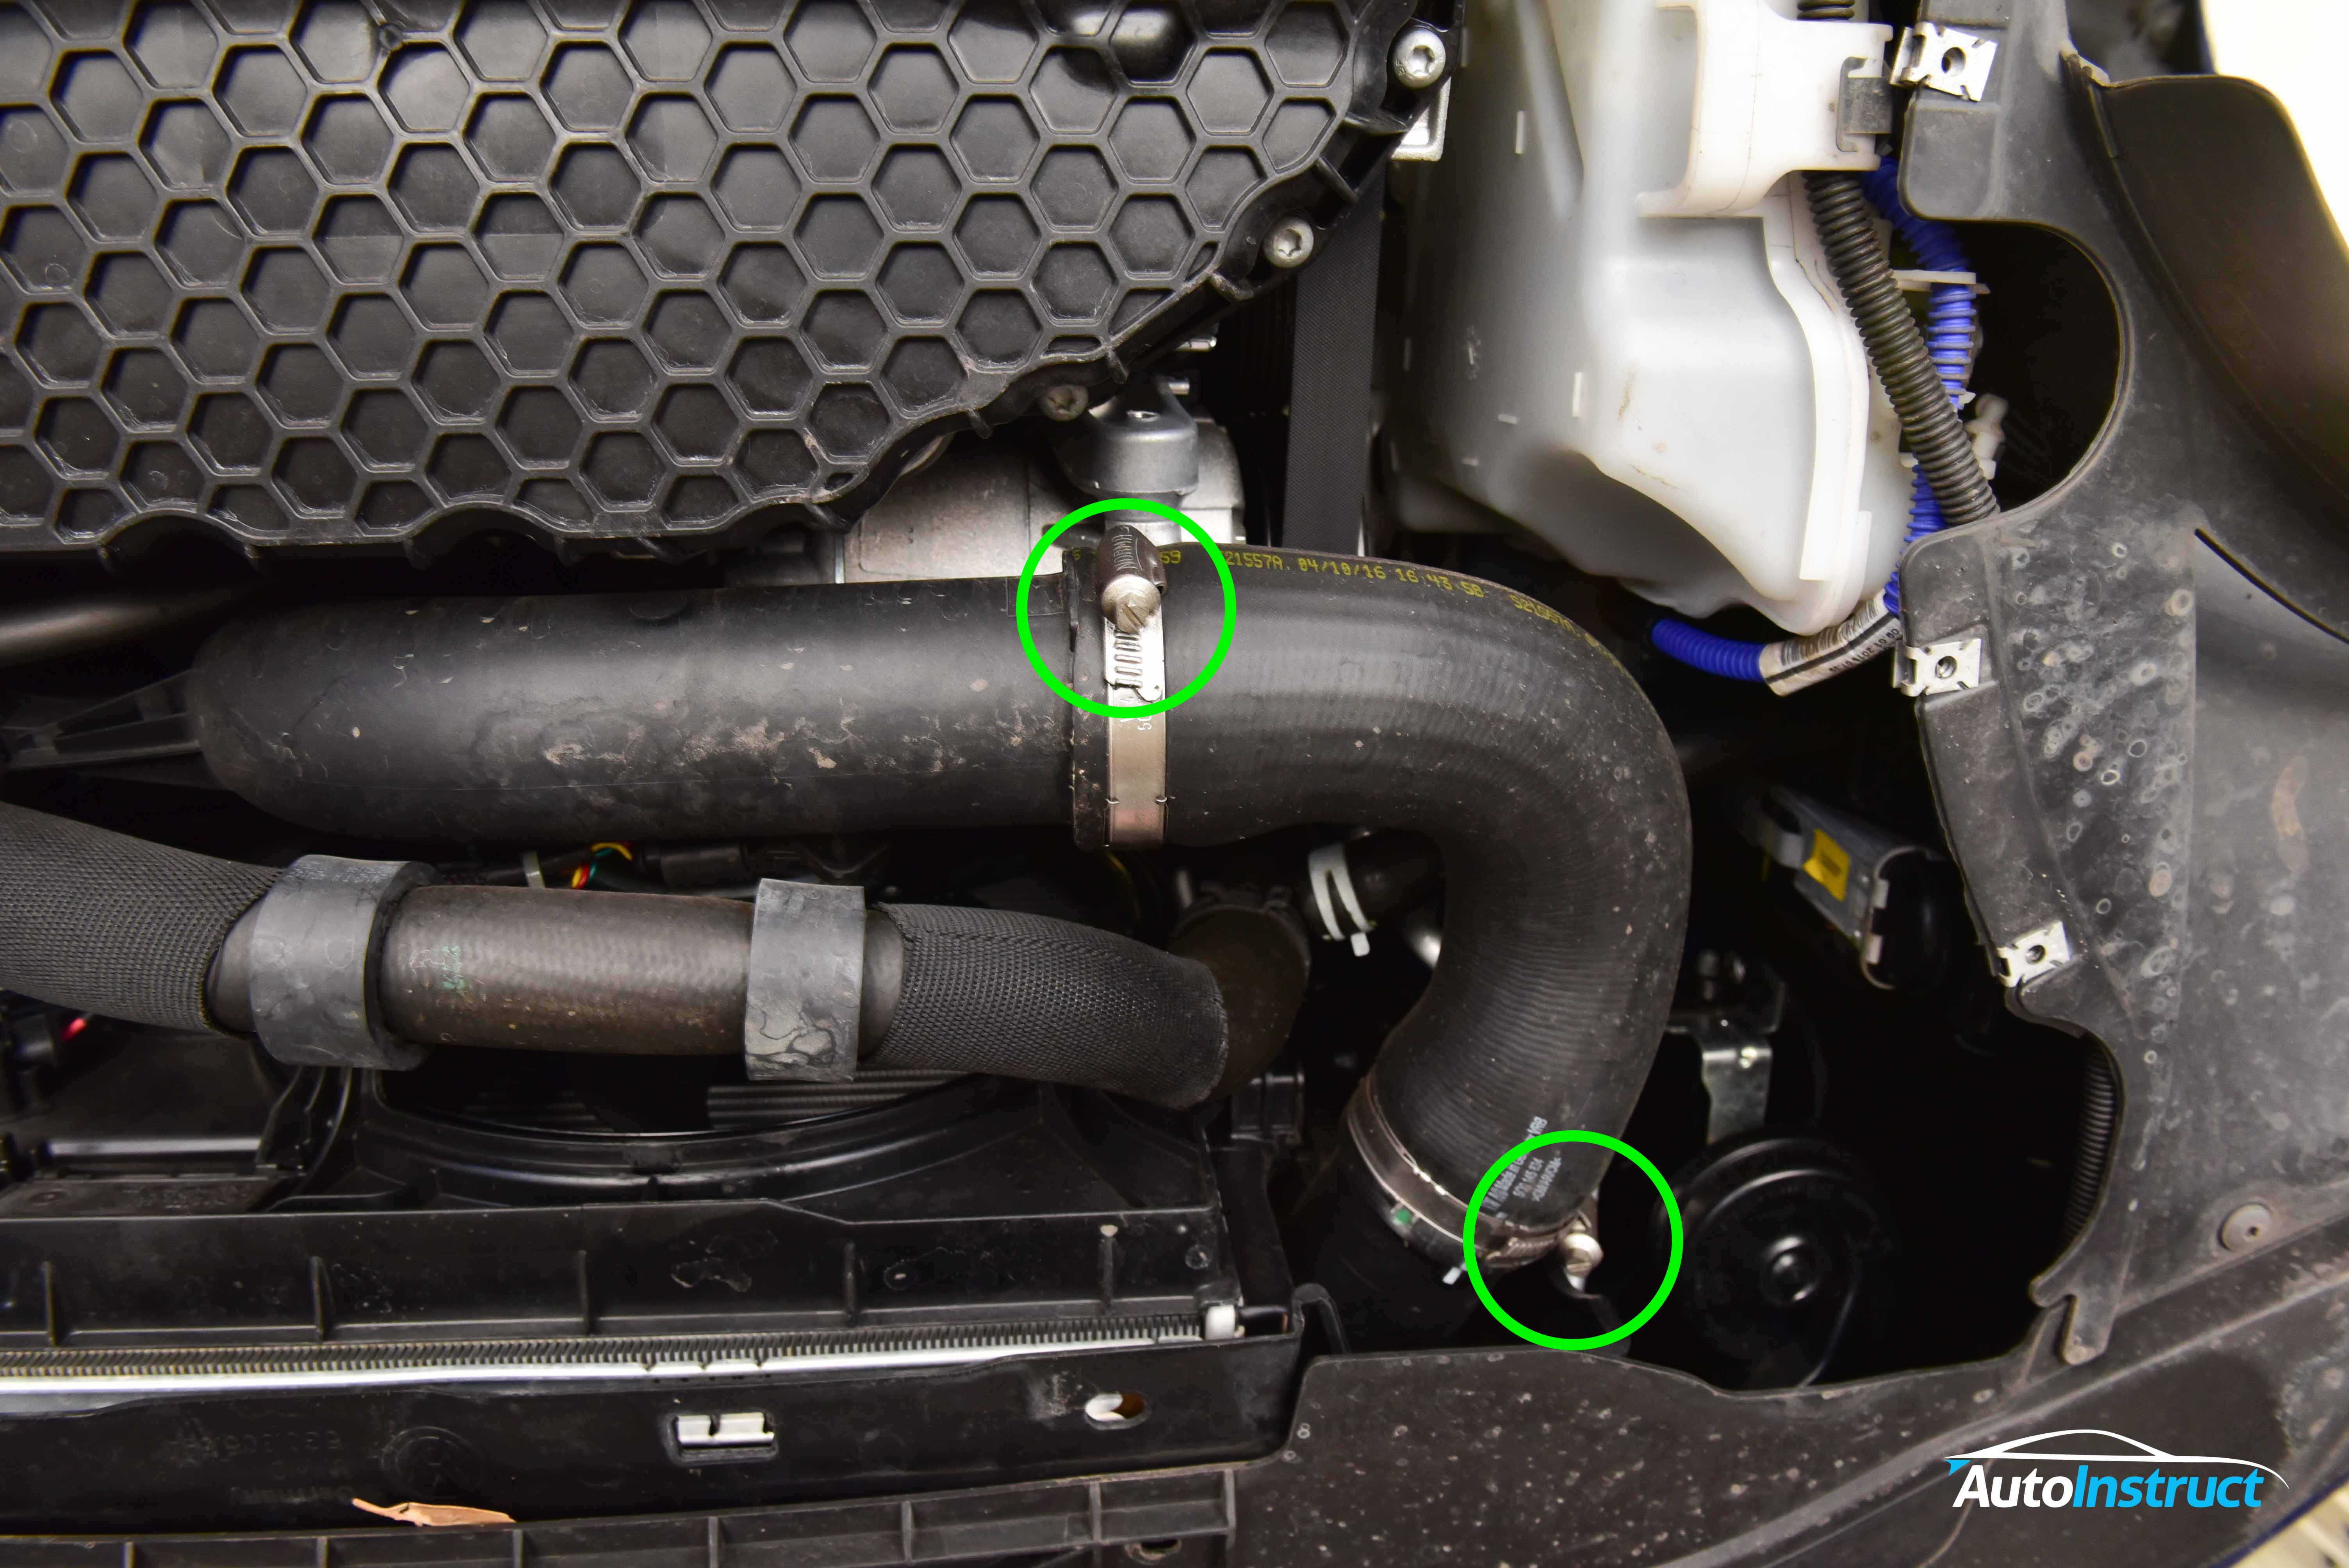
Step 5
Undo both hose clamps and remove the intercooler outlet pipe.
Step 6
Remove the inner-rear headlight screws.
Step 7
Remove the upper-rear headlight screws.
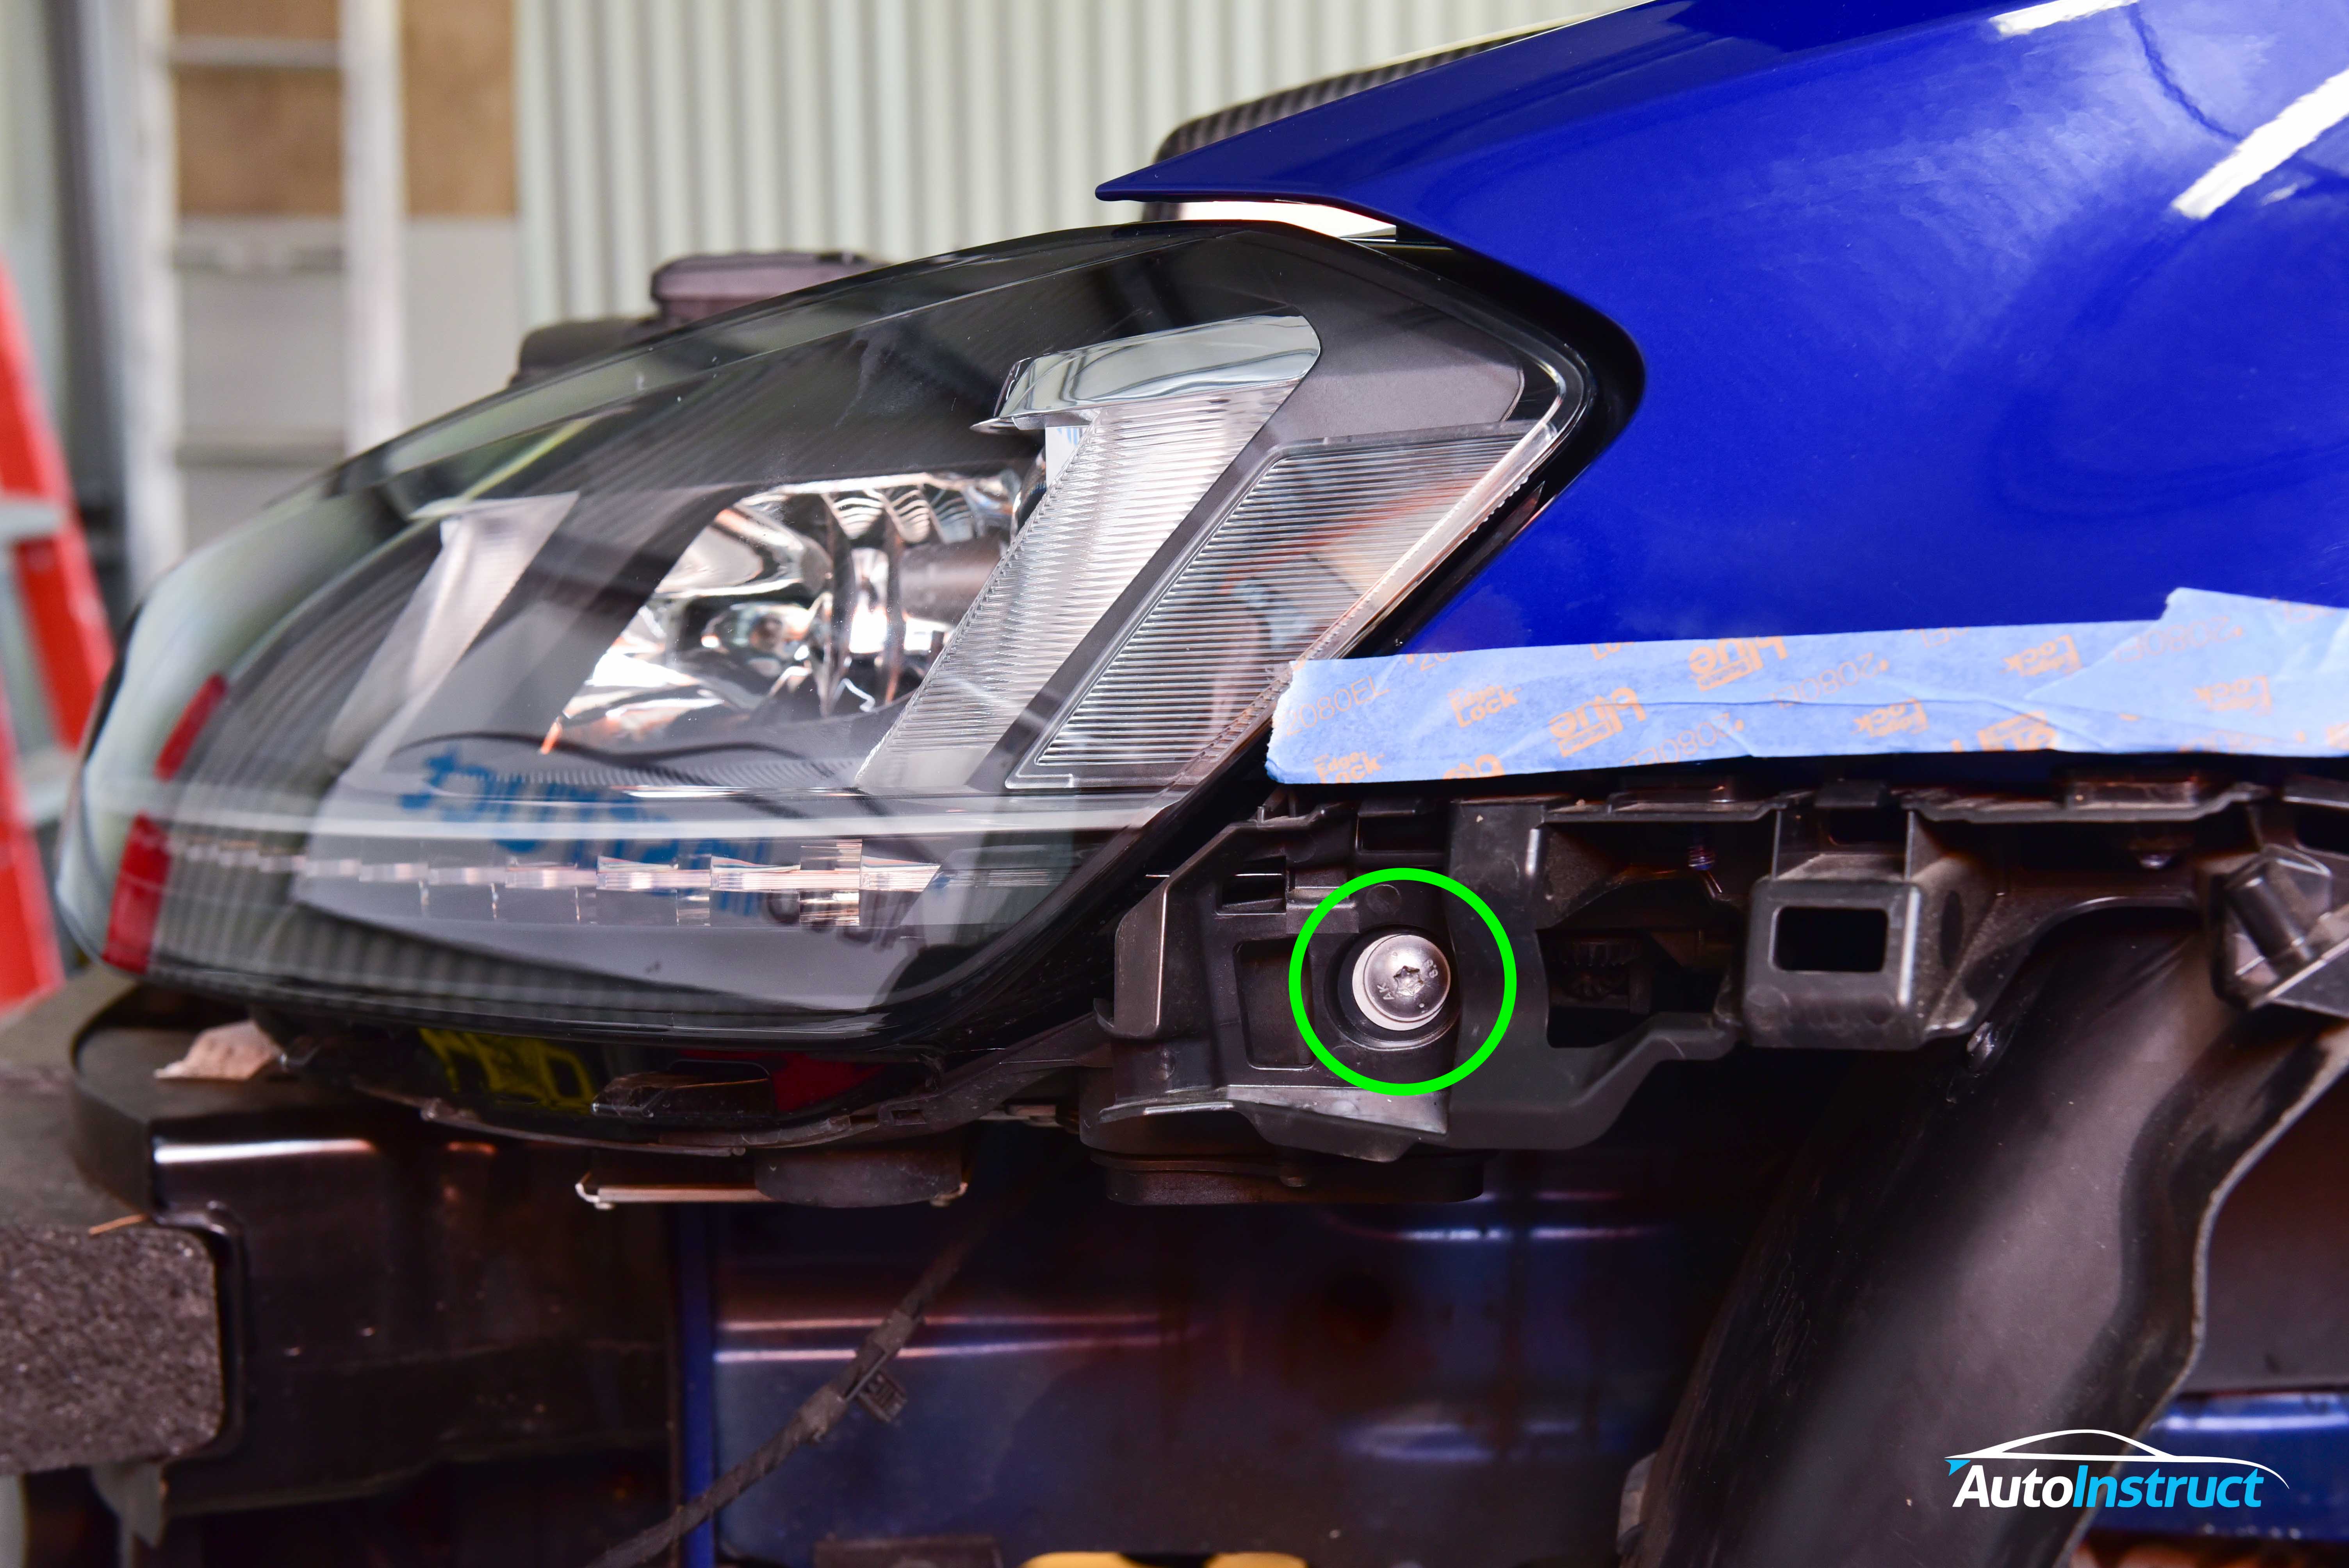
Step 8
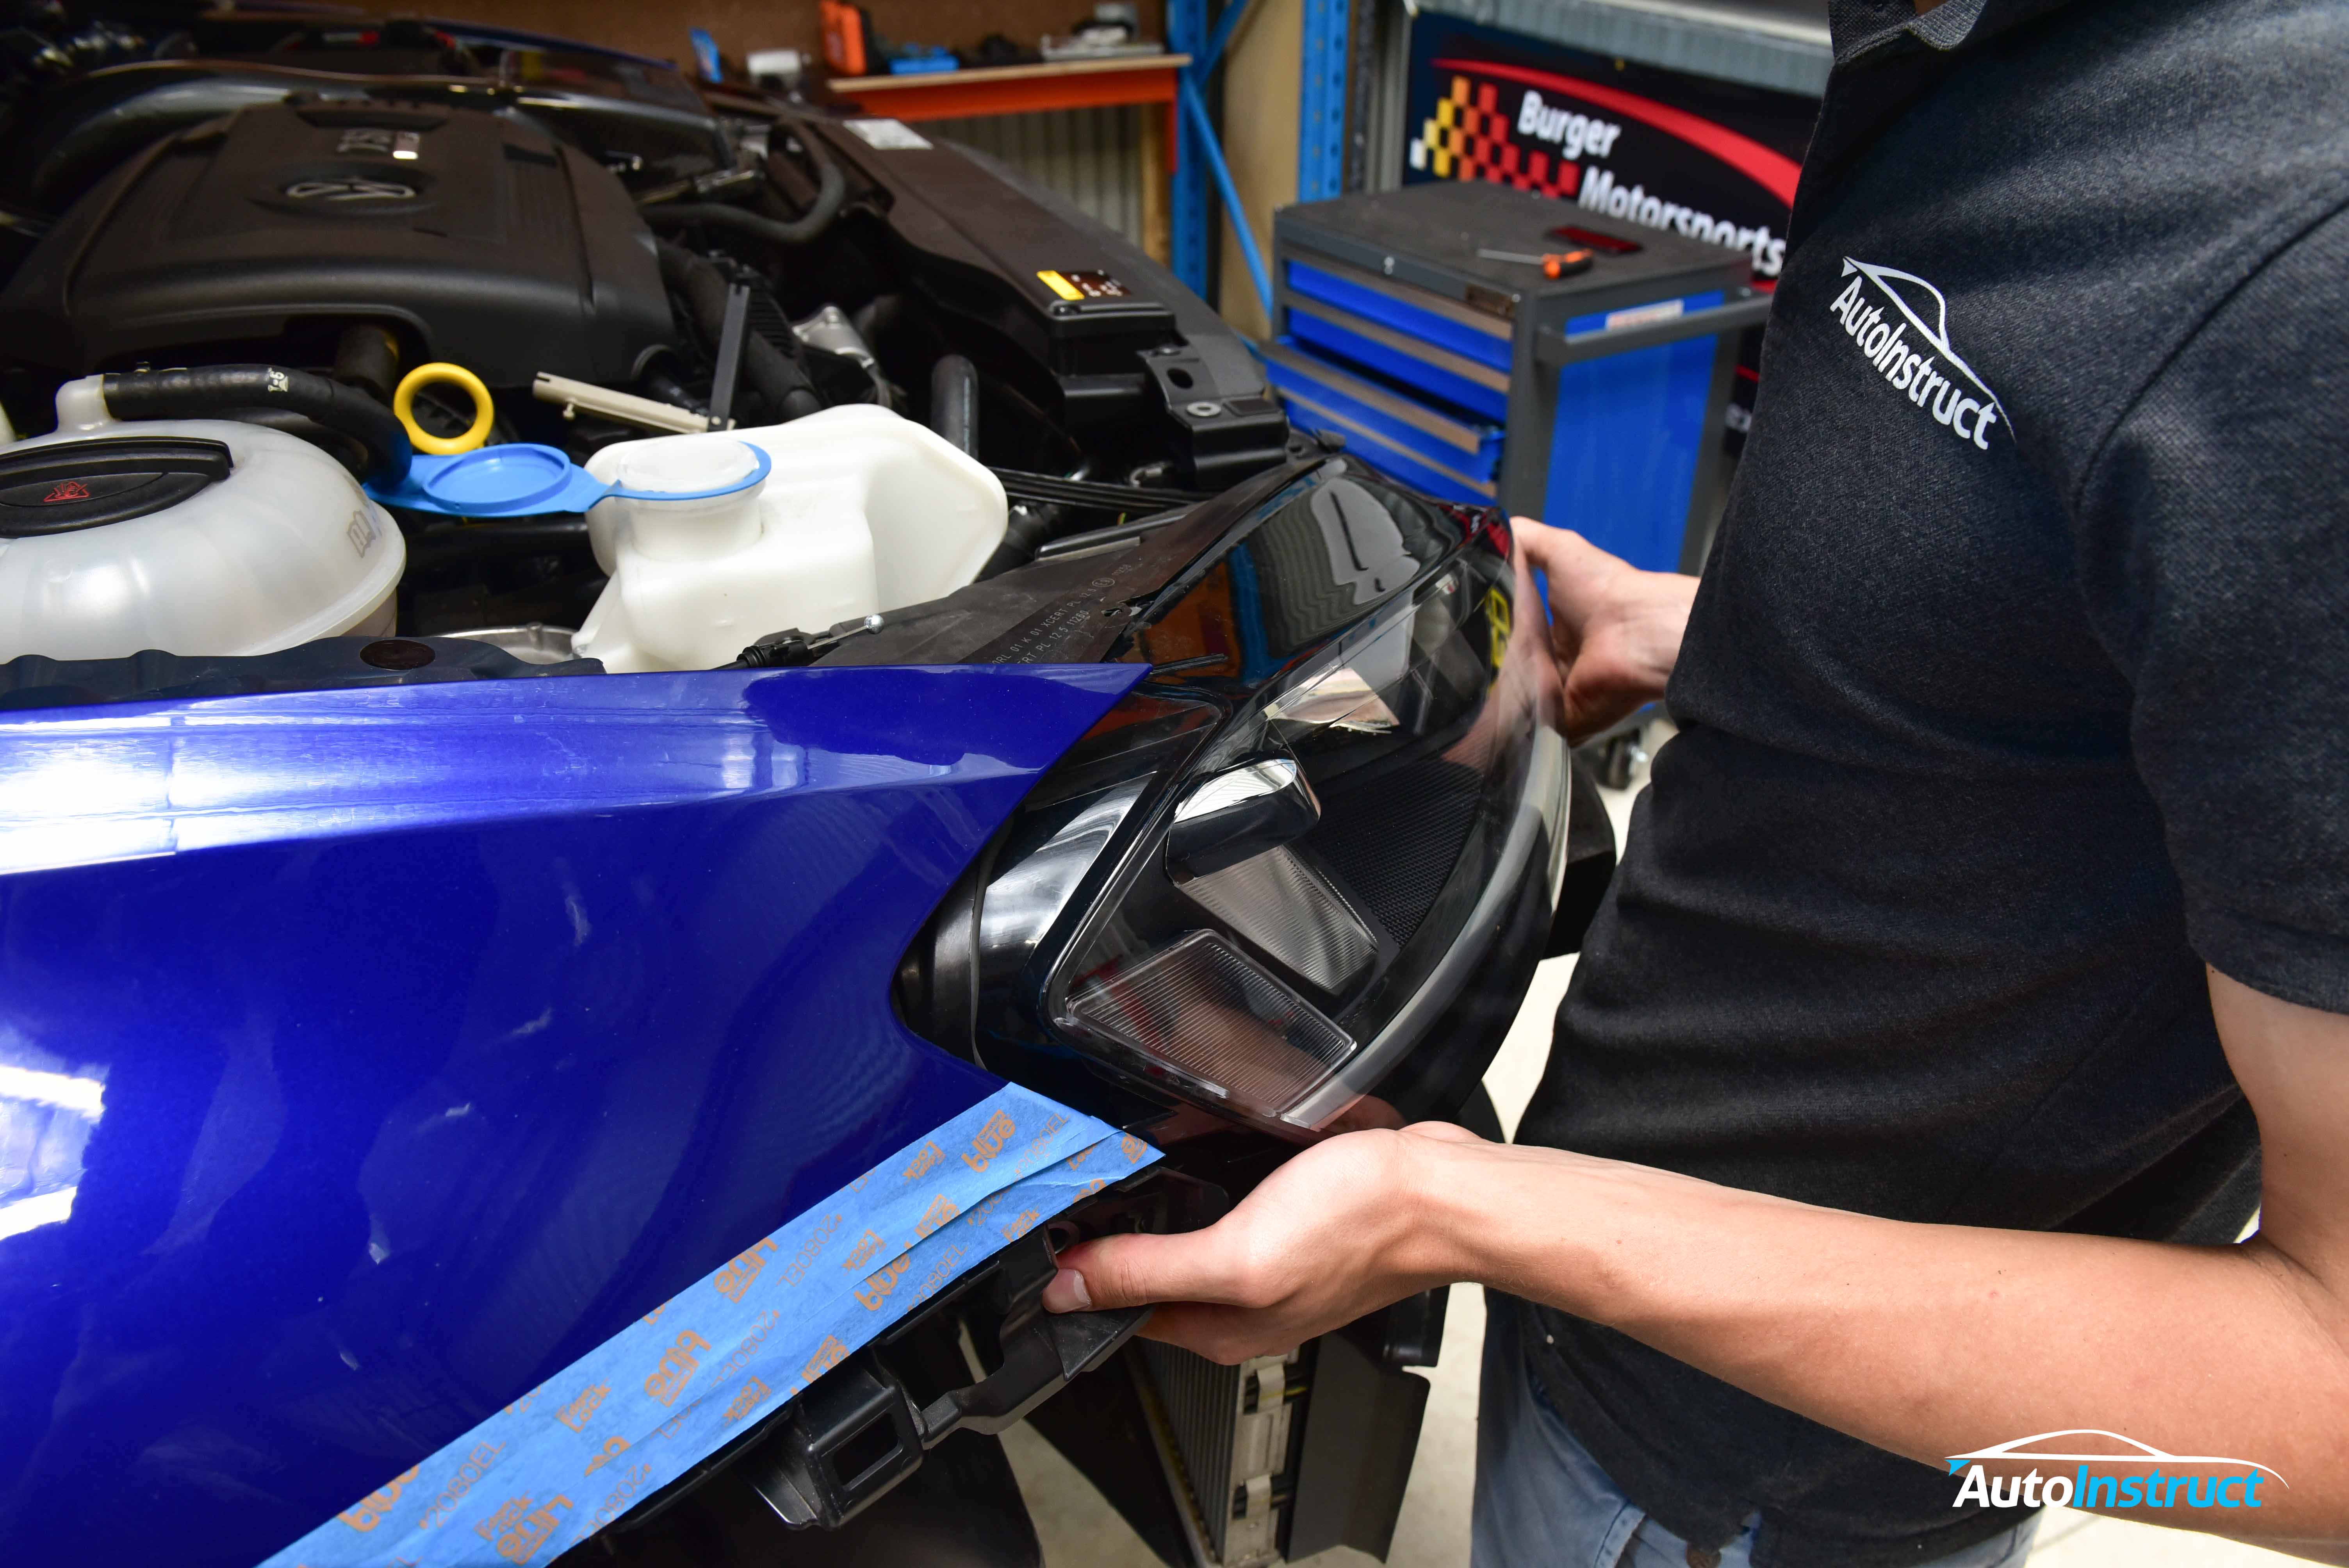
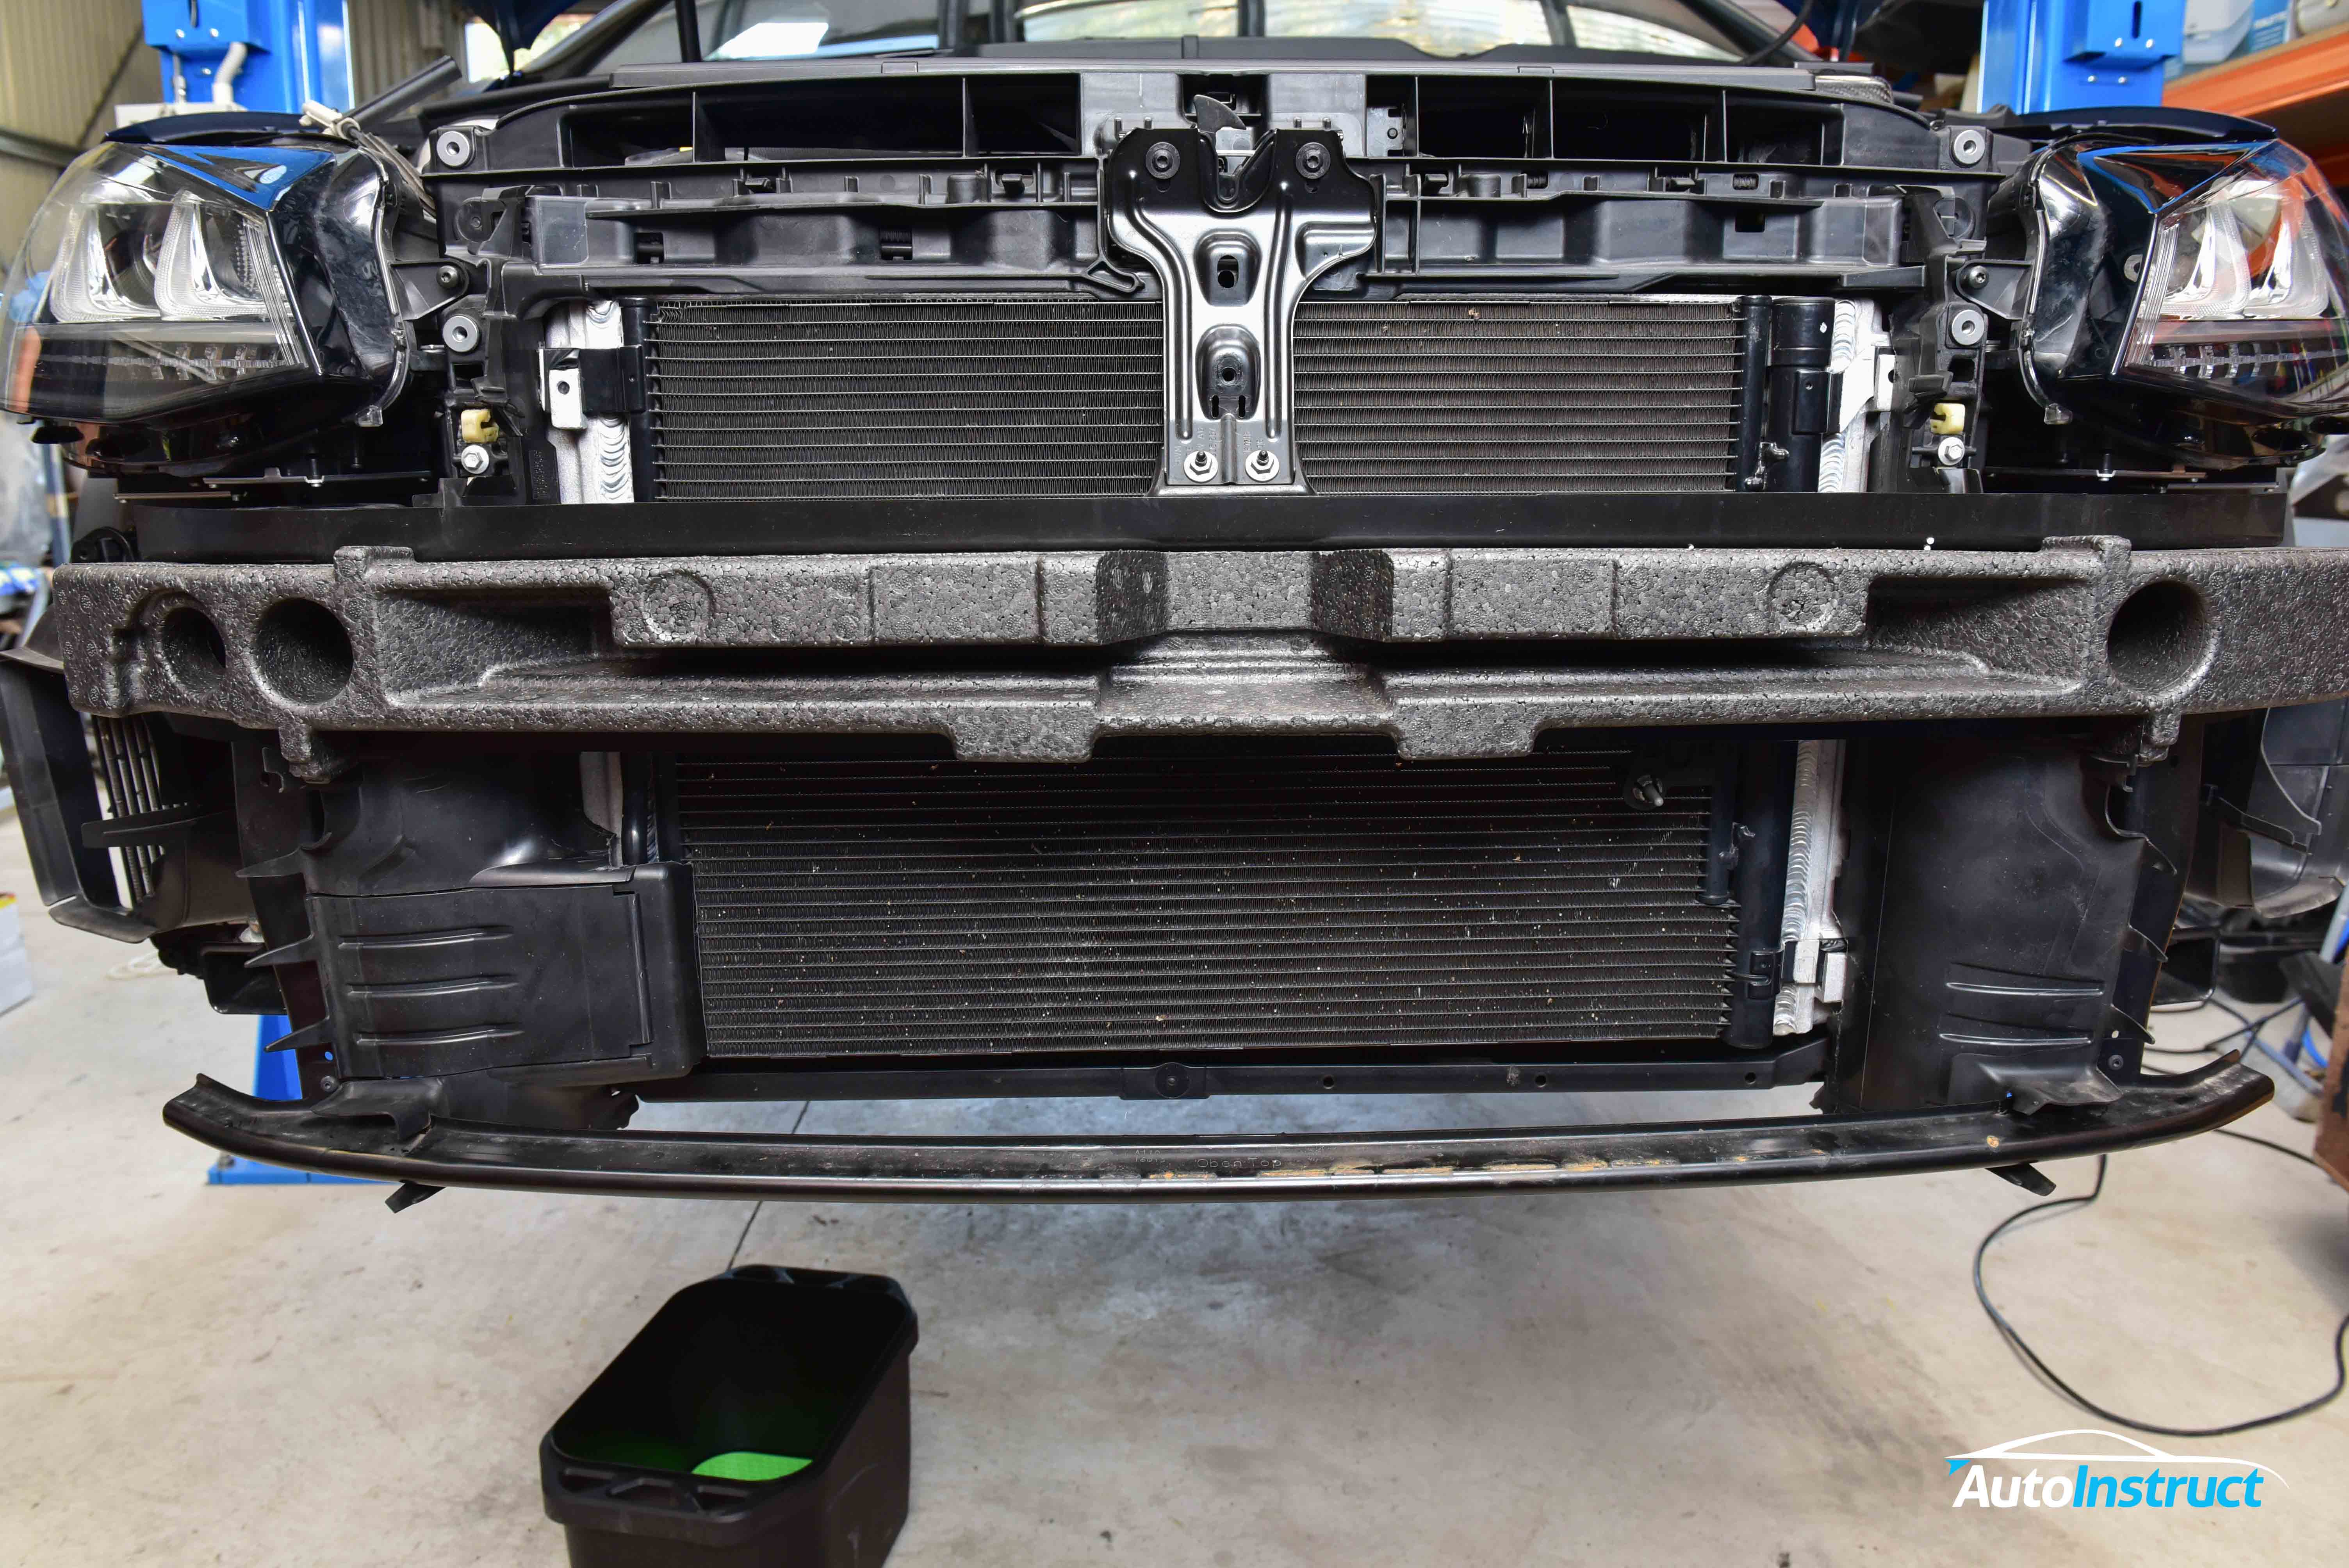
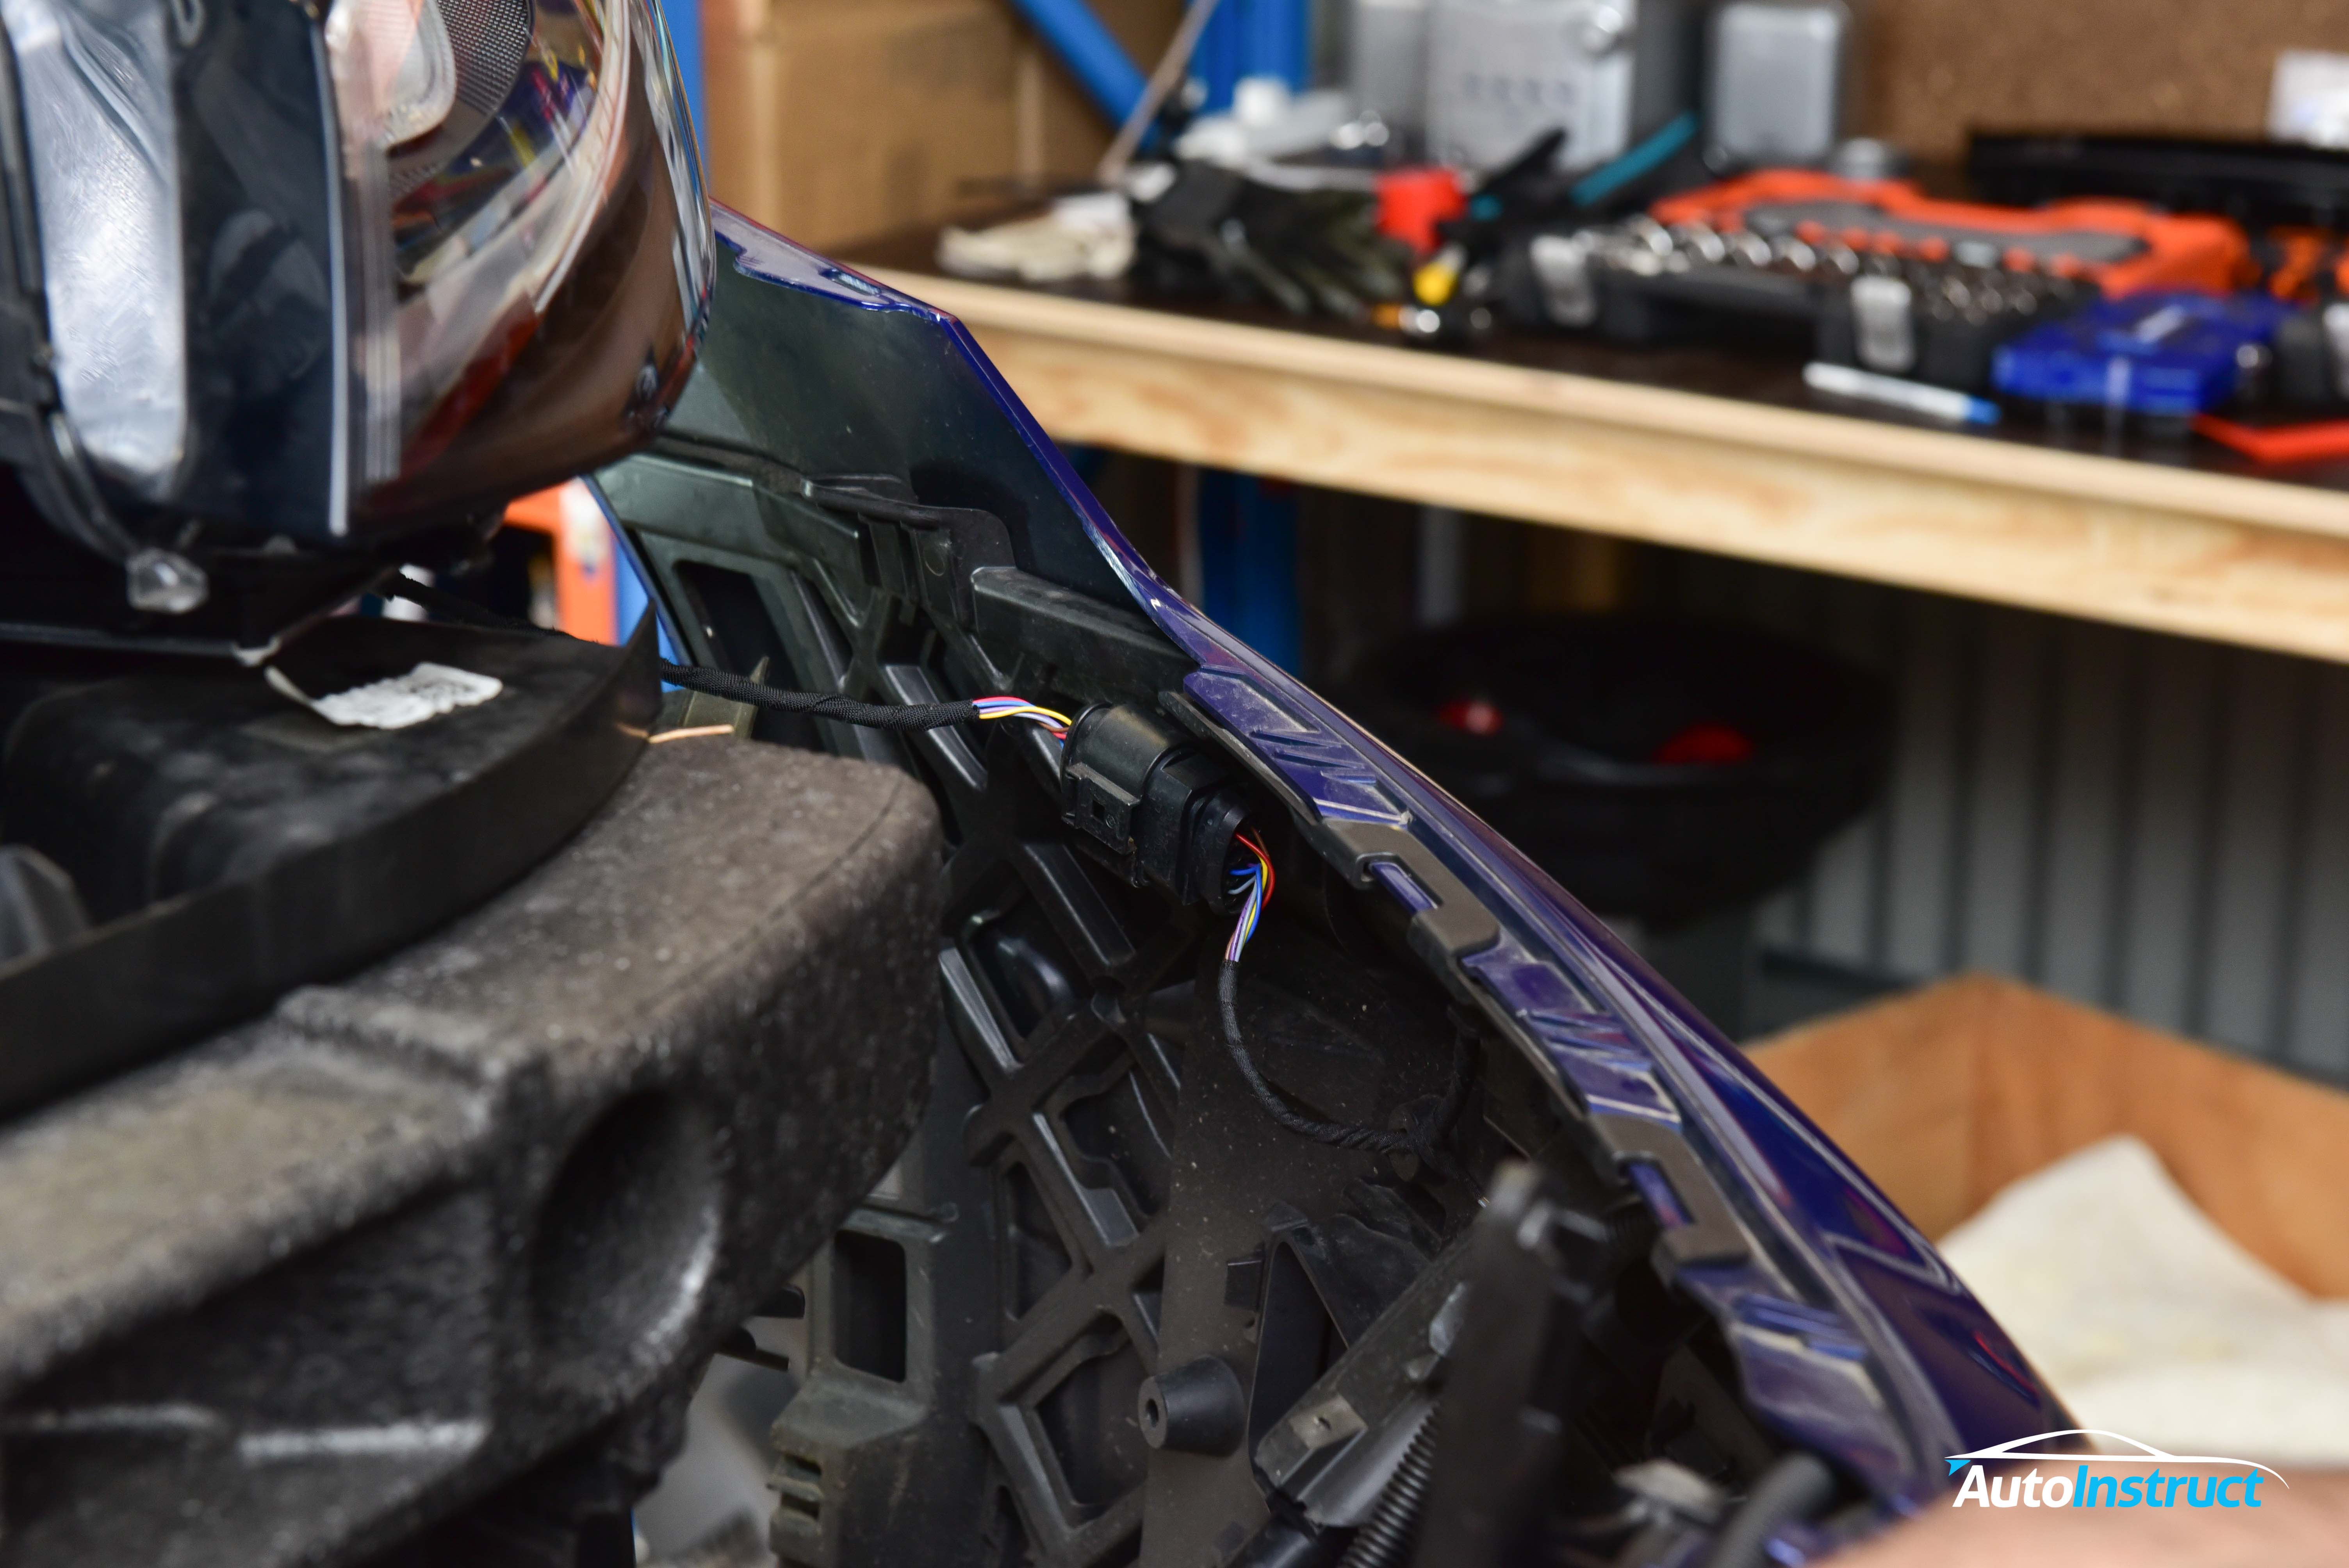
Remove the side headlight screws. You can now gently pull the headlight away from the vehicle, and disconnect the wiring loom. Do this on both sides.
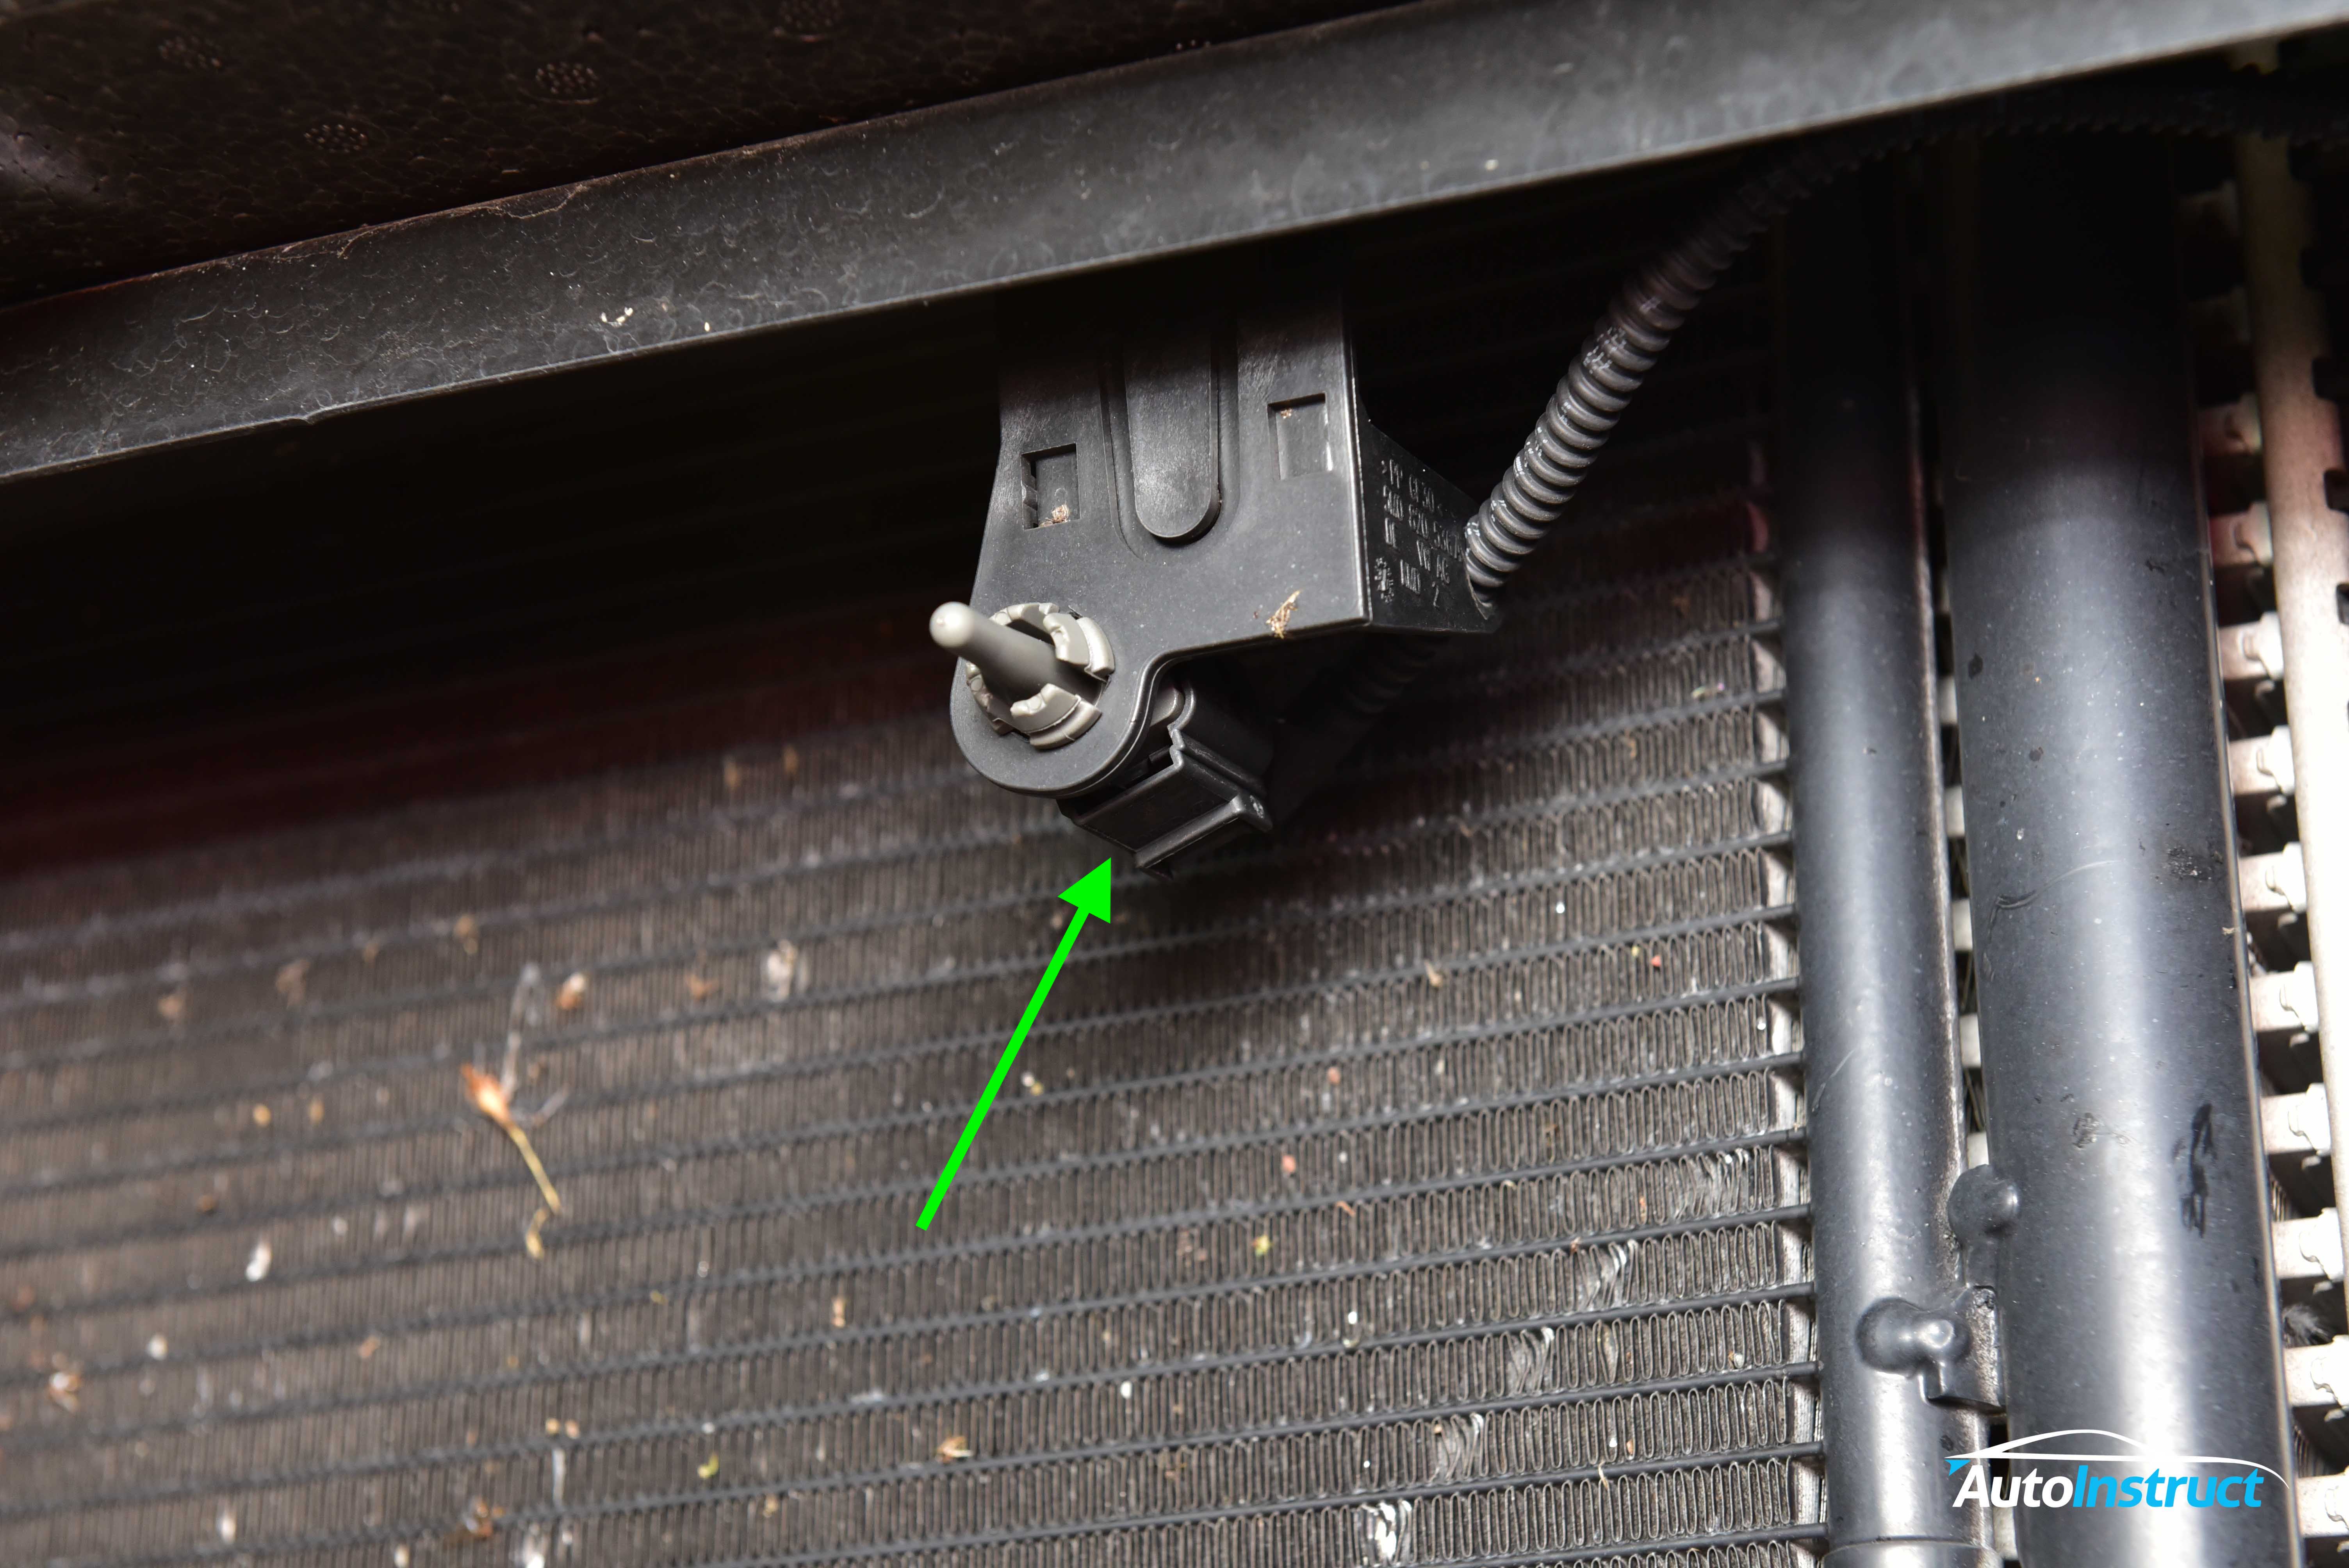
Step 9
Disconnect the coolant sensor, and any airbag sensors running along the top of the radiator (Look for the yellow connector). Their position tends to vary depending on your year and model.
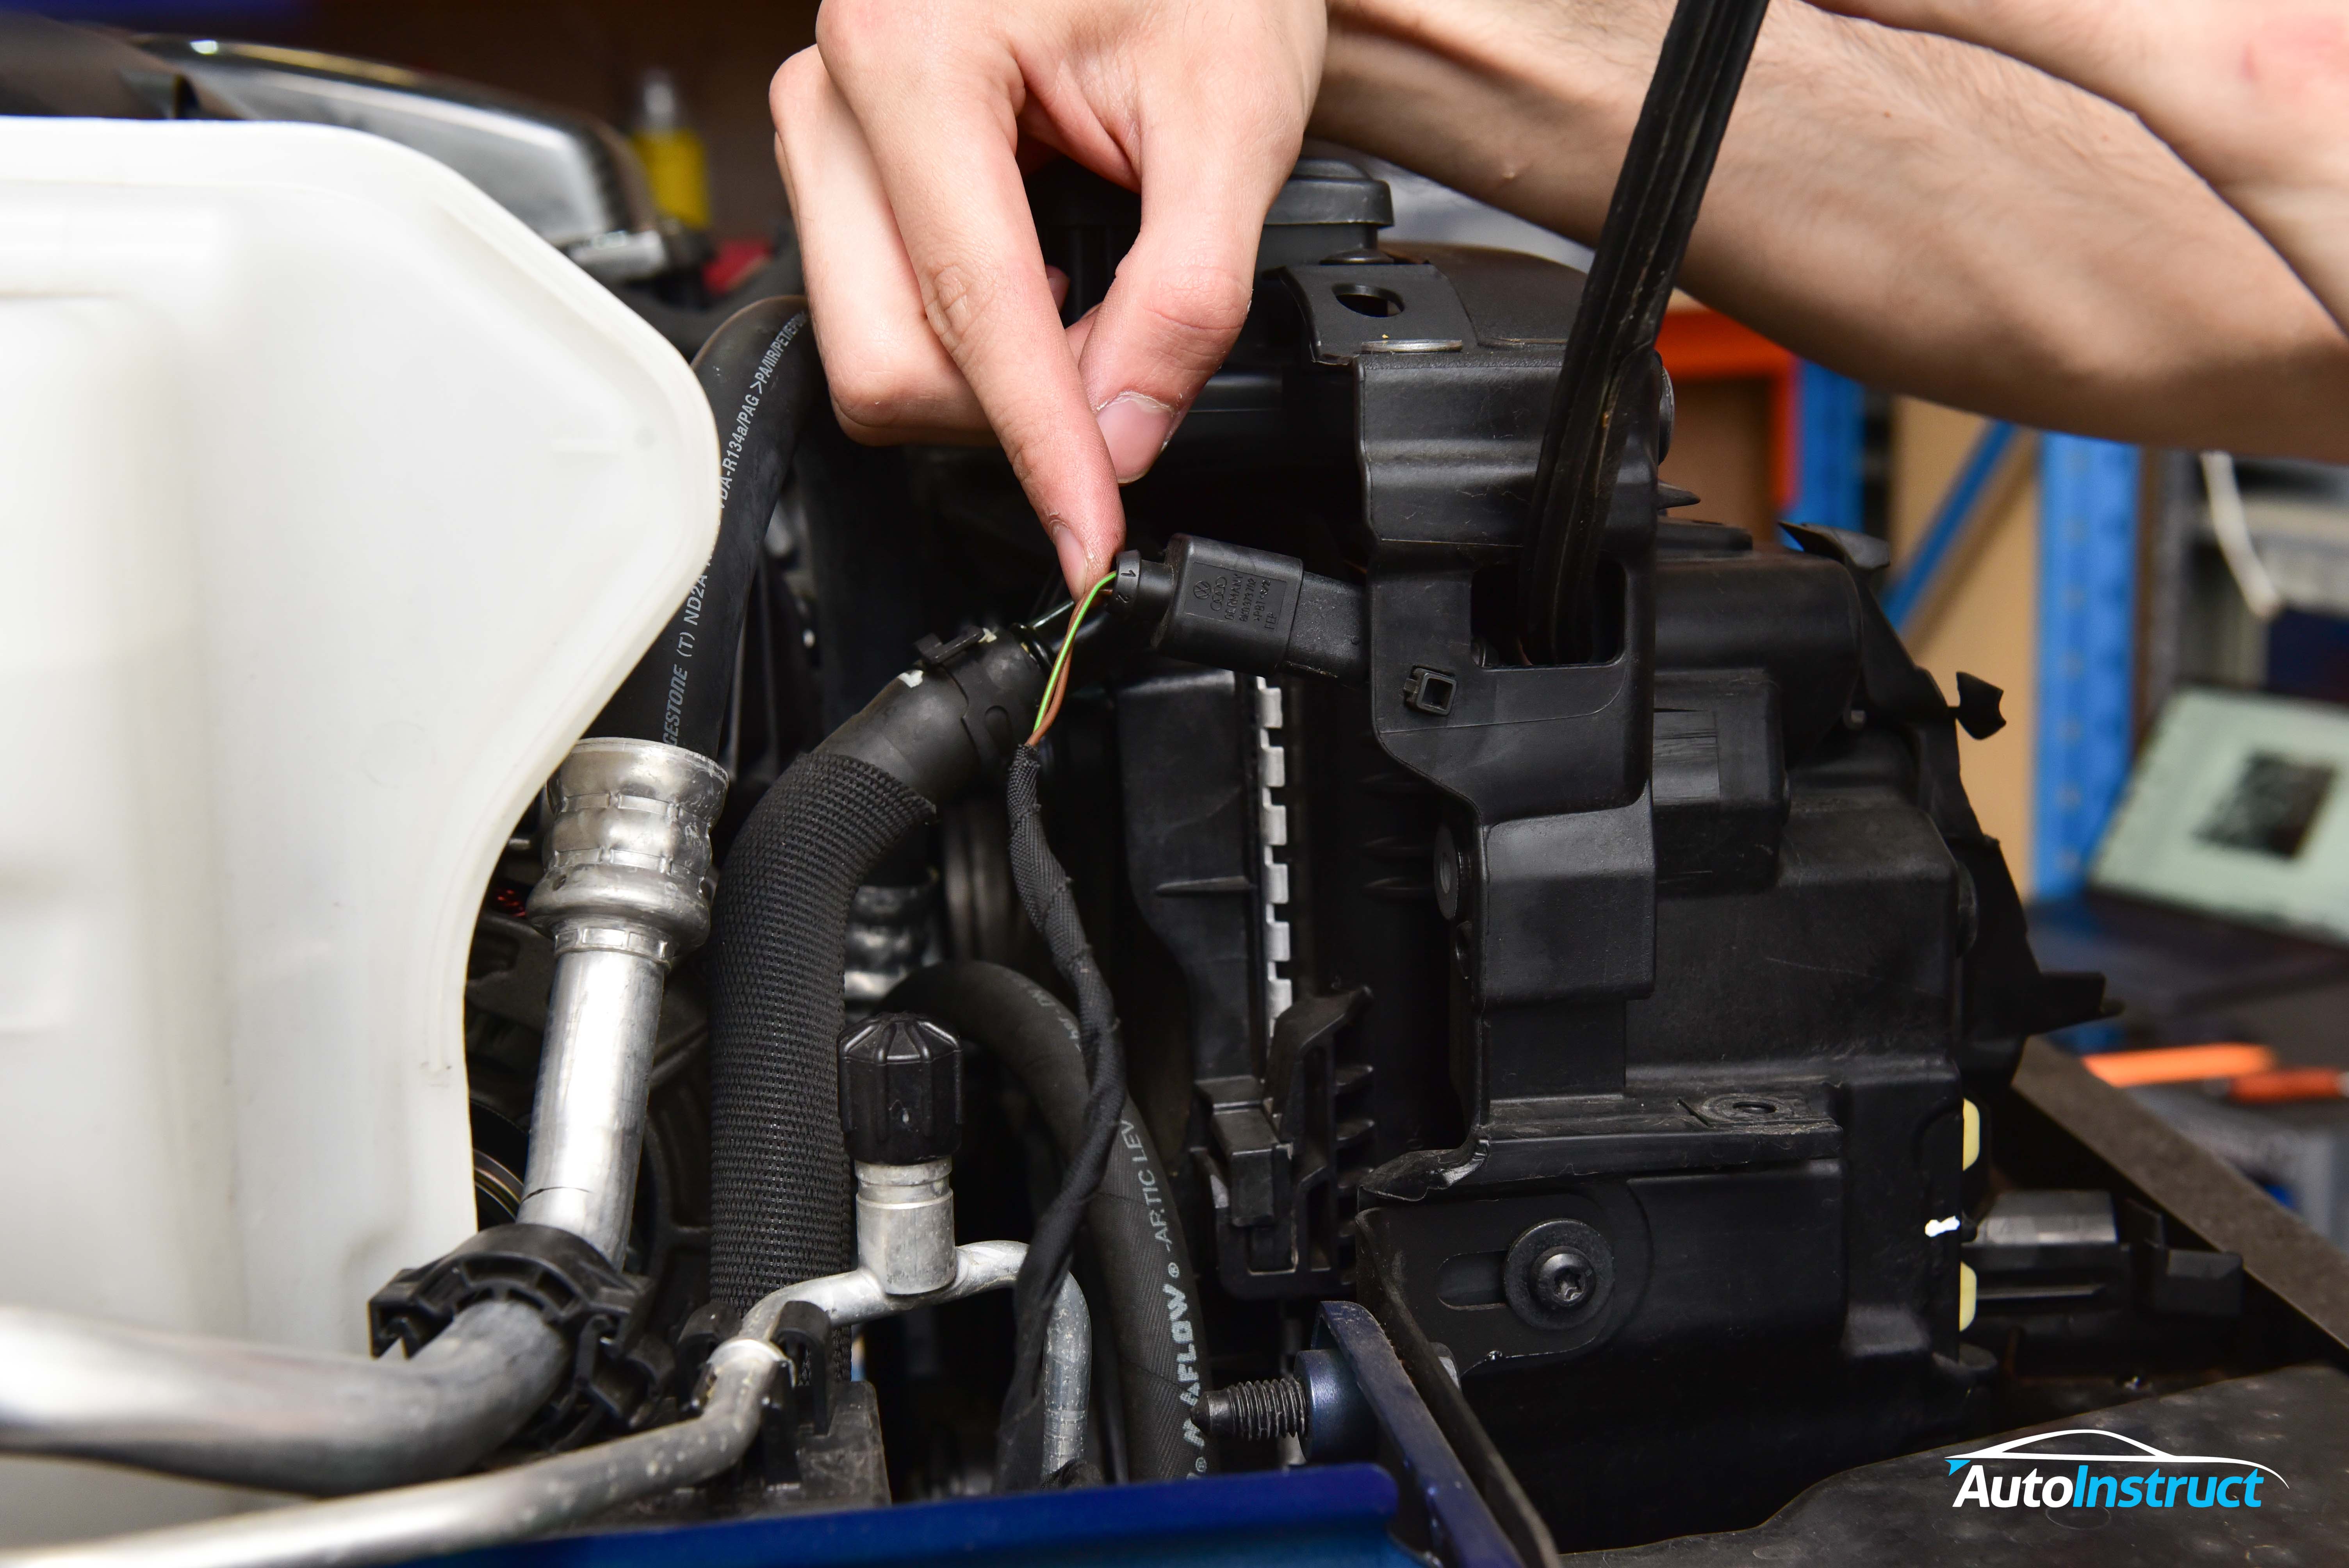
Step 10
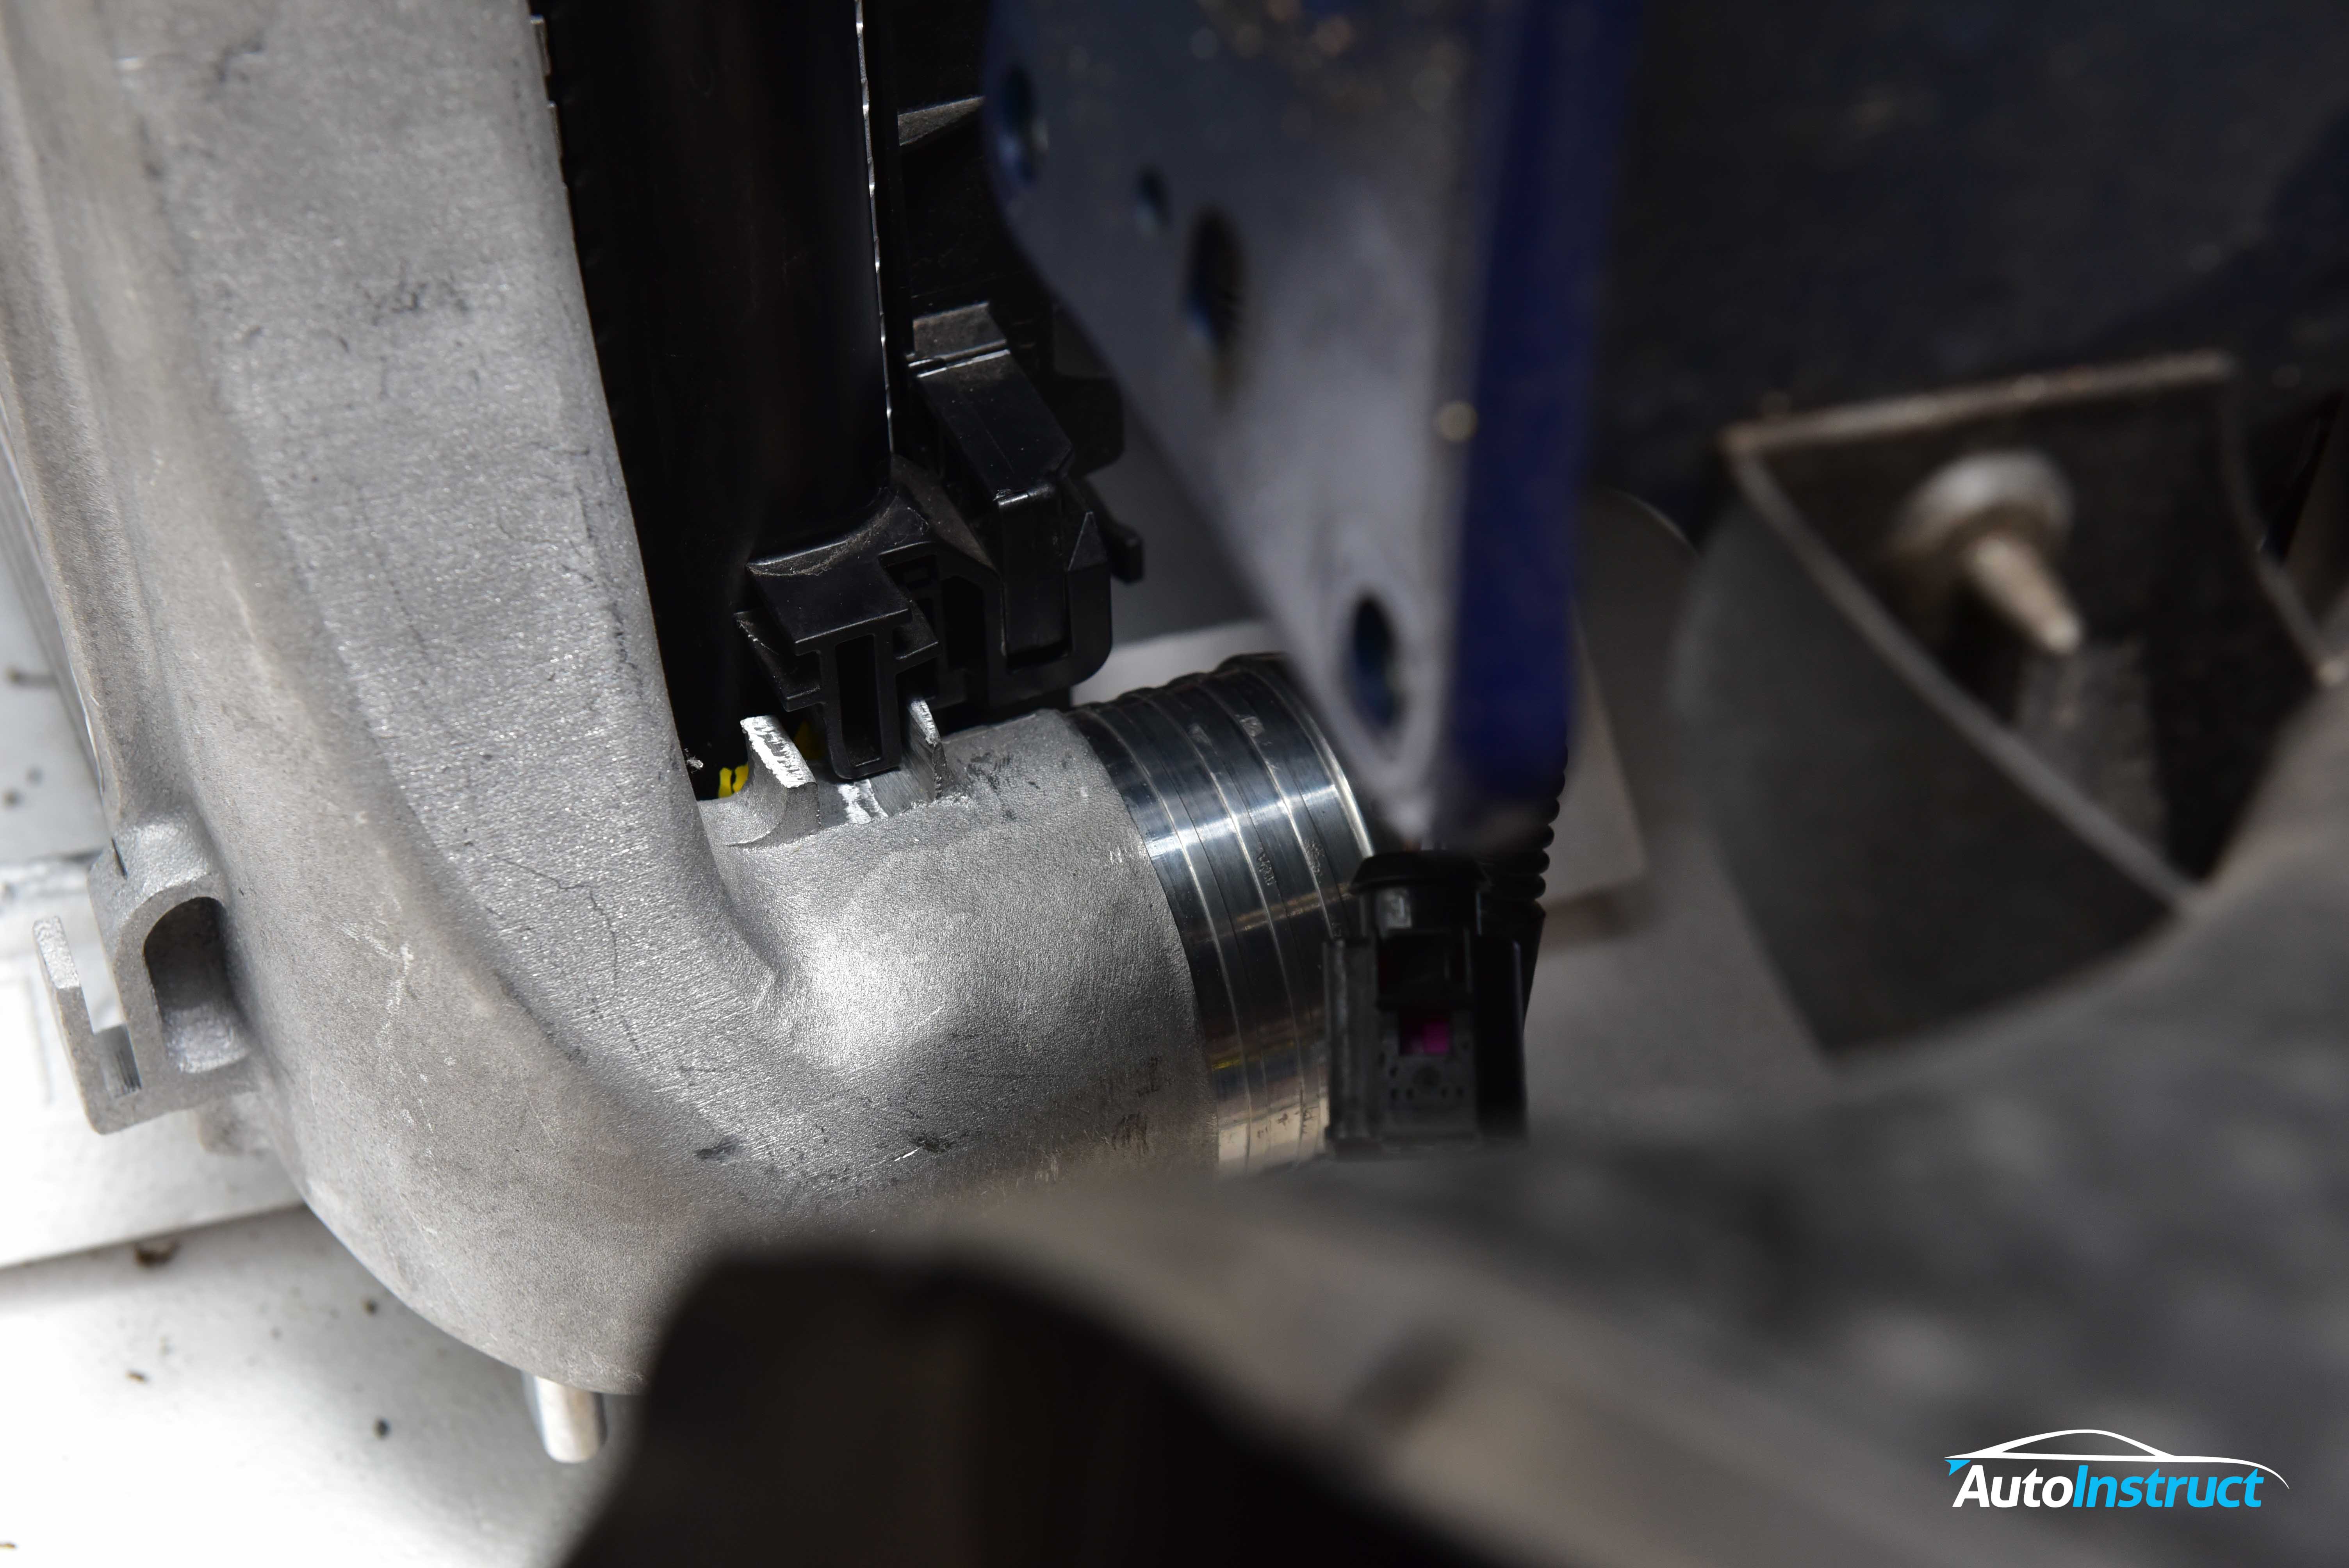
Disconnect the air temperature sensor, and pull the loom out from the radiator area.
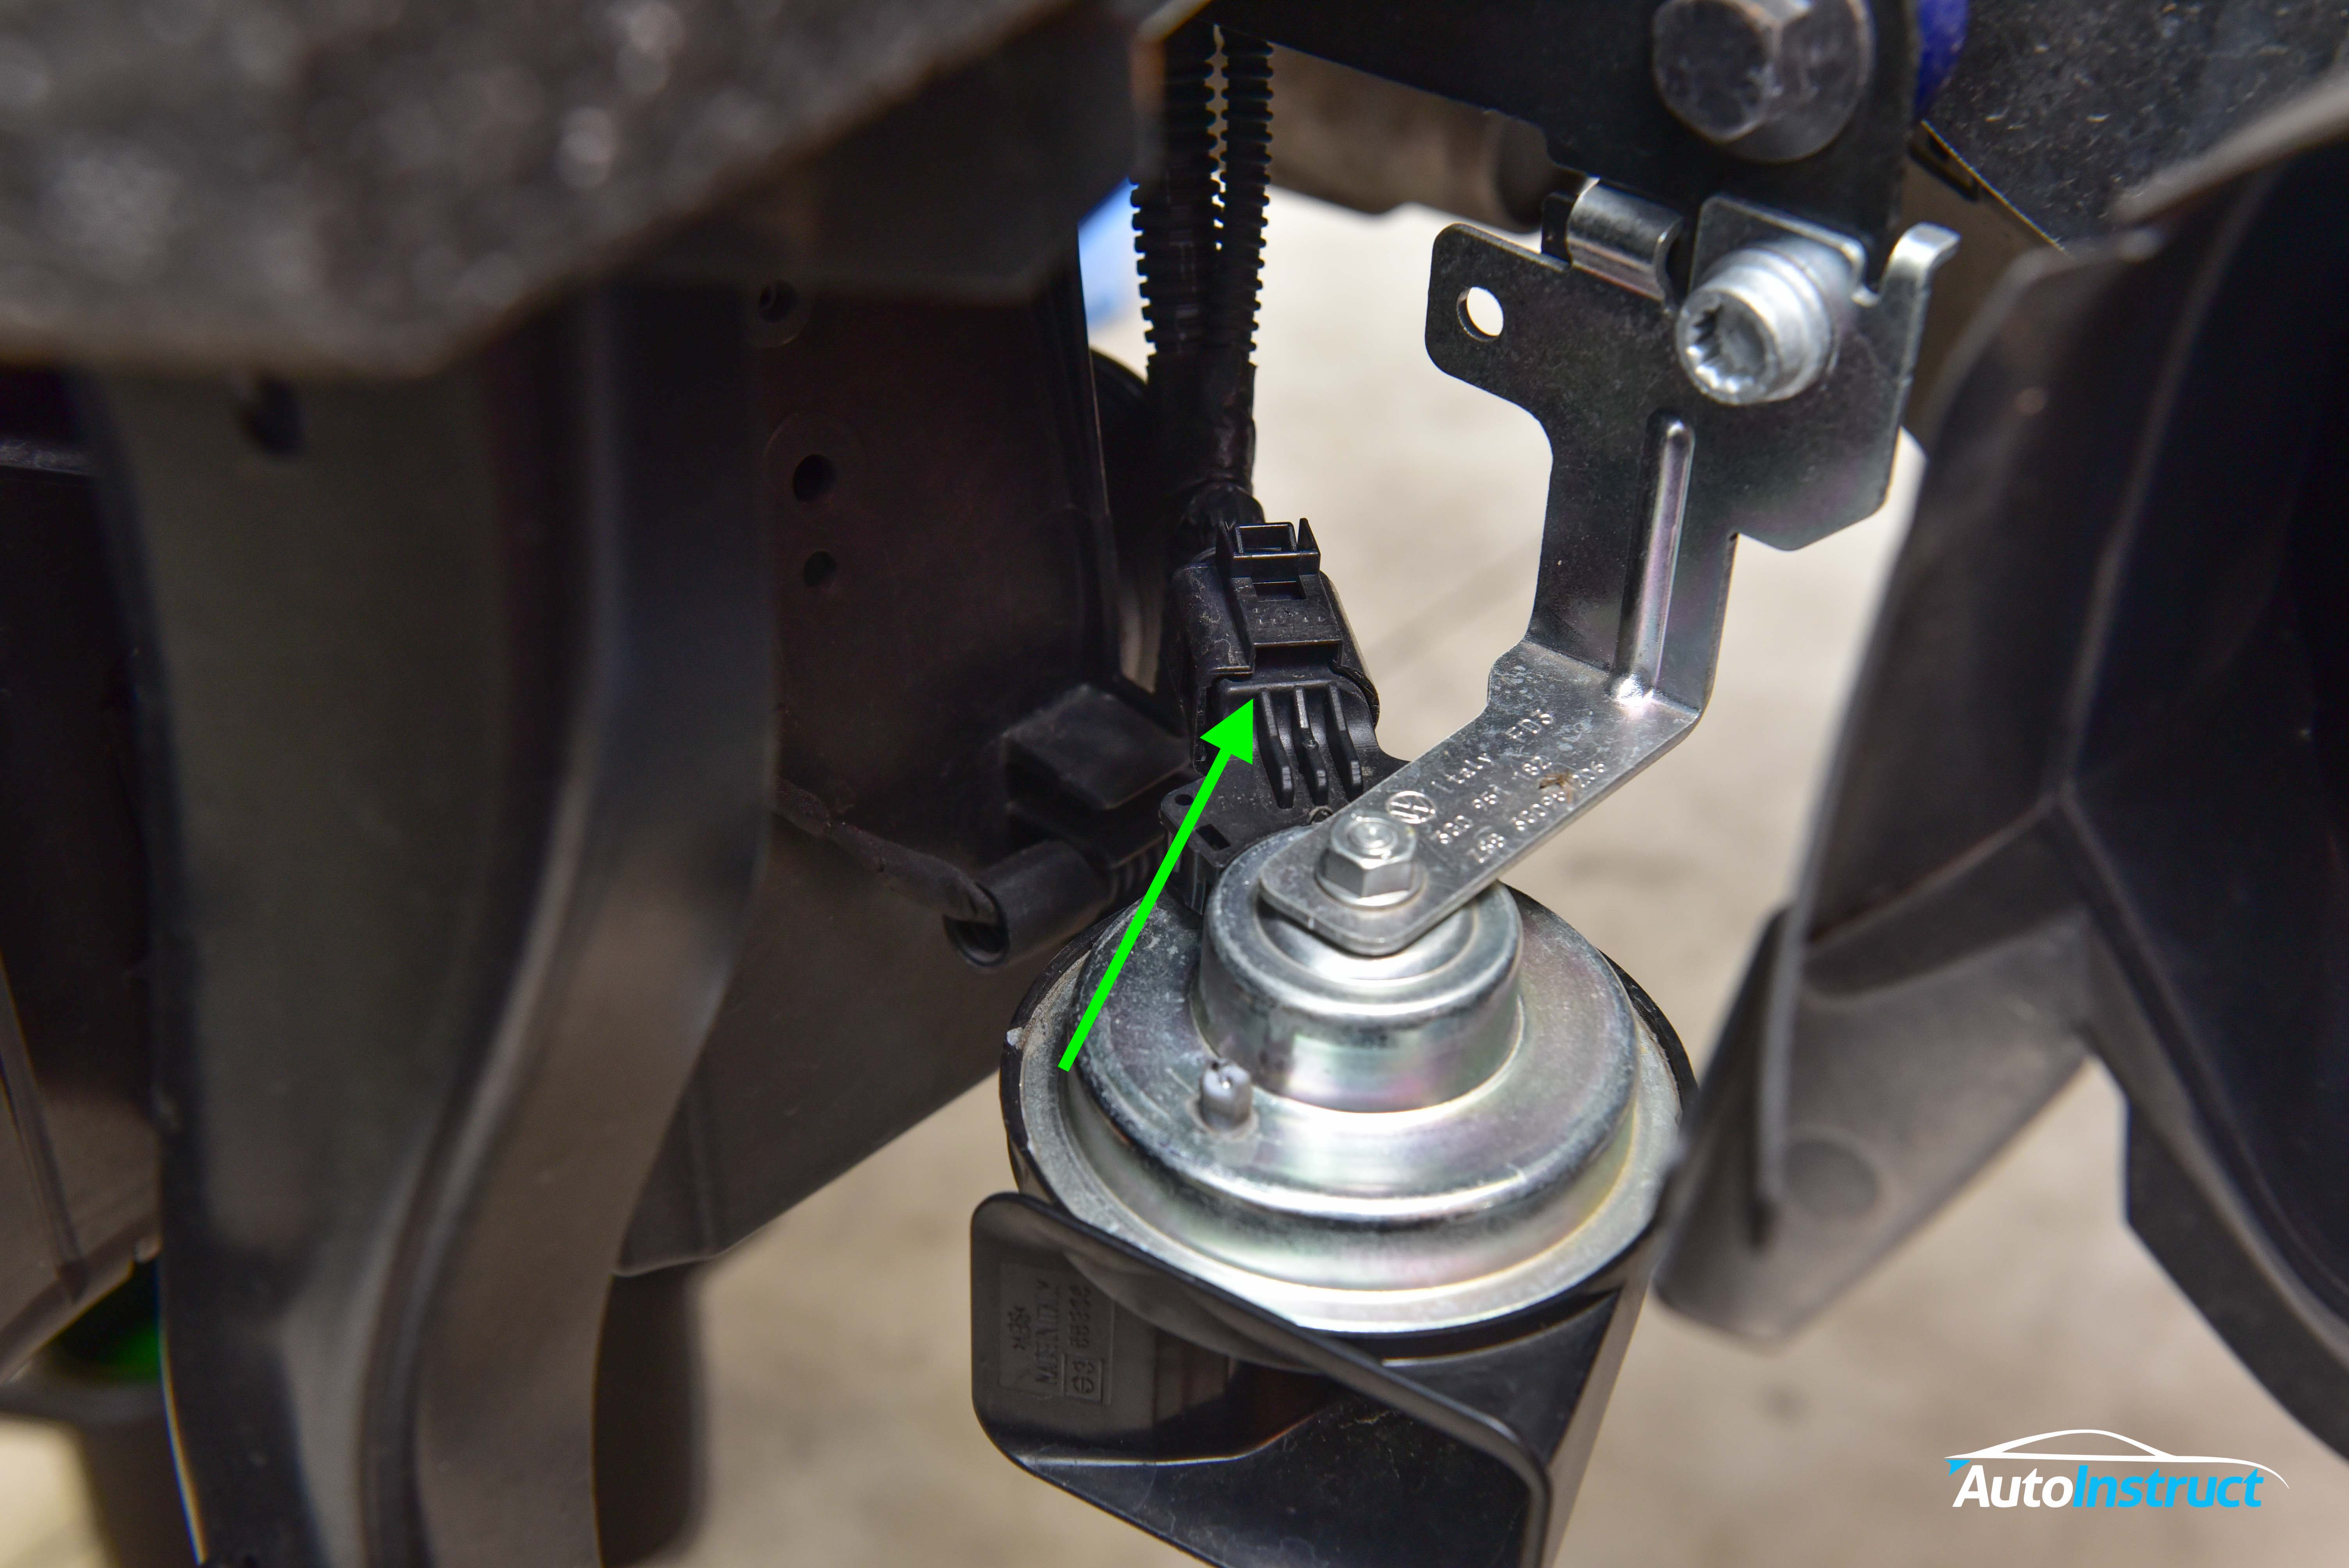
Step 11
Disconnect both the left and right horns
Step 12
Place a solid box or similar under the entire radiator and intercooler assembly to support the unit
Scribe the location of the following six bolts, on both the left and right side of the vehicle.
First remove the inner bolts securing the core assembly on both sides. The radiator and intercooler will now be supported by the box.
Now remove the four large bolts securing the crash support beam. Do this on both sides and remove the beam.
Step 13
Remove the inner air guides sitting loosely on the AC Condenser.
Step 14
Remove the large air guides. These are held in by three clips on either side. Depress each clip with a screwdriver to release them.
Step 15
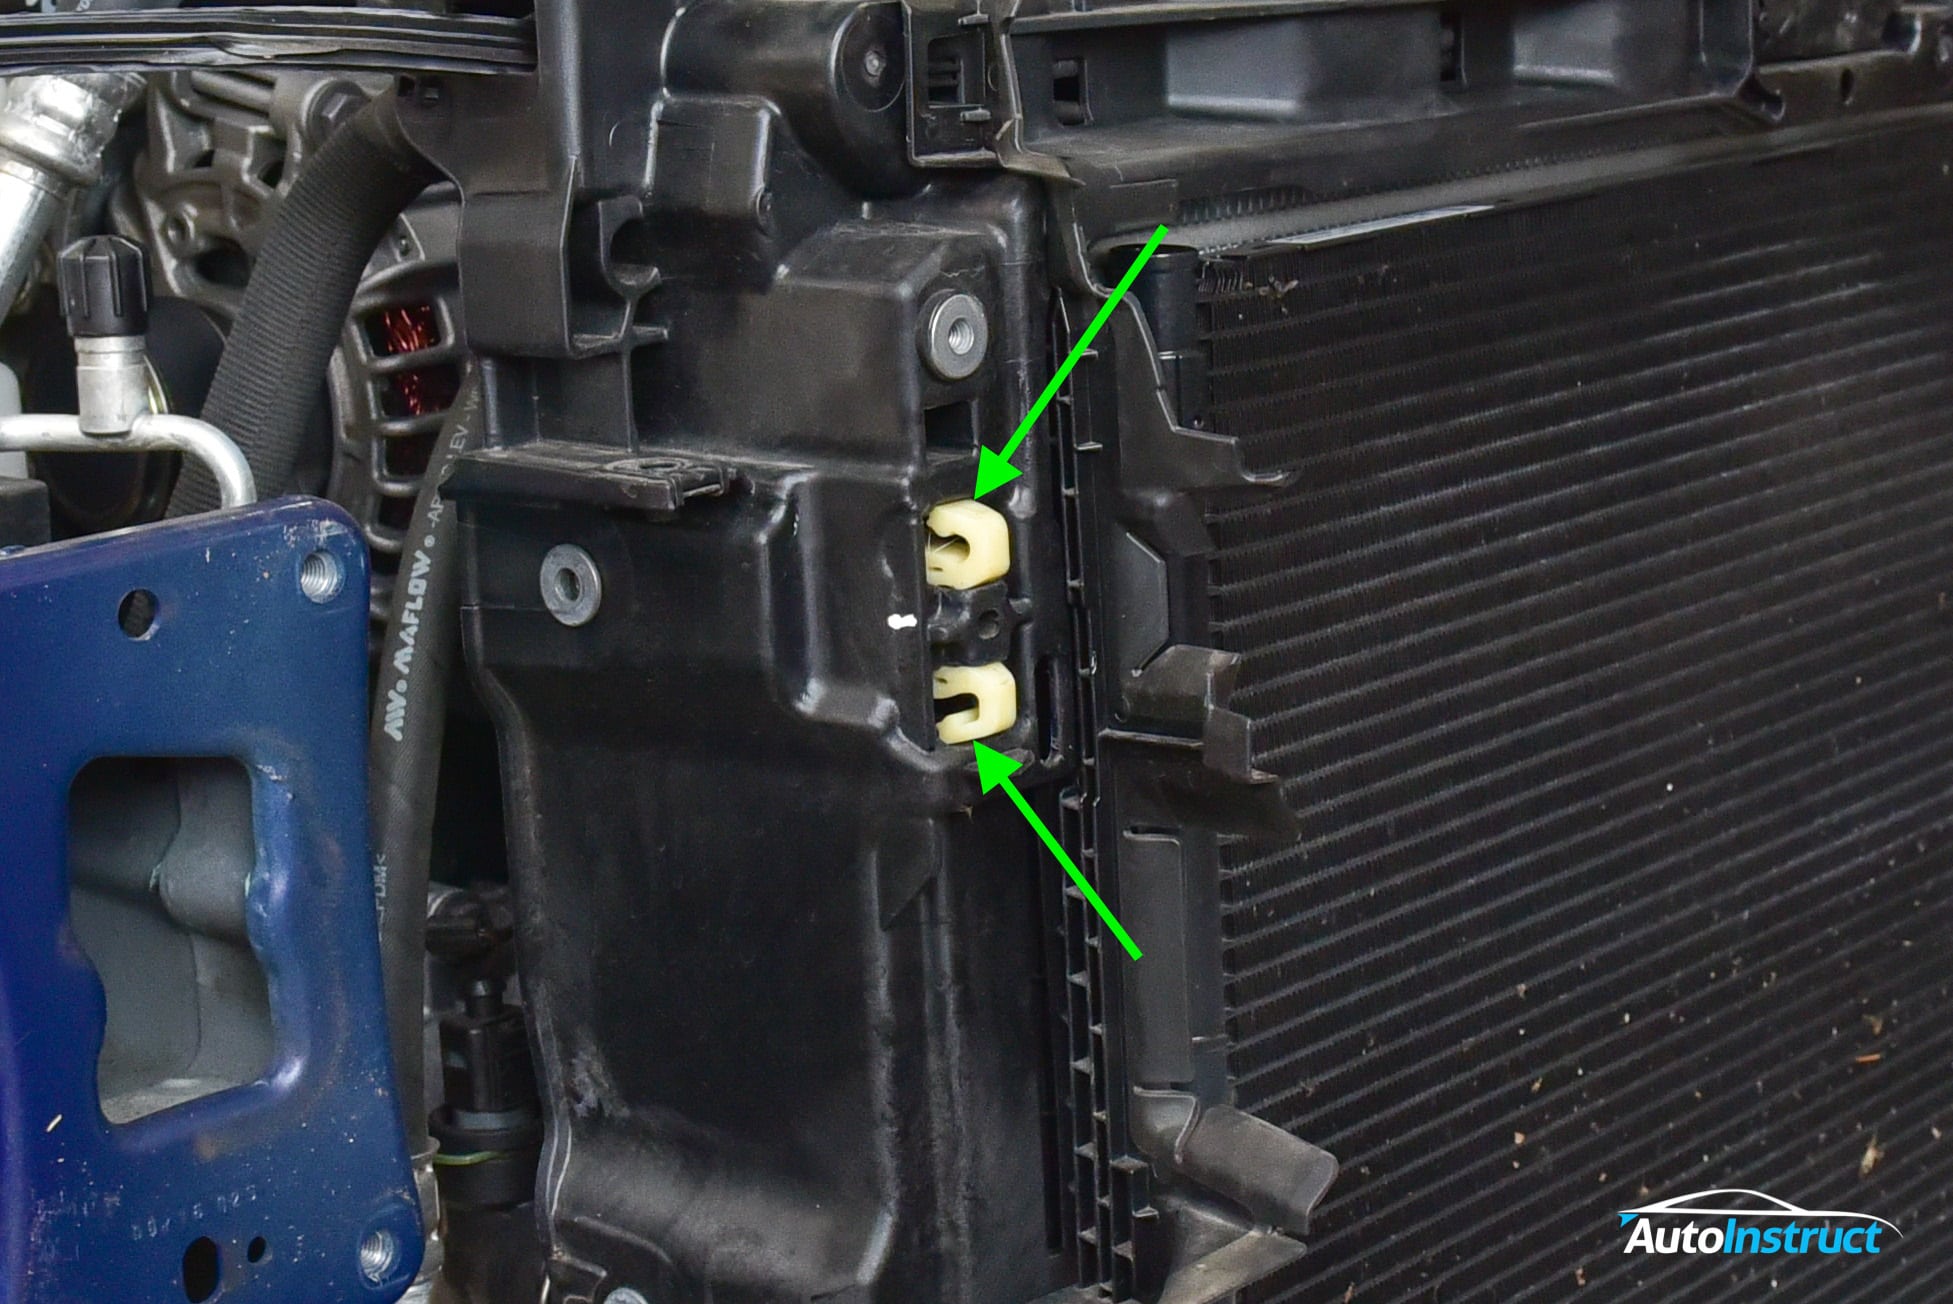
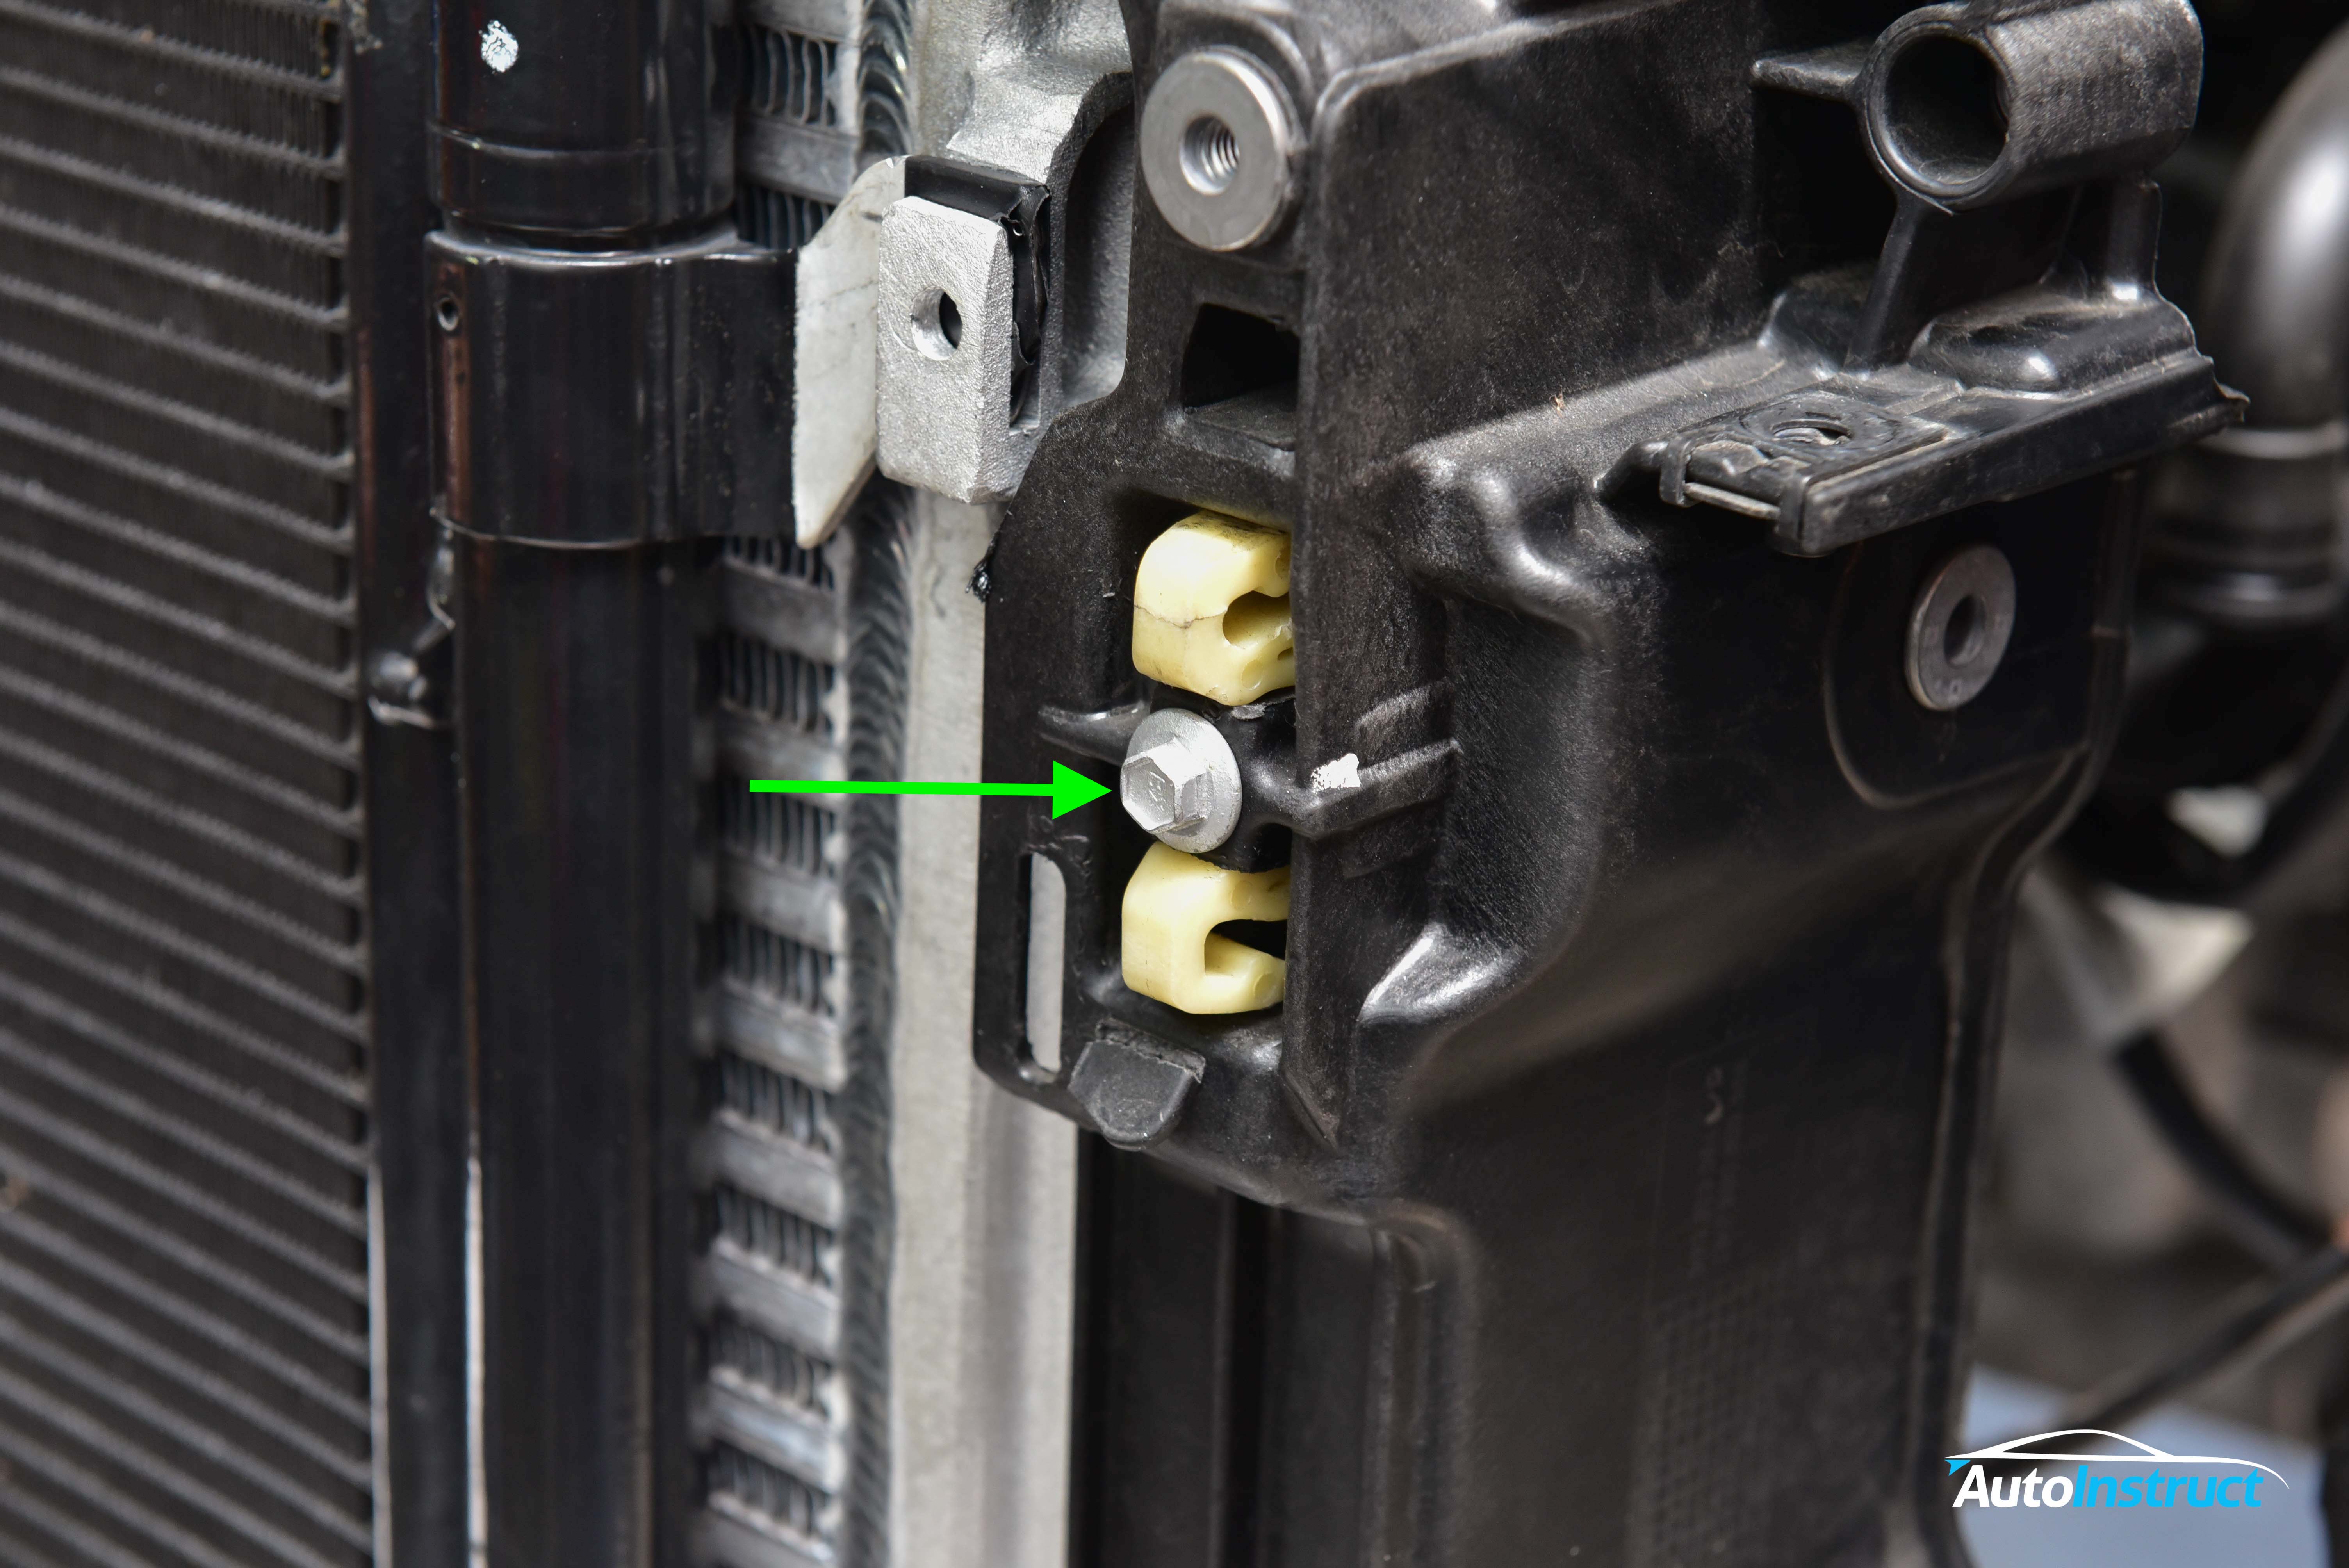
We will now release the core surround. Depress the top and bottom of the large yellow clips whilst pulling the core surround forward.
These clips are very difficult to remove, and are prone to breaking, be gentle. If you break a clip we’ll show you how to fix it later on.
Step 16
Depress the clip that is retaining the AC condenser, and slide the condenser up, releasing it from the intercooler.
Step 17
You can now pull the condenser away from the intercooler.
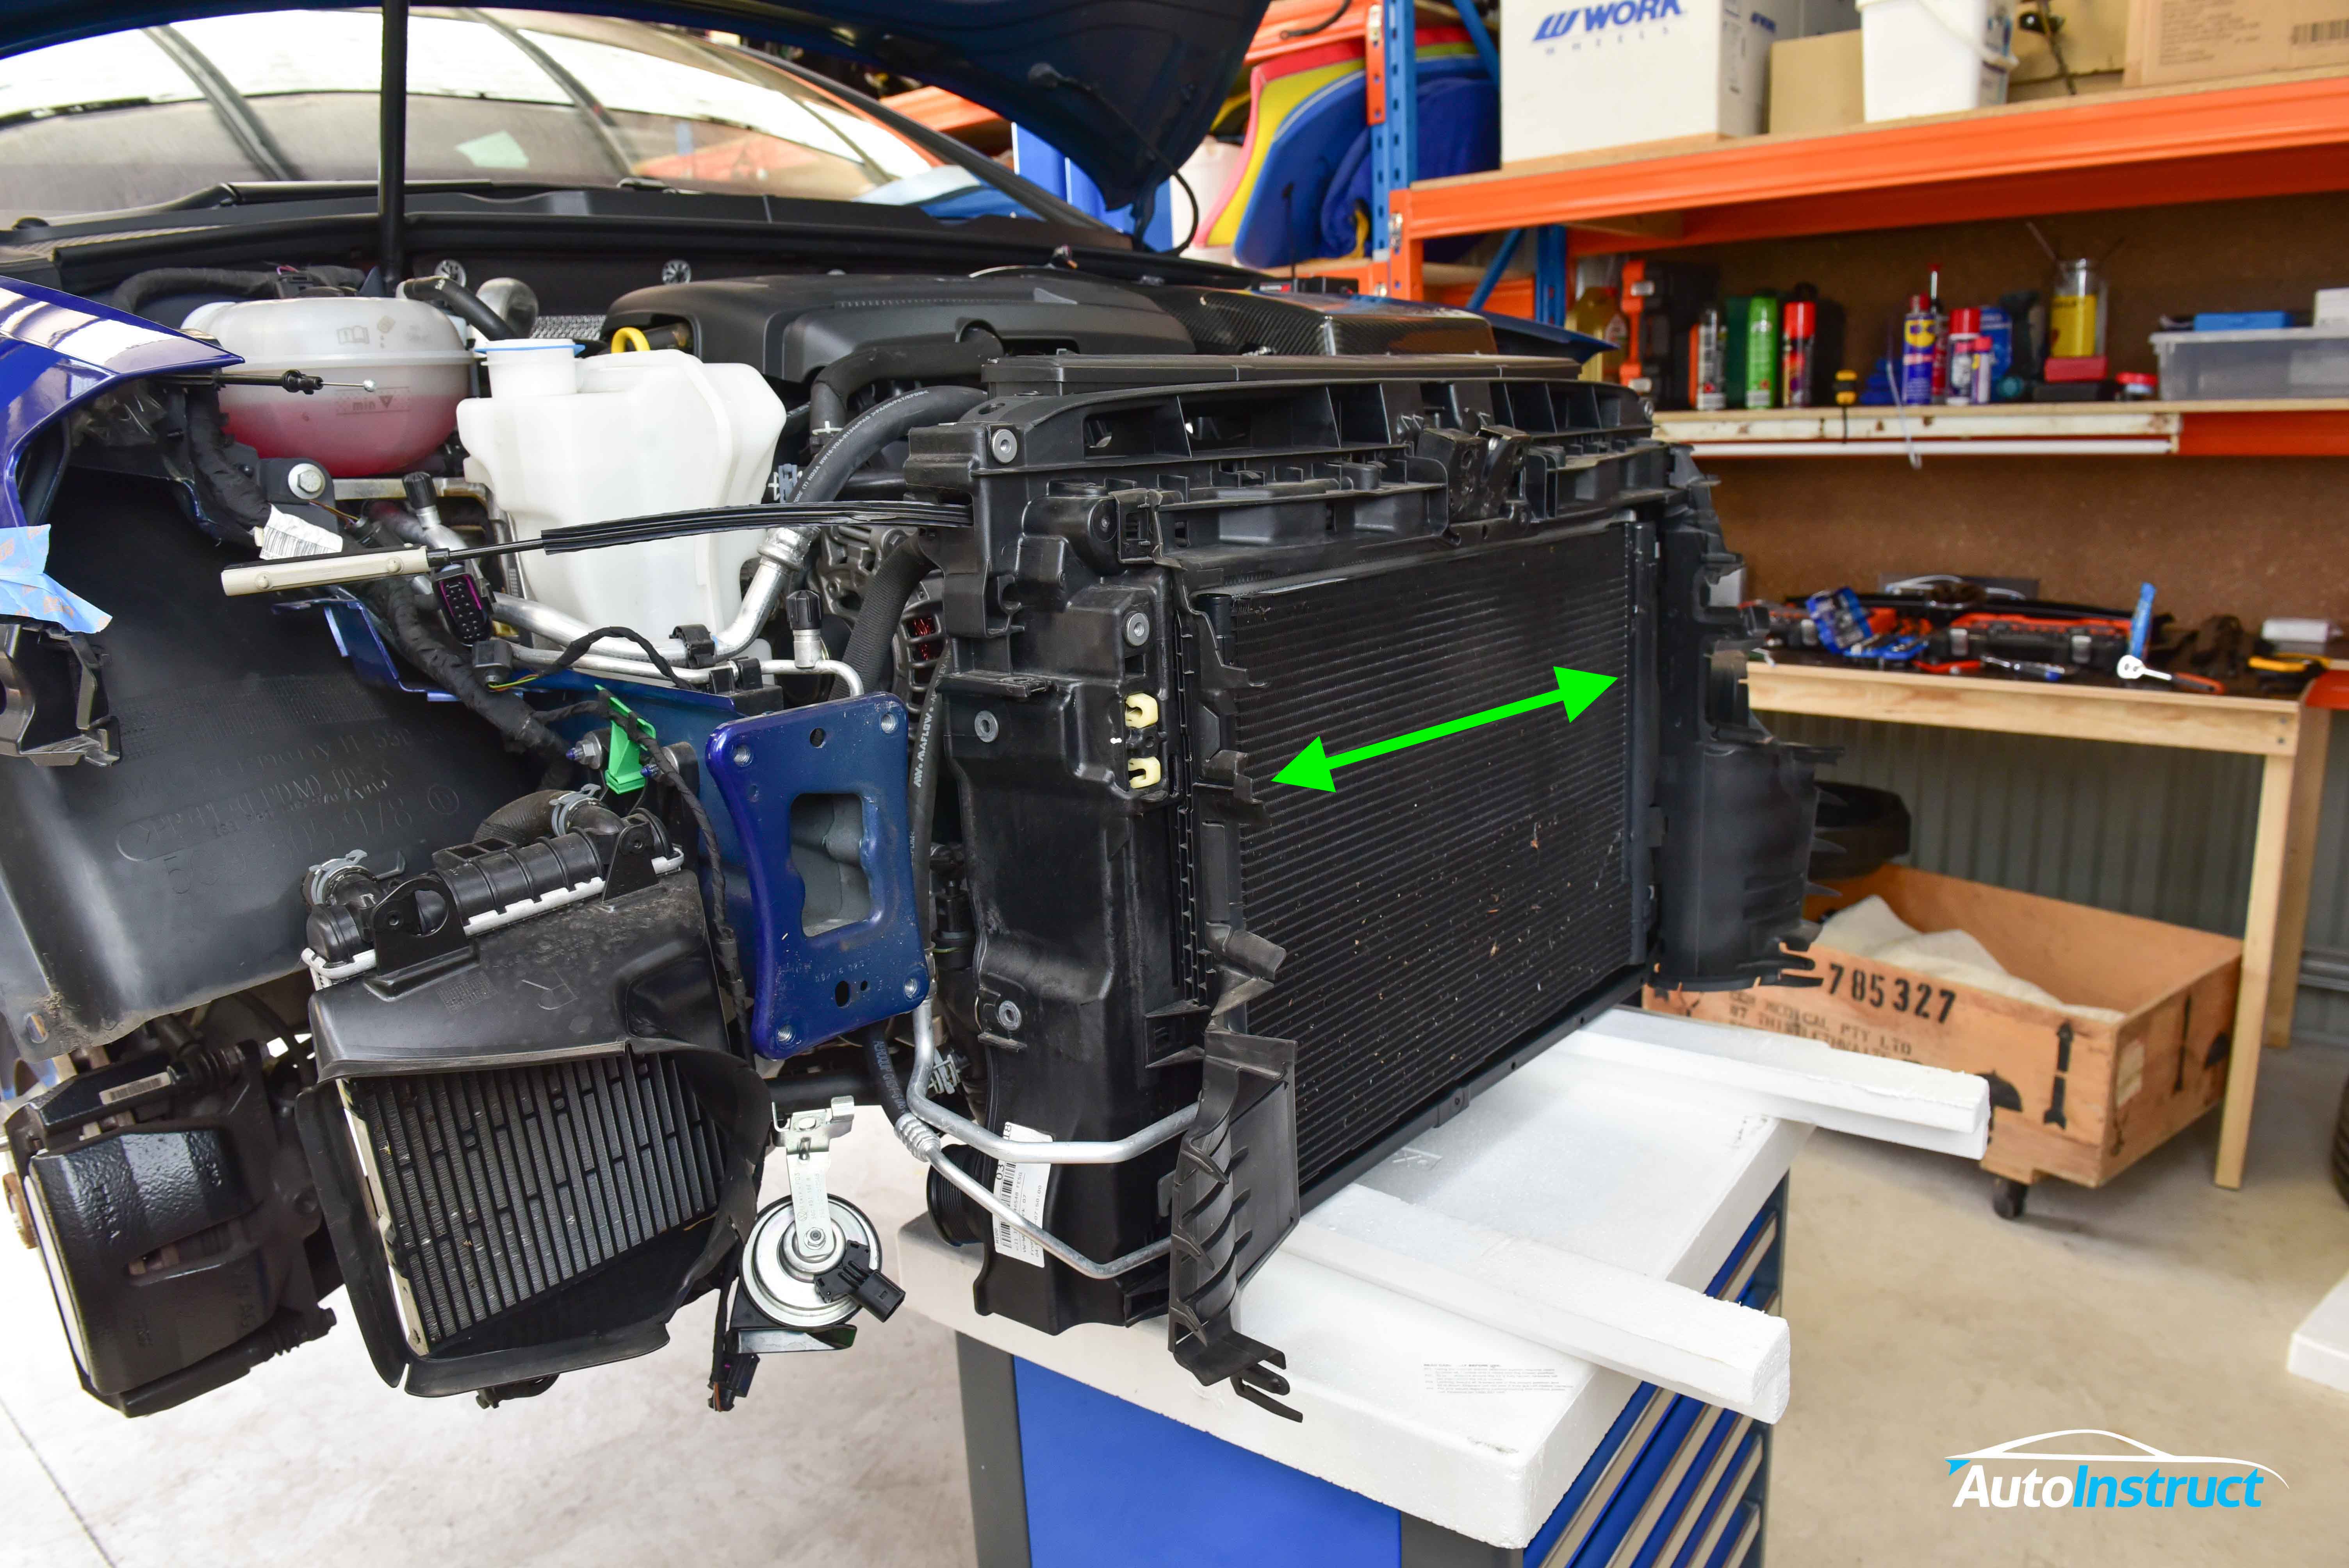
Step 18
Rest the condenser forward of the intercooler, being careful not to stress the flexible hoses which are keeping the condenser connected.
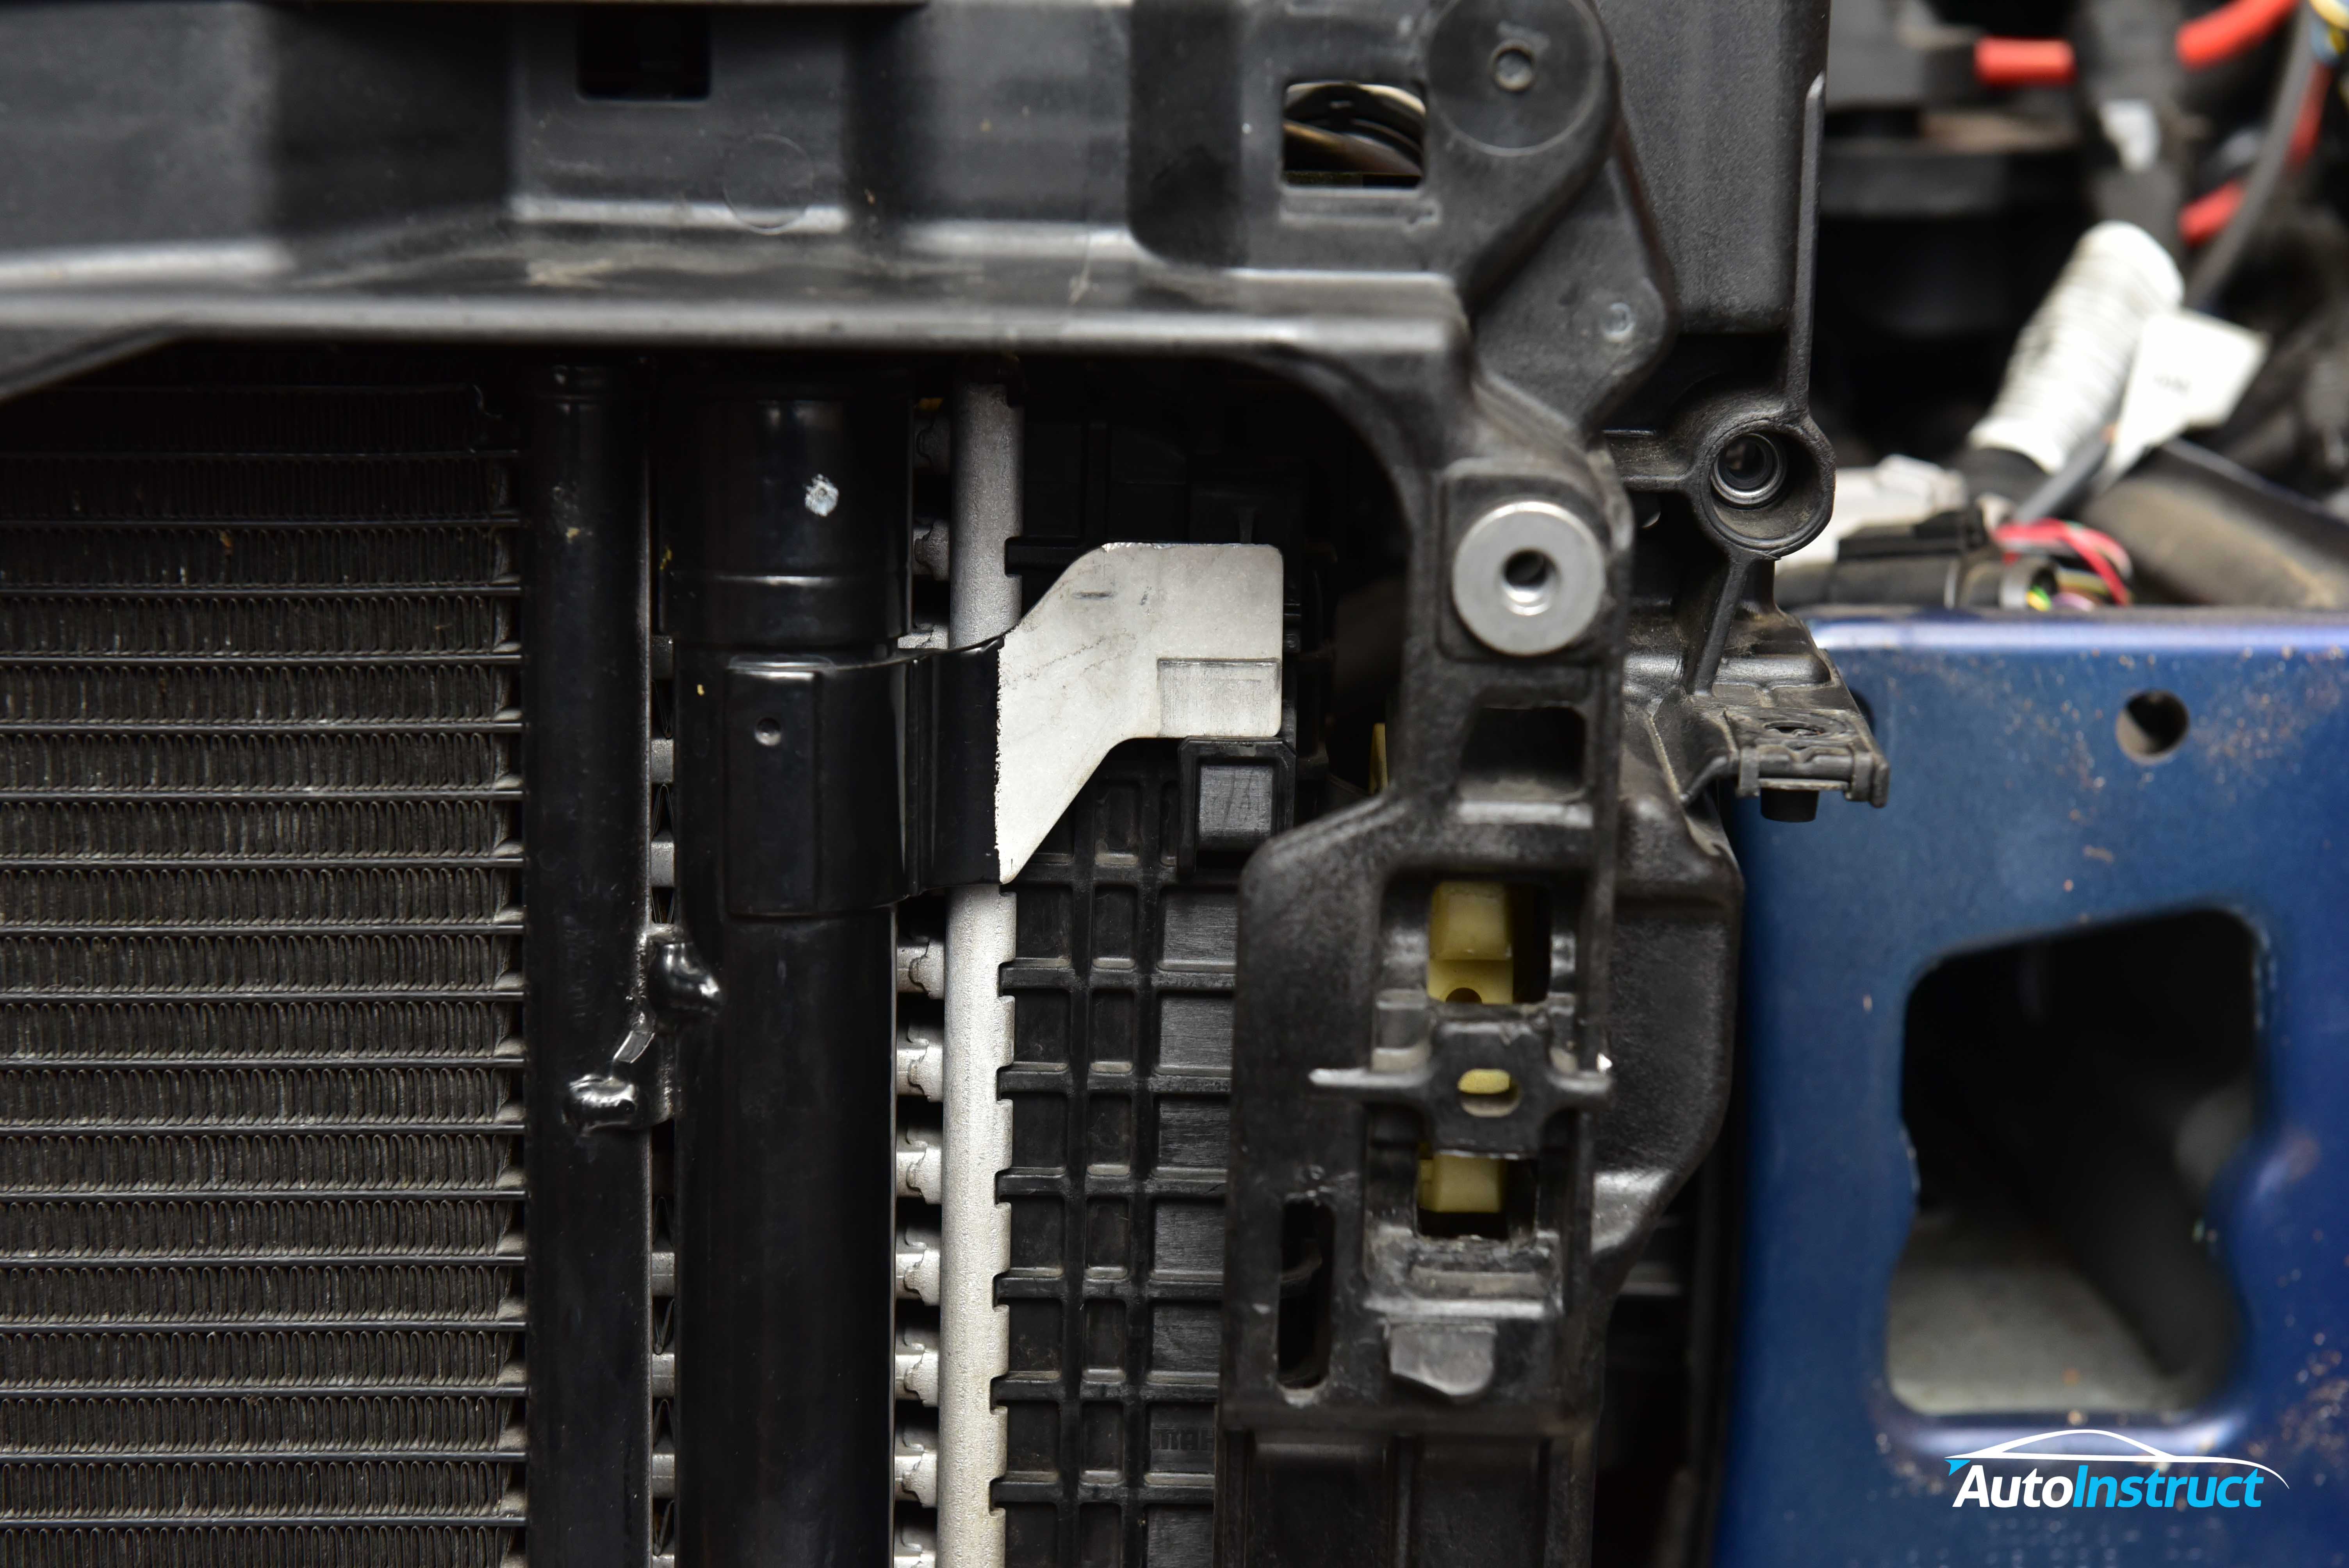
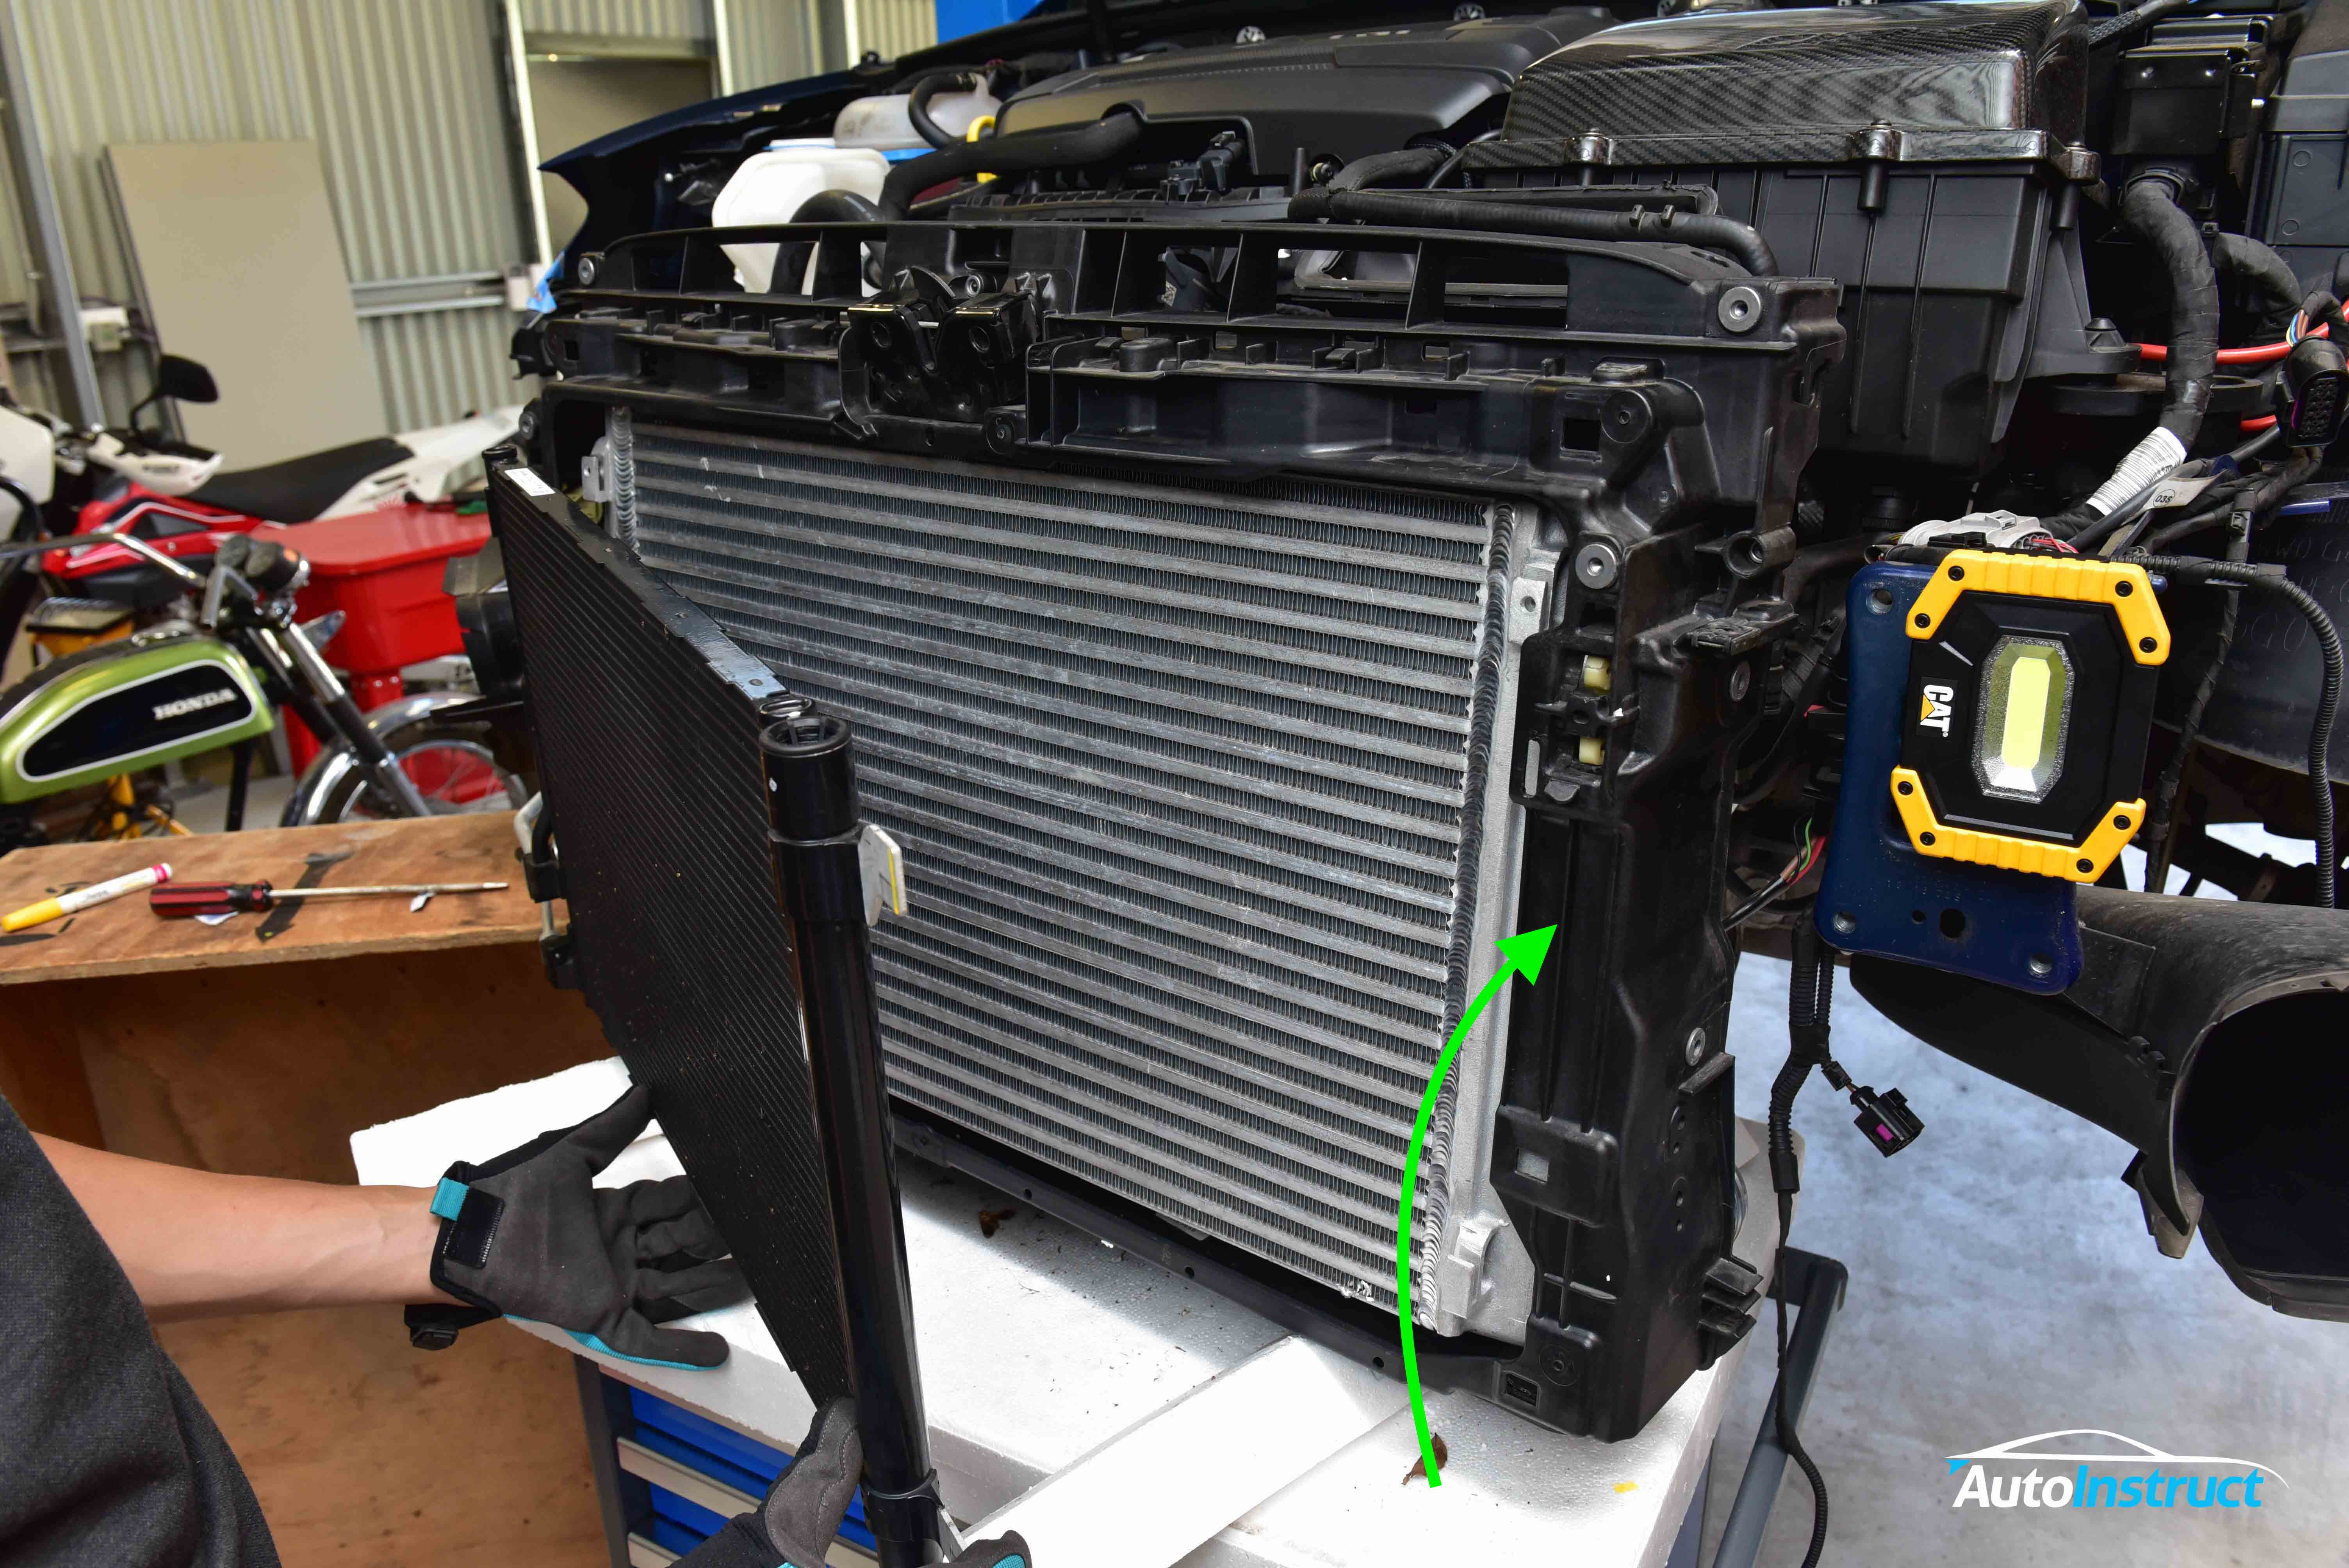
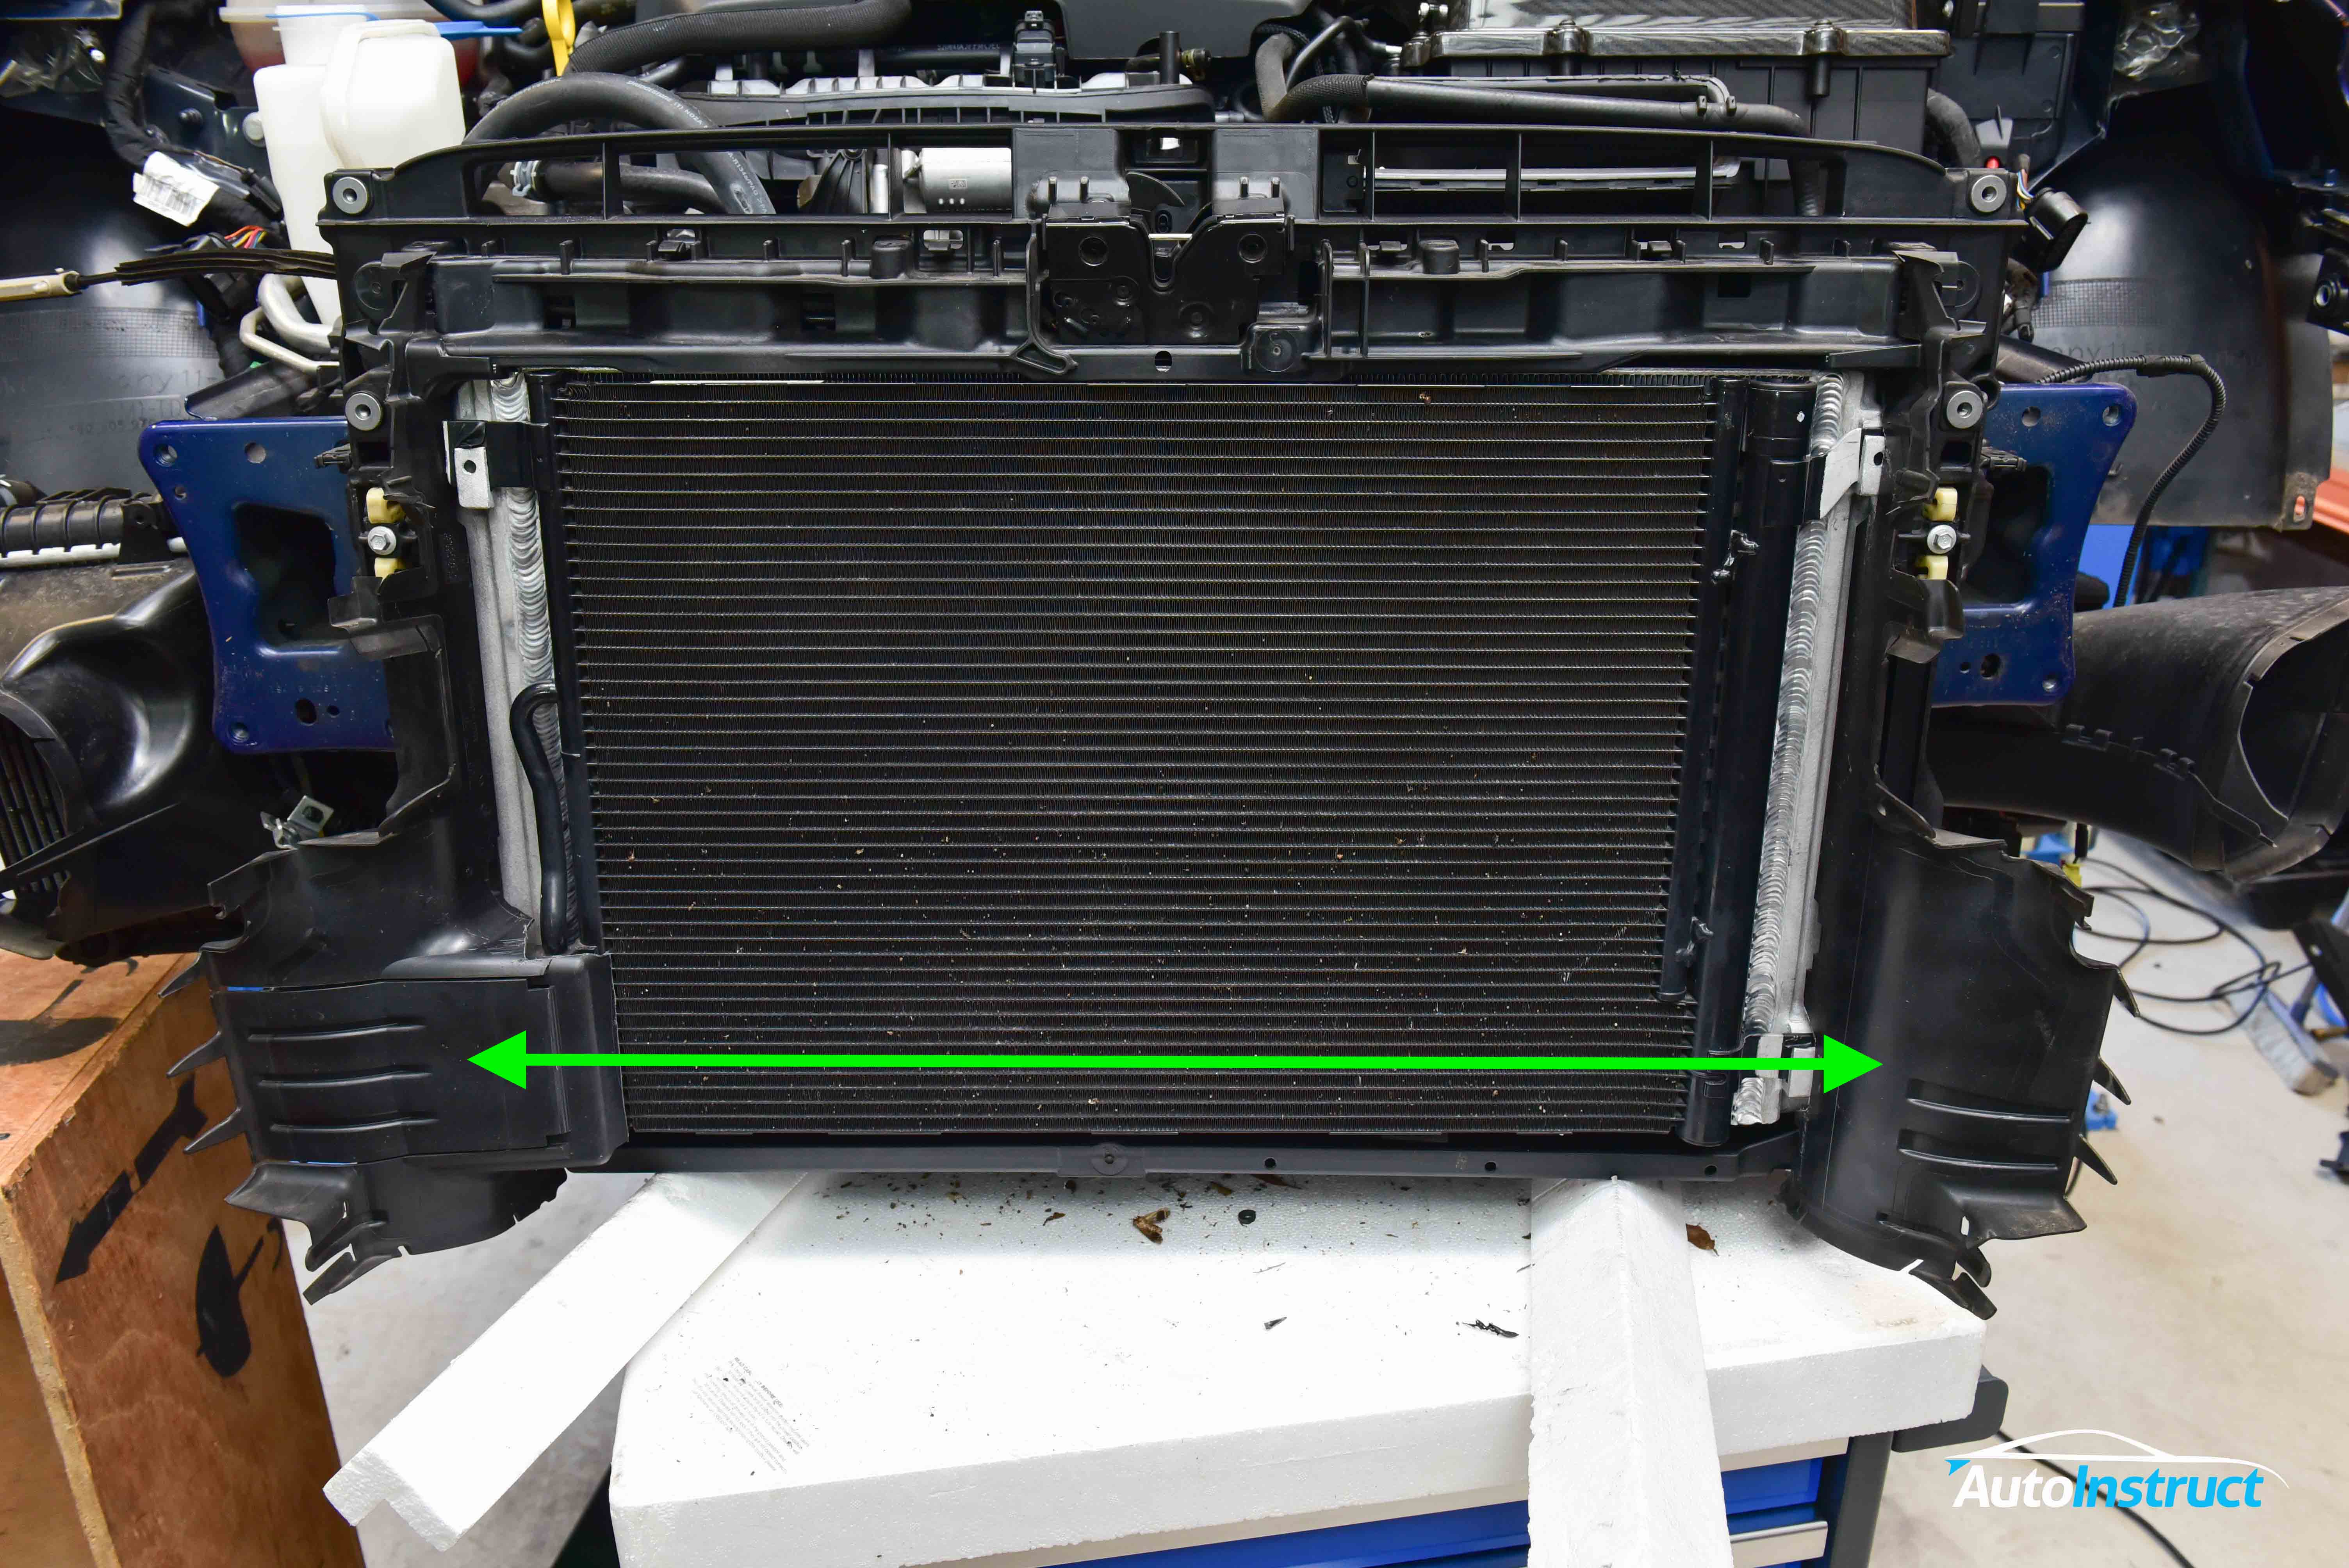
Pull the top of the core surround forward as shown by the green arrows. Once you’ve done this, lower the core surround/lift the radiator to seperate them as there’s two alignment legs keeping it together.
You can now remove the outer core from the vehicle.
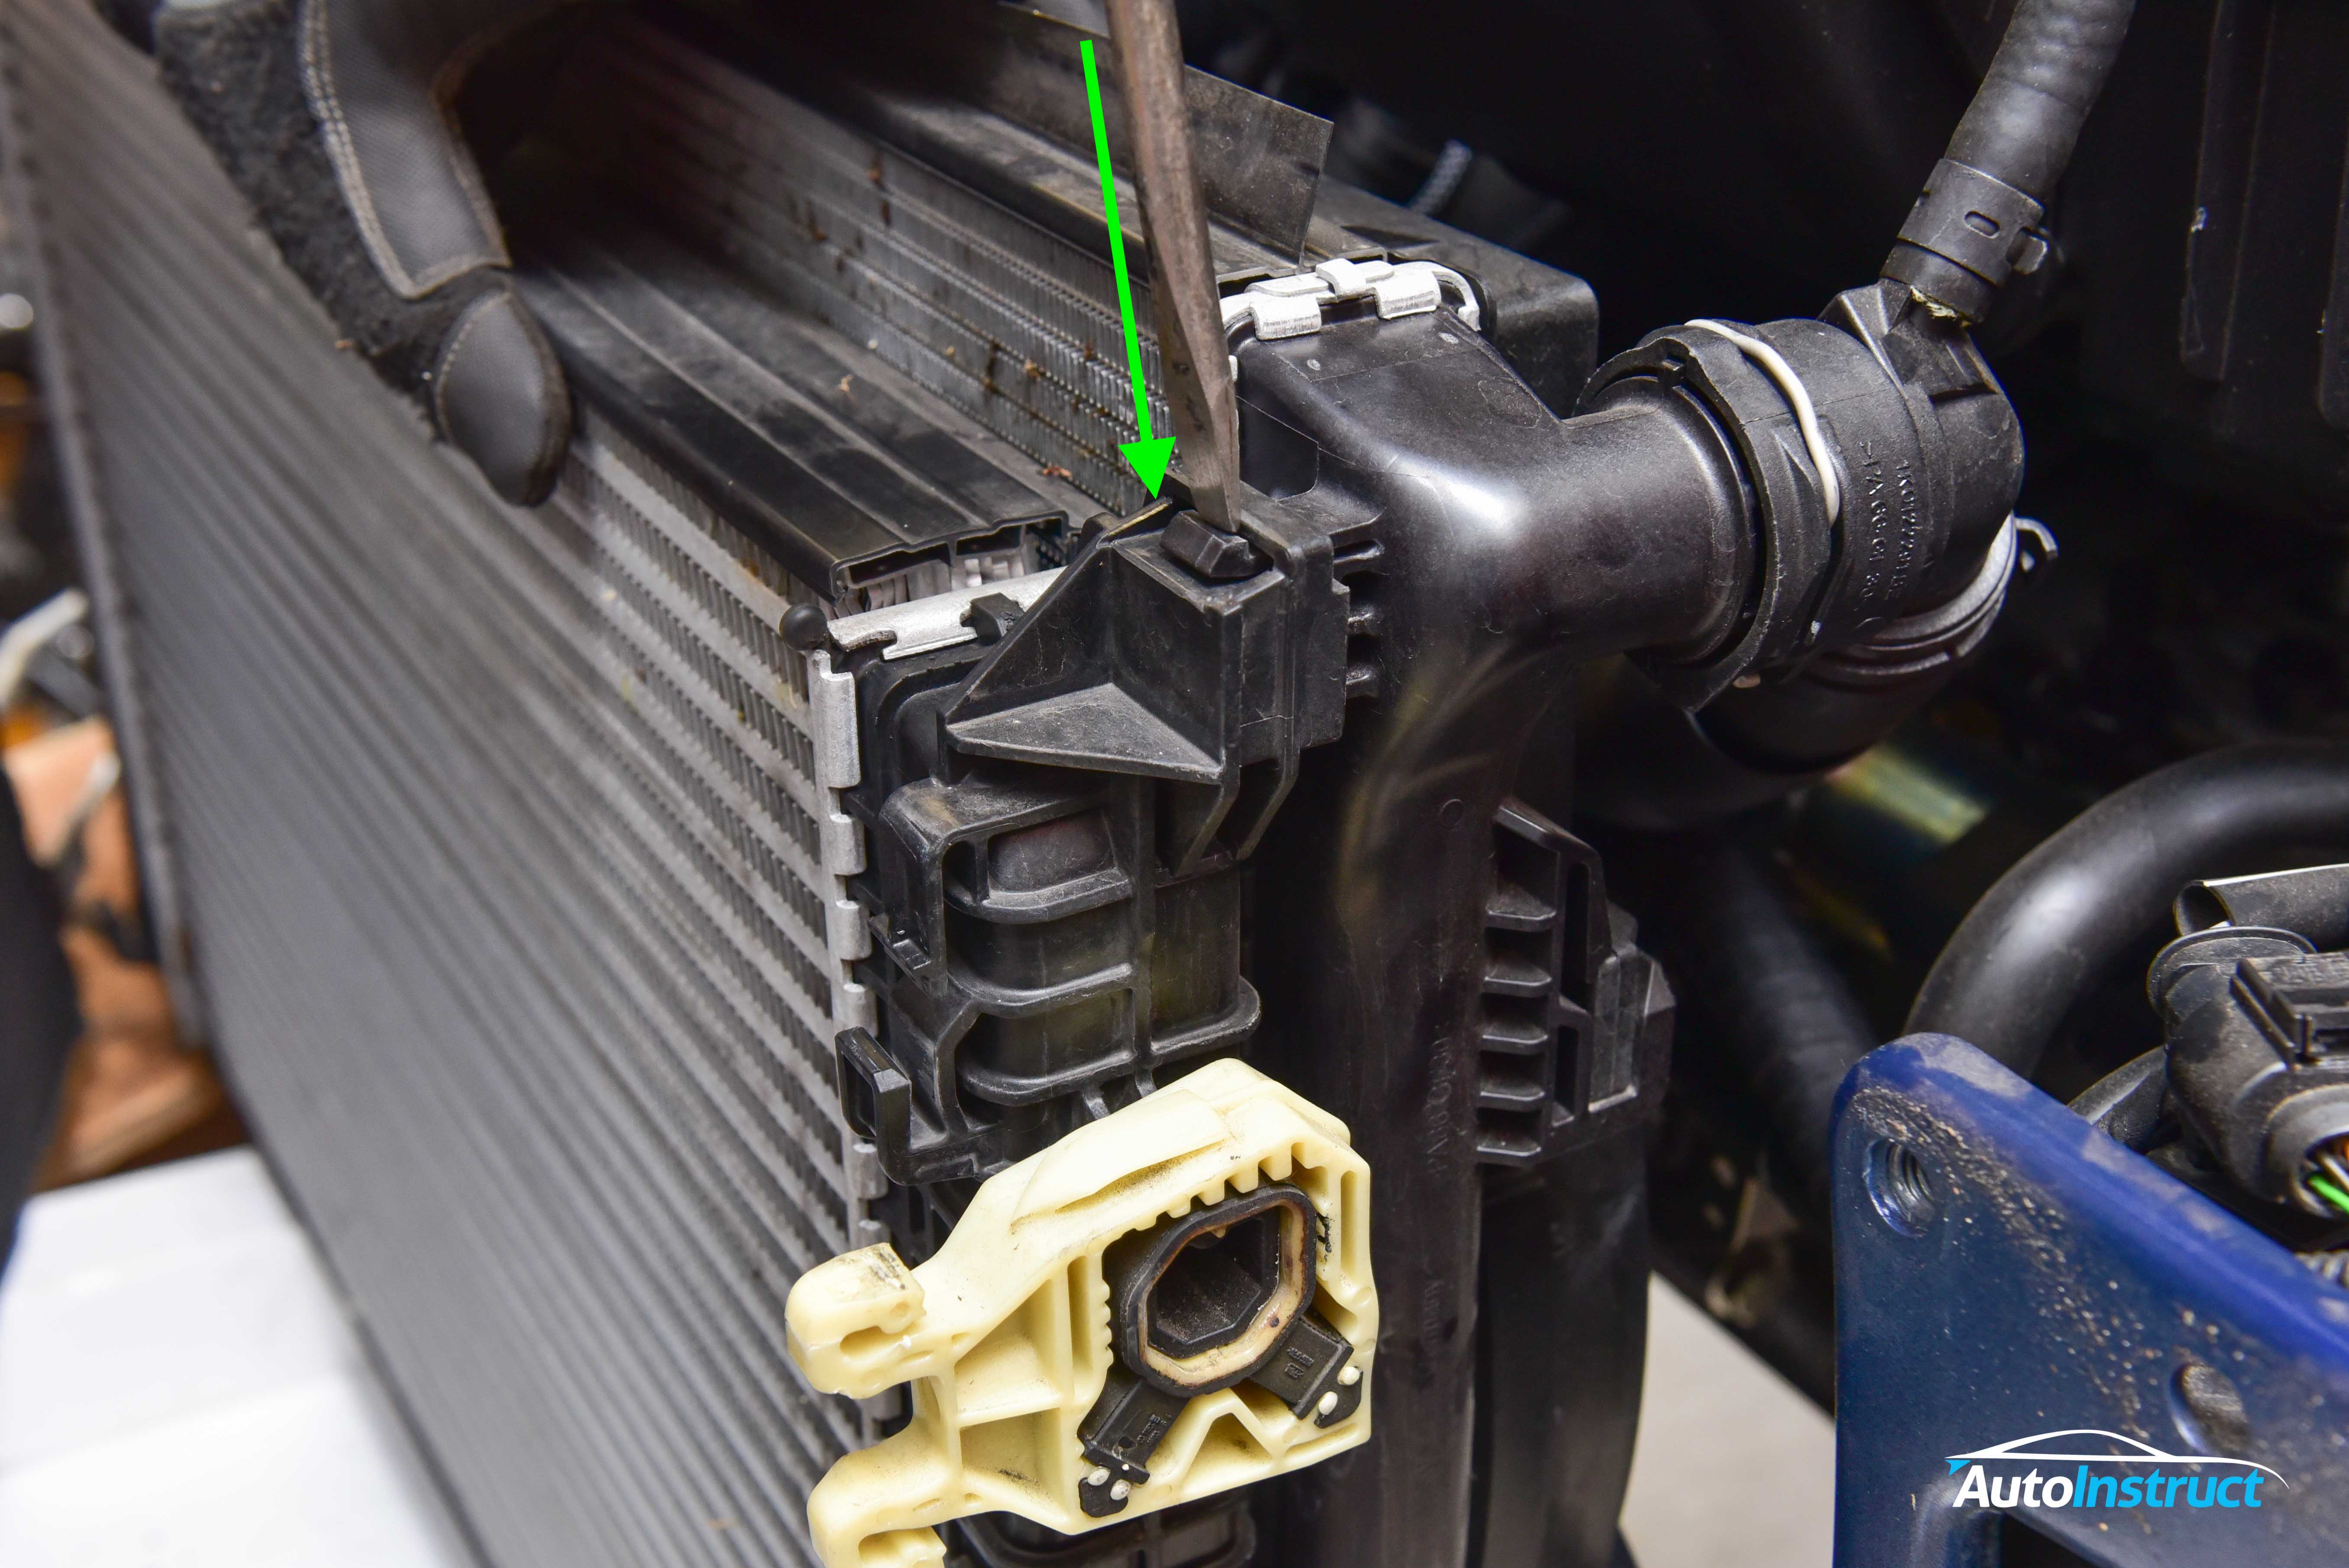
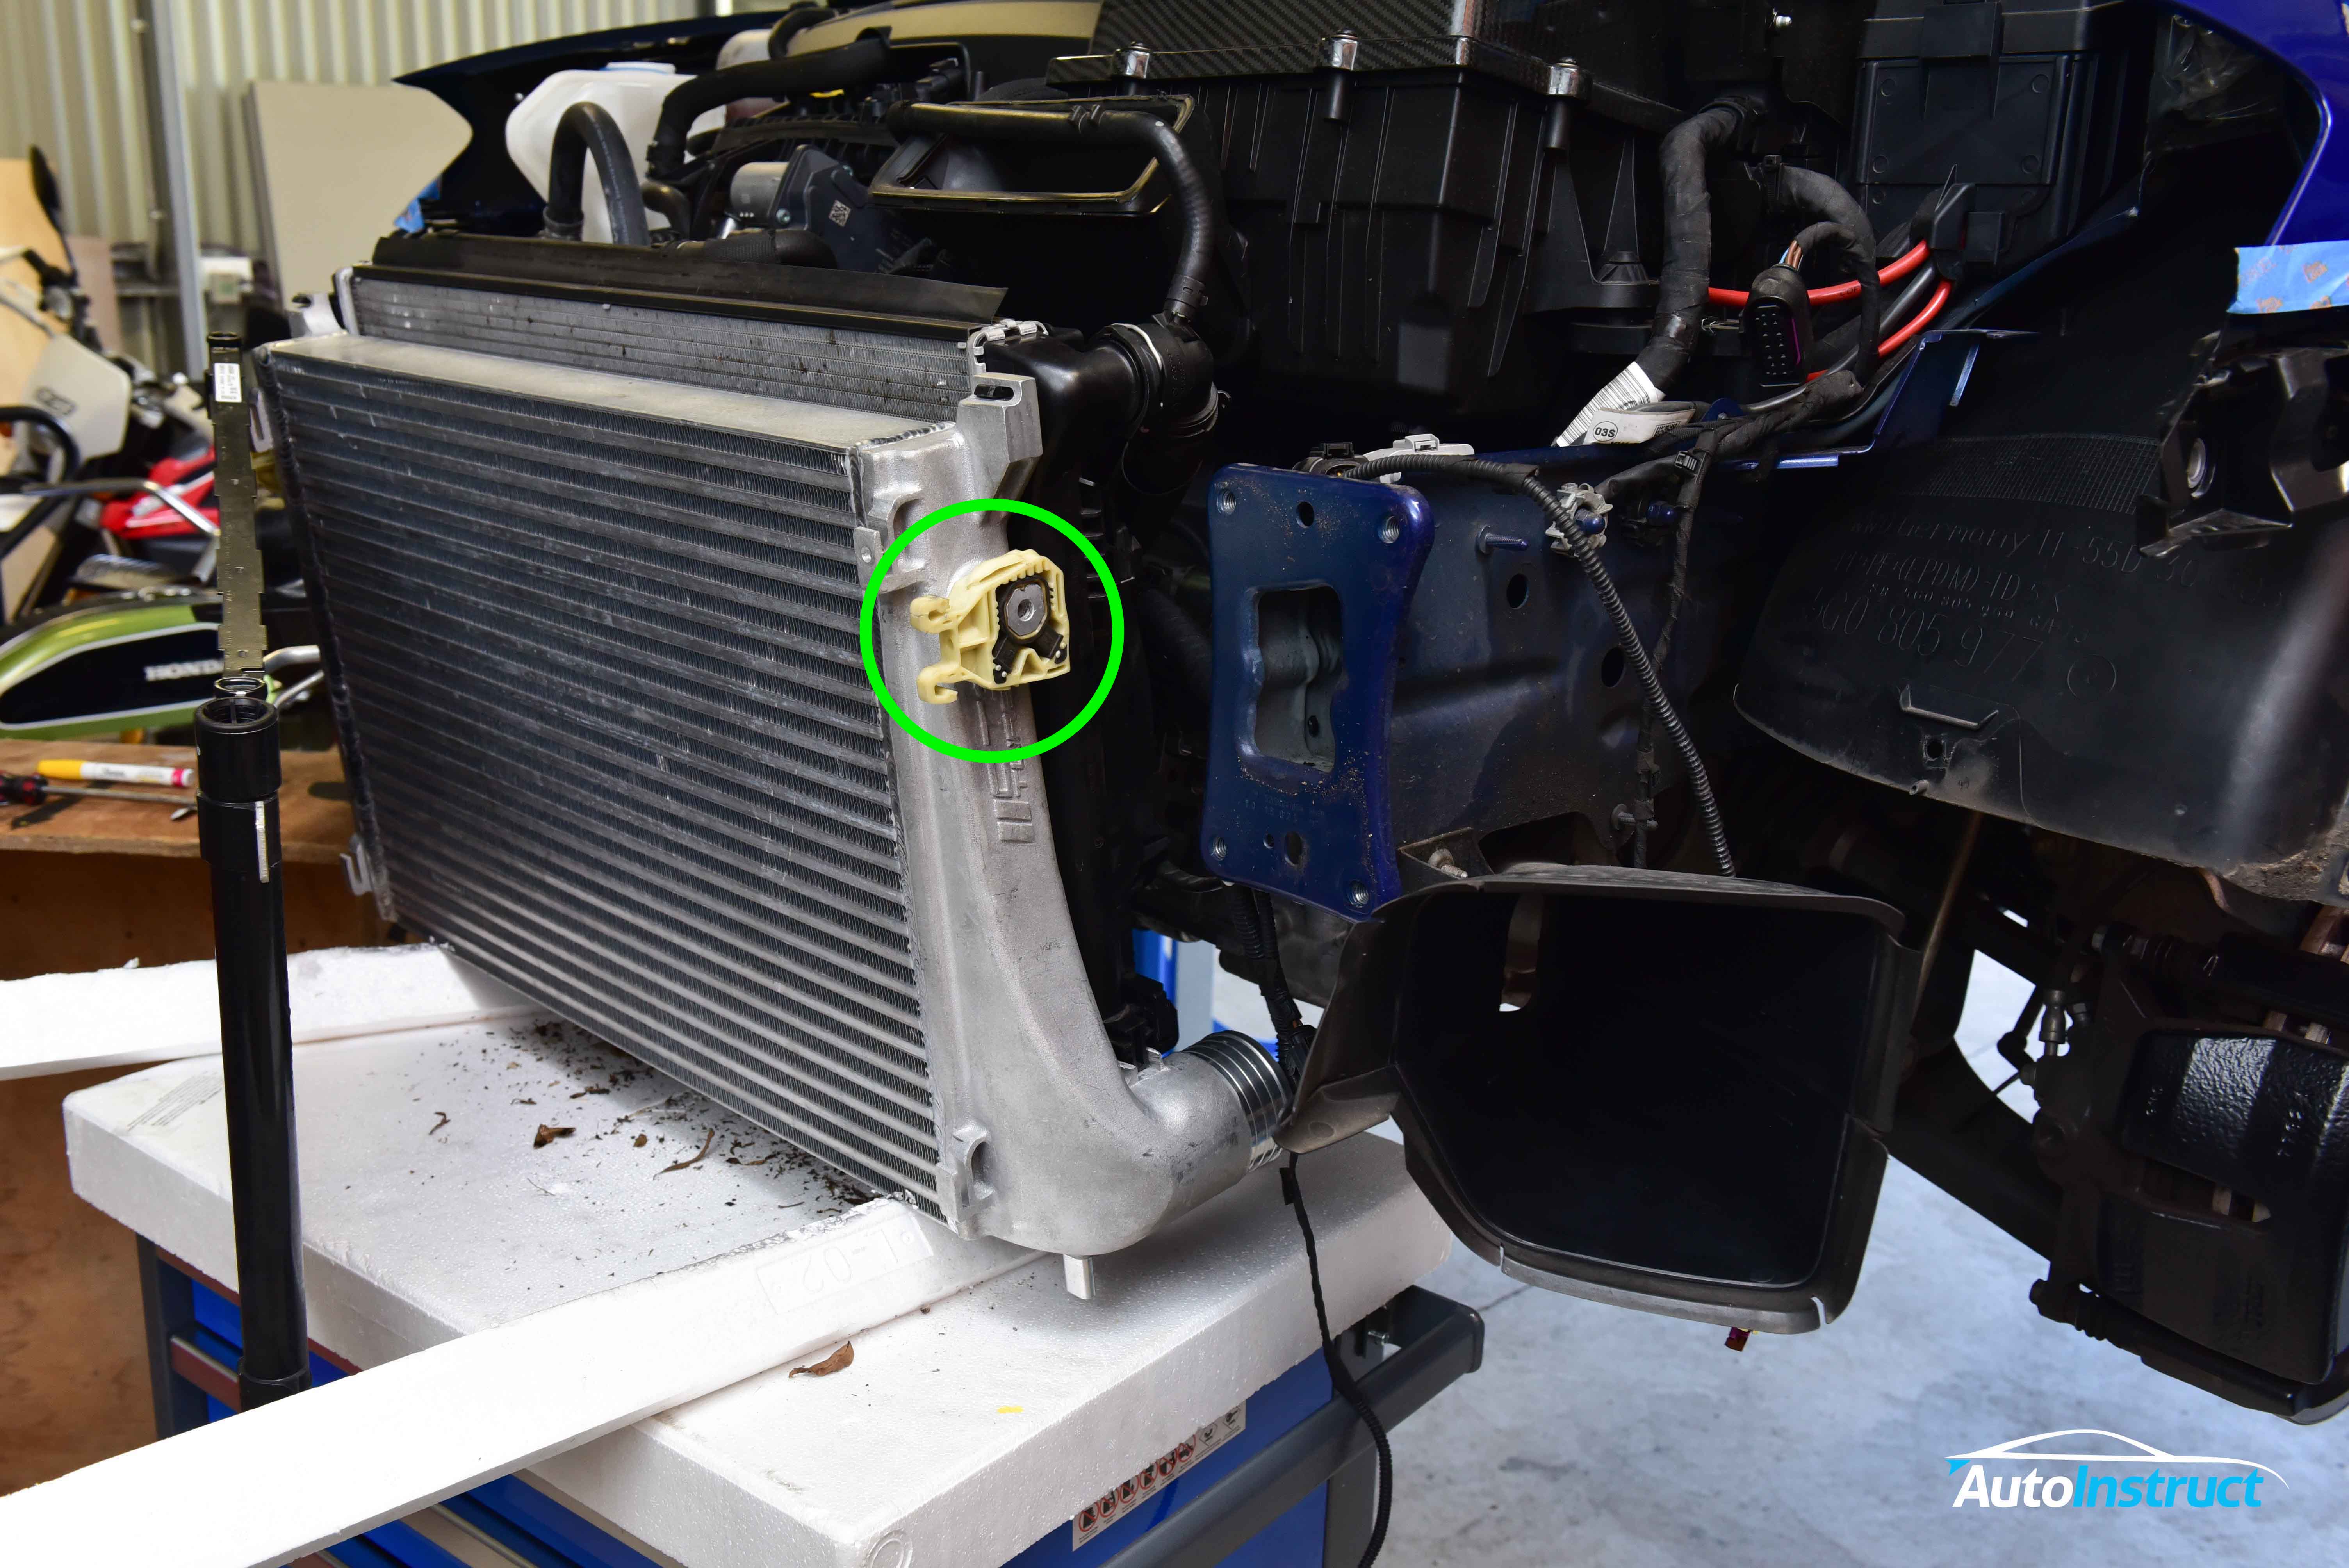
Step 19
We can now remove the OEM Intercooler. Push down firmly but gently on the upper clips, releasing the intercooler.
Step 20
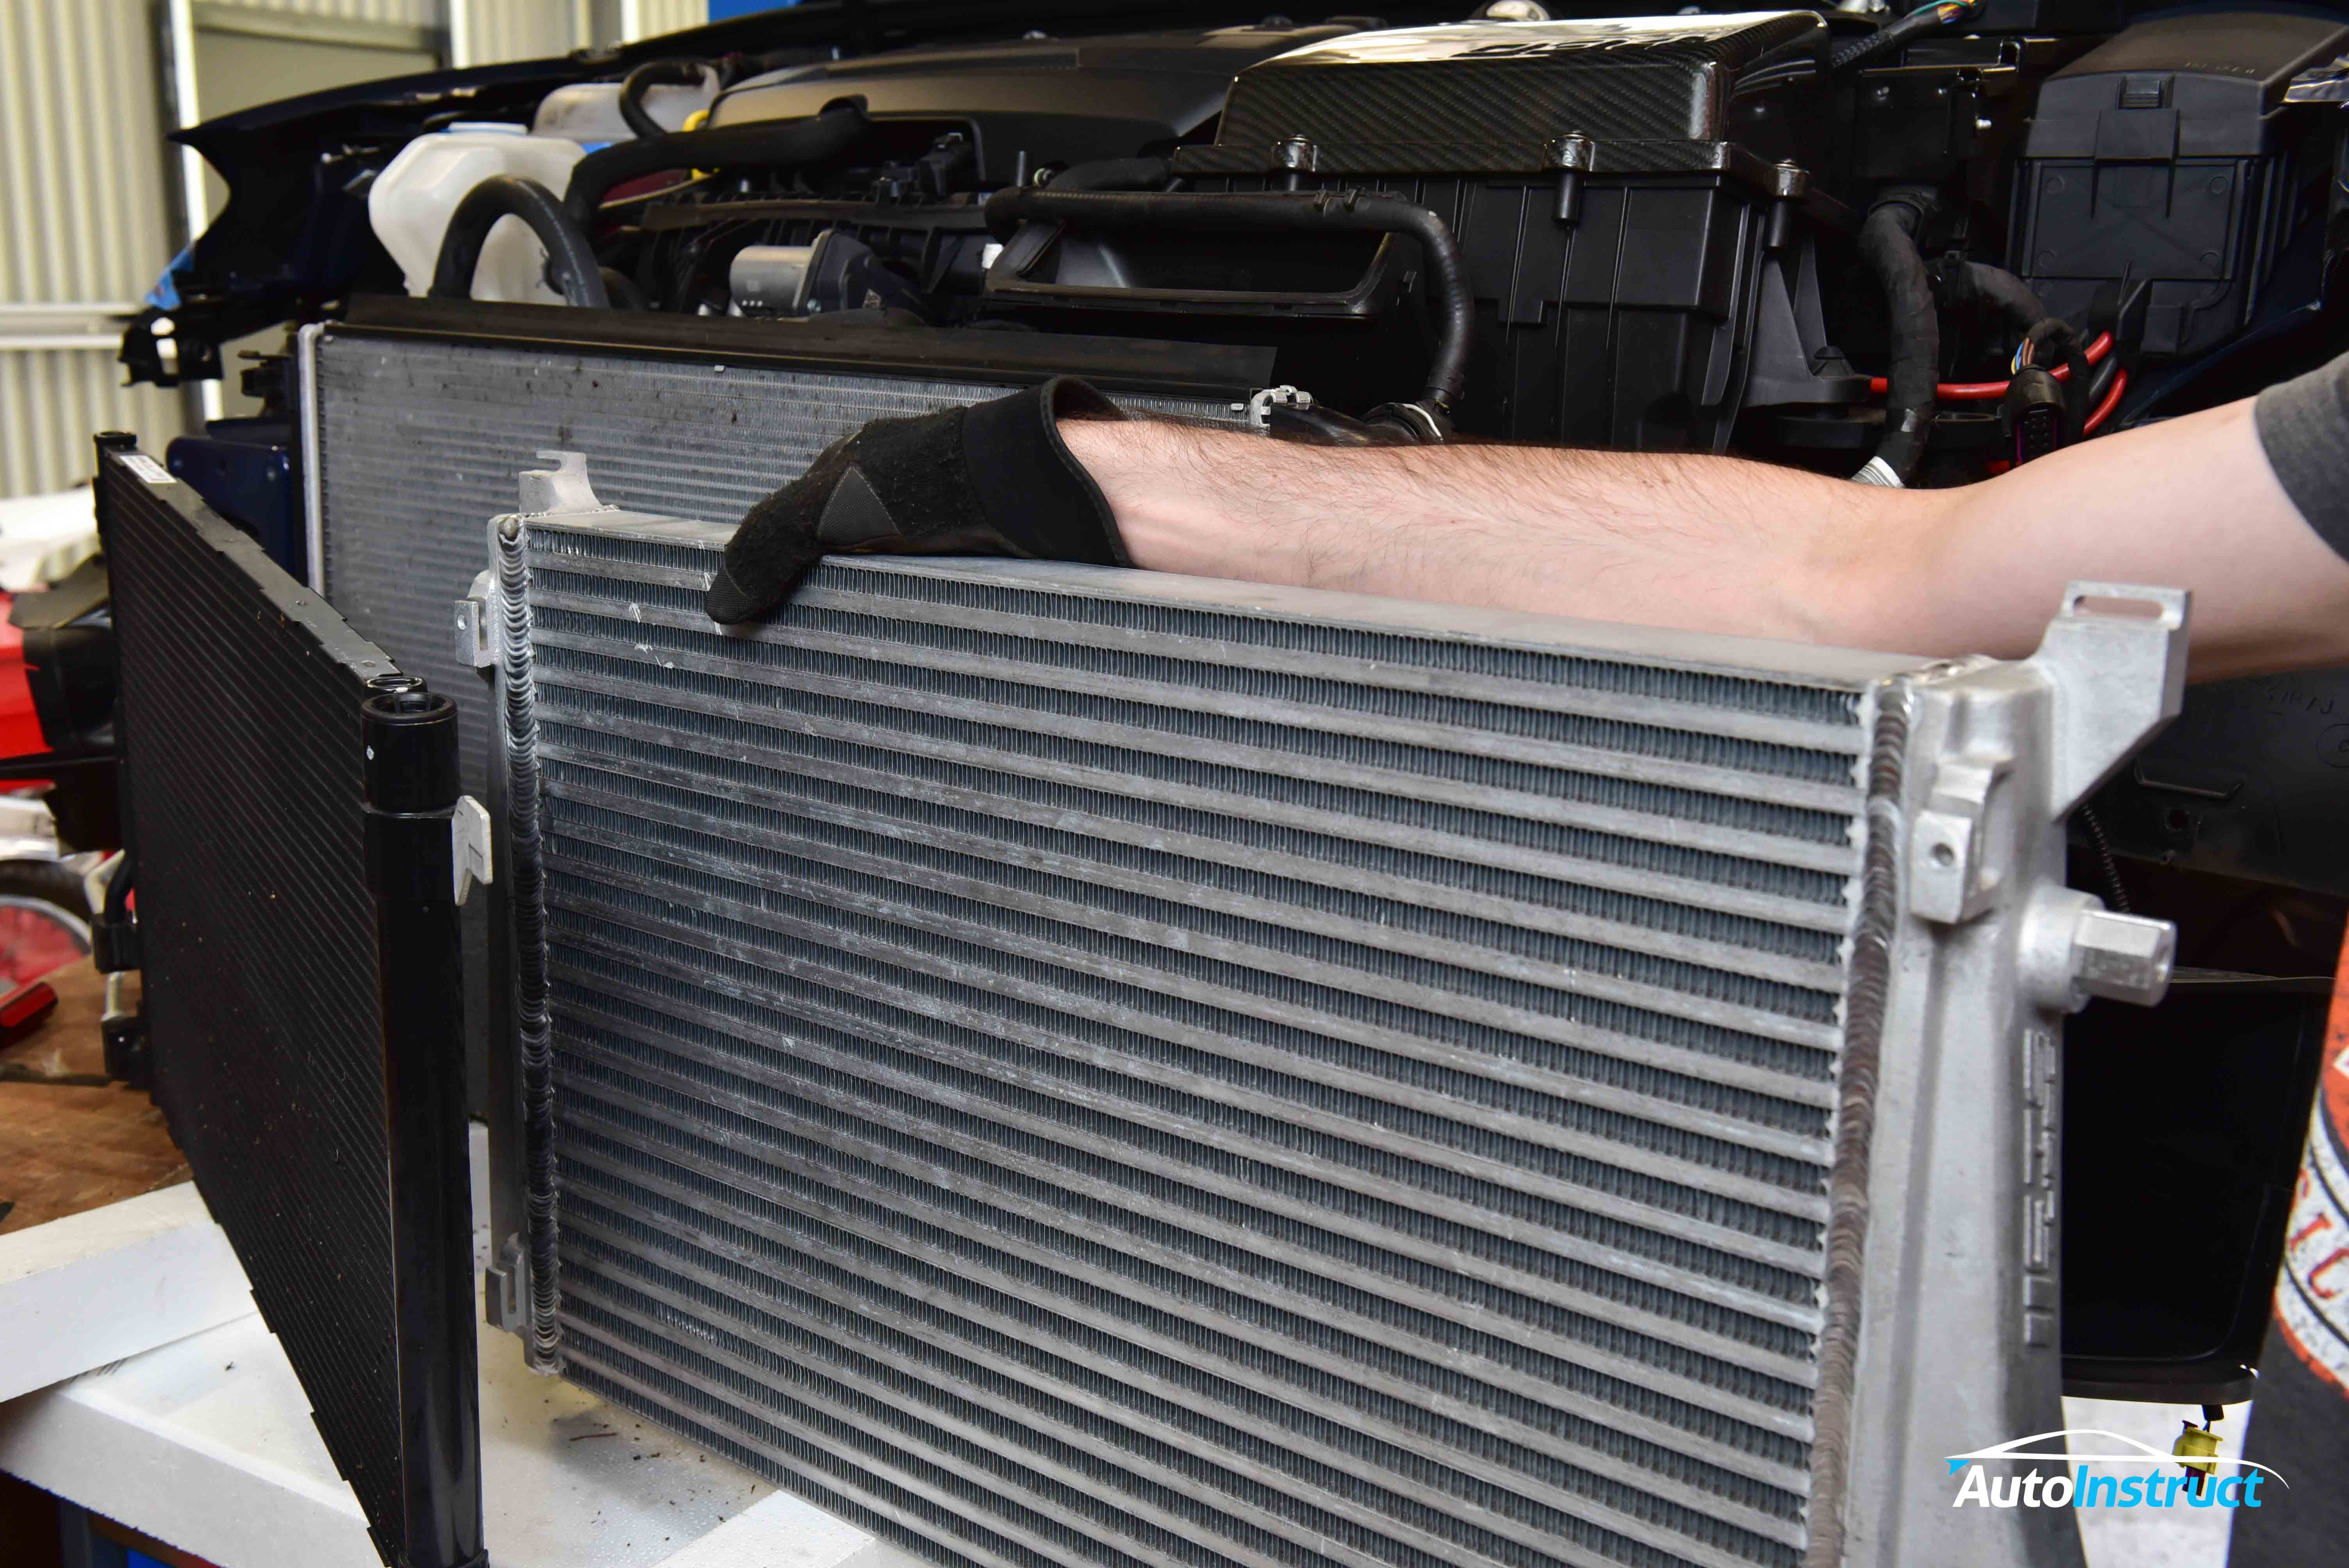
Reinstallation
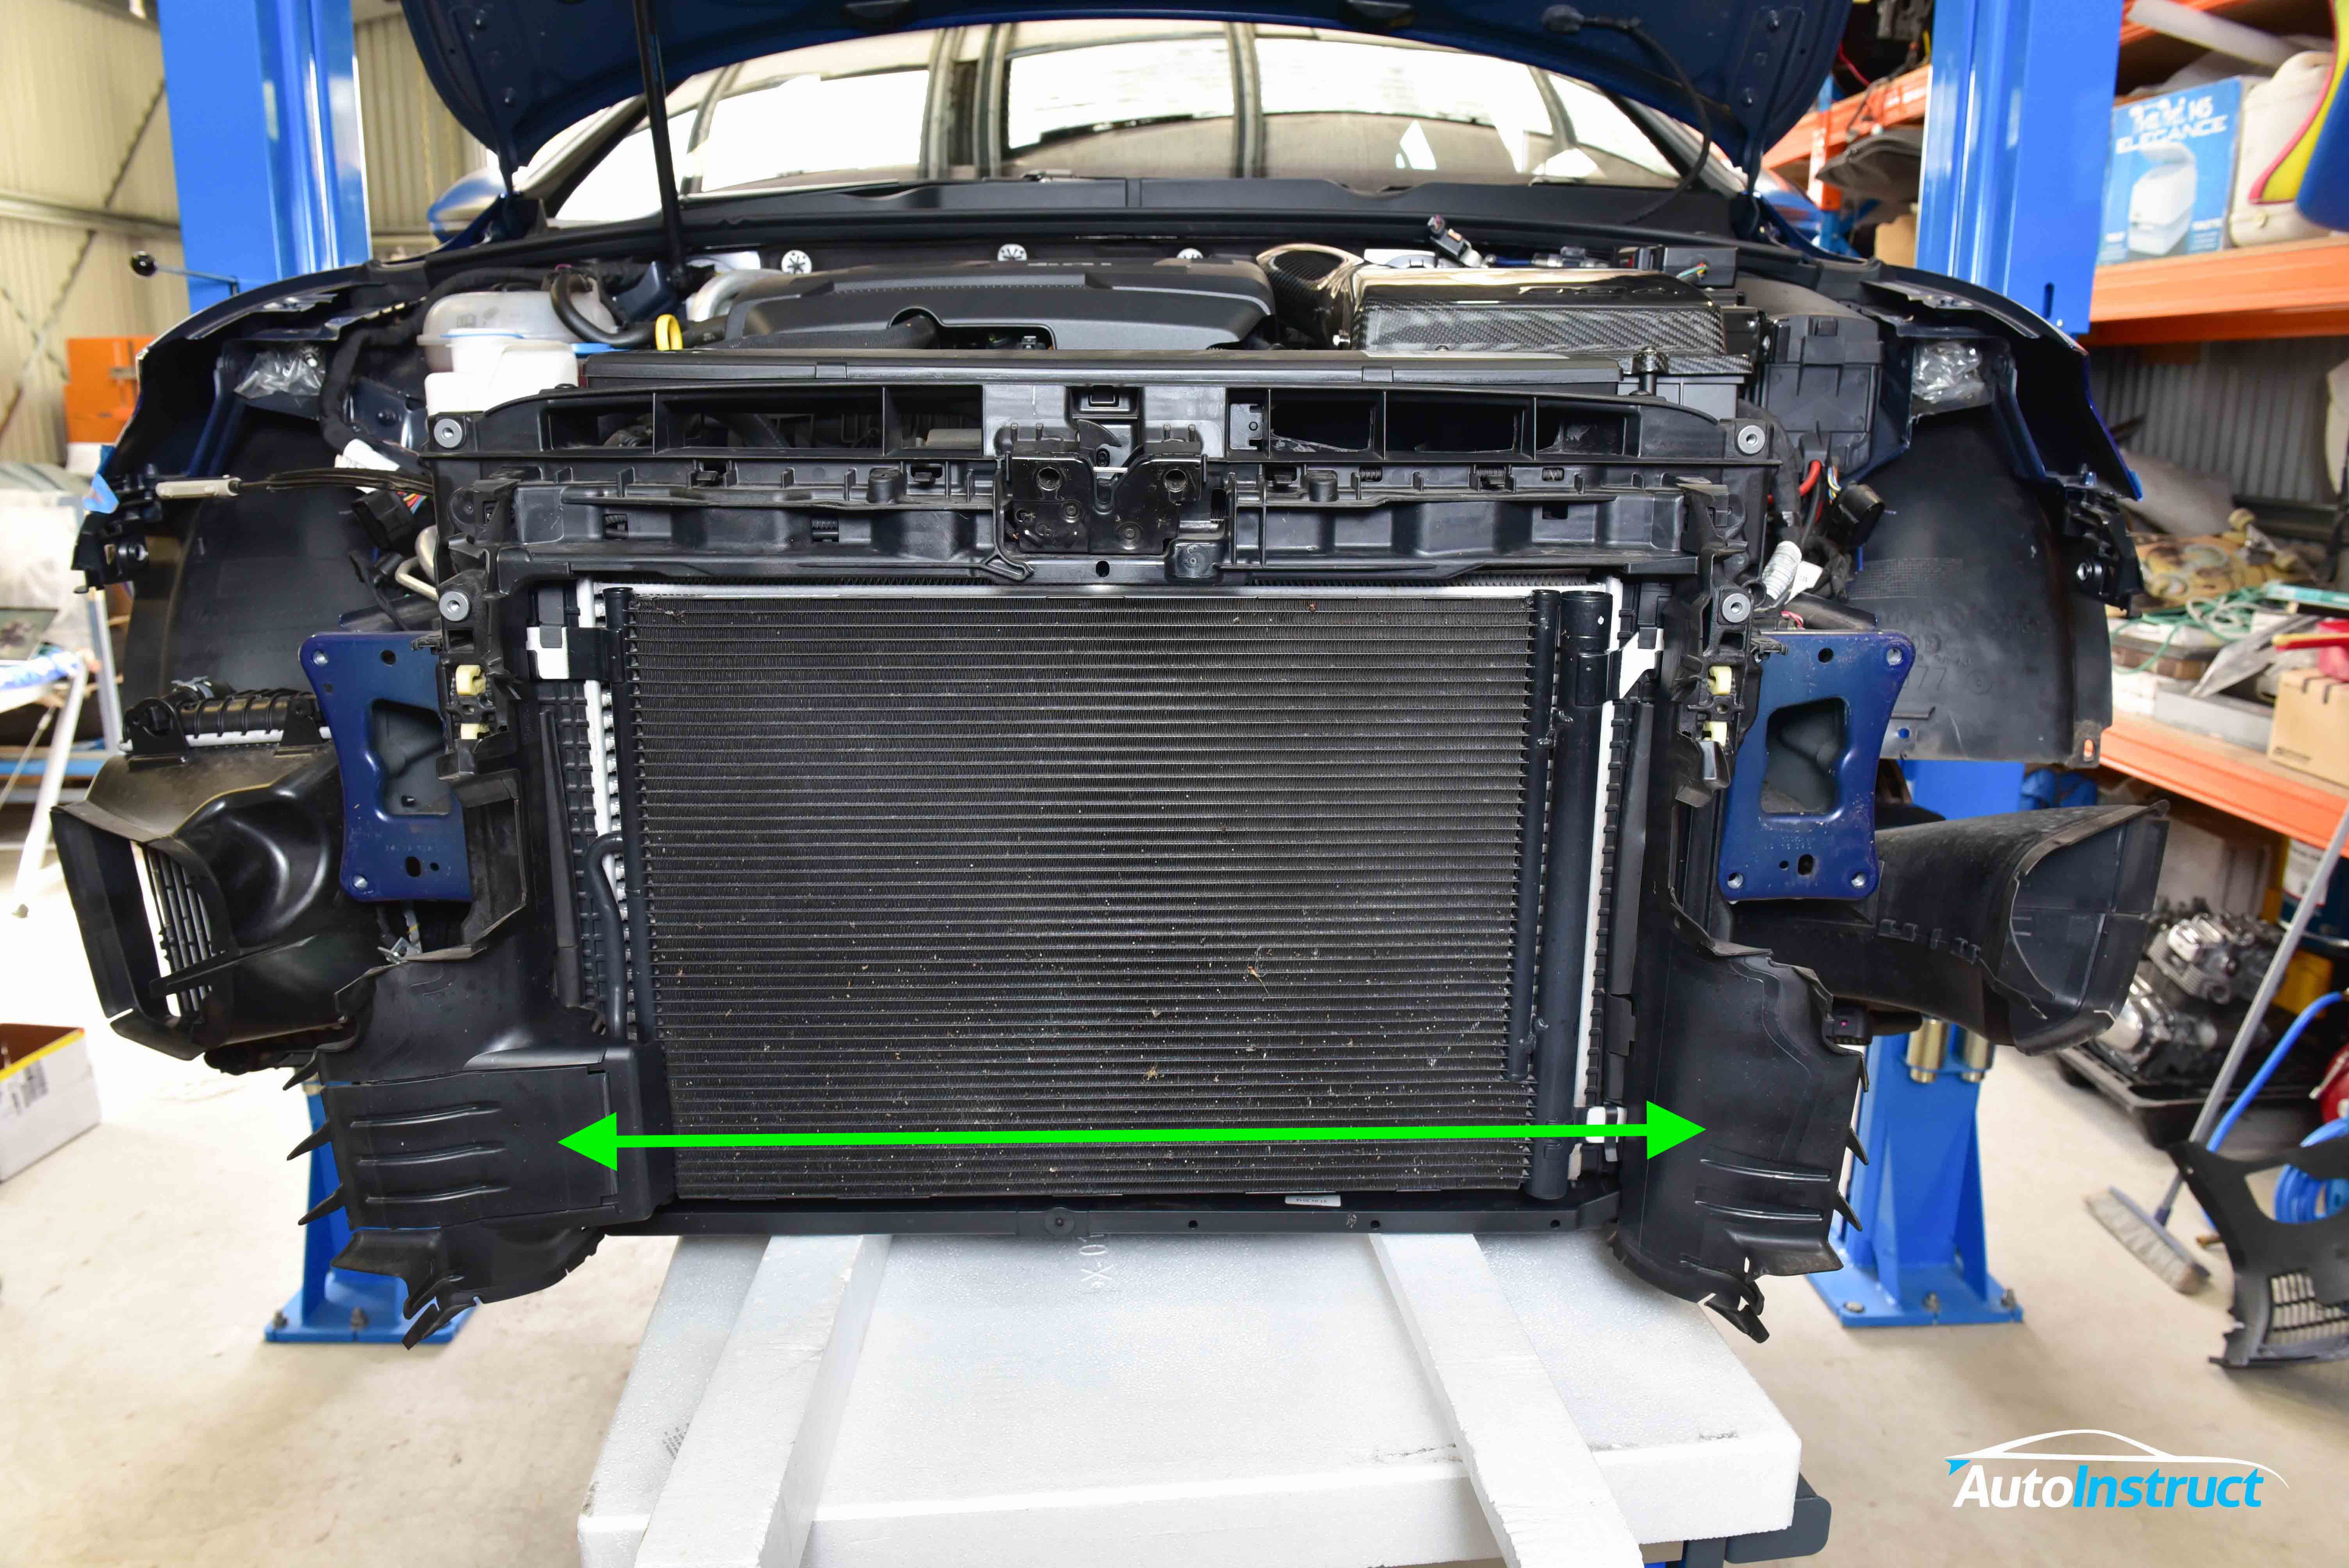
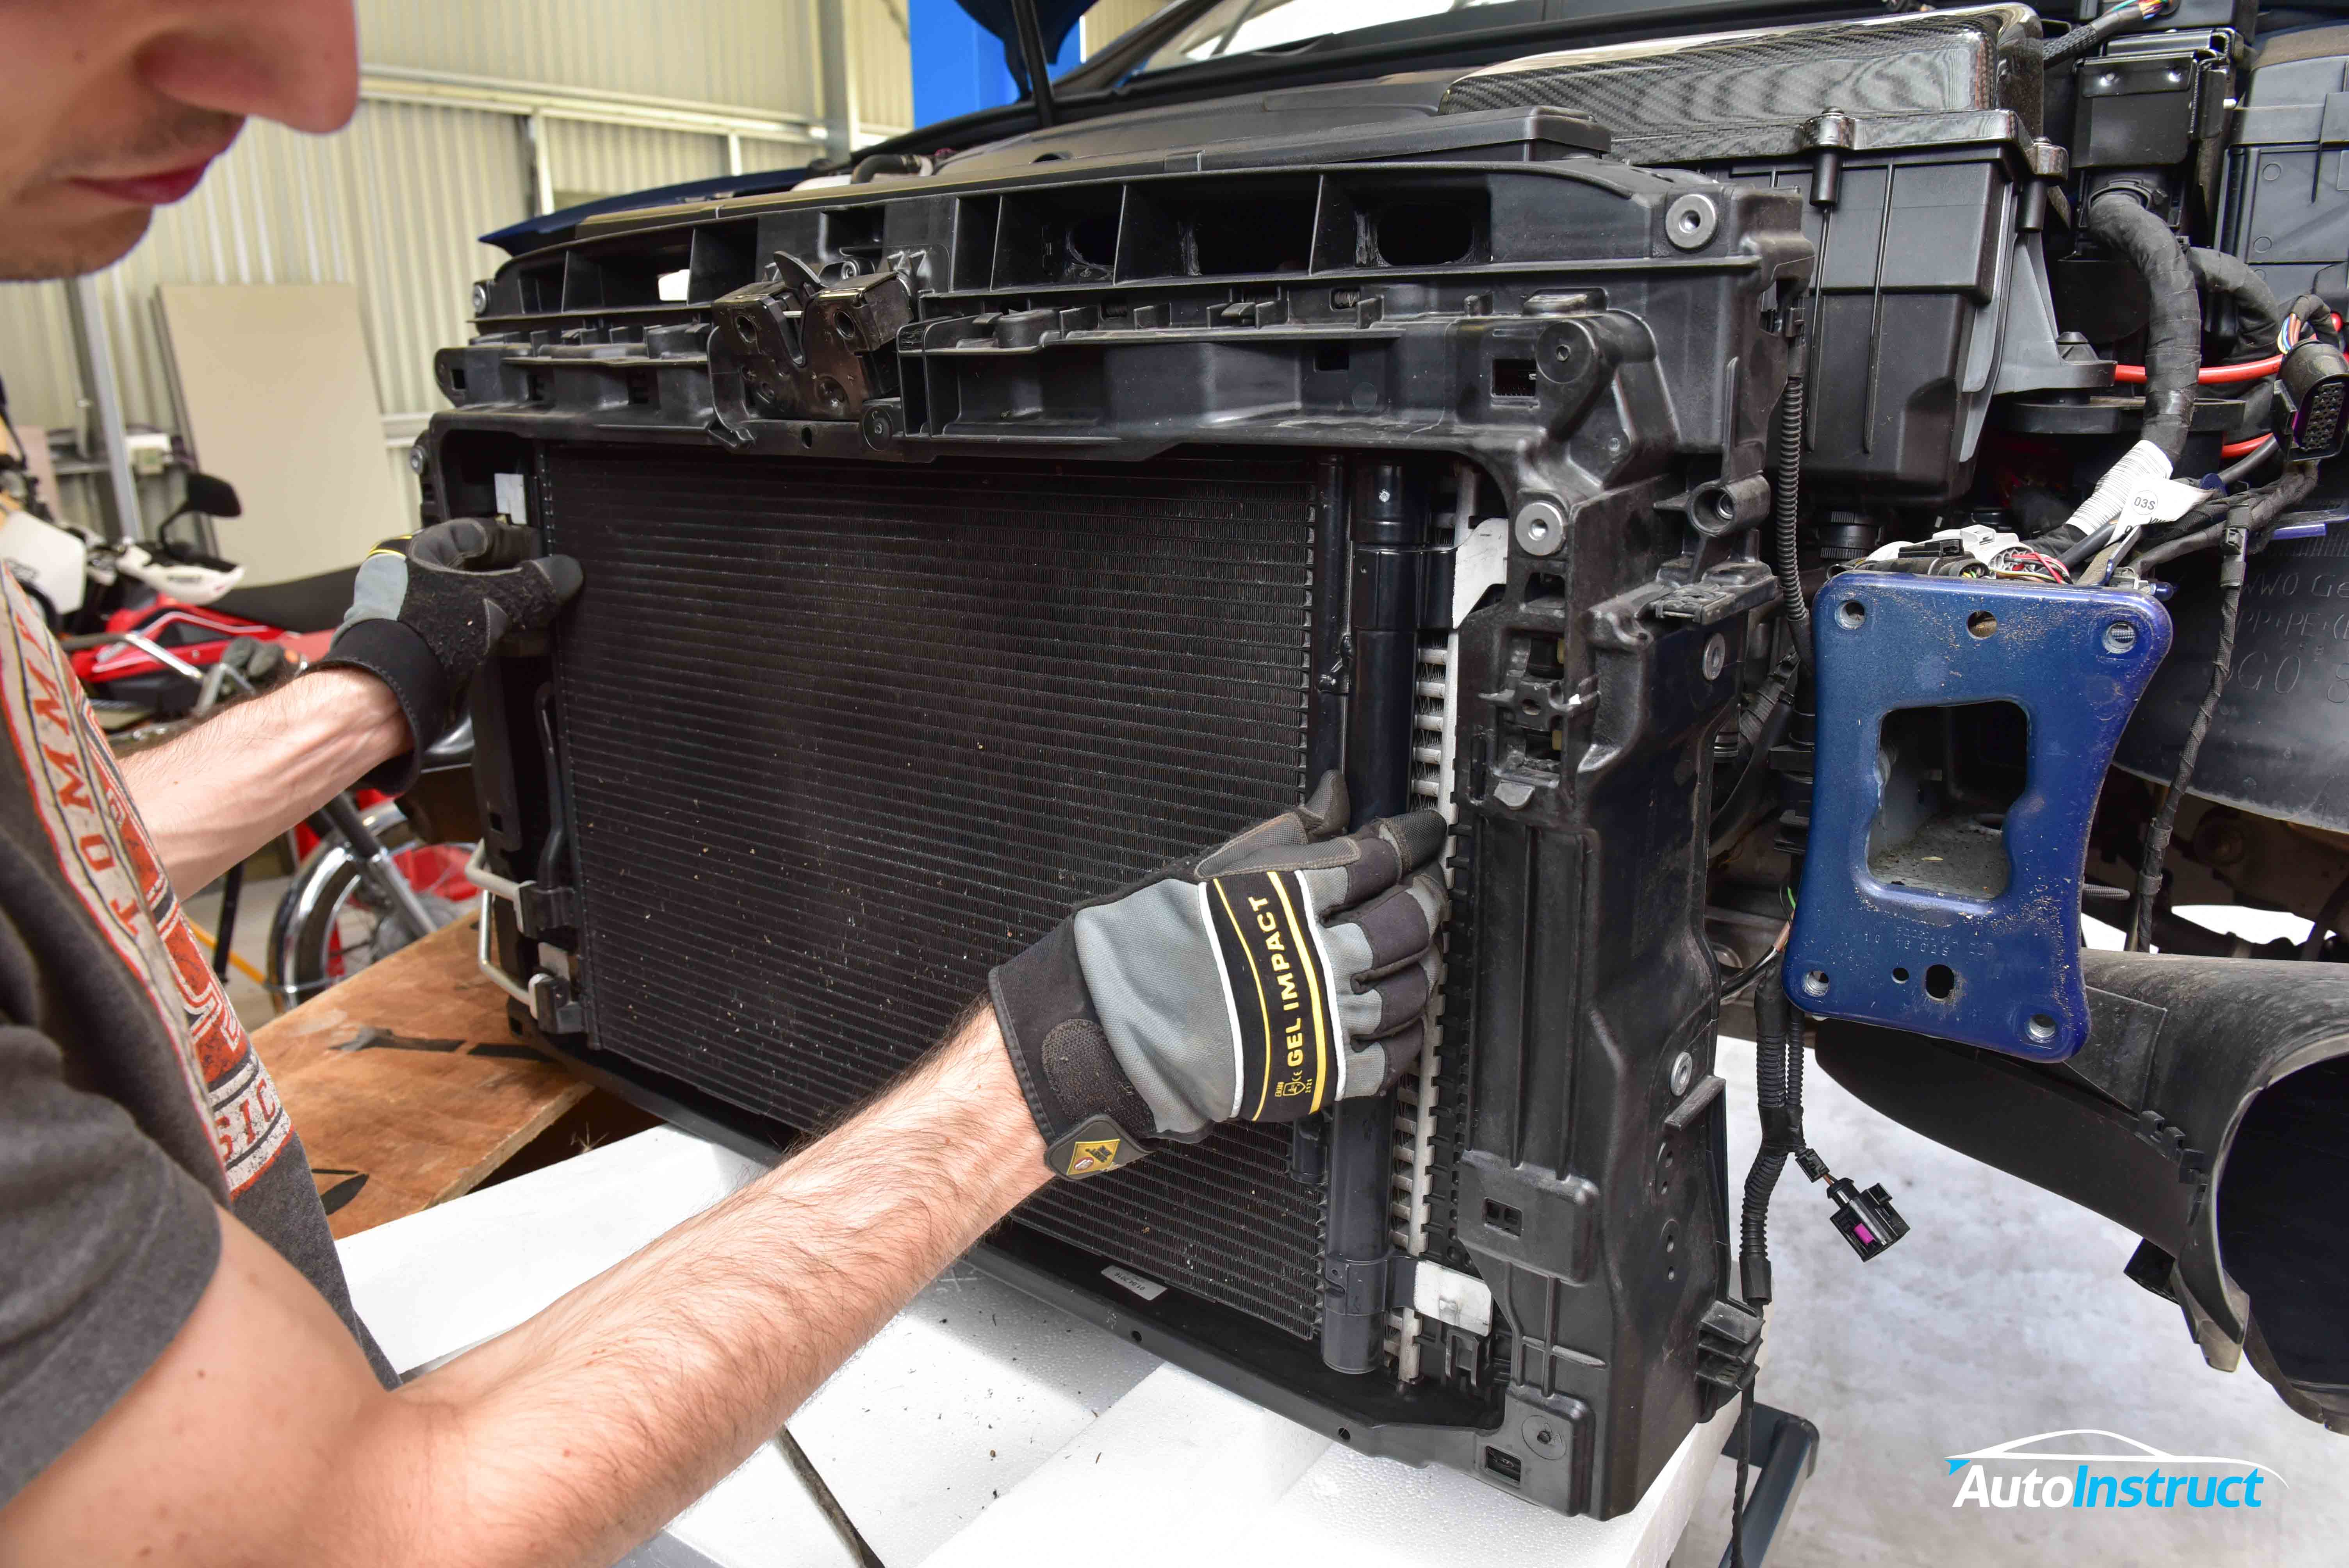
Slide your new intercooler into position, being vary careful not to dent the fins on the radiator.
Step 21
With the assistance of a friend, lift up both sides of the intercooler, ensuring the feet of the radiator slide into the intercooler.
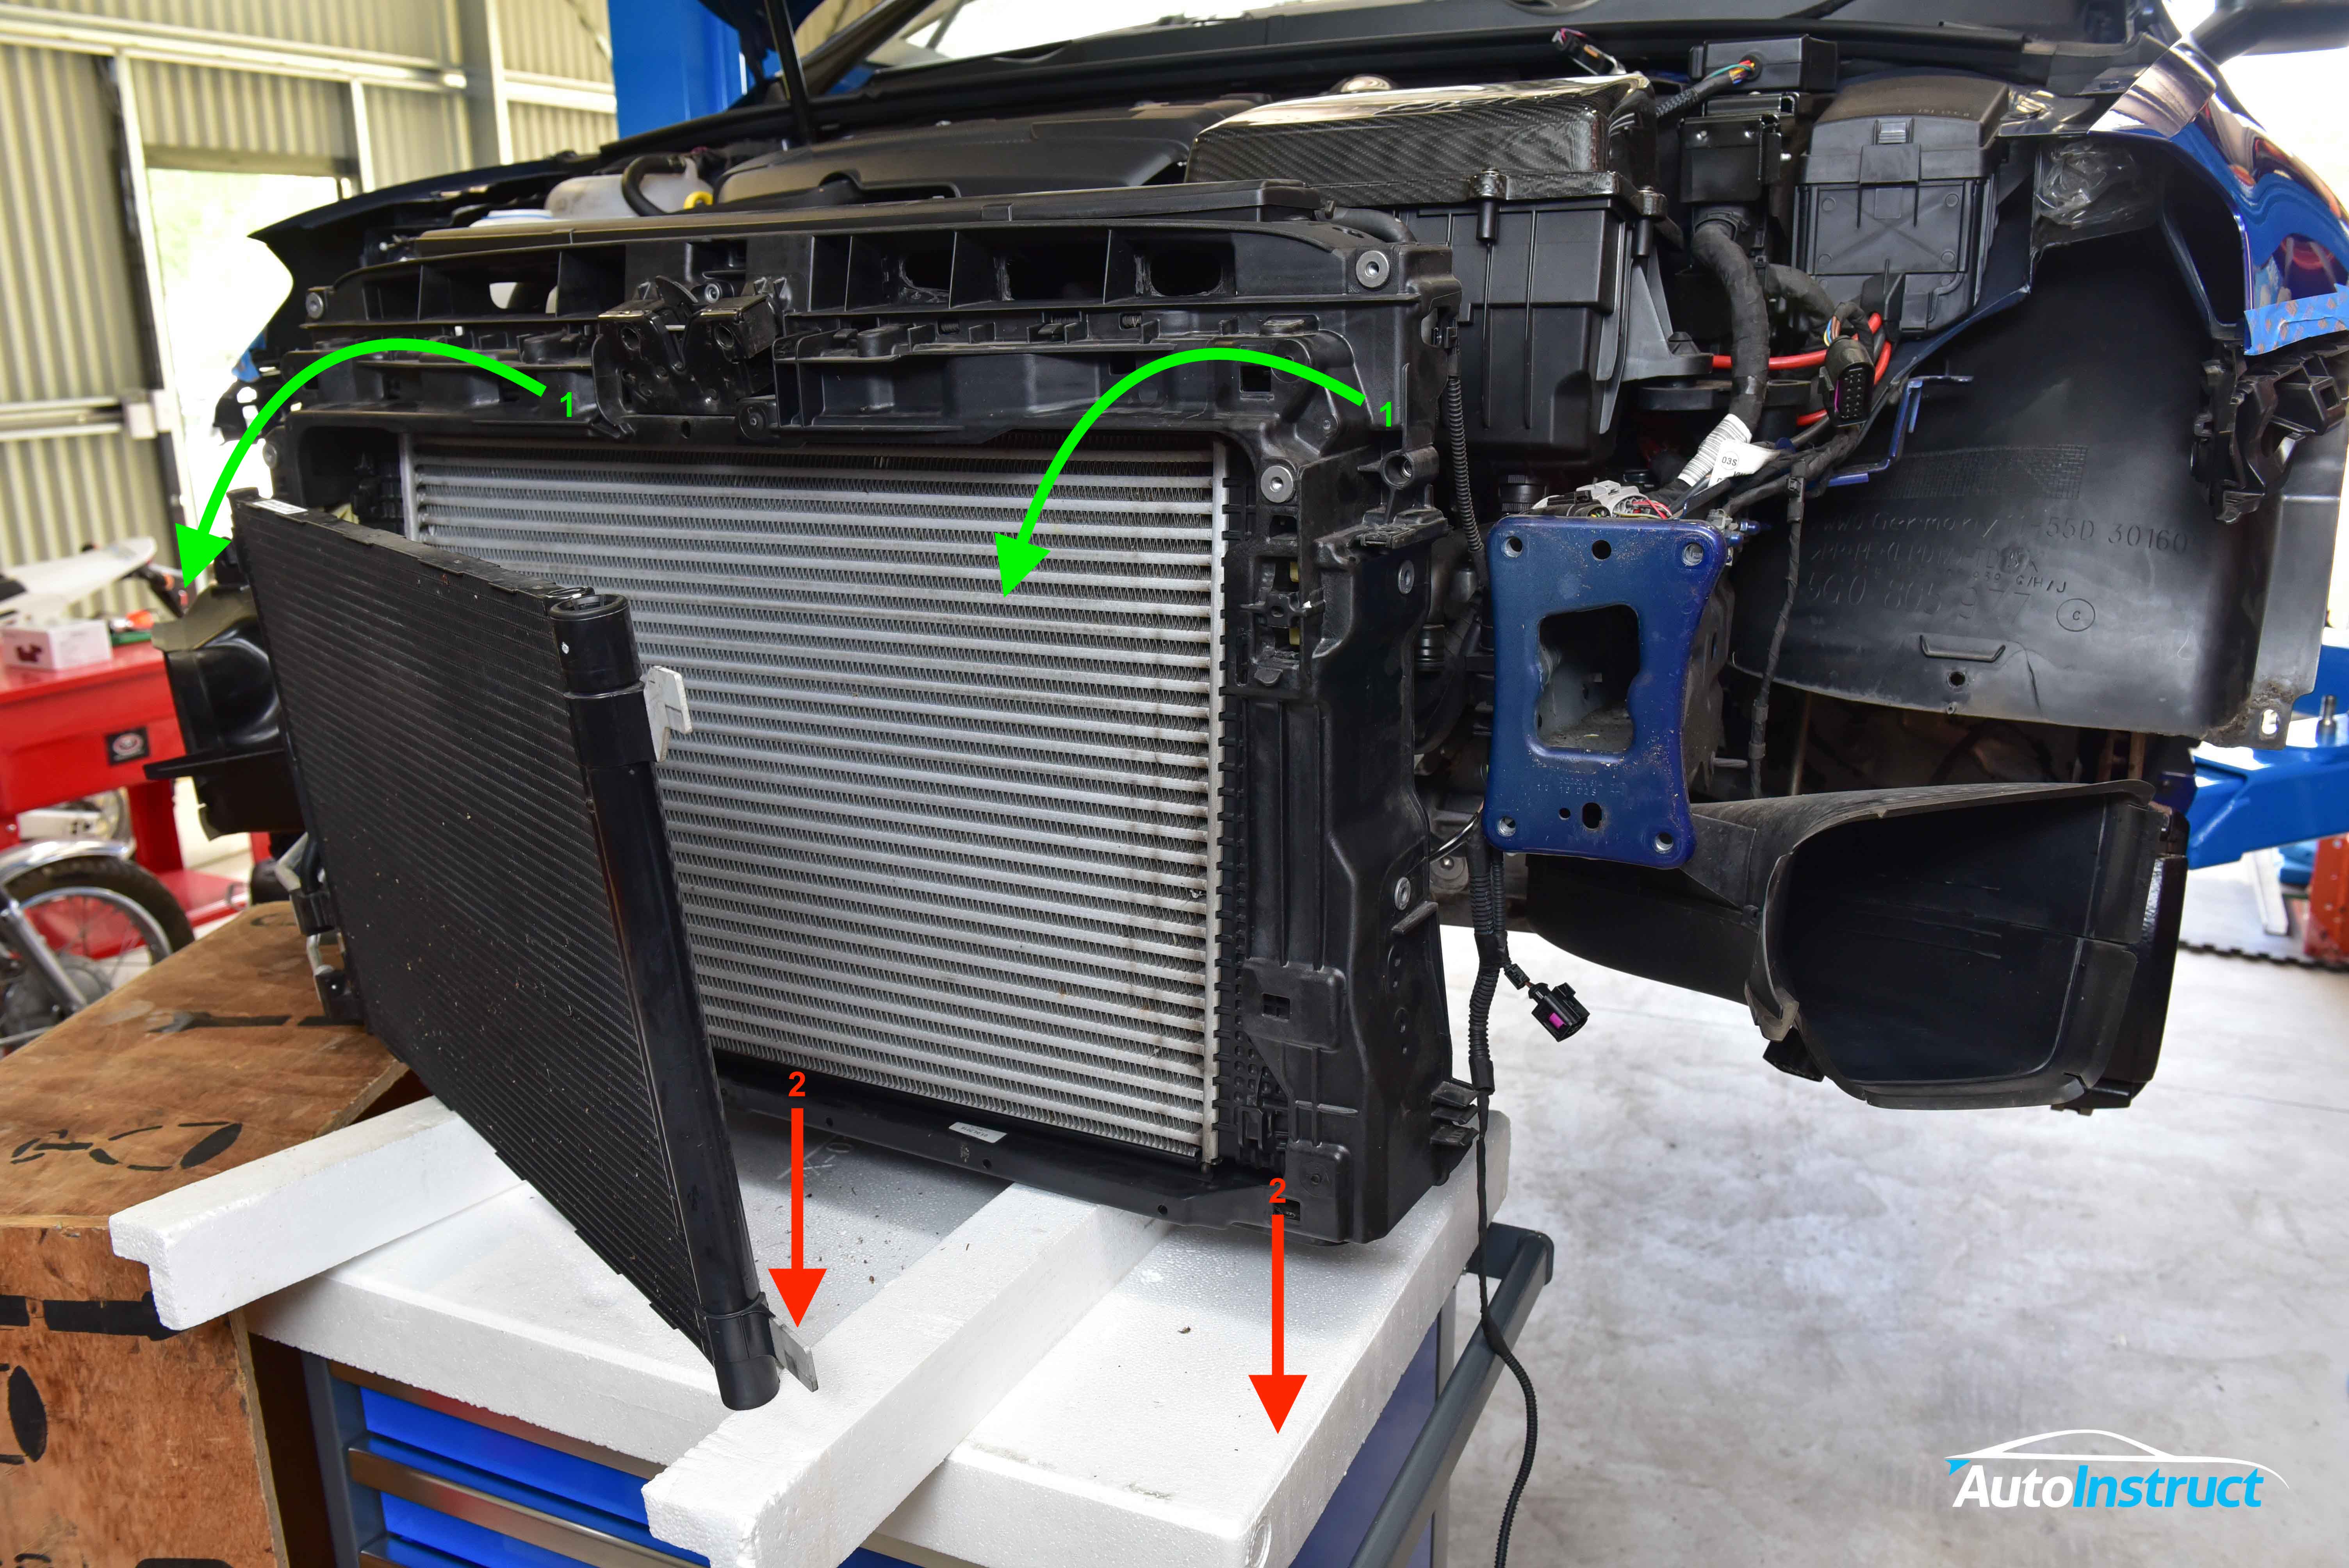
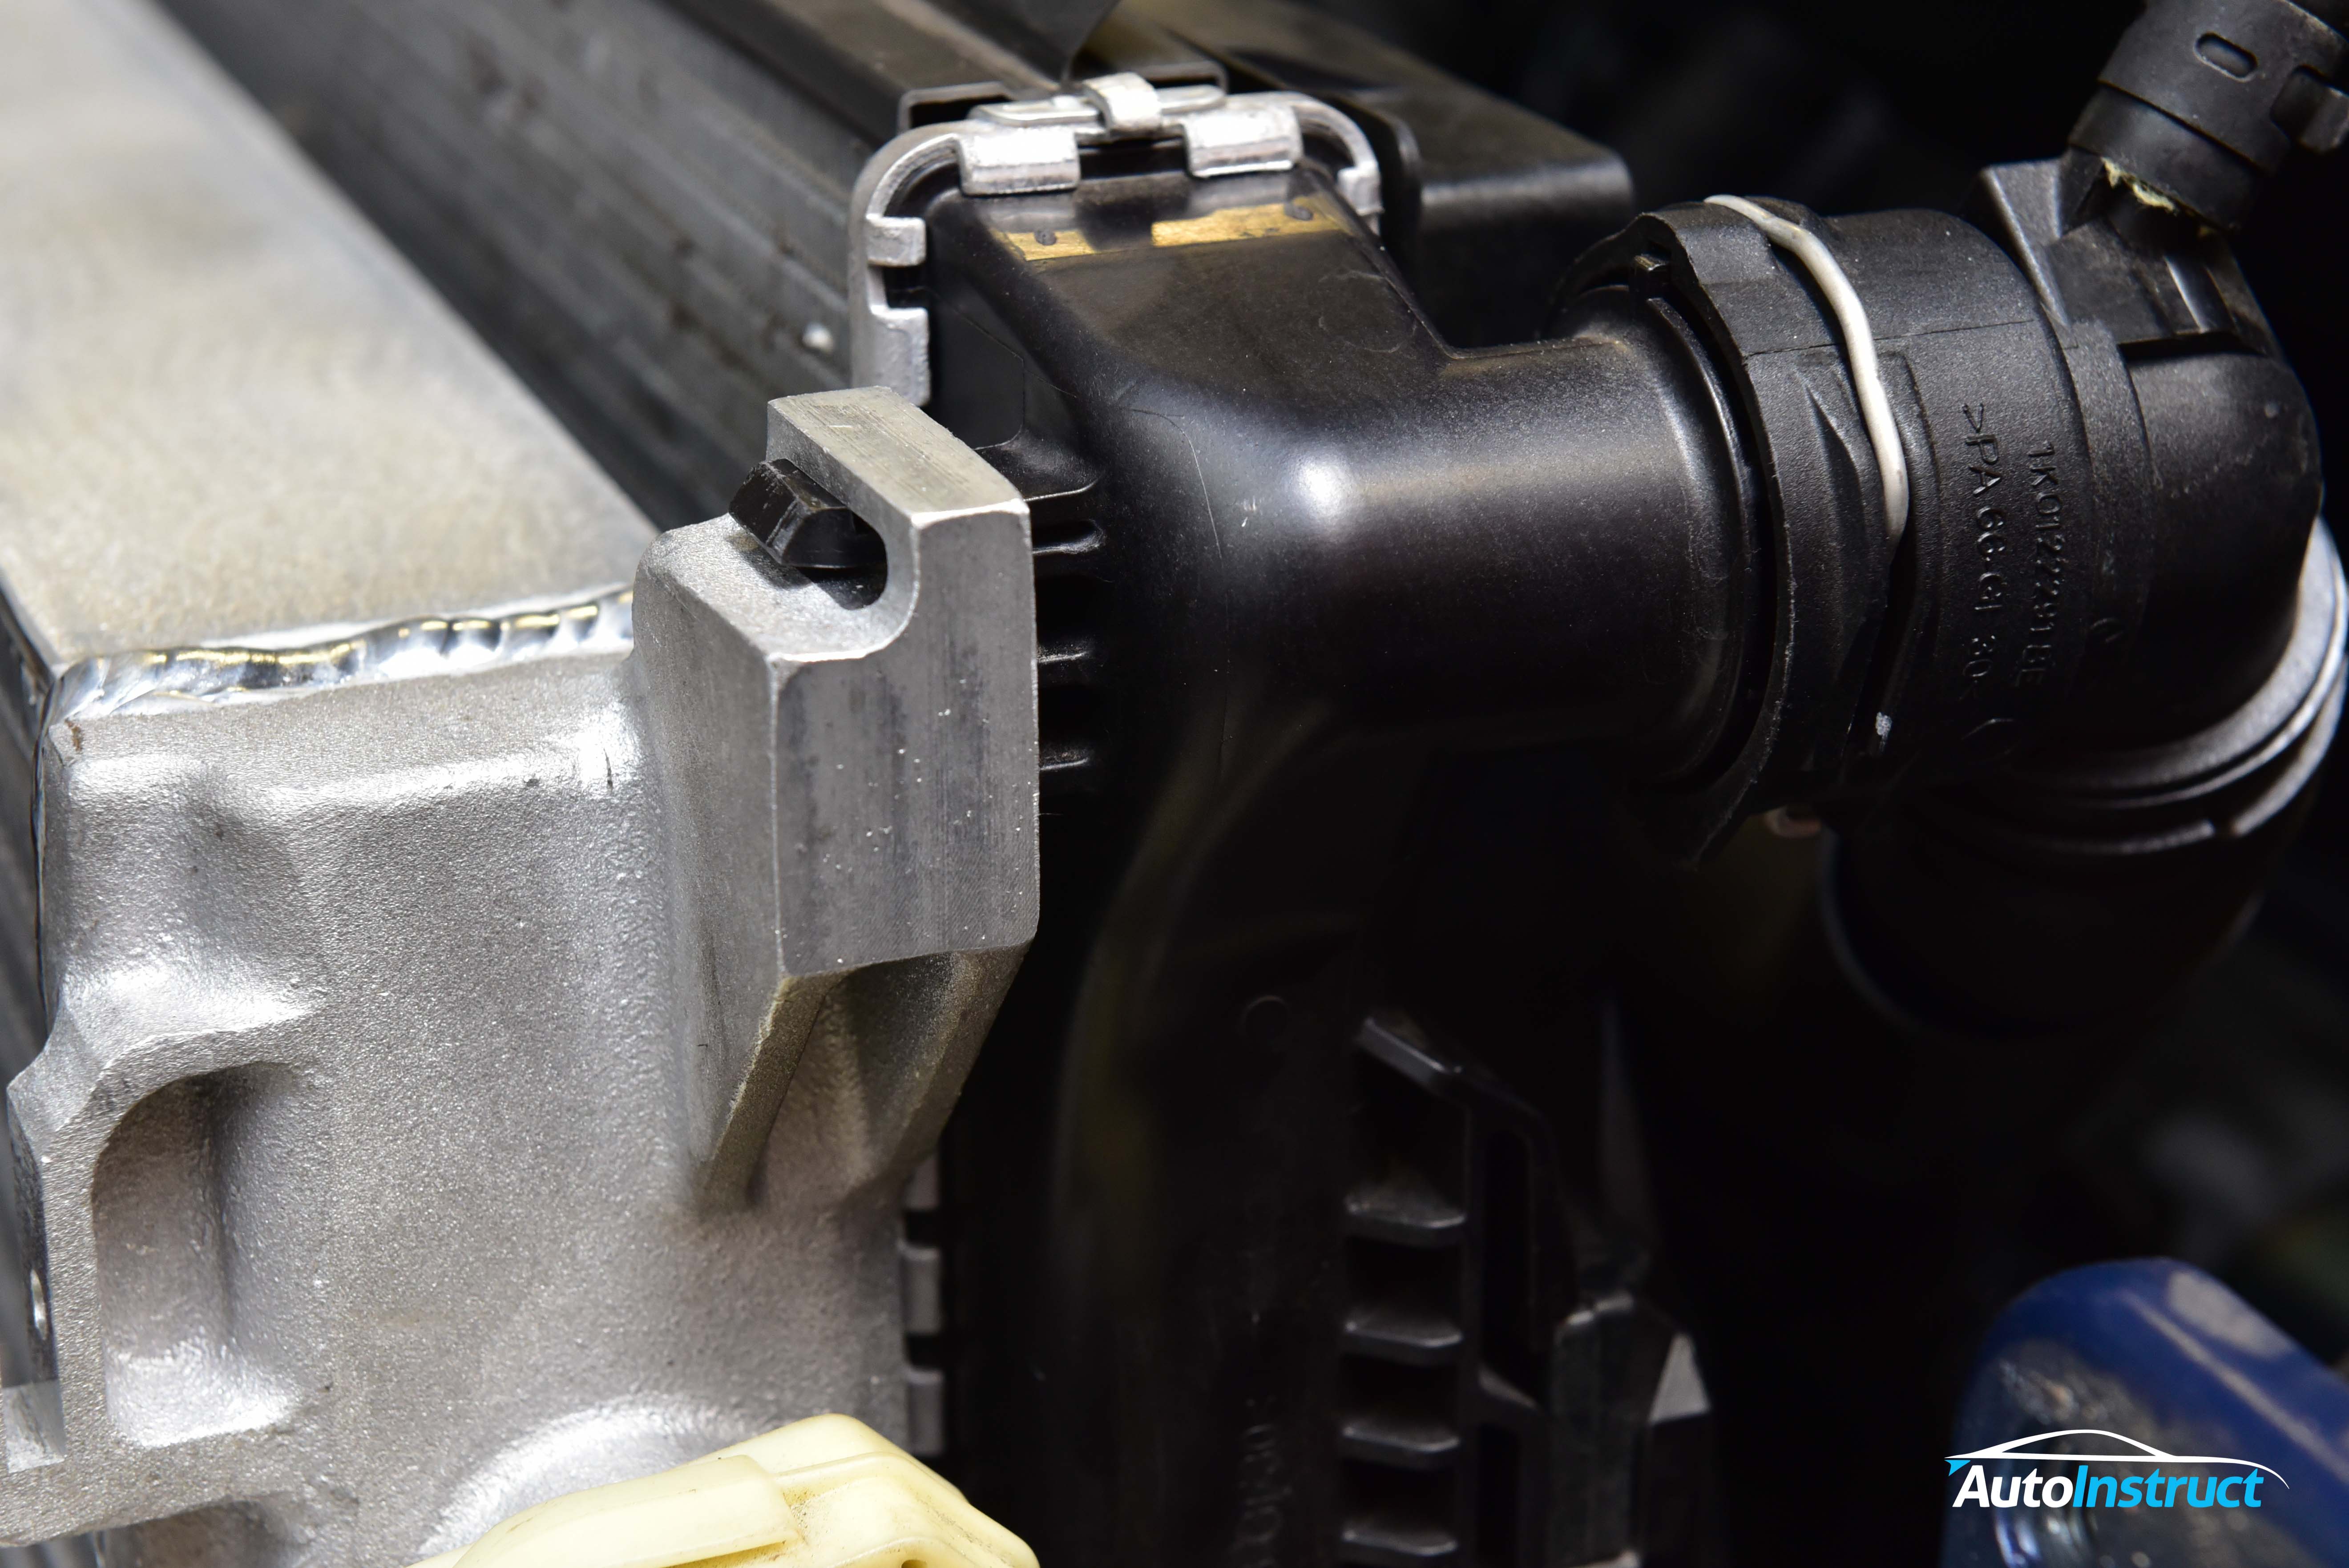
Step 22
Gently clip the top of the intercooler into the radiator. It will now be secured in place.
Step 23
Transfer the two yellow clips from the OEM Intercooler, onto your new unit.
Step 24
Sit the intercooler back into the core surround, ensuring both feet of the intercooler are secured correctly.
Do not clip the core surround into the intercooler, this will be done later on.
Step 25
Test fit the AC condenser into position. You may need to cut back one or two of the tabs as they may clash with the core surround.
Step 26
You can now clip the core surround into the Yellow clips.
If you have accidentally broken one of the clips (Like we did!), simply drive a screw into the middle of the clip. There is already a hole there, which is coincidently perfect for this.
Step 27
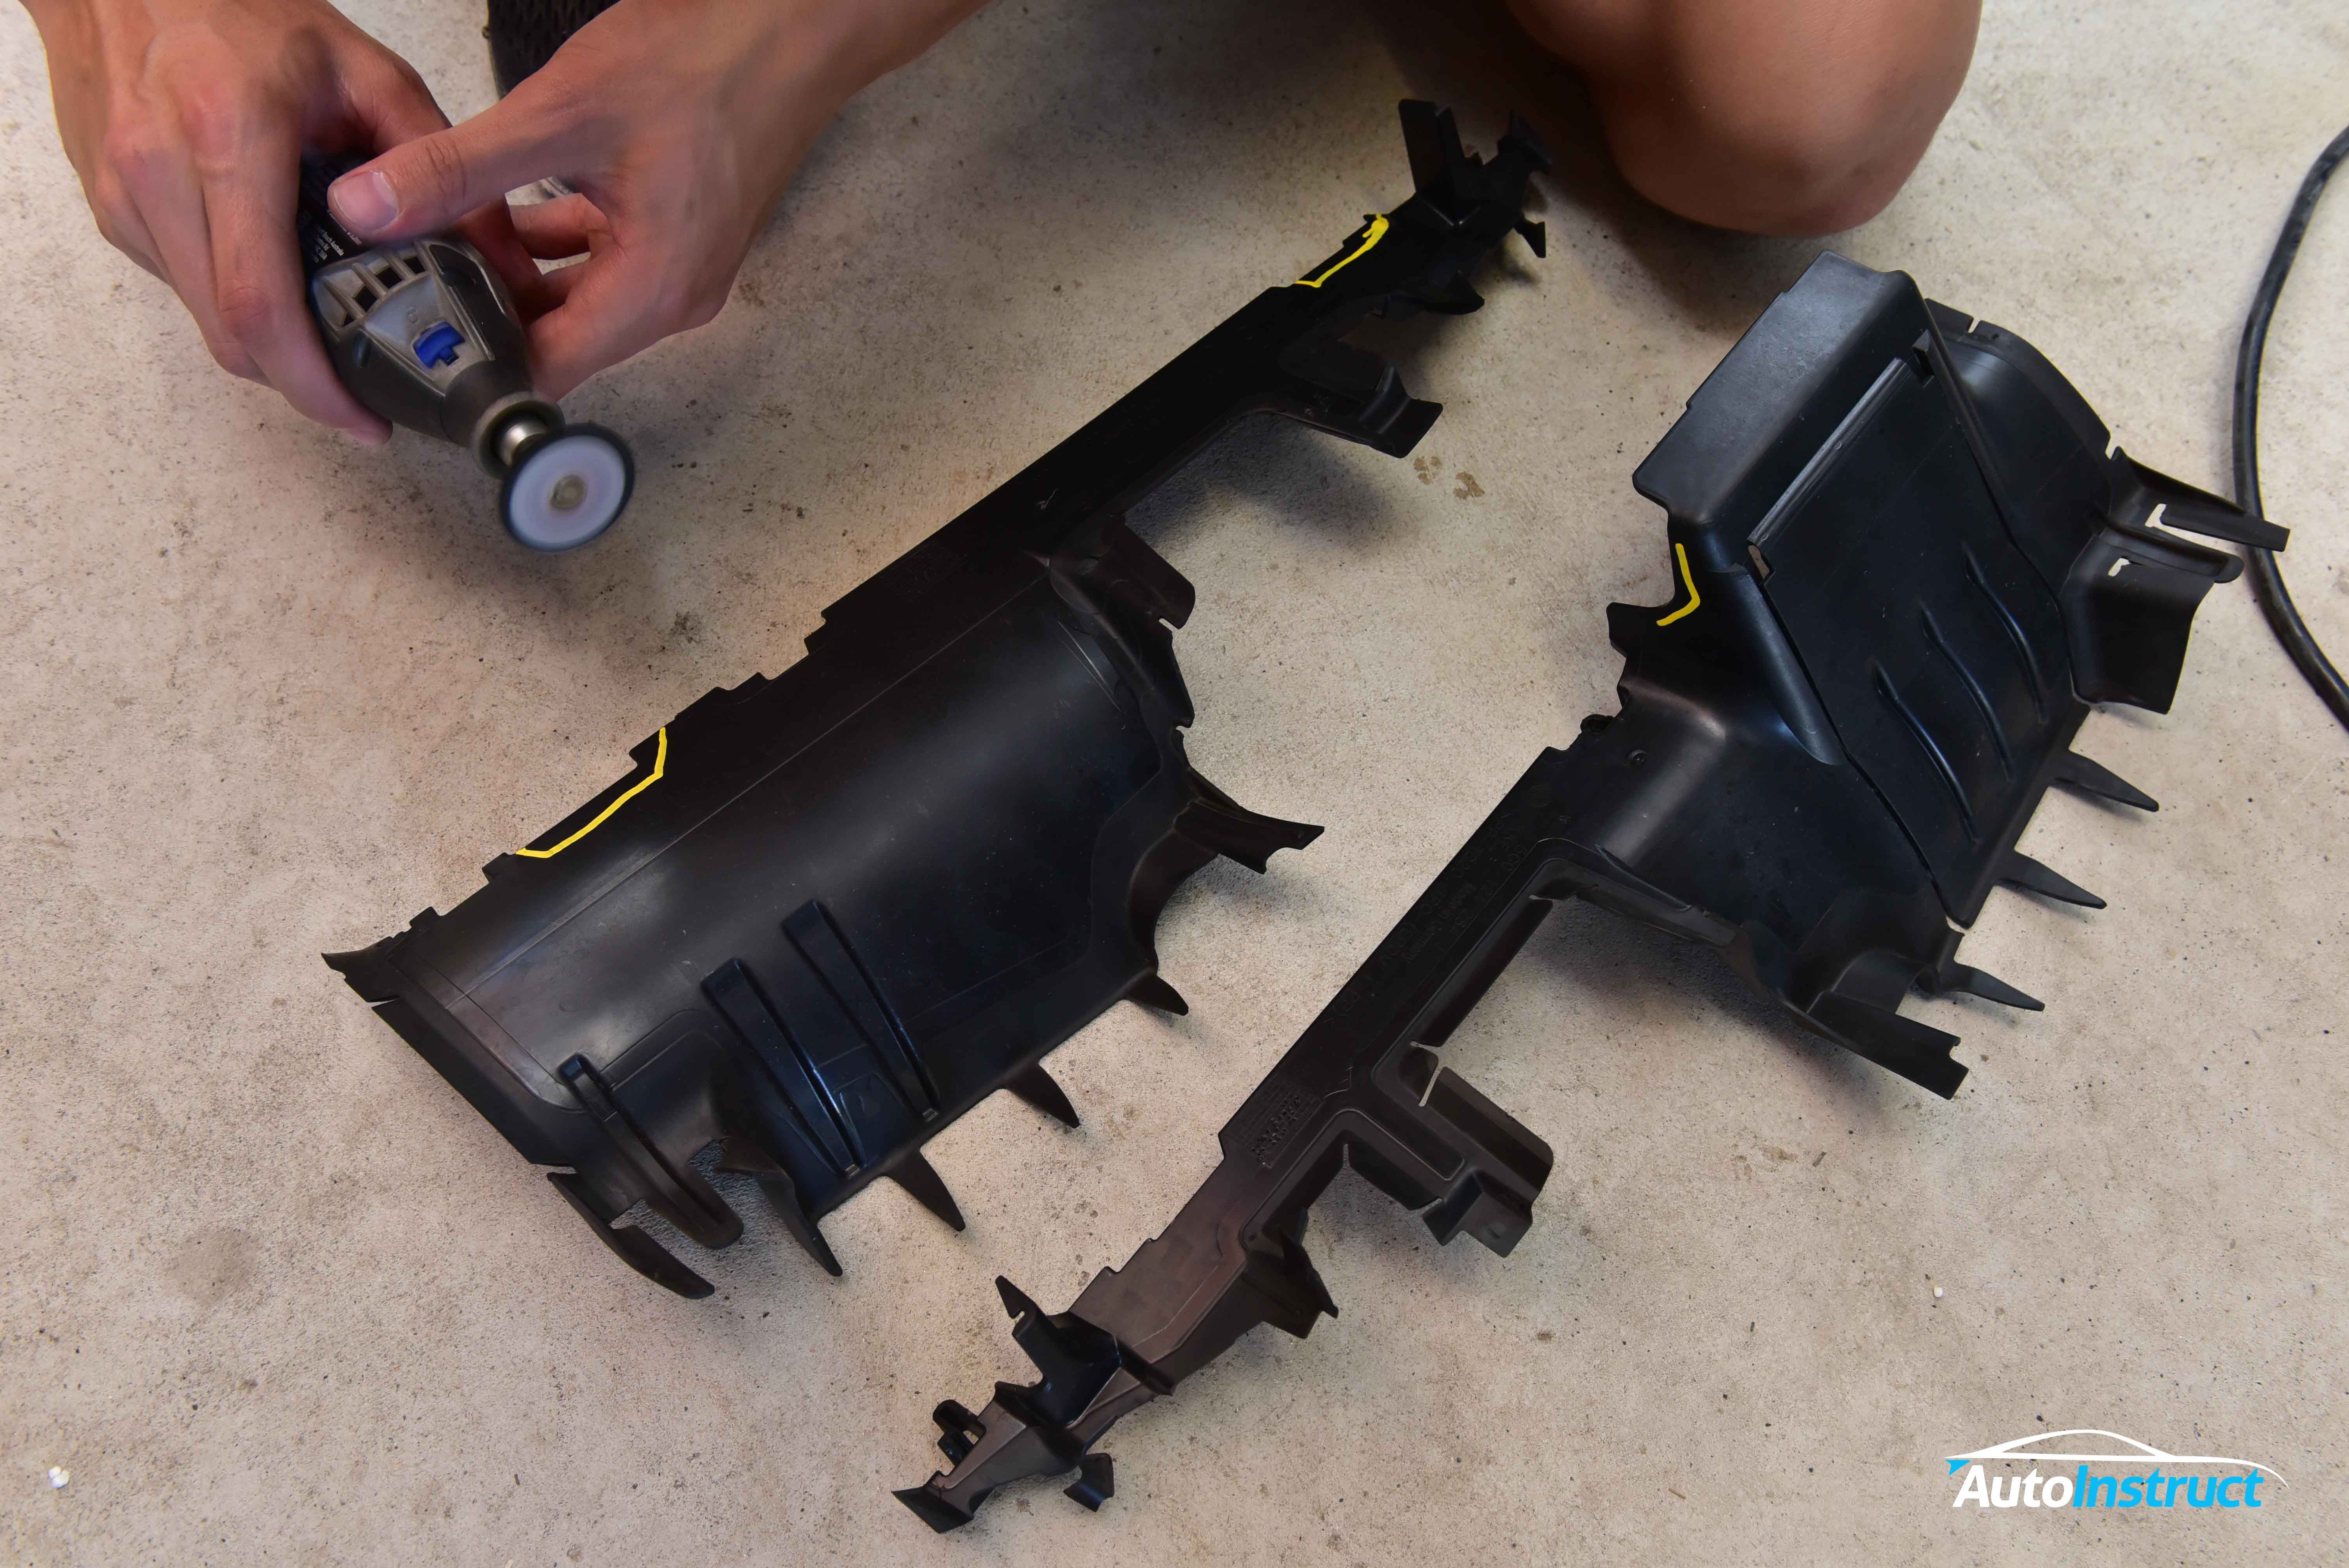
Due to the extra width of the intercooler, we’ll need to trim back the air guides.
Carry out a test fit, making note of any areas of that need to be trimmed. Use a Dremel or cutters to trim these back.
Step 28
Refit both air guides into position.
Step 29
Refit both headlights into position, ensuring you reconnect the wiring looms. You can also re-fit the support bars, and re-attach the bonnet release cable.
Test the latch mechanism before closing your hood!
Step 30
Refit the crash bar into position, and secure all twelve bolts, taking note of the markings we previously scribed.
Ensure the air guides are not jammed behind the crash beam.
Step 31
Reconnect the radiator sensor, airbag sensor, both horns and the air temperature sensor.
Step 32
You can now refit the front bumper bar, remembering to reconnect the wiring loom.
Also ensure the air guides are correctly positioned as you gently fit the front bumper into position.
Step 33
Re-attach the washer jet hose, and clip into position.
Step 34
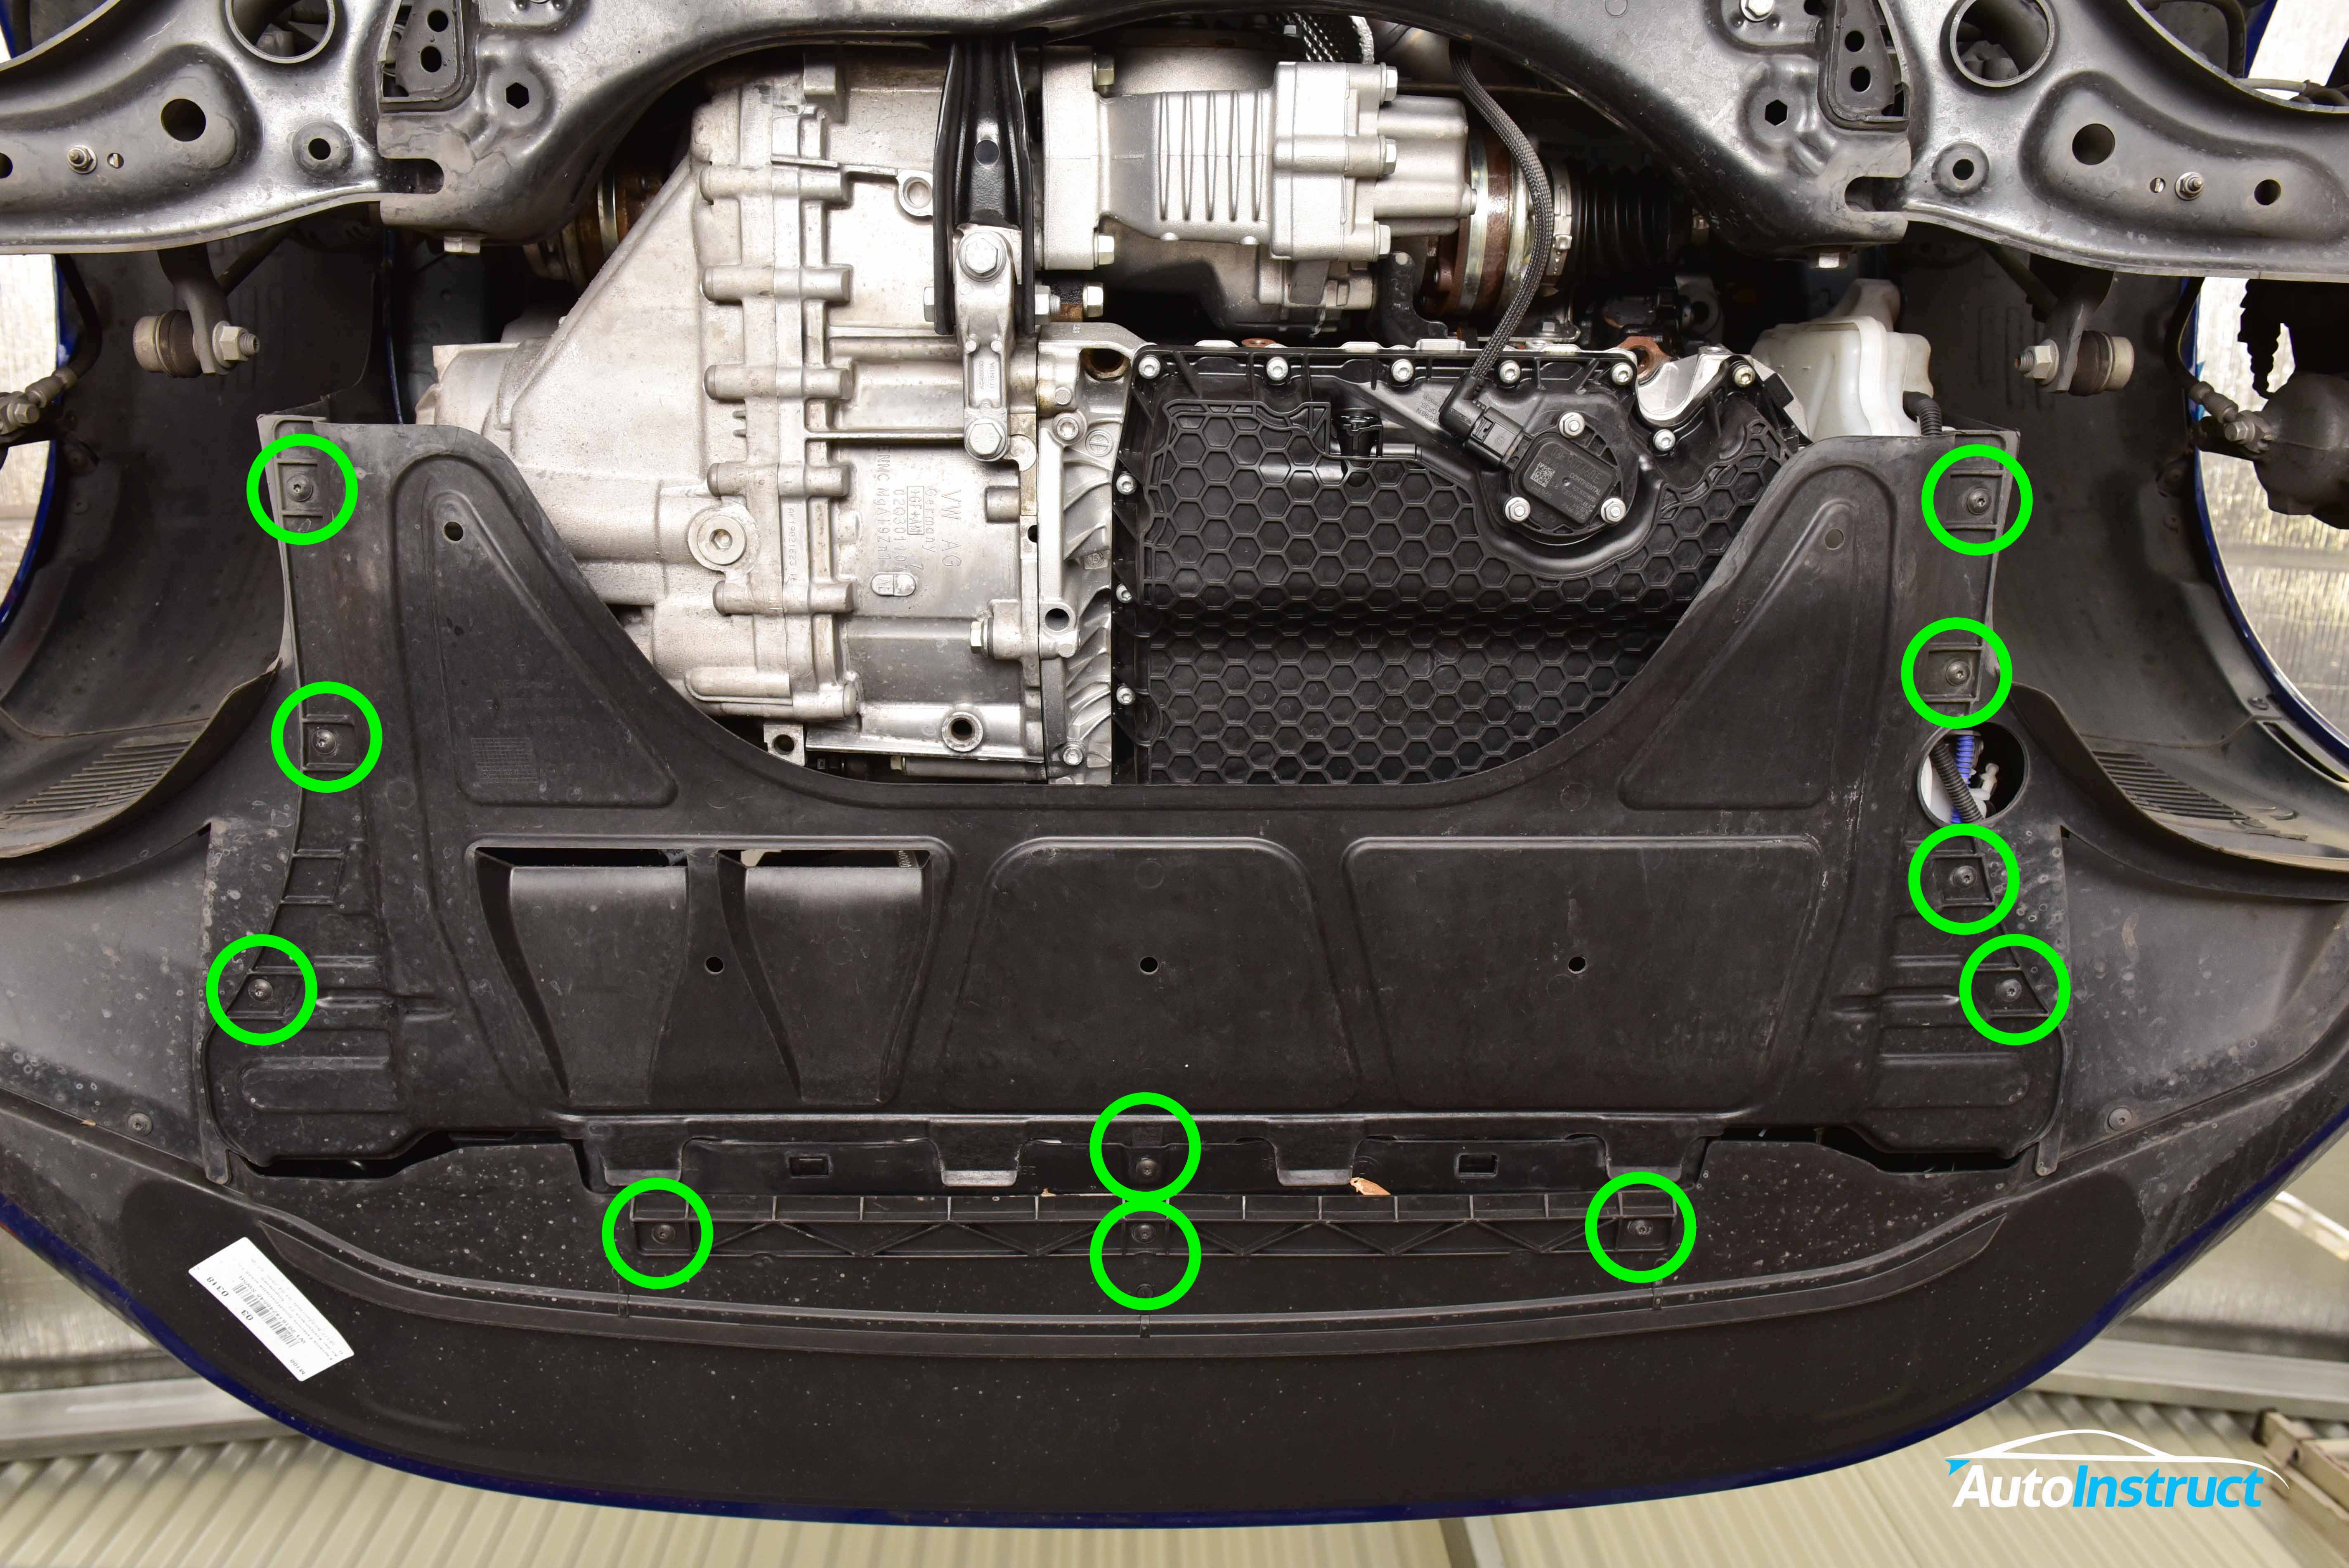
Install your new intercooler piping, and reattach all plastic shields, including the wheel arch liners and underbody.
Step 35
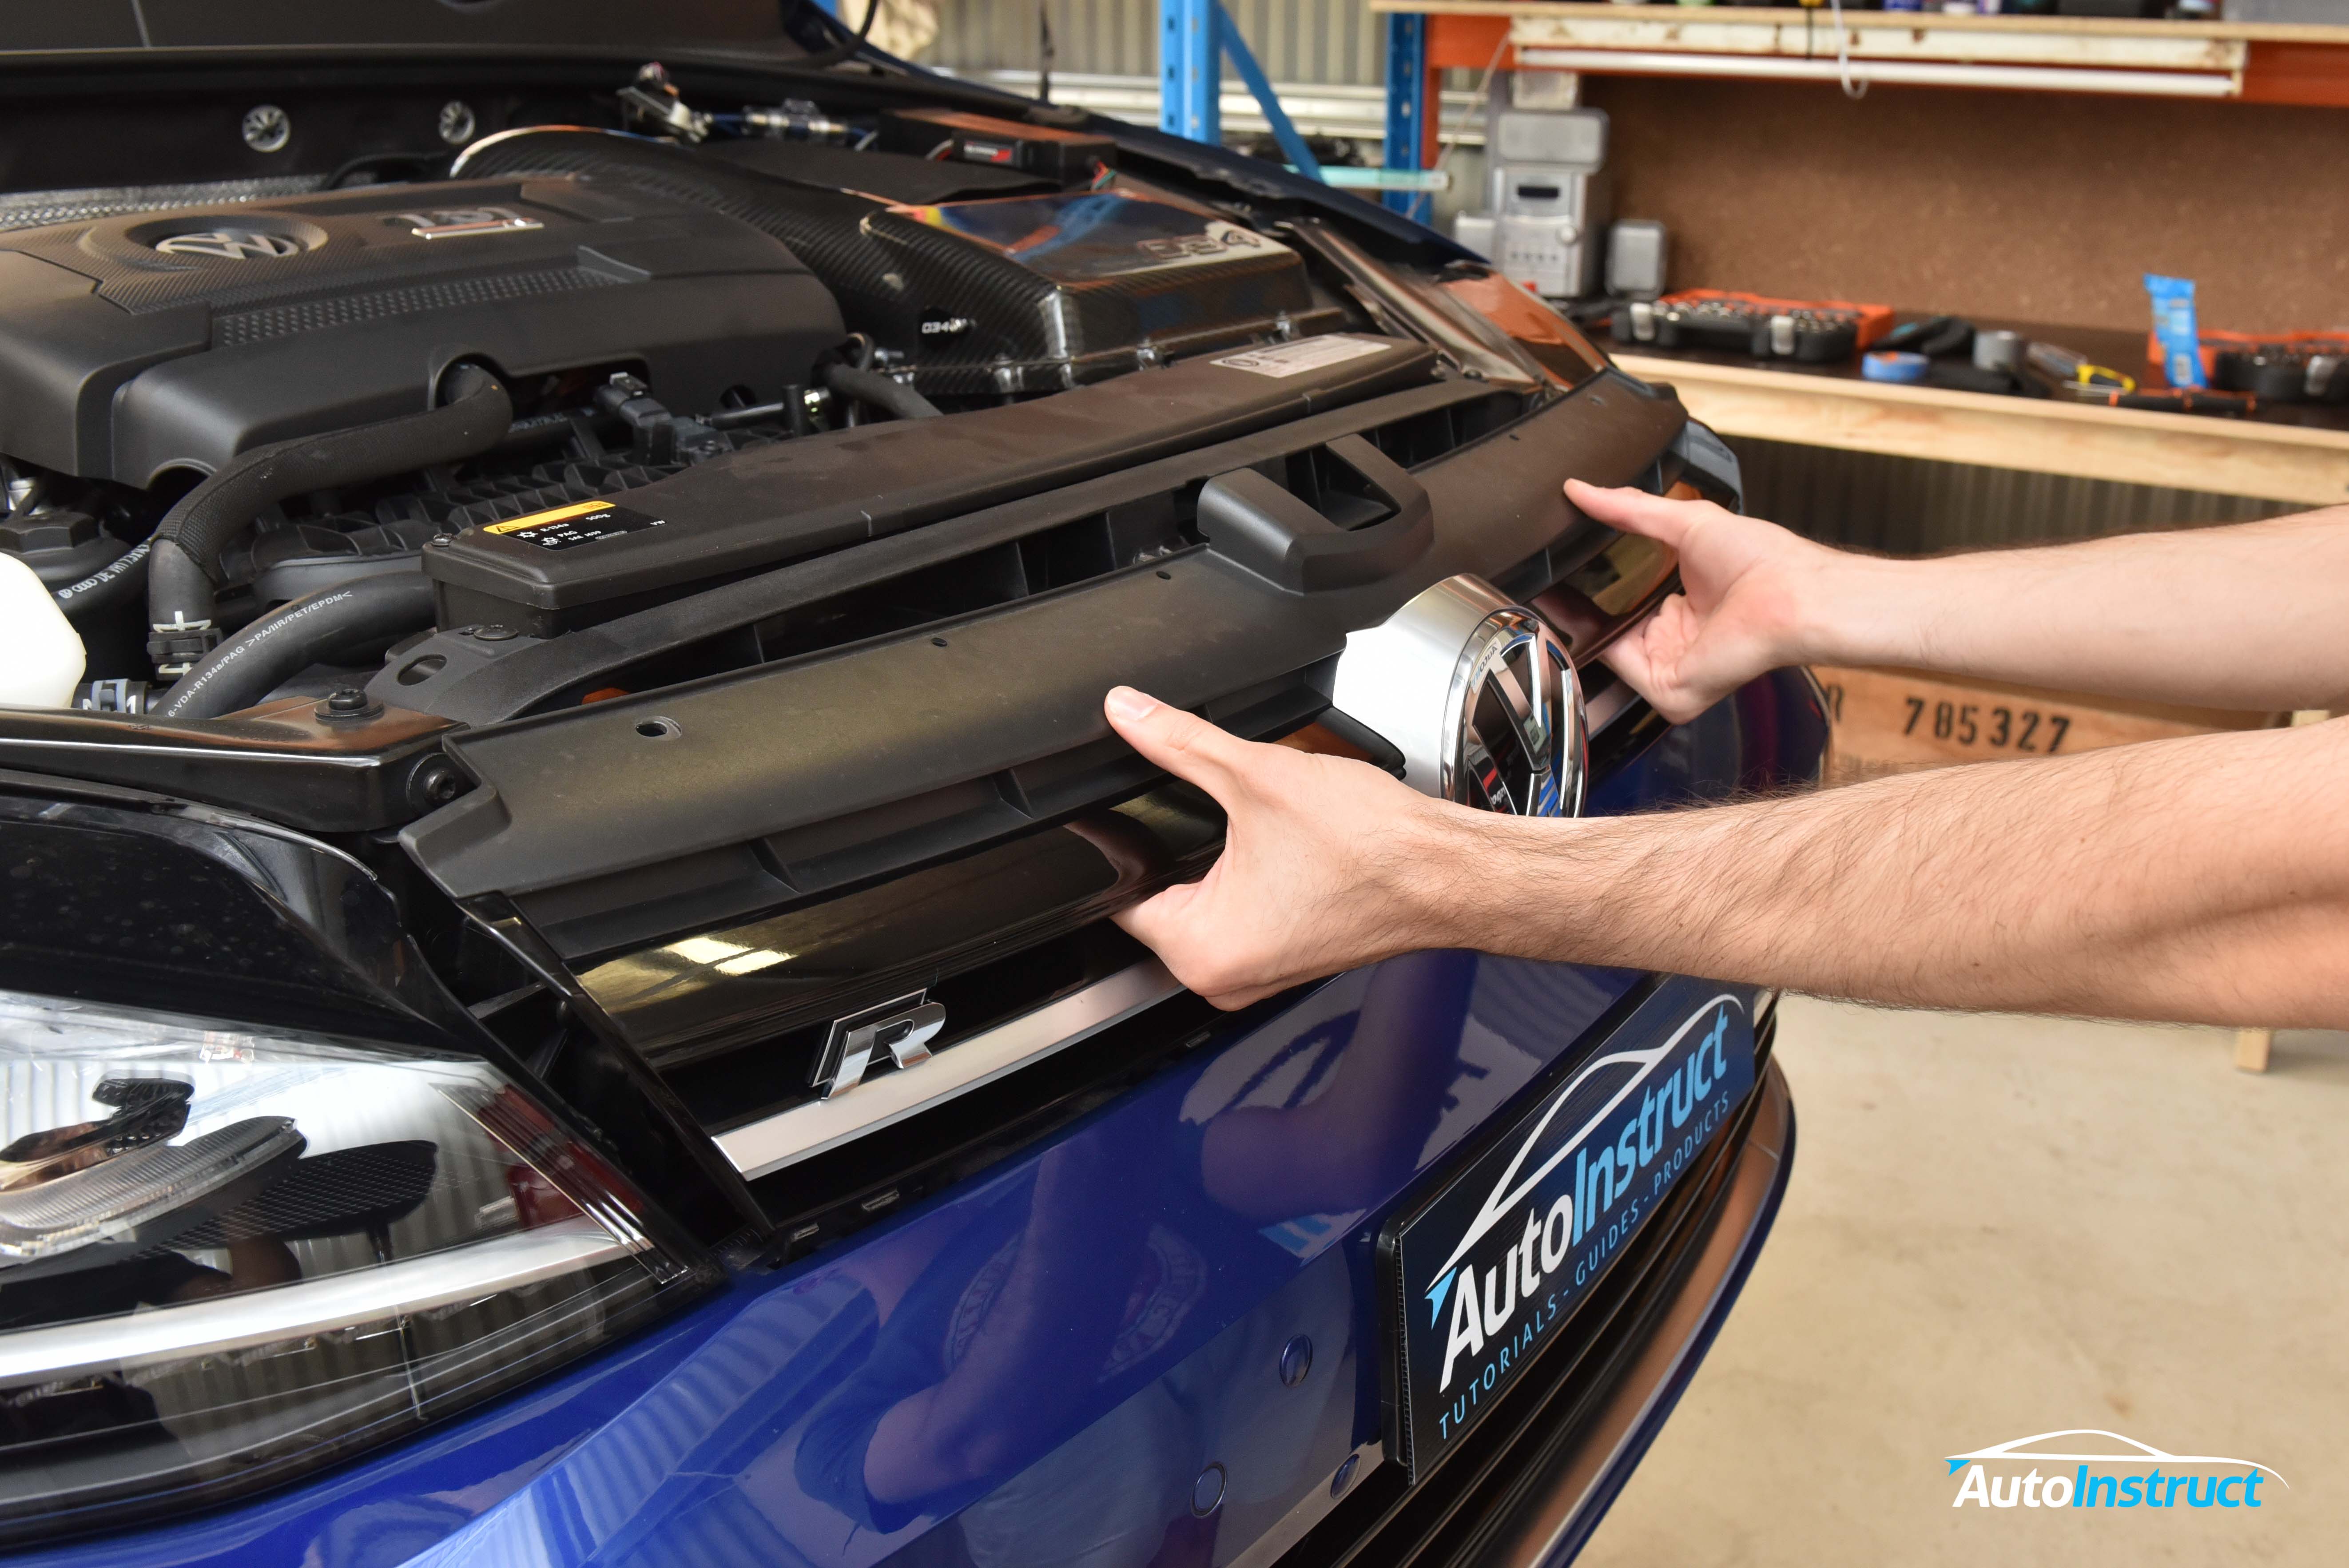
Install your grill back into position, and tighten the remaining screws.
Reconnect your battery, put your wheels back on and you’re done! You can now head out and enjoy your new performance boost!
Did you find this guide helpful? Consider sharing it to help other car enthusiasts